

P/N: 2900-300855 Rev 1 www.KramerAV.com
USER MANUAL
MODEL:
VP-428H2
4K HDBT Transmitter/Scaler

VP-428H2 - Introduction
i
Contents
Introduction 1
Getting Started 1
Overview 2
Functionality 2
Typical Applications 4
Controlling your VP-428H2 4
Defining VP-428H2 4K HDBT Transmitter/Scaler 5
Connecting VP-428H2 7
Connecting to VP-428H2 via RS-232 8
Operating VP-428H2 9
Front Panel Buttons 9
OSD Menu 9
Firmware Upgrade 14
Technical Specifications 15
Default Communication Parameters 16
Input Resolutions 16
Output Resolutions 17
Protocol 3000 18
Understanding Protocol 3000 19
Kramer Protocol 3000 Syntax 20
Protocol 3000 Commands 21

Kramer Electronics Ltd.
VP-428H2 - Introduction
1
Introduction
Welcome to Kramer Electronics! Since 1981, Kramer Electronics has been providing a world of
unique, creative, and affordable solutions to the vast range of problems that confront the video,
audio, presentation, and broadcasting professional on a daily basis. In recent years, we have
redesigned and upgraded most of our line, making the best even better!
Our 1,000-plus different models now appear in 14 groups that are clearly defined by function:
GROUP 1: Distribution Amplifiers; GROUP 2: Switchers and Routers; GROUP 3: Control
Systems; GROUP 4: Format & Standards Converters; GROUP 5: Range Extenders &
Repeaters; GROUP 6: Specialty AV Products; GROUP 7: Scalers; GROUP 8: Cables and
Connectors; GROUP 9: Room Connectivity; GROUP 10: Mounting and Rack Adapters;
GROUP 11: Sierra Video; GROUP 12: Digital Signage; GROUP 13: Audio; and GROUP 14:
Collaboration; GROUP 15: KM & KVM Switches.
Getting Started
We recommend that you:
Unpack the equipment carefully and save the original box and packaging materials for
possible future shipment.
Review the contents of this user manual.
Go to www.kramerav.com/downloads/VP-428H2 to check for up-to-date user manuals,
application programs, and to check if firmware upgrades are available (where appropriate).
Achieving the Best Performance
Use only good quality connection cables (we recommend Kramer high-performance,
high-resolution cables) to avoid interference, deterioration in signal quality due to poor
matching, and elevated noise levels (often associated with low quality cables).
Do not secure the cables in tight bundles or roll the slack into tight coils.
Avoid interference from neighbouring electrical appliances that may adversely influence
signal quality.
Position your Kramer VP-428H2 away from moisture, excessive sunlight and dust.
This equipment is to be used only inside a building. It may only be connected to other
equipment that is installed inside a building.

Kramer Electronics Ltd.
VP-428H2 - Introduction
2
Safety Instructions
Caution:
There are no operator serviceable parts inside the unit.
Warning:
Use only the Kramer Electronics power supply that is provided with the unit.
Warning:
Disconnect the power and unplug the unit from the wall before installing.
Recycling Kramer Products
The Waste Electrical and Electronic Equipment (WEEE) Directive 2002/96/EC aims to reduce
the amount of WEEE sent for disposal to landfill or incineration by requiring it to be collected
and recycled. To comply with the WEEE Directive, Kramer Electronics has made
arrangements with the European Advanced Recycling Network (EARN) and will cover any
costs of treatment, recycling and recovery of waste Kramer Electronics branded equipment on
arrival at the EARN facility. For details of Kramer’s recycling arrangements in your particular
country go to our recycling pages at www.kramerav.com/support/recycling.
Overview
Congratulations on purchasing your Kramer VP-428H2 4K HDBT Transmitter/Scaler.
VP-428H2 is an HDBaseT 4K transmitter/scaler with HDMI, DP and VGA inputs. VP-428H2
supports HDBT tunneling of Ethernet, bidirectional RS-232 and IR signals, as well as PoE to
provide power to the HDBaseT receiver. It receives the selected AV signal, up-scales,
down-scales or bypasses the video, according to the settings selected by the user, and
converts it for sending via HDBaseT, together with the tunneled data and PoE.
VP-428H2 is housed in a compact, Kramer MegaTOOL™ enclosure which can be mounted
side by side in a 19-inch rack using the RK-T2B rack adapter.
VP-428H2 provides exceptional quality, advanced and user-friendly operation, and flexible
control.
Functionality
Supports scaling to / from all input and output resolutions.
Works with any HDBT receiver (supports 4K without the need for a specialized receiver).
Upscales to all popular 4K resolutions (to 4K60 4:2:0 max).
Downscales from 4K60 4:4:4 to all resolutions.
Automatically downscales 6G 4K color space to 4:2:0.
OSD supported bypass option, as well as hardware bypass support.
HDBT tunnelling of RS-232, IR and Ethernet.

Kramer Electronics Ltd.
VP-428H2 - Introduction
3
Exceptional Quality
PixPerfect™ Scaling Technology – Kramer’s precision pixel mapping and high quality
scaling technology.
Output resolutions – with selectable refresh rates up to 4K/UHD.
System Range – For the HDBaseT output, extended reach of up to 100m (330ft) using
Kramer recommended cables.
Includes numerous filters and algorithms for eliminating picture artifacts.
HDCP 2.2, HDMI 2.0/1.4 compliance.
HDBaseT certified.
Advanced and User-friendly Operation
Built-in video Proc-Amp – color, hue, sharpness, contrast, and brightness are set
individually for each input.
An OSD (On-Screen Display) – for making adjustments – that can be located anywhere on
the screen.
Advanced EDID management per input.
Constant Sync – Maintains sync on the output, even if input video signal is lost or
interrupted.
Audio – Unbalanced stereo and embedded audio with individual input level controls.
Audio delay selection.
MENU and navigation buttons for using OSD.
Front-panel push-button for input selection.
STEP-IN button for Step-in control when connected to a device that provides step-in
support.
Firmware Upgrade – Via USB-A port, using a user-friendly software upgrade tool.
Auto-switching – Selectable last connected and auto-scanning of inputs.
Non-volatile memory that retains the last settings, after switching the power off and then
on again.

Kramer Electronics Ltd.
VP-428H2 - Introduction
4
Flexible Connectivity
A FREEZE button, RESET TO XGA/1080P buttons (to hardware-reset the output
resolution); and a STEP-IN button.
3 video input ports – DP, HDMI and PC.
Ethernet tunnelling via HDBT.
Analog stereo audio input.
Embedded audio on the HDMI and DisplayPort inputs and outputs.
Scaled HDBT output.
IR input and output ports.
Data and device control RS-232 ports.
Typical Applications
VP-428H2 is ideal for the following typical applications:
Educational – Classrooms, lecture theaters.
Projection systems in conference rooms, boardrooms, hotels and churches.
Home theatre up-scaling.
Controlling your VP-428H2
Control your VP-428H2 directly via the front panel push buttons (see Front Panel Buttons
on page 9), with on-screen menus (OSD Menu on page 9), or:
By RS-232 serial commands transmitted by a touch screen system, PC, or other serial
controller (see Connecting to VP-428H2 via RS-232 on page 8).
Kramer Electronics Ltd.
VP-428H2 - Defining VP-428H2 4K HDBT Transmitter/Scaler
5
Defining VP-428H2 4K HDBT
Transmitter/Scaler
This section defines VP-428H2.
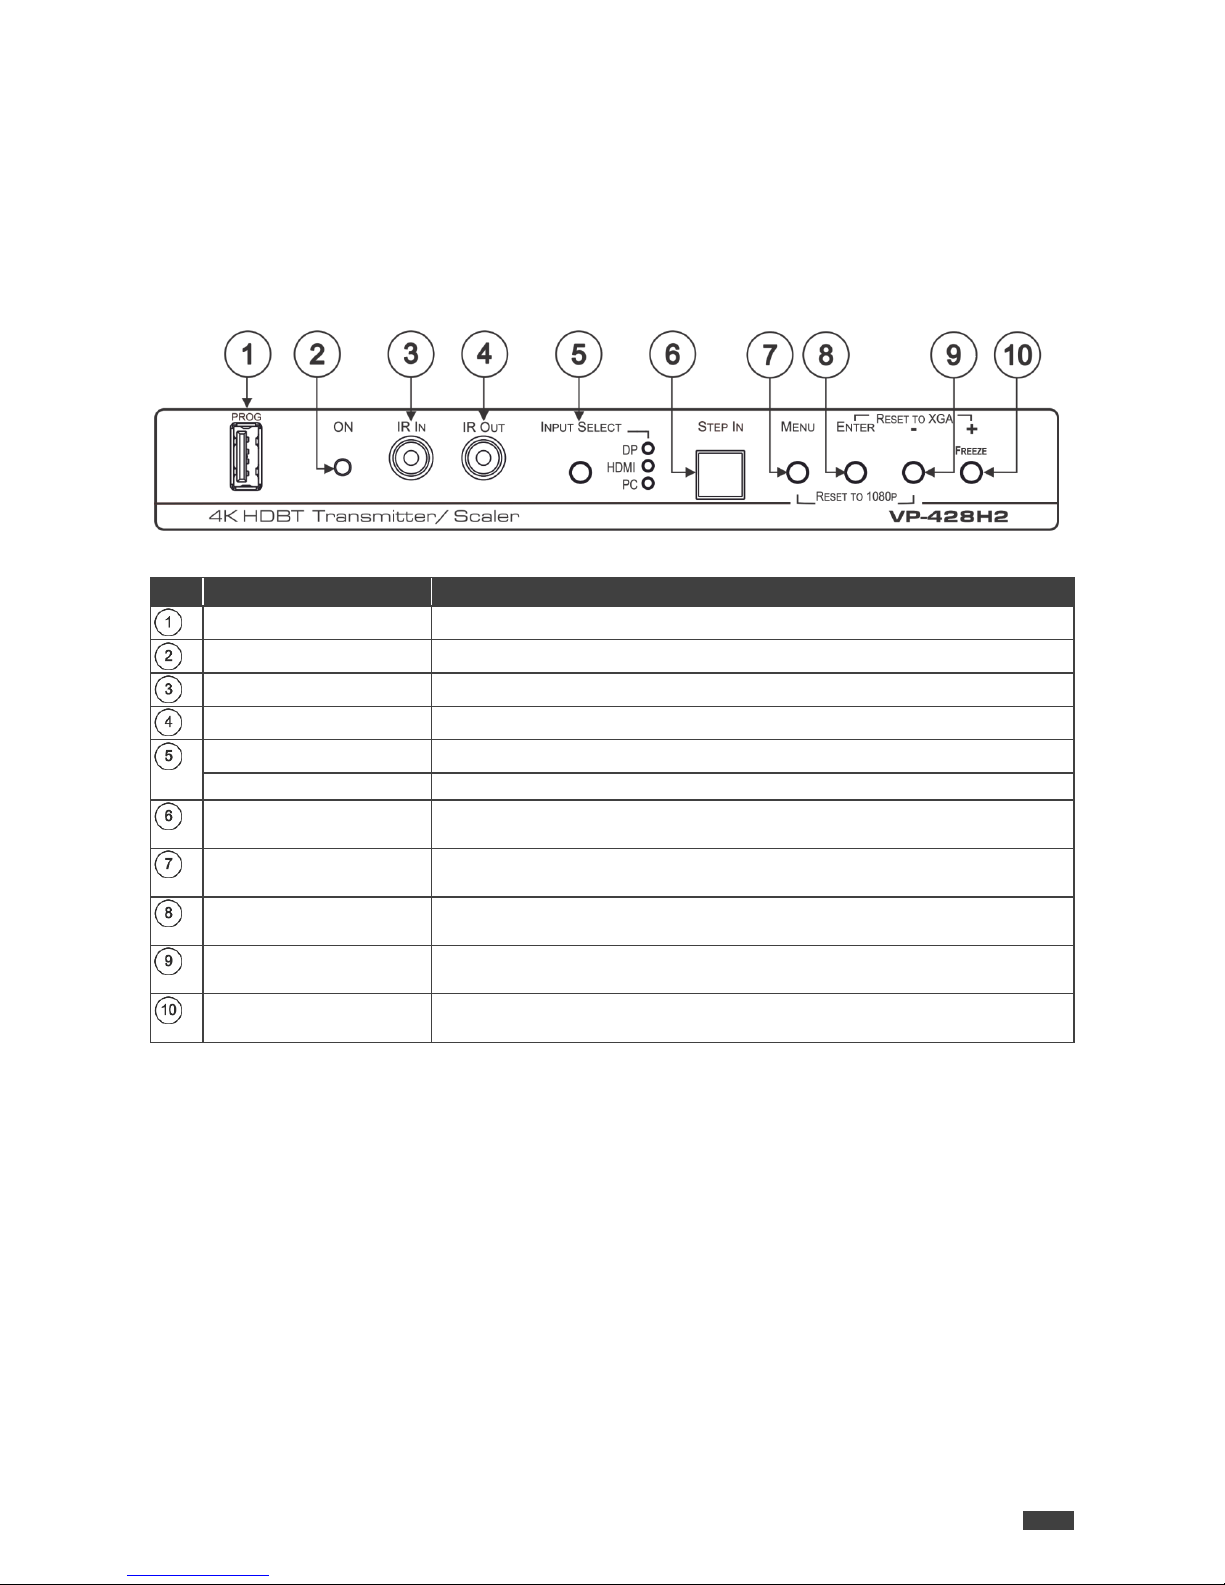
Figure 1: VP-428H2 4K HDBT Transmitter/Scaler Front Panel
#
Feature
Function
PROG USB Connector
Connects to a USB memory stick for programming upgrade.
ON LED
Lights green when the unit is powered on.
IR IN 3.5mm Mini Jack
Connects to an IR sensor.
IR OUT 3.5mm Mini Jack
Connects to an IR emitter.
INPUT SELECT Button
Press to cycle between inputs.
INPUT SELECT LEDs
The selected input lights.
STEP IN Button
Press to activate the input on the switcher to which the VP-428H2 is
connected.
MENU Button
Press to enter/exit the on-screen display (OSD) menu.
Press together with the – button to reset to 1080p.
ENTER Button
In OSD, press to choose the highlighted menu item.
Press together with the +/FREEZE button to reset to XGA.
– Button
In OSD, press to move back through the list or to decrement the parameter
value.
+/FREEZE Button
In OSD, press to move forward through the list or to increment the
parameter value. When not in OSD, press to freeze the display.
Kramer Electronics Ltd.
VP-428H2 - Defining VP-428H2 4K HDBT Transmitter/Scaler
6
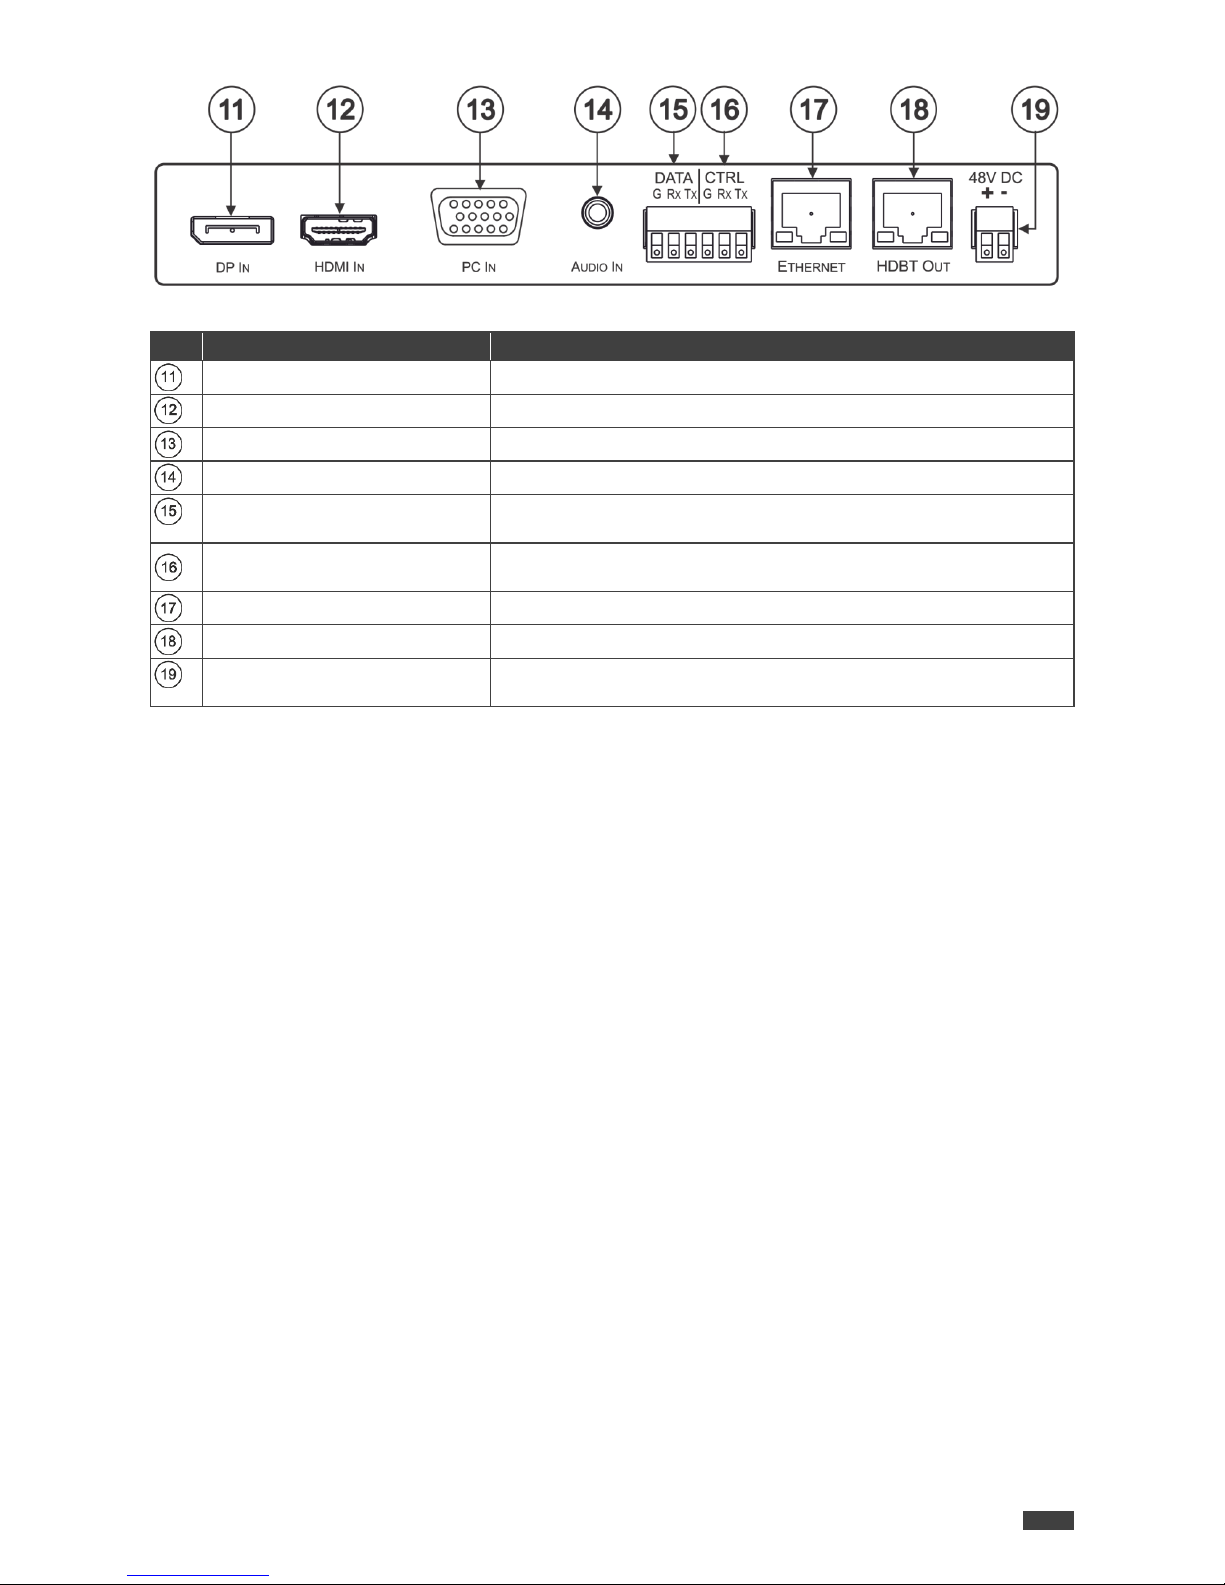
Figure 2: VP-428H2 4K HDBT Transmitter/Scaler Rear Panel
#
Feature
Function
DP IN DisplayPort Connector
Connect to a DisplayPort source.
HDMI IN Connector
Connect to an HDMI source.
PC IN 15-pin HD Connector
Connect to a computer graphics source.
AUDIO IN 3.5mm Mini Jack
Connects to an unbalanced stereo audio source.
DATA (G, Rx, Tx)Terminal Block
Connectors
Connect to a source for tunneling control commands via HDBaseT.
CTRL (G, Rx, Tx)Terminal Block
Connectors
Connect to a PC or remote controller to control VP-428H2.
ETHERNET RJ-45 Connector
Connect to a PC via a LAN to tunnel Ethernet data via HDBT.
HDBT OUT RJ-45 Connector
Connect to an HDBaseT receiver.
48V DC Power Terminal Block
Connector
Connect to the Kramer power adapter.
Kramer Electronics Ltd.
VP-428H2 - Connecting VP-428H2
7
Connecting VP-428H2
Always switch off the power to each device before connecting it to your VP-428H2. After
connecting your VP-428H2, connect its power and then switch on the power to each device.
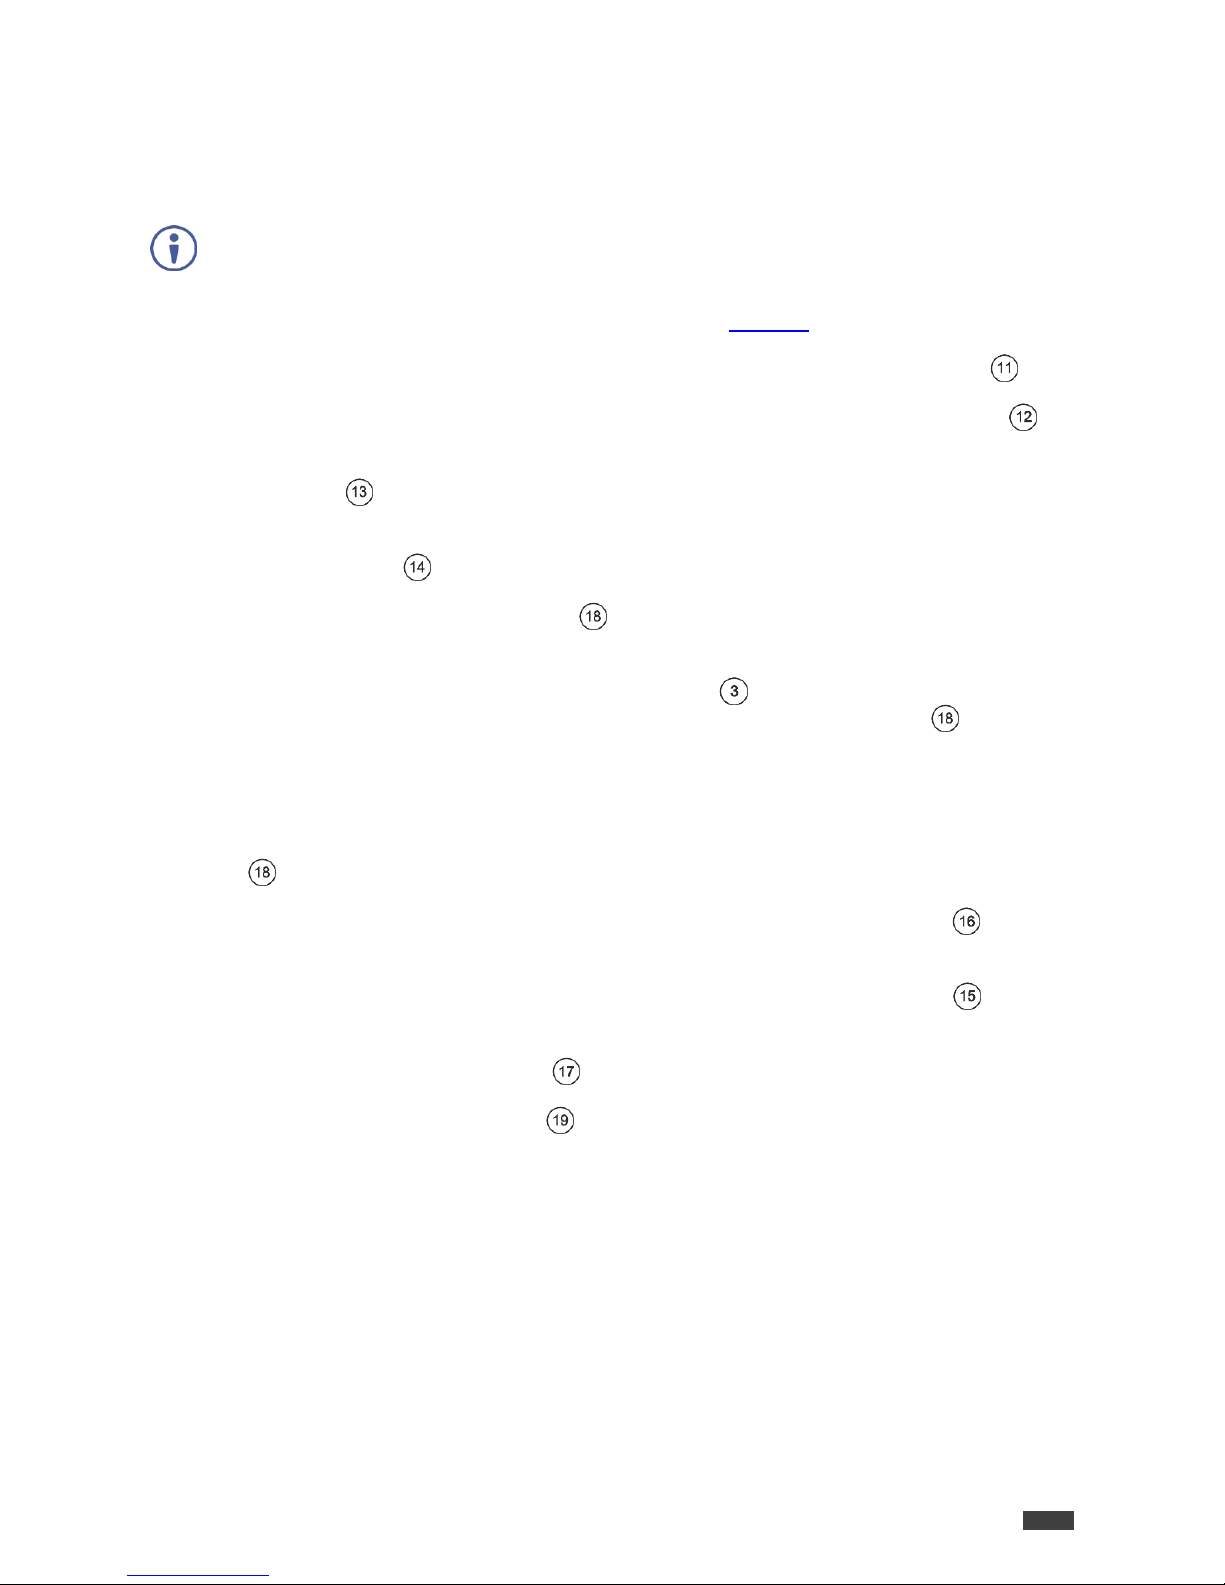
To connect VP-428H2 as illustrated in the example in Figure 3:
1. Connect a DP source (for example, a laptop) to the DP IN DisplayPort connector .
2. Connect an HDMI source (for example, a Blu-ray player) to the HDMI IN connector .
3. Connect a computer graphics source (for example, a laptop) to the PC IN 15-pin HD
connector .
4. Connect an analog stereo audio source (for example, from the laptop) to the AUDIO IN
3.5mm mini jack .
5. Connect the HDBT OUT RJ-45 port to a receiver (for example, the Kramer
TP-580Rxr).
6. Connect an IR sensor to the IR IN 3.5mm mini jack (for example, to control the
projector connected to the HDBT receiver that is connected to HDBT OUT ).
The projector IR remote control transmitter sends commands to the projector via the IR
sensor.
7. Connect the IR IN 3.5mm mini jack to an IR emitter (for example, to control the
HDMI-connected Blu-ray player via the HDBT receiver that is connected to HDBT OUT
).
8. Connect a control system to the CTRL (G, Rx, Tx) terminal block connectors to
control VP-428H2.
9. Connect a control system to the DATA (G, Rx, Tx) terminal block connectors to
tunnel control commands via HDBT OUT.
10. Connect the RJ-45 Ethernet port to tunnel Ethernet data via HDBT OUT.
11. Connect the 48V power adapter and connect the adapter to the mains.

Kramer Electronics Ltd.
VP-428H2 - Connecting VP-428H2
8
Figure 3: Connecting to the VP-428H2
Connecting to VP-428H2 via RS-232
You can connect to the VP-428H2 via an RS-232 connection ( , ) using, for example, a
PC.
To connect to the VP-428H2 via RS-232 Connect the RS-232 rear panel port on the VP-428H2
unit to the RS-232 port on your PC.

Kramer Electronics Ltd.
VP-428H2 - Operating VP-428H2
9
Operating VP-428H2
Operate VP-428H2 via:
Front Panel Buttons on page 9.
OSD Menu on page 9.
Front Panel Buttons
Use VP-428H2 front panel buttons to perform the following operations:
Press MENU , ENTER , + and – to use the OSD menu.
Press MENU and – simultaneously to reset the resolution to 1080p (RESET TO 1080p).
Press ENTER and FREEZE simultaneously to reset the resolution to XGA (RESET TO
XGA).
Press INPUT SELECT to manually select the input to switch to the output.
Press STEP-IN to activate the input on a Step-in compatible device, see Using the
Step-in Feature on page 13.
OSD Menu
The control buttons let you control the VP-428H2 via the OSD menu. Press:
MENU to enter the menu.
The default timeout is set to 10 seconds.
ENTER button to accept changes and to change the menu settings.
+ and – to move through the OSD menu, which is displayed on the video output.
On the OSD menu, select EXIT to exit the menu.
The OSD menu enables performing the following:
Setting Image Parameters on page 10.
Selecting the Input Signal on page 10.
Setting Output Parameters on page 11.
Setting the Audio Source on page 11.
Setting OSD Parameters on page 12.
Defining Advanced Settings on page 12.
Performing Factory Reset on page 13.
Viewing Device Information on page 13.
 Loading...