

Page 1
The Kramer T-RC-76/T-RC-78 TBUS Mounting Insert Kits for RC-76 and
i
RC-78
Congratulations on purchasing your Kramer T-RC-76/T-RC-78 TBUS Mounting insert kits for
RC-76 and RC-78. The T-RC-76/T-RC-78 lets you add the RC-76 and RC-78 to TBUS inner
frames that include dual power socket openings (such as the TBUS-1Axl, TBUS-10xl and
TBUS-18xl).
Figure 1: T-RC-76, T-RC-78 Insert Kits for RC-76 and RC-78 (P/N: 80-000080 and 80-000081, respectively)
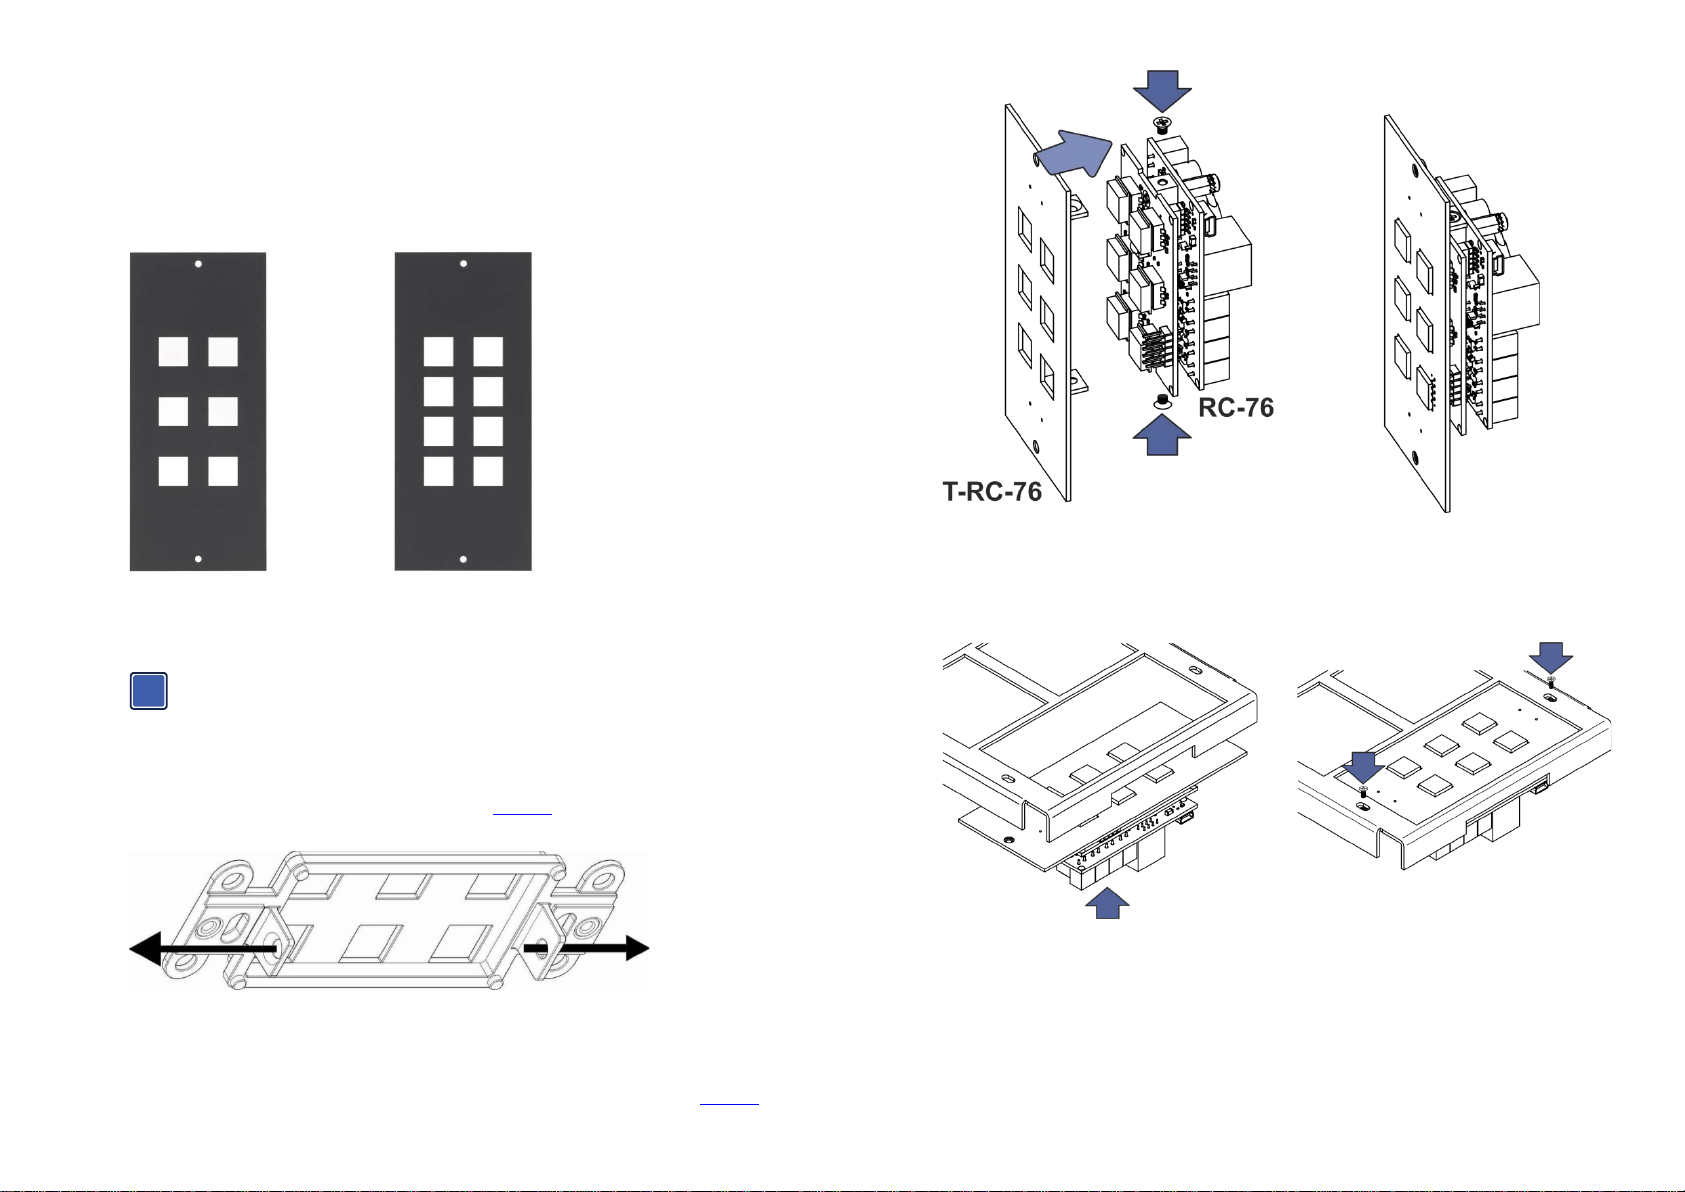
Installing the T-RC-76/T-RC-78 Insert Kits for RC-76 and RC-78
Figure 3: T-RC-76/T-RC-78 Installation
4. Place the assembled T-RC-76 + RC-76 under the dual socket opening.
5. Insert the two screws (supplied with the kit) to fix the T-RC-76/T-RC-78 in place, and
tighten them.
Note that the T-RC-76 installation example also applies to the T-RC-78.
To install the T-RC-76/T-RC-78 insert:
1. Unscrew the design frame from the device.
2. Remove the two mounting plate screws (see Figure 2
Put the screws aside.
Figure 2: Removing the Mounting Plate Screws
) and remove the mounting plate.
Figure 4: Fix the T-RC-76 in Place
6. Install the inner frame (when configuration is complete) according to the specific TBUS
inner frame installation instructions.
3. Fit the T-RC-76 over the buttons of the RC-76; insert the two mounting plate screws
through the T-RC-76 mounting bracket screw holes and tighten them (see Figure 3
).
Page 2

Instructions
P/N:
2900-300691
Rev:
2
!
SAFETY WARNING
Disconnect the unit from the power
supply before opening and servicing
KRAMER ELECTRONICS LTD.
Installation
MODEL:
TBUS Mounting Insert Kits
For the latest information on our products and a list of Kramer
distributors, visit our Web site where updates to these installation
instructions may be found
We welcome your questions, comments,
and feedback.
Web site: www.kramerav.com
E-mail: info@kramerel.com
T-RC-76, T-RC-78
for RC-76 and RC-78
For more detailed
information regarding
this product scan the
QR code:
P/N: 2900-300691 Rev 2
 Loading...