

Page 1
KRAMER
2 9 0 0 - 3 0 0 5 8 8 QS
2
RK-21 Quick Start Guide
This guide helps you install and use your product for the first time. For more detailed information, g
http://www.kramerav.com/manual/RK-21 to download the latest manual or scan the QR code on the left.
Step 1: Check what’s in the box
The RK-21 Rack Adapter: 2 extension brackets and 1 fastening bracket
6 M3x5 flat-head screws
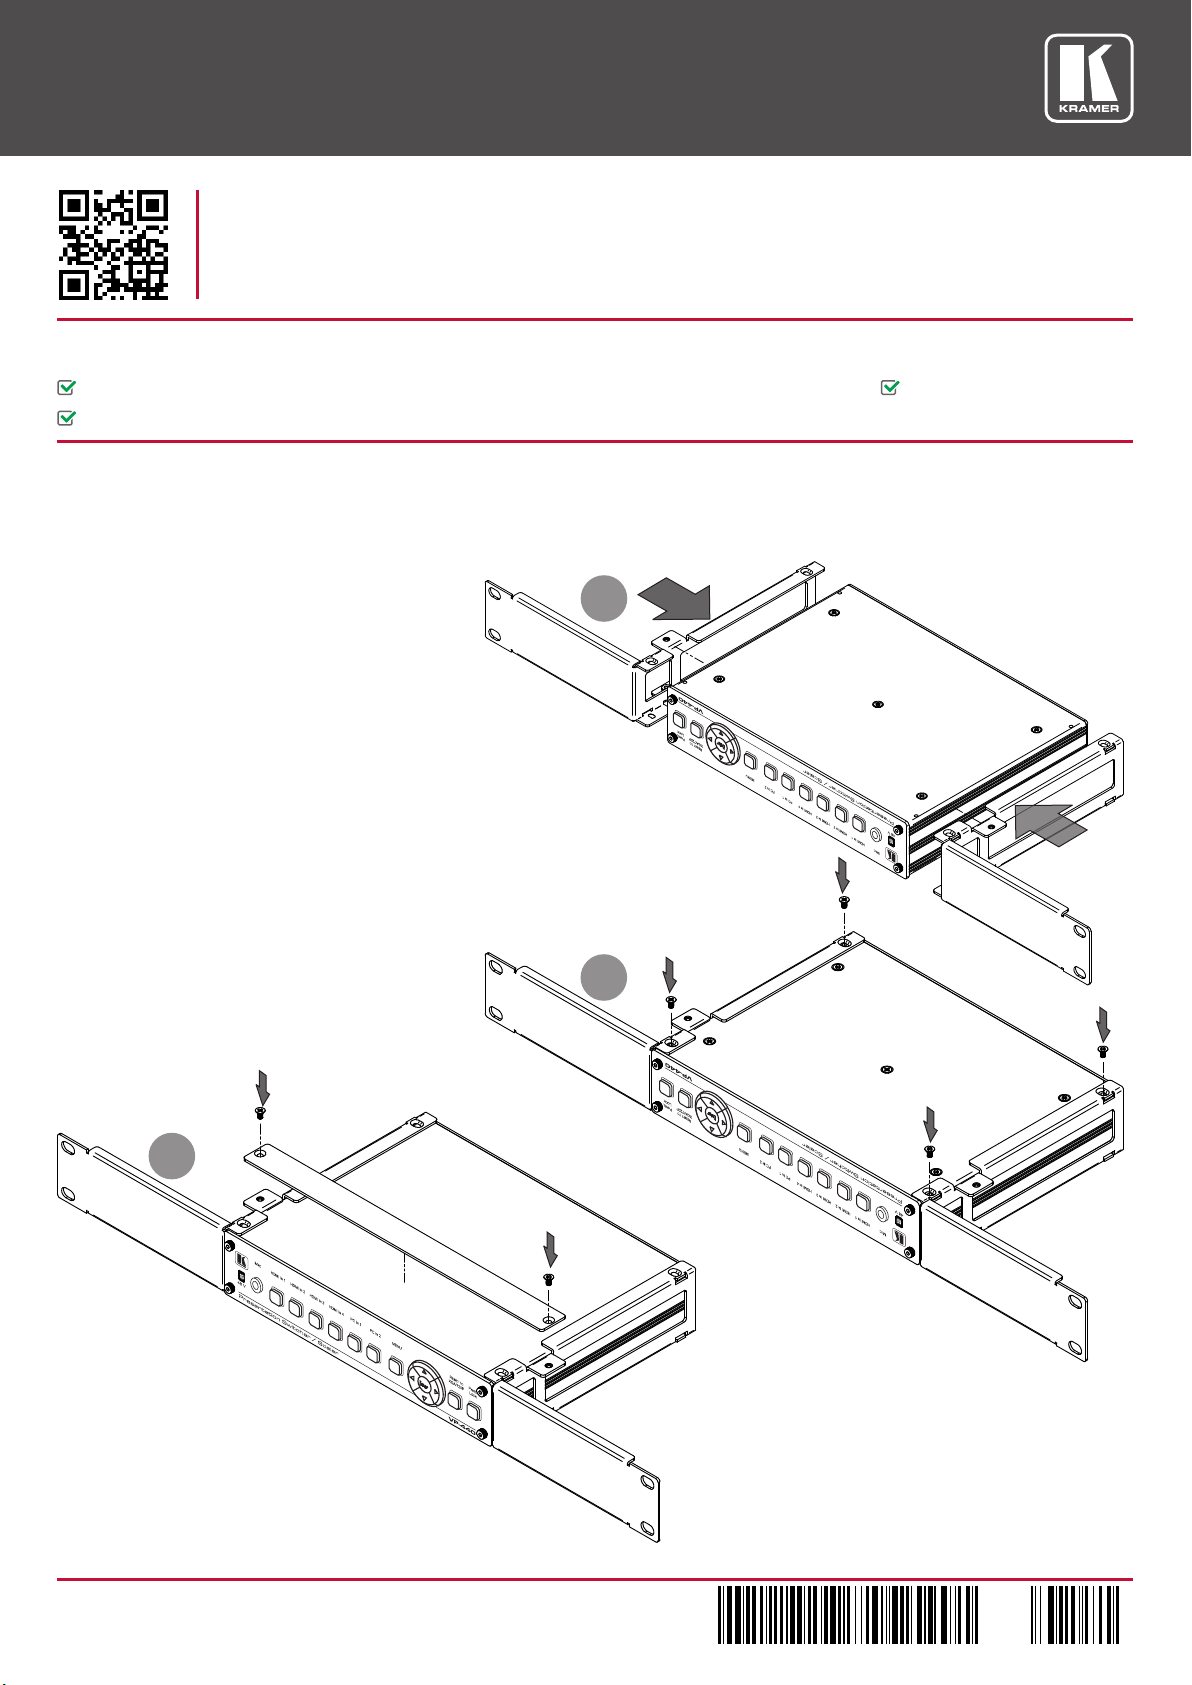
Step 2: mounting the RK-21
The RK-21 Rack Adapter lets you mount a Kramer desktop device to fit into a 19” rack space.(8.5”-wide)
Step 1
Turn the desktop device (the Kramer
VP-440 in this example)
Fit the two extension brackets to the sides of the
device.
upside down
.
o to
1 Quick start guide
Step
1
Step 2
Attach both extension brackets (one on each side of
the device) by screwing four M3x5 screws (two on
each side) through the brackets and onto the four
holes in the device.
Step
3
Step
2
Step 3
Turn the device and attached brackets upright.
Attach the fastening bracket using 2 M3x5 screws.
RK-21 Quick Start (P/N: 2900-300588QS REV 2)
The device can now be attached to a 19” rack
space.
P/N:
Rev:
 Loading...