

Page 1
RK-10MT Quick Start
P/N:
2900- 301507QS
Rev:
2
Scan for full manual
RK-10MT Quick Start Guide
This guide helps you install and use your RK-10MT for the first time.
Go to www.kramerav.com/downloads/RK-10MT to download the latest user manual and check if firmware
upgrades are available.
Step 1: Check what’s in the box
RK-10MT Rack Mount
2 Blank Panels
50 Screws
1 Quick start guide
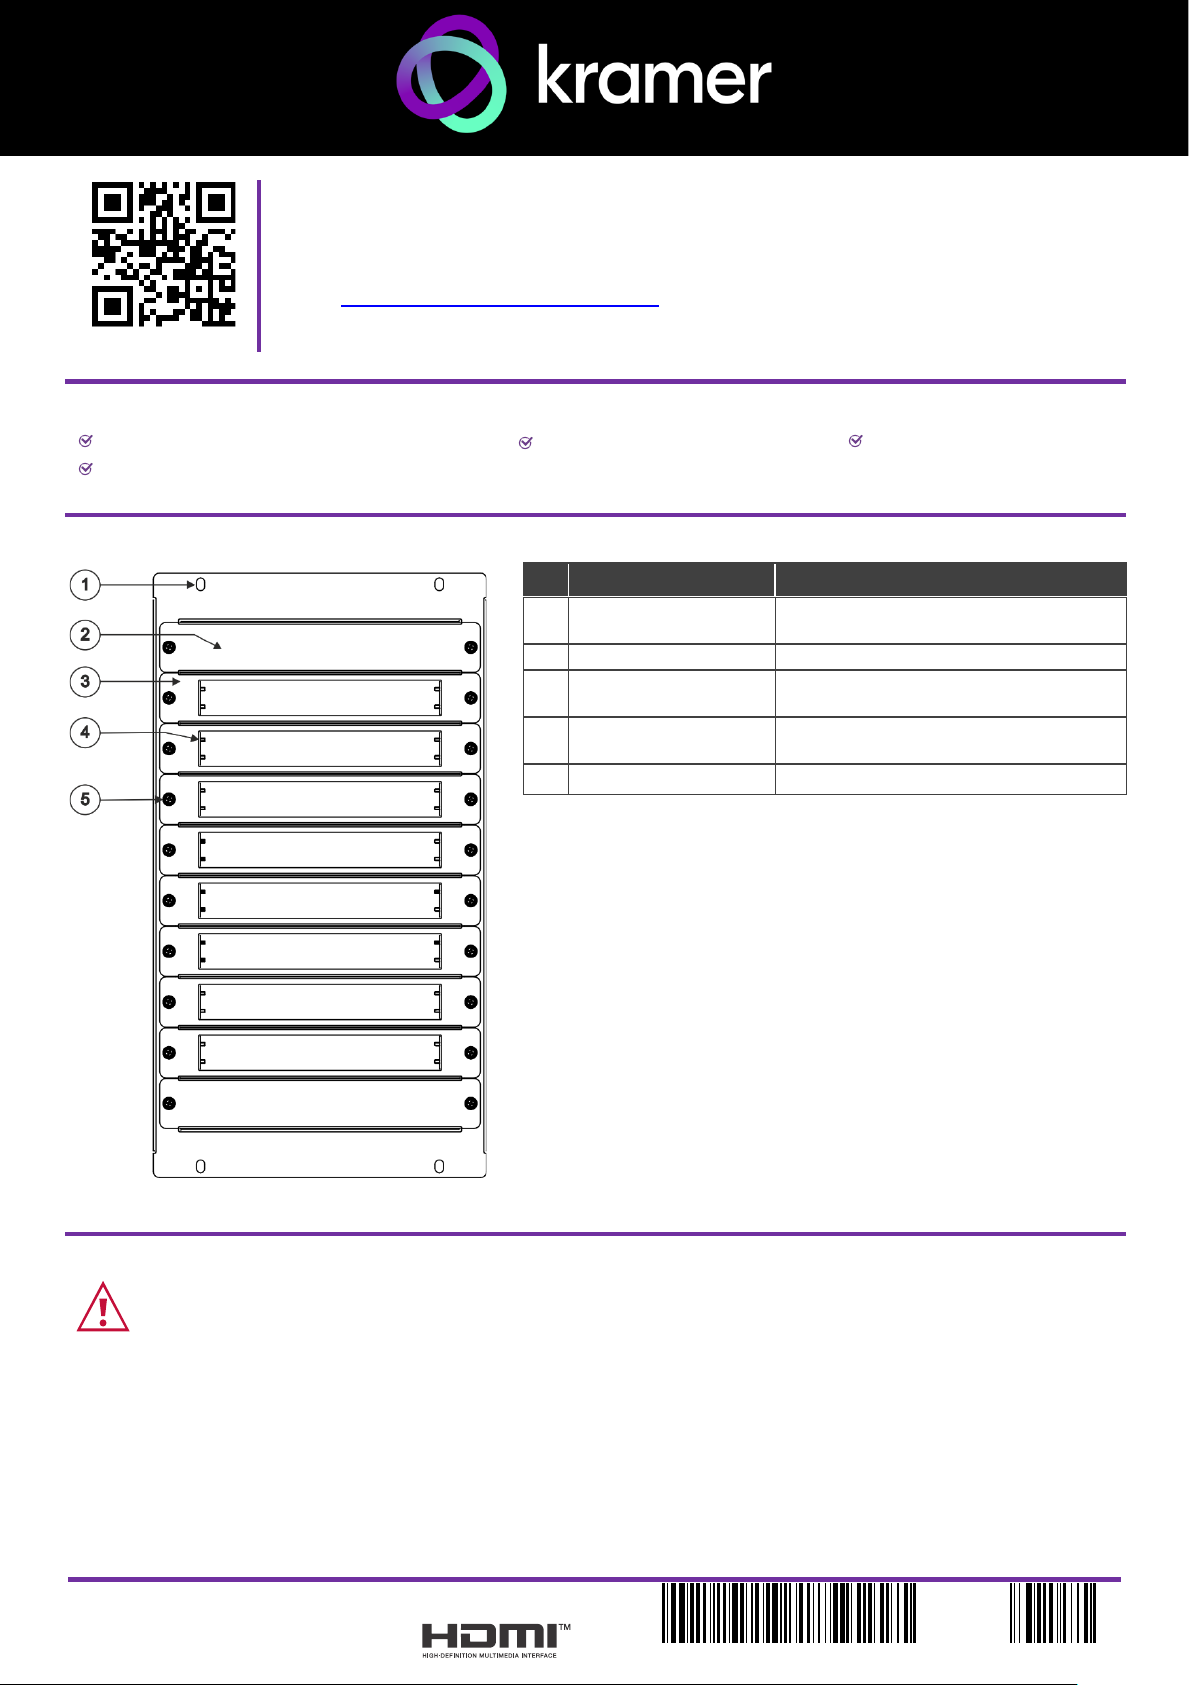
Step 2: Get to know your RK-10MT
#
Feature
Function
1
Rack Adapter Screw
Holes
Connect to a Rack adapter shelf.
2
Blank Panel
Blank panel to cover open slot.
3
Open Panel
Rack-mount panel with opening for
inserting the device.
4
Inside Screw Holes
Insert screws (supplied) to attach the
device to the open panel.
5
Knob
Turn to attach a panel to the rack.
Step 3: Mount RK-10MT
• Ensure that the environment (e.g., maximum ambient temperature & air flow) is compatible for the device.
• Avoid uneven mechanical loading.
Page 2

To mount a device onto the rack:
1. Unfasten the knobs to remove the open panel.
2. Slide the device into the panel opening.
3. Attach the device to the panel using 4 screws (2 on
each side to secure the device to the panel.
4. Slide the open panel with the device into the rack
opening.
5. Turn the knob to secure panel to rack.
Technical Specifications
Environmental
Conditions
Operating Temperature
0° to +40°C (32° to 104°F)
Storage Temperature
-40° to +70°C (-40° to 158°F)
Humidity
10% to 90%, RHL non-condensing
Regulatory
Compliance
Safety
CE
Environmental
RoHs, WEEE
Enclosure
Type
SGCC
General
Net Dimensions (W, D, H)
48.2cm x 26.5cm x 3.1cm (19" x 10.4" x 1.2")
Shipping Dimensions (W, D, H)
52.5cm x 40cm x 8.5cm (20.7" x 15.7" x 3.3")
Net Weight
1.7kg (3.7lbs) approx.
Shipping Weight
2.5kg (5.5lbs) approx.
Specifications are subject to change without notice at www.kramerav.com
 Loading...