

Galil 6-AW Quick Start
P/N:
2900- 301402QS
Rev:
2
Scan for full manual
Galil 6-AW Quick Start Guide
This guide helps you install and use your Galil 6-AW for the first time.
Go to www.kramerav.com/downloads/Galil 6-AW to download the latest user manual and check if firmware
upgrades are available.
Step 1: Check what’s in the box
Galil 6-AW All Weather Speakers
4 knobs
2 cable glands
1 Quick start guide
2 mounting U-brackets
4 mounting screws
2 grommets
1 User manual
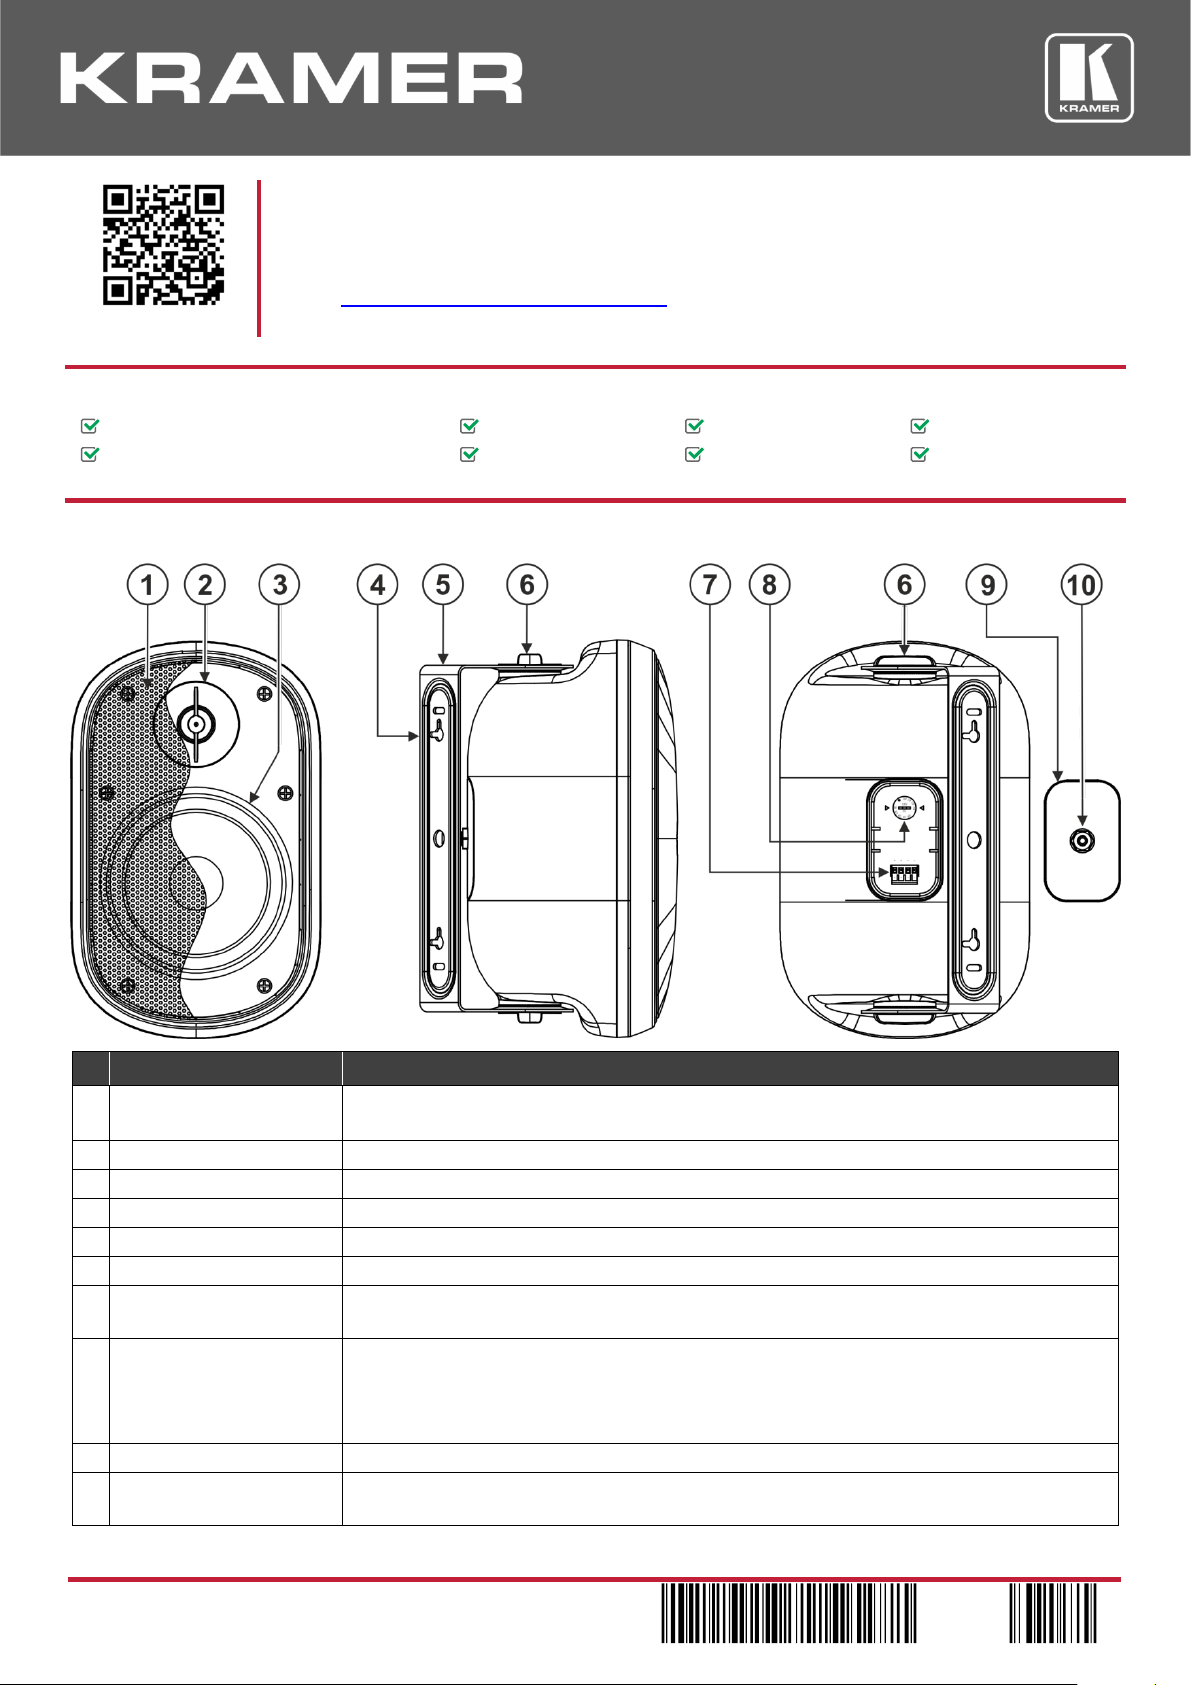
Step 2: Get to know your Galil 6-AW
#
Feature
Function
1
Speaker Grille
Protects the internal components of the speaker from foreign objects.
Do not remove the grille from the speakers.
2
Tweeter
Emits high frequency sounds.
3
Woofer Driver
Emits low frequency sounds.
4
Keyhole Mounting Point
Use to attach the U-bracket to a wall.
5
U-Bracket
Use to mount the speaker onto a wall (allowing left/right rotation).
6
U-Bracket knobs (2x2)
Use to fasten the U-bracket to the speaker (two knobs per bracket).
7
Input and Output Terminal
Block Connectors
One +, - pair for the input and one +, - pair to output to the next speaker in an array
configuration.
8
Tap Selector
Adjust each speaker to the appropriate tap setting:
For 70V: select 3.7W, 7.5W, 15W, or 30W; For 100V: select 7.5W, 15W, or 30W.
Alternatively, select 8 to bypass the transformer when connecting directly to an amplifier
without using the 70/100V array option.
9
Protective Cover
Protects speaker cables and tap selector.
10
Cable Gland/Grommet
Pass the speaker cable through the cable gland/grommet to protect the connectors from outdoor
weather conditions.

Step 3: Choose the best location
Before installing the speakers:
• Experiment by placing the speakers in different locations before finally deciding on the most suitable location.
• Be sure that the wall type is appropriate for the mounting U-brackets, that is, either solid wood, bricks, concrete,
hollow building blocks, or wood studs.
• Check that the mounting location is free of obstructions, such as electrical piping, AC ducts or water lines, and so on.
Step 4: Install the Galil 6-AW
Always switch OFF the power on each device before connecting it to your Galil 6-AW.
To connect the Galil 6-AW to the amplifier:
1. Cut the dual color cable wires to similar lengths, leaving some excess wire to easily
remove the speakers from the U-brackets.
For outdoor installations you need to use weatherproof cables.
2. Adjust the tap setting.
3. Connect the wires to the appropriate terminal block connectors on the speaker.
4. Mount the grommet/cable gland on the protective cover and pass the cables
through the grommet/cable gland and the protective cover.
5. Close the tap selector and connector opening with the protective cover.
6. Connect the mounting U-brackets.
7. Connect the wires to the amplifier (left speaker wires to amplifier “L” terminal blocks
and right speaker to amplifier “R” terminal blocks.
The following diagram displays the Galil 6-AW speakers connected
to a recommended Kramer power amplifier
(for example, PA-120Z):
For optimum range and performance use the recommended Kramer cables available at www.kramerav.com/product/Galil 6-AW.
Using third-party cables may cause damage!
 Loading...