

Kozyard Alexander 10x12, Alexander 12x16 Assembly Manual
10’x12’ Alexander hardtop gazebo
with double roof
Assembly Manual
Kozyard LLC Products
©
Copyright 2016 - 2019 Kozyard LLC. | All Rights Reserved.
2+
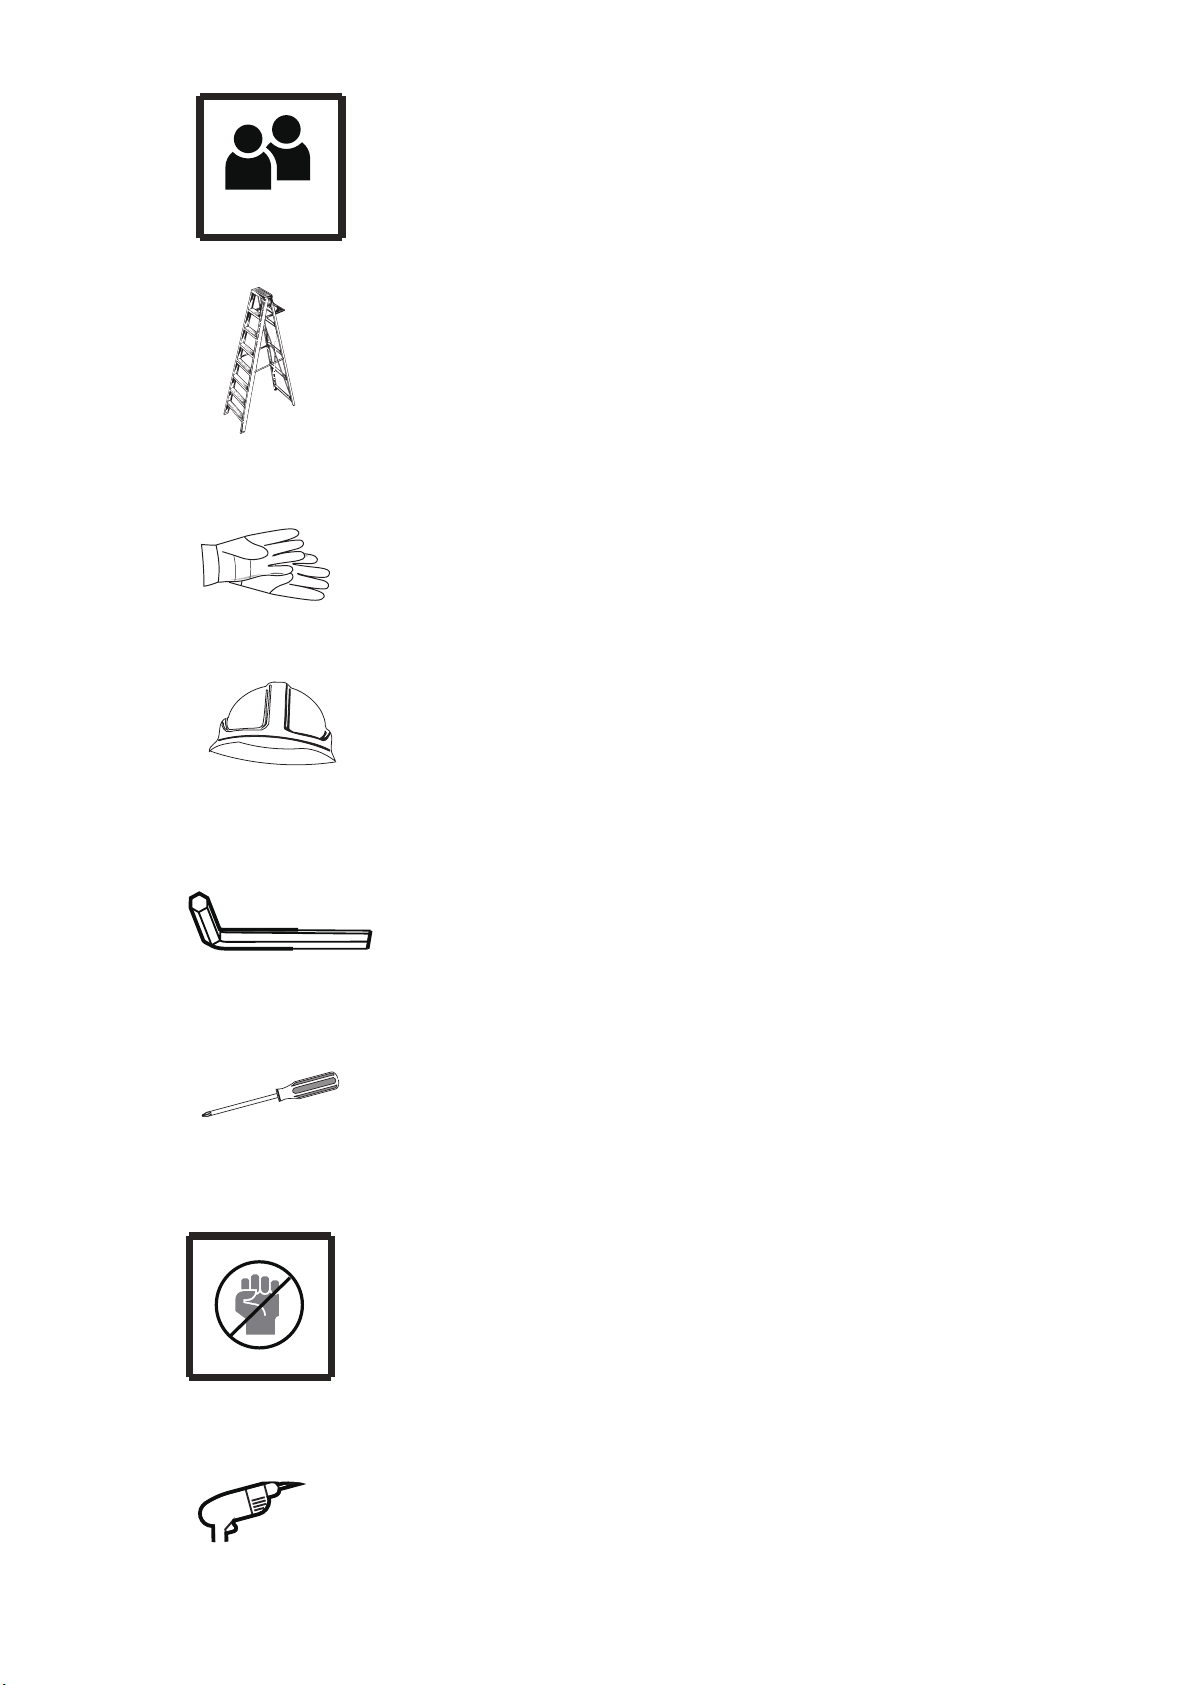
1.Two or more people are required for assembly.
2.You will need one or more stepladders.
3. Wearing protective gloves is recommended.
4.You may need a safety hat.
5.Use the hex keys in the box.
6.Please use a Phillips screwdriver.
7.Do not fully tighten screws prior to
complete assembly.
8.For ease of construction, you may need to
use a drill.
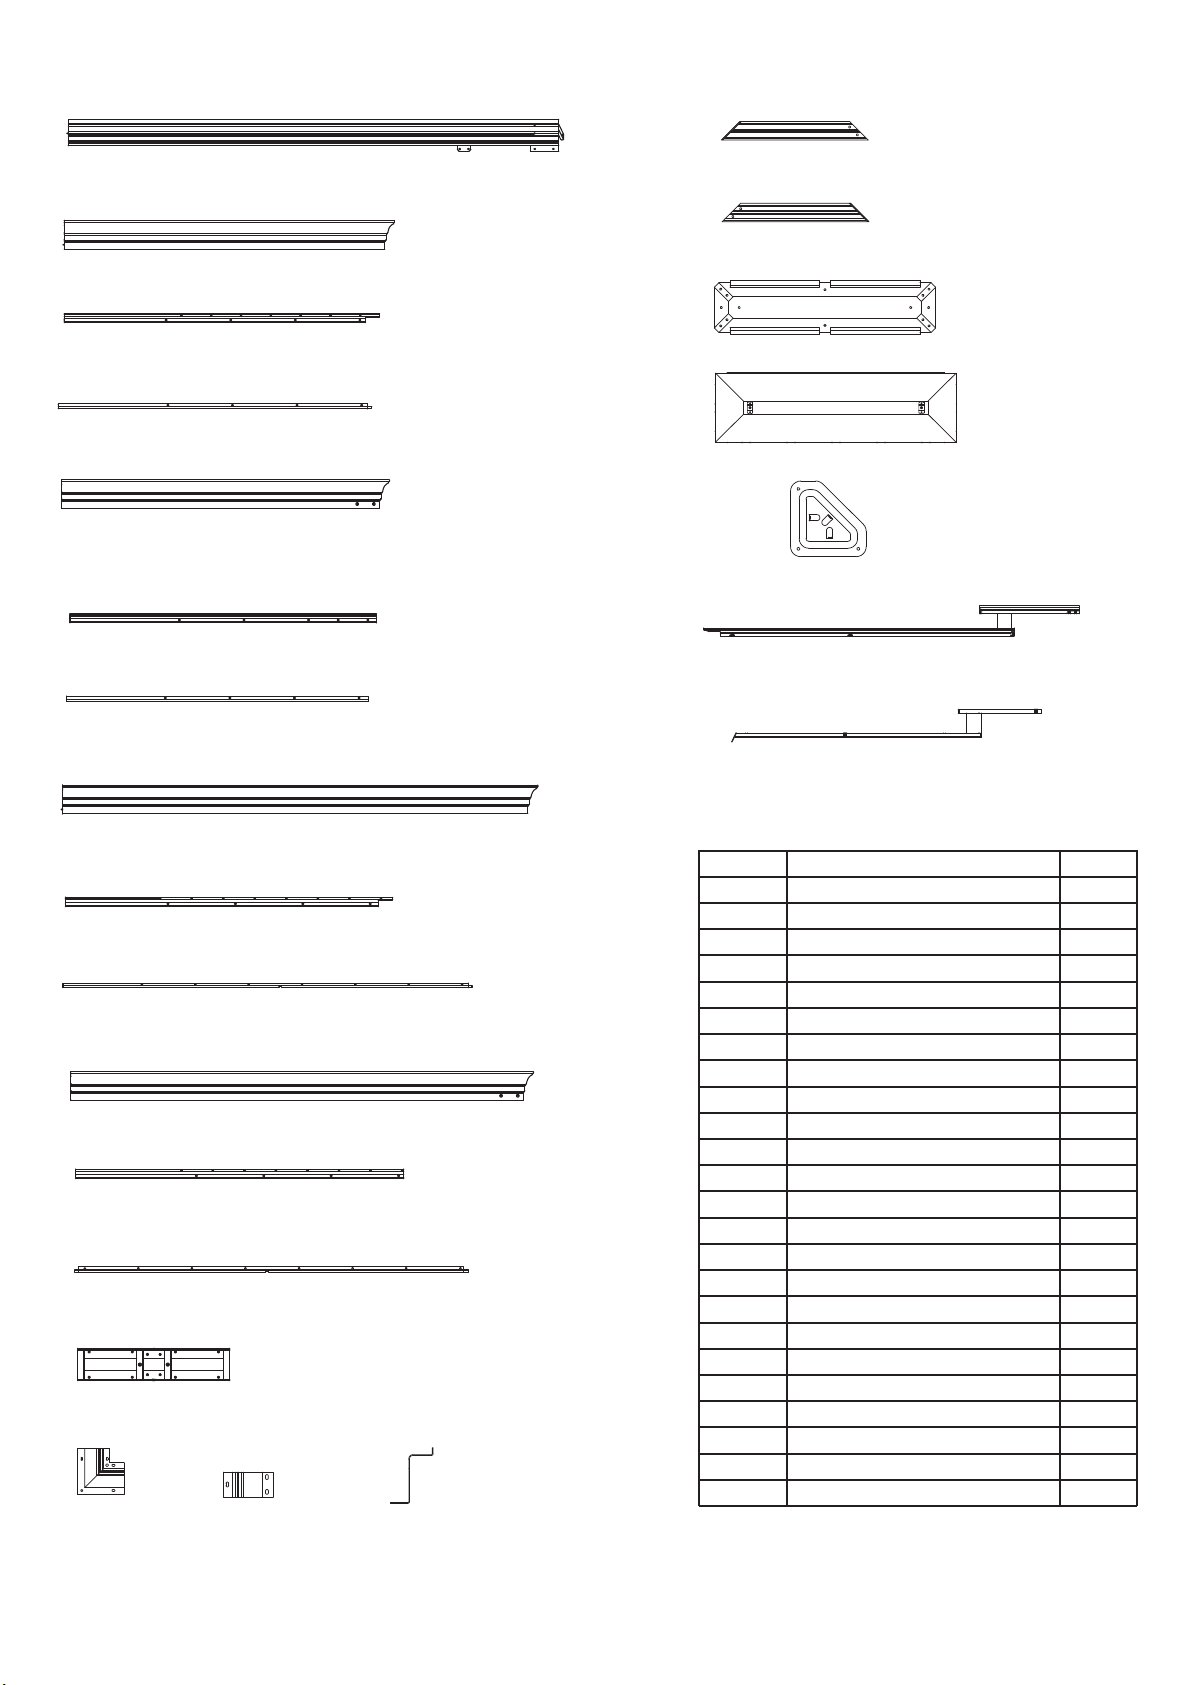
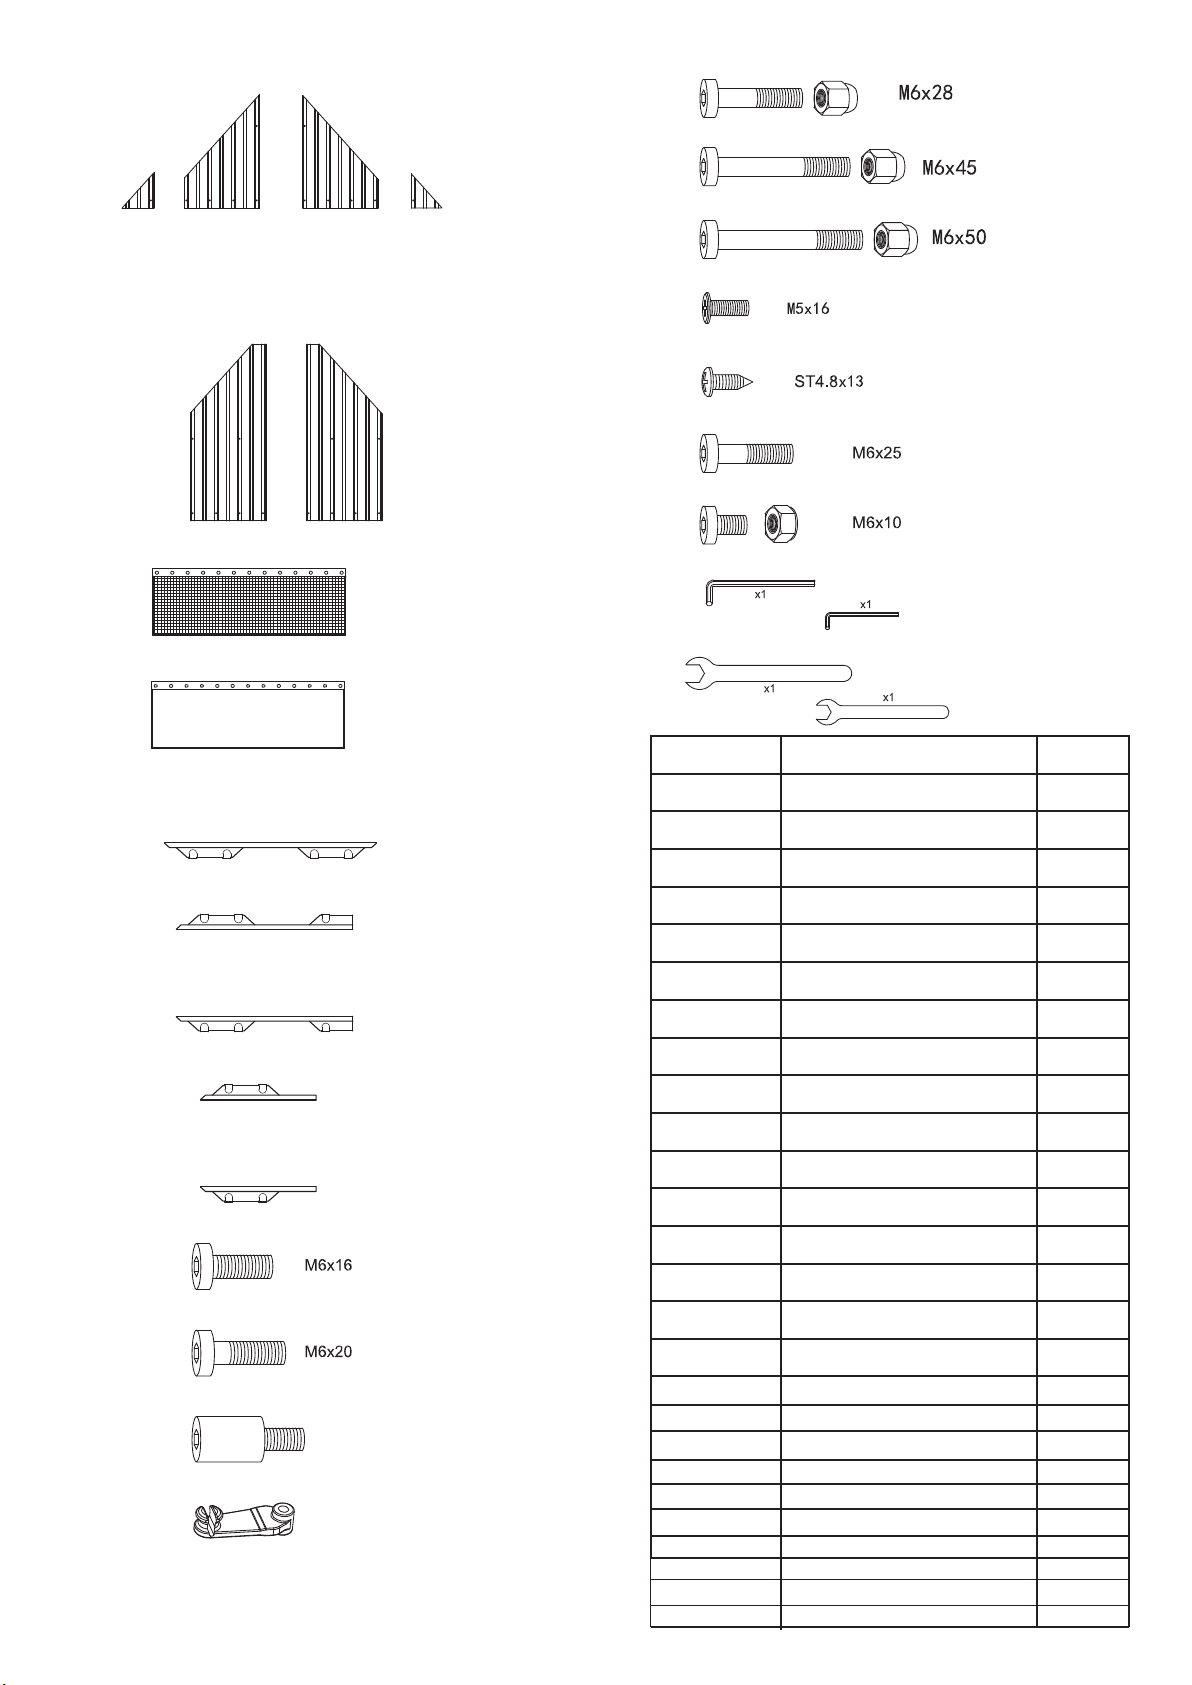
AX4
BX2
J1X4
J2X4
GX4
HX4
H1X4
B1X2
B2X2
CX2
C1X2
C2X2
DX2
D1X2
D2X2
EX2
E1X2
E2X2
FX4
ITEM
A
B
B1
B2
C
C1
C2
D
D1
D2
E
E1
E2
F
G
H
H1
J1
J2
K
K1
L
M
N
KX1
K1X1
LX4
DESCRIPTION
Pole
Beam
Joint Bar
Sidewall Track
Beam
Jointer Bar
Sidewall Track
Beam
Jointer Bar
Sidewall Track
Beam
Jointer Bar
Sidewall Track
Union Bar
Corner Cover
Joint Cover
Joint Cover
Corner Solidifyng Bar
Corner Solidifyng Bar
Inside Roof Connector
Outside Roof Connector
Base
Corner roof bar
roof bar
MX4
NX4
QTY
4
2
2
2
2
2
2
2
2
2
2
2
2
4
4
4
4
4
4
1
1
4
4
4
page 1
PX2
P1X2
RX8
Q1X2
SX104
T1X2
QX2
Q2X2
T2X2
U1X2
W3X2
W1X2
W2X2
W5X2
W4X2
W6X2
X4X2 X5X2
U5X4
V1X2
V2X2
U6X4
V3X2 V4X2 V5X2 V6X2
U2X2
U3X2
U4X2
page 2
ITEM DESCRIPTION QTY
P
Finishing Bar
Net Frame
P1
Finishing Bar
Q
Net Frame
Q1
Q2
Net Frame
Finishing End
R
S
Spacer
T1
Finishing Bar
Finishing Bar
T2
U1
Solidifying Bar
U2
Solidifying Bar
U3
Solidifying Bar
Solidifying Bar
U4
U5
Iron Angle
U6
Iron Angle
Roof Panel
V1
V2
Roof Panel
V3
Roof Panel
V4
Roof Panel
V5
Roof Panel
V6
Roof Panel
W3
Roof Panel
W4
Roof Panel
W1
Roof Panel
W2
Roof Panel
W5
Roof Panel
W6
Roof Panel
X4
Roof Panel
X5
Roof Panel
2
2
2
2
2
8
104
2
2
2
2
2
2
4
4
2
2
2
2
2
2
2
2
2
2
2
2
2
2
5#X64+3
6#X8+1
X1X2
X3X2
X2X2
ZX56
X7X2 X8X2
X6X2
YX4
Y1X4
7#X28+2
8#X4+1
9#X24+2
10#X4+1
11#X8+1
Allen key
Wrench
ITEM DESCRIPTION QTY
X1
X2
Roof Panel
Roof Panel
2
2
Z1X4
Z2X4
Z3X4
Z4X4
1#X206+3
2#X16+2
3#X16+2
4#X104
X7
X8
X3
X6
Y
Y1
Z
Z1
Z2
Z3
Z4
1#
2#
3#
4#
5#
6#
7#
8#
9#
10#
11#
Roof Panel
Roof Panel
Roof Panel
Roof Panel
Mosquito Sidewall
Solid Sidewall
Metal Bracket
Metal Bracket
Metal Bracket
Metal Bracket
Metal Bracket
Screws
Screws
Screws
Hook
Screws
Screws
Screws
Screws
Screws
Screws
Screws
Allen key
Wrench
2
2
2
2
4
4
56
4
4
4
4
206+3
16+2
16+2
104
64+3
8+1
28+2
4+1
24+2
4+1
8+1
2
2
page 3
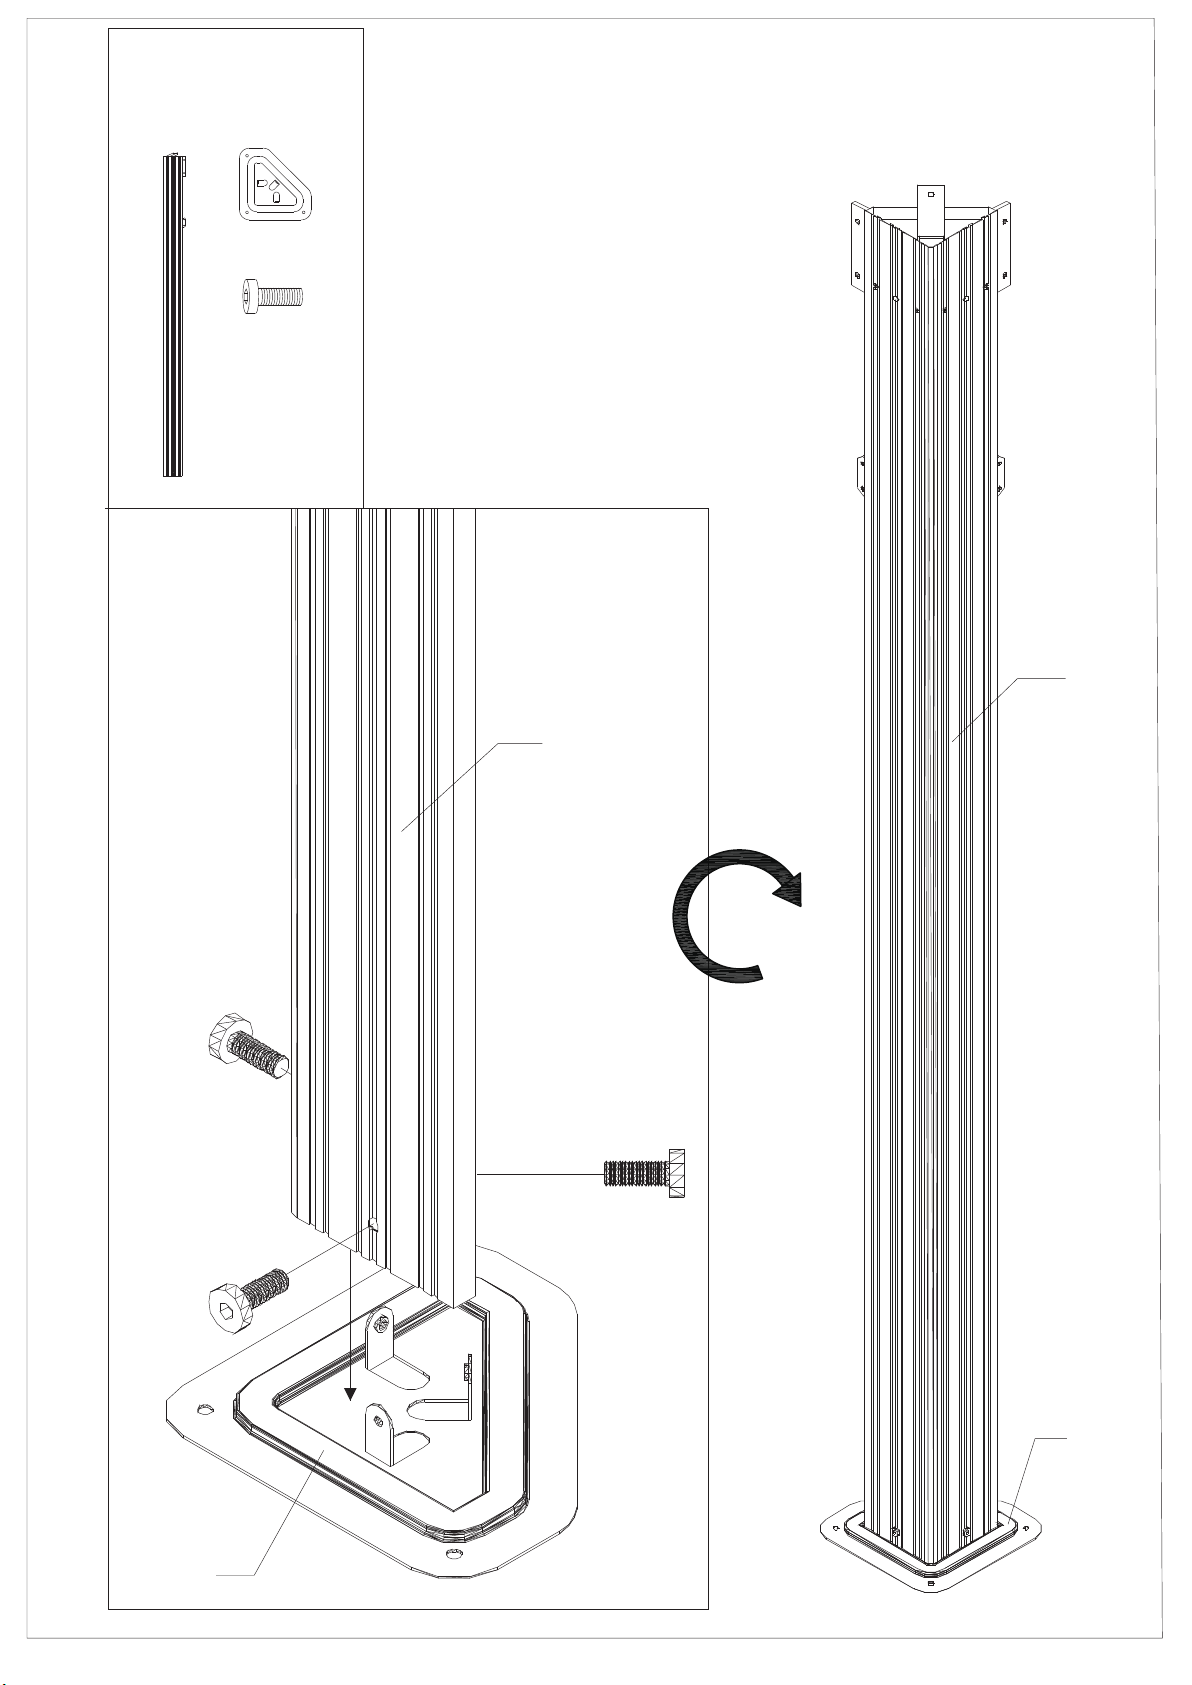
Parts Required:
A x4
Step 1:
Set up poles (Part A) with stand plates (Part L) using
screws 1# as shown in diagram.
L x4
1#
x12
1#
A
A
X4
1#
1#
x1
L
L
page 4
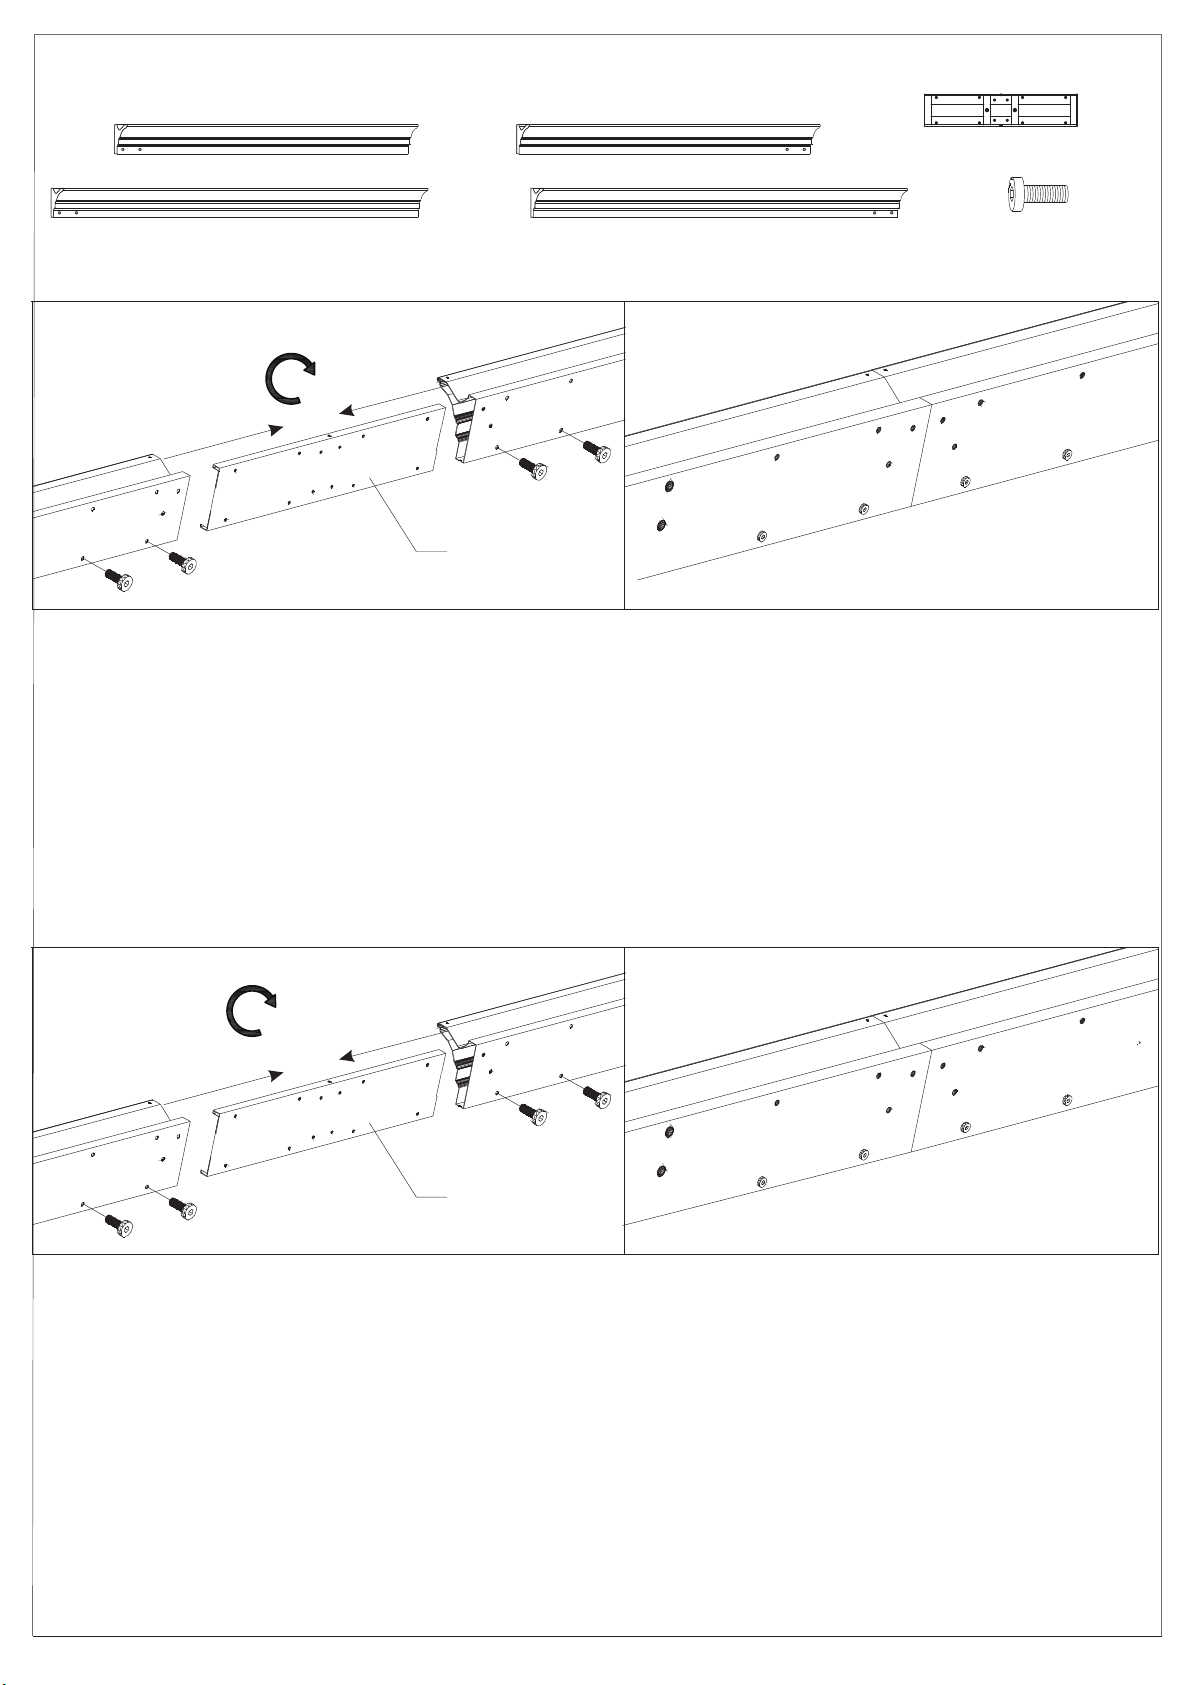
Parts Required:
F x4
C
1#
Step 2:
X2
Cx2
F
D x2
B
1#
C
B x2
E x2
1#
X16
B
Connect (Part C) and (Part B) into one beam using union bar
(Part F) with screws 1#.
③
X2
D
E
E
1#
F
1#
D
Connect Part E and Part D into one beam using union bar
(Part F) with screws 1# as shown in diagram.
page 5
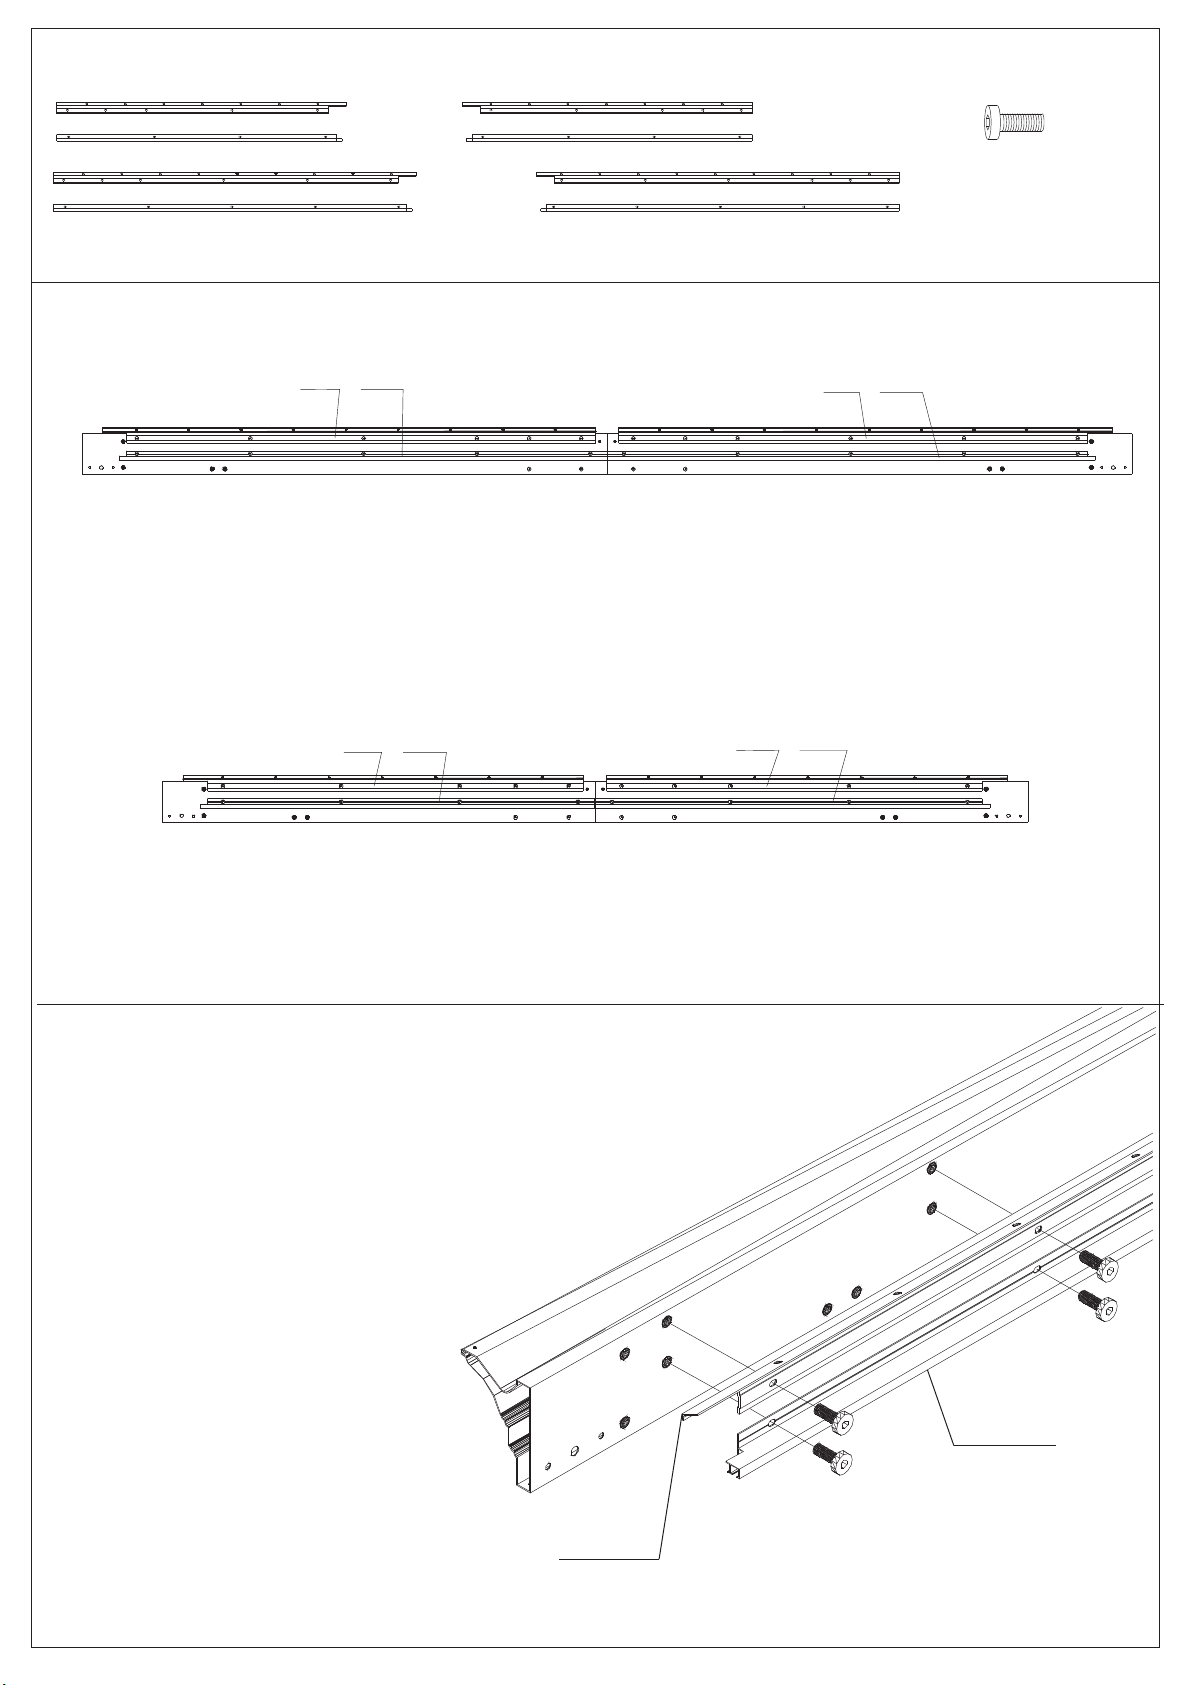
Parts Required:
Step 3
:
C1 x2
C2 x2
E
E1 x2
E2 x2
B1 x2
B2 x2
D1
1#
x80
D1 x2
D2 x2
D2E1 E2
D
C1 C2
C
Connect parts (E2&D2) to the finished beam (part E& part D)
using screws 1# as shown in diagram.
Replicate the same steps for parts (C2 & B2),
attaching them to the finished beam (C & B)
using screws 1#.
B1 B2
B
1#
Attach parts (E1& D1) to finished
beam (E & D) using screws 1#.
Attach parts (C1 & B1) to finished beam
(C & B) using screws 1#.
E1/D1
C1/B1
page 6
1#
E2/D2
C2/B2
 Loading...