

1
33..55”” IInntteerrnnaall FFllooppppyy wwiitthh CCaarrdd RReeaaddeerr
MMuullttii MMeeddiiaa
DDeevviiccee
User Manual
(Rev.: V1.1)
INDEX
z Trademarks ---------------------------------------------------------------------
z Introductions -------------------------------------------------------------------
z Package contents ----------------------------------------------------------------
z Hardware requirements ------------------------------------------------------
z System Supports -----------------------------------------------------------------
z How to install multi media device ------------------------------------------
z Card reader software installation ------------------------------------------
Windows
®
XP software installation ---------------------------------
Windows
®
Vista software installation -------------------------------
z How to use floppy disk drive --------------------------------------------------
z How to use your media memory cards --------------------------------------
z Indicator description ---------------------------------------------------------
z Product specifications --------------------------------------------------------
2
2
2
2
2
3
5
5
7
10
10
12
13

2
Trademarks
All names and products mentioned below are registered trademarks of their respective companies.
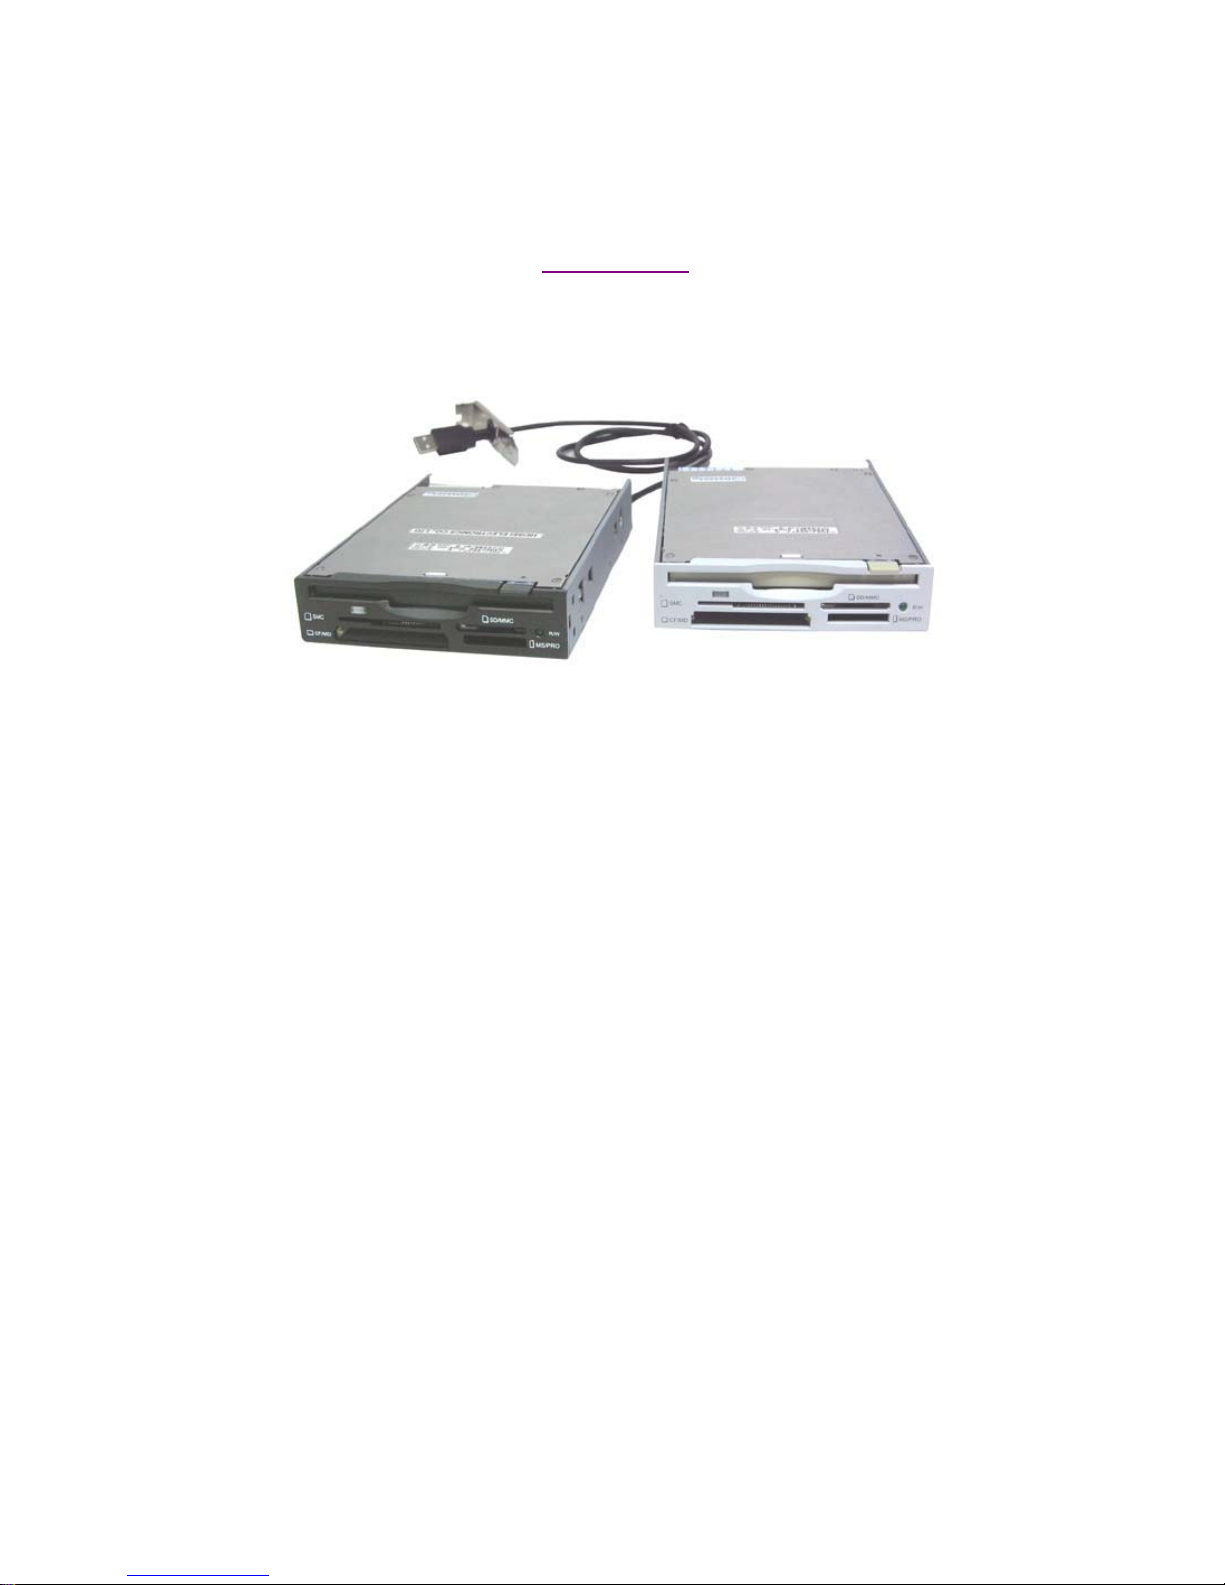
Introductions
The Multi Media Device combine with floppy drive and card reader in a single 3.5" for a space
saving design which can let you install into any standard floppy disk drive bay, it is ideal for
replacing your existing internal 1 inch height floppy drive to a multi media computer.
This device includes 1/2inch slim floppy drive which can support standard 1.44MB, 1.2MB &
720KB floppy disks, It come along with four media slots for most popular media memory cards to
access in front of your computer.
Card reader can accepts following media memory cards:
1. Compact Flash™ (CF) Type I
2. Compact Flash™ (CF) Type II
3. Microdrive (MD)
4. Secure Digital card (SD)
5. Mini SD (need an adapter)*
6. Multi Media card (MMC)
7. Multi Media card II (MMC II)
8. RS MMC (need an adapter)
9. Smart Media card (SM)
10. Memory Stick (MS)
11. Memory Stick Pro
12. Memory Stick Duo (need an adapter)
13. Memory Stick Pro Duo (need an adapter)
14. T-flash (micro SD) (need an adapter)
15. xD Picture card
16. Other new picture cards * please refer to “How to use your media memory cards” section.
Floppy disk formatted capacity:
2HD
y1.44MB (512Bytes * 18sectors * 80tracks * 2 sides) for Macintosh, Windows
y1.2MB (512Bytes * 15sectors * 80tracks * 2 sides) for Windows
2DD
y720KB (512Bytes * 9sectors * 80tracks * 2 sides) for Windows
Package contents
Please verify following accessories are in the package before using, if you find some short
supplied, please inform your local sale distributor.
• 3.5” internal multi media device
• Software disc with manual
• Mounting screws
Hardware requirements
zIBM
®
PC computer with one available 3.5inch drive bay.
zOne USB2.0 host connector for card reader connection.
zOne floppy ribbon cable for floppy disk drive connection.
System Supports
zWindows
®
98/SE, Windows®2000, Windows® ME, Windows® XP Windows® Vista.
3
How to Install Multi Media Device
--------------------------------------------------------------------------------------------------------------------CAUTION:
z Always turn off and disconnect the power cord before opening the computer’s cover to avoid an
dangerous electric shock.
z Electrostatic discharge can damaged electronic components. Be sure you are properly grounded
before beging any procedure.
z You can touch a metal part of the computer’s chassis or power supply unit to discharge any static
charge that may have built up inside your body.
-----------------------------------------------------------------------------------------------------------------------
1. Turn your computer off and disconnect the power cord.
2. Remove the cover off the computer.
(Refer to your computer’s hardware reference manual and follow the instructions to remove the
cover.)
3. Remove your existing floppy plastic cover from front computer panel.
4. Put the multi media device into the 3.5” drive bay.
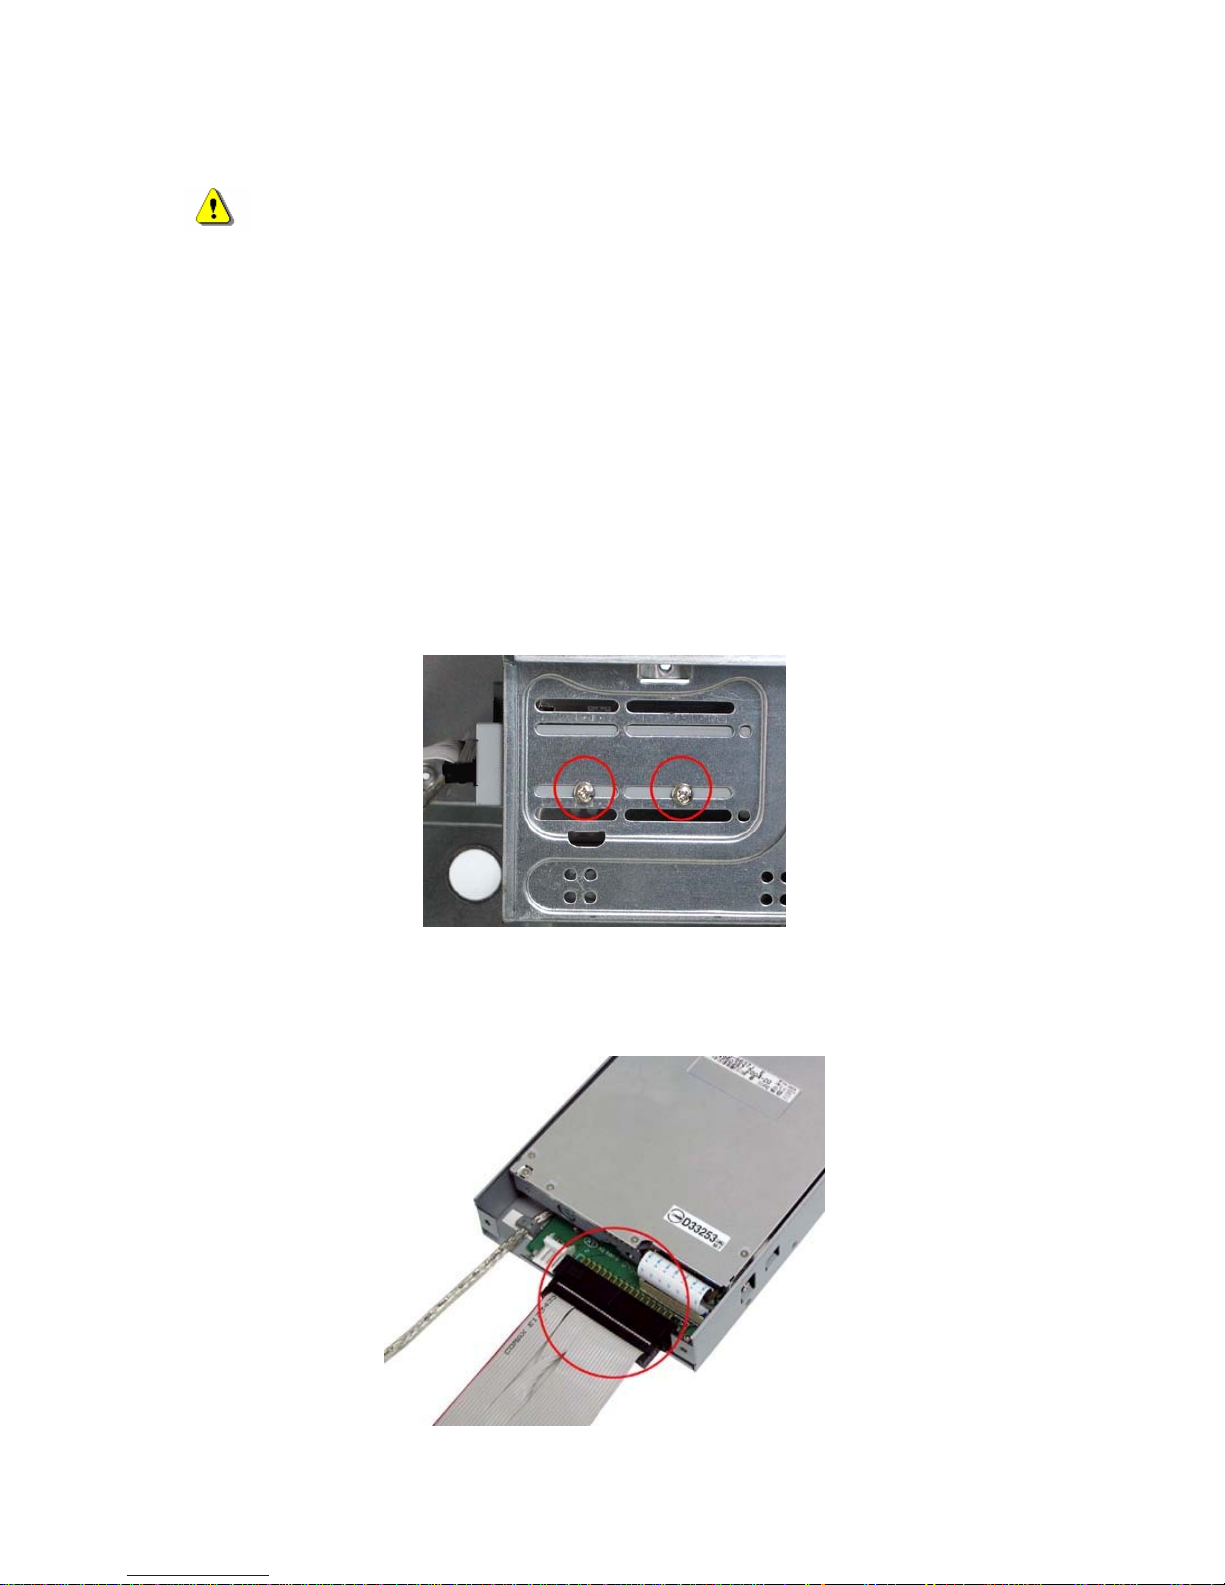
5. Mount the multi media device firmly in both tracks of drive bay by four screws. ( ISO 3φ*4mm)
6. Plug the end of floppy ribbon cable back into the 34-pin floppy connector J1.
Note: Orient the red marking on the floppy ribbon cable to J1 Pin-1. Refer to following photo.

4
7. Connect 4-pin power cord to floppy’s power connector JP1
Note: The red wire orient towards the JP1 Pin-1. Refer to following photo.
8. Remove a free slot’s metal cover in rear side and connect the attached USB cable to an external
USB port via this PCI slot.
9. Check every connection is correct and do not leave any tooling or screw inside.
10. Recover your computer and re-plug your computer power cord.

5
Card Reader Software Installations
The card reader need to install application driver for showing media icon on your Windows, you can
find the software program in bundle disc and follow next steps to complete the software installation.
Note:
All installation steps may be a little different from this guide when you using a new upgrade O.S.
version, in this situation please follow the Windows prompt steps to complete the installation
procedure.
Windows® XP software installation
1. Close all of your exist executing file.
2. Insert driver disc into CD-ROM drive and double click on “Driver” folder.
3. Double click on “setup” icon.
4. Click “Next” button to continue.
5. Plug your card reader to an USB port and click “OK” button to continue.

6
6. Click “Yes” then “Finish” button to restart your computer.
7. Reboot your system, the Windows will detect reader and display four recognizable icons in “My
Computer”, now you can insert your memory card for application. If you have any problem of
using media card, you can refer to next “How to use your media memory cards” section.

7
8. When system detects an existent media card successfully in card slot, the gray media icon will
change to a colorful icon for identification. (Refer to the following illustration)
Windows® Vista softw are installation
1. Close all of your exist executing file.
2. Insert driver disc into CD-ROM drive and double click on “Driver” folder.
3. Double click on “setup” icon.
4. Click “Next” button to continue.

8
5. Plug your card reader to an USB port and click “OK” button to continue.
6. Click “Yes” then “Finish” button to restart your computer.

9
7. Reboot your system, the Windows will detect reader and display four recognizable icons in “My
Computer”, now you can insert your memory card for application. If you have any problem of using
media card, you can refer to next “How to use your media memory cards” section.
8. When system detects an existent media card successfully in card slot, the gray media icon will change
to a colorful icon for identification. (Refer to the following illustration)

10
How to use floppy disk drive
The floppy drive doesn’t install any software driver before you use, just insert your floppy disk as
following photo direction then you can read, write or delete files whatever you need. Otherwise you
can push the button to eject the floppy disk out.
Note: Certainly you need to format your floppy disk in first time before you use.
How to use your media memory cards
The card reader provides four slots for over fifteen most popular memory cards application. You must
insert each memory card in correct slot and do not attempt to insert the memory card in reverse
direction or slanted towards by force. Please refer to the following figures to help descriptions.
1. CF/MD slot: This slot place in bottom-left of front bezel and label as “CF/MD”. It can accept a
Compact Flash™ memory card type I/II and IBM™ Microdrive.

11
2. SMC/xD slot: This slot place in top-left of front bezel and label as “SMC”. It can accept Smart
Media™ memory card and xD™ picture card, the gold plate must be downward when you
insert it.
3. SD/MMC slot: This slot place in top-right of front bezel and label as “SD/MMC”, it can accept
Secure Digital card and Multi Media card. The gold plate must be downward when
you insert it.

12
4. MS/MS Pro slot: This slot place in bottom-right of front bezel and label as “MS/Pro”, it can accept
Sony®MS、MS-Pro、MS-DUO. The gold plate must be downward when you insert
it.
Note: When you using mini memory cards such as Memory Stick DUO, mini SD, T-flash (micro SD)
or RS MMC to this reader, you need to utilize an adapter then card slot can accept it. Normally
the adapter comes with package when you buy a new mini memory card. Otherwise you need
to purchase this adapter alone from your local dealer. See the following photo of adapters.
Indicator Descriptions
There are two active indicators on the bezel. One is square LED of floppy data access indication
another round of green LED is for card reader R/W (read /write) status indication. Both indicators are
always off, till data access between PC and memory card or floppy, they will turn flash.
-------------------------------------------------------------------------------------------------------------------------WARNING:
Please do not unplug any memory card while data is transmitting between PC and card reader or R/W
status LED is flashing, it may result your computer to crash and lost valuable data.
--------------------------------------------------------------------------------------------------------------------------

13
Product specifications
Specifications:
Media device:
Floppy disk drive with multi card reader
Five Media Slots:
Floppy disk drive
CF/MD
SMC/xD
SD/MMC
MS/MS Pro
Media supports:
1. 720KB &1.44MB floppy disks
2. Compact Flash™ Type I
3. Compact Flash™ Type II
4. MicroDrive
5. Magicstor
6. Secure Digital card
7. Mini SD *
8. Multi Media card
9. RS MMC *
10. Smart Media™
11. Memory Stick
12. Memory Stick Pro
13. Memory Stick Duo *
14. Memory Stick Pro Duo *
15. T-flash/ Micro SD *
16. xD™ picture card
17. Other new media cards
* need a media adapter for application.
Indicators:
z One floppy R/W indicator.
z One media card R/W indicator.
Reader interface
:
100cm USB A-type connector with a PCI bracket
FDD interface:
34 Pin connector
Front bezel color:
Beige or black colors
Unit Dimensions:
(W*D*H)
102*148*25.4 mm (Suitable for 3.5” bay)
System support:
Windows
®
98SE, Windows®ME, Windows®2000, Windows®XP, Windows® Vista
Main housing:
Metal housing
Certification:
FCC Class B, CE
All Materials:
RoHS Compliant
∗ This specification may be revised without notice.
P/N: M-710HFR215A3
 Loading...