

Kortex IAM V90 Installation And User Manual

Version 1.0
INSTALLATION
AND USER'S
GUIDE
WITH PC &
MACINTOSH
®
KORTEX
IAM V90
THE INTERNET
ANSWERING-MACHINE

2
WARRANTY REGISTRATION CARD............................................................5
PRECAUTIONS IN USE .............................................................................8
IAM INTERCONNECTION..............................................................................8
INTERCONNECTION CLASSIFICATION SCHEME......................................................8
CE LABEL.................................................................................................8
TELECOM NETWORK SAFETY.........................................................................8
PRECAUTIONS IN INSTALLATION......................................................................9
CLEANING................................................................................................9
DECLARATION OF COMPATIBILITY WITH DIFFERENT NETWORKS...............................9
INTRODUCTION......................................................................................10
USE OF THE INTERNET ANSWERING-MACHINE.................................................10
INSTALLING IAM ON A PC .........................................................................10
STEP ŒŒ : INSTALLING IAM ON A PC.......................................................12
CONTENTS OF THE PC PACKAGE.................................................................. 12
CONNECTING TO THE PC............................................................................12
Finding the serial port on the PC......................................................12
CONNECTORS AND SOCKETS OF IAM............................................................13
CONNECTING TO THE SERIAL PORT................................................................14
CONNECTING THE MODEM TO A POWER OUTLET AND THE TELEPHONE LINE.............15
Connecting to a power outlet...........................................................15
Connecting to the telephone line......................................................15
STEP ŒŒ: INSTALLATION OF IAM ON MACINTOSH®.................................16
CONTENTS OF MACINTOSH
®
PACKAGE..........................................................16
LOCATING THE MODEM PORT......................................................................16
Serial version of IAM........................................................................16
CONNECTORS AND SOCKETS OF MACINTOSH
®
MODEM .....................................17
CONNECTING TO THE MODEM PORT OF A MACINTOSH®....................................17
CONNECTING THE MODEM TO A POWER OUTLET AND THE TELEPHONE LINE............18
USB version of IAM..........................................................................18
CONNECTORS AND SOCKETS OF MACINTOSH
®
MODEM .....................................18
CONNECTING TO THE USB PORT OF A MACINTOSH®........................................19
CONNECTING THE MODEM TO A POWER OUTLET AND THE TELEPHONE LINE............19
STEP •• INSTALLING THE DRIVER FOR WINDOWS 95, 98 OR NT ........20

3
STEP • • INSTALLING AN ARA SCRIPT FOR MACINTOSH ...................22
INSTALLING THE CONFIGURATION SOFTWARE OF IAM........................23
INSTALLING CONFIGURATION SOFTWARE UNDER WINDOWS................................23
STARTING THE CONFIGURATION SOFTWARE FOR THE FIRST TIME .......25
INFORMATION ABOUT YOUR INTERNET ACCOUNT..............................................26
Login...............................................................................................26
Password........................................................................................26
ISP number......................................................................................26
Call parameters...............................................................................27
Communication port.........................................................................27
Restoring the last configuration.......................................................27
Type of ISP......................................................................................27
TCP/IP PARAMETERS................................................................................28
Outgoing mail (SMTP).....................................................................28
Incoming mail (POP3)......................................................................28
Account name..................................................................................28
Password........................................................................................29
E-mail address................................................................................29
DNS server addresses.....................................................................29
CALL SCHEDULING....................................................................................30
ISP Call Schedule.............................................................................30
Weekly operator call.......................................................................30
Remote loading of e-mails...............................................................31
Text to speech e-mails (Available in France only).........................31
Text and voice e-mails.................................................................. 31
Leave copy of text and voice e-mails on the server......................31
Number of attempts on no connection.............................................31
FOLLOW ME...........................................................................................32
Automatic callback in presence of new messages............................32
Call back telephone number.............................................................33
Access code.....................................................................................33
Immediate callback in presence of new messages...........................33
Weekly call......................................................................................33
Number of attempts on no connection.............................................33
PHONE AND E-MAIL DIRECTORY OF IAM........................................................33
New................................................................................................34
Update............................................................................................34
Import.............................................................................................34

4
RESOLVING COMMON PROBLEMS .......................................................37
FINDING THE RELEASE NUMBER OF IAM.........................................................37
MAKING SURE YOUR IAM IS CORRECTLY INSTALLED..........................................37
In standalone Answering-Machine mode.........................................37
Modem check under Windows 3.1...................................................37
Modem check under Windows 95, 98 or NT 4.0...............................38
IN CASE OF PROBLEMS: QUESTIONS - ANSWERS.................................40
ANSWERING-MACHINE..............................................................................40
MODEM................................................................................................41
TECHNICAL CHARACTERISTICS OF IAM...................................................43
COMMANDS AND REGISTERS ...............................................................45
STANDARD HAYES COMMANDS................................................................... 45
S REGISTERS..........................................................................................47
REPORTS................................................................................................50
KORTEX WEB SERVER...........................................................................52
BEFORE CONTACTING TECHNICAL SUPPORT.........................................53
5
WARRANTY REGISTRATION CARD
Terms of warranty:
1. Nature:
The warranty entitles you to free replacement of defective items by the producer, without any billing for labor.
2. Exceptions:
a) Any damage caused by an accident resulting from improper or abnormal use.
b) Any damage linked to the installation and/or not corresponding to standard customary use.
c) Any damage linked to a voltage surge, abuse of the hardware, negligence on the part of the customer, a defective
electrical installation, failure to heed the instructions on installation or use, or interference with the hardware by the
customer or a third party.
d) Also excluded from this warranty are any damages resulting from force majeure and the acts of third parties.
3. Characteristics:
This warranty does not confer any right to any reimbursement of consecutive damages resulting from unavailability of
the equipment during the term of the warranty.
4. Application of the warranty:
a) No distributor or retailer is authorized to modify the terms of the warranty.
b) The warranty does not affect the legal warranty in any way.
c) To benefit from the warranty, the attached warranty registration card must be returned within 15 days of purchasing
the modem.
d) The serial number of the unit must not be removed or altered.
In order to benefit from this, all you have to do is correctly fill in the warranty
registration card, not forgetting to state the serial number indicated on the
hardware (not on the CD ROM), and return it within 15 days of purchasing the
modem to the address on the rear. Note: failure to return the warranty card
within 15 days reduces your warranty to only one year.
----------------------------------------------------------------------------------------------I want to benefit from the
5 year KORTEX warranty
Name:
First name:
Company:
Function:
Adress:
Postal code: E-mail :
City:
Phone: Fax :
Serial no.:
Name and address of retailer:
Name of product:
Date of purchase:
Indicate three things that
motivated your purchase:
¨ Design
¨ Reputation
¨ Retailer's
recommendation
¨ Price
¨ Technical specifications
¨ Answerphone function
¨ Modem function
¨ Hands-free function
¨ ……………………..

6
WHY SHOULD YOU RETURN YOUR WARRANTY REGISTRATION CARD STRAIGHT
AWAY?
YOU BENEFIT FROM THE 5 YEAR WARRANTY
YOU RECEIVE UPDATE OFFERS
By returning your warranty registration card, KORTEX will inform you of
new software releases and versions of products that you are using, prices,
terms for exchange, technical specifications, etc.
YOU ARE THE FIRST TO BE INFORMED
KORTEX keeps you updated on the latest innovations, products, offers and
technical information.
HOW TO BENEFIT FROM THE HOTLINE
You can use the KORTEX HOTLINE during the warranty period. Just phone 01 49 92 55 50
and experienced technicians will offer you personalized help, or fax 01 49 92 55 48. Note: we
recommend that you note down your hardware configuration (type of modem, PC, operating
system, software used, type of telephone line, etc) and prepare your questions before
calling.
HOW TO RETURN DEFECTIVE HARDWARE
To benefit from the KORTEX 5 year warranty, it is essential that you attach a copy of your bill
of purchase when returning your hardware to us for repair and that you have sent us your
warranty registration card within 15 days of purchasing the modem. We also ask you to
attach a description of the malfunction encountered.
------------------------------------------------------------------------------------------------
KORTEX INTERNATIONAL
SERVICE REPARATION
139, 147 AVENUE PAUL-VAILLANT COUTURIER
F-93126 LA COURNEUVE CEDEX
Stamps
on

7
IMPORTANT NOTICE
All information contained in this guide is subject to modification without prior notice. The
producer cannot be held responsible for any omissions, whether of a technical or editorial
nature.
This guide contains information protected by copyright. Reproduction of the guide, in whole or
in part, is forbidden without the permission of:
Trade marks and copyrights:
MS-DOS, Windows, Windows 95, 98, NT by Microsoft Corporation; PC, XT,
AT by IBM Corporation; Macintosh and QuickTime by Apple; Pentium by
Intel Corporation
KORTEX INTERNATIONAL
139, 147 AVENUE PAUL VAILLANT COUTURIER
F-93126 LA COURNEUVE CEDEX
Tél. : 0033 1 49 92 55 55 - Fax : 0033 1 49 92 55 77
8
PRECAUTIONS IN USE
IAM interconnection
The IAM unit conforms with the IEC 950 standard for electrical safety. The
unit does not have a power switch, the power receptacle serves as a
means of selecting the power supply. Furthermore, the electrical socket
must be installed close to the hardware and easily accessible.
Interconnection classification scheme
TRT: telephone network voltage
TBTS: very low voltage
CE label
The product conforms with directives 89/336/EEC for electromagnetic
compatibility and 73/23/EEC for user safety.
Telecom network safety
The product conforms with the EN 41003 standard. It may be connected to
telecom networks.

9
Precautions in installation
@ Avoid installing the IAM unit in a damp room or close to a radiator.
@ Do not open the IAM unit - contact after-sales service for any repairs.
@ If you live in a region where there are frequent thunder storms,
protect the IAM unit suitably against voltage surges.
Cleaning
@ Disconnect the telephone line and power supply before cleaning the
IAM unit.
@ Do not use any cleaning products that contain solvents.
Declaration of compatibility with different networks
This equipment conforms with directive 98/482/EEC of the European Council
concerning pan-European connection of standalone terminals to public
switched telephone networks (PSTNs). However, since there are
differences between (PSTNs) from one country to another, this does not
constitute an absolute guarantee of optimum functioning at every
terminating point of a network (PSTNs). If you have any problems, it is
best to contact your supplier. The conformity label is attached to the
bottom of the unit.

10
INTRODUCTION
You have just acquired a modem. IAM is the
ideal solution for everyone who wants the
benefits of e-mails but without using a PC.
IAM is the first standalone Internet Answering-Machine that
not only automatically records your e-mails but also allows
you to read their contents on its LCD display without the need
for a PC. After reading them, you can make a voice reply.
Connected to a PC, IAM becomes a powerful modem/fax
56000 V.90. Then you have access to all the communication
functions you may need (fax, file transfer, surfing on the Web,
etc).
Use of the Internet Answering-Machine
There are two ways of using IAM: with or without a PC.
² With a PC
Before using IAM, you must first install the modem and its software. Follow
the instructions in "Installing IAM on a PC".
² Without a PC
If you do not have a PC, you can use IAM straight away. To do this, you
must first start it up. Follow the instructions in "Using IAM without a PC".
Installing IAM on a PC
To install your IAM modem, follow the steps 1 through 4.

11
Step ΠInstalling IAM on a PC
Step ΠInstalling IAM on a PC
Step • Installing the driver for Windows 95, 98 or
NT
Step •
Installing an ARA script for Macintosh
Step Ž
Starting up IAM
Step •
Installing the configuration software of IAM
Note: Follow the steps 1 and 2 corresponding to your installation (PC or
Macintosh).
12
STEP ŒŒ : INSTALLING IAM ON A PC
Contents of the PC package
Before starting to install, make sure that you have everything necessary
for installation.
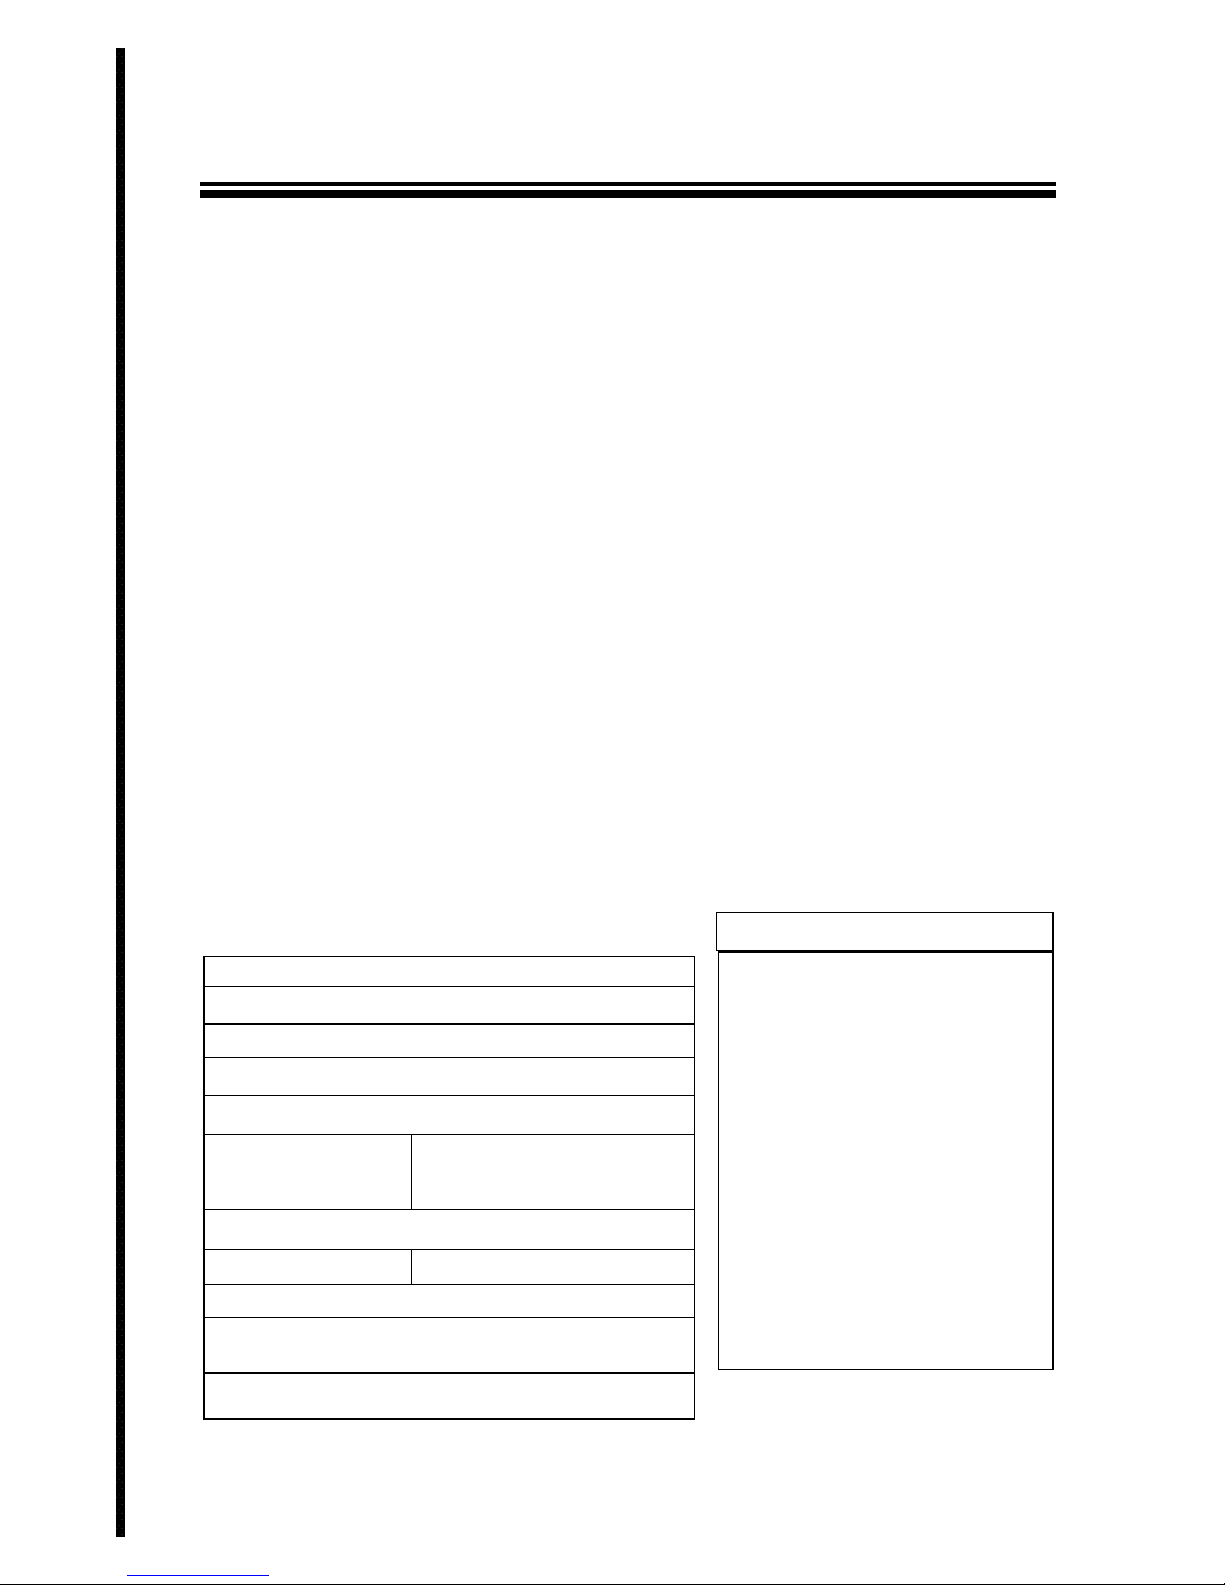
IN THE PC PACKAGE
STANDARD OPTIONAL
IAM unit and quick installation
guide
Communication software Stereo headset with
integrated
microphone
Serial cable PC-unit
DB9 female/DB9 male
Internet access and online
services software
Necktie microphone
Power pack IAM configuration software Stereo/stereo
cable 3.5 mm dia.
Matching telephone cable 9/25 adapter
Connecting to the PC
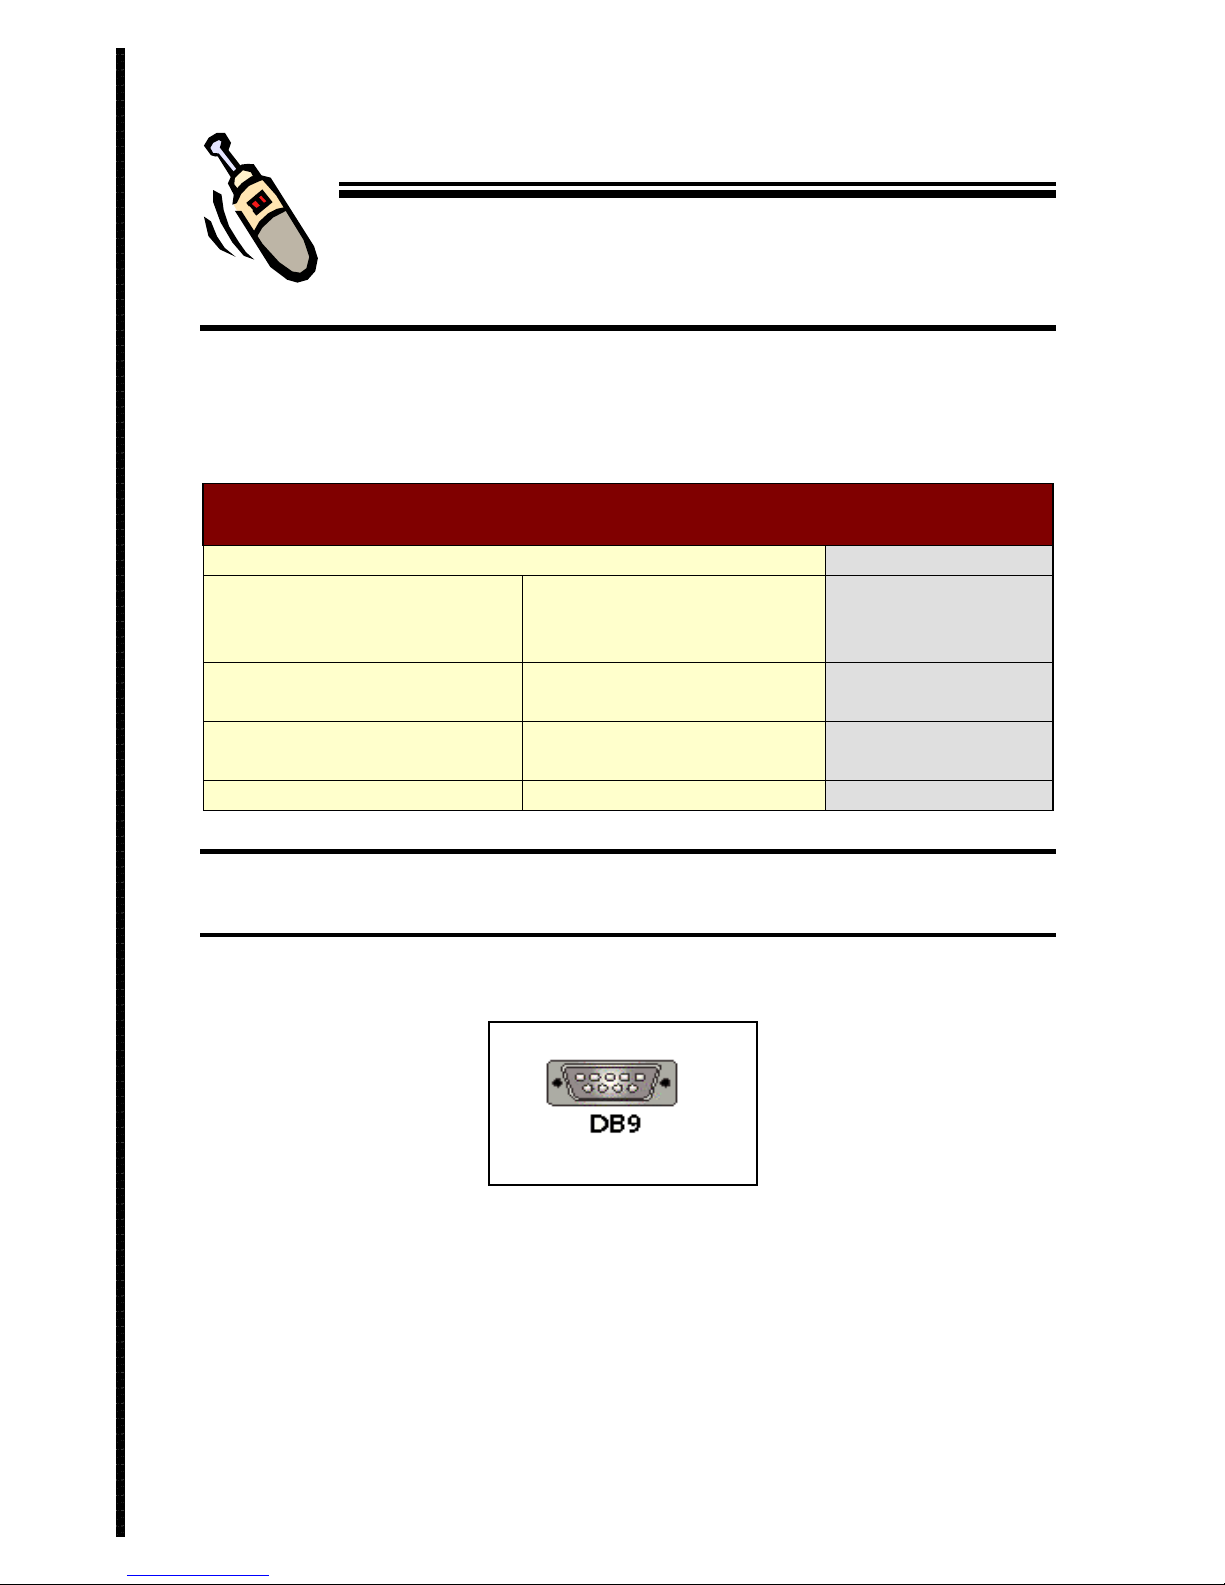
Finding the serial port on the PC
Before starting, you must have a free serial port on your PC (for example
COM1 or COM2). Look for the following socket on the rear of your PC:
SERIAL PORT
13
Figure 2: DB9 male connector of the serial port of the PC.
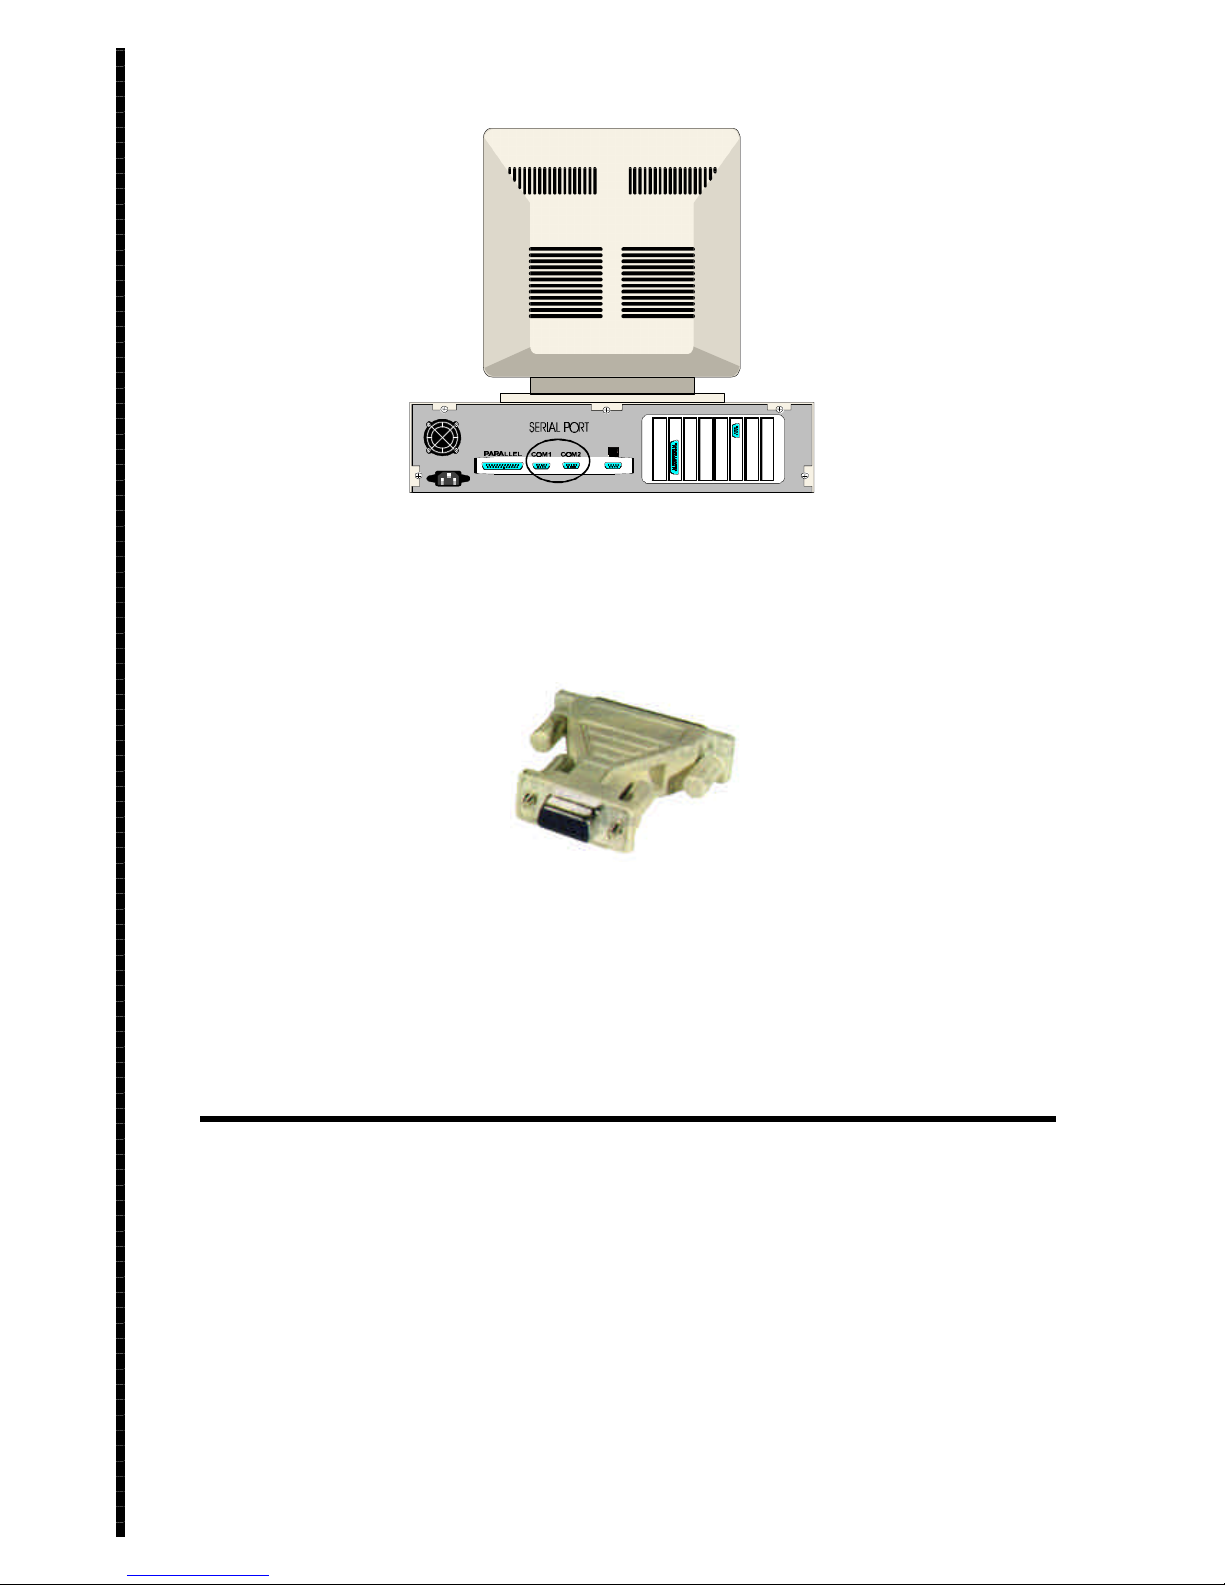
Note: The serial connector of your PC may have 25 pins, in which case it
is necessary to use a 9 pin male/25 pin female adapter. You can obtain
this from your dealer.
Figure 3: 9 pin male/25 pin female adapter
If no serial port is free (occupied by the mouse for example), you have two
possibilities:
z Add a serial port to your PC (eg by purchasing an extra serial card).
z Replace your serial mouse by a bus mouse and free a serial port in
this way.
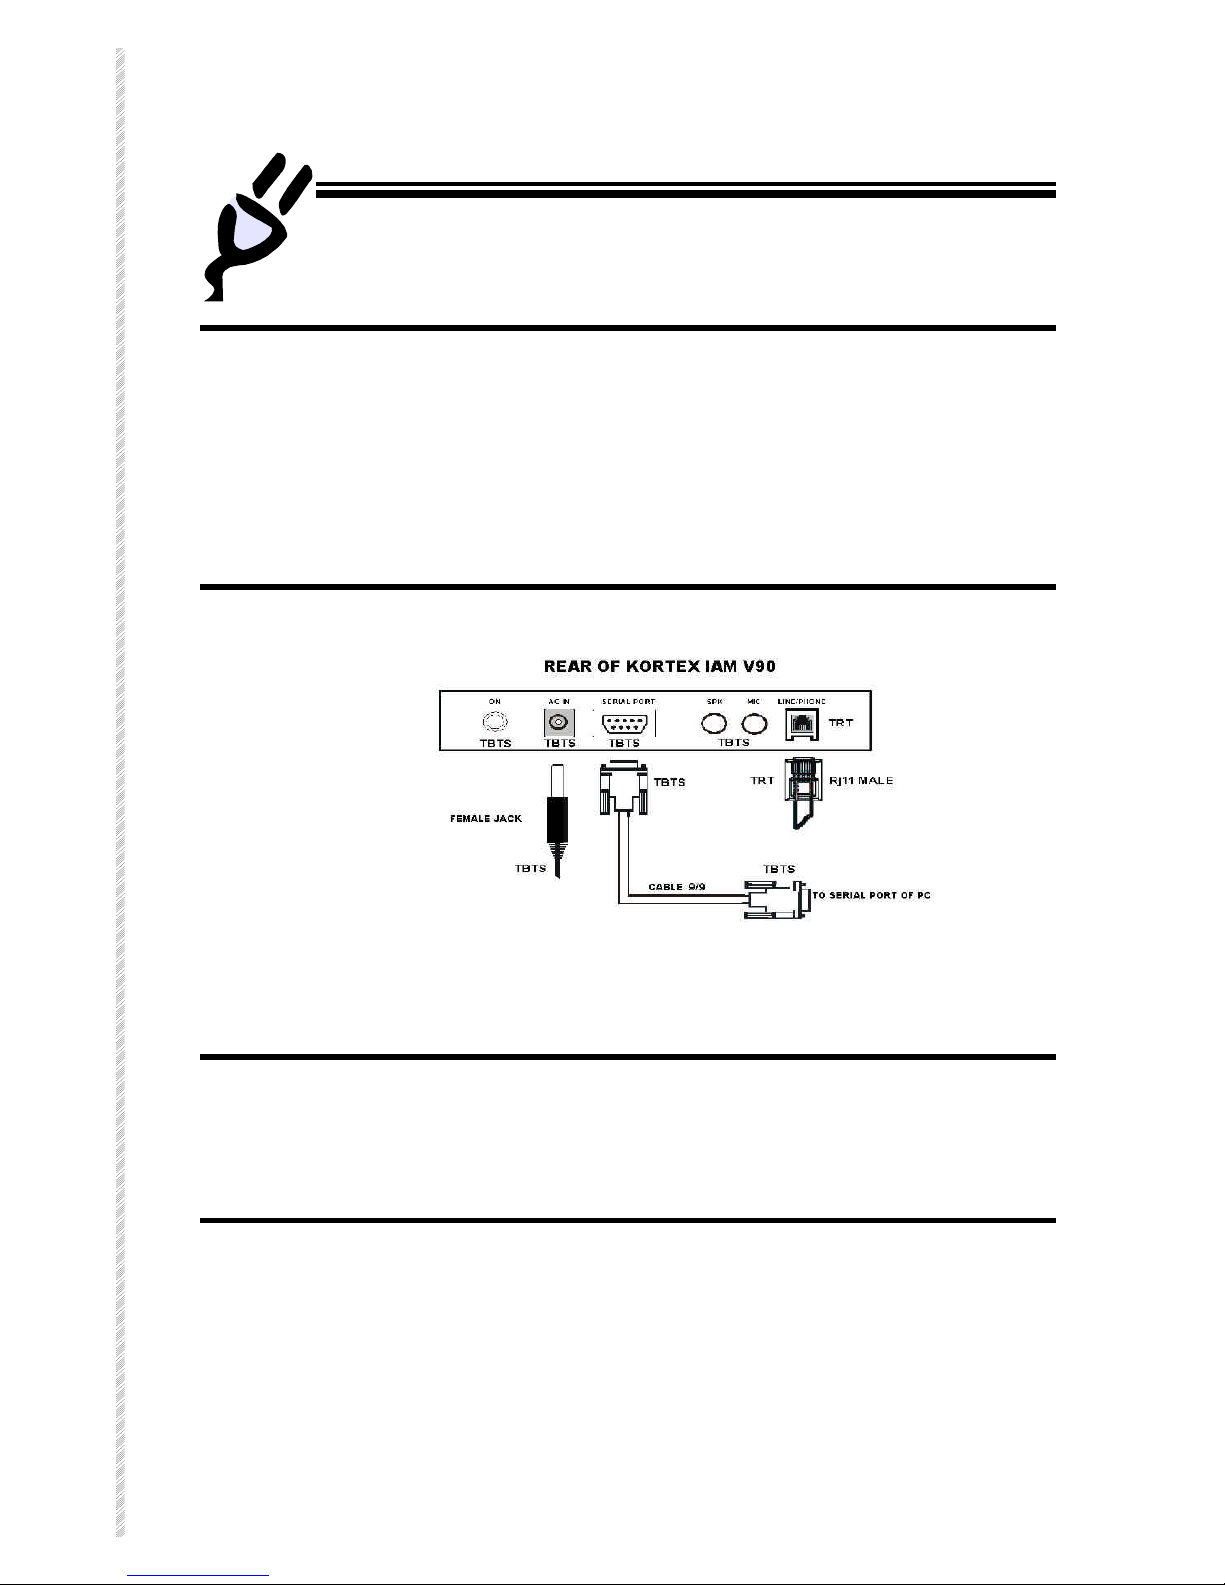
Connectors and sockets of IAM
Before connecting your modem, identify the location of the sockets and
connectors (figure 4).
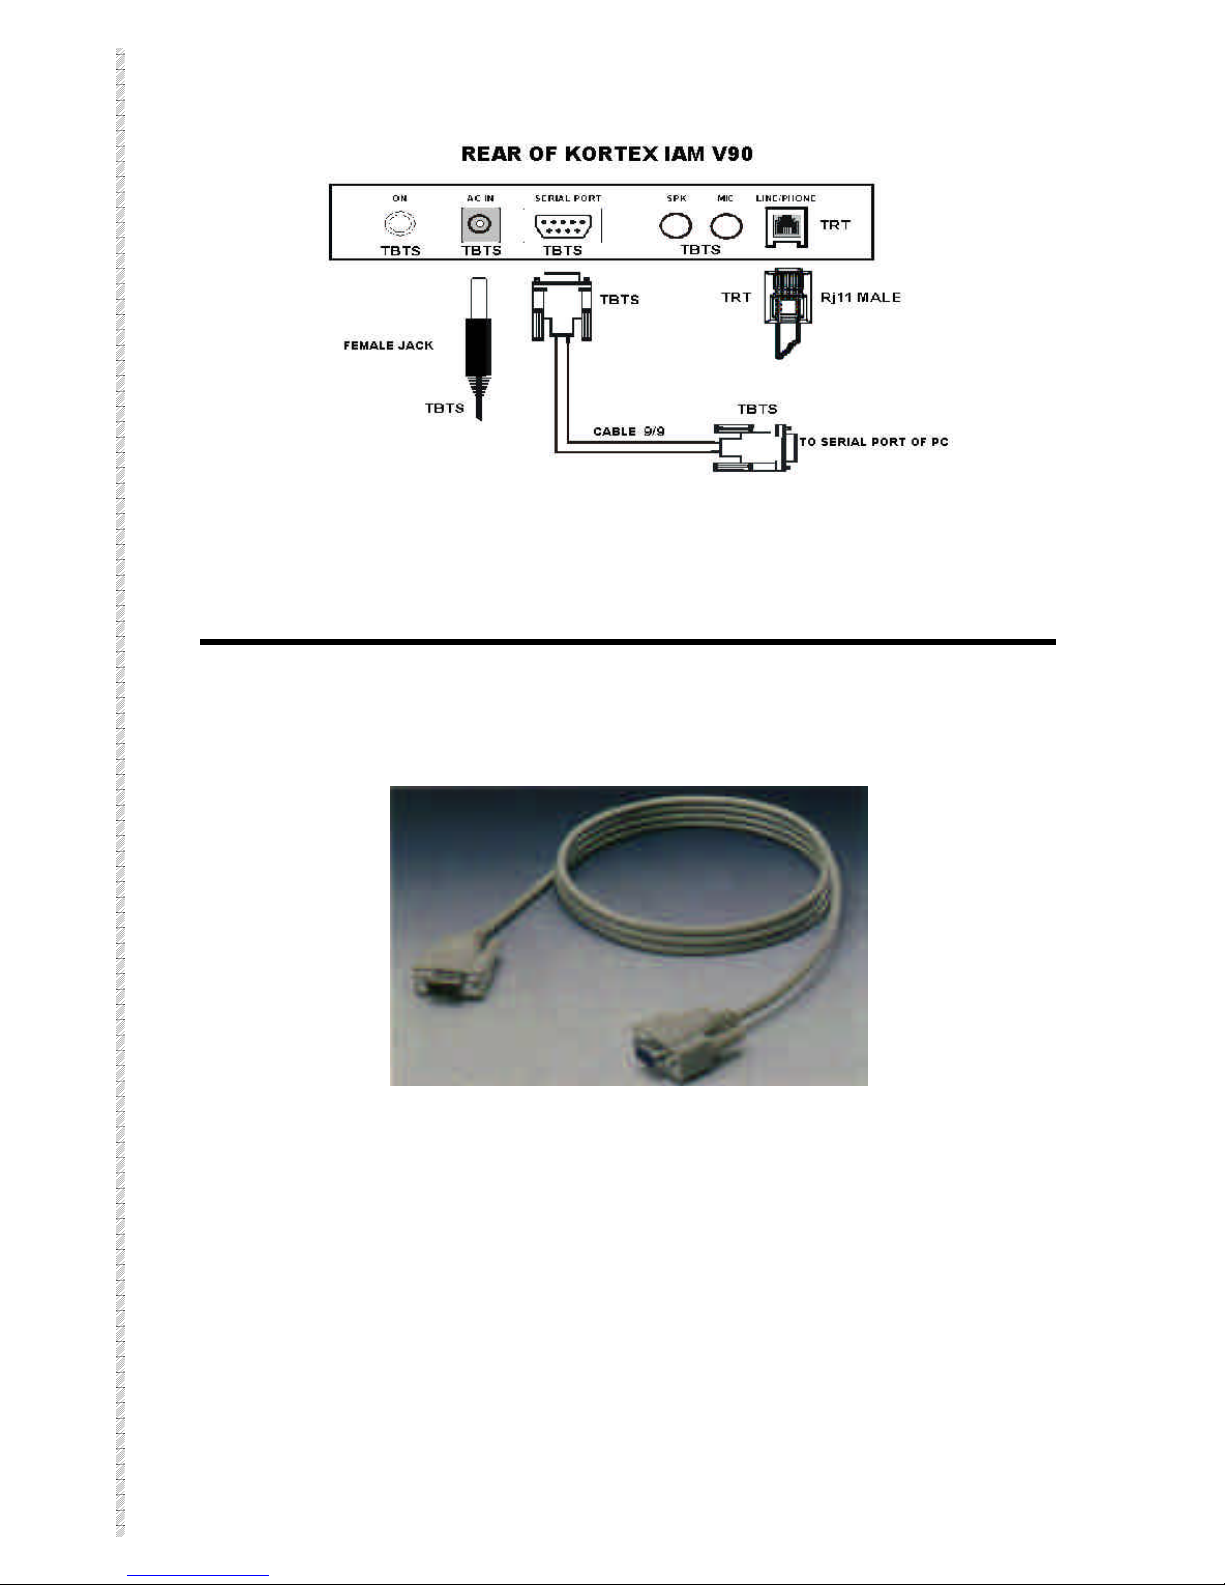
14
Figure 4: Connectors and sockets of IAM
Connecting to the serial port
@ Join the 9 pin male connector of the supplied serial cable to the female
socket (SERIAL PORT) of your unit.
Figure 5: Serial DB9 male/DB9 female cable.
@ Make sure that it is connected.
@ Connect the 9 pin female end of this cable to a serial port of your PC
(COM1 or COM2). If necessary, use a 9/25 adapter (cf. figure 3).
15
Connecting the modem to a power outlet and the telephone
line
Connecting to a power outlet
Connect the supplied power pack to a 220 V power outlet and the female
pin of the adapter cable to the male pin (AC IN) of the modem.
Power pack
Note: Do not use any other power adapter than the one supplied with the
modem.
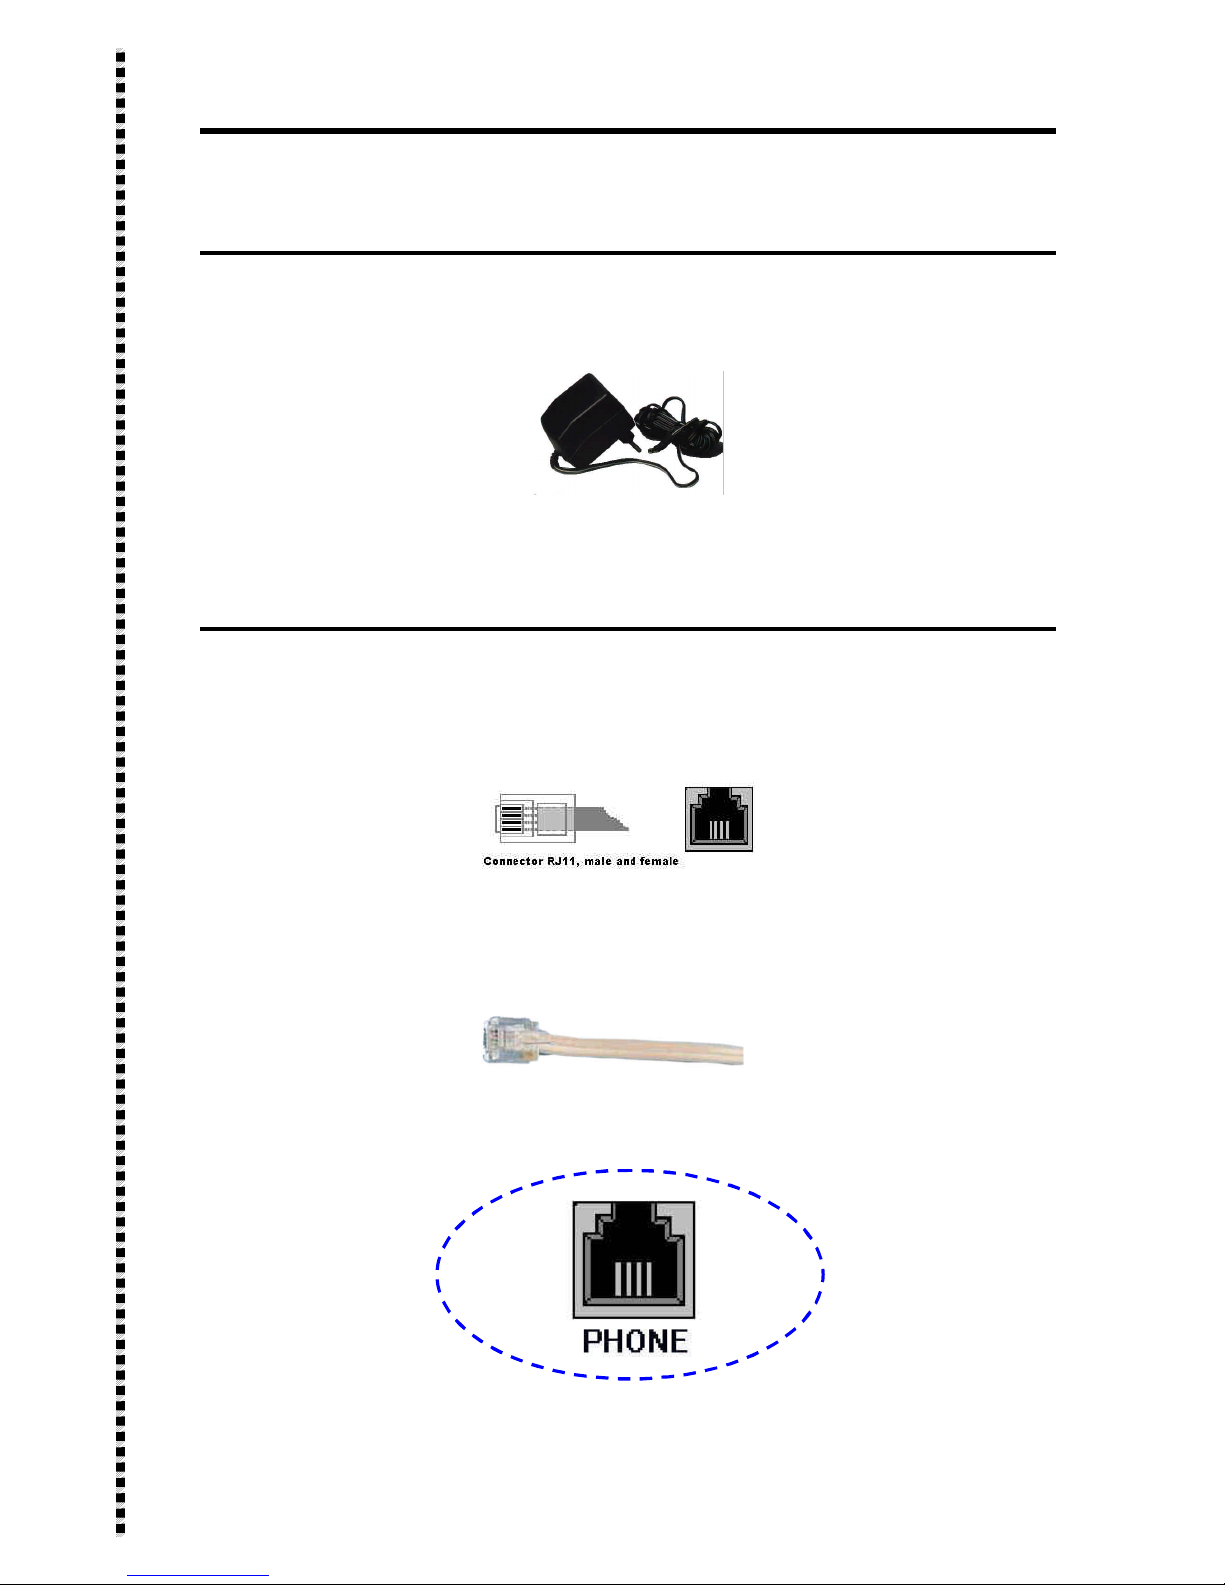
Connecting to the telephone line
@ Connect the supplied telephone cable to the socket (LINE) of your
modem.
@ Join the male connector of the telephone cable to your wall telephone
socket.
@ If you have a telephone terminal, connect it to the matching part of the
telephone cable.

16
STEP ŒŒ: INSTALLATION OF IAM ON
MACINTOSH
®
Contents of Macintosh® package
Before starting, make sure you have everything necessary for installation.
The connecting cable you use depends on your IAM version (serial or USB).
MACINTOSH PACKAGE
STANDARD OPTIONAL
IAM unit and installation
guide
Communication software Stereo headset
with integrated
microphone
Serial connecting cable
(DB9/mini DIN 8)
or
USB connecting cable
(type A and B)
Internet software and
access and online services
Power pack IAM configuration software
Matching telephone cable
Locating the modem port
Serial version of IAM
Before starting, you must have a free modem port (serial port) on your
Macintosh. Look on the rear of your Macintosh for the socket indicated by
a telephone symbol.
Modem port

17
Connectors and sockets of Macintosh® modem
Before connecting your modem, locate the sockets and connectors (cf.
figure 4).
Connecting to the modem port of a Macintosh
®
@ Connect the supplied serial cable to the female socket (SERIAL PORT)
of the modem and make sure it is firmly in place.
Figure 5: Serial DB9 male/mini DIN 8 male cable
@ Connect the other 8 pin male end of the cable to the modem port of
your Macintosh (female socket, indicated by a telephone symbol).
Figure 2
Figure 4: Connectors and sockets of Macintosh® modem
 Loading...