

Korenix JetCon 3401G Quick Installation Manual

JetCon 3401G
Industrial Gigabit Ethernet Media Converter
Quick Installation Guide
V1.0 2-Oct-2008
www.korenix.com
Korenix Technology Co., Ltd.
Introduction
The JetCon 3401G Industrial Gigabit Ethernet Converter, conforming IEEE 802.3 10Base-T, 802.3u
100Base-TX and 1000Base-T/SX/LX standard, supports RJ-45 copper to Gigabit fiber conversion
using store and forward technology. The JetCon 3401G adopts rugged metal case design to operate in
harsh environments (-25℃~70℃); It also provides IP-31 standard protection. It features Link Loss
Forwarding to raise an alarm when a remote fault occurs and also adopts one relay output to alarm
users if a port link fails or if the power fails. Alarms can be enabled/ disabled by dip switch. The fiber
port supports SFP socket for several of SFP transceiver to achieve different link distance.
JetCon 3401G is recommended to be powered by DC 24V with 12~48V range from the 6-pin
removable terminal block.
Package contents Check List
Box contents:
¾ JetCon 3401G
¾ Quick Installation Guide
¾ CD User Manual
JetCon 3401G
QIG
CD User manual
Mounting the Unit
¾ Din-Rail mount: Mount the din-rail clip screwed on the
rear of JetCon 3401G on the DIN rail.
For information about the DIN Rail installation, please refer user’s
manual.
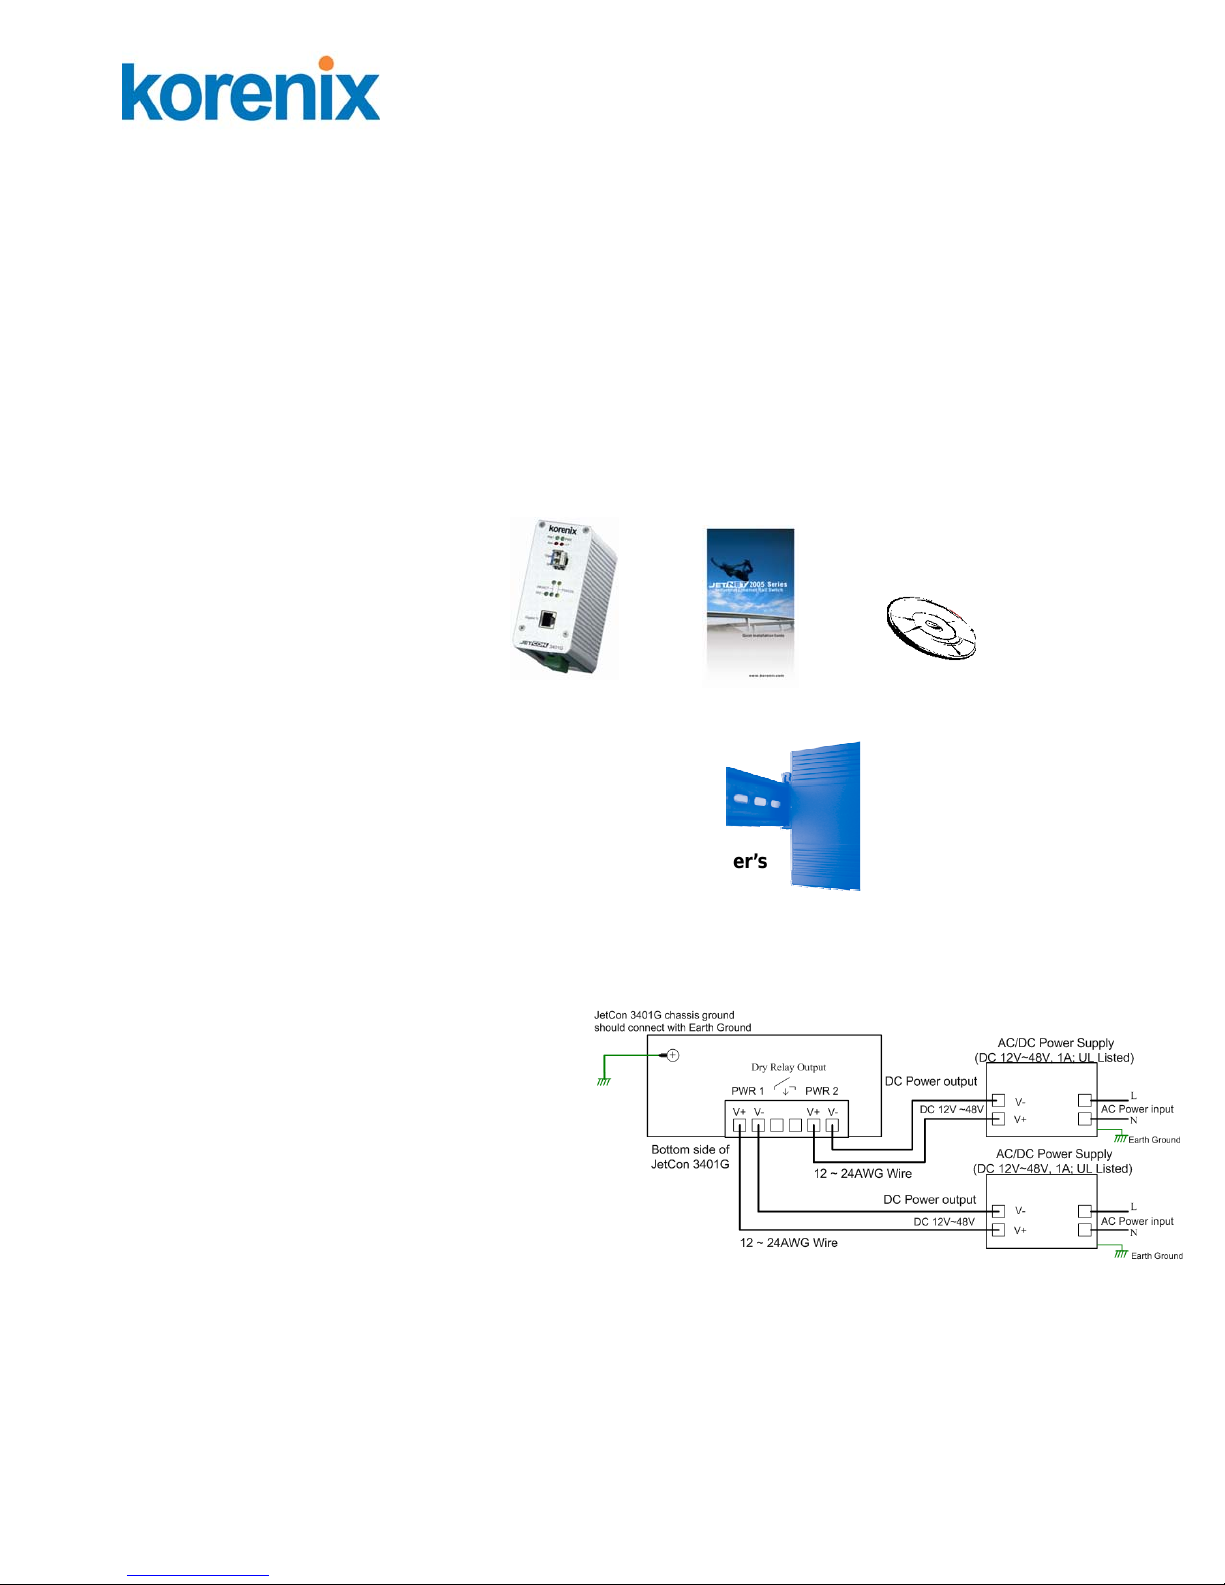
Wiring the Power Inputs
1. Insert the positive and negative wires into the
V+ and V- contact on the terminal block
connector.
2. Tighten the wire-clamp screws to prevent the
DC wires from being loosened. See Figure-1
Notes: The recommended working voltage is
DC24V (DC12~ 48V).
Figure-1
2
 Loading...