

Koonlung K1S User Manual
Hidden Full HD Car DVR
User Manual

WEEE Notice
This symbol on the product or on the packaging indicates that
this cannot be disposed of as a household waste. You must
dispose of your waste equipment and/or battery by handling it
over to the applicable take-back scheme for the recycling of
electrical and electronic equipment and/or battery. For more
information about recycling of this equipment and/or battery,
please contact your city office, the shop where you purchased the
equipment or your household waste disposal service. The recycling of
materials will help to conserve natural resources and ensure that it is
recycled in a manner that protects human health and environment.
CE Regulatory Notice
This equipment complies with the requirements set out in the Council
Directives on the Approximation on of the Laws of the Member States
relating Electromagnetic Compatibility (2004/108/EC); the Low Voltage
Directive (2006/95/EC); the Restriction of The Use of Certain Hazardous
Substances in Electrical And Electronic Equipment Directive (2002/95/EC),
Turkish EEE Directive; the Commission Regulation (EC) No 1275/2008
implementing Directive 2005/32/EC of the European Parliament and of the
Council with regard to eco-design requirements for standby and off mode
electric power consumption of electrical and electronic household and office
equipment, and the Directive 2009/125/EC.

Contents
Notice ....................................................................... 1
1. Introduction ..................................................... 1
1.1 Features .................................................................. 2
1.2 Package Contents ................................................... 3
1.3 Product Overview .............................................. 4
2. Getting Started................................................ 5
2.1 Inserting the Memory Card ...................................... 5
2.2 Installing in Vehicles ................................................ 6
2.3 Using the Car DVR .................................................. 9
2.4 Speed Cam Alert ................................................... 17
3. Adjusting the Settings ................................ ..... 19
3.1 Using the Menu .......................................................... 19
3.2 Menu Tree .................................................................. 20
4. Specifications ................................ ...................... 27


1
Notice
1. Please use the authorized charger only.
2. Never disassemble or attempt repair of this product. Doing so
may damage the DVR, cause electric shock and void your product
warranty.
3. Never short-circuit the battery.
4. Exposing the DVR to open flames can cause explosion. Due to
local laws and vehicles safety considerations, do not manually operate
the device while driving.
5. This camera is intended for non-commercial use, within the limits
permitted by applicable law. Company is NOT responsible for the loss of
any data/content during operation.
6. This camera is intended for non-commercial use, within the limits
permitted by applicable law. Company is NOT responsible for the loss of
any data/content during operation.
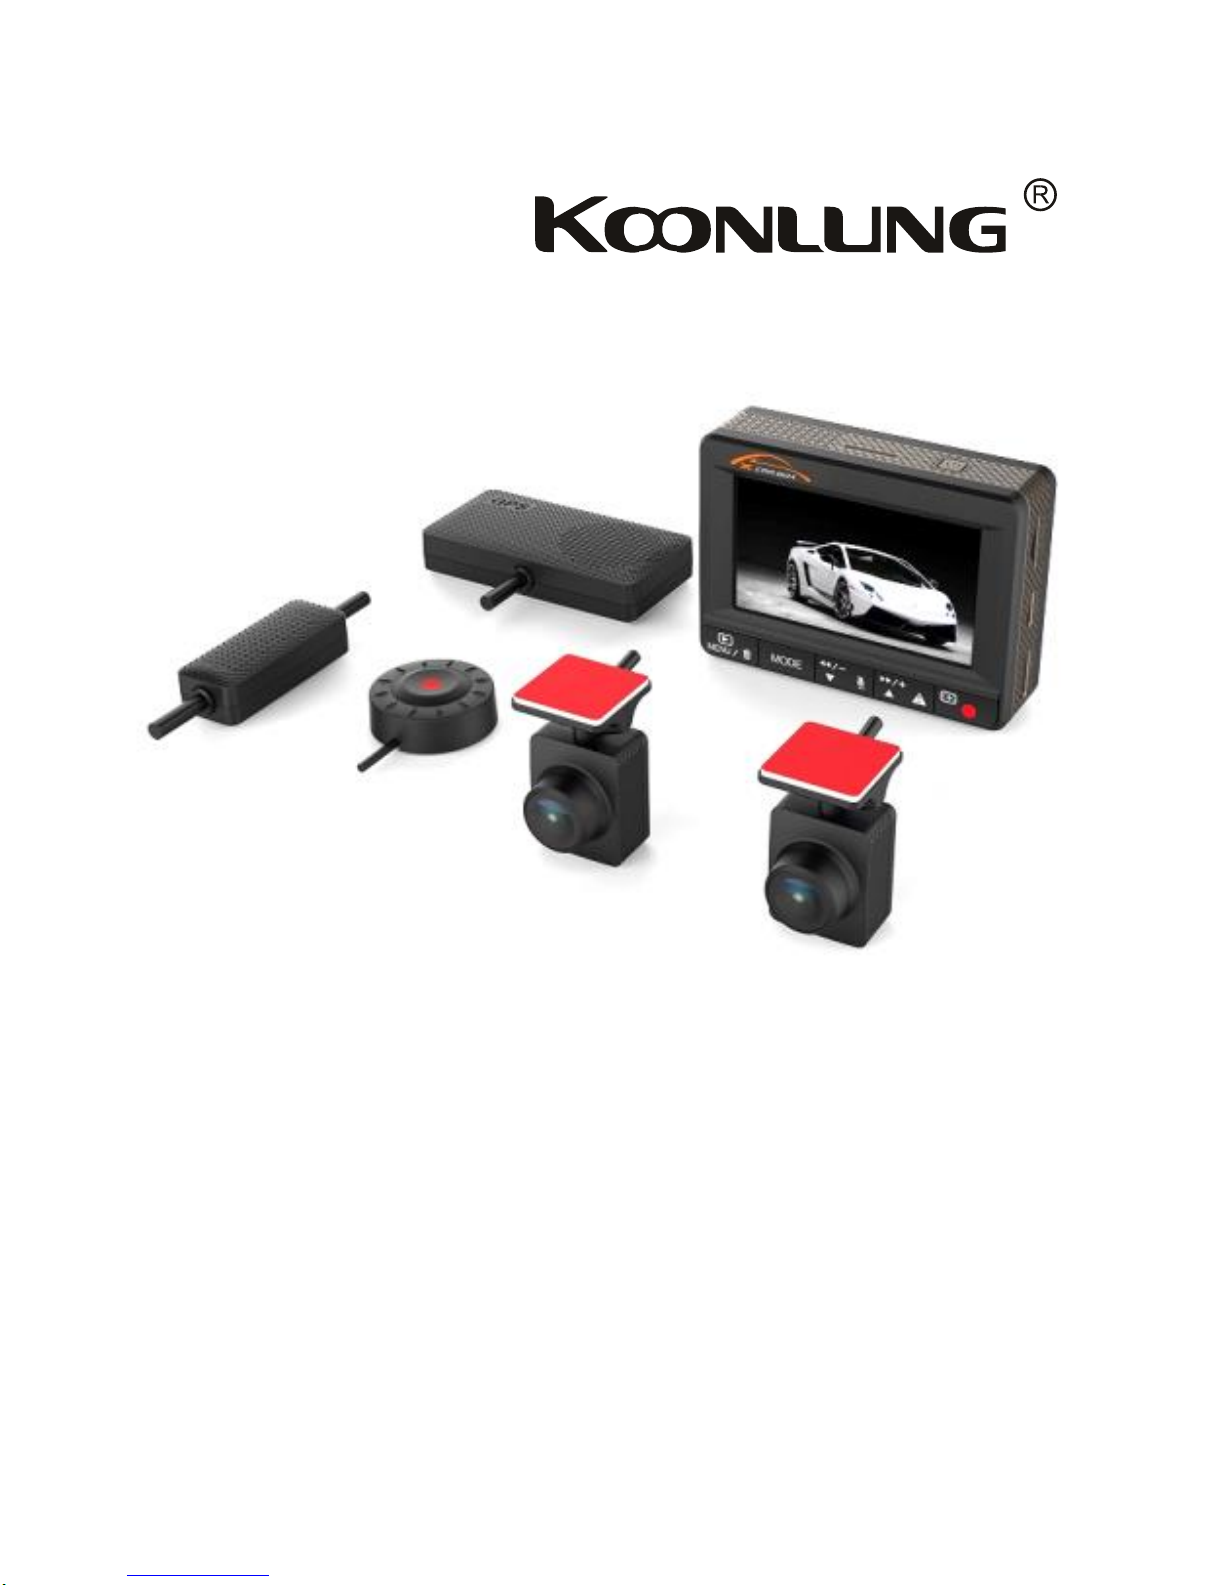
1. Introduction
Thank you for purchasing this 2CH detached Car DVR. This device is
specially designed for real time video and audio recording when driving.

2
1.1 Features
-2 channel detached cameras
-2.7” LCD color screen
-140 degree wide angle lens with full glass lens
-Front cable 3 meters and back cable 6meters
-Motion detection
-Automatic emergency recording for collision detection- Supports micro-SD
up to 64GB (Class 10)
-LDWS (Lane Departure Warning System) and FCWS (Forward Collision
Warning System)
-AV out to the car monitor
3
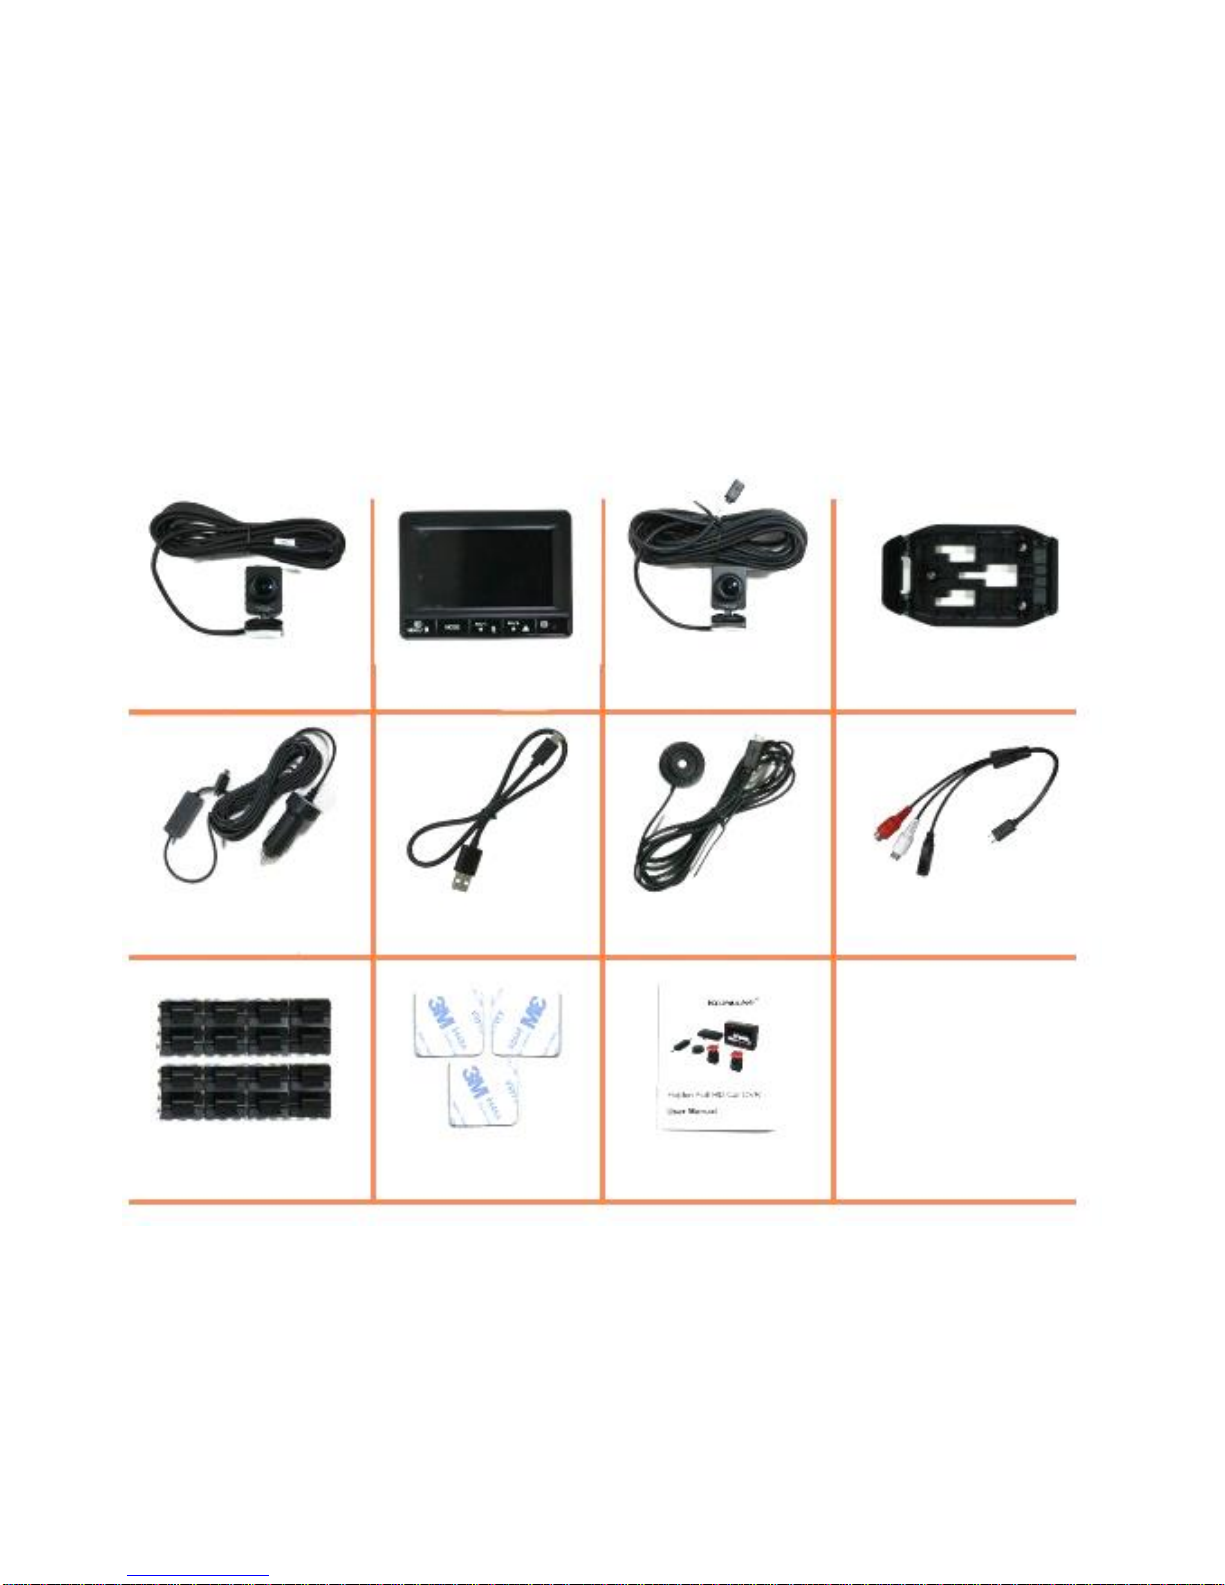
1.2 Package Contents
The package contains the following items. In case there is any missing or
damaged item, contact your dealer immediately.
* For the wired control, hold to start | stop recording; during recording, press
3m
Front lens
DVR unit
6m
Back lens
DVR holder
4.8V ~ 30V
Charging cable
USB cable
Wired control*
AV out cable
Cable clips*16
3M pad
User manual
4
to protect file.
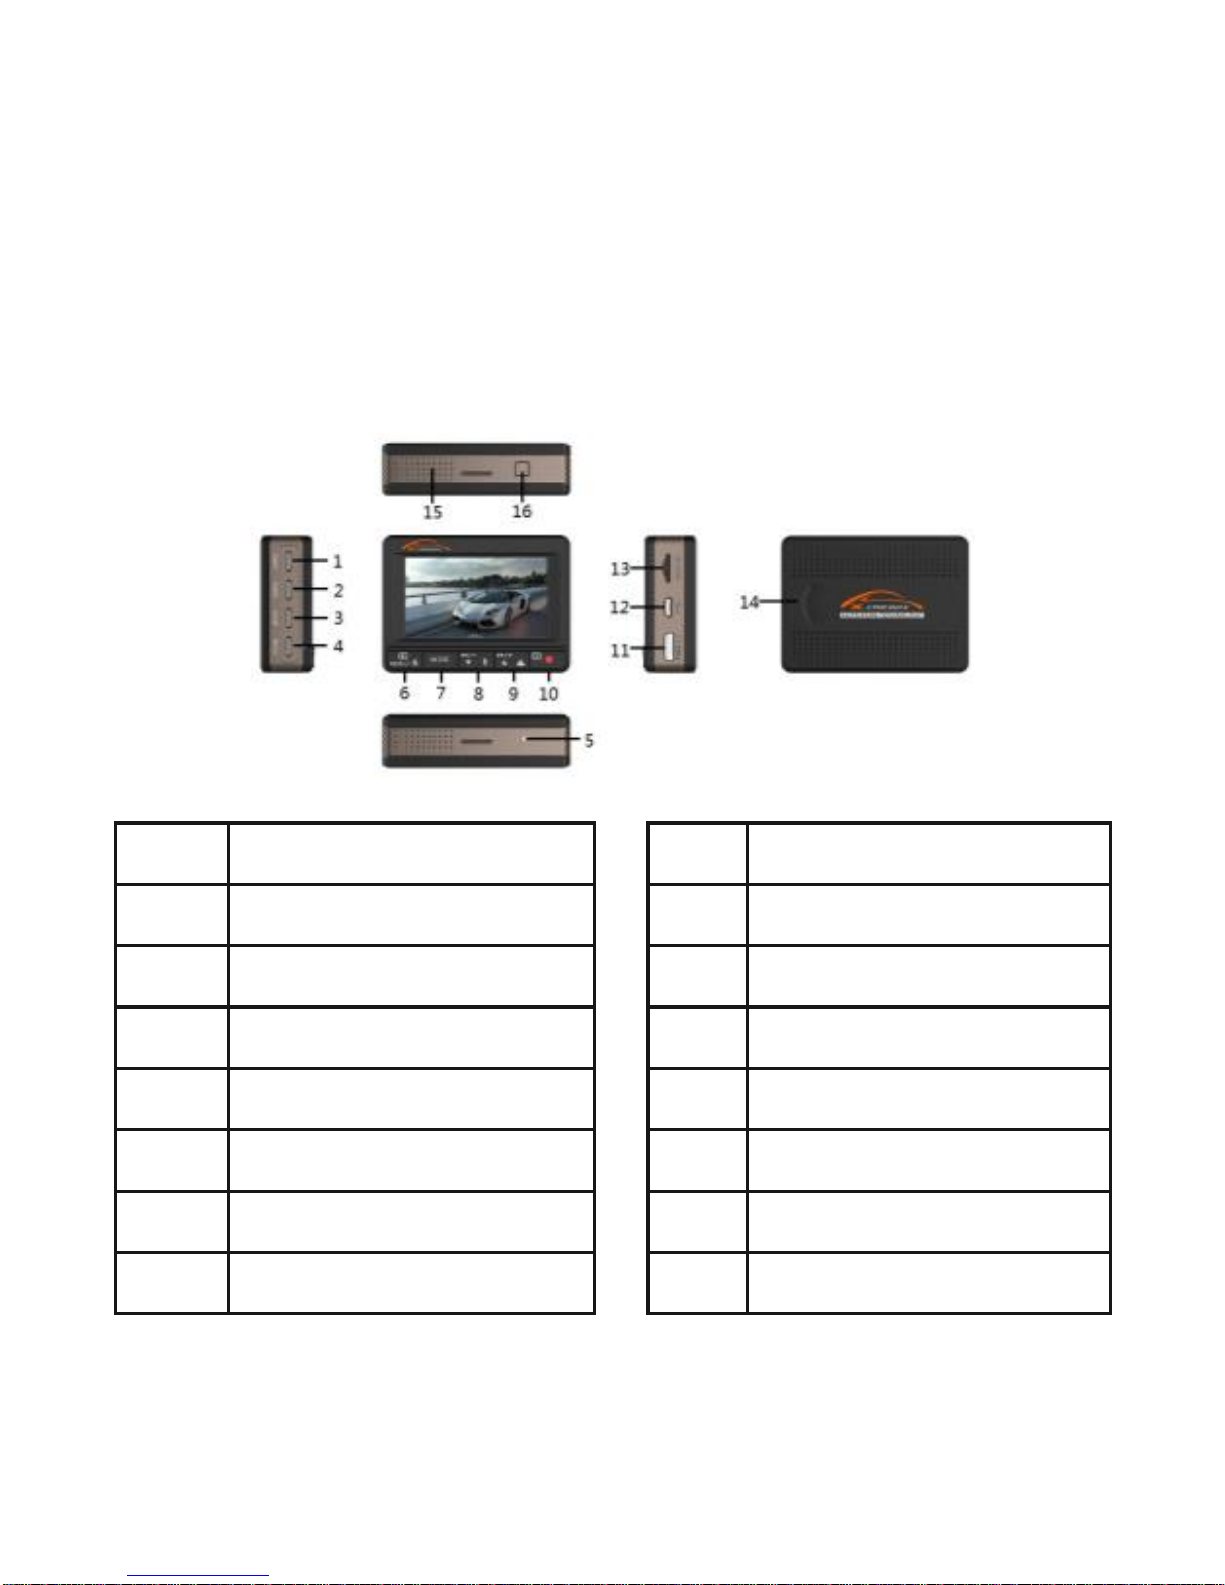
1.3 Product Overview
No.
Description
No.
Description
1
Cam1(Front)
9
Up
2
Cam2(Back)
10
Record | OK
3
GPS | Wired control
11
HDMI
4
Power | AV OUT
12
USB for computer
5
Reset
13
Card slot
6
Menu
14
Back cover
7
Mode
15
Speaker

5
8
Down
16
Power
2. Getting Started
2.1 Inserting the Memory Card
Insert the memory card with the gold contacts facing the front of the
DVR. Push the memory card until it clicks into place.
To remove the memory card, push to eject the memory card out of
the slot.
Note
1. Do not remove or insert the memory card when the device is being
powered on. This may damage the memory card.
2. It is recommended to format the micro SD cards before the first use.

6
2.2 Installing in Vehicles
Please refer to the quick installation.
2.2.1 Mount the lens
1. Attached the lens to your window using the sticker.
2. Rotate and tilt the lens to the right position.
2.2.2 Mount the device
1. Hide the DVR inside your car. Or mount it on your windshield with the
suction cup.
2. Connect the cables.
2.2.3 Connecting to Power
Use only the supplied car adapter to power up the device and charge the
built-in battery.
1. Connect one end of the car adapter to power port of the DVR.
2. Plug the other end of the car charger to the cigarette lighter socket of
your vehicle. Once the vehicle engine is started, the DVR powers on
automatically and starts cycle recording.

7
Note:
1. The yellow LED lights up while the battery is charging.
2. Please take note if the environment temperature reaches 45°C or above,
the car adapter still can supply power to DVR, but it will not charge the
battery. This is the characteristic of Lithium polymer battery and is not a
malfunction.
2.2.4 Powering the DVR On / Off
Auto Power On/Off
Once the vehicle engine is started, the device automatically turns on and
start recording. Once the vehicle engine shuts down, the DVR automatically
saves the recording and turns off the power within 5 seconds. Will be a
countdown timer on the screen.
Manual Power On/Off
To manually turn on the power, press the POWER button for 2 seconds.
 Loading...