

Page 1
1
Koolance EHX-1050 Installation Guide v1.00
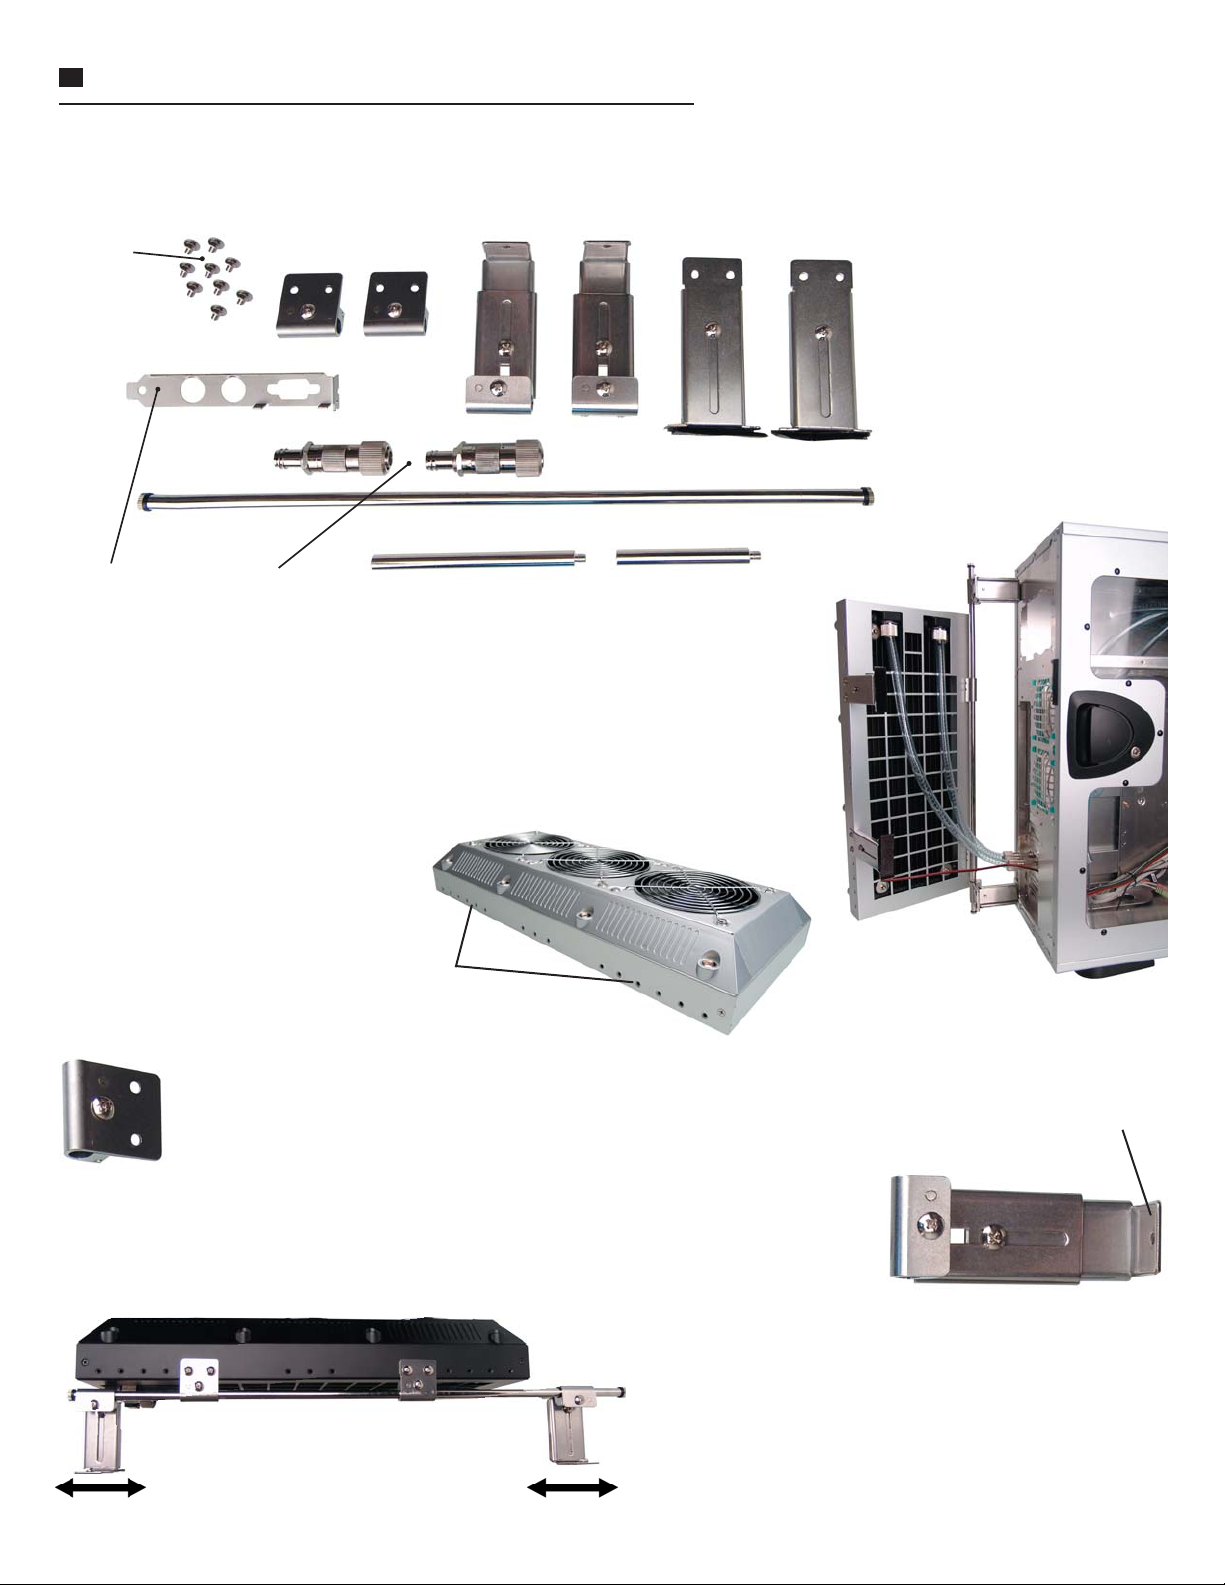
The EHX-1050 is designed to maximize compatibility with different computer chassis. It requires two side panel screws on the
rear of the computer chassis.
Bracket
Screws
EHX to Pole
Brackets
Pole to Chassis
Brackets
Main Mounting Pole
EHX to Chassis
Brackets
L-Bracket Slot
Interface
L-Bracket
Shut-off Valves
Pole Extension 1
Pole Extension 2
The EHX should be mounted behind the computer side panel that is least often
removed. It can be mounted to hinge open from the left or right, provided there are
screws behind the computer to do so.
It is recommended to mount the EHX with radiator nozzles on the top side for easier
hose routing (see image to the right).
There are rows of screw holes on both
sides of the EHX-1050 housing for vertical
adjustment of the mounting brackets.
Bracket
Mounting Holes
Start the installation by mounting the EHX to Pole brackets to the
EHX-1050 unit with the included screws. These can be adjusted later
if necessary. Slide the Main Mounting Pole through both of these
brackets (after removing the pole’s threaded metal end caps).
Chassis Tab
Next, thread both Pole to Chassis brackets onto either end of the Main
Mounting Pole. Typically, the sliding chassis tabs will face toward the outside
of the chassis, but some systems may require them to face inward.
The assembly thus far should look similar to the image on
the left. There is no “correct” position for the brackets on the
Main Mounting Pole and EHX-1050. Simply, they should
be adjusted so that the Pole to Chassis brackets will align
with at least two of the computer’s side panel screws.
Page 2
2
Koolance EHX-1050 Installation Guide v1.00
If the computer chassis is extra tall, one or both of the Pole Extensions can be used to lengthen the Main Mounting Pole. These
simply screw on to either end of the pole (in place of the threaded metal cap). This can allow the EHX to be positioned higher or
lower in relation to a given computer case.
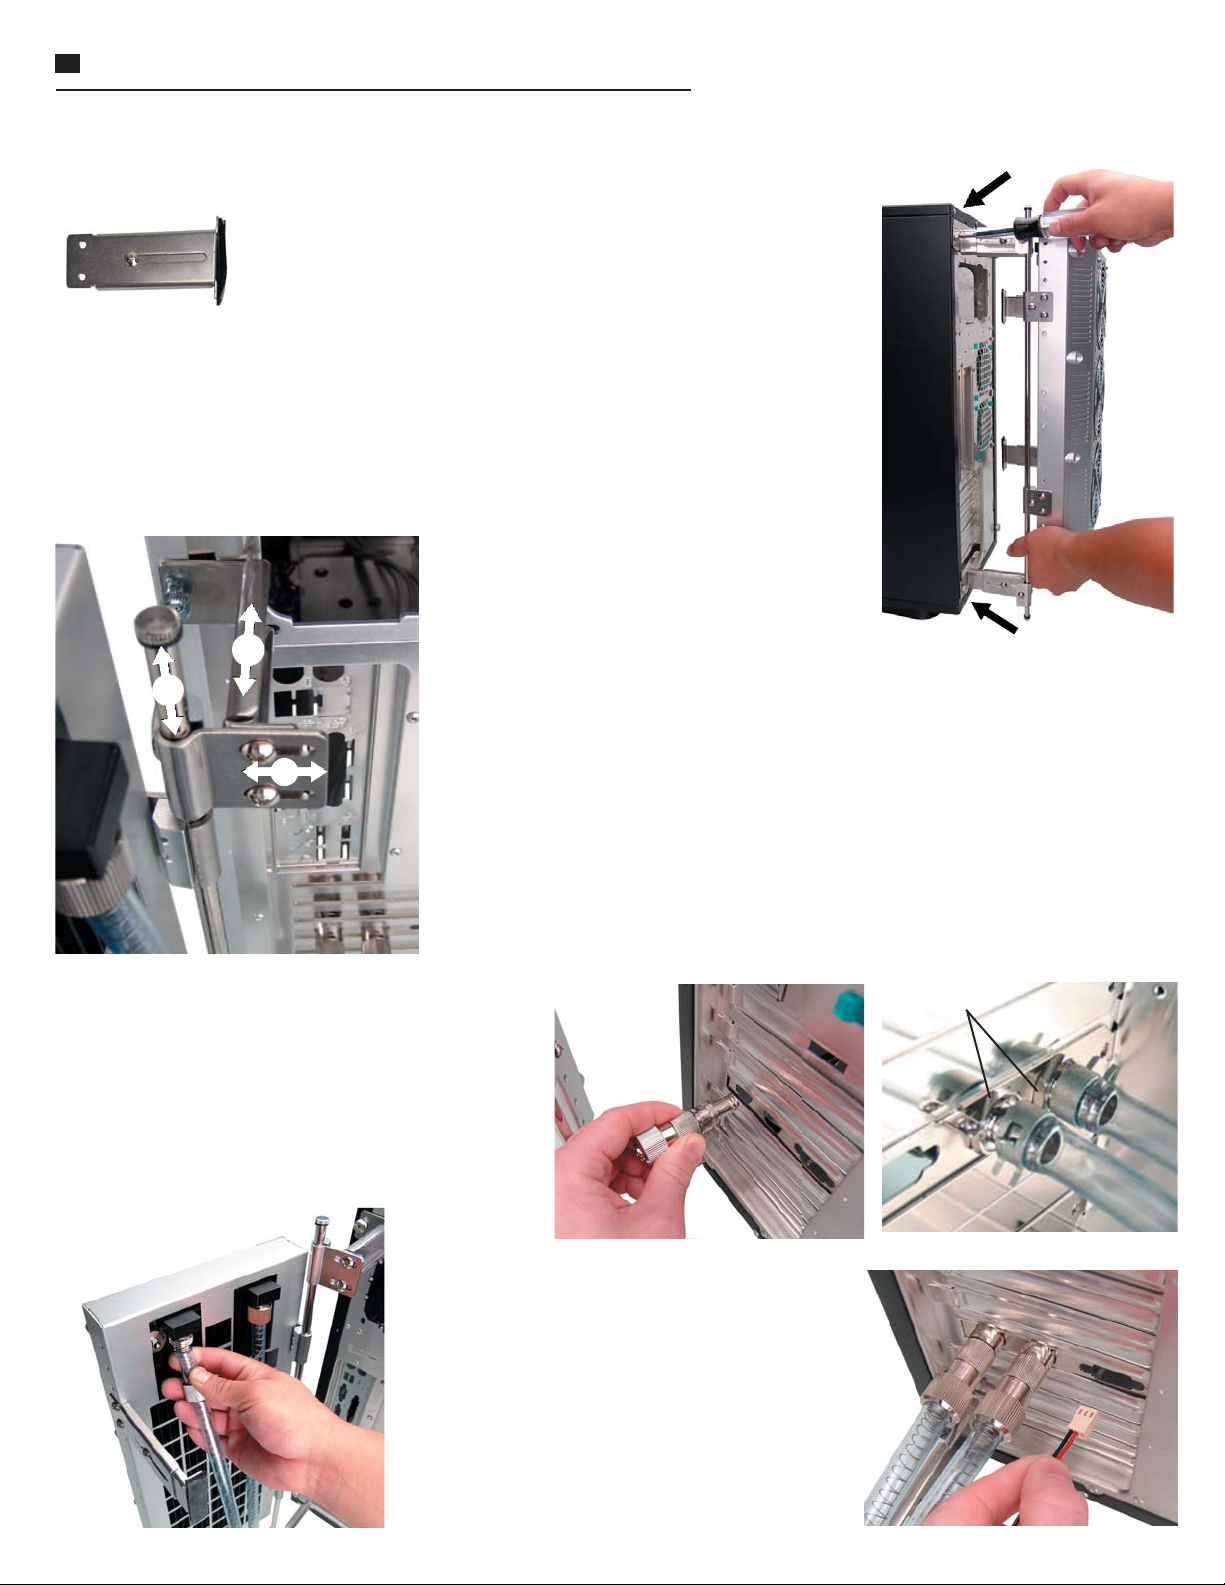
Now attach both EHX to Chassis brackets to the opposite
side of the EHX-1050. The location of these are not critical,
but they should avoid any potential confl icts with the
computer side panel (the side that is frequently opened)
before the adhesive velcro is applied. There is no fi xed mounting done here on
the chassis-side. These brackets serve only to keep the EHX-1050 in the “closed”
position.
Mount the EHX-1050 to the computer
chassis using the two available side panel
screws. Longer chassis screws may be
necessary if the default panel screws are
too short.
3
1
2
The empty L-Bracket Slot Interface should be installed
within the chassis into an available card slot.
The large hex nuts must be removed from the L-Bracket
Shut-off Valves. Both valves are then threaded through
the L-Bracket Slot Interface from the outside rear.
From inside the chassis, replace the large hex nuts onto
each nozzle and tighten.
The EHX-1050 brackets allow for adjustment in various ways:
1. The EHX-1050 and Main Mounting Poles can be adjusted vertically to any
stable location, from ground level to about 10” (25.4cm) high depending on chassis
height.
2. The Pole to Chassis brackets have a small amount of horizontal movement to
keep the EHX-1050 centered behind the computer.
3. If there is not suffi cient cable room between the EHX and computer chassis, both
the EHX to Chassis and Pole to Chassis brackets can be extended (about 3-5” /
7-13cm). This is done simply by retightening the bracket adjustment center screw
in the desired position.
Hex Nuts
Lastly, the spring hoses are installed between the
radiator and slot interface, along with the empty
hoses within the system (using the included
clamps).
Run the radiator fan wire directly into the open
port on the L-Bracket Slot Interface, using the
included wire extension if necessary to reach its
power source.
 Loading...