

Page 1
1 2
Koolance CPU-305 Installation Guide v1.02
Temperature Sensor
CAUTION: Be sure to attach the Koolance temperature probe to the CPU cooler during
installation. The safety features of your system may not function properly without the
!
correct placement of this probe, and hardware damage can result.
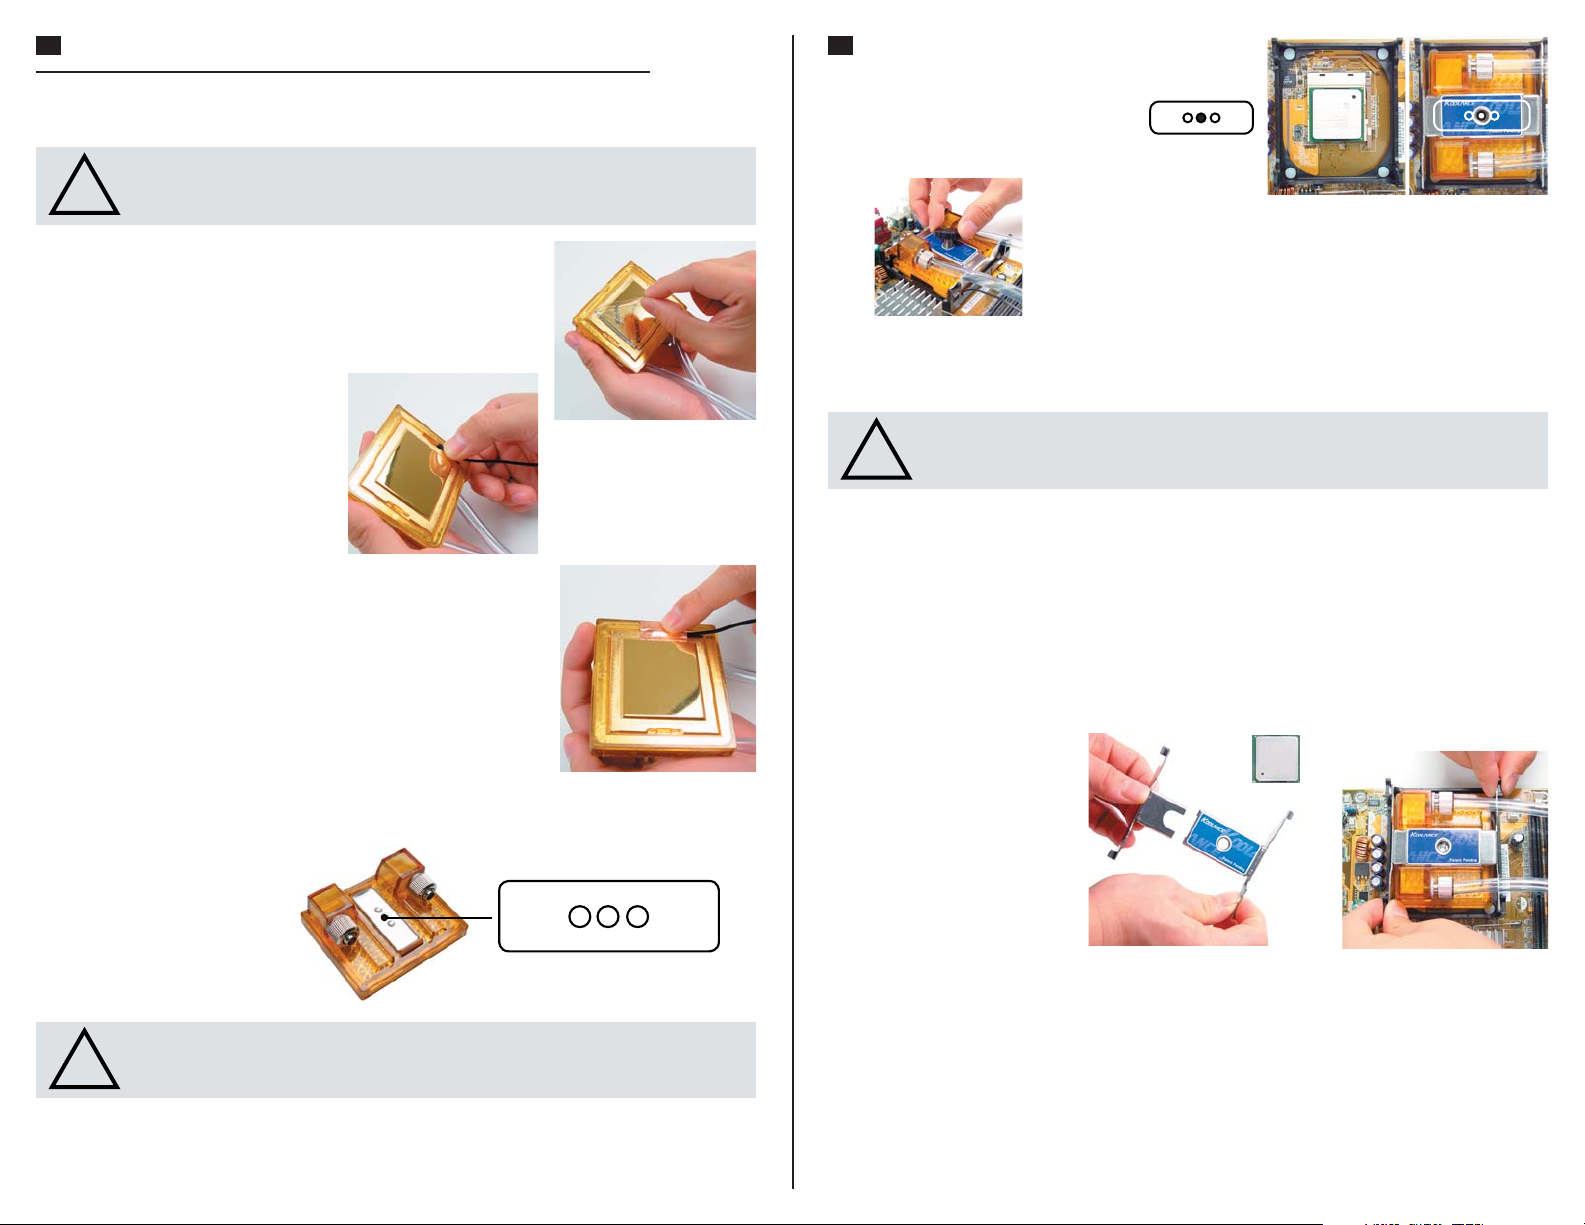
Remove the protective fi lm from the bottom of the CPU cooler.
Screw alignment for P-4,
Xeon, Athlon 64, FX, X2,
and Opteron processors
Use the included black screw for the following processors: Intel
Pentium-4 (including dual core), Xeon, AMD Athlon 64, FX,
Opteron, & X2 chips.
Insert the temperature sensor into either
bottom groove on the CPU cooler. The
sensor is required for proper fan speed
control and system safety features.
DO NOT attempt to install the
temperature probe in between the
processor and cooler. Despite its thin
size, it will interfere with CPU contact
or burn-out the sensor.
Apply metal tape to keep the temperature probe in place. DO NOT stick
metal tape or the temperature probe to the the raised (polished) portion
of the CPU cold plate.
You can use a zip-tie to further secure the temperature probe wire to
the CPU tubing.
Tension Screw
There are 3 metal center receptacles on the CPU-305 cooler:
3 center holes correspond with
different CPU socket positions
Intel P-4/Xeon & AMD 64/Opteron
With the bracket properly aligned, insert and slowly twist the tension screw until it can no longer be
tightened. Over-tightening is prevented by a ratcheting action.
Black Screw
CAUTION: Installing the tension screw into the wrong cooler receptacle can cause
insuffi cient cooler contact, and may result in hardware damage.
!
Intel Socket 478 Processors
Apply thermal interface compound directly to the CPU die. Do not add more than is necessary to cover
it with a very thin layer.
Assemble the CPU mounting
bracket using the appropriate
clips. The longer pair are for
Intel Pentium-4 processors; the
shorter are for AMD Athlon/XP
and Intel P-III processors.
CAUTION: Installing the tension screw into the wrong cooler receptacle can cause
insuffi cient cooler contact, and may result in hardware damage.
!
For Intel P-4 (478 & 775), Xeon, AMD Athlon 64, FX, or Opteron processors, use the center hole:
Clips for Intel P-4 socket 478
Fit the cooler and mounting brackets onto the CPU socket. The bracket clips slide inward and outward
in order to hook to the socket tabs. Check that the bracket clips are aligned before installing the tension
screw.
The tension screw must be aligned over the center of the CPU. Otherwise, insuffi cient contact could
result in poor performance, or even damage. (Please see Tension Screw for more details.)
Page 2
3 4
AMD Socket 939, 754, & 940 Processors
Bracket
The AMD 64 Adapter is designed for AMD Athlon 64, X2, FX,
and Opteron processors in socket 754, 940, and 939 formats.
The motherboard may need to be removed from the chassis
in order to install this device.
Short Screws
Various hardware comes with the Koolance AMD 64 Kit, and depending
on your particular motherboard, some of it may not be required.
AMD 64-bit boards have 2 primary mounting holes which the Adapter
will use.
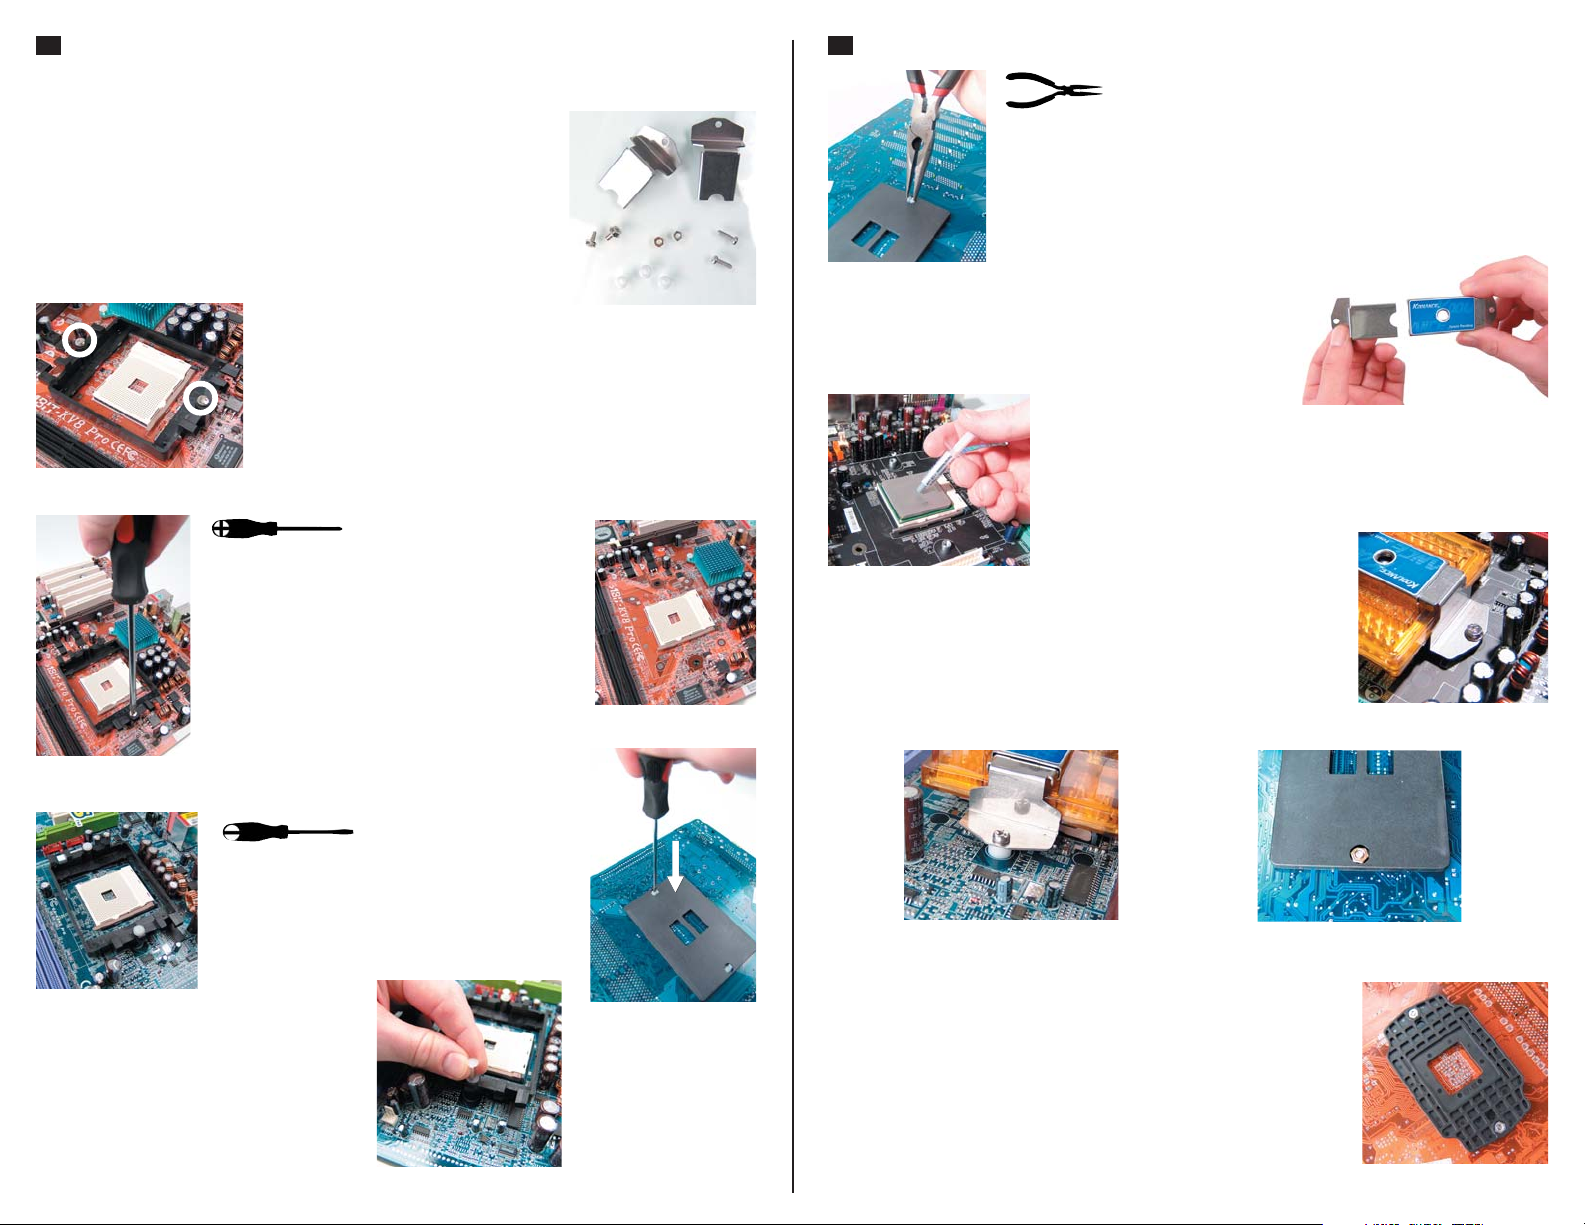
Remove the black plastic retention frame from the
motherboard. Generally, this is held in place with 2
metal screws.
(If there are plastic tabs instead of screws, please
skip to the next paragraph.)
Clips
Plastic Spacers
Nuts
Long
Screws
Finally, squeeze the remaining tabs together beneath the board, and gently
push them through with long-nose pliers.
This should allow you to remove the CPU socket’s plastic rentention frame
from the motherboard.
The included bracket clips are used to mount the Cooler. Assemble
the bracket by inserting these clips into the center slider of the
CPU Cooler.
Apply thermal paste to the CPU directly. Spread the paste so that it
evenly covers the CPU. A piece of thick paper (such as a business
card) works well for this.
Ideally, the short screws with the Koolance AMD 64 Adapter kit are all
that will be required to mount the bracket. (These are standard ATX
chassis screws.)
However, if the socket’s backplate is a different design, the longer screws,
plastic spacers, and nuts may be needed to hold the bracket.
Short Metal Screws
For motherboards with plastic tabs instead of
metal screws, turn the motherboard over and
push the center locking bolt inward with a small
fl at screw driver.
From the top side, pull up both plastic center
locking bolts.
Plastic Washer (with Long Screw)
Bottom Metal Nut (with Long Screw)
Despite the fi nal method of attachment, the Koolance AMD 64 Adapter
should utilize the original motherboard backplate. This is a necessary
component to avoid physical damage of the motherboard or CPU.
Page 3

5 6
CAUTION: Always use the motherboard’s original CPU socket backplate with the Kool-
ance AMD 64 Adapter. This component is designed to avoid damage to your hardware
!
from over-extension.
Be sure to install the temperature sensor before mounting the CPU
Cooler.
The CPU Cooler will use the black tension screw and the center hole
for AMD 64, Opteron, or FX processors. (Please see Tension Screw
for more details.)
Both rails are mounted with two screws from the back side of the
motherboard.
Apply thermal paste to the CPU directly.
Spread the paste so that it evenly covers the processor. A piece of thick
paper (such as a business card) works well for this.
Intel Socket LGA-775 (“T”) Processors
The LGA 775 Adapter is designed for Intel LGA 775 (“Socket T”)
processors. The motherboard should be removed from the chassis
in order to install this device.
LGA 775 boards have 4 mounting holes which the adapter
will use.
The adapter can be mounted in any direction, but it will be easier
to install the CPU if the metal rails are mounted parallel to the
socket locking arm.
CORRECT: rails parallel to socket
locking arm
INCORRECT: rails perpendicular to socket
locking arm
The P-4 socket 478 bracket clips are also used with the LGA-775
Adapter. Assemble the bracket by inserting these clips into the center
slider.
Rails
Screws
The temperature sensor should already be installed into the CPU
Cooler.
Fit the cooler and mounting bracket onto the CPU socket. The bracket
clips slide inward and outward in order to hook to the rail holes.
The CPU-305 uses the bottom rail
holes of the LGA-775 Adapter. Once the
tension screw is tightened, the cooler
should not be loose when mounted to
the processor.
Use the bottom holes on the LGA-775 Rails
Check that the bracket clips are aligned in all 4 rail holes before
installing the tension screw.
The CPU-305 Cooler will use the black tension screw, and the
center hole for LGA-775 processors. (Please see Tension Screw
for more details.)
 Loading...