

Page 1
CPU-300 Installation Guide v 1.01
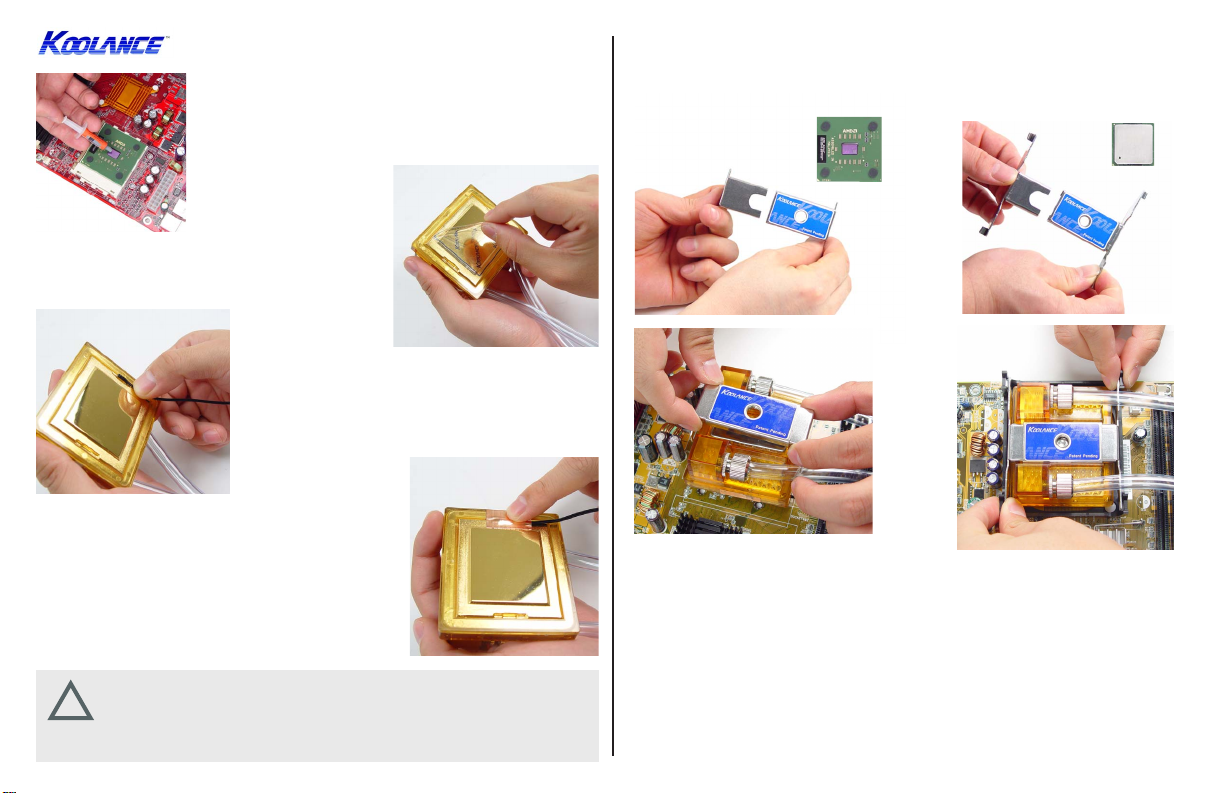
Apply thermal interface compound directly to the
CPU die. Do not add more than is necessary to cover
it with a very thin layer.
Remove the protective film from the bottom of
the CPU cooler.
(For Koolance Systems) Insert the temperature
sensor into either bottom groove on the CPU
cooler. The sensor is required for proper fan
speed control and system safety features.
Apply metal tape to keep the temperature probe in
place. Do not stick metal tape to the the raised
(polished) portion of the CPU cold plate.
Assemble the CPU mounting bracket using the appropriate clips. The
longer pair are for Intel P-4 processors; the shorter are for AMD Athlon/
XP and Intel P-III processors. (AMD 64/Opteron and Intel Xeon require
additional adapters. Please see www.koolance.com.)
Clips for AMD socket 472
& P-III socket 370
Clips for P-4 socket 478
You can use a zip-tie to further secure the
temperature probe to the CPU tubing.
CAUTION: Be sure to attach the Koolance temperature probe to
the CPU cooler during installation. The safety features of your
!
system may not function properly without the correct placement of
this probe.
Fit the cooler and mounting brackets onto the CPU socket. The bracket clips
slide inward and outward in order to hook to the socket tabs. Check that the
bracket clips are aligned before installing the tension screw.
The tension screw must be aligned over the center of the CPU (particularly
for AMD Athlon/XP processors). Otherwise, insufficient contact could result in
poor performance, or even damage. There are 3 metal center receptacles on
the CPU-300 cooler:
Page 2
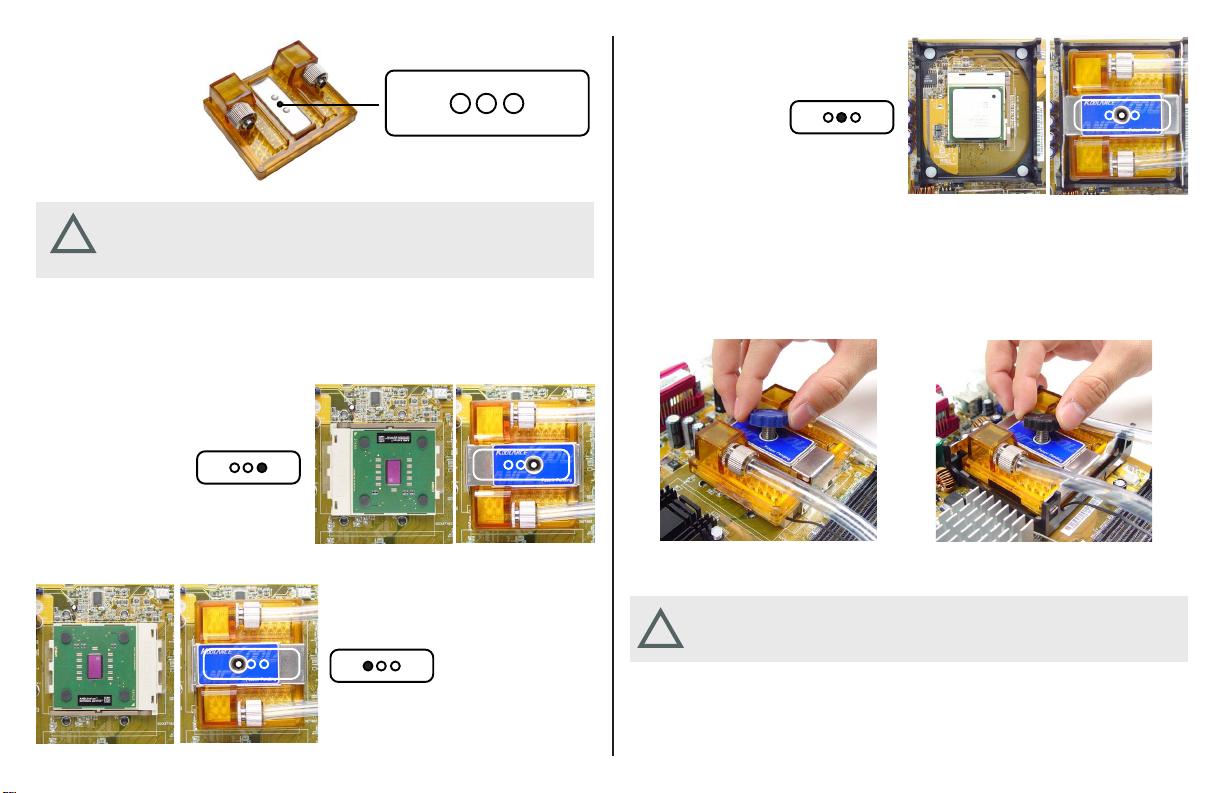
3 center holes
correspond with
different CPU
socket positions
Screw alignment
for P-4/Xeon and
Athlon 64/Opteron
processors
CAUTION: Installing the tension screw into the wrong cooler
receptacle can cause insufficient cooler contact, and may result in
!
hardware damage.
For AMD Athlon/XP processors, the left or right receptacles will be used,
depending on which direction the CPU socket faces in relation to the cooler.
For Intel P-4, Xeon, AMD Athlon 64, or Opteron processors, use the center
hole.
Screw alignment
for right-side AMD
Athlon/XP
processors
Screw alignment for
left-side AMD
Athlon/XP
processors
Due to different contact pressure requirements, two tension screws are
included with the CPU-300. Use the BLUE screw for “open die” processors,
such as: AMD Athlon/XP or Intel P-III. Use the BLACK screw for processors
with heat spreaders, such as: Intel P-4, Xeon, or AMD 64/Opteron.
AMD Athlon/XP Blue Screw
CAUTION: Installing the incorrect tension screw for your processor
!
may result in hardware damage.
With the bracket properly aligned, insert and slowly twist the tension screw
until it can no longer be tightened. Over-tightening is prevented by a
ratcheting action.
Intel P-4/Xeon & AMD 64/
Opteron Black Screw
 Loading...