

StockCheck.com
V Panel Express
V Box Express II
User’s Man ual
Version 1.0
Kon tron Embedded Computers GmbH
0-0096-3678

Table of Contents
StockCheck.com
Table of Conten ts
Table of Contents.................................................................................................1
Introduction ..........................................................................................................3
Symbols used in this Manual..................................................................................4
Important Instructions......................................................................................... 5
Warranty Note........................................................................................................ 5
Exclusion of Accident Liability Obligation ...............................................................5
Liability Limitation / Exemption from the Warranty Obligation................................. 5
Safety Instructions...............................................................................................6
Electrostatic Discharge (ESD)................................................................................ 8
Grounding Methods........................................................................................... 8
Instructions for the Lithium Battery......................................................................... 9
FCC Statement.....................................................................................................10
Electromagnetic Compatibility ..............................................................................10
Scope of Delivery ..............................................................................................11
Optional Parts.......................................................................................................11
Type Label and Product Identification..................................................................11
Product Description...........................................................................................12
Front Side View....................................................................................................14
Panel mount Front Plate..................................................................................14
Display.............................................................................................................15
Touch Screen ..................................................................................................15
USB (2.0) Connector .......................................................................................17
Rear Side .............................................................................................................18
Bottom Side (with Interfaces)................................................................................19
Interfaces on the Bottom Side (Rear side of the System)................................20
Power Button................................................................................................... 21
LED Control Indicators.....................................................................................21
Power LED Error codes This function display four important fail conditions: ..22
CompactFlash™ Slot....................................................................................... 23
Removable HDD Drive Cage........................................................................... 23
Left Side (Expansion Card Access Side).............................................................. 25
Right Side............................................................................................................. 26
Top Side...............................................................................................................27
Integrated ETXexpress® Module..........................................................................28
Riser Card........................................................................................................28
V Panel Express – User’s Manual 1

Table of Contents
StockCheck.com
Starting Up ..........................................................................................................29
DC-Connection.................................................................................................29
Accessing Internal Components......................................................................30
Installing/Removing the Expansion Cards.............................................................31
Maintenance and Prevention............................................................................33
Replacing the Lithium Battery...............................................................................33
Installation Instructions.....................................................................................35
Operating System and Hardware Component Drivers..........................................36
Main Specifications............................................................................................37
Power Specifications ............................................................................................38
Electrical Specifications........................................................................................38
Mechanical Specifications ....................................................................................38
Environmental Specifications................................................................................39
CE Directives and Standards................................................................................40
Technical Appendix - Interfaces.......................................................................41
Serial Port (COM1, COM2)...................................................................................41
USB Port...............................................................................................................42
DVI-I Connector (Single Link)................................................................................43
Technical Support ..............................................................................................44
Returning Defective Material ................................................................................45
2 V Panel Express – User’ Manual

Introduction
StockCheck.com
Introduction
Kontron Embedded Computers would like to point out that the information
contained in this manual may be subject to technical alteration, particularly as a
result of the constant upgrading of Kontron Embedded Computers products. The
attached documentation does not entail any guarantee on the part of Kontron
Embedded Computers with respect to the technical processes described in the
manual or any product characteristics set out. Kontron Embedded Computers
does not accept any liability for any printing errors or other inaccuracies in the
manual unless it can be proven that Kontron Embedded Computers is aware of
such errors or inaccuracies or that Kontron Embedded Computers is unaware of
these as a result of gross negligence and Kontron Embedded Computers has
failed to eliminate these errors or inaccuracies for this reason. Kontron Embedded
Computers expressly informs the user that this manual only contains a general
description of technical processes and instructions which may not be applicable in
every individual case. In cases of doubt, please contact Kontron Embedded
Computers.
This manual is protected by copyright. All rights are reserved by Kontron
Embedded Computers. Copies of all or part of this manual or translations into a
another language may only be made with the prior written consent of Kontron
Embedded Computers. Kontron Embedded Computers points out that the
information contained in this manual is constantly being updated in line with the
technical alterations and improvements made by Kontron Embedded Computers
to the products and thus this manual only reflects the technical status of the
products by Kontron Embedded Computers at the time of printing.
© 2007 by Kontron Embedded Computers
Printing and duplication, even of sections, is only permissible with the express
approval of
Kontron Embedded Computers GmbH
Oskar-von-Miller-Str. 1
85385 Eching
Germany
V Panel Express – User’s Manual 3
Introduction
StockCheck.com
Symbols used in this Manual
Symbol Meaning
This symbol indicates the danger of injury to the user or the risk of
damage to the product if the corresponding warning notices are
not observed.
This symbol indicates that the product or parts thereof may be
damaged if the corresponding warning notices are not observed.
This symbol indicates general information about the product and
the user manual.
This symbol indicates detail information about the specific product
configuration.
This symbol precedes helpful hints and tips for daily use.
4 V Panel Express – User’ Manual

Important Instructions
StockCheck.com
Important Instructions
This chapter contains instructions which must be observed when using the
V Panel Express.
The manufacturer’s instructions provide useful information on the
V Panel Express.
Warranty Note
Due to their limited service life, parts which by their nature are subject to a
particularly high degree of wear (wearing parts) are excluded from the warranty
beyond that provided by law. This applies to batteries and display, for example.
Exclusion of Accident Liability Obligation
Kontron Embedded Computers shall be exempted from the statutory accident
liability obligation if the user fails to observe the safety instructions.
Liability Limitation / Exemption from the
War r anty Obligation
In the event of damage to the device caused by failure to observe the hints in this
manual and on the device (especially the safety instructions), Kontron Embedded
Computers shall not be required to honor the warranty even during the warranty
period and shall be exempted from the statutory accident liability obligation.
V Panel Express – User’s Manual 5

Safety Instructions
StockCheck.com
Safety Instructions
Please read this section carefully and observe the instructions for your own safety
and correct use of the device.
The chapter also contains information on approval and interference suppression
of your device.
Observe the warnings and instructions on the device and in the manual.
The device has been built and tested by Kontron Embedded Computers in
accordance to EN 60950-1 and left the company in a perfectly safe condition.
In order to maintain this condition and ensure safe operation, the user must
observe the instructions and warnings contained in this manual.
The device must be used in accordance with the instructions for use.
The electrical installations in the room must correspond to the requirements of
the respective regulations.
Take care that there are no cables, particularly power cables, in areas where
persons can trip over them.
Do not use a power cable in sockets shared by a number of other power
consumers. Do not use an extension cable.
Only use the power cord supplied.
Do not place the device in direct sunlight, near heat sources or in a damp
place. Make sure the device has adequate ventilation.
Only devices and components which fulfill the requirements of an SELV circuit
(safety extra low voltage) in accordance with EN60950 may be connected to
the interfaces of the system.
All plugs on the connection cables must be screwed or locked to the housing.
The device is designed to be used in vertical position with the interfaces
downwards.
6 V Panel Express – User’ Manual

Safety Instructions
StockCheck.com
Repairs may only be carried out by a person authorized by Kontron Embedded
Computers.
Maintenance or repair on the open device may only be done out by qualified
personnel authorized by Kontron Embedded Computers which is aware of with
the associated dangers.
The device may only be opened for the installation and removal of PCI cards
in accordance with the description in this manual. These procedures have to
be carried-out only by qualified specialist personnel.
If extensions are made to the device the legal stipulations and the device
specifications must be observed.
The device must be switched off before installation and removal of any PCI
and CompactFlash™ cards.
Only original accessories approved by Kontron Embedded Computers may be
used.
It must be assumed that safe operation is no longer possible,
• if the device has visible damage or
• if the device no longer functions.
In these cases the device must be shut down and secured against
unintentional operation.
For DC Powered Systems
The DC-input must fulfill SELV requirements of EN60950-1 standard.
DC/DC-supplies do not fulfil the requirements for centralized DC power
systems as required for use in the USA.
V Panel Express – User’s Manual 7

Safety Instructions
StockCheck.com
Electrostatic Discharge (ESD)
A sudden discharge of electrostatic electricity can destroy static-sensitive devices
or micro-circuitry. Therefore proper packaging and grounding techniques are
necessary precautions to prevent damage. Always take the following precautions:
1. Transport boards in ESD-safe containers such as boxes or bags.
2. Keep electrostatic sensitive parts in their containers until they arrive at the
ESD-safe workplace.
3. Always be properly grounded when touching a sensitive board, component, or
assembly.
4. Store electrostatic-sensitive boards in protective packaging or on antistatic
mats.
Grounding Me t hods
The following measures help to avoid electrostatic damages to the device:
1. Cover workstations with approved antistatic material. Always wear a wrist
strap connected to workplace as well as properly grounded tools and
equipment.
2. Use antistatic mats, heel straps, or air ionizers for more protection.
3. Always handle electrostatic sensitive components by their edge or by their
casing.
4. Avoid contact with pins, leads, or circuitry.
5. Turn off power and input signals before inserting and removing connectors or
connecting test equipment.
6. Keep work area free of non-conductive materials such as ordinary plastic
assembly aids and Styrofoam.
7. Use field service tools such as cutters, screwdrivers, and vacuum cleaners
which are conductive.
8. Always place drives and boards PCB-assembly-side down on the foam.
8 V Panel Express – User’ Manual

Safety Instructions
StockCheck.com
Instructions for th e Lithium Battery
The installed board is equipped with a lithium battery. To replace this battery refer
to the instructions described in the chapter
“Replacing the Lithium Battery ”
Warning
There is a danger of explosion if the wrong type of battery is used
for replacement. Replace only with the same or equivalent type of
battery as recommended by the manufacturer. Dispose of used
batteries according to the manufacturers instructions.
V Panel Express – User’s Manual 9

Safety Instructions
StockCheck.com
FCC Statement
This equipment has been tested and found to comply with the limits for a Class A
digital device, pursuant to Part 15 of the FCC Rules. These limits are designed to
provide reasonable protection against harmful interference when the equipment is
operated in commercial environment. This equipment generates, uses, and can
radiate radio frequency energy and, if not installed and used in accordance with
the instruction manual, may cause harmful interference to radio communications.
Operation of this equipment in residential area is likely to cause harmful
interference in which case the user will be required to correct the interference at
his own expense.
Electromagnetic Compatibility
This product has been designed for industrial, commercial and office use,
including small business use. The most recent version of the EMC guidelines
(2004/108/EC) and/or the German EMC laws apply. If the user modifies and/or
adds to the equipment (e.g. installation of add-on cards), the prerequisites for the
CE conformity declaration (safety requirements) may no longer apply.
10 V Panel Express – User’ Manual

Scope of Delivery
StockCheck.com
Scope of Del ivery
V Panel Express
V Panel Express - User’s Manual
Optional Parts
CF Card
DC Power Cable
Ty pe Label and Product Identification
The type label with the corresponding Kontron product part number is at the rear
right hand side of the system.
Type Label for Systems
V Panel Express
121/150/170
V Panel Express
121/150/170
On the type label of your system, the "XXXX" group is replaced by Arabic
numerals combination according to the ordered system configuration.
Kontron
Product Identification
2-AOHA-xxxx
for V panel Express with ETXexpress-PM Module
2-AOHA-xxxx
for V panel Express with ETXexpress-CD Module
V Panel Express – User’s Manual 11
Product Description
StockCheck.com
Product Descri pti on
The V Panel Express is a Human-Machine-Interface (HMI) System designed for
high industrial application. The V Panel Express is a workstation system with
integrated touch screen display. The system is designed for:
Installation in an instrument panel or other cabinets
Installation by VESA 75/100 compliant mounting system
The hardware of the V Panel Express system can be flexibly configured
corresponding to customized requirements. The rugged design offers excellent
mechanical stability. The V Panel Express provides the demanding characteristics
required for a computer that is very suitable for using in harsh industrial
environment.
The system accommodates a baseboard with an ETXexpress® module.
Depending on the ordered system configuration, your V Panel Express can be
equipped with the ETXexpress®-PM or -CD ETX module.
Depending on the ordered system configuration, the built-in display can be as a
12.1”, 15“ or 17” TFT-LCD display. In front of the display there is installed a glass
protection pane with antireflection properties. In front of the display is available a
resistive touch screen. This protects the display surface from dirt and scratches
also.
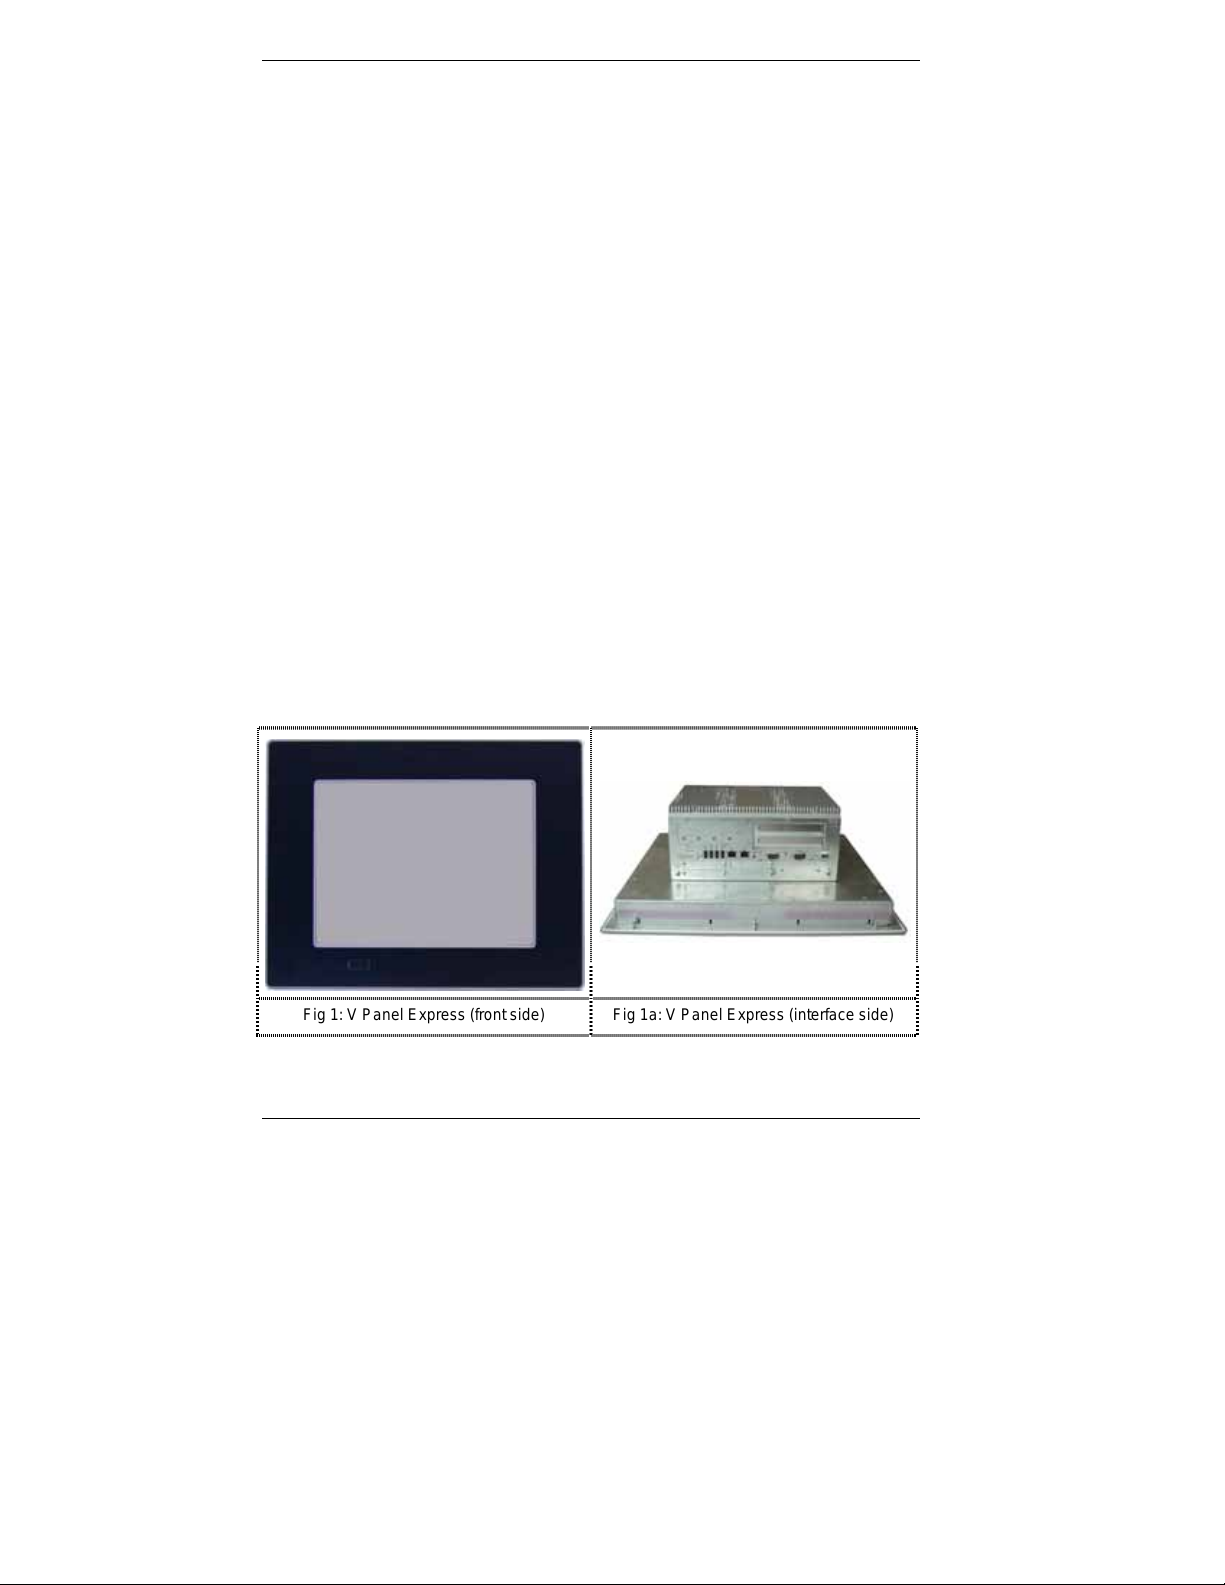
The V Panel Express accommodates two rear side accessible drive bays:
drive bay (removable) for 2.5" SATA (I or II) HDD) and
Compact Flash™-drive for CF card, type I.
Fig 1: V Panel Express (front s ide) Fig 1a: V Panel Express (interf ace side)
12 V Panel Express – User’ Manual

Product Description
StockCheck.com
The power button, the RESET button, the LED control indicators and user
interfaces such as DVI-I/VGA, USB (2.0) LANs (10/100Mbps or 1Gbps) and serial
ports (RS232) are accessible on the rear side of the system. At the front side is
available a
USB (2.0) port.
The V Panel Express is designed to be powered from a DC high voltage external
power sources.
The V Panel Express system ensures at the front side the IP65 (NEMA 250 Type
12 and 13) protection class.
The V Panel Express I is a fan less system. The cooling of the V Panel Express is
performed by the heat sink surface of the chassis (rear side).
When powering on the V Panel Express, make sure that the
air intake and exhaust openings are not obstructed.
V Panel Express – User’s Manual 13

Product Description
StockCheck.com
Front Side View
At the front side are located:
Panel Mount front plate
Display (12.1"/15"/17") with corresponding resistive touch screen
USB (2.0) connector (covered)
1
2
3
Fig. 2: V Panel Express (shown with a 15" display)
1 Front plate (panel mount)
2 TFT display (12.1”/15”/17”)
3 USB (2.0) connector (covered)
Panel mount Front Plate
This version of front plate is suitable for the installation in an instrument panel or
other cabinets. Therefore at the rear side of the front plate are twelve threaded
M4 metric studs refer to the “Rear Side” chapter.
14 V Panel Express – User’ Manual

Product Description
StockCheck.com
Display
Depending on the ordered system configuration, the built-in TFT display has
12.1”, 15“ or 17”. For technical specifications of the built-in display refer to the
“Main Specification” chapter.
The display is mechanically protected by the resistive touch screen.
Touch Screen
The display unit is equipped with a resistive touch screen. The touch screen is
internally connected to the on-board USB interface of the installed
ETX baseboard.
The touch screen registers contacts of a finger or a pen and moves the mouse
pointer.
Install touch controller software
Please download software form Kontron WEB server http://www.kontron.com/
>>Confirm license agreement
Do not use a hard or a pointed object to operate the touch screen,
since it can damage the touch screen foil surface.
V Panel Express – User’s Manual 15

Product Description
StockCheck.com
>>Start touch calibration
After complete installation and calibration of touch you find a new icon in the
control panel to set additional features.
Calibrating the Touch Screen
Calibration serves two purposes:
Sets the active area of the touch screen
Aligns the active area of the touch screen to the screen’s image.
16 V Panel Express – User’ Manual

Product Description
StockCheck.com
Before you calibrate the touch screen, let the unit warm up for 30
minutes.
Calibration aligns the active touch-sensitive area of the touch screen with the
image on the display. Calibration also determines the edges of the screen’s image
and locates the center of the touch screen. If the touch screen is not calibrated
properly, the active area of the touch screen may not be aligned with the screen’s
image or may be unnecessarily small in size.
Use the calibration tool “Align” to recalibrate the touch screen as necessary:
The installed touch screen is calibrated at the factory. Run the calibration routine
when an alignment problem exists between the mouse pointer and the contact
location on the screen.
Carefully touch the location of the markers with your stylus to recalibrate the touch
screen.
USB (2.0) Co nn ec tor
This connector allows connection of USB-compatible devices.
The front side USB port with mounted plastic cover is also
protected acc. IP65.
V Panel Express – User’s Manual 17

Product Description
StockCheck.com
Rear Side
At the rear side of the V Panel Express are rubber seal, the 12 mounting threaded
M4 metric studs and the PC unit with the heat sink. Also are available two screws
for securing the PC unit to the display unit (not visible in the picture below).
1
2
3 3
4
Fig. 3: V Panel Express (rear side)
3
3
5
1 Rear side of the front plate (panel mount)
2 Rubber seal (gasket)
3 Threaded M4 metric studs
4 Heat sink with VESA® 75/100 mounting holes
5 VESA® 75/100 compliant mounting holes
18 V Panel Express – User’ Manual

Product Description
StockCheck.com
Bottom Side (with Interfaces)
17
16
15
Fig. 4: V Panel Express (inter f ace side)
1 4x USB (2.0) connector
2 LAN2 interface connector
3 LAN1 interface connector
4 Power button (ATX)
5 LED control indicators
6 Free expansion slots for PCI cards
32bit@33MHz (half size)
7 COM2 (RS232) port connector
8 DC power plug (shown with DC
terminal for the power cord)
2
1
13 14
3 4 5
11 12
10
10 HDD drive cage with knurled
screws
11 COM1 (RS232) port connector
12 CF slot (not equipped
13 Express Card slot
14 CF slot (shown with installed CF
card (type I)
15 DVI-I/VGA connector
16 Grounding Piont
17 COM3 and COM4 optional
6
7
8
)
9
9 Reset switch
V Panel Express – User’s Manual 19

Product Description
StockCheck.com
Interfaces on t he Bott om Side (Rear side of the System)
USB 2.0 Connectors
The system is equipped at the bottom side (rear) with four USB 2.0 interface
connectors. These connectors and provide connections for USB-compatible
devices.
DVI-I Interface Connector
The DVI-I interface (Single Link) supports both digital and analog connections.
Digital devices can be connected directly to this interface of the V Panel Express
but analog devices should be connected to this interface via a DVI to VGA adapter
(not included).
Serial Interface Connectors (COM1 and COM2)
These RS232 connections are available as 9-pin D-SUB plugs and provide
connection for serial devices.
Ethernet Interface Connectors
These interface connectors are provided as RJ45 sockets with integrated LEDs.
The data transfer rate depends on the installed ETXexpress module (see below):
Ethernet Port
LAN1 10/100/1000 Mbps 10/100/1000 Mbps
LAN2 10/100/1000 Mbps 10/100/1000 Mbps
LED States:
Left LED State Link Speed Right LED State Link Activity State
off 10 Base-T Off Link not active
green 100 Base-T Green Link active
yellow 1000 Base-T
20 V Panel Express – User’ Manual
Data Transfer Rate for System Configuration with:
ETXexpress-PM Module ETXexpress-CD Module

Product Description
StockCheck.com
Power Button
2
1
3
Fig. 5: Power button and LED indicators
The power button “PWR ON“ is located on the bottom side (rear) of the system.
Press this button in order to turn the system on or off. The power button behavior
can be set in the BIOS Setup.
Even the system is turned off via the ATX power button
there is still a standby-voltage of 5 V on the ETX express
baseboard.
LED Control Indicators
The system is not completely disconnected from the main
power source by turning it off via the ATX power button.
The unit is only completely disconnected from the main
power source, when the power cord is disconnected either
from the power source or the unit.
Therefore, the power cord and its connectors must always
remain easily accessible.
1 Power button
2 HDD LED
3 Power LED
The V panel Express is equipped with two LED indicators (bottom, rear side).
Power LED
HDD LED Lights up red for hard disk activity.
V Panel Express – User’s Manual 21
Lights up green when the system is powered on via the power
button.
Lights up red when the system is in standby (depends on the
behavior of the power button (BIOS Setup setting).

Product Description
StockCheck.com
Power LED Error codes
This function display four important fail conditions:
• Voltage Error
• Temperature Error
• Fan Error
• Battery Error
All these errors will be notified by the status led and by a beeper. The following
illustration shows the blink/beep for different conditions:
OK
Voltage Err or
Temper ature Er r or
Fan Error
Battery Error
If more than one fail condition occurs simultaneously, only the highest priority
error code will be shown.
The priority order is:
1. most Voltage Error
2. less Temperature Error
3. less Fan Error
4. at least Battery Error
E.g. is there a temperature error and a fan error, only the temperature error will be
displayed.
Error Good: Error
Voltage Error
Temperature Error …<-10°C -10°C… +79°C >79°C
Battery Error 0..<2.5V 2.5V … 3.5V >3.5V
22 V Panel Express – User’ Manual
12V 0..<11,4V 11,4V..12.6V >12.6V..
5V 0..<4.7V 4.7V..5.2V >5.2V
3.3V 0..<3.1V 3.1V..3.5V >3.5V
1 …<900
1/min
2 …<900
1/min
900 1/min...20000
1/min
900 1/min...20000
1/min
>20000 1/min Fan Error
>20000 1/min

Product Description
StockCheck.com
CompactFlash™ Slot
The V Panel Express is equipped with a bottom side accessible CompactFlash™
slot. (The second CF slot is not equipped; refer to Fig. 4, pos. 14). The CF slot
will accept only CF cards type I.
Removable HDD Drive Cage
The V panel Express is equipped with a removable drive cage for a 2.5” SATA
HDD. The drive cage is secured to the system with two knurled screws.
It is allowed to remove/replace the hard disk while the system is powered-up.
The system must be powered down before the
Compact Flash™ card can be installed or removed.
In order to prevent the loss of data do not remove the hard
disk during HDD read or write activities.
System operation is allowed only with closed HDD drive
cage and secured by the knurled screws.
1
2
3
Fig. 6: Bott om side of V Panel Express (shown with opened removable drive cage)
V Panel Express – User’s Manual 23

Product Description
StockCheck.com
1 2.5” SATA hard disk
2 Removable drive cage
3 Knurled screws
24 V Panel Express – User’ Manual

Product Description
StockCheck.com
Left Side (E xpansion Card Access Side)
At this side is situated the expansion card access door secured with a knurled
screw. When opening this access door you have access to the free card slots of
the raiser card installed onto the ETX baseboard. Install the expansion cards as
described in the “Installing/Removing the expansion cards”chapter.
3
1
2
4 Heat sink with V ESA 75/100
mounting holes
5 Expansion card access door
with knurled screw
6 Front panel with display
5
4
Fig. 7: Left s ide of V Panel Express
7 Exhaust openings
8 Interface side (bottom)
V Panel Express – User’s Manual 25
When powering on the V Panel Express, make sure that the
air intake and exhaust openings are not obstructed.

Product Description
StockCheck.com
Right Side
1
2
1 Front panel with display
2 Heat sink with V ESA 75/100
mounting holes
3 Exhaust openings
3
Fig. 8: Right side of V Panel Express
26 V Panel Express – User’ Manual
When powering on the V Panel Express, make sure that the
air intake and exhaust openings are not obstructed.

Product Description
StockCheck.com
Top S i de
1
2
3
Fig.9: Left s ide of V Panel Express
1 Heat sink with VESA 75/100
mounting holes
2 Screws for securing the PC unit to
the display unit
3 Exhaust openings
When powering on the V Panel Express, make sure that the
air intake and exhaust openings are not obstructed.
3
V Panel Express – User’s Manual 27

Product Description
StockCheck.com
Integra te d ETXexpress® Module
Depending on the ordered system configuration, your V Panel Express
accommodates a baseboard with either an ETXexpress-PM or an
ETXexpress-CD module.
Refer to the information and technical data in the user m anual of
the installed baseboard and ETXexpress Module.
The user’s manual of the installed board can be downloaded from
our web page www.kontron.com
installed board.
Riser Ca r d
The V Panel Express accommodates a riser card with two 32 bit PCI slots. You
can expand your system with PCI ex tension cards as half size length.
To expand your system with additional cards, please observe the
power consumption specification specified in the “Power
Specifications” chapter and that every additional card does not
exceed 25 W power consumption.
. Search for the name of the
28 V Panel Express – User’ Manual

Starting Up
StockCheck.com
Starting Up
The DC power socket is located on the bottom side (rear) of the system.
DC-Connection
Fig. 10: DC-connector ( without Phoenix plug
For the DC-connection prepare the connecting wires with the supplied Phoenix
plug. Pay attention to the right polarity of the wires (refer to
The second end of each wire will be p repared as required for the connection to
the DC-power supply.
The voltage of the power source must correspond to the
voltage value on the type label.
The length of the DC connecting wires may not exceed 3m. Strip
and twist the connecting wire-ends but do not tin it the with solder.
Fig. 10a: DC-Terminal (Phoenix plug
terminal)
terminal AWG 28-16)
Fig. 10 and 10a).
V Panel Express – User’s Manual 29

Accessing Internal Components
StockCheck.com
Accessing Internal Components
This section contains important information that you m ust read before accessing
the internal components. You must follow these procedures properly when
installing, removing or handling any board.
Please consider following instruction when you install (or remove) expansion
cards.
The installation and removal of ex pansion cards have to be
carried-out only by qualified specialist personnel in accordance
with the description in this manual.
Before removing the cover to gain access to the internal
components, the system must be powered-down and the power
cord has to be disconnected from the power source.
To expand your system with additional cards, please observe
the power consumption specification specified in the “Power
Specifications” chapter and that each additional card does not
exceed 25 W power consumption.
Please observe the safety instruction for handling assemblies
with static sensitive device.
Failure to take heed of this warning instruction can result in
damage to the device.
Please consult the documentation provided by the manufacturer
of the expansion card for instructions before attem pting to
install/remove an expansion card into/from the V Panel Express.
30 V Panel Express – User’ Manual

Accessing I nternal Components
StockCheck.com
Installi ng/ Removing the Expansion Car ds
The expansion cards for the performance extension of your computer can be
installed into the free slots of the riser card. Please consider following instruction
when you install (or remove) expansion cards.
To install (or remove) an expansion card, follow these steps:
1. Turn off your system and disconnect the power cord from the power source.
2. The V Panel Express should lie on a flat, clean surface with the front panel
downwards (Make sure that the display surface is protected against scratching
and damage).
3. Loosen the knurled screw on the left side of the unit that secures the access
door refer to
4. To remove/install an expansion card, you have to remove the corresponding
expansion card/slot bracket. Loosen the corresponding fastening screw on the
internal side, which secures the slot bracket and remove it. Retain the screws
for later use
5. Insert/remove the expansion card into/from the slot of the riser card.
6. If you have removed an expansion card, re-insert a slot bracket.
7. Secure the bracket (slot bracket or card bracket) to the chassis with the
fastening screw.
8. Close the access door and secure it with the knurled screw.
Fig. 7, pos 2) and open the expansion card access door.
1
2
5
Fig. 11: V Panel Express with opened expansion cards access door)
V Panel Express – User’s Manual 31
3
4

Accessing Internal Components
StockCheck.com
1 Screws to secure the expansion
cars/slot brac k e ts
2 Front panel (detail)
3 Free PCI slots (32bit@32 MHz)
4 Expansion cards access door with
knurled screw
5 Changeable Batterie
32 V Panel Express – User’ Manual

Maintenance and Prevention
StockCheck.com
Maintenance and Prevention
Kontron Embedded Computers systems require m inimal maintenance and care to
keep them operating correctly.
Occasionally wipe the system with a soft dry cloth.
You should only remove persistent dirt by use of a soft, slightly damp cloth
(use only a mild detergent).
Do not use abrasives, abrasion sponges, steel wool, metal threads,
or solvent like alcohol, acetone, or gasoline to clean the display’s
protection pane or the touch screen surface.
Repla cing the Lithium Battery
The baseboard is equipped with a lithium battery. To replace this battery, please
proceed as follows:
1. Open the unit as described in the “Installing/Removing the Expansion Cards”
chapter (steps 1-3).
2. If your system is equipped with ex pansion cards, please remove them first as
described in the “Installing/Removing the Expansion Cards” chapter
(steps 5-6).
3. Remove the battery by pressing outwards the ejector spring.
4. Insert the new battery in to th e socket.
5. Make sure that you insert the battery correctly. The plus pole must be on top!
6. Reinstall the removed expansion cards and reconnect the removed data cable.
7. Close the Unit as described in chapter “Installing/Removing the Expansion
Cards” (step 8).
The lithium battery must be replaced with an identical battery or a battery type
recommended by Kontron Embedded Computers (Lithium battery 3.0 V for RTC,
type: CR2032).
Do not dispose of lithium batteries in domestic waste. Dispose of
the battery according to the local regulations dealing with the
disposal of these special materials (e.g. to the collecting points for
the disposal of batteries).
V Panel Express – User’s Manual 33

Maintenance and Prevention
StockCheck.com
Warning
There is a danger of explosion if the wrong type of battery is used
for replacement. Replace only with the same or equivalent type of
battery as recommended by the manufacturer. Dispose of used
batteries according to the manufacturers instructions.
34 V Panel Express – User’ Manual

Installation Instructions
StockCheck.com
Installation Instructions
Expansion card installation should be performed before installing
the V Panel Express system into an industrial cabinet or into a
control panel. Refer to the chapter “Accessing Internal
Components”.
Leave sufficient space at the interface side for connecting the
peripheral devices.
Important Instructions!
If you mount the V Panel Express into an industrial cabinet, it is
advisable to use two people for the mounting, because the system
weighs approx. 11 kg (approx. 24,25 lbs).
Ensure there is sufficient air circulation around the device when
installing the V Panel Express. The openings for air intake and
exhaust on the device m u st not be obstructed.
Leave at least 5 cm (approx. 2”.) of free space around the PC unit
to prevent the device from possibly overheating!
The voltage feeds must not be overloaded. Adjust the cabling and
the external overcharge protection to correspond with the
electrical data indicated on the type label.
The type label is located on the rear right hand side of the
system.
If you install the V panel into an instrument panel or other cabinet use the twelve
threaded M4 metric studs on the rear side of the front plate.
For the panel assembly, cut a window and twelve pre-drill holes according
Mechanical Drawings for V Panel Express 121/150/170 on the web page
www.kontron.com
nuts. The contact surface with the rubber seal must be clean and flush.
V Panel Express – User’s Manual 35
. The system must be attached firmly with twelve M4 metric

Installation Instructions
StockCheck.com
Operating System and Hardware Component
Drivers
The V-Panel Express can optionally be supplied with or without a pre- installed
operating system.
If you have ordered your V-Panel Express with a pre- installed operating system,
all drivers are installed, corresponding to the ordered computer configuration
(optional hardware components). Your computer is fully functional, when you
switch it on fo r th e firs t time.
If you have ordered your V-Panel Express without pre- installed operating system,
you have to install the operating system and the corresponding drivers for the
ordered computer configuration (optional hardware components).
The needed drivers can be downloaded from our web page:
www.kontron.com. Search for the product name.
Consider the manufacturer specifications of the operating system
and the integrated hardware components.
36 V Panel Express – User’ Manual
To expand your system with additional cards, please observe
the power consumption specification specified in the “Power
Specifications” chapter and that every additional card does not
exceed 25 W power consumption.

Main Specifications
StockCheck.com
Main Specifi cations
V Panel Express 121 150 170
Display (Size) 12.1” 15.0” 17.0”
Resolution 800x600 1024 x 768 1280x1024
Brightness 400 cd/m
Touchscreen Resistive analog Resistive analog Resistive analog
V Panel Express
Dimensions (HxWxD)
Processor Up to Intel® Core™ Duo T2500
Lithium Battery Type: CR2032; 3.0 V; 0.22Ah;
External Interfaces
(accessible at the front
side)
External Interfaces
(accessible from the
bottom side)
Free Expansion Slots 2x PCI 32 bit @ 33MHz (half size)
Removable HDD
(external accessible)
Drive Bay
(external accessible)
Operating Elements
(on back side)
LED Indicators
(on the front panel)
DC Power Plug On the bottom side
VESA 75/100
compliant
Operating System Please refer to the actually data sheet on our web
312x380x163 mm 354x450x163 mm 339x461x168 mm
1x USB 2.0
1x DVI-I (single Link) or 1x external DV I to VGA Adapter
4x USB (2.0/1.0)
1x LAN2 10/100/1000 Mbps
1x LAN1 (10/100Mbps for
or
1x LAN1 (10/100/1000 Mbps for ETX express-PM)
2x serial Port (RS232)
1x SATA I (150Mbps) for config. with ETXexpress-PM)
or
1x SATA II (300Mbps) for config. with
1x Compact Flash™ (on-board), for CF card type I
Power button / Reset button
Power LED
HDD LED
Rear side
page: www.kontron.com
Search for the product name.
2
350 cd/m2 300 cd/m2
ETXexpress-CD)
ETXexpress-CD)
V Panel Express – User’s Manual 37

Main Specifications
StockCheck.com
Power Specifications
Power Specificati on
(max. power val ue
for additional
customized
applications)
Total power of all additional
customized applications
Power consum pt ion per slot ( PCI) max . : 25W
Power consumption at +3.3 VDC
+5 VDC and +12 VDC (combin ed)
max . : 125W
max.: 75W
Electrical Specifications
System Type Input voltage Input current
V Panel Express 121 24 VDC PSU +/- 20% A: max. 5,4A
V Panel Express 150 24 VDC PSU +/- 20% A: max. 5,4A
V Panel Express 170 24 VDC PSU+/- 20% A: max. 5,4A
Mechanical Specifications
Weight
(without packaging)
Housing Zinc-coated steel, Aluminum front bezel
11 kg (24,25 lbs.) max
38 V Panel Express – User’ Manual

Main Specifications
StockCheck.com
Environmental Specifications
Thermal Management Fan less
Operating Temperature /
relative Humidity
Storage / Transit Temp. /
relative Humidity
Operating Altitude 3000 m (10,000 ft)
Storage / Transit Altitude 4.500 m (15.000 ft)
Operating Shock 15 G, 11 ms duration, half sine
Storage / Transit Shock 30 G, 11 ms duration, half sine
Operating Vibration 10 – 500 Hz, 1.0 G
Storage / Transit Vibration 10 – 500 Hz, 2.0 G
0 … +40°C / at 90 % r.H. non condensing
0 … +45°C / at 70 % r.H. non condensing
0 … +40°C / at 90 % r.H. non condensing
0 … +45°C (max) / at 70 % r.H. non condensing
V Panel Express – User’s Manual 39

Main Specifications
StockCheck.com
CE Directives and Standards
CE Directives
Low Voltage Directive
(Electrical Sa fe ty )
EMC Directive 2006/95/EC + 2004/108/EC
CE Marking 93/68/EEC
Electrical Safety
EUROPE
U.S.A. to meet UL 60950-1, First Edition
EMC
EUROPE Generic emission standard for industrial
U.S.A. FCC 47 CFR Part 15, Class A
73/23/EEC modified by 93/68/EEC
Standards
EN 60950-1
Standards
environments (Emission):
EN 61000-6-4
Generic standards - Immunity for industrial
environments (Immunity):
EN 61000-6-2
40 V Panel Express – User’ Manual

Technical Appendix - Interfaces
StockCheck.com
Technical Appendix - Interfaces
The following tables contain the plug assignments for the external connections of
the V Panel Express.
Low-active signals are indicated by a minus sign.
Serial Port (COM1, COM2 )
Pin Signal Name 9-pin D-SUB Plug (male)
1 DCD (Data Carrier Detect)
2 RXD (Receive Data)
3 TXD (Transmit Data)
4 DTR (Data Terminal Ready)
5 GND (Signal Ground)
6 DSR (Data Set Ready)
7 RTS (Request to Send)
8 CTS (Clear to Send)
9 RI (Ring Indicator)
V Panel Express – User’s Manual 41

Technical Appendix - Interfaces
StockCheck.com
USB Port
Pin Signal Name 4-pin USB Socket
Type A Version 2.0/1.1
1 VCC
2 Data3 Data+
4 GND
42 V Panel Express – User’ Manual

Technical Appendix - Interfaces
StockCheck.com
DVI-I Conne ctor (Single Li nk)
Pin Signal Name Description DVI-I - Connector
(female)
1 TMDS2– Differential TMDS Data 2–
2 TMDS2– Differential TMDS Data 2+
3 GND TMDS Shield
4–5 NC
6 DVI_SCL DDC EDID data clock
7 DVI_SDA DDC EDID data
8 DVI_VS Analog VSYNC
9 TMDS1– Differential TMDS Data 1–
10 TMDS1+ Differential TMDS Data 1+
11 GND TMDS Shield
12–13 NC
14 DVI_5V 5V / 100mA Power Supply
15 GND Ground
16 DISPDET Hot Plug Detection
17 TMDS0– Differential TMDS Data 0–
18 TMDS0+ Differential TMDS Data 0+
19 GND TMDS Shield
20–21 NC
22 GND TMDS Shield
23 TMDSSCL– Differential TMDS Clock–
24 TMDSSCL+ Differential TMDS Clock +
C1 DVI_R Analog red
C2 DVI_G Analog green
C3 DVI_B Analog blue
C4 DVI_HS Analog HSYNC
C5 Analog GND Analog Ground
V Panel Express – User’s Manual 43

Technical Support
StockCheck.com
Technical Support
For technical support, please contact our Technical Support department.
German headquarter Hotline:
Tel: +49 (0)9461 950-104
Fax: +49 (0)9461 950-200
E-mail: support@kontron.com
Make sure you have the following information on hand when you call:
• the unit part id number (P/No #),
• and the serial number (S/No #) of the unit (provide the serial
number found on the type label, placed on the rear right hand side of the
system).
Be ready to explain the nature of your problem to the service technician.
If you have questions about Kontron Embedded Computers or our products and
services, you may reach us at the aforementioned numbers, or at:
www.kontron.com
Kontron Embedded Computers GmbH
Oskar-von- M ille r-Str. 1
85386 Eching
Germany
or by writing to:
44 V Panel Express – User’ Manual

Technical Support
StockCheck.com
Returning Defective Material
Before returning any material, please:
1. Contact our Service and request an
RMA number (Return Material Authorization) by :
Fax: +49 (0)9461 950-200
E-mail: service@kontron.com
2. Make sure that you receive an RMA number from Kontron Embedded
Computers-Service before returning any material. Clearly write or mark this
number on the outside of the package you are returning.
3. Describe the device failure behavior.
4. When returning goods, include the name and telephone number of a person
whom w e can contact for further explanations if necessary. Where applicable,
always include all duty papers and invoice(s) associated with the item(s) in
question.
5. When returning a unit.
• Ensure that the unit is properly packed in the original box.
• Include a copy of the RMA form.
V Panel Express – User’s Manual 45
 Loading...