

Page 1
KISS Stor Slim Quick Installation Guide
Package Contents
z KISS Stor Slim RAID box.
z Two disk drive carriers.
z KISS Stor Slim Quick Installation Guide.
z KISS Stor Slim user kit CD. (User’s Manual and GUI software)
z RS-232 cable with bracket and serial cable for COM port.
z Disk drive mounting screws.
z Two keys for drive carriers. (identical)
Know your KISS Stor Slim
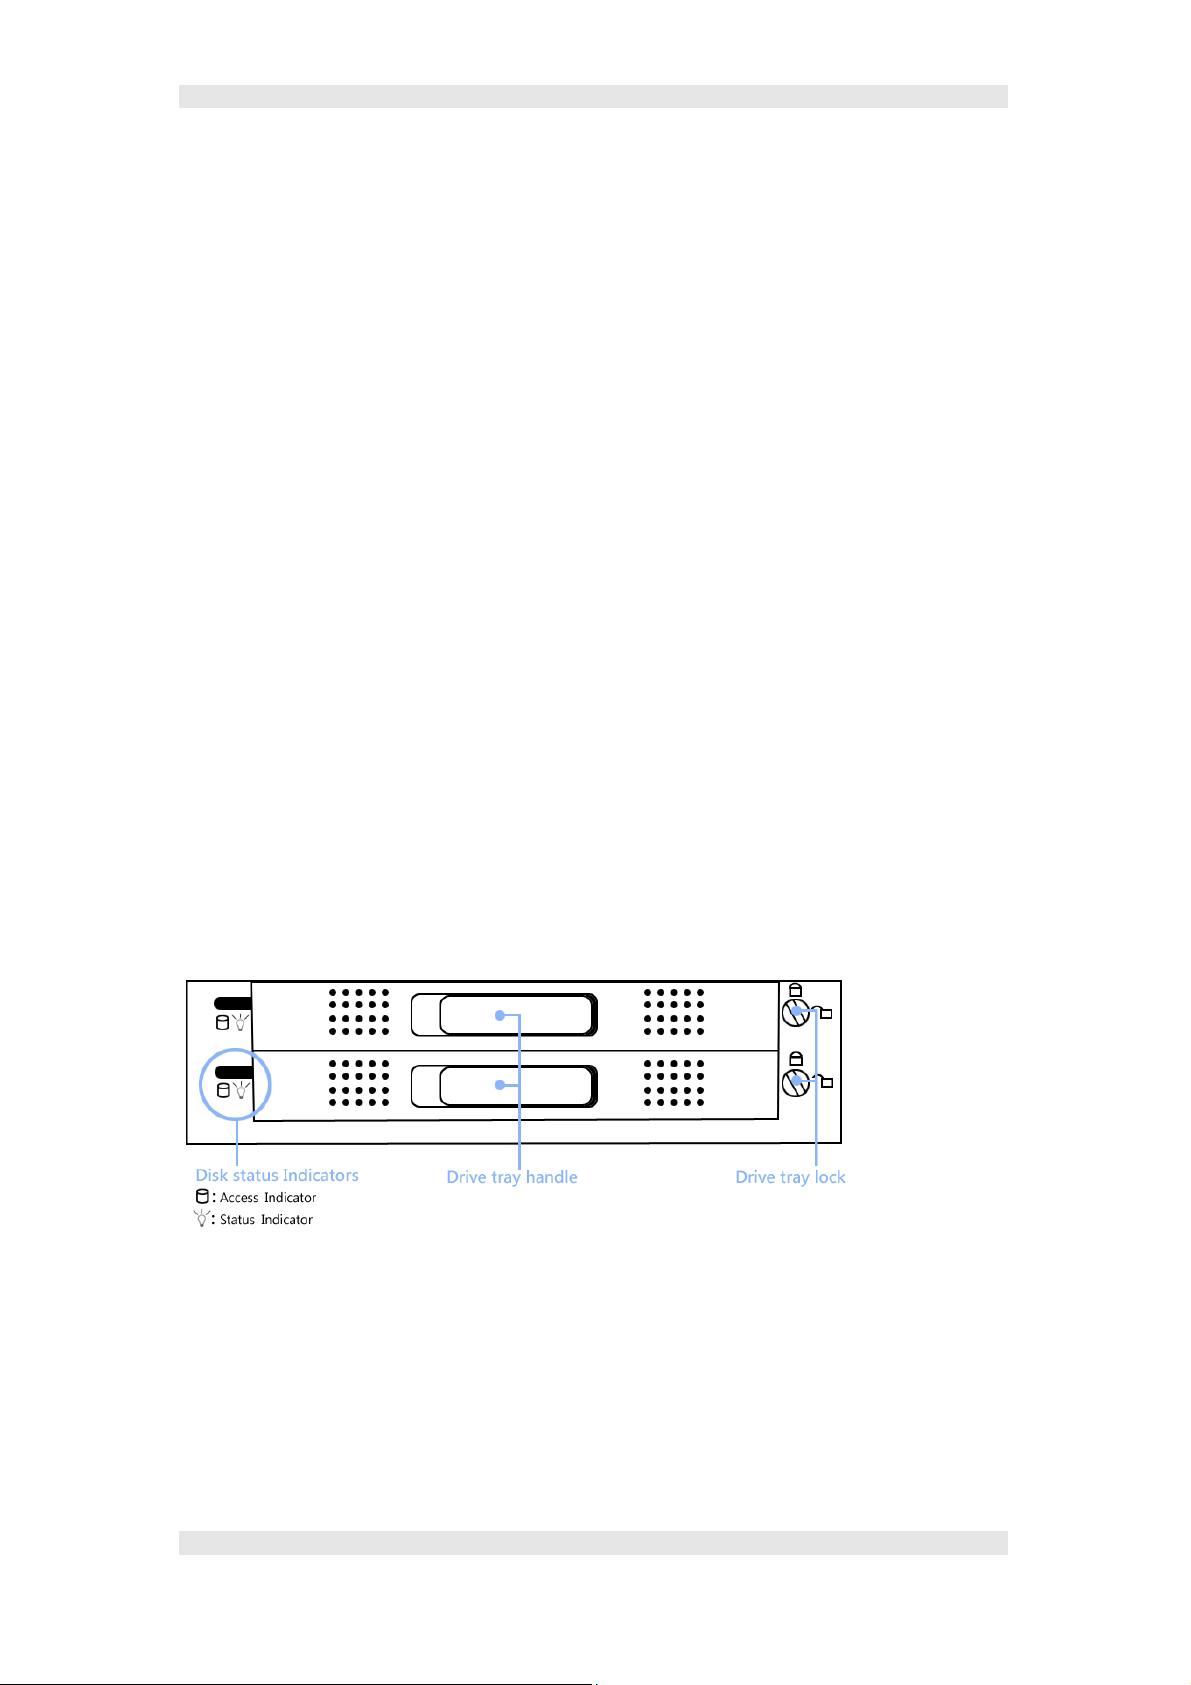
z KISS Stor Slim Front view:
Access LED indicator for indicating that hard disk is been accessing.
Status LED indicator for indicating that disk current status.
KISS Stor Slim 1
Page 2
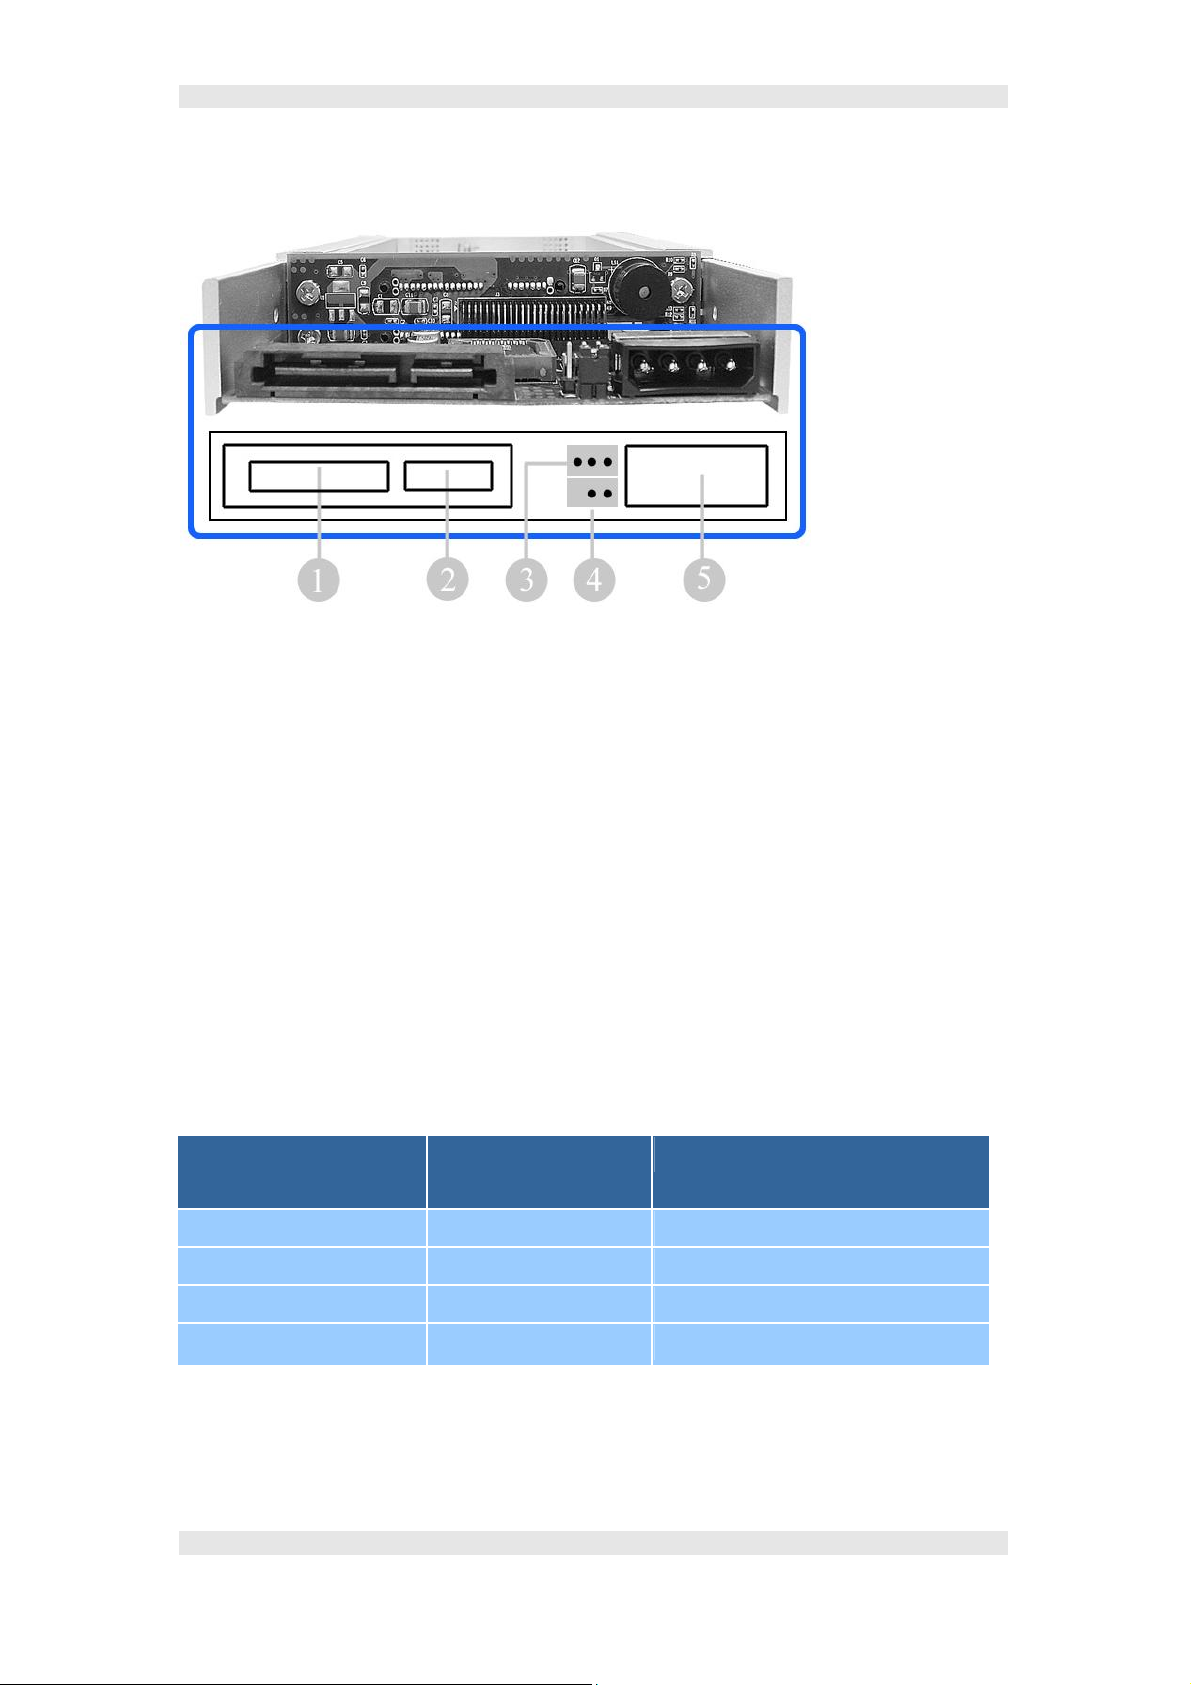
z KISS Stor Slim Rear view:
1. SATA DC power input connector
2. SATA host connector
3. RS232 connector (J1 0)
4. Reserved for feature/function expand (J9 default is closed)
5. Standard AT/ATX DC power input connector
z Status of all LED indicators KISS Stor Slim
The table lists all matches of 2 LED indicators for indicating status of RAID
box.
Status indicator
Red/Green
Green Off Disk is installed, no access
Green On/flash Disk is being accessing
Access indicator
Yellow
RAID status
Red Off No disk installed or disk failure
Flash (Red/Green) On/flash Disk is rebuilding
KISS Stor Slim 2
Page 3

T
Setup your KISS Stor Slim
Caution
urn off and disconnect all electrical power from the system
before beginning installation.
1. Load hard drives to each drive carriers, and secure the hard drives by
screwing.
2. Power down your host computer and mount the RAID box in the host.
3. Connect the SATA or IDE cable and D C power cable to RAID box from host
computer.
4. Connect the RS-232 cable to RAID box RS-232 port and COM port of the host.
(Option for upgrading firmware or GUI remote monitor)
Note
There is a triangular symbol “▲” on both PCB
connector(J10) and RS-232 cable connector, please
make sure that you connect in the right direction (both
triangle symbols match each other).
KISS Stor Slim 3
Page 4

Start to use your KISS Stor SATA
Application 1: Two new disk drives.
1. Install and lock all drive carriers and they are ready for use.
2. Power on the host computer.
3. After system boot up, the RAID box will be recognized as Accusys KISS
Stor Slim by host system. And system treats it as a single disk.
4 Partition and format the RAID box before it can be used.
Note
If you have installed non-identical hard disk drives,
your computer will recognize RAID box
disk with a capacity equal to the smaller hard disk drive
installed in the RAID box.
as a single hard
Application 2: Installing one disk drive with data and one new disk
drive.
1. The new disk drives must have the same capacity or larger capacity than
the drive with data.
2. Lock the disk with data at the top drive carrier and leave the new disks
unlocked at the bottom drive carriers. This identifies the disk with data as
the source drive. (The host computer must in power off state.)
3. Power on the host computer.
4. Lock the bottom drive.
5. The RAID box will immediately begin mirroring the data from the source
drive to the new disk drive in bottom drive carrier. Any old data on the
new disk drive will be lost, and is overwritten with the mirror image of the
source drive.
Contact Kontron Embedded Computers GmbH
• Support: support@kontron.com
KISS Stor Slim 4
 Loading...