

Page 1

CMP-WNUSB31
WIRELESS LAN
USB 150MBPS
Page 2
2
ENGLISH
Installation for Windows XP
Please follow the following instructions to install your new wireless network card:
1. Insert the USB wireless network card into an empty USB 2.0 port of your computer
when the computer is switched on.
2. Insert the device driver CD-ROM into the CD/DVD ROM drive of your computer,
and execute ‘Setup.exe’. Please read the end user license agreement and click ‘I
accept the terms of the license agreement’ then click the ‘Next’ button, to accept
the license agreement. It is recommend to install the driver and utility if the network
card is used for the first time.
3. Now you can choose the desired configuration tool to configure the network card.
It’s recommended to select the ‘Ralink Configuration Tool’, which provides full
access to all functions of this wireless network card. If you prefer to use the wireless
configuration tool provided by Windows XP or Vista, please select ‘Microsoft Zero
Configuration Tool’ and click ‘Next’.
4. Now you’ll see the following message: please click ‘Install’ to start utility installation.
If you see the ‘Found New Hardware’ message again, please ignore it and wait.
Click “install” to continue the installation process.
5. Please wait while the install procedure is in progess. When you see the message:
“please click ‘Finish’ to complete the driver installation process” please click finish.
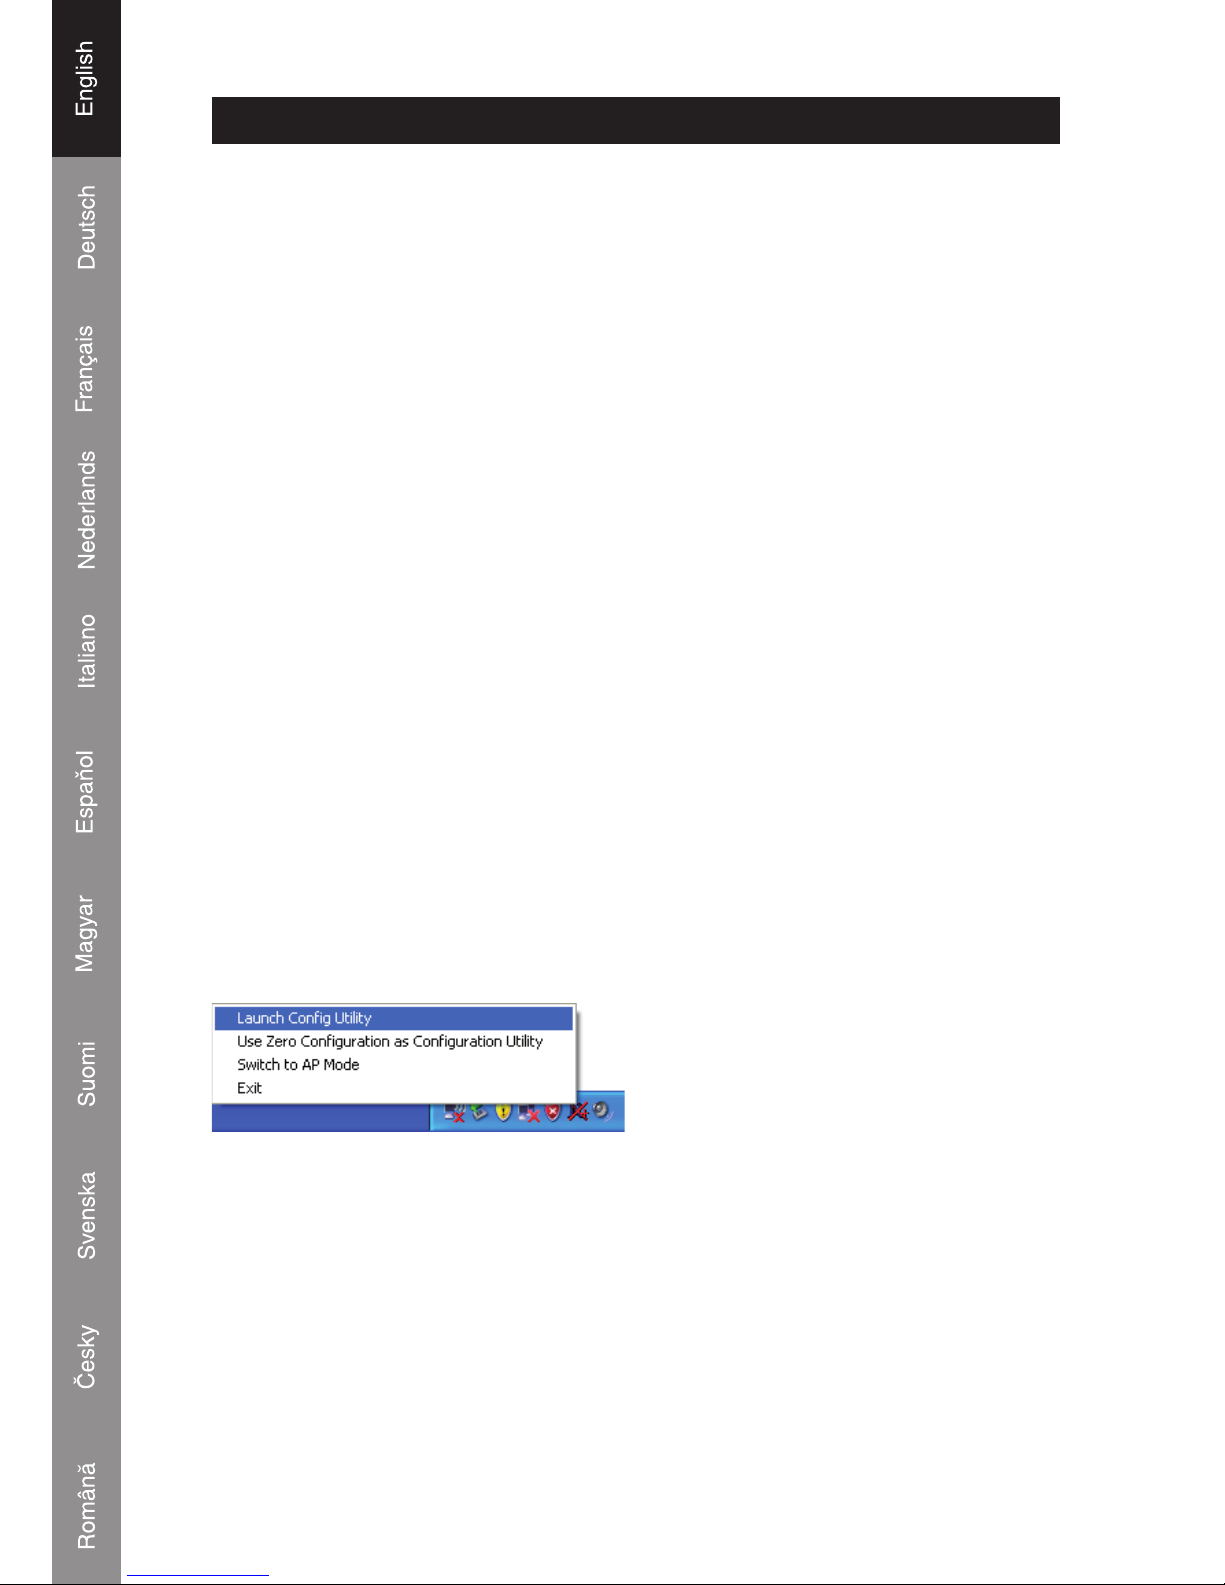
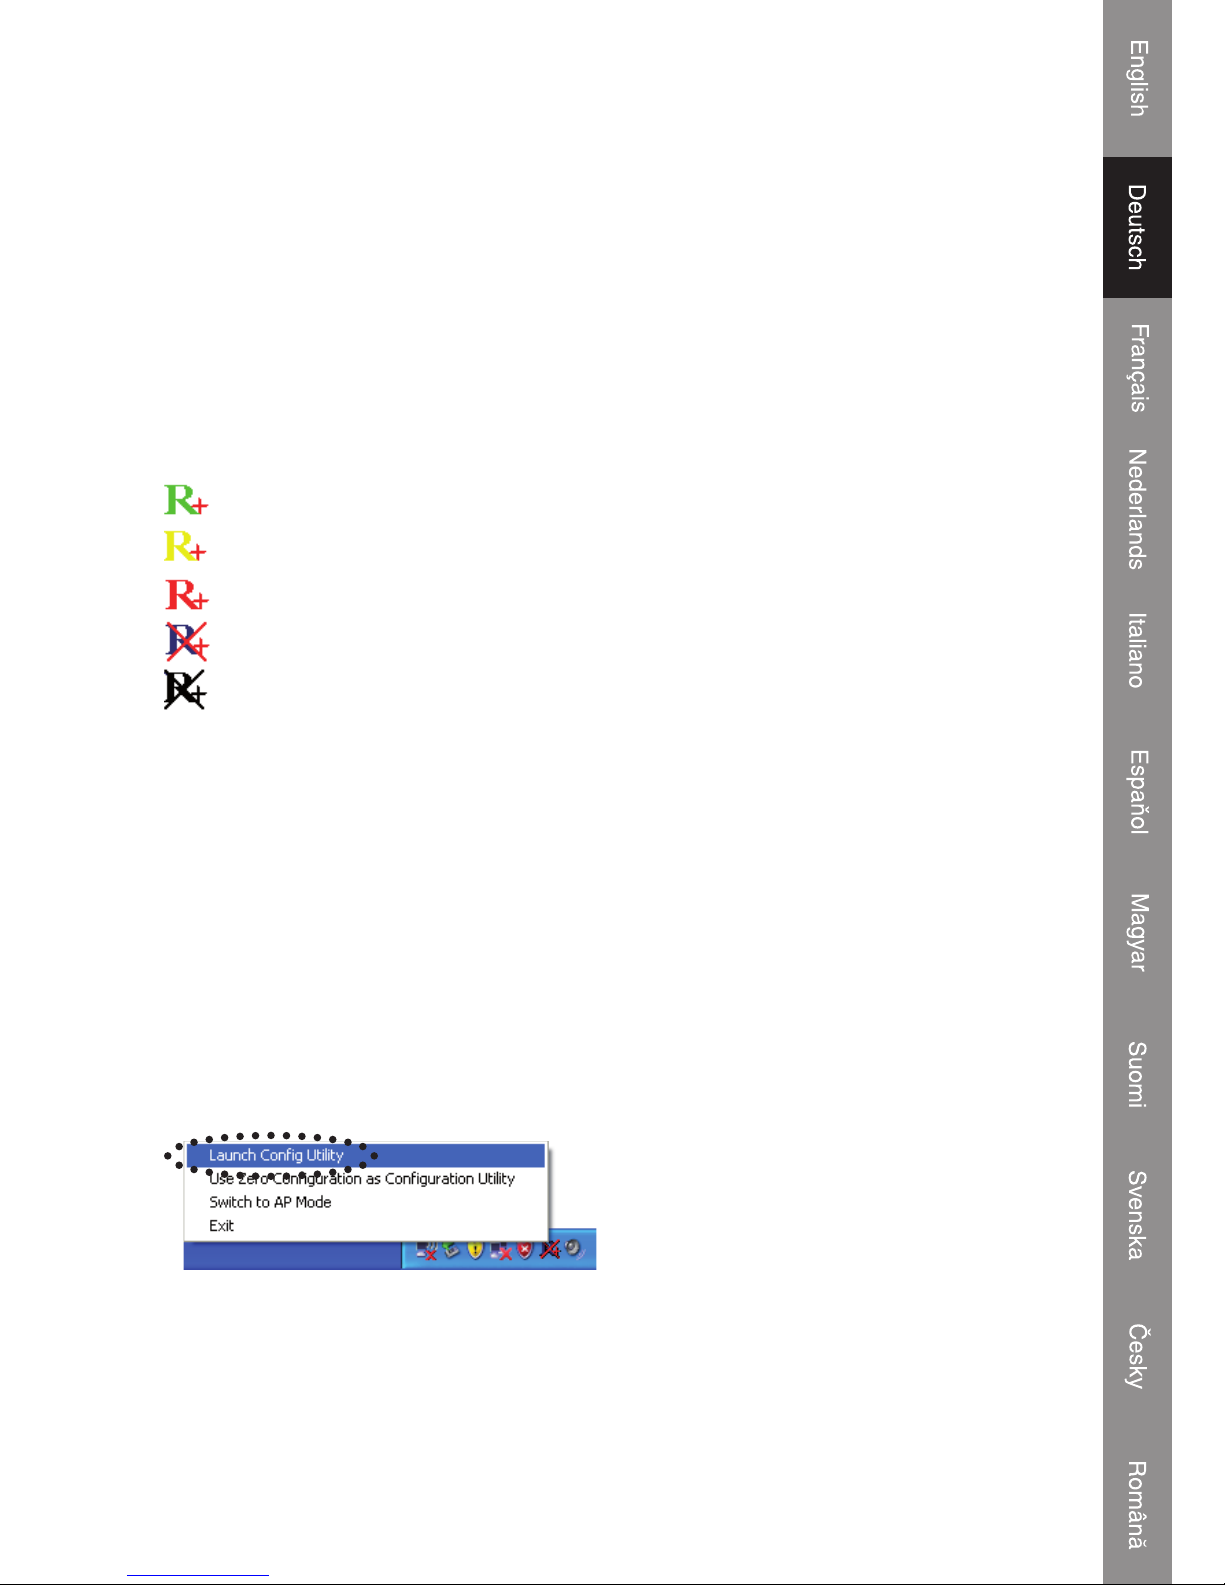
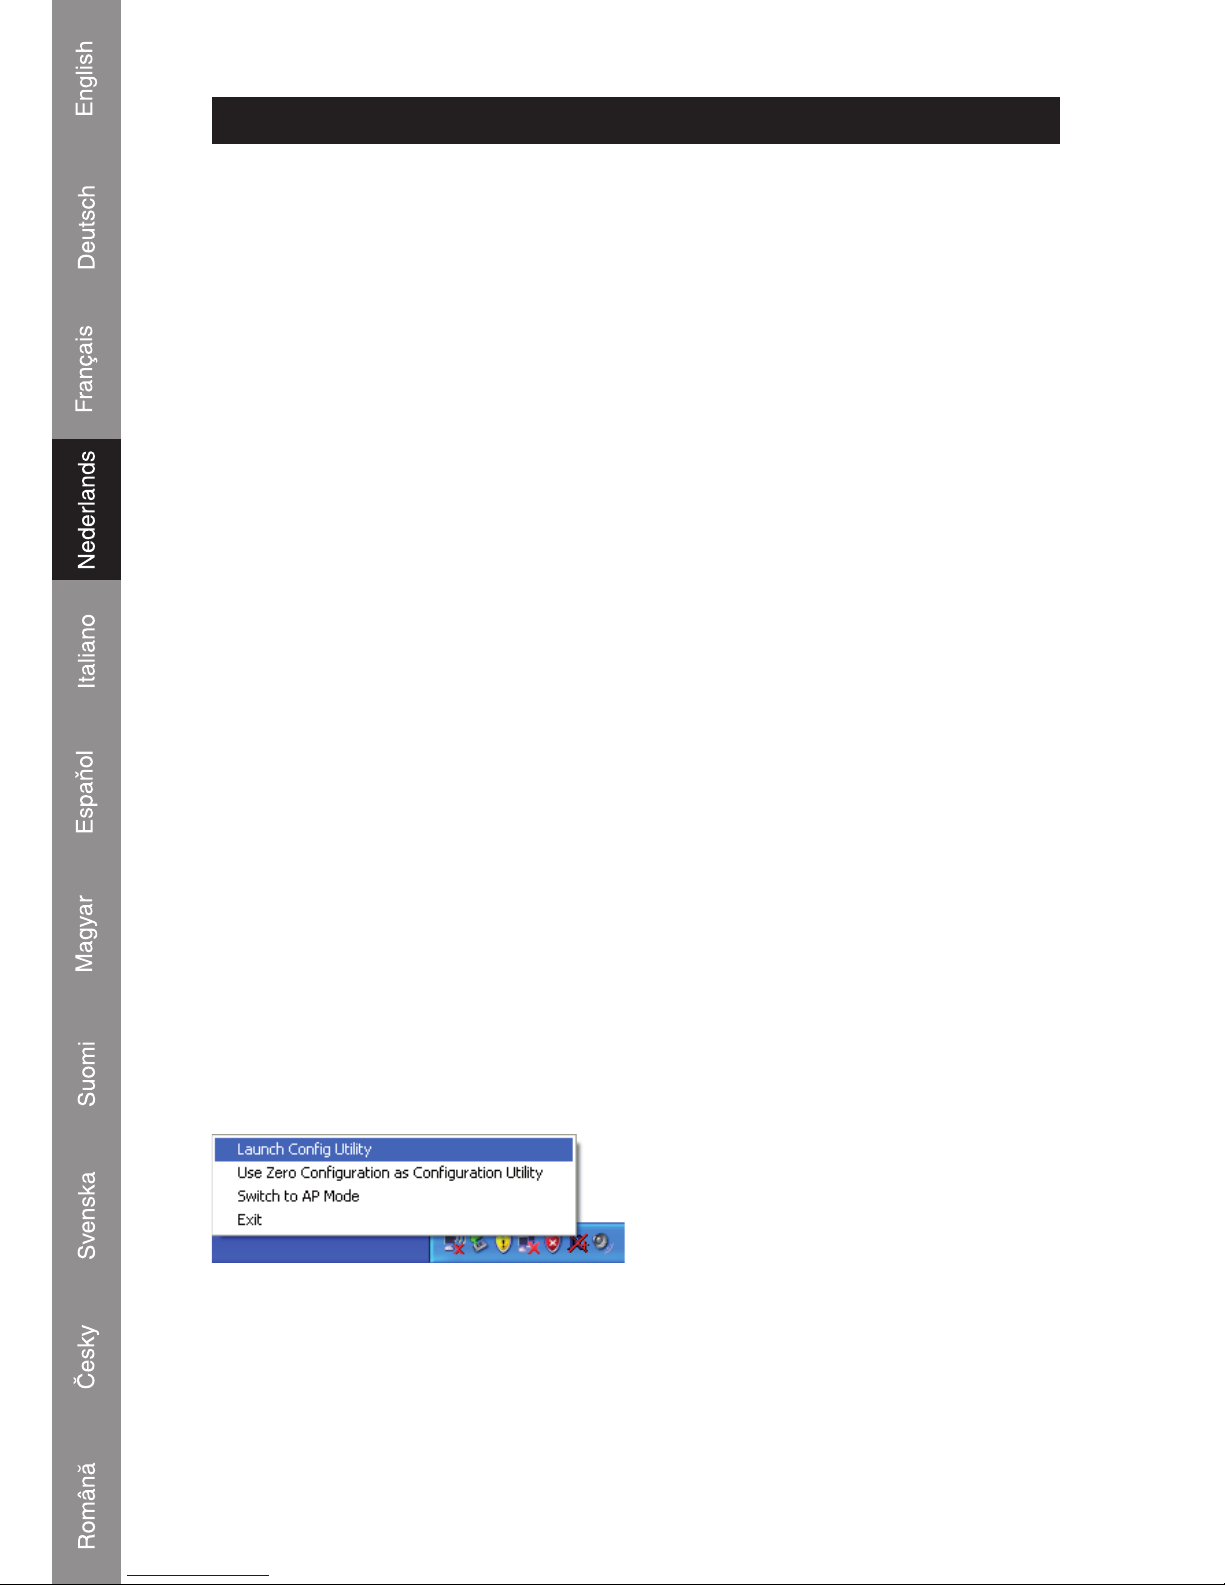
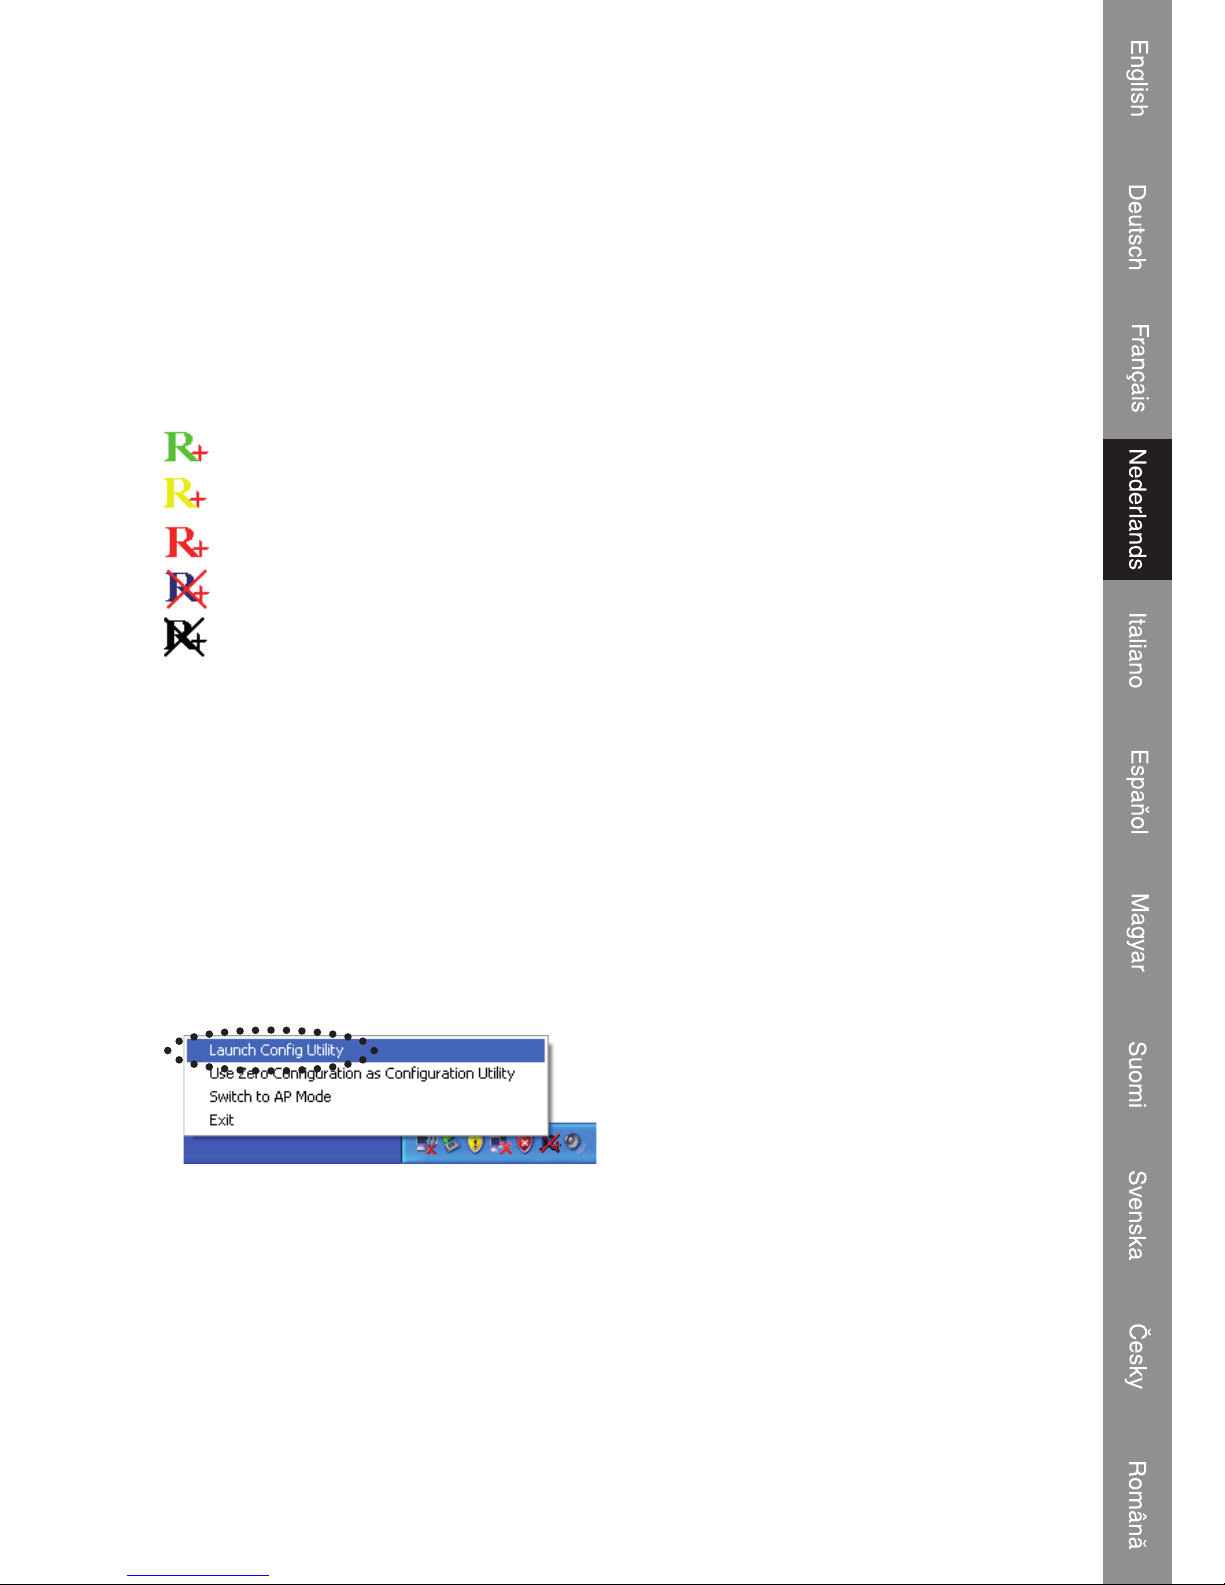
6. After the installation has been completed, the wireless configuration utility will be
shown on the desktop of your computer automatically. You will also see an icon at
the lower-right corner in your windows system tray. When you want to configure your
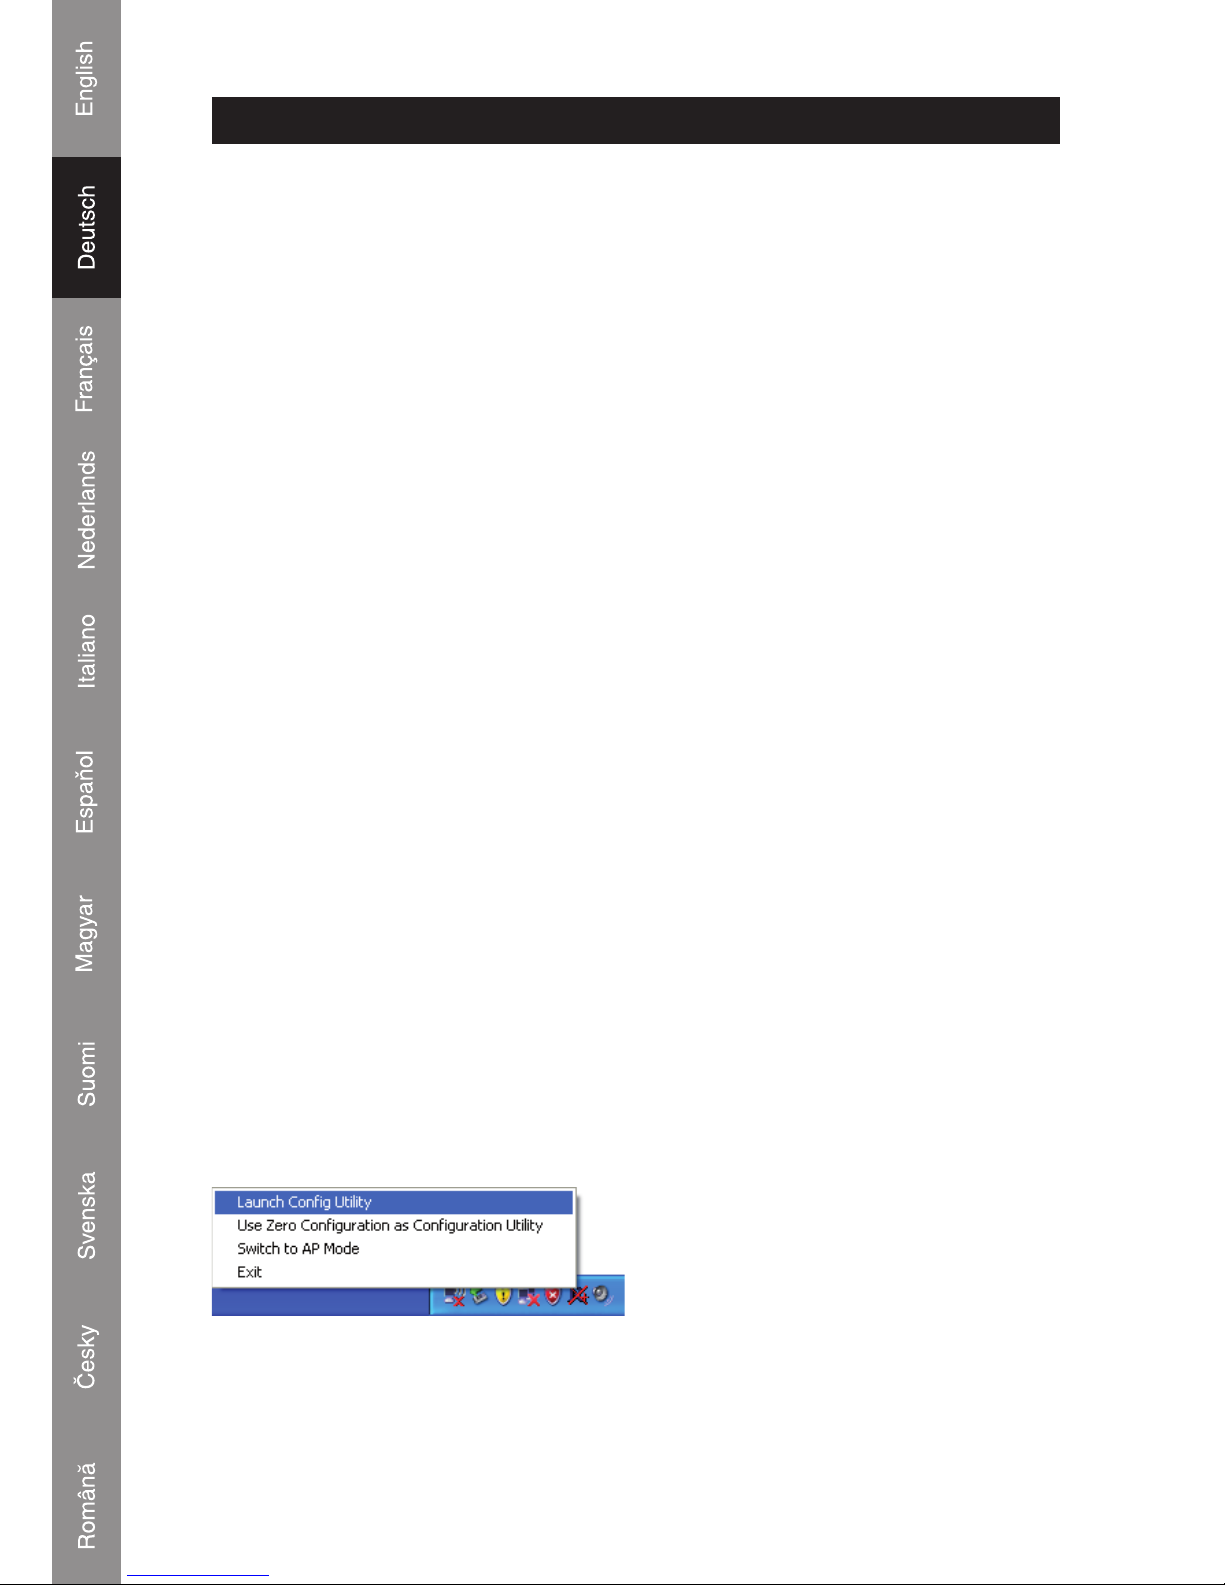
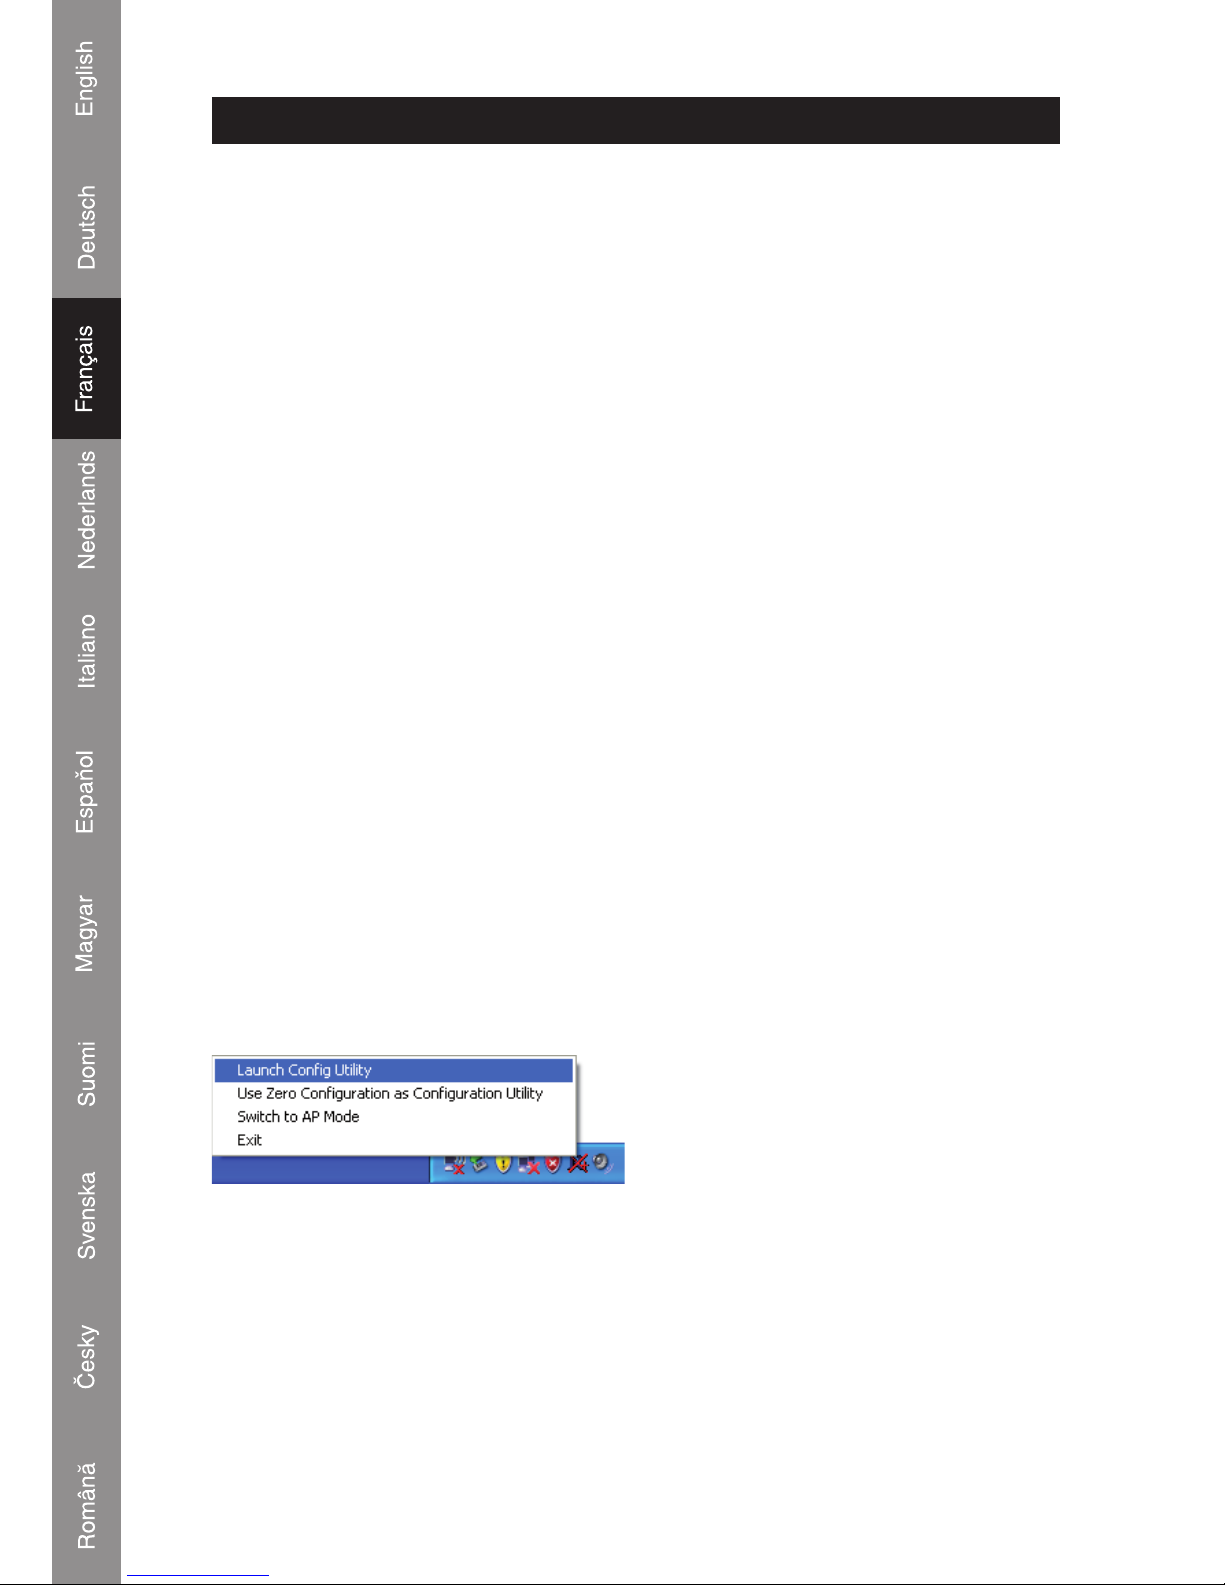
wireless connection, please right click on this icon, and a popup menu will appear.
Click ‘Launch Config Utility’ to start the configuration program.
Connect to Wireless Access Point
After the driver has been correctly installed, it will try to connect to a unencrypted
wireless access point automatically. If you want to connect to a specific wireless access
point, or the access point of your choice uses encryption, you have to configure the
wireless network card.
NOTE: In Vista, the network card will not connect to any unencrypted wireless access
point automatically. --> In Vista, the network card will not try to connect
automatically.
Page 3
3
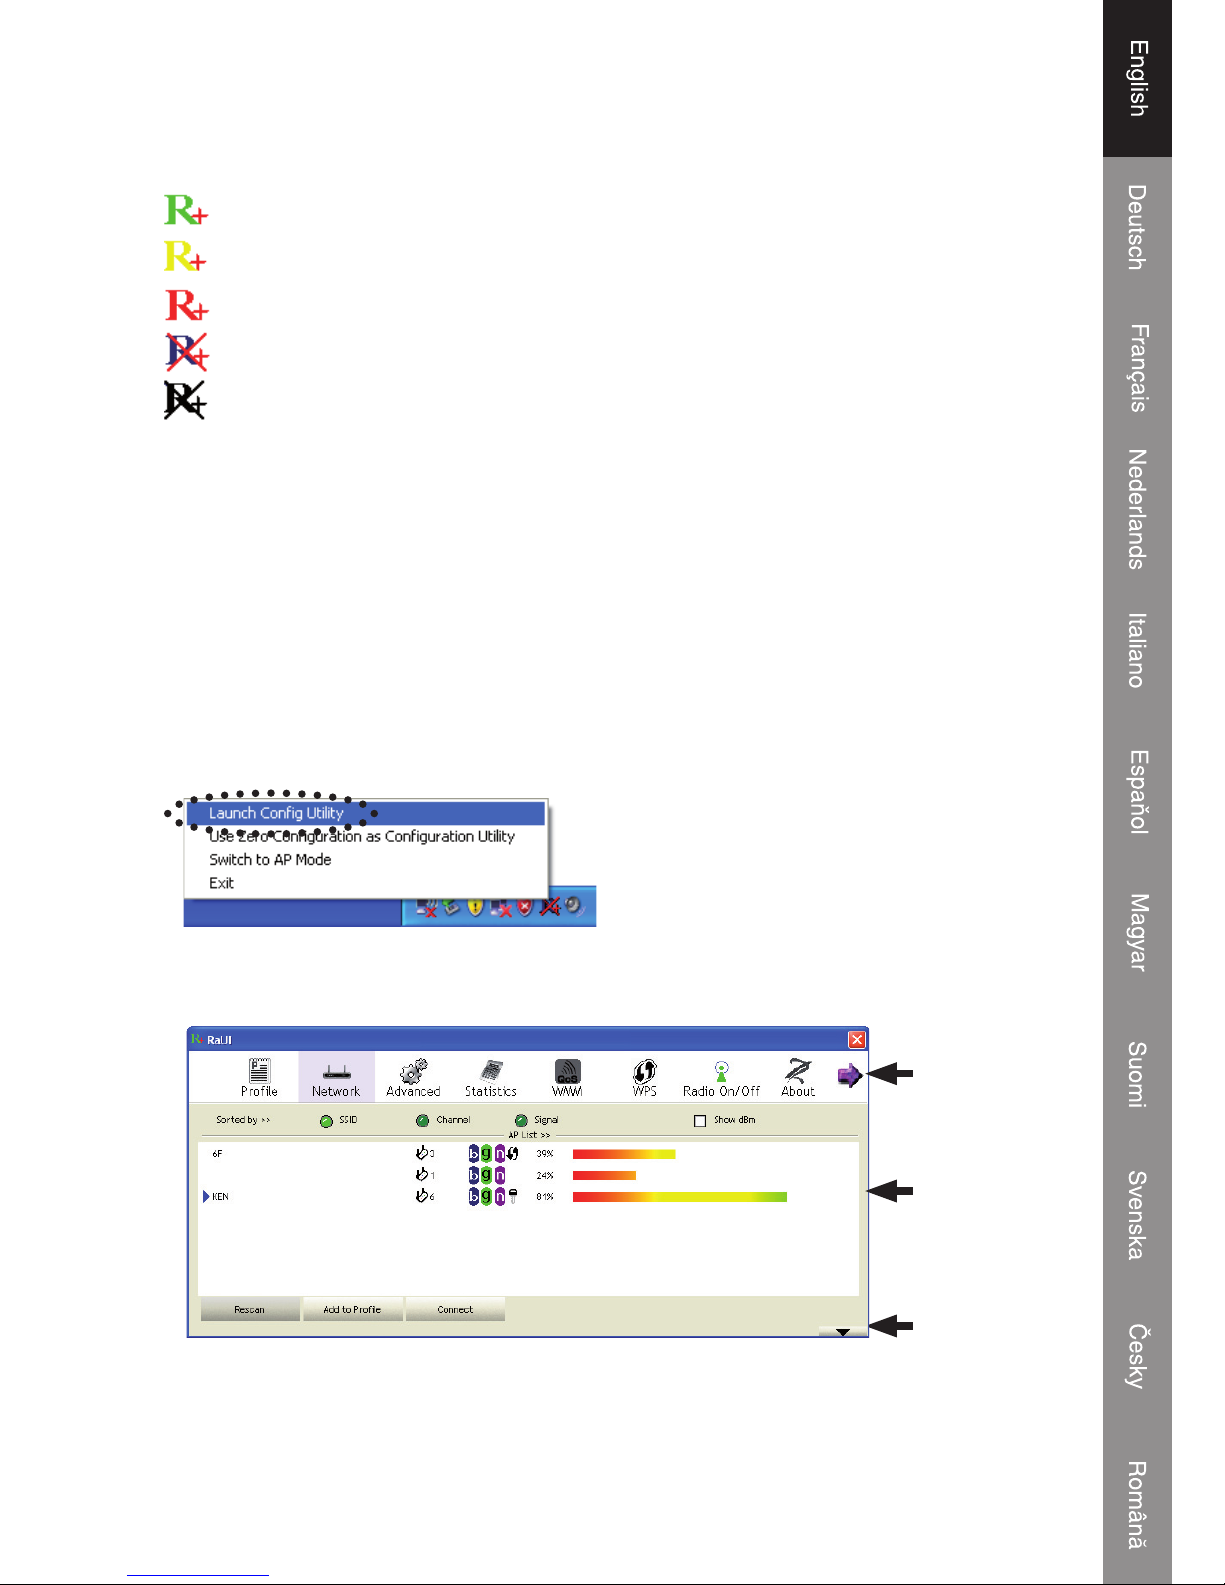
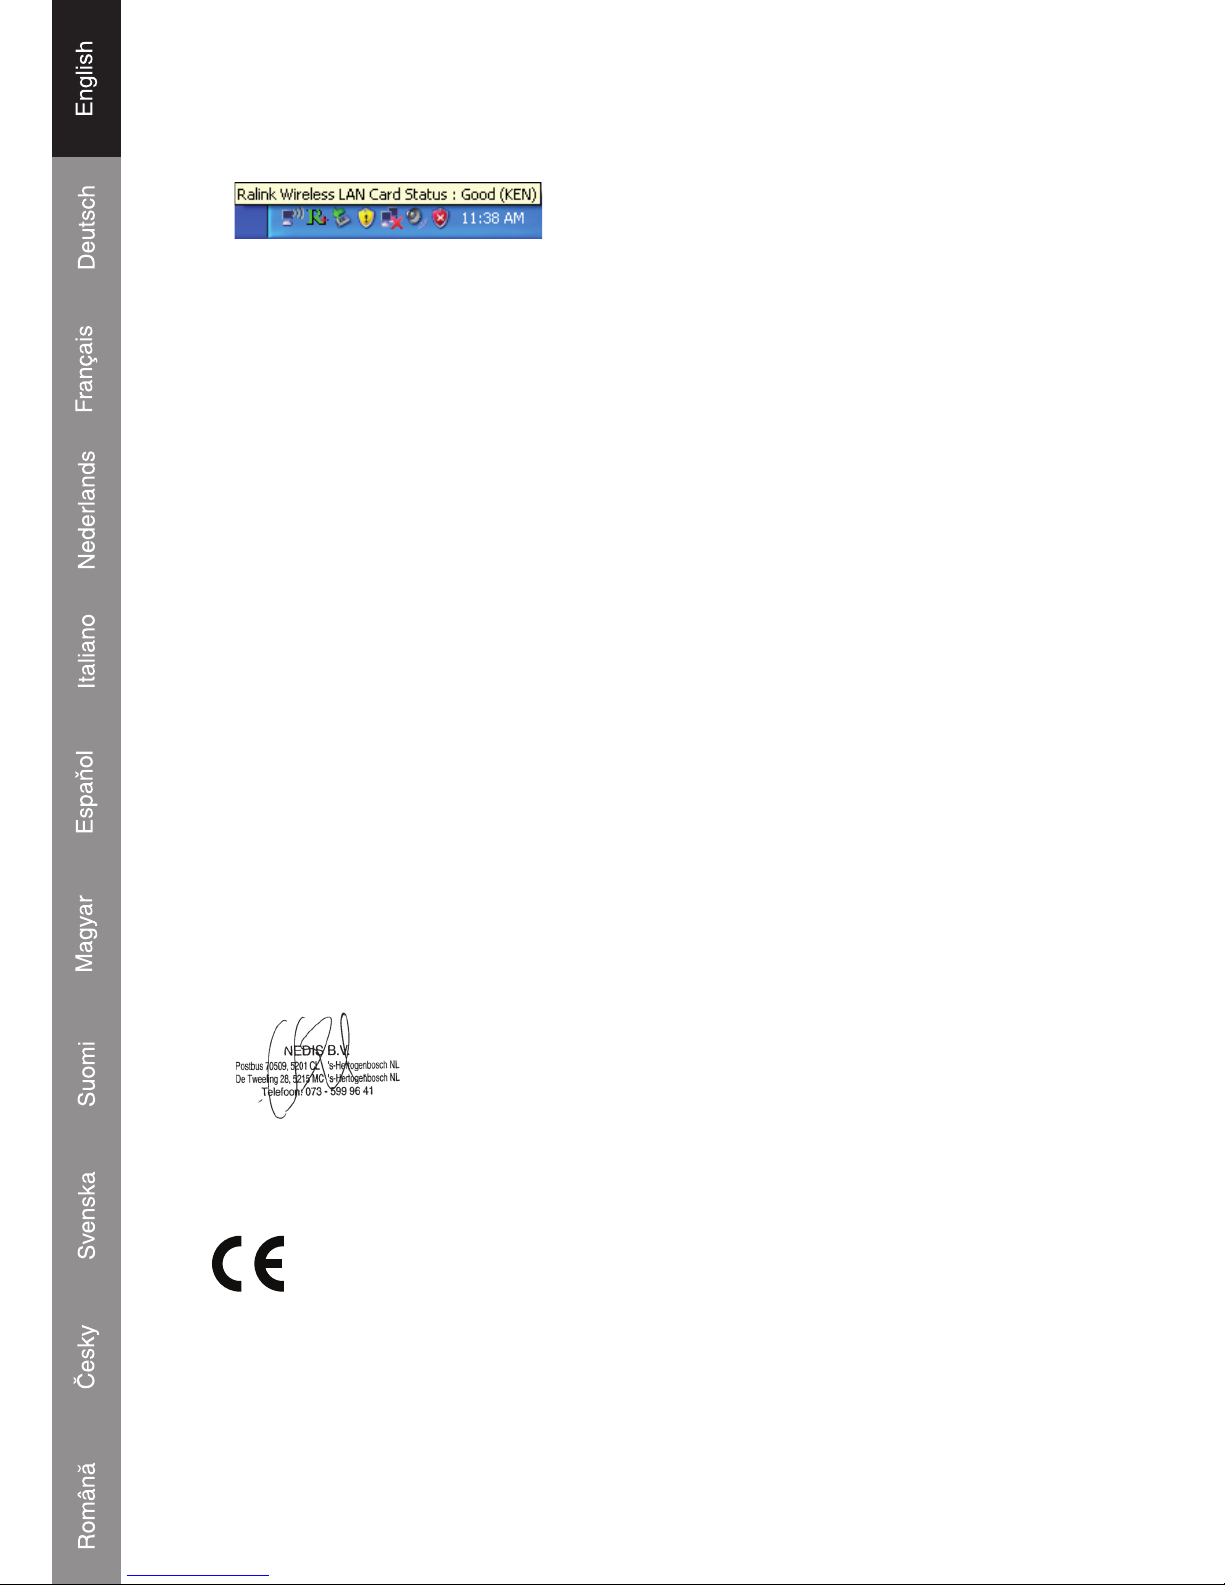
The current status of the wireless connection will be displayed by the Ralink
configuration utility in icons:
Wireless connection is established, good signal reception.
Wireless connection is established, normal signal reception.
Wireless connection is established, weak signal reception.
Connection is not established yet.
Wireless network card is not detected.
There are two ways you can configure your wireless network card to connect to a
wireless access point:
1. Using the Ralink configuration utility
2. Using the built-in Windows Zero configuration utility
Using Ralink Utility
Please follow the instructions below to use the Ralink configuration utility to connect to
a wireless access point.
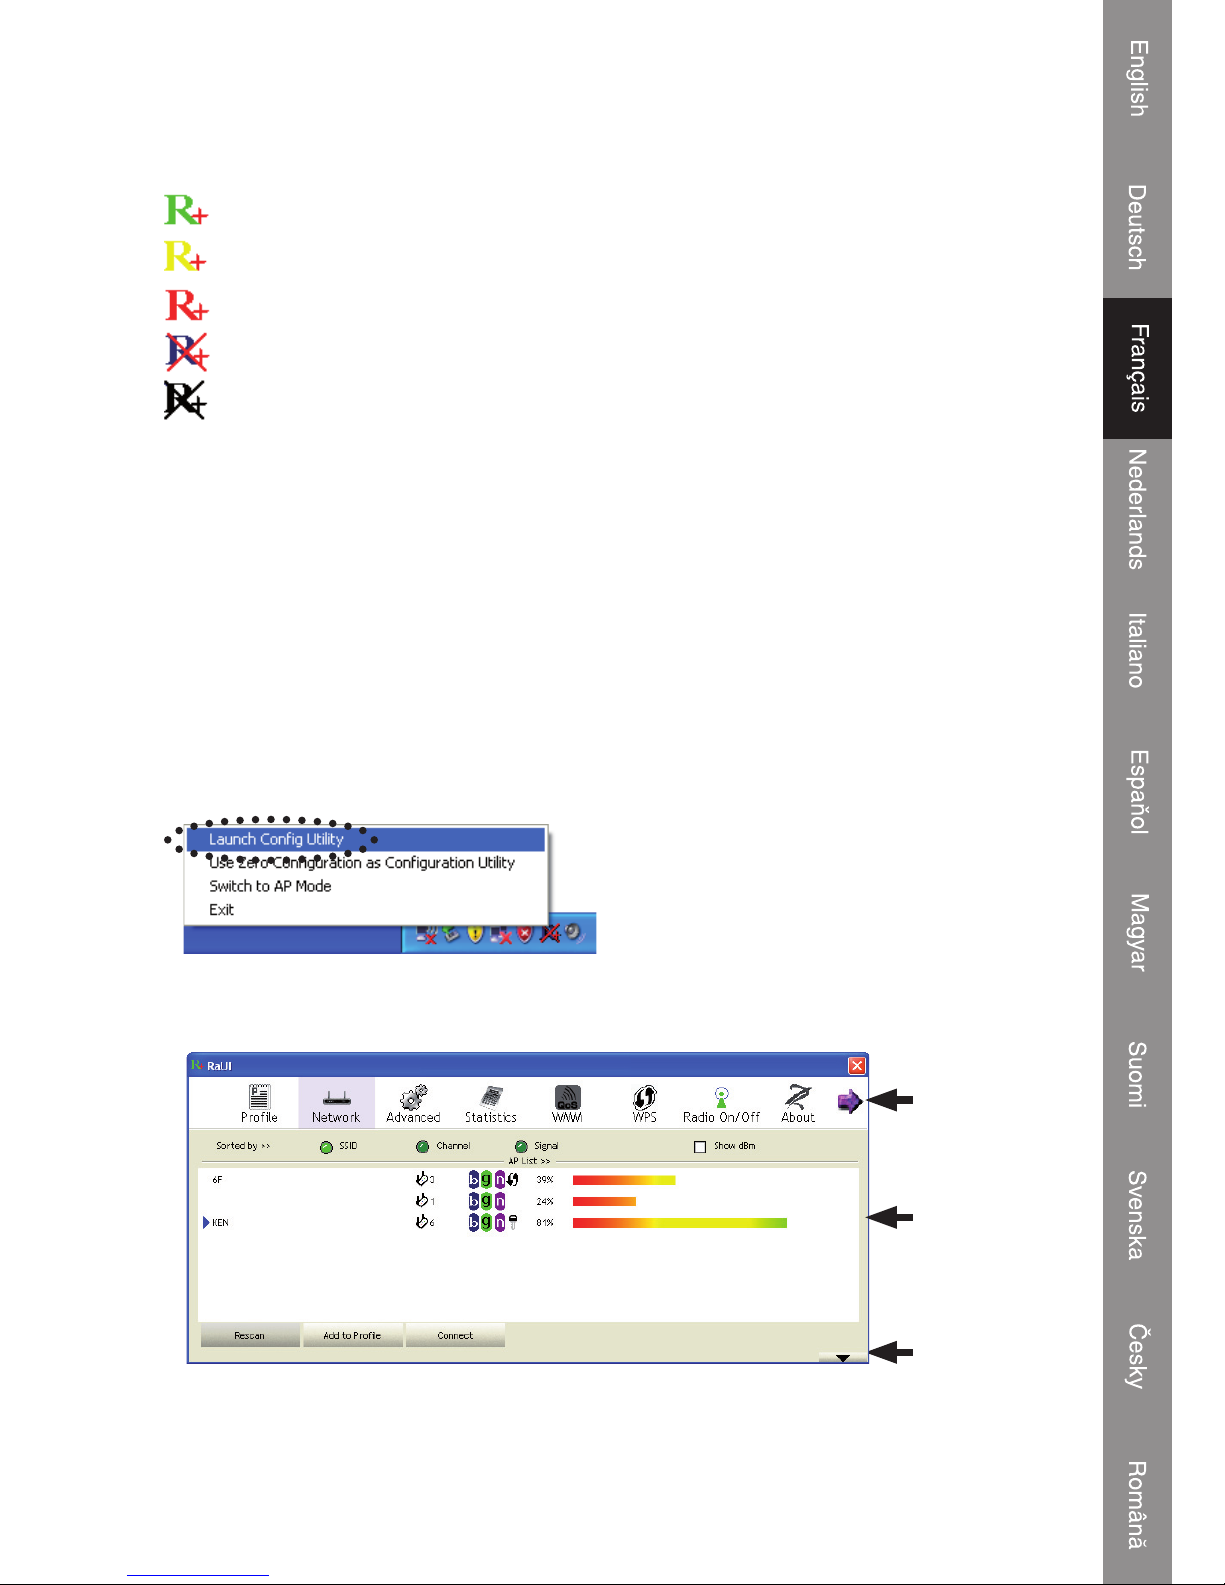
1. Right-click the Ralink configuration utility icon located in the lower-right corner of
your computer desktop and then click ‘Launch Config Utility’.
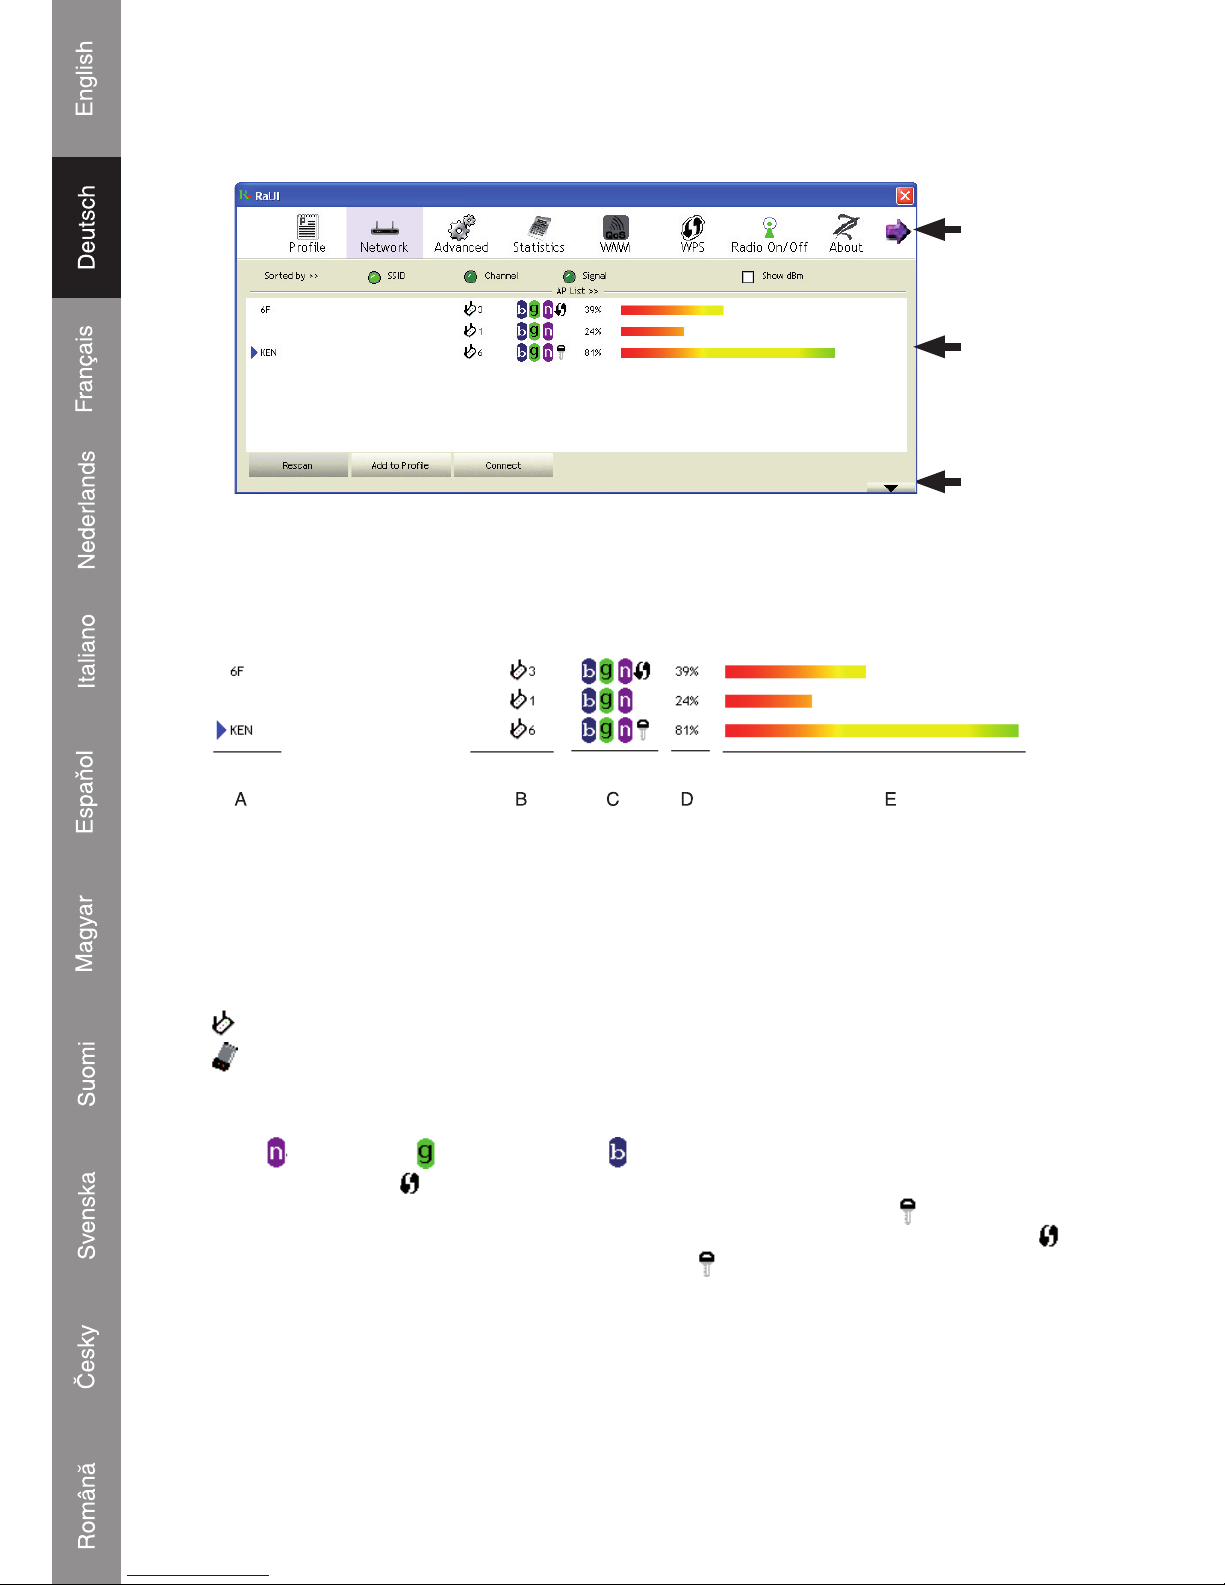
Ralink setup utility (RaUI) will launch, and begin to scan for all wireless access
points automatically.
Menu
Setup
Area
More
/ Less
button
Page 4
4
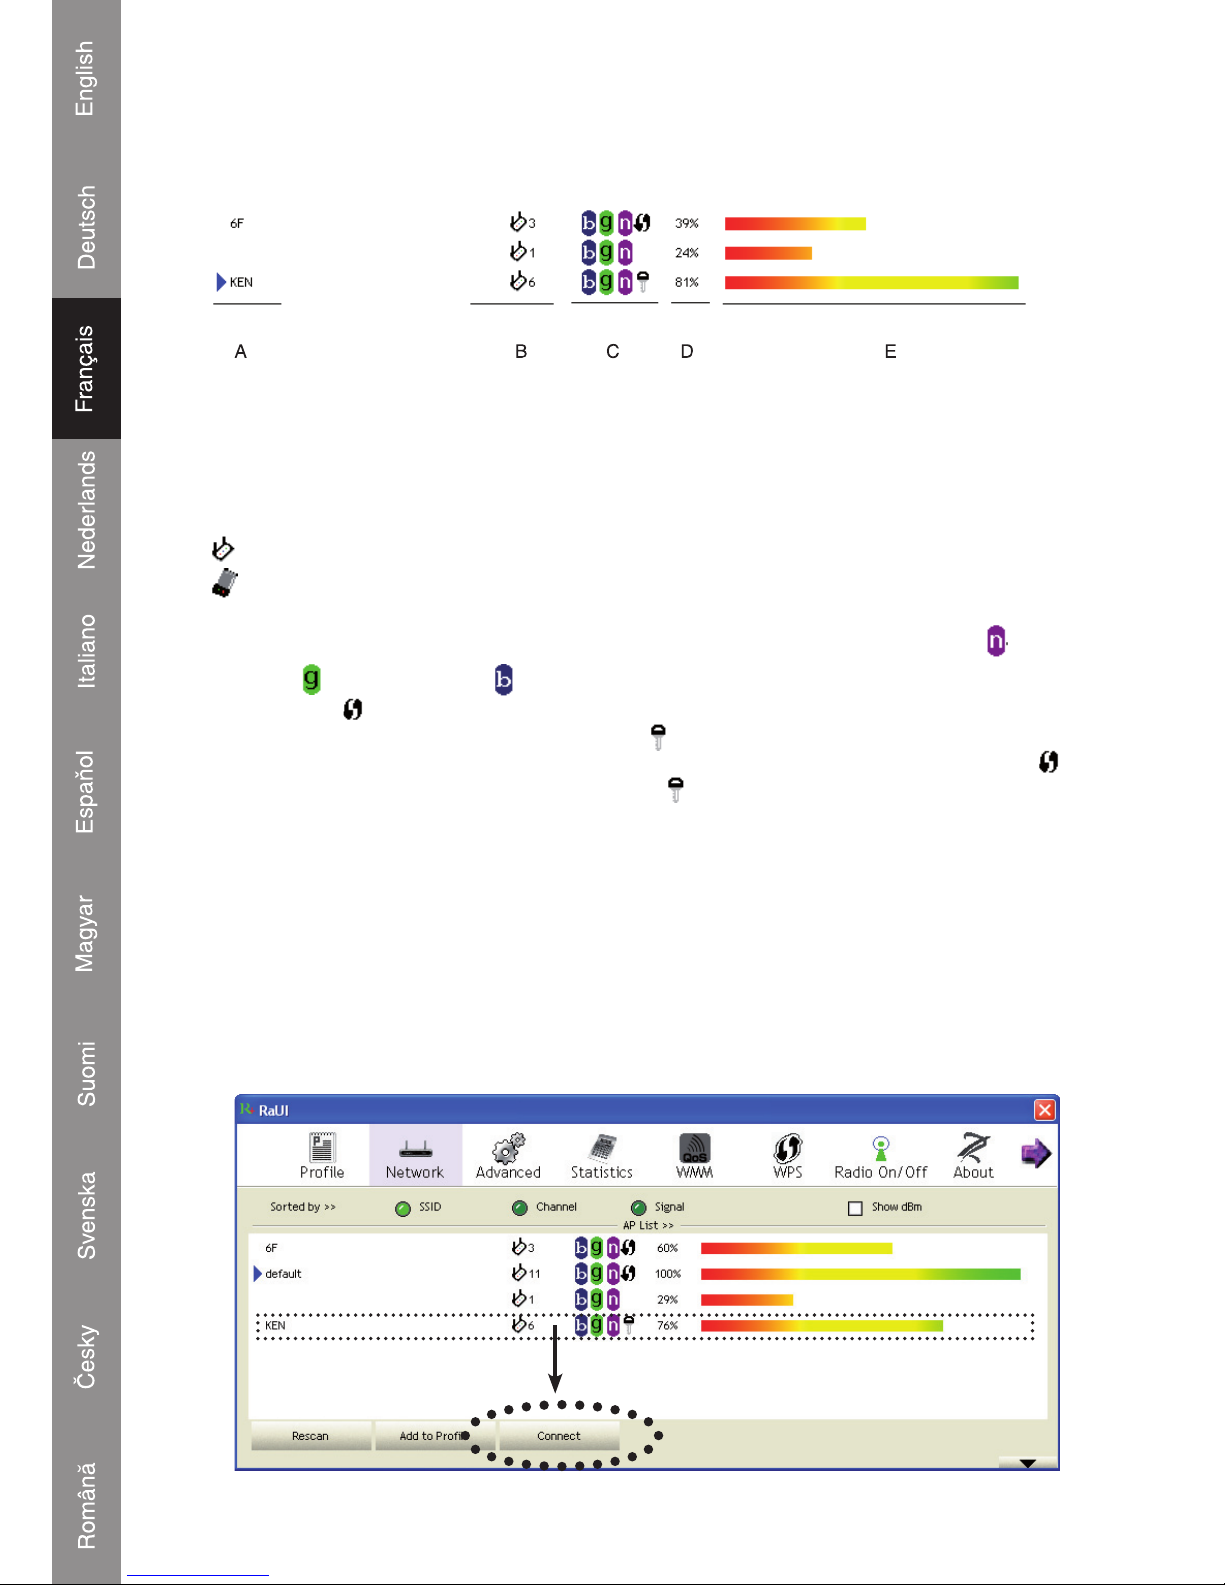
Information explanation
Scan result includes 5 types of information, which are:
A The SSID (Service Set Identifier) of the wireless device.
If nothing is displayed here, it means the SSID of this wireless device is hidden. If a
symbol appears in front of the name of the wireless device, it means you’ve established
a connection with that wireless device
B The type of this wireless device and the channel number of this wireless device
Means this wireless device is an access point
Means this wireless device is a computer (Ad-Hoc mode, point-to-point
connection)
C The wireless standard supported by this access point is displayed here.
for
802.11n,
for 802.11g, and for 802.11b.
The WPS icon
will appear when the access point supports WPS. If the access point
uses encryption, a key icon
will appear
Note: When the access point supports WPS and the WPS icon
is shown, you will
not see the key icon
here even though the access point uses encryption.
D Shows the signal strength of the access point in percentage
E Shows a bar graph of the signal strength
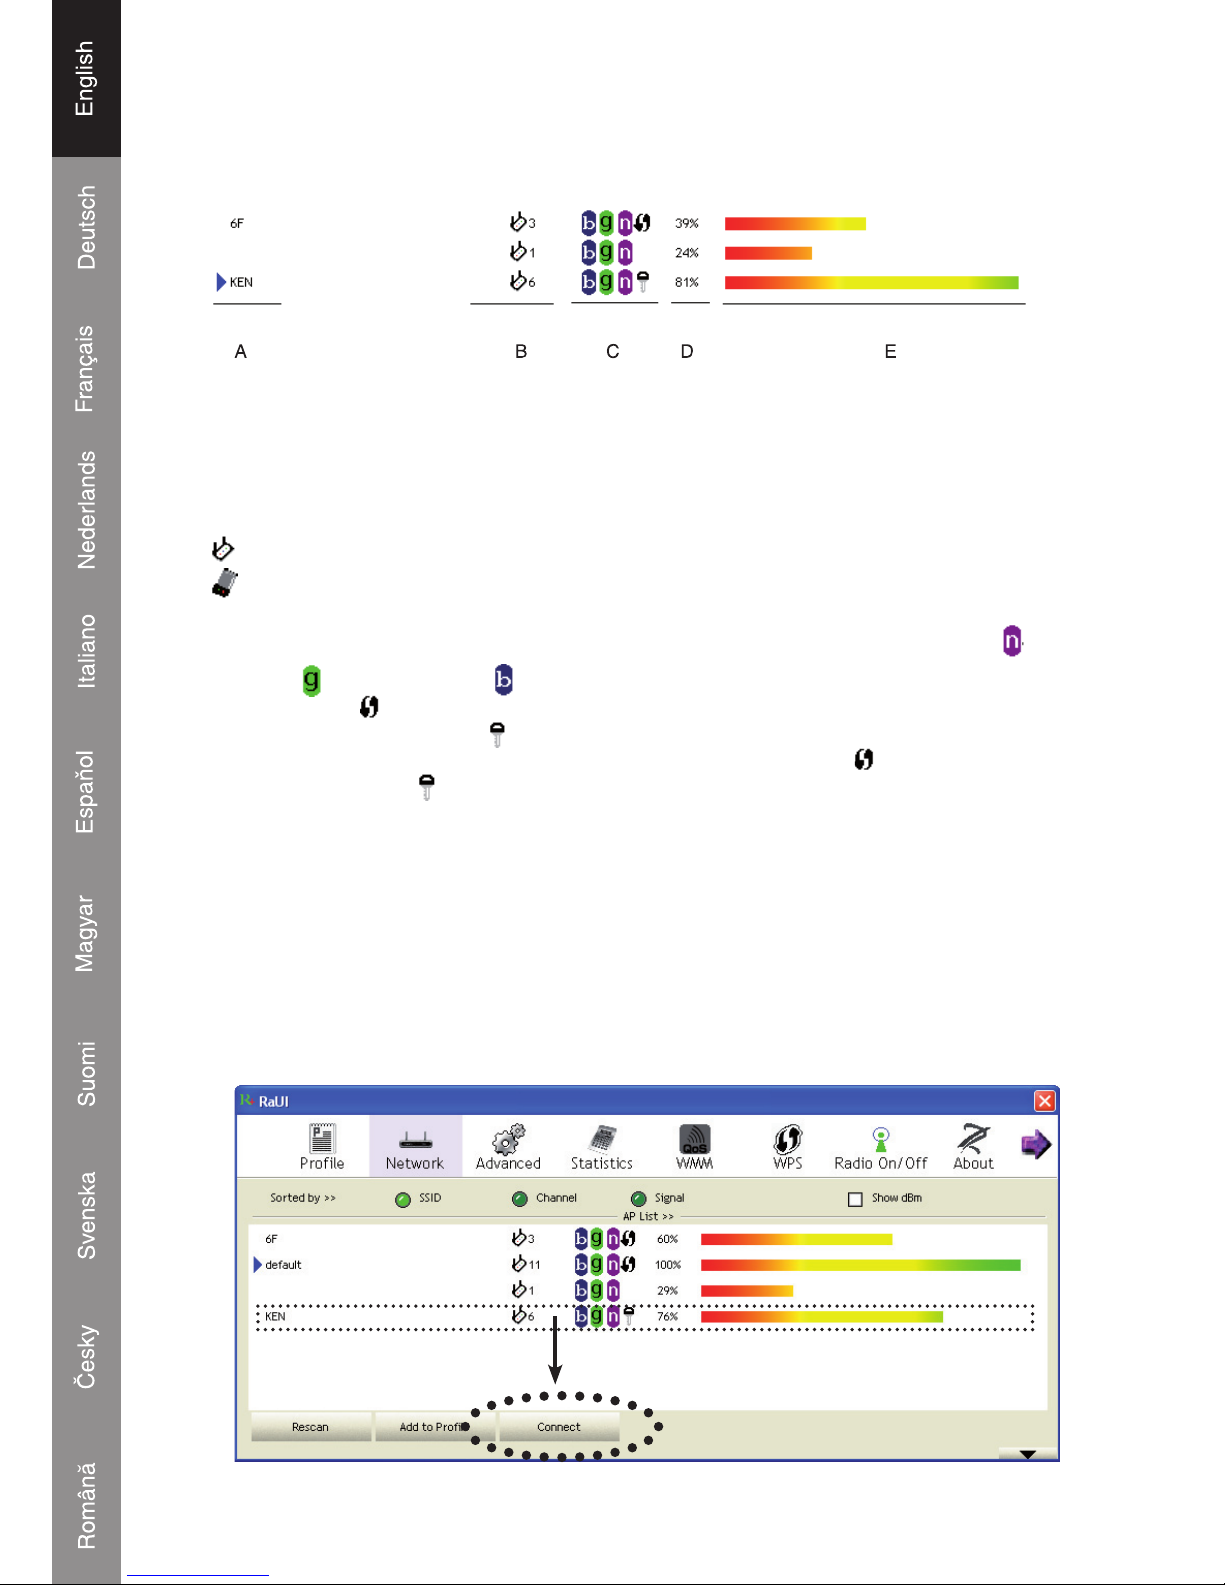
Connecting to an Access Point
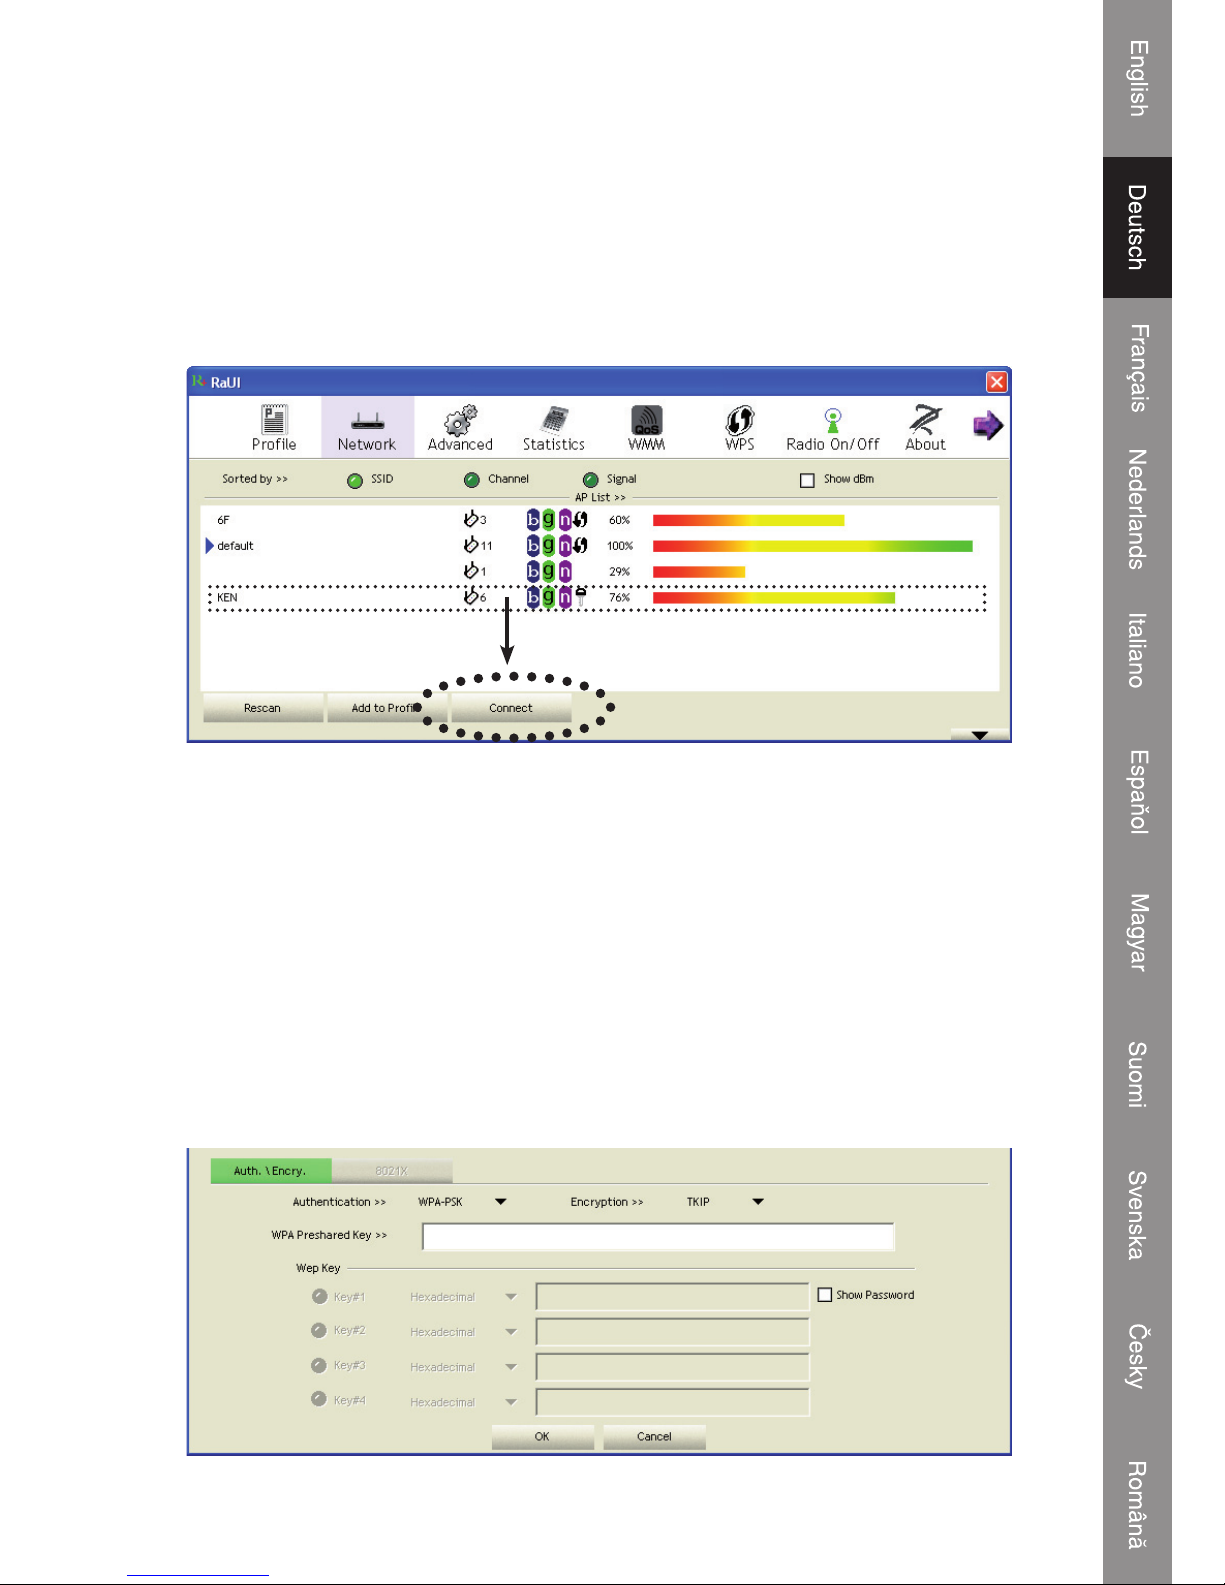
If the wireless access point you wish to connect to is found, you can establish a
connection with it by clicking the ‘Connect’ button.
1. Click the wireless access point or network device you wish to connect to, it will be
highlighted, then click ‘Connect’.
Page 5
5
If the access point you selected does not use encryption, you’ll be connected to
this wireless access point within one minute. If the access point you selected uses
encryption, please proceed to step 3.
2. If the wireless access point does not have SSID, you’ll be prompted to input it now.
Please ask the owner of the wireless access point for the exact SSID and input it
here. Then click ‘OK’. If the SSID you provided here is wrong, you’ll not be able to
connect to this access point, and you’ll be prompted to enter it again.
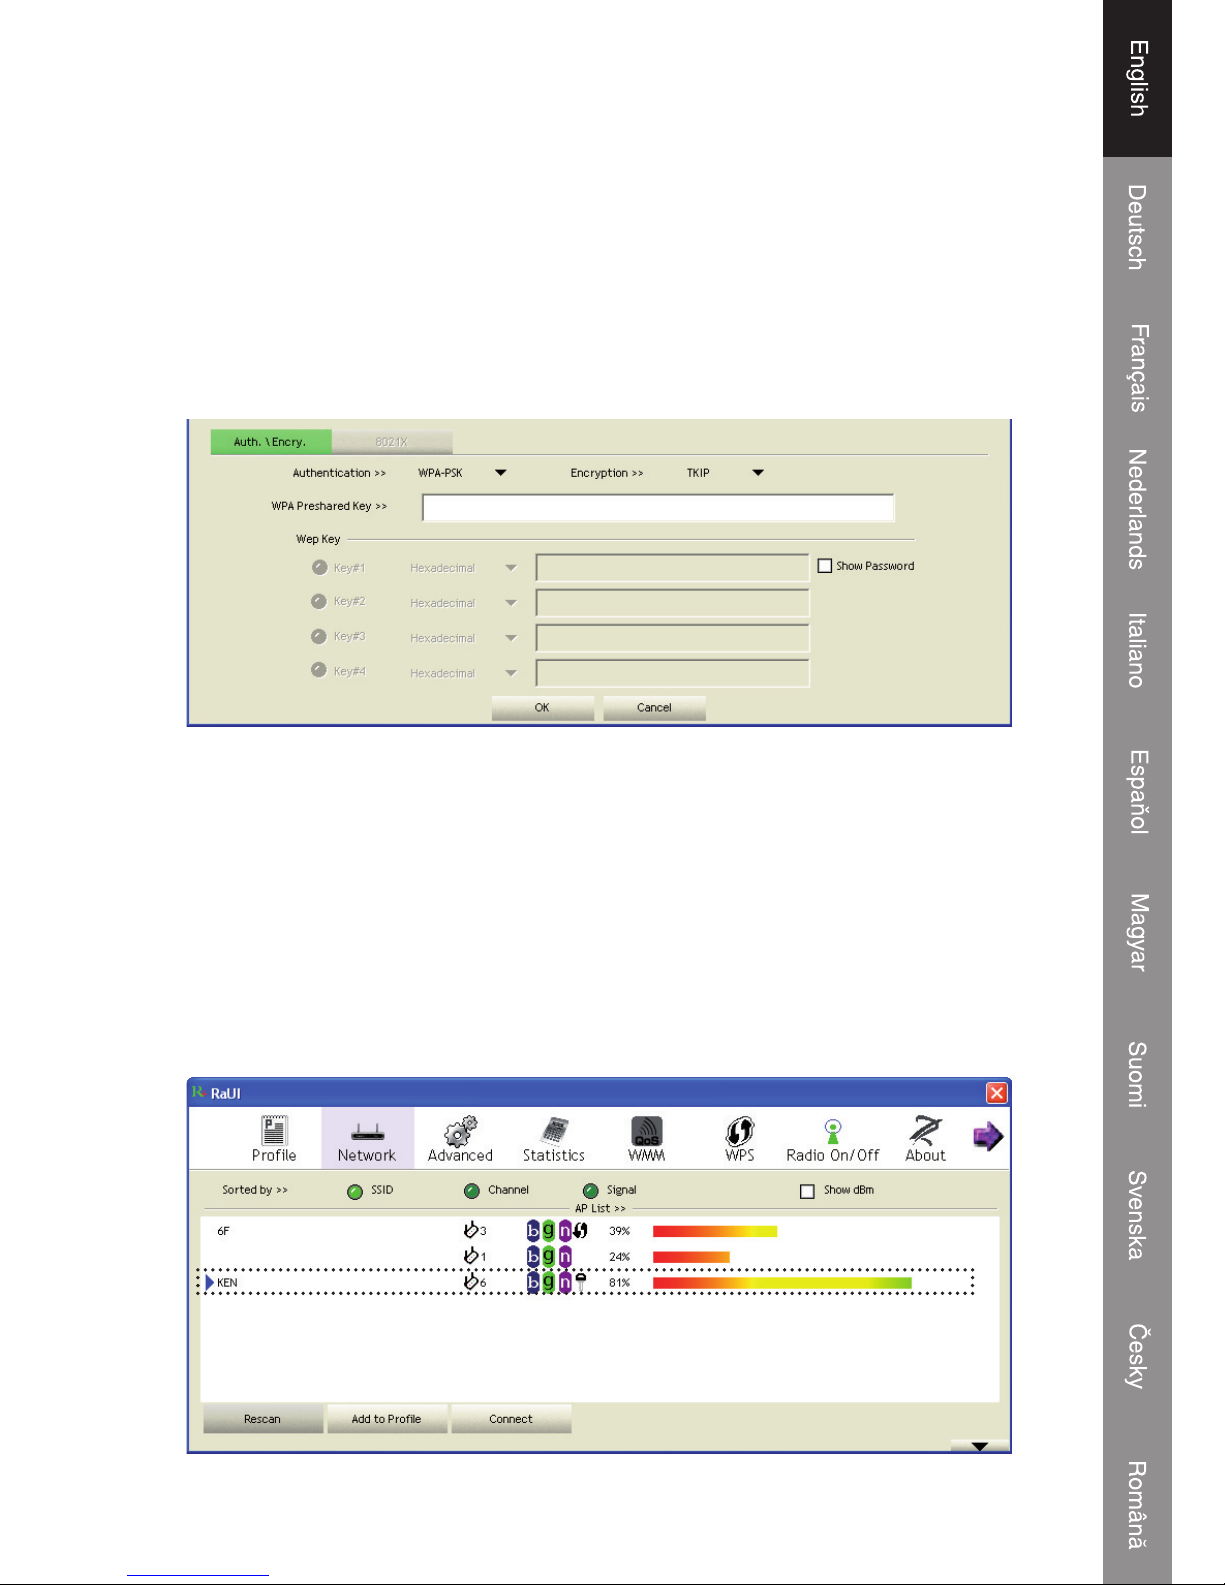
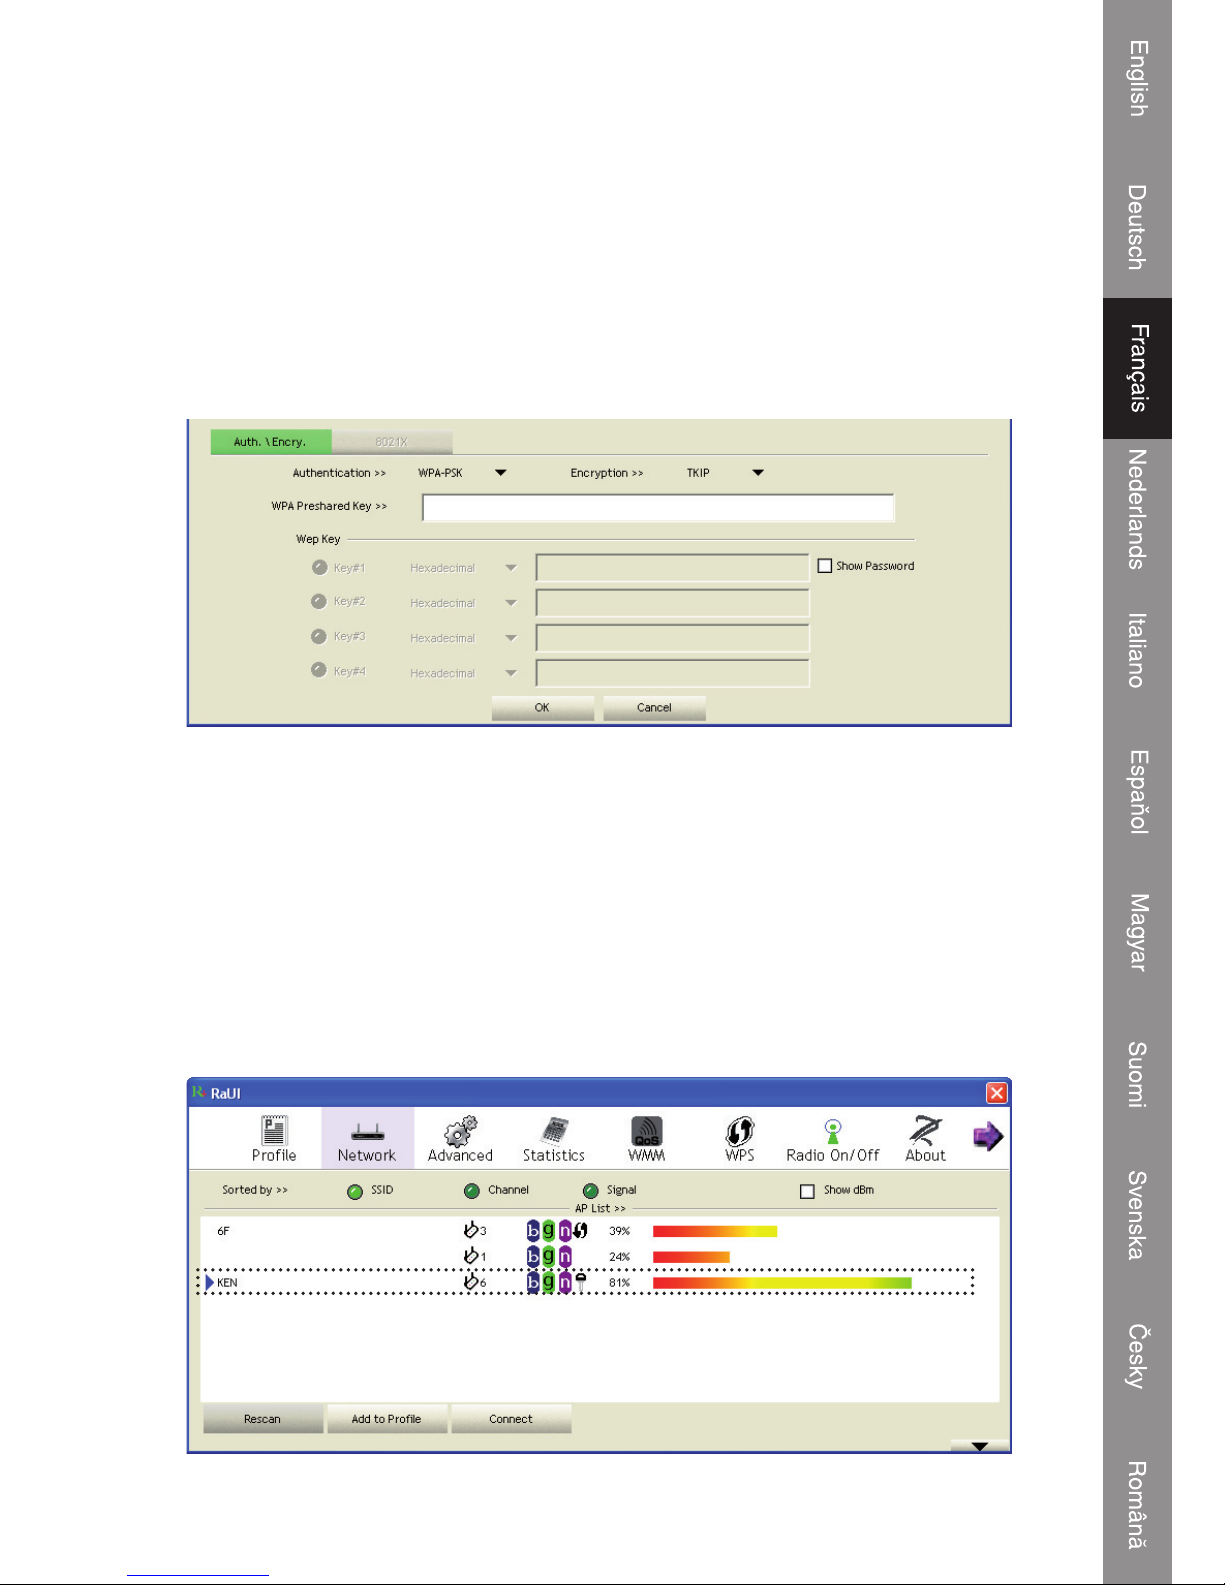
3. If the wireless access point uses encryption, you will be prompted to input its WEP
key or WPA preshared key.
4. Please ask the owner of the wireless acces point for the correct key. Input the key
and click ‘OK’. By checking the ‘Show Password’ box, the encryption key you enter
here will be displayed enabling you to check it.
If the key you enter is wrong, you will not be able to connect to this wireless access
point.
Authentication type will be selected by the access point automatically, please
don’t change it.
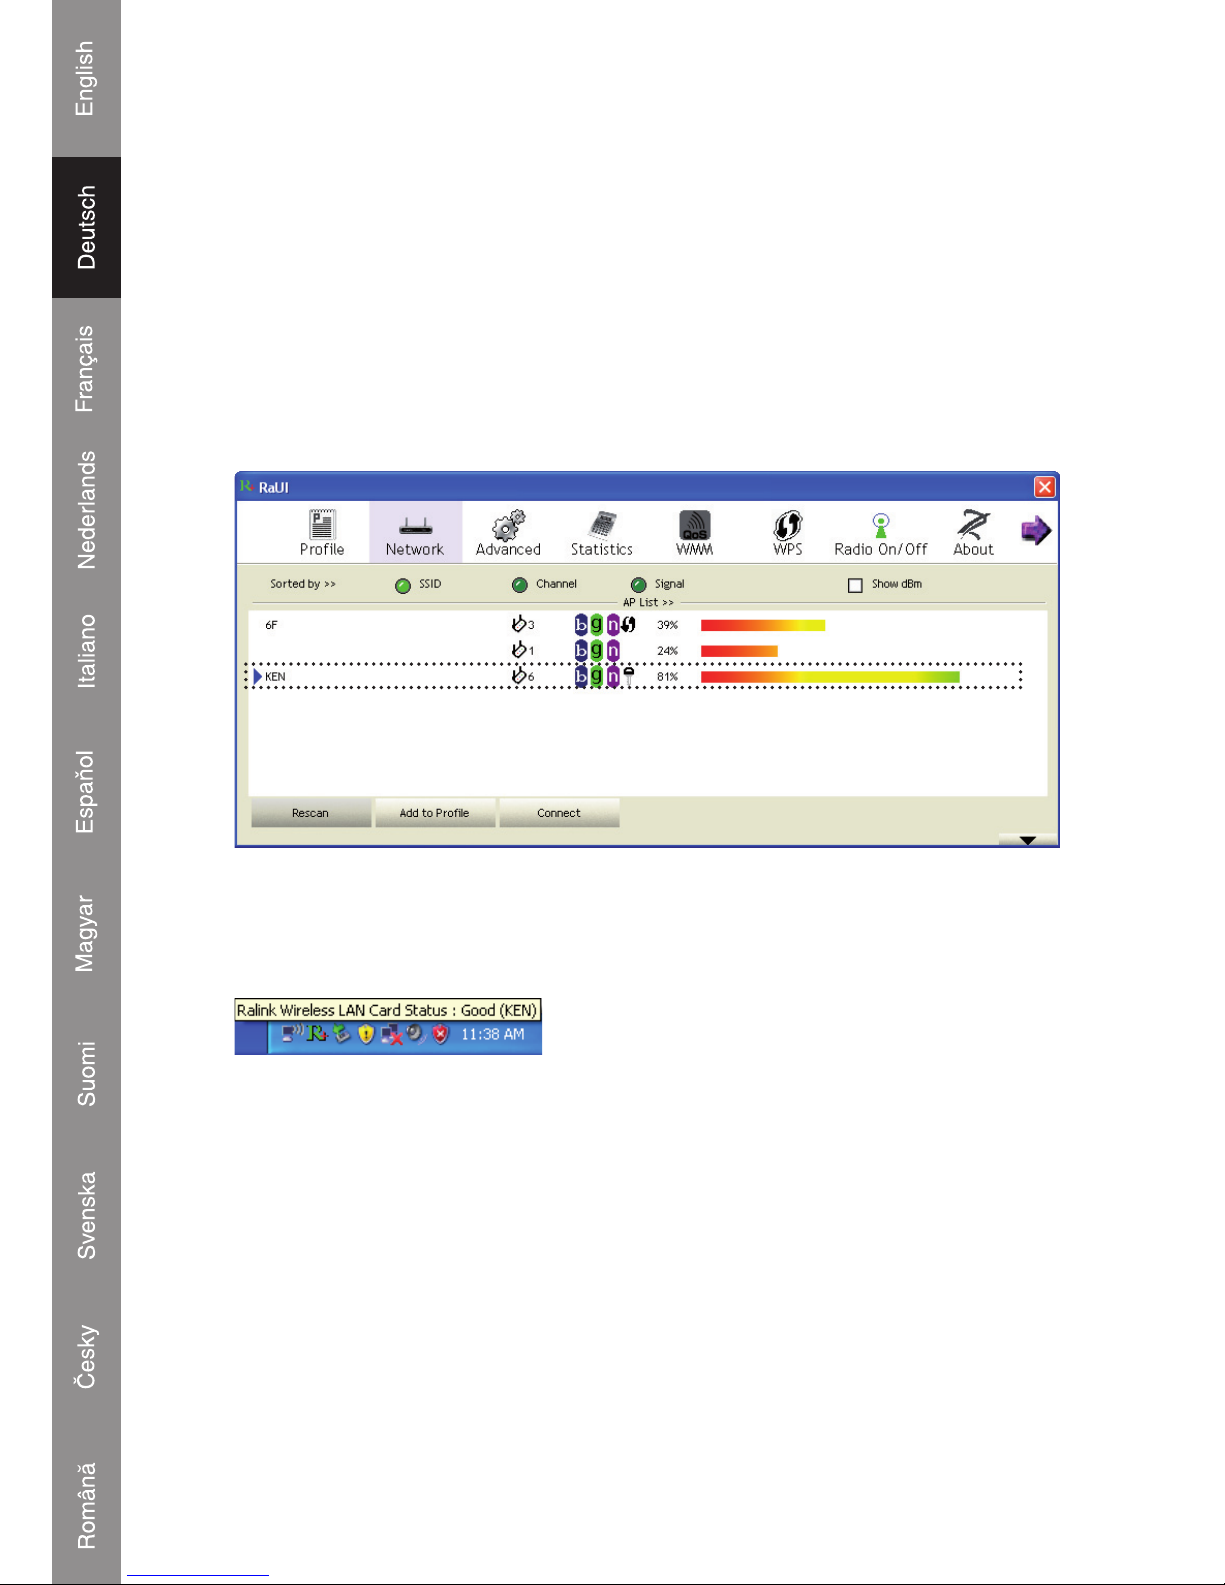
5. If you successfully connect to the wireless acces point, you’ll see a
symbol in front
of the wireless device.
Page 6
6
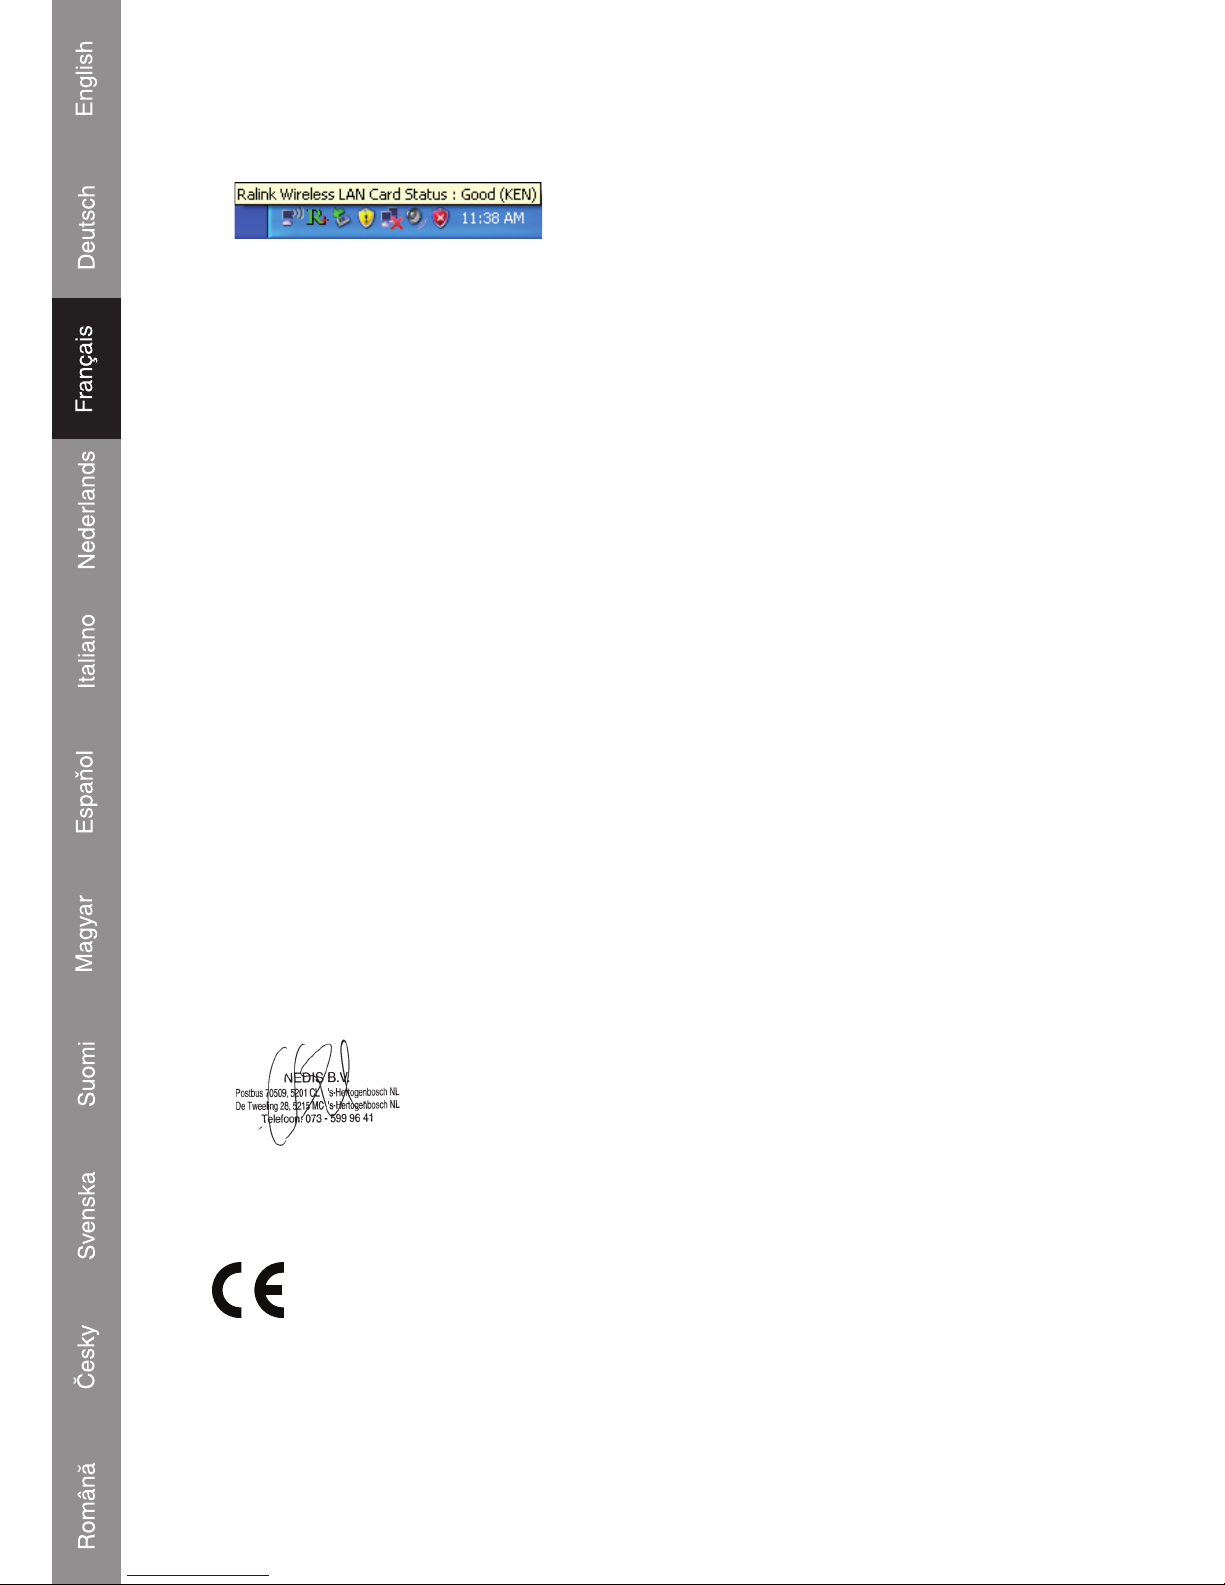
If you move your cursor over the Raling configuration utility icon, a balloon pops up
with information about the connection status.
Declaration of conformity
We,
Nedis B.V.
De Tweeling 28
5215MC ’s-Hertogenbosch
The Netherlands
Tel.: 0031 73 599 1055
Email: info@nedis.com
Declare that product:
Brand: König Electronic
Model: CMP-WNUSB31
Description: WIRELESS LAN USB 150MBPS
Is in conformity with the following standards
LVD: IEC 60950-1: 2001
EN 60950-1: 2001 + A11: 2004
EMC: EN 301 489-1 V1.6.1 (2005-09)
EN 301 489-17 V1.2.1 (2002-08)
EN 50392:2004
Radio: EN 300 328 V1.7.1 (2006-05)
And complies with the requirements of the European Directive 1999/5/EC.
‘s-Hertogenbosch, 17-11-08
Mrs. J. Gilad
Purchase Director
Page 7
7
Safety precautions:
Do not expose the product to water or moisture.
Maintenance:
Clean only with a dry cloth. Do not use cleaning solvents or abrasives.
Warranty:
No guarantee or liability can be accepted for any changes and modifications of the
product or damage caused due to incorrect use of this product.
General:
Designs and specifications are subject to change without notice.
All logos brands and product names are trademarks or registered trademarks of their
respective holders and are hereby recognized as such.
Attention:
This product is marked with this symbol. It means that used electrical and
electronic products should not be mixed with general household waste.
There is a separate collections system for these products.
Copyright ©
Page 8

8
Page 9
CMP-WNUSB31
USB WLAN-ADAPTER
150MBit/s
Page 10
2
DEUTSCH
Installation für Windows XP
Befolgen Sie bitte die folgende Anleitung zur Installation des USB WLAN-Adapters:
1. Stecken Sie den USB WLAN-Adapter bei eingeschaltetem Computer in einen freien
USB 2.0-Anschluss Ihres Computers.
2. Legen Sie die CD-ROM mit dem Gerätetreiber in das CD/DVD-ROM-Laufwerk
Ihres Computers ein, und rufen Sie das Programm “Setup.exe” auf. Bitte lesen Sie
die Endbenutzervereinbarung durch, und klicken Sie auf “I accept the terms of the
license agreement (Ich akzeptiere die Bedingungen der Lizenzvereinbarung)” und
auf “Next (Weiter)”, um die Lizenzvereinbarung zu akzeptieren. Es wird empfohlen,
den Treiber und das Dienstprogramm zu installieren, wenn der Adapter das erste
Mal benutzt wird.
3. Sie können hier das Konfigurationswerkzeug auswählen, das zum Konfigurieren des
WLAN-Adapters verwendet wird. Es ist empfehlenswert, das “Ralink Configuration
Tool” auszuwählen, welches Zugriff auf alle Funktionen dieses WLAN-Adapters
ermöglicht. Wenn Sie das WLAN-Konfigurationswerkzeug von Windows XP oder
Vista bevorzugen, wählen Sie bitte “Microsoft Zero Configuration Tool”, und klicken
Sie anschließend auf “Next (Weiter)”.
4. Bei der folgenden Meldung klicken Sie bitte auf “Install”, um die Installation des
Dienstprogramms zu beginnen. Wenn die Meldung ‘Found New Hardware (Neue
Hardware gefunden)’ erneut angezeigt wird, ignorieren Sie diese bitte und warten.
Klicken Sie auf “Install (Installieren)”, um mit der Installation fortzufahren.
5. Warten Sie bitte, während die Installation läuft. Wenn die Meldung “Please click
‘Finish’ to complete the driver installation process (Klicken Sie bitte auf 'Beenden',
um die Installation des Treibers zu beenden)” angezeigt wird, klicken Sie bitte auf
“Finish (Fertig stellen)”.
6. Nachdem die Installation beendet worden ist, wird auf dem Desktop Ihres Computers
automatisch das Dienstprogramm für die WLAN-Konfiguration angezeigt. Unten
rechts sehen Sie in der Taskleiste von Windows auch ein Symbol. Wenn Sie Ihren
WLAN-Anschluss konfigurieren möchten, klicken Sie bitte mit rechts auf dieses
Symbol, und es öffnet sich ein Popup-Menü. Klicken Sie auf ‘Launch Config Utility
(Starte Konfigurationsprogramm)', um das Konfigurationsprogramm zu starten.
Page 11
3
Verbindung mit einem WLAN Access Point
Nachdem der Treiber richtig installiert worden ist, versucht er, automatisch eine
Verbindung zu irgendeinem unverschlüsselten WLAN Access Point herzustellen.
Wenn Sie eine Verbindung zu einem bestimmten WLAN Access Point herstellen
möchten oder der von Ihnen gewünschte Access Point eine Verschlüsselung benutzt,
müssen Sie den USB WLAN-Adapter konfigurieren.
ANMERKUNG: In Vista wird der WLAN-Adapter nicht automatisch mit irgendeinem
unverschlüsselten WLAN Access Point verbunden.
Der aktuelle Zustand der WLAN-Verbindung wird vom Ralink-Konfigurationsprogramm
durch Symbole angezeigt:
WLAN-Verbindung ist hergestellt worden, guter Signalempfang.
WLAN-Verbindung ist hergestellt worden, normaler Signalempfang.
WLAN-Verbindung ist hergestellt worden, schwacher Signalempfang.
WLAN-Verbindung ist noch nicht hergestellt worden.
WLAN-Netzwerkkarte wird nicht erkannt.
Es gibt zwei Möglichkeiten, wie Sie Ihren WLAN-Adapter konfigurieren können, damit
die Verbindung zu einem WLAN Access Point hergestellt wird:
1. Unter Benutzung des Ralink-Konfigurationsprogramms
2. Unter Benutzung des eingebauten Windows Zero Konfigurationsprogramms
Benutzung des Ralink-Programms
Befolgen Sie bitte die folgende Anleitung zur Benutzung des RalinkKonfigurationsprogramms, um die Verbindung zu einem WLAN-Access Point
herzustellen.
1. Klicken Sie mit rechts auf das Symbol für das Ralink-Konfigurationsprogramm,
das sich unten rechts auf der Taskleiste befindet und dann klicken Sie auf ‘Launch
Config Utility (Starte Konfigurationsprogramm)’.
Page 12
4
Es wird das Ralink-Installationsprogramm (RaUI) gestartet, und es beginnt,
automatisch nach allen WLAN Access Points zu suchen.
Menü
Installationsbereich
Taste für
mehr/
weniger
Erklärung der Informationen
Das Suchergebnis enthält 5 Arten von Informationen, welche sind:
A Der SSID (Service Set Identifier) des WLAN-Geräts.
Wenn hier nichts angezeigt wird, bedeutet das, dass der SSID dieses WLAN-Geräts
ausgeblendet ist. Wenn ein
Symbol vor dem Namen des WLAN-Geräts angezeigt
wird, bedeutet das, dass Sie eine Verbindung mit diesem WLAN-Gerät hergestellt
haben.
B Die Art und die Kanalnummer dieses WLAN-Geräts.
Bedeutet, dass dieses WLAN-Gerät ein Access Point ist.
Bedeutet, dass dieses WLAN-Gerät ein Computer ist (Ad-Hoc-Modus, Point-to-
Point-Verbindung).
C Hier wird der WLAN-Standard angezeigt, der von diesem Access Point unterstützt
wird.
für 802.11n, für 802.11g, und für 802.11b.
Das WPS-Symbol
wird angezeigt, wenn der Access Point WPS unterstützt. Wenn
der Access Point Verschlüsselung benutzt, wird ein Schlüsselsymbol
angezeigt.
Anmerkung: Wenn der Access Point WPS unterstützt und das WPS-Symbol
angezeigt wird, sehen Sie das Schlüsselsymbol
hier nicht, auch wenn der Access
Point Verschlüsselung benutzt.
D Zeigt die Signalstärke des Access Points in Prozent an.
E Zeigt einen Balken für die Signalstärke an.
Page 13
5
Verbindung zu einem Access Point
Wenn der Access Point, zu dem Sie eine Verbindung herstellen möchten, gefunden
wird, können Sie eine Verbindung zu ihm herstellen, indem Sie auf die Schaltfläche
'Connect (Verbinden)' klicken.
1. Klicken Sie auf den WLAN Access Point oder das WLAN-Netzwerkgerät, zu dem
Sie eine Verbindung herstellen möchten, wobei er/es markiert wird, und dann klicken
Sie auf 'Connect (Verbinden)'.
Wenn der von Ihnen gewählte Access Point keine Verschlüsselung benutzt, werden
Sie innerhalb einer Minute mit diesem WLAN Access Point verbunden. Wenn der
von Ihnen gewählte Access Point Verschlüsselung benutzt, fahren Sie bitte mit
Schritt 3 fort.
2. Wenn der WLAN Access Point keinen SSID hat, werden Sie aufgefordert, ihn jetzt
einzugeben. Fragen Sie bitte den Eigentümer des WLAN Access Points nach dem
genauen SSID und geben ihn hier ein. Klicken Sie anschließend auf 'OK'. Wenn der
hier eingegebene SSID falsch ist, können Sie keine Verbindung zu diesem Access
Point herstellen, und Sie werden aufgefordert, ihn noch einmal einzugeben.
3. Wenn der WLAN Access Point Verschlüsselung benutzt, werden Sie aufgefordert,
seinen WEP-Schlüssel oder seinen vorher vereinbarten WPA-Schlüssel
einzugeben.
Page 14
6
4. Fragen Sie bitte den Eigentümer des WLAN Access Points nach dem richtigen
Schlüssel. Geben Sie den Schlüssel ein und klicken auf 'OK'. Durch Anhaken des
Kontrollkästchens ‘Show Password (Passwort anzeigen)’ wird der hier eingegebene
Verschlüsselungsschlüssel angezeigt, damit Sie ihn überprüfen können.
Wenn der eingegebene Schlüssel falsch ist, können Sie keine Verbindung zu diesem
WLAN Access Point herstellen.
Der Bestätigungstyp wird automatisch vom Bestätigungstyp des Access
Points ausgewählt, bitte verändern Sie ihn nicht.
5. Wenn Sie erfolgreich eine Verbindung zum WLAN Access Point hergestellt haben,
sehen Sie ein
Symbol vor dem WLAN-Gerät.
Wenn Sie den Mauszeiger auf das Symbol für das Raling-Konfigurationsprogramm
bewegen, öffnet sich ein Fenster mit Informationen über den Status der
Verbindungen.
Page 15

7
Konformitätserklärung
Wir,
Nedis B.V.
De Tweeling 28
5215MC ’s-Hertogenbosch
Niederlande
Tel.: 0031 73 599 1055
Email: info@nedis.com
erklären, dass das Produkt:
Marke: König Electronic
Modell: CMP-WNUSB31
Beschreibung: USB WLAN-ADAPTER 150MBit/s
den folgenden Standards entspricht:
LVD: IEC 60950-1: 2001
EN 60950-1: 2001 + A11 : 2004
EMV: EN 301 489-1 V1.6.1 (2005-09)
EN 301 489-17 V1.2.1 (2002-08)
EN 50392:2004
Funk: EN 300 328 V1.7.1 (2006-05)
Das Produkt erfüllt die Bestimmungen der EG-Richtlinie 1999/5/EC.
‘s-Hertogenbosch, 17.11.2008
J. Gilad
Einkaufsleiterin
Page 16
8
Sicherheitsvorkehrungen:
Sorgen Sie dafür, dass das Gerät nicht mit Wasser oder Feuchtigkeit in Berührung
kommt.
Wartung:
Nur mit einem trocknen Tuch säubern. Keine Reinigungs- oder Scheuermittel
verwenden.
Garantie:
Es wird keine Garantie oder Gewährleistung bei Veränderungen, Modifikationen oder
Schäden durch unsachgemäße Behandlung des Produktes gewährt.
Allgemeines:
Design und technische Daten können ohne vorherige Ankündigung geändert werden.
Alle Logos, Marken und Produktnamen sind Warenzeichen oder registrierte
Warenzeichen ihrer jeweiligen Eigentümer und werden hiermit als solche anerkannt.
Achtung:
Dieses Produkt ist mit diesem Symbol gekennzeichnet. Es bedeutet, dass
ausgediente elektrische und elektronische Produkte nicht im allgemeinen
Haushaltsmüll entsorgt werden dürfen. Für diese Produkte stehen gesonderte
Sammelsysteme zur Verfügung.
Copyright ©
Page 17
CMP-WNUSB31
RÉSEAU SANS FIL
USB 150MBPS
Page 18
2
FRANÇAIS
Installation pour Windows XP
Veuillez suivre les instructions ci-dessous pour installer votre nouvelle carte réseau
sans fil :
1. Introduisez la carte réseau sans fil USB dans un port USB 2.0 libre sur votre
ordinateur une fois que l'ordinateur est en marche.
2. Insérez le CD-ROM de pilote du périphérique dans le lecteur CD/DVD ROM de
votre ordinateur et lancez le programme “Setup.exe”. Veuillez lire l'accord de licence
pour utilisateur final et cliquer sur “J'accepte les termes de l'accord de licence”, puis
sur le bouton “Suivant” pour accepter l'accord de licence. Il est conseillé d'installer
le pilote et l'utilitaire si la carte réseau est utilisée pour la première fois.
3. Vous pouvez choisir l'outil de configuration utilisé pour configurer la carte réseau
sans fil ici. Il est conseillé de choisir “Ralink Configuration Tool”, qui permet l'accès
à toutes les fonctions de cette carte réseau sans fil. Si vous préférez utiliser l'outil
de configuration sans fil fourni par Windows XP ou Vista, veuillez sélectionner
“Microsoft Zero Configuration Tool”, puis cliquez sur “Suivant”.
4. Le message suivant s'affiche : veuillez cliquez sur ‘Installer’ pour lancer l'installation
de l'utilitaire. Si le message ‘Nouveau matériel détecté’ réapparaît, ignorez-le et
patientez. Cliquez sur “installer” pour continuer l’installation.
5. Veuillez patienter pendant la procédure d'installation. Lorsque ce message s'affiche :
“Veuillez cliquer sur ‘Terminer’ pour terminer l'installation du pilote” veuillez cliquez
sur Terminer.
6. Après l'installation, l'utilitaire de configuration sans fil s'affiche automatiquement sur le bureau
de votre ordinateur. Vous pouvez voir également une icône en bas à droite dans la zone de
notification de Windows. Lorsque vous souhaitez configurer votre connexion sans fil, veuillez
effectuer un clic droit sur cette icône pour afficher un menu contextuel. Cliquez sur ‘Launch
Config Utility’ (Lancer l'utilitaire de configuration) pour lancer le programme de configuration.
Connexion à un point d'accès sans fil
Après avoir terminé l'installation du pilote correctement, ce dernier essaie de se
connecter automatiquement à un point d'accès sans fil non crypté. Si vous voulez
vous connecter à un point d'accès sans fil spécifique ou si le point d'accès désiré
utilise le cryptage, vous devez configurer la carte réseau sans fil.
REMARQUE : avec Windows Vista, la carte réseau ne se connecte pas
automatiquement à un point d'accès non crypté.
Page 19
3
L'état actuel de la connexion sans fil sera affiché par l'utilitaire de configuration Ralink
sous forme d'icônes :
Connexion sans fil établie, bonne réception du signal.
Connexion sans fil établie, réception du signal normale.
Connexion sans fil établie, réception du signal faible.
Connexion pas encore établie.
Carte réseau sans fil non détectée.
Il y a deux manières de configurer votre carte réseau sans fil pour la connexion à un
point d'accès sans fil :
1. En utilisant l'utilitaire de configuration Ralink
2. En utilisant l'utilitaire de configuration intégré à Windows
Utilisation de l'utilitaire Ralink
Veuillez suivre les instructions ci-dessous pour utiliser l'utilitaire de configuration Ralink
afin de vous connecter à un point d'accès sans fil.
1. Effectuez un clic droit sur l'icône de l'utilitaire de configuration Ralink situé en bas
à droite du bureau de l'ordinateur, puis cliquez sur ‘Launch Config Utility’ (lancer
l'utilitaire de configuration).
L'utilitaire de configuration Ralink (RaUI) se lance et commence automatiquement à
rechercher tous les points d'accès.
Menu
Zone de
configuration
Bouton
plus/
moins
Page 20
4
Explication des informations
Le résultat de la détecte comprend 5 types d'informations :
A Le SSID (Service Set Identifier) du dispositif sans fil.
Si rien ne s'affiche ici, cela signifie que le SSID de ce dispositif sans fil est masqué.
Si un symbole
s'affiche devant le nom du dispositif sans fil, cela signifie qu'une
connexion a été établie avec ce dispositif sans fil
B Le type de ce dispositif sans fil et le numéro de canal de ce dispositif sans fil
Signifie que ce dispositif sans fil est un point d'accès
Signifie que ce dispositif sans fil est un ordinateur (mode Ad-Hoc, connexion point
à point)
C Le standard sans fil pris en charge par ce dispositif sans fil est affiché ici.
pour
802.11n,
pour 802.11g, et pour 802.11b.
L'icône WPS
s'affiche lorsque le point d'accès prend en charge le WPS. Si le point
d'accès utilise le cryptage, une icône de clé
s'affiche
Remarque : lorsque le point d'accès prend en charge le WPS et que l'icône WPS
est affichée, vous ne voyez pas l'icône de clé
ici, même si le point d'accès utilise le
cryptage.
D Affiche la force du signal du point d'accès en pourcentage
E Affiche un graphique à barres de la force du signal
Connexion à un point d'accès
Si le point d'accès sans fil auquel vous voulez vous connecter est détecté, vous pouvez
établir une connexion avec ce dernier en cliquant sur le bouton ‘Connect’.
1. Cliquez sur le point d'accès sans fil ou sur le dispositif réseau auquel vous voulez
vous connecter pour le mettre en surbrillance, puis cliquez sur ‘Connect’.
Page 21
5
Si le point d'accès que vous avez sélectionné n'utilise pas le cryptage, vous
serez connecté à ce point d'accès dans un délai d'une minute. Si le point d'accès
sélectionné utilise le cryptage, veuillez passer à l'étape 3.
2. Si le point d'accès ne possède pas de SSID, vous devrez le saisir à ce stade. Veuillez
demander au propriétaire du point d'accès le SSID exact pour le saisir ici. Cliquez
ensuite sur OK. Si le SSID fourni est erroné, vous ne pourrez pas vous connecter à
ce point d'accès et vous devrez le saisir à nouveau.
3. Si le point d'accès sans fil utilise un cryptage, vous devez saisir la clé WEP ou la clé
pré-partagée WPA.
4. Veuillez demander la clé correcte au propriétaire du point d'accès. Saisissez la clé et
cliquez sur OK. En cochant la case ‘Show Password’ (afficher mot de passe), la clé
de cryptage que vous saisissez sera affichée pour vous permettre de la contrôler.
Si la clé que vous saisissez est erronée, vous ne pourrez pas vous connecter à ce
point d'accès sans fil.
Le type d'authentification sera automatiquement sélectionné par le type
d'authentification du point d'accès. Veuillez ne pas le modifier.
5. Si vous réussissez à vous connecter au point d'accès sans fil, vous verrez un
symbole
devant le dispositif sans fil.
Page 22
6
Si vous déplacez votre curseur sur l'icône de l'utilitaire de configuration Ralink, une
info-bulle s'affiche pour fournir les informations sur l'état de la connexion.
Déclaration de conformité
Nous,
Nedis B.V.
De Tweeling 28
5215MC ’s-Hertogenbosch
Pays-Bas
Tél. : 0031 73 599 1055
E-mail : info@nedis.com
Déclarons que le produit :
Marque : König Electronic
Modèle : CMP-WNUSB31
Description : RÉSEAU SANS FIL USB 150MBPS
est conforme aux normes suivantes :
DBT : IEC 60950-1: 2001
EN 60950-1: 2001 + A11: 2004
CEM : EN 301 489-1 V1.6.1 (2005-09)
EN 301 489-17 V1.2.1 (2002-08)
EN 50392:2004
Radio: EN 300 328 V1.7.1 (2006-05)
et qu'il est conforme aux prescriptions de la Directive 1999/5/CE de l'Union
Européenne.
‘s-Hertogenbosch, 17-11-08
Mme. J. Gilad
Directeur des Achats
Page 23
7
Consignes de sécurité :
N'exposez jamais l'appareil à l'eau ou à l'humidité.
Entretien :
Ne nettoyez qu'avec un chiffon sec. N'utilisez pas de solvants ou de produits abrasifs.
Garantie :
Aucune garantie ou responsabilité ne sera acceptée en cas de modification et/ou
de transformation du produit ou en cas de dommages provoqués par une utilisation
incorrecte de l'appareil.
Généralités :
Le design et les caractéristiques techniques sont sujets à modification sans notification
préalable.
Tous les logos de marques et noms de produits sont des marques déposées ou
immatriculées dont leurs détenteurs sont titulaires et sont donc reconnues comme
telles dans ce document.
Attention :
Ce symbole figure sur l'appareil. Il signifie que les produits électriques et
électroniques ne doivent pas être jetés avec les déchets domestiques. Le
système de collecte est différent pour ce genre de produits.
Copyright ©
Page 24
8
Page 25
CMP-WNUSB31
DRAADLOZE LAN
USB 150MBPS
Page 26
2
NEDERLANDS
Installatie bij Windows XP
Volg de onderstaande instructies voor het installeren van uw nieuwe draadloze
netwerkkaart:
1. Steek de draadloze USB- netwerkkaart in een ongebruikte USB 2.0-poort van uw
computer terwijl deze is ingeschakeld.
2. Plaats de bijgeleverde cd in de cd-speler van uw computer en start het programma
Setup.exe. Lees de licentieovereenkomst en klik op 'I accept the terms of the license
agreement' (ik accepteer de voorwaarden van de licentieovereenkomst) en 'Next'
(volgende) om de licentieovereenkomst te accepteren. Het wordt aanbevolen om de
driver (stuurprogramma) en utility (software) te installeren voordat de netwerkkaart
voor de eerste keer wordt gebruikt.
3. U kunt nu het configuratieprogramma kiezen om de draadloze netwerkkaart mee
in te stellen. Het wordt aanbevolen om de 'Ralink Configuration Tool' te selecteren,
waarmee u toegang krijgt tot alle functies van de draadloze netwerkkaart. Indien u
de voorkeur geeft aan het draadloze configuratiemenu geleverd door Windows XP
of Vista, selecteer dan 'Microsoft Zero Configuration Tool', en klik op 'Next'.
4. Nu krijgt u de volgende melding te zien: please click ‘Install’ to start utility installation
(klik op “install” om de software te installeren). Als u opnieuw de melding ‘Found
New Hardware’ (nieuwe hardware gevonden) te zien krijgt, negeer deze dan en
wacht. Klik op install om verder te gaan met het installatieproces.
5. Wacht tot de installatieprocedure is afgerond. Als u de mededeling: “please click
‘Finish’ (klik op finish) te zien krijgt, klik dan op finish om het installatieproces te
beëindigen.
6. Nadat de installatie is afgerond, zal het draadloze configuratieprogramma
automatisch op het bureaublad van uw computer worden getoond. U zult ook een
icoon zien in de rechter benedenhoek in de Windows taakbalk. Als u uw draaloze
verbinding wilt configureren, klik dan met uw rechtermuisknop op dit icoon en er zal
een menu verschijnen. Klik op ‘Launch Config Utility’ om het configuratieprogramma
te starten.
Page 27
3
Met het Wireless Access Point verbinden
Nadat u de driver correct heeft geïnstalleerd zal het automatisch proberen een
verbinding te maken met een niet beveiligd wireless access point. Als u een verbinding
wilt maken met een specifiek wireless access point of als het access point van uw
keuze is beveiligd, dan dient u de draadloze netwerkkaart te configureren.
NB: In Vista zal de netwerkkaart niet automatisch verbinding maken.
De status van de draadloze verbinding zal door het Ralink configuratieprogramma met
behulp van iconen worden weer gegeven:
De draadloze verbinding is tot stand gebracht, goede signaalontvangst.
De draadloze verbinding is tot stand gebracht, normale signaalontvangst.
De draadloze verbinding is tot stand gebracht, zwakke signaalontvangst.
Er is nog geen verbinding tot stand gebracht.
Draadloze netwerkkaart is niet gevonden.
Er zijn twee manieren waarop u uw draadloze netwerkkaart kunt configureren om een
verbinding te maken met een wireless access point:
1. Gebruik de Ralink configuratiesoftware
2. Gebruik de ingebouwde Windows Zero configuration utility
Gebruik van de Ralink software
Volg de onderstaande instructies over het gebruik van de Ralink configuratiesoftware
om een verbinding te maken met een wireless access point.
1. Klik met de rechtermuisknop op het Ralink configuratie-icoon, dit kunt u vinden in
de rechter benedenhoek van het bureaublad en klik op ‘Launch Config Utility’.
Page 28

4
De Ralink setup utility (RaUI) zal gestart worden en automatisch gaan zoeken naar
alle wireless access points.
Menu
Instellingen
gebied
Meer /
minder
knop
Informatie-uitleg
Het zoekresultaat levert 5 typen informatie op, dit zijn:
A De SSID (Service Set Identifier) van het draadloze apparaat.
Als hier niets wordt getoond, betekent dit dat de SSID van het draadloze apparaat
verborgen is. Als een
symbool verschijnt voor de naam van het draadloze apparaat,
betekent dit dat er een verbinding is gemaakt met het draadloze apparaat.
B Het type van het draadloze apparaat en het kanaalnummer van het draadloze
apparaat.
Betekent dat dit draadloze apparaat een access point is
Betekent dat dit draadloze apparaat een computer is (ad-hocnetwerk, Point to Point
Protocol)
C De draadloze standaard die ondersteund wordt door dit access point wordt hier
getoond.
voor 802.11n, voor 802.11g, en voor 802.11b.
Het WPS-icoon
zal verschijnen wanneer het access point WPS ondersteunt. Als
het access point encryptie gebruikt zal een sleutelicoon
verschijnen.
NB: Als het access point WPS ondersteunt en het WPS-icoon
wordt getoond, zult u
het sleutelicoon niet zien
ook al gebruikt het access point encryptie.
D Toont de signaalsterkte van het access point in procenten.
E Toont een staafgrafiek van de signaalsterkte.
Page 29

5
Verbinden met een Access Point
Als het wireless access point dat u wilt gaan gebruiken is gevonden, kunt u een
verbinding maken door op de ‘Connect’ (verbinding) knop te klikken.
1. Klik op het wireless access point of netwerkapparaat waarmee u een verbinding wilt
maken, het zal worden gemarkeerd, klik nu op ‘Connect’.
Als het access point van uw keuze geen encryptie gebruikt, zult u binnen een minuut
worden verbonden met het geselecteerde wireless access point. Als het access
point van uw keuze encryptie gebruikt, ga dan verder met stap 3.
2. Als het wireless access point geen SSID heeft, wordt u nu gevraagd om dit in te
voeren. Vraag de eigenaar van het wireless access point voor het exacte SSID en
vul het hier in. Klik nu op ‘OK’. Als het ingevoerde SSID niet juist is, zult u geen
verbinding kunnen maken met het access point en zal worden gevraagd om het
opnieuw in te voeren.
3. Als het wireless access point gebruik maakt van encryptie, moet u de WEP-sleutel
of WPA-sleutel invoeren.
Page 30

6
4. Vraag de eigenaar van het wireless acces point om de juiste sleutel. Voer de sleutel
in en klik op ‘OK’. Door op het ‘Show Password’ selectievakje te klikken kunt u de
encryptie sleutel die u hier invoert bekijken zodat u het kunt controleren.
Als de waarde die u hier invoert niet juist is, zult u geen verbinding met het draadloze
toegangspunt kunnen maken.
Het authenticatie protocol zal automatisch worden geselecteerd door het
access point, verander dit niet.
5. Als u succesvol een verbinding heeft gemaakt met het wireless acces point, zult u
voor het draadloze apparaat een
symbool zien.
Als u de cursor over het Raling configuratie-icoon houdt, zal een ballon verschijnen
met informatie over de status van de verbinding.
Page 31

7
Conformiteitsverklaring
Wij,
Nedis BV
De Tweeling 28
5215 MC ’s-Hertogenbosch
Nederland
Tel.: 0031 73 599 1055
E-mail: info@nedis.com
verklaren dat het product:
Merknaam: König Electronic
Model: CMP-WNUSB31
Omschrijving: DRAADLOZE LAN USB 150MBPS
in overeenstemming met de volgende normen is
LVD: IEC 60950-1: 2001
EN 60950-1: 2001 + A11 : 2004
EMC: EN 301 489-1 V1.6.1 (2005-09)
EN 301 489-17 V1.2.1 (2002-08)
EN 50392:2004
Radio: EN 300 328 V1.7.1 (2006-05)
en voldoen aan de vereiste richtlijn 1999/5/EG van de Europese Unie.
‘s-Hertogenbosch, 17 november 2008
Mevr. J. Gilad
Directeur inkoop
Page 32

8
Veiligheidsvoorzorgsmaatregelen:
Stel het product niet bloot aan water of vocht.
Onderhoud:
Uitsluitend reinigen met een droge doek. Gebruik geen reinigingsmiddelen of
schuurmiddelen.
Garantie:
Voor wijzigingen en veranderingen aan het product of schade veroorzaakt door een
verkeerd gebruik van dit product, kan geen aansprakelijkheid worden geaccepteerd.
Tevens vervalt daardoor de garantie.
Algemeen:
Wijziging van ontwerp en specificaties zonder voorafgaande mededeling onder
voorbehoud.
Alle logo's, merken en productnamen zijn handelsmerken of geregistreerde
handelsmerken van de respectievelijke eigenaren en worden hierbij als zodanig
erkend.
Let op:
Dit product is voorzien van dit symbool. Dit symbool geeft aan dat afgedankte
elektrische en elektronische producten niet met het gewone huisafval
verwijderd mogen worden. Voor dit soort producten zijn er speciale
inzamelingspunten.
Copyright ©
Page 33

CMP-WNUSB31
LAN WIRELESS
USB 150 MBPS
Page 34

2
ITALIANO
Installazione per Windows XP
Attenersi alle seguenti istruzioni per installare la nuova scheda di rete senza fili:
1. Inserire la scheda di rete senza fili USB in una porta USB 2.0 libera del computer,
mentre quest'ultimo è acceso.
2. Inserire il CDR-ROM del driver del dispositivo nell'unità CD/DVD ROM del computer
ed eseguire “Setup.exe”. Leggere il contratto di licenza per l'utente finale e fare clic
su “Accetto i termini del contratto di licenza” e quindi fare clic sul pulsante “Avanti”
per accettare il contratto di licenza. Quando si usa la scheda di rete per la prima
volta, si consiglia di installare il driver e l'utilità.
3. Qui è possibile scegliere il tool di configurazione utilizzato per configurare la
scheda di rete senza fili. Si consiglia di selezionare “Ralink Configuration Tool”, che
fornisce l'accesso completo a tutte le funzioni della scheda di rete senza fili. Se si
preferisce utilizzare il tool di configurazione senza fili fornito da Windows XP o Vista,
selezionare “Microsoft Zero Configuration Tool” e quindi fare clic su “Avanti”.
4. Apparirà il seguente messaggio: fare clic su “Installare” per avviare l'installazione
dell'utilità. Se appare di nuovo il messaggio ‘Trovato nuovo hardware’, ignorarlo
ed attendere. Fare clic su “installa” per continuare la procedura di installazione.
5. Attendere l'avanzamento della procedura di installazione. Quando apparirà il
messaggio: “fare clic su “Fine” per completare il processo di installazione del driver”,
fare clic su Fine.
6. Al termine dell'installazione, sul desktop del computer apparirà automaticamente l'utilità di
configurazione senza fili. Nella barra delle applicazioni di Windows sarà anche visibile un'icona
nell'angolo in basso a destra. Quando si desidererà configurare la connessione senza fili, fare
clic on il tasto destro del mouse sull'icona per far apparire un menu a comparsa. Fare clic su
“Launch Config Utility” (Utilità Lancia configurazione) per avviare il relativo programma.
Collegare al punto di accesso senza fili
Dopo la sua installazione corretta, il driver cercherà di collegarsi automaticamente
qualsiasi access point senza fili non codificato. Se si intende eseguire la connessione
a un access point senza fili specifico o se l'access point prescelto è codificato, occorre
configurare la scheda di rete senza fili.
Nota: In Vista, la scheda di rete non si connetterà automaticamente ad alcun access
point non codificato.
Page 35

3
Lo stato corrente della connessione senza fili sarà visibile mediante l'utilità di
configurazione Ralink nelle icone:
La connessione senza fili è stata stabilita, buona ricezione del segnale.
La connessione senza fili è stata stabilita, normale ricezione del segnale.
La connessione senza fili è stata stabilita, debole ricezione del segnale.
La connessione non è stata ancora stabilita.
La scheda di rete senza fili non è stata rilevata.
La scheda di rete senza fili è configurabile attraverso due modalità, in relazione alla
connessione all'access point senza fili:
1. Utilizzo dell'utilità di configurazione Ralink
2. Utilizzo dell'utilità di configurazione zero integrata di Windows
Utilizzo dell'Utility Ralink
Attenersi alle istruzioni riportate più avanti per servirsi dell'utilità di configurazione
Ralink per collegarsi a un access point senza fili.
1. Fare clic con il tasto destro del mouse sull'icona dell'utilità di configurazione Ralink,
che si trova nell'angolo in basso a destro del desktop del computer; quindi fare clic
sul “Launch Config Utility”.
L'utilità di configurazione Ralink (RaUI) sarà lanciata e inizierà automaticamente la
scansione di tutti gli access point senza fili.
Menu
Area
configurazione
Pulsante
Più/Meno
Page 36

4
Spiegazione delle informazioni
I risultati della scansione comprendono 5 tipi di informazioni, ovvero:
A Il SSID (Service Set Identifier) del dispositivo senza fili.
Se qui non appare nulla, significa che il SSID di questo dispositivo senza fili è nascosto.
Se davanti al nome del dispositivo senza fili appare il simbolo
, significa che è stata
stabilita la connessione con tale dispositivo
B Il tipo e il numero di canale del dispositivo senza fili
Indica che il dispositivo senza fili è un access point
Significa che il dispositivo senza fili è un computer (Modalità Ad-Hoc, connessione
point-to-point)
C Lo standard wireless supportato da questo access point appare in questo punto.
per 802.11n,
per 802.11g e per 802.11b.
Se l'access point supporta il WPS, apparirà l'icona WPS
. Se l'access point utilizza
la codifica, apparirà un'icona a forma di chiave
Nota: Se l'access point supporta il WPS ed è visibile l'icona WPS , non sarà qui
visibile l'icona a forma di chiave
anche se l'access point utilizza la codifica.
D Indica la potenza del segnale dell'access point espressa in percentuale
E Indica un grafico a barre della potenza del segnale
Connessione a un Access Point
Se l'access point senza fili da collegare viene rilevato, è possibile stabilire la
connessione facendo clic sul pulsante “Connect” (Connetti).
1. Fare clic sull'access point senza fili o sul dispositivo di rete da collegare che apparirà
evidenziato. Fare clic su “Connect”.
Page 37

5
Se l'access point selezionato non utilizza la codifica, la connessione a tale access
point senza fili avverrà entro un minuto. Se l'access point selezionato utilizza la
codifica, passare alla fase 3.
2. Se l'access point senza fili non ha il SSID, apparirà la richiesta di inserirlo. Chiedere
al proprietario dell'access point senza fili il SSID esatto e inserirlo in questo punto.
Quindi fare clic su OK. Se il SSID fornito non è corretto, non sarà possibile collegarsi
a questo access point e apparirà la richiesta di inserirlo di nuovo.
3. Se l'access point senza fili è codificato, apparirà la richiesta di inserire la relativa
chiave WEP oppure la chiave precondivisa WPA.
4. Chiedere al proprietario dell'access point senza fili la chiave corretta. Inserire la
chiave e fare clic su “OK”. Selezionando la casella “Password”, apparirà la chiave di
codifica inserita in questa sede, consentendo la verifica.
Se la chiave inserita non è corretta, non sarà possibile effettuare il collegamento a
questo access point senza fili.
Il tipo di autenticazione sarà selezionato automaticamente in base al tipo di
autenticazione dell'access point e non deve essere modificato.
5. Se si ottiene la connessione all'access point senza fili, apparirà il simbolo
davanti
al dispositivo senza fili.
Page 38

6
Se si sposta il cursore sull'icona dell'utilità di configurazione Raling, apparirà uno
spazio con le informazioni sullo stato delle connessioni.
DICHIARAZIONE DI CONFORMITÀ
Questa società,
Nedis B.V.
De Tweeling 28
5215MC ’s-Hertogenbosch
Paesi Bassi
Tel.: 0031 73 599 1055
Email: info@nedis.com
Dichiara che il prodotto:
Marca: König Electronic
Modello: CMP-WNUSB31
Descrizione: LAN WIRELESS USB 150 MBPS
è conforme ai seguenti standard:
LVD: IEC 60950-1: 2001
EN 60950-1: 2001 + A11 : 2004
EMC: EN 301 489-1 V1.6.1 (2005-09)
EN 301 489-17 V1.2.1 (2002-08)
EN 50392:2004
Radio: EN 300 328 V1.7.1 (2006-05)
e rispetta i requisiti della direttiva dell'Unione Europea 1999/5/CE.
‘s-Hertogenbosch, 17-11-08
Sig.ra J. Gilad
Direttore agli acquisti
Page 39

7
Precauzioni di sicurezza:
Non esporre il prodotto ad acqua o umidità.
Manutenzione:
Pulire solo con un panno asciutto. Non utilizzare solventi detergenti o abrasivi.
Garanzia:
Non sarà accettata alcuna garanzia o responsabilità in relazione a cambiamenti e
modifiche del prodotto o a danni determinati dall'uso non corretto del prodotto stesso.
Generalità:
Il design e le caratteristiche tecniche sono soggetti a modifica senza necessità di
preavviso.
Tutti i marchi a logo e i nomi di prodotto sono marchi commerciali o marchi registrati
appartenenti ai rispettivi titolari e sono in questo documento riconosciuti come tali.
Attenzione:
Il prodotto è contrassegnato con questo simbolo, con il quale si indica che i
prodotti elettrici ed elettronici usati non devono essere gettati insieme ai
rifiuti domestici. Per questi prodotti esiste un sistema di raccolta
differenziata.
Copyright ©
Page 40

8
Page 41

CMP-WNUSB31
LAN INALÁMBRICA
USB 150 Mbps
Page 42

2
ESPAÑOL
Instalación para Windows XP
Por favor, utilice las instrucciones siguientes para instalar su nueva tarjeta de red
inalámbrica:
1. Introduzca la tarjeta de red inalámbrica USB en un puerto vacío USB 2.0 de su
ordenador cuando el ordenador esté encendido.
2. Introduzca el CD-ROM del piloto del dispositivo en el lector de CD/DVD ROM de
su ordenador y ejecute ‘Setup.exe’. Por favor, lea el acuerdo de licencia de usuario
final y pulse en “Acepto los términos del contrato de licencia” y a continuación,
pulse el botón “Siguiente” para aceptar el contrato de licencia. Le aconsejamos que
instale el piloto y la utilidad si la tarjeta de red se utiliza por primera vez.
3. Puede seleccionar aquí la herramienta de configuración utilizada para configurar
la red inalámbrica. Se recomienda seleccionar “Ralink Configuration Tool”, que
otorga el acceso completo a todas las funciones de la tarjeta de red inalámbrica. Si
desea utilizar la herramienta de configuración inalámbrica de Windows XP o Vista,
seleccione “Microsoft Zero Configuration Tool”, y haga clic en “Next” (Siguiente).
4. Ahora verá el siguiente mensaje: por favor, pulse en ‘Install’ (Instalar) para lanzar
la instalación de la utilidad. Si vuelve a ver el mensaje de ‘Nuevo dispositivo
encontrado’ por favor, ignórelo y espere. Pulse “Instalar” para seguir con el proceso
de instalación.
5. Por favor, espere mientras avanza el proceso de instalación. Cuando vea el mensaje:
“por favor, pulse ‘Finish’ (terminar) para completar el proceso de instalación del
piloto” por favor, pulse terminar.
6. Una vez que haya terminado la instalación, la utilidad de configuración inalámbrica
aparecerá en el escritorio de su ordenador automáticamente. También verá un icono
en la esquina inferior derecha de su bandeja de sistema de Windows. Cuando desee
configurar su conexión inalámbrica, por favor, haga clic derecho en este icono, y un
menú en pantalla aparecerá. Pulse en ‘Launch Config Utility’ (Lanzar la utilidad de
configuración) para empezar el programa de configuración.
Conexión a un punto de acceso inalámbrico
Una vez que haya instalado correctamente el piloto, intentará conectarse con cualquier
punto de acceso inalámbrico automáticamente que no esté codificado. Si desea
conectarse a un punto de acceso inalámbrico específico, o al punto de acceso de su
elección, tendrá que configurar la tarjeta de red inalámbrica.
Page 43

3
Nota: En Vista, la tarjeta de red no se conectará a ningún punto de acceso inalámbrico
no codificado automáticamente.
El estado actual de la conexión inalámbrica aparecerá en pantalla con la utilidad de
configuración Ralink en los iconos:
Conexión inalámbrica establecida, buena señal de recepción.
Conexión inalámbrica establecida, señal normal de recepción.
Conexión inalámbrica establecida, mala señal de recepción.
La conexión aún no se ha establecido.
La tarjeta de red inalámbrica no se ha detectado.
Existen dos modos de configurar su tarjeta de red inalámbrica a un punto de acceso
inalámbrico:
1. Utilizando la utilidad de configuración de Ralink
2. Utilizando la utilidad de configuración cero integrada de Windows
Utilizando la utilidad de Ralink
Por favor, siga las instrucciones indicadas a continuación para utilizar la utilidad de
configuración Ralink para conectarse a un punto de acceso inalámbrico.
1. Haga clic derecho en el icono de la utilidad de configuración Ralink ubicado en la
esquina inferior derecha del escritorio de su ordenador y a continuación pulse en
“Lanzar la utilidad de configuración”.
La utilidad de configuración Ralink (RaUI) se lanzará y empezará a buscar todos
los puntos de acceso inalámbricos automáticamente.
“Menu”
(Menú)
Zona de
configuración
Botón
más/
menos
Page 44

4
Explicación de la información
El resultado de la búsqueda incluye 5 tipos de información, que son:
A El SSID (Identificador de fijación de servicio) del dispositivo inalámbrico.
Si no aparece nada en esta sección, esto significa que el SSID de este dispositivo
inalámbrico está oculto. Si un símbolo
aparece frente al nombre del dispositivo
inalámbrico, esto significa que ha establecido una conexión con dicho dispositivo
inalámbrico
B El tipo de este dispositivo inalámbrico y el número de canal del dispositivo
inalámbrico
Significa que este dispositivo inalámbrico es un punto de acceso
Significa que este dispositivo inalámbrico es un ordenador (modo Ad-Hoc, conexión
de punto a punto)
C El soporte inalámbrico aceptado por este punto de acceso aparecerá aquí.
para
802.11n,
para 802.11g, y para 802.11b.
El icono WPS
aparecerá cuando el punto de acceso acepte WPS. Si el punto de
acceso utiliza la codificación, un icono clave
aparecerá en pantalla
Nota: Cuando el punto de acceso acepte el WPS y el icono de WPS
aparezca en
pantalla, no verá el icono de clave
aquí a pesar de que su punto de acceso utilice
la codificación.
D Indica la fuerza de la señal del punto de acceso mediante un porcentaje
E Indica un gráfico de barras de la fuerza de señal
Conexión a un punto de acceso
Si el punto de acceso inalámbrico que desea conectar se encuentra, podrá establecer
una conexión con él pulsando el botón ‘Connect’ (Conectar).
1. Pulse en el punto de acceso inalámbrico o en el dispositivo de red al que desea
conectarse y se resaltará, y a continuación, pulse en ‘Connect’ (Conectar).
Page 45

5
Si el punto de acceso que ha seleccionado no utiliza la codificación, se conectará
a este punto de acceso inalámbrico en un minuto. Si el punto de acceso que ha
seleccionado utiliza la codificación, por favor, véase la etapa 3.
2. Si el punto de acceso inalámbrico no tiene SSID, se le pedirá que lo indique ahora.
Por favor, pregunte al propietario del punto de acceso inalámbrico el SSID exacto
e indíquelo aquí. A continuación, pulse ‘OK’. Si el SSID que indicó aquí es erróneo,
no podrá conectarse a este punto de acceso y deberá indicarlo de nuevo.
3. Si el punto de acceso inalámbrico utiliza el cifrado, deberá indicar su clave WEP o
la clave WPA.
4. Por favor, pregunte al propietario del punto de acceso inalámbrico la clave
correcta. Indique la clave y pulse ‘OK’. Si marca la casilla “Mostrar contraseña”, la
clave de codificación que Vd. indique aquí aparecerá en pantalla para que pueda
comprobarla.
Si la clave que indicó aquí es errónea, no podrá conectarse a este punto de acceso
inalámbrico.
El tipo de autenticación será seleccionado mediante el tipo de autenticación
del punto de acceso automáticamente, por favor, no lo cambie.
5. Si logra conectarse adecuadamente al punto de acceso inalámbrico, verá un
símbolo
frente al dispositivo inalámbrico.
Page 46

6
Si desplaza el cursor por el icono de utilidad de configuración Raling, un globo
aparecerá con la información acerca del estado de conexión.
Declaración de conformidad
La empresa infraescrita,
Nedis B.V.
De Tweeling 28
5215MC ’s-Hertogenbosch
Países Bajos
Tel.: 0031 73 599 1055
Correo electrónico: info@nedis.com
Declara que el producto:
Marca: König Electronic
Modelo: CMP-WNUSB31
Descripción: LAN INALÁMBRICA USB 150 Mbps
se encuentra conforme a las siguientes normas:
LVD: IEC 60950-1: 2001
EN 60950-1: 2001 + A11: 2004
EMC: EN 301 489-1 V1.6.1 (2005-09)
EN 301 489-17 V1.2.1 (2002-08)
EN 50392:2004
Radio: EN 300 328 V1.7.1 (2006-05)
Y cumple con todos los requisitos de las directivas de la Unión Europea 1999/5/EC
‘s-Hertogenbosch, 17-11-08
D.. J. Gilad
Director de compras
Page 47

7
Medidas de seguridad:
No exponga el producto al agua ni a la humedad.
Mantenimiento:
Limpiar exclusivamente con un paño seco. No utilice solventes de limpieza ni
abrasivos.
Garantía:
No se aceptará ninguna garantía o responsabilidad derivada de cualquier cambio o
modificaciones realizadas al producto o daños provocados por un uso incorrecto del
presente producto.
General:
Las ilustraciones y las especificaciones podrán sufrir cambios sin previo aviso.
Todas las marcas de los logotipos y los nombres de productos constituyen patentes o
marcas registradas de sus titulares correspondientes, reconocidos como tal.
Cuidado:
Este producto está señalizado con este símbolo. Esto significa que los
productos eléctricos y electrónicos gastados no deberán mezclarse con los
desechos domésticos generales. Existen distintos sistemas de recogida
individuales para este tipo de productos.
Copyright ©
Page 48

8
Page 49

CMP-WNUSB31
VEZETÉK NÉLKÜLI LAN
USB KÁRTYA, 150 MB/mp
Page 50

2
MAGYAR NYELVŰ
Telepítés Windows XP rendszerre
Az új vezeték nélküli hálózati kártya telepítéséhez végezze el az alábbi műveleteket:
1. Tegye az USB vezeték nélküli kártyát a számítógép egyik üres USB 2.0 portjára a
számítógép kikapcsolt állapotában.
2. Helyezze a kártya illesztőprogramját tartalmazó CD-ROM-OT a számítógép CD/
DVD ROM meghajtójába, és hajtsa végre a “Setup.exe” fájlt. Tanulmányozza át a
végfelhasználói licenc megállapodást, és kattintson az “I accept the terms of the
license agreement(Elfogadom a licenc feltételeket), majd a “Next” (Tovább) gombra
kattintson. A hálózati kártya legelső használata előtt ajánlatos az illesztőprogram és
a segédprogram telepítése.
3. Itt választhatja ki az eszközt a vezeték nélküli hálózati kártya konfigurálásához.
Ajánlatos a “Ralink Configuration Tool” (Ralink konfigurációs eszköz) kiválasztása,
amely teljes hozzáférést biztosít ennek a hálózati kártyának valamennyi funkciójához.
Ha a Windows XP vagy Vista telepítő eszközét részesíti előnyben, válassza a
“Microsoft Zero Configuration Tool” eszközt, majd kattintson a “Next” (Tovább)
gombra.
4. Ekkor a következő üzenet fog megjelenni: kattintson az “Install” (Telepítés) gombra
a segédprogram telepítésének elindításához. Ha a “Found New Hardware” (Új
hardver) üzenet ismét megjelenik, hagyja figyelmen kívül, és várjon. A telepítés
folytatásához kattintson az “install” (telepítés) gombra.
5. Várjon, amíg a telepítés folyamatban van. Ha a “Please click “Finish” to complete
the driver installation process” (Az illesztőprogram telepítését a “Finish” (Befejezés)
gombra kattintva fejezze be) tartalmú üzenet jelenik, meg, kattintson a “Finish”
(Befejezés) gombra.
6. A telepítés befejezése után a vezeték nélküli konfigurációs segédprogram a
számítógép képernyőjén, az asztalon automatikusan megjelenik. A tálca jobb alsó
sarkában egy ikont is fog találni. Amikor a vezeték nélküli kapcsolatot konfigurálni
szeretné, kattintson jobb egérgombbal erre az ikonra, és megjelenik egy előugró
menü. A “Launch Config Utility” (Konfigurációs segédprogram indítása) opcióra
kattintva indítsa el a konfigurációs programot.
Page 51

3
Csatlakozás vezeték nélküli hozzáférési ponthoz
Az illesztőprogram helyes telepítése után az eszköz automatikusan kapcsolódni próbál
egy nem titkosított vezeték nélküli hozzáférési ponthoz. Ha egy adott vezeték nélküli
hozzáférési ponthoz kíván csatlakozni, vagy titkosított hozzáférési pontot választ,
konfigurálnia kell a vezeték nélküli hálózati kártyát.
MEGJEGYZÉS: A Vista rendszernél a hálózati kártya nem csatlakozik automatikusan
titkosítatlan vezeték nélküli hozzáférési ponthoz.
A vezeték nélküli kapcsolat pillanatnyi állapotát a Ralink konfigurációs segédprogram
az alábbi ikonokkal jelzi:
A vezeték nélküli kapcsolat létrejött, a jelek vétele jó.
A vezeték nélküli kapcsolat létrejött, ja jelek vétele normál.
A vezeték nélküli kapcsolat létrejött, a jelek vétele gyenge.
A vezeték nélküli kapcsolat még nem jött létre.
A vezeték nélküli hálózati kártyát a rendszer nem érzékeli.
A vezeték nélküli hálózati kártyát két módon konfigurálhatja, hogy az kapcsolódjon a
vezeték nélküli hozzáférési ponthoz:
1. A Ralink konfigurációs segédprogrammal
2. A Windows saját zéró konfigurációs segédprogramjával
A Ralink segédprogram használata
Vezeték nélküli hozzáférési ponthoz való kapcsolódás végett a Ralink konfigurációs
segédprogramot az alábbi útmutatások szerint futtassa:
1. Kattintson bal egérgombbal a Ralink konfigurációs segédprogram ikonjára az asztal
jobb alsó sarkában, majd kattintson a “Launch Config Utility” (A konfigurációs
segédprogram indítása) opcióra.
Page 52

4
A Ralink beállító segédprogram (RaUI) elindul, és automatikusan keresni kezdi a
vezeték nélküli hozzáférési pontokat.
Menü
Beállítási
terület
Több /
Kevesebb
gomb
A keresés eredményeinek jelentése
A keresési eredmények 5-féle információt tartalmaznak:
A A vezeték nélküli eszköz SSID-je (szolgáltatáscsoport azonosító).
Ha itt semmi nem látható, az annyit jelent, hogy ennek a vezeték nélküli eszköznek az
SSID-je rejtett. Ha a
szimbólum jelenik meg a vezeték nélküli eszköz neve előtt, az
annyit jelent, hogy létrejött a kapcsolat azzal a vezeték nélküli eszközzel.
B Ennek a vezeték nélküli eszköznek a típusa és csatornaszáma.
Azt jelenti, hogy ez a vezeték nélküli eszköz egy hozzáférési pont.
Azt jelenti, hogy ez a vezeték nélküli eszköz egy számítógép (Adhoc mód, pont-
pont összeköttetés)
C Az ezen hozzáférési pont által támogatott vezeték nélküli szabványt itt jelzi ki.
a
802.11n-hez,
a 802.11g-hez és a 802.11b-hez.
A WPS (Wifi Protected Setup, biztonságos Wifi beállítás)
ikonja akkor jelenik meg,
ha a hozzáférési pont támogatja a WPS-t. Ha a hozzáférési pont titkosított, a kulcsot
ábrázoló ikon
jelenik meg.
Megjegyzés: Ha a hozzáférési pont támogatja a WPS-t, és a
ikon megjelenik, a
kulcs
ikont itt akkor sem fogja látni, ha a hozzáférési pont titkosított.
D A hozzáférési pont jelerősségét mutatja százalékban.
E A jelerősség állapotsávját mutatja.
Page 53

5
Kapcsolódás hozzáférési pontra
Ha a rendszer megtalálta a keresett vezeték nélküli hozzáférési pontot, a “Connect”
(Kapcsolódás) gombra kattintva létrehozhatja vele a kapcsolatot.
1. Kattintson a hozzáférési pontja vagy a csatlakoztatni kívánt eszközre, és amint azt a
program kiemeli, kattintson a “Connect” (Kapcsolódás) gombra.
Ha a kiválasztott hozzáférési pont nem titkosított, a hozzá való kapcsolódás egy
percen belül létrejön. Ha a kiválasztott hozzáférési pont titkosított, ugorjon tovább a
3. lépéshez.
2. Ha a vezeték nélküli hozzáférési pontnak nincs SSID-je, a rendszer felkéri Önt, hogy
vigye be most. A vezeték nélküli hozzáférési pont tulajdonosától érdeklődje meg a
pontos SSID-t, és vigye be. Ezután kattintson az OK gombra. Ha helytelen SSID-t
visz be, nem fog tudni erre a hozzáférési pontra kapcsolódni, és a rendszer újból
felkéri az SSID bevitelére.
3. Ha a vezeték nélküli hozzáférési pont titkosított, a rendszer felkéri a WEP kulcs vagy
a WPA megosztott kulcs bevitelére.
Page 54

6
4. A kulcsot érdeklődje meg a vezeték nélküli elérési pont tulajdonosától. Vigye be
a kulcsot, majd kattintson az OK gombra. A “Show Password” (Jelszó mutatása)
mezőben az Ön által bevitt kulcs megjelenik, hogy ellenőrizhesse.
Ha helytelen kulcsot vitt be, nem tud ehhez a vezeték nélküli hozzáférési ponthoz
csatlakozni.
A hitelesítési típust a hozzáférési pont hitelesítési típusa automatikusan
kijelöli, kérjük, ne változtassa meg.
5. Ha sikeresen rákapcsolódott a vezeték nélküli hozzáférési pontra, a vezeték nélküli
eszköz előtt a
szimbólumot fogja látni.
Ha a kurzort áthúzza a Raling konfigurációs segédprogram ikonján, egy léggömb
tűnik elő, amely a kapcsolódás állapotáról mutat információt.
Page 55

7
Megfelelőségi nyilatkozat
Mi,
a Nedis B.V.,
De Tweeling 28
5215MC ’s-Hertogenbosch
Hollandia
Tel.: 0031 73 599 1055
E-mail: info@nedis.com
Kijelentjük, hogy a termék, amelynek:
Márkája: König Electronic
Típusa: CMP-WNUSB31
Megnevezése: VEZETÉK NÉLKÜLI LAN USB KÁRTYA, 150 MB/mp
Összhangban van az alábbi szabványokkal:
LVD (Kisfeszültségű elektromos termékekre vonatkozó irányelv):
IEC 60950-1: 2001
EN 60950-1: 2001 +A11 : 2004
EMC (Elektromágneses összeférhetőségre vonatkozó irányelv):
EN 301 489-1 V1.6.1 (2005-09)
EN 301 489-17 V1.2.1 (2002-08)
EN 50392:2004
Rádió: EN 300 328 V1.7.1 (2006-05)
Megfelel továbbá az Európai Unió 1999/5/EK irányelvében támasztott
követelményeknek.
‘s-Hertogenbosch, 2008. november 17.
Mrs. J. Gilad
értékesítési igazgató
Megfelelőségi nyilatkozat.
Egyetértek és elfogadom a Nedis B.V. Hollandia által adott nyilakozatot.
Jacob Gilad
HQ-Nedis kft.
ügyvezető igazgató
Page 56

8
Biztonsági óvintézkedések:
A terméket víztől és egyéb nedvességtől védje.
Karbantartás:
Csak száraz ronggyal tisztítsa. Tisztító- és súrolószereket ne használjon.
Jótállás:
Nem vállalunk jótállást és felelősséget a terméken végzett változtatás vagy módosítás
vagy a termék helytelen használata miatt bekövetkező károkért.
Általános tudnivalók:
A kivitel és a műszaki jellemzők előzetes értesítés nélkül is változhatnak.
Minden logó, terméknév és márkanév a tulajdonosának márkaneve vagy bejegyzett
márkaneve, és azokat ennek tiszteletben tartásával említjük.
Figyelem!
Ezt a terméket ezzel a jelöléssel láttuk el. Azt jelenti, hogy az elhasznált
elektromos és elektronikus termékeket tilos az általános háztartási
hulladékhoz keverni. Ezek begyűjtését önálló begyűjtő létesítmények
végzik.
Copyright ©
Page 57

CMP-WNUSB31
LANGATON LAN
USB 150MBPS
Page 58

2
SUOMI
Asennus käyttöjärjestelmään Windows XP
Noudata seuraavia langattoman verkkokortin asennusohjeita:
1. Aseta langaton USB-verkkokortti tietokoneen vapaaseen USB 2.0 -porttiin
tietokoneen ollessa päällä.
2. Aseta CD-ROM-laiteajuri tietokoneen CD/DVD ROM -asemaan ja käynnistä ohjelma
“Setup.exe”. Lue loppukäyttäjän lisenssisopimus ja napsauta “I accept the terms of
the license agreement” (Hyväksyn lisenssisopimuksen ehdot) ja “Next” (Seuraava)
hyväksyäksesi sopimuksen. Ajurin ja apuohjelman asennus on suositeltavaa, jos
verkkokorttia käytetään ensimmäistä kertaa.
3. Voit nyt valita konfigurointivälineen langattoman verkkokortin konfigurointia varten.
Suositeltavaa on valita “Ralink Configuration Tool”, joka mahdollistaa pääsyn tämän
langattoman verkkokortin kaikkiin toimintoihin. Jos haluat käyttää Windows XP tai
Vista -käyttöjärjestelmien konfigurointivälinettä, valitse “Microsoft Zero Configuration
Tool”, ja napsauta sitten “Next” (Seuraava).
4. Tällöin näkyviin tulee seuraava viesti: napsauta ‘Install’ (Asenna) käynnistääksesi
apuohjelman asennuksen. Jos viesti ‘Found New Hardware’ (Uusi laite havaittu)
tulee uudelleen näkyviin, älä välitä siitä ja odota. Napsauta “Asenna” jatkaaksesi
asennusprosessia.
5. Odota asennusprosessin ajan. Kun näkyviin tulee viesti: “please click ‘Finish’
to complete the driver installation process” (Napsauta Lopeta suorittaaksesi
asennuksen loppuun), napsauta Lopeta.
6. Kun asennus on suoritettu loppuun, langaton konfigurointiohjelma näkyy automaattisesti
tietokoneen työpöydällä. Windows-käyttöjärjestelmän oikeassa alakulmassa näkyy
myös kuvake. Kun haluat konfiguroida langattoman yhteyden, napsauta kuvaketta hiiren
oikealla näppäimellä ja näkyviin tulee ponnahdusikkuna. Napsauta ‘Launch Config
Utility’ (Käynnistä konfigurointiohjelma) käynnistääksesi konfigurointiohjelman.
Yhteyden luonti langattomaan tukiasemaan
Kun ajuri on asennettu oikein, se pyrkii luomaan automaattisesti yhteyden
suojaamattomiin langattomiin tukiasemiin. Jos haluat luoda yhteyden johonkin tiettyyn
langattomaan tukiasemaan, tai jos haluamasi tukiasema on suojattu, tulee langaton
verkkokortti konfiguroida.
HUOM: Vista-käyttöjärjestelmässä verkkokortti ei luo yhteyttä suojaamattomiin
langattomiin tukipisteisiin automaattisesti.
Page 59

3
Langattoman yhteyden nykyisen tilan näyttää Ralink-konfigurointiohjelma kuvakkein:
Langaton yhteys on luotu, hyvä signaalin voimakkuus.
Langaton yhteys on luotu, normaali signaalin voimakkuus.
Langaton yhteys on luotu, heikko signaalin voimakkuus.
Yhteyttä ei ole vielä luotu.
Langatonta verkkokorttia ei ole havaittu.
Langaton verkkokortti voidaan konfiguroida kahdella tapaa yhteyden luomiseksi
langattomaan tukiasemaan:
1. Ralink-konfigurointiohjelmaa käyttäen
2. Sisäänrakennettua Windows-käyttöjärjestelmän konfigurointiohjelmaa käyttäen
Ralink-apuohjelman käyttö
Noudata alla olevia ohjeita käyttääksesi Ralink-konfigurointiohjelmaa luodaksesi
yhteyden langattomaan tukiasemaan.
1. Napsauta hiiren oikealla painikkeella tietokoneen työpöydän oikeassa alakulmassa
olevaa Ralink-konfigurointiohjelman kuvaketta ja napsauta sen jälkeen ‘Launch
Config Utility’ (Käynnistä konfigurointiohjelma).
Ralink-asetusohjelma (RaUI) käynnistyy ja alkaa selaamaan kaikkia langattomia
tukiasemia automaattisesti.
Valikko
Asetusalue
Lisäys-/
laskupainike
Page 60

4
Tietojen selitykset
Selaustulos sisältää viidenlaisia tietoja, joita ovat:
A Langattoman laitteen SSID (Service Set Identifier).
Jos tässä kohtaa ei näy mitään, tämän langattoman laitteen SSID on piilotettu. Jos
langattoman laitteen eteen ilmestyy merkki
, yhteys on luotu kyseiseen langattomaan
verkkoon.
B Tämän langattoman laitteen tyyppi ja sen vastaava kanavanumero
Merkitsee, että tämä langaton laite on tukiasema.
Merkitsee, että tämä langaton laite on tietokone (Ad-Hoc-tila, pisteestä-pisteeseen-
kytkentä)
C Tukiaseman tukema langaton standardi näkyy tässä kohtaa.
mallille 802.11n,
mallille 802.11g, ja mallille 802.11b.
WPS-kuvake icon
will apptulee näkyviin silloin, kun tukiasema tukee WPS:aa. Jos
tukiasemassa on salaus, näkyviin tulee avaimen kuvake
.
Huom. Kun tukiasema tukee WPS:a ja WPS-kuvake
näkyy, avaimen merkkiä ei
näy, vaikka tukiasema onkin suojattu.
D Näyttää tukiaseman signaalin voimakkuuden prosenttilukuna.
E Näyttää signaalin voimakkuuden palkkina.
Yhteyden luominen tukiasemaan
Jos löydät tukiaseman, johon haluat luoda yhteyden, voit luoda siihen yhteyden
napsauttamalla painiketta ‘Connect’ (Luo yhteys).
1. Napsauta langatonta tukiasemaa tai verkkolaitetta, johon haluat luoda yhteyden,
valinta korostuu ja napsauta sitten ‘Connect’ (Luo yhteys).
Page 61

5
Jos valitussa tukiasemassa ei ole suojaa, järjestelmä luo yhteyden langattomaan
tukiasemaan yhden minuutin sisällä. Jos valitussa tukiasemassa on suoja, jatka
vaiheeseen 3.
2. Jos langattomassa tukiasemassa ei ole SSID:ta, sinua pyydetään syöttämään
se nyt. Kysy langattoman tukiaseman omistajalta oikea SSID-tunnus ja syötä se
järjestelmään. Napsauta sitten ‘OK’. Jos syöttämäsi SSID on virheellinen, yhteyden
luominen kyseiseen tukiasemaan ei onnistu ja sinua pyydetään syöttämään tunnus
uudelleen.
3. Jos langattomassa tukiasemassa on suojaus, sinun on syötettävä WEP-salasana
tai jaettu WPA-avain.
4. Kysy langattoman tukiaseman omistajalta oikea salasana. Syötä salasana ja
napsauta ‘OK’. Rastittamalla ruudun ‘Show Password’ (Näytä salasana) syöttämäsi
salasana näkyy ja sen tarkistus on mahdollista.
Jos syöttämäsi arvo on virheellinen, langattomaan tukiasemaan ei voida luoda
yhteyttä.
Tukiaseman vahvennetyyppi valitsee vahventeen automaattisesti, älä muuta
sitä.
5. Jos luot yhteyden onnistuneesti langattomaan tukiasemaan, langattoman laitteen
edessä näkyy merkki
.
Page 62

6
Jos liikutat kursorin Raling-konfigurointiohjelman kuvakkeen kohdalle, näkyviin tulee
yhteystilan tietoruutu.
Yhdenmukaisuusvakuutus
Me,
Nedis B.V.
De Tweeling 28
5215MC ’s-Hertogenbosch
Alankomaat
Puh: 0031 73 599 1055
Sähköposti: info@nedis.com
Vakuutamme, että:
Merkki: König Electronic
Malli: CMP-WNUSB31
Kuvaus: LANGATON LAN USB 150MBPS
Täyttää seuraavat standardit:
LVD: IEC 60950-1: 2001
EN 60950-1: 2001 + A11 : 2004
EMC: EN 301 489-1 V1.6.1 (2005-09)
EN 301 489-17 V1.2.1 (2002-08)
EN 50392:2004
Radio: EN 300 328 V1.7.1 (2006-05)
Täyttää EU-direktiivien 1999/5/EY vaatimukset.
‘s-Hertogenbosch, 17-11-08
Mrs. J. Gilad
Toimitusjohtaja
Page 63

7
Turvallisuuteen liittyvät varoitukset:
Älä altista tuotetta vedelle tai kosteudelle.
Huolto:
Puhdista ainoastaan kuivalla kankaalla. Älä käytä liuottimia tai hioma-aineita.
Takuu:
Takuu ja vastuuvelvollisuus mitätöityy, jos tuote vaurioituu siihen tehtyjen muutoksien
tai sen väärinkäytön takia.
Yleistä:
Muutoksia malliin ja teknisiin ominaisuuksiin voidaan tehdä ilmoituksetta.
Kaikki logot, merkit ja tuotenimet ovat niiden vastaavien omistajien tuotemerkkejä tai
rekisteröityjä tuotemerkkejä ja niitä on käsiteltävä sellaisina.
Huomio:
Tuote on varustettu tällä merkillä. Se merkitsee, ettei käytettyjä sähkö- tai
elektronisia tuotteita saa hävittää kotitalousjätteen mukana. Kyseisille
tuotteille on olemassa erillinen keräysjärjestelmä.
Copyright ©
Page 64

8
Page 65

CMP-WNUSB31
Trådlöst LAN USB
150Mbps
Page 66

2
SVENSKA
Installation för Windows XP
Följ anvisningarna nedan för att installera ditt nya trådlösa nätverkskort:
1. Anslut ditt trådlösa USB-nätverkskort till ett ledigt USB 2.0 uttag på din dator när
den är påkopplad.
2. Sätt i drivrutin-CD ROM:en i datorns CD-enhet och kör “Setup.exe’’. Läs licensavtalet
för slutanvändare och klicka på “I accept the terms of the license agreement” och
sedan på “Next” för att godkänna licensavtalet. Det rekommenderas att drivrutinen
och hjälpprogrammet installeras, om nätverkskortet används för första gången.
3. Här kan du välja vilket konfigurationsverktyg som ska användas för att konfigurera
det trådlösa nätverkskortet. Du rekommenderas att välja “Ralink Configuration
Tool, som ger full åtkomst till alla funktioner på det trådlösa nätverkskortet. Om du
föredrar att använda det trådlösa konfigurationsverktyget i Windows XP eller Vista,
välj “Microsoft Zero Configuration Tool” och klicka på “Next”.
4. Nu visas följande meddelande: please click ‘Install’ to start utility installation (klicka
på ‘Installera’ för att starta installationen av hjälpprogrammet). Ser du meddelandet
‘Found New Hardware’ (ny maskinvara har hittats) igen, ignorera det och vänta.
Klicka på “install” för att fortsätta installationsprocessen.
5. Vänta medan istallationen pågår. När du ser meddelandet: “please click ‘Finish’
to complete the driver installation process” (klicka på ‘avsluta’ för att slutföra
installationen av drivrutinen) klicka på finish.
6. När installationen är färdig kommer hjälpprogrammet för konfiguration av det trådlösa
nätverkskortet automatiskt att visas på datorns skrivbord. Du kommer alltså att se
en ikon i windows aktivitetsfält nere till höger. När du vill konfigurera den trådlösa
nätverksförbindelsen, högerklicka på denna ikon varvid en popup-meny kommer
fram. Klicka på ‘Launch Config Utility’ för att starta hjälpprogrammet.
Anslut till trådlös åtkomstpunkt
När drivrutinen har installerats på rätt sätt, kommer den automatiskt att försöka upprätta
en förbindelse till vilken som helst okrypterad trådlös åtkomstpunkt (accsess point). Om
du vill upprätta förbindelse med en specifik åtkomstpunkt, eller om åtkomstpunkten du
har valt är krypterad, måste du konfigurera det trådlösa nätverkskortet.
Obs! Om du använder Vista, kommer nätverkskortet inte att ansluta till en okrypterad
åtkomstpunkt automatiskt.
Page 67

3
Den trådlösa anslutningens status för tillfället visas i form av ikoner i hjälpprogrammet
Ralink:
Trådlös anslutning upprättad, god signalstyrka.
Trådlös anslutning upprättad, normal signalstyrka.
Trådlös anslutning upprättad, dålig signalstyrka.
Anslutningen är ännu inte upprättad.
Det trådlösa nätverkskortet har inte detekterats.
Det finns två sätt att konfigurera ditt trådlösa nätverkskorts anslutning till en trådlös
åtkomstpunkt.
1. Med hjälpprogrammet Ralink.
2. Med det inbyggda hjälpprogrammet windows zero.
Med hjälpprogrammet Ralink
Följ anvisningarna här nedan för att med hjälpprogrammet Ralink konfigurera
anslutningen till en trådlös åtkomstpunkt.
1. Högerklicka Ralink hjälpprogrammets ikon, nere till höger på ditt skrivbord och välj
sedan ‘Launch Config Utility’.
Ralink setup utility (RaUI) startas och börjar automatiskt söka efter trådlösa
åtkomstpunkter.
Menu
Inställningssektion
Mer /
Mindre
knapp
Page 68

4
Förklaring av informationen
Sökningen ger 5 olika slags information enligt följande:
A Den trådlösa enhetens SSID (Service Set Identifier).
Om ingenting visas här, betyder det att den trådlösa enhetens SSID är gömd. Om
symbolen
visas framför den trådlösa enheten, betyder det att du har etablerat
förbindelse med denna trådlösa enhet.
B Vilken typ av trådlös enhet det är fråga om och denna trådlösa enhets
kanalnummer.
Betyder att denna trådlösa enhet är en åtkomstpunkt
Betyder att denna trådlösa enhet är en dator (Ad-Hoc läge, point-to-point
förbindelse).
C Vilken trådlös standard denna åtkomstpunkt använder visas här.
för 802.11n,
för 802.11g, och för 802.11b.
WPS ikonen
visas om åtkomstpunkten stöder WPS. Om åtkomstpunkten använder
kryptering, kommer en nyckel-ikon
att visas
Obs! När åtkomstpunkten stöder WPS och WPS ikonen
visas, kommer ingen
nyckel-ikon att visas här
även om åtkomstpunkten använder kryptering.
D Visar åtkomstpunktens signalstyrka i procent
E Visar ett stapeldiagram av signalstyrkan
Ansluta till en åtkomstpunkt (Access Point)
Om den trådlösa åtkomstpunkt du vill ansluta till har hittats, kan du upprätta
förbindelsen genom att trycka på ‘Connect’ knappen.
1. Klicka på den trådlösa åtkomstpunkt eller den trådlösa enhet som du vill ansluta till,
varvid den kommer att bli markerad och klicka sedan på ‘Connect’.
Page 69

5
Om den åtkomstpunkt du har valt inte använder kryptering kommer du att anslutas
till denna trådlösa åtkomstpunkt inom en minut. Om den åtkomstpunkt du har valt
använder kryptering, vänligen gå vidare till steg 3.
2. Om den trådlösa åtkomstpunkten saknar SSID, kommer du uppmanas att ge in den
nu. Fråga administratören av den trådlösa åtkomstpunkten efter exakt SSID och
ange den här. Klicka sedan på OK. Om du anger fel SSID, kommer förbindelsen till
denna åtkomstpunkt inte att upprättas, och du uppmanas att mata in den igen.
3. Om den trådlösa åtkomstpunkten är krypterad uppmanas du mata in dess WEP key
(lösenord) eller WPA preshared key.
4. Fråga administratören av den trådlösa åtkomstpunken efter lösenordet. Ange
lösenordet och klicka på ‘OK’. Om du kryssar för ‘Show Password’ rutan, kommer
krypteringslösenordet att visas så att du kan kontrollera det.
Om lösenordet du har matat in här är fel, kommer du inte kunna ansluta till denna
åtkomstpunkt.
Typen av autentisering kommer att väljas automatiskt beroende på
åtkomstpunktens typ av autentisering, låt bli att ändra på den.
5. Om du lyckas upprätta förbindelse med åtkomstpunkten, kommer du att se symbolen
framför den trådlösa enheten.
Page 70

6
Om du rör markören över Raling hjälpprogrammets ikon, kommer ett fält som visar
anslutningsstatusen fram.
ÖVERENSSTÄMMELSEFÖRKLARING
Vi,
Nedis B.V.
De Tweeling 28
5215MC ’s-Hertogenbosch
Nederländerna
Tel.: 0031 73 599 1055
e-post: info@nedis.com
Intygar att produkten:
Märke: König Electronic
Modell: CMP-WNUSB31
Beskrivning: Trådlöst LAN USB 150Mbps
Överensstämmer med följande standarder
LVD: IEC 60950-1: 2001
EN 60950-1: 2001 + A11 : 2004
EMC: EN 301 489-1 V1.6.1 (2005-09)
EN 301 489-17 V1.2.1 (2002-08)
EN 50392:2004
Radio: EN 300 328 V1.7.1 (2006-05)
Och uppfyller kraven i den Europeiska unionens direktiv1999/5/EC.
‘s-Hertogenbosch, 17-11-08
Fru J. Gilad
Inköpschef
Page 71

7
Säkerhetsanvisningar:
Utsätt inte produkten för vatten eller fukt.
Underhåll:
Rengör endast med en torr trasa. Använd inga rengöringsmedel eller frätande medel.
Garanti:
Ingen garanti gäller vid några ändringar eller modifieringar av produkten eller skador
som har uppstått på grund av felaktig användning av denna produkt.
Allmänt:
Utseende och specifikationer kan komma att ändras utan föregående meddelande.
Alla logotyper och produktnamn är varumärken eller registrerade varumärken som
tillhör sina ägare och är härmed erkända som sådana.
Obs!
Produkten är märkt med denna symbol. Det innebär att använda elektriska
eller elektroniska produkter inte får slängas bland vanliga hushållssopor. Det
finns särskilda återvinningssystem för dessa produkter.
Copyright ©
Page 72

8
Page 73

CMP-WNUSB31
BEZDRÁTOVÝ LAN USB
ADAPTÉR 150 MBPS
Page 74

2
ČESKY
Instalace v systému Windows XP
Při instalaci bezdrátové síťové karty se řiďte následujícími pokyny:
1. Zapněte počítač a zasuňte bezdrátovou síťovou kartu USB do volného portu USB
2.0 na vašem počítači.
2. Do CD/DVD-ROM mechaniky vašeho počítače vložte CD disk s ovladači a spusťte
instalační program Setup.exe. Přečtěte si souhlas s uživatelskou licencí a klikněte
na „I accept the terms of the license agreement (Přijímám podmínky licence)“ a
na tlačítko „Next (Další)“, čímž potvrdíte souhlas s podmínkami. Doporučujeme
instalovat ovladače a utility při prvním použití karty.
3. Zde můžete vybrat konfigurační nástroj pro konfigurování bezdrátové síťové karty.
Doporučujeme zvolit položku „Ralink Configuration Tool (Konfigurační nástroj
Ralink)“, který umožňuje plný přístup ke všem funkcím bezdrátové karty. Chcete-li
používat bezdrátový konfigurační nástroj Windows XP nebo Vista, zvolte položku
„Microsoft Zero Configuration Tool“ a pak klikněte na „Next“.
4. Nyní se na displeji zobrazí následující upozornění: „Please click ‘Install’ to start utility
installation (Pokud chcete spustit instalaci utilit, klepněte na ‘Install (Instalovat)’)“.
Pokud počítač zobrazí upozornění „Found New Hardware (Nalezen nový hardware)“,
ignorujte jej a vyčkejte. Klepnutím na Install (Instalovat) pokračujte v instalaci.
5. Během instalace trpělivě čekejte. Jakmile uvidíte upozornění: „Please click ‘Finish’
to complete the driver installation process (Pro ukončení instalačního procesu
klepněte na ‘Finish’)”, klepněte na tlačítko „Finish (Ukončit)“.
6. Po ukončení instalace se na pracovní ploše automaticky zobrazí ikona konfiguračního
programu. Ikonka je také automaticky zobrazena v pravém dolním rohu na
systémové liště. Pokud si přejete nakonfigurovat bezdrátové připojení, klepněte na
tuto ikonu a displej zobrazí okénko možností. Klepněte na „Launch Config Utility
(Spustit konfigurační program)“.
Zapojení bezdrátového přístupového bodu (Wireless access point)
Po úspěšné instalaci ovladače se systém automaticky připojí k dostupnému
a nekódovanému přístupovému bodu. Pokud se chcete připojit ke specifickému
bezdrátovému přístupovému bodu nebo k bodu, který používá kódování, musíte
nastavit parametry bezdrátové karty ručně.
POZNÁMKA: Operační systém Vista neumožňuje připojení k jakékoli bezdrátové
a nekódované síti/přístupovému bodu automaticky.
Page 75

3
Okamžitý stav dostupných bezdrátových sítí je zobrazen konfigurační utilitou Ralink
Configuration Utility (Konfigurační nástroj Ralink) a ikonkami:
Bezdrátové připojení úspěšné, dobrý příjem signálu.
Bezdrátové připojení úspěšné, normální příjem signálu.
Bezdrátové připojení úspěšné, slabý příjem signálu.
Bezdrátové připojení zatím neúspěšné.
Bezdrátová karta nebyla nalezena/detekována.
Existují dva způsoby jak nakonfigurovat bezdrátovou kartu a připojit se k bezdrátovému
přístupovému bodu:
1. za použití Ralink Configuration Utility (Konfigurační nástroj Ralink).
2. za použití existujícího programu Windows Zero Configuration Utility.
Použití Ralink Utility k připojení
Pro připojení k bezdrátovému přístupovému bodu se řiďte následujícími pokyny
programu Ralink Configuration Utility.
1. Pravým tlačítkem myši klepněte na ikonu Ralink Configuration Utility, která se
nachází v pravém dolním rohu na systémové liště, a klepněte na „Launch Config
Utility (Spustit konfigurační program)“.
Ralink setup Utility (RaUI) se spustí a automaticky začne vyhledávat dostupné
přístupové body.
Menu
(Možnosti
nastavení)
Setup Area
(Oblast
nastavení)
More / Less
button (Více
/ méně
tlačítek)
Page 76

4
Vysvětlivky k zobrazeným informacím
Výsledky vyhledávání zobrazují 5 druhů informací:
A Hodnota SSID (Service Set Identifier – Identifikátor služby) příslušného
přístupového bodu.
Pokud zde není zobrazena žádná hodnota, znamená to, že SSID příslušného
bodu není zobrazována. Pokud je před názvem bezdrátového přístupového bodu
zobrazena šipka
, znamená to, že jste připojeni k danému přístupovému bodu.
B Typ bezdrátového bodu a číslo kanálu bezdrátového zařízení.
Označuje, že toto bezdrátové zařízení je přístupový bod.
Označuje, že toto bezdrátové zařízení je počítač (připojený v režimu Ad-Hoc,
počítač přímo k počítači).
C Zobrazuje bezdrátový standard podporovaný tímto přístupovým bodem.
pro
standard 802.11n,
pro standard 802.11g, a pro standard 802.11b.
Ikona WPS
je zobrazena, pokud přístupový bod podporuje WPS. Pokud
přístupový bod používá kódování, je zobrazena ikonka klíče
.
Poznámka: Pokud přístupový bod podporuje WPS a ikonka WPS
je zobrazena,
ikona klíče
zobrazena není, přestože přístupový bod používá kódování.
D Zobrazuje sílu signálu v procentech.
E Zobrazuje a znázorňuje sílu signálu graficky.
Připojení k přístupovému bodu
Pokud systém nalezl přístupový bod, můžete se k němu připojit klepnutím na tlačítko
„Connect“ (Připojit).
1. Nejdříve klepněte na přístupový bod, ke kterému se chcete připojit, a potom na
tlačítko „Connect (Připojit)“.
Page 77

5
Pokud vámi zvolený přístupový bod nepoužívá kódování, systém vás připojí k tomuto
bodu během jedné minuty. Pokud vámi zvolený přístupový bod používá kódování,
pokračujte krokem 3.
2. Pokud přístupový bod nezobrazuje hodnotu SSID, systém vás požádá o zadání této
hodnoty. Obraťte se na majitele přístupového bodu a zadejte SSID hodnotu. Potom
klepněte na „OK“. Pokud zadáte nesprávnou SSID hodnotu, nebudete se moci
připojit k přístupovému bodu a systém vás požádá, abyste zadali SSID hodnotu
znovu a správně.
3. Pokud přístupový bod používá kódování dat, musíte také zadat WEP nebo WPA
klíč.
4. Obraťte se na majitele/administrátora přístupového bodu a požádejte o správný klíč.
Zadejte klíč a klepněte na „OK“. Pokud zvolíte položku „Show Password (Zobrazit
klíč)“, klíč bude zobrazen a vy jej můžete zkontrolovat.
Pokud je klíč nesprávný, připojení k přístupovému bodu nebude možné.
Typ autorizace je zvolen automaticky systémem přístupového bodu. Toto
nastavení neměňte.
5. Pokud jste připojeni k bezdrátovému přístupovému bodu, symbol šipky
se zobrazí
před bezdrátovým zařízením.
Page 78

6
Pokud najedete kurzorem na ikonu konfigurační utility Ralink Configuration, systém
zobrazí okénko se stavovými informacemi o připojení.
Prohlášení o shodě
Společnost
Nedis B.V.
De Tweeling 28
5215MC ’s-Hertogenbosch
Nizozemí
Tel.: 0031 73 599 1055
E-mail: info@nedis.com
prohlašuje, že výrobek:
Značka: König Electronic
Model: CMP-WNUSB31
Popis: BEZDRÁTOVÝ LAN USB ADAPTÉR 150 MBPS
splňuje následující normy:
Elektronická zařízení napájená ze sítě:
IEC 60950-1:2001
EN 60950-1:2001+A11:2004
Elektromagnetická kompatibilita:
EN 301 489-1 V1.6.1 (2005-09)
EN 301 489-17 V1.2.1 (2002-08)
EN 50392:2004
Rádiová komunikace:
EN 300 328 V1.7.1 (2006-05)
a vyhovuje požadavkům směrnic Evropské unie 1999/5/EC.
‘s-Hertogenbosch 17. listopadu 2008
Mrs. J. Gilad
Obchodní ředitelka
Page 79

7
Bezpečnostní opatření:
Nevystavujte zařízení nadměrné vlhkosti nebo vodě.
Údržba:
K čištění používejte pouze suchý hadřík. Nepoužívejte rozpouštědla ani abrazivní
materiály.
Záruka:
Jakékoli změny, modifikace nebo poškození zařízení v důsledku nesprávného
zacházení se zařízením ruší platnost záruční smlouvy.
Obecné upozornění:
Design, provedení a parametry výrobku se mohou měnit bez předchozího upozornění
uživatele výrobcem.
Všechna loga a názvy výrobků jsou obchodní značky nebo registrované obchodní
značky příslušných vlastníků a jsou chráněny příslušnými zákony.
Upozornění:
Tento výrobek je označen následujícím symbolem. To znamená, že s
výrobkem je nutné zacházet jako s nebezpečným elektrickým a elektronickým
odpadem a nelze jej po skončení životnosti vhazovat do běžného domácího
odpadu. Výrobek je nutné odevzdat sběrným surovinám nebo recyklačnímu
středisku, zabývajícímu se zpracováním nebezpečných odpadů.
Copyright © (Autorská práva)
Page 80

8
Page 81

CMP-WNUSB31
LAN WIRELESS 150
MBPS CU USB
Page 82

2
ROMÂNĂ
Instalarea sub Windows XP
Vă rugăm să parcurgeţi etapele următoare pentru a instala noua dvs. placă de reţea
wireless:
1. Având calculatorul pornit, introduceţi placa de reţea wireless cu USB într-un port
USB 2.0 liber al calculatorului Dvs.
2. Introduceţi CD-ROM-ul care conţine driverul plăcii în unitatea CD/DVD-ROM a
computerului şi lansaţi programul dând clic pe “Setup.exe”. Vă rugăm să citiţi acordul
de licenţă pentru utilizatorul final, după care daţi clic pe “I accept the terms of the
license agreement” (Accept termenii acordului de licenţă) şi pe “Next” (Următor),
pentru a dovedi acceptarea acordului de licenţă. Dacă placa de reţea este utilizată
pentru prima dată, se recomandă instalarea atât a driverului cât şi a utilitarului.
3. De aici, puteţi alege unealta ce configurare pentru configurarea plăcii de reţea
fără fir. Este recomandată alegerea utilitarului “Ralink Configuration Tool” (Unealta
de configurare Ralink), care oferă acces complet la toate funcţiile plăcii de reţea
wireless. Dacă preferaţi unealta de configurare a plăcii wireless oferită de către
Windows XP sau Vista, vă rugăm să selectaţi “Microsoft Zero Configuration Tool”
(Unealta de configurare Microsoft Zero), apoi daţi click pe “Next” (Următor).
4. Acum veţi vedea mesajul următor: Vă rugăm să daţi clic pe ‘Instalare’, pentru a
demara instalarea utilitarului. Dacă apare din nou mesajul ‘Found New Hardware’
(Hardware nou detectat), ignoraţi-l şi aşteptaţi. Daţi clic pe “Install”, pentru a continua
procesul de instalare.
5. Vă rugăm să aşteptaţi în timp ce procesul de instalare este în derulare. Dacă apare
mesajul: “Vă rugăm să daţi clic pe ‘Terminat’ pentru a completa procesul de instalare
al driverului”, vă rugăm să daţi clic pe ”Terminat”.
6. La terminarea completă a instalării, utilitarul de configurare wireless va apare în
mod automat pe desktopul calculatorului Dvs. În colţul din dreapta jos, în zona
de notificare a sistemului de operare Windows va apare o icoană. Dacă doriţi să
configuraţi conexiunea Dvs. wireless, vă rugăm să daţi un clic dreapta pe această
icoană şi va apare un meniu popup. Pentru a demara programul de configurare, daţi
clic pe ‘Launch Config Utility’ (Lansează utilitarul de configurare).
Page 83

3
Conectarea la un punct de acces fără fir wireless
După instalarea corectă a driverului, dispozitivul va încerca să se conecteze în mod
automat la un punct de acces wireless necriptat. Dacă doriţi să vă conectaţi la un
anumit punct de acces wireless sau punctul de acces ales este criptat, trebuie să vă
configuraţi placa Dvs. de reţea wireless.
Observaţie: Sub Vista, placa de reţea wireless nu se va conecta în mod automat la
niciun punct de acces wireless necriptat.
Starea actuală a conexiunii wireless va fi afişată de utilitarul de configurare Ralink în
icoanele:
S-a stabilit conexiunea wireless, recepţie bună de semnal.
S-a stabilit conexiunea wireless, recepţie normală de semnal.
S-a stabilit conexiunea wireless, recepţie slabă de semnal.
Conexiunea nu este stabilită încă.
Nu s-a detectat nicio placă de reţea wireless.
Există două modalităţi de configurare a plăcii de reţea wireless pentru a o putea
conecta la un punct de acces wireless:
1. Folosind utilitarul de configurare Ralink
2. Folosind utilitarul încorporat: Windows Zero Configuration
Folosirea utilitarului de configurare Ralink
Vă rugăm să urmaţi instrucţiunile de mai jos, pentru a folosi utilitarul de configurare
Ralink în procesul de conectare la un punct de acces wireless.
1. Daţi clic dreapta pe icoana utilitarul de configurare Ralink amplasată în colţul din
dreapta jos a desktopului, după care daţi clic pe opţiunea ‘Lansează utilitarul de
configurare’.
Page 84

4
Va porni utilitarul de configurare Ralink (RaUI) şi va începe scanarea automată a
tuturor punctelor de acces wireless.
Meniu
Zona de
configurare
Butonul
mai mult/
mai puţin
Explicarea informaţiilor care apar
Rezultatul scanării include 5 tipuri diferite de informaţii:
A SSID-ul (Service Set Identifier) dispozitivului wireless.
Dacă nu se afişează nimic, înseamnă că SSID-ul dispozitivului wireless este ascuns.
Dacă înaintea denumirii dispozitivului wireless apare simbolul
, acesta indică faptul
că s-a stabilit o conexiune cu acel dispozitiv wireless.
B Tipul dispozitivului wireless şi numărul canalului acestui dispozitiv wireless.
Indică faptul că acest dispozitiv wireless este un punct de acces.
Indică faptul că acest dispozitiv wireless este un calculator (modul Ad-Hoc,
conexiune de la un punct de la altul).
C Aici se afişează standardul wireless sprijinit de acest punct de access.
pentru
802.11n,
pentru 802.11g, şi pentru 802.11b.
Icoana WPS
va apare când punctul de access sprijină WPS-ul. Dacă punctul de
acces utilizează criptarea, va apare o icoană gen cheie
.
Observaţie: Dacă punctul de acces sprijină WPS-ul şi icoana WPS
este afişată, aici
nu se va vedea icoana gen cheie
, chiar dacă se ştie că punctul de acces utilizează
criptarea.
D Indică puterea semnalului punctului de acces în procente.
E Afişează o diagramă cu bare care indică puterea semnalului.
Page 85

5
Conectarea la un punct de acces
Dacă s-a găsit punctul de acces wireless la care doriţi să vă conectaţi, conexiunea se
poate stabili printr-un clic pe butonul ‘Connect’ (Conectare).
1. Daţi clic pe punctul de acces wireless sau pe dispozitivul de reţea pe care doriţi
sa-l conectaţi şi acesta va fi evidenţiat. După aceasta daţi clic pe ‘Connect’
(Conectare).
În cazul în care punctul de acces selectat de Dvs. nu utilizează niciun fel de criptare,
în decurs de un minut veţi fi conectat la acel punct de acces wireless. Dacă punctul
de acces pe care l-aţi selectat utilizează criptarea, vă rugăm să treceţi la punctul 3.
2. În cazul în care punctul de acces wireless nu are SSID, vi se va cere să-l introduceţi
acum. Vă rugăm să cereţi SSID-ul de la proprietarul punctului de acces wireless şi
introduceţi-l aici. După aceasta daţi clic pe ‘OK’. Dacă SSID-ul introdus este greşit,
nu vă veţi putea conecta la acest punct de acces şi vi se va cere să-l introduceţi din
nou.
3. Dacă punctul de acces wireless utilizează criptarea, trebuie să introduceţi codul
WEP sau cheia WPA partajată în prealabil.
Page 86

6
4. Vă r ug ăm să c ere ţi prop ri et ar ul ui pu nc tulu i de acces wireless codul corect. Introduceţi
codul şi daţi clic pe ‘OK’. Prin bifarea casetei de dialog ‘Show Password’ (Arată
parola), codul de criptare introdus de Dvs. va fi afişat, făcând posibilă verificarea
lui.
Dacă codul introdus este greşit, nu vă veţi putea conecta la punctul de acces
wireless.
Tipul autentificării va fi selectat în mod automat de tipul de autentificare al
punctului de acces, de accea vă rugăm să-l lăsaţi aşa.
5. Dacă v-aţi conectat cu succes la punctul de acces wireless, veţi vedea simbolul
în
faţa dispozitivului wireless.
Dacă aşezaţi cursorul deasupra icoanei utilitarului de configurare Ralink, va apare
un mic balonaş care va conţine informaţii despre starea conexiunii.
Page 87

7
Declaraţie de conformitate
Noi,
Nedis B.V.
De Tweeling 28
5215 MC ’s-Hertogenbosch
Olanda
Tel.: 0031 73 599 1055
Email: info@nedis.com
Declarăm că acest produs:
Marca: König Electronic
Model: CMP-WNUSB31
Descriere: LAN WIRELESS 150 MBPS CU USB
Este în conformitate cu următoarele standarde:
LVD: IEC 60950-1: 2001
EN 60950-1: 2001 +A11: 2004
EMC: EN 301 489-1 V1.6.1 (2005-09)
EN 301 489-17 V1.2.1 (2002-08)
EN 50392:2004
Radiofrecvenţe: EN 300 328 V1.7.1 (2006-05)
Şi este în conformitate cu cerinţele directivei 1999/5/EC ale Uniunii Europene.
‘s-Hertogenbosch, 17. 11. 2008
J. Gilad
Director achiziţii
Page 88

8
Măsuri de siguranţă:
Feriţi aparatul de apă şi de umezeală.
Întreţinere:
Curăţarea trebuie făcută cu o cârpă uscată. Nu folosiţi solvenţi sau agenţi de curăţare
abrazivi.
Garanţie:
Nu oferim nicio garanţie şi nu ne asumăm niciun fel de responsabilitate în cazul
schimbărilor sau modificărilor aduse acestui produs sau în cazul deteriorării cauzate
de utilizarea incorectă a produsului.
Generalităţi:
Designul şi specificaţiile produsului pot fi modificate fără o notificare prealabilă.
Toate siglele mărcilor şi numele produselor sunt mărci comerciale sau mărci comerciale
înregistrate ale proprietarilor de drept şi aici sunt recunoscute ca atare.
Atenţie:
Acest produs este marcat cu acest simbol. Acesta semnifică faptul că
produsele electrice şi electronice nu trebuie aruncate în gunoiul menajer.
Aceste produse au un sistem separat de colectare.
Copyright ©
 Loading...