

Page 1
07-12-2011
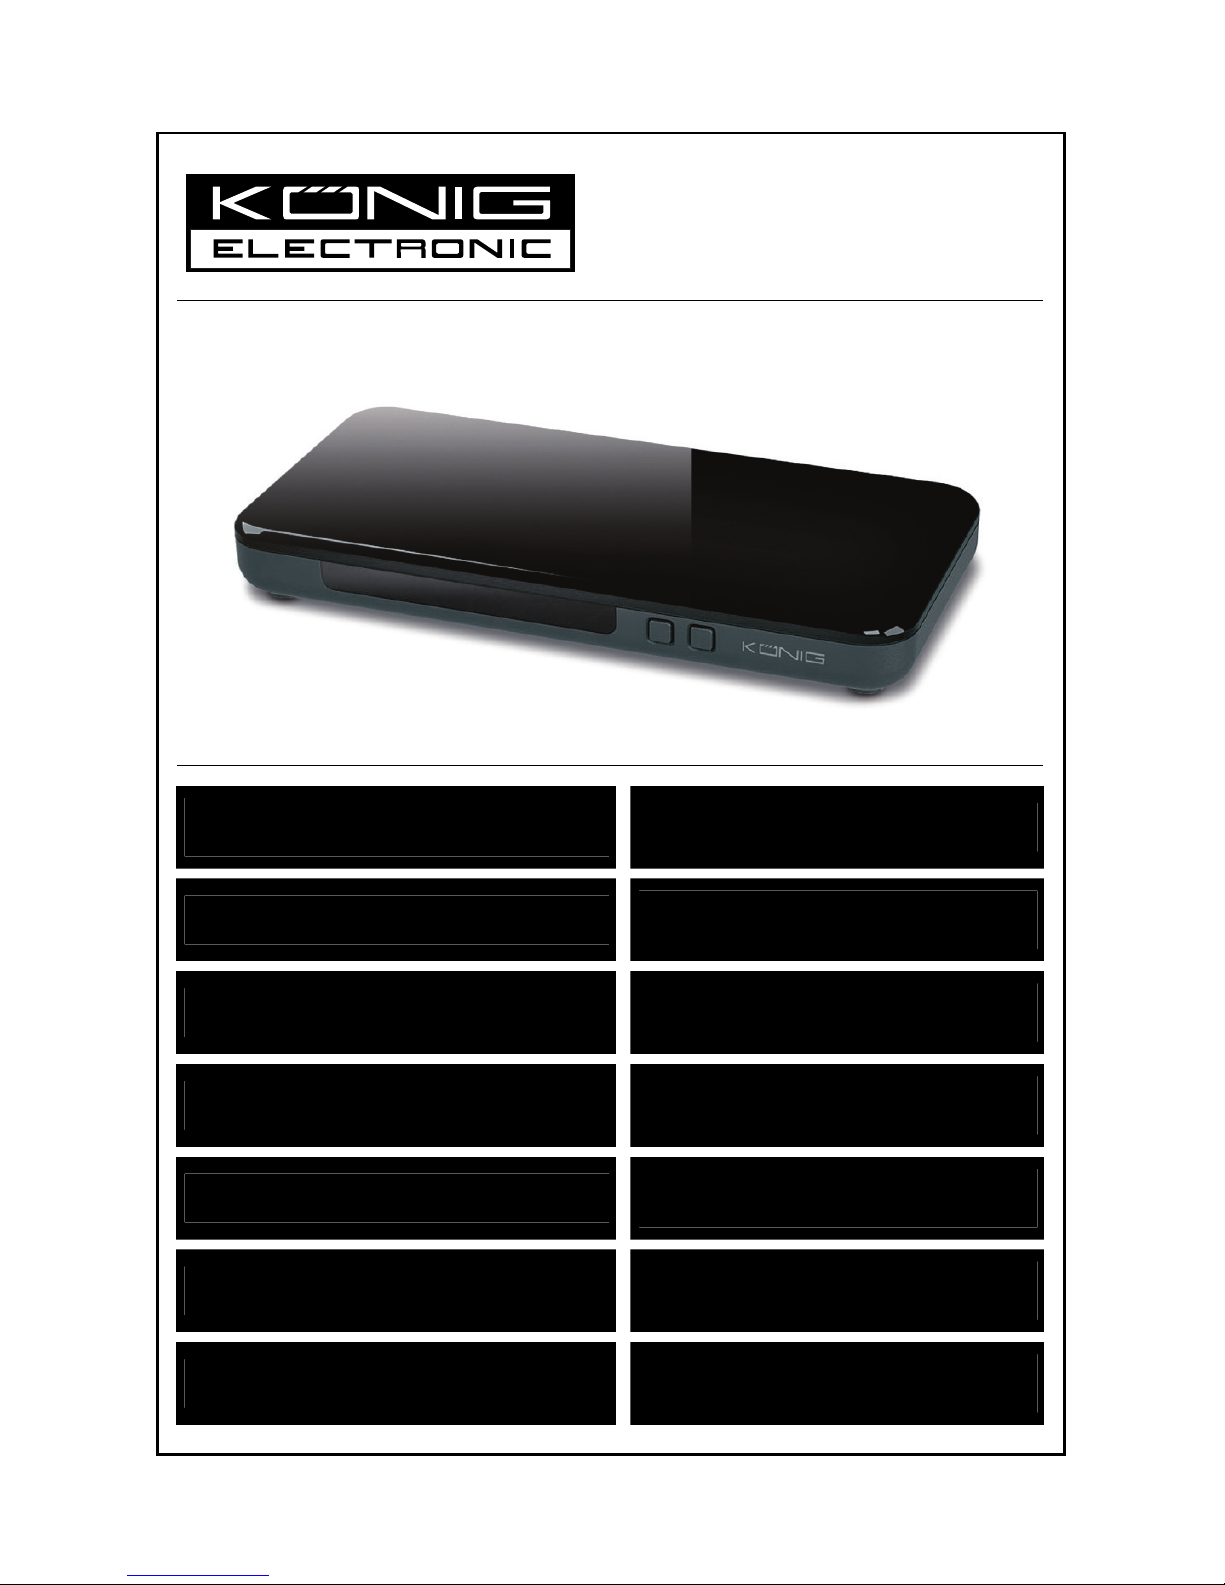
CMP-2DTO3DCONV
MANUAL (p. 2)
2D to 3D video converter box
ANLEITUNG (S. 4)
2D in 3D Videokonverter
MODE D’EMPLOI (p. 7)
Boîtier vidéo convertisseur 2D vers 3D
GEBRUIKSAANWIJZING (p. 9)
2D naar 3D videoconverter-box
MANUALE (p. 12)
Box di conversione video da 2D a 3D
MANUAL DE USO (p. 14)
Convertidor de video 2D a 3D
HASZNÁLATI ÚTMUTATÓ (o. 17.)
2D - 3D videó átalakító doboz
KÄYTTÖOHJE (s. 19)
2D -> 3D videomuunnin
BRUKSANVISNING (s. 21)
Videoomvandlare för 2D till 3D
NÁVOD K POUŽITÍ (s. 24)
Video konvertor 2D na 3D
MANUAL DE UTILIZARE (p. 26)
Convertor video 2D/3D
ΕΓΧΕΙΡΙΔΙΟ XPHΣHΣ (σελ. 29)
Μετατροπέας εικόνας 2D σε 3D
BRUGERVEJLEDNING (s. 32)
2D til 3D video converterboks
VEILEDNING (s. 34)
2D til 3D-videokonverteringsboks
Page 2
2
ENGLISH
2D to 3D video converter box
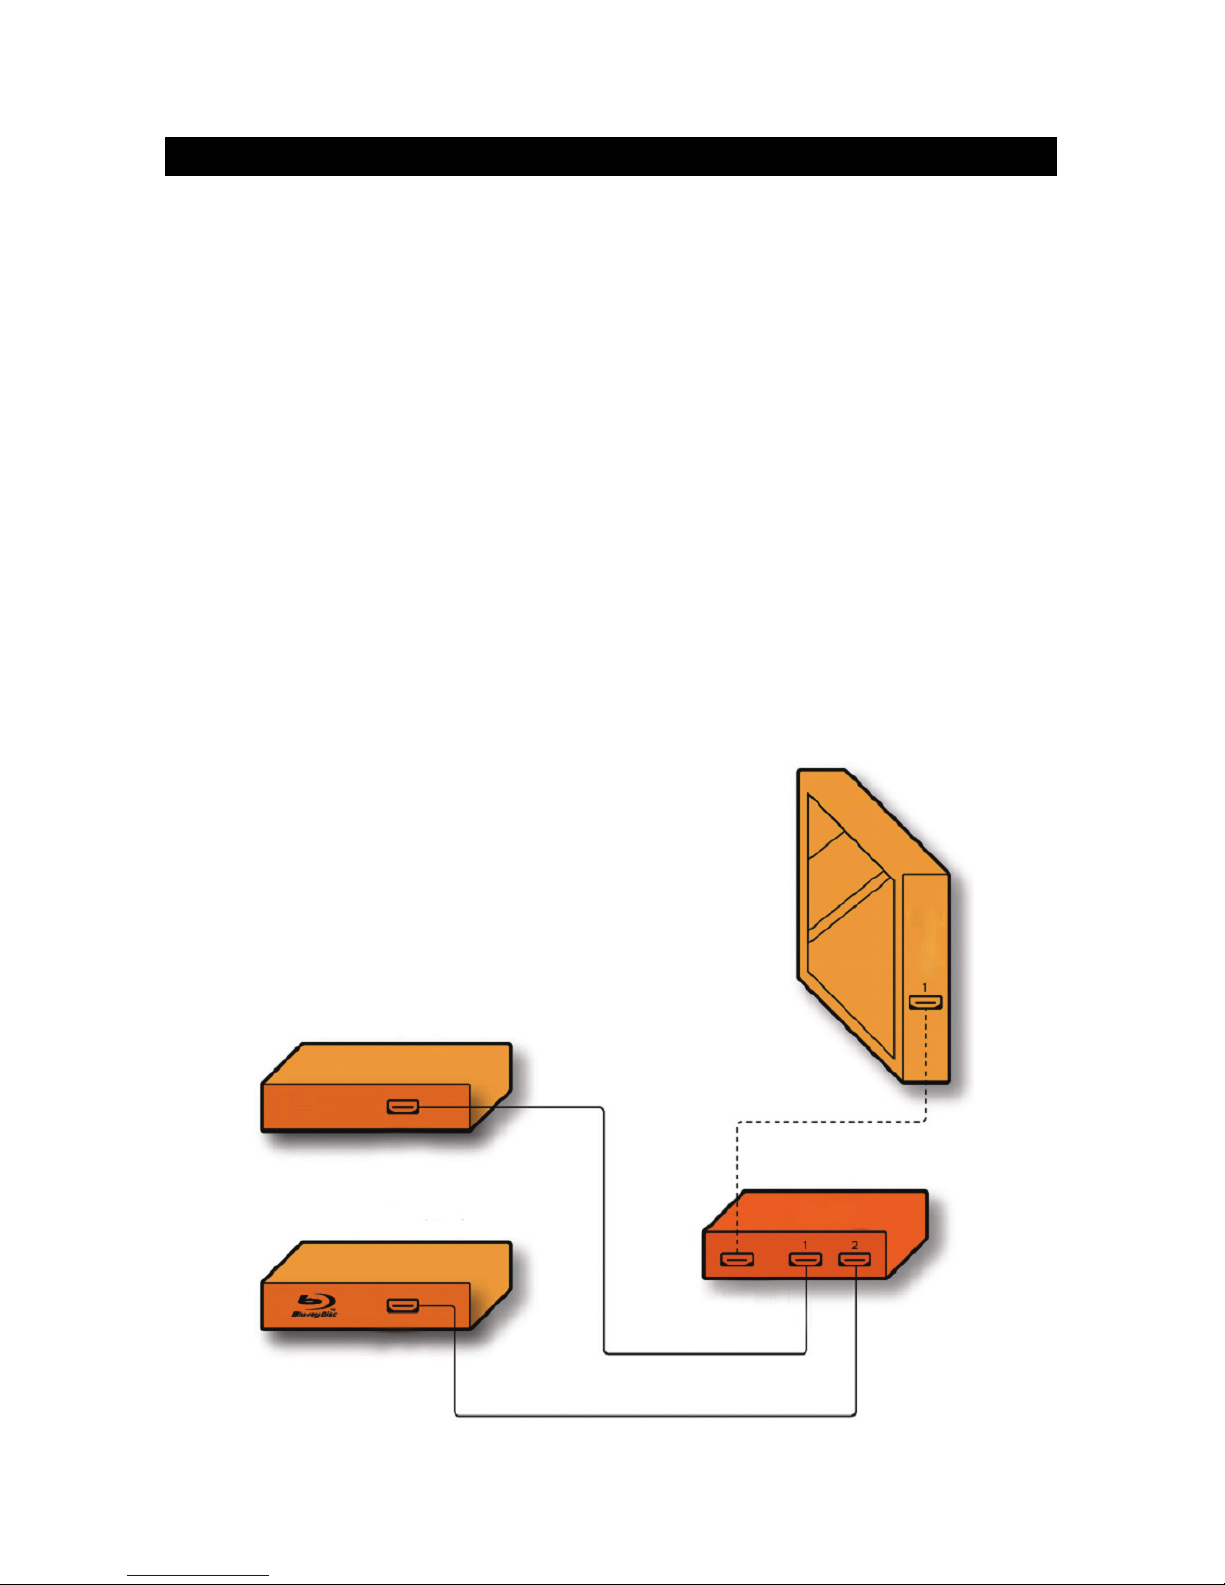
First installation:
1. Connect the converter box power cable to the converter box and plug in.
2. You will see a single continuous blue light on the front of the converter box.
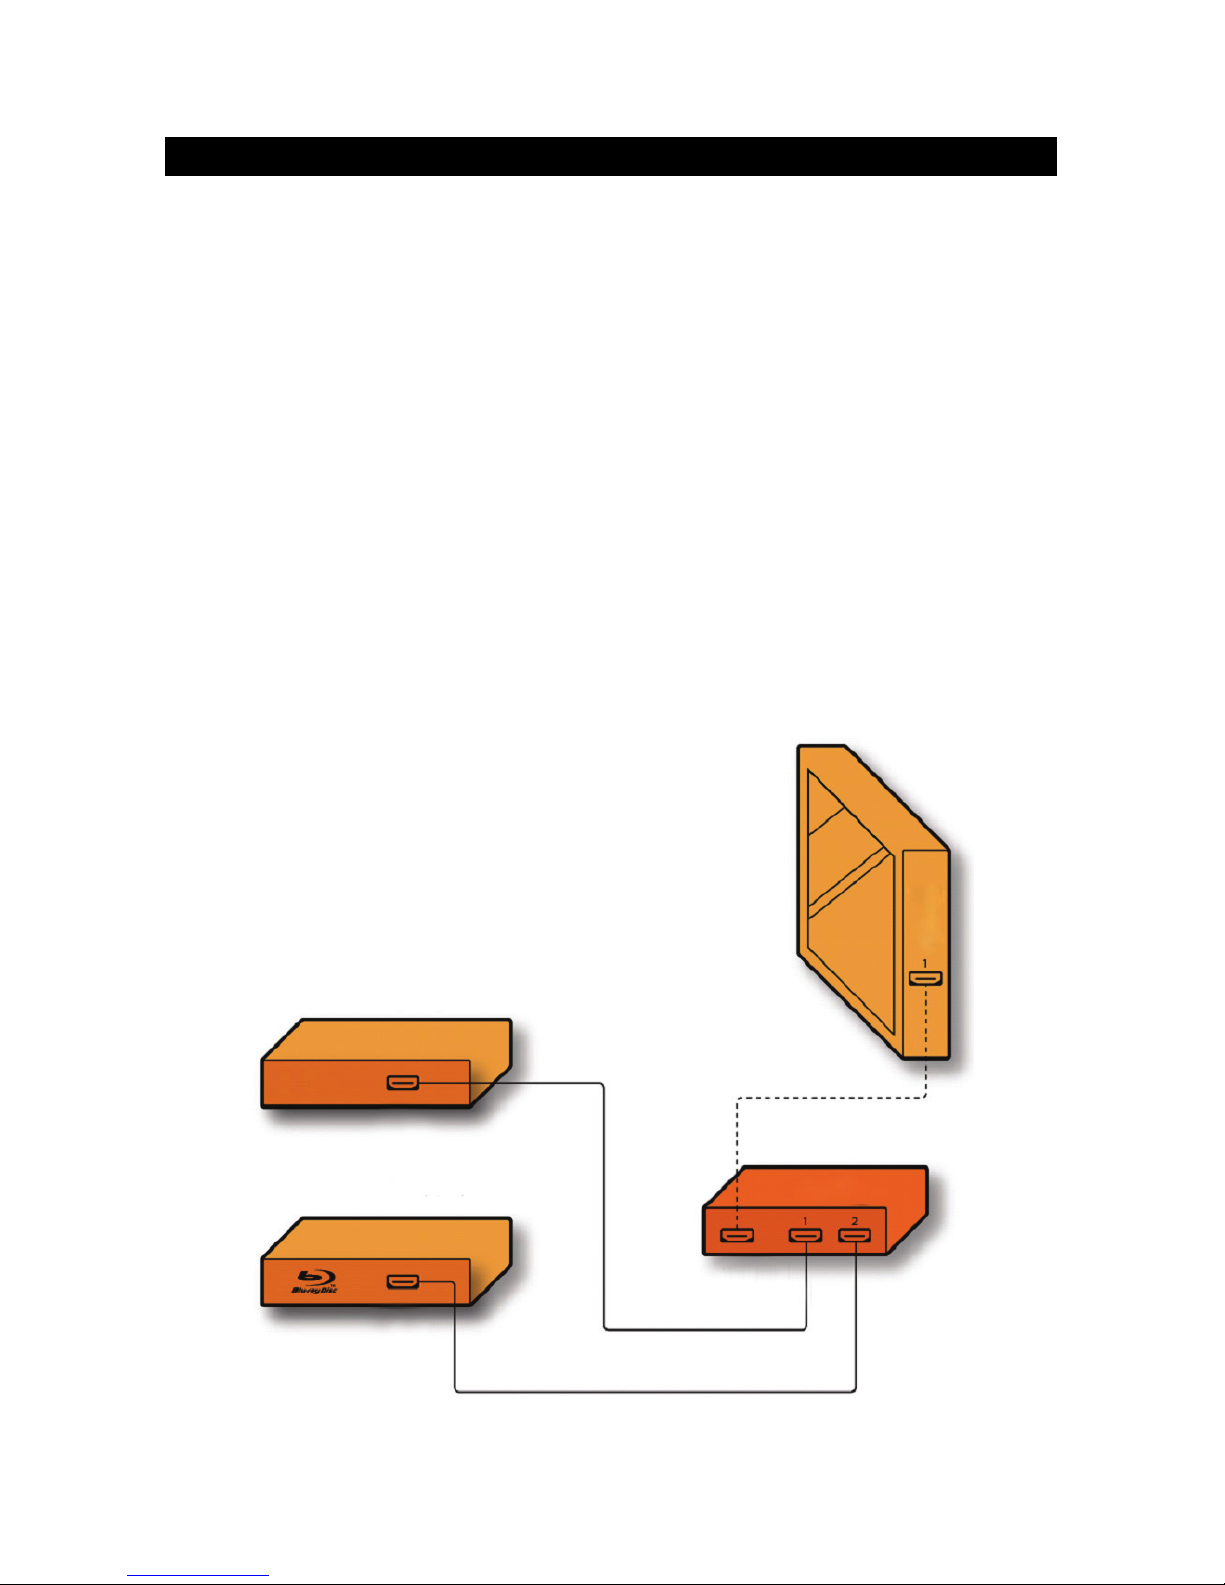
3. Disconnect the HDMI cable from the video source device (HD Cable Box, HD Satellite Box, Blu-ray
or media player or game console and connect it to the output on the converter box (leave the other
end connected to the TV). You will see a second continuous blue light on the front of the converter
box.
4. Using a second HDMI cable, connect one of the HDMI inputs from the converter box to the original
video source device.
5. Switch on the TV.
6. Set the TV to display the relevant HDMI input (the same as you used before for the video source).
You should see a green screen on the TV, indicating the converter box is connected to your TV.
7. If necessary, switch on the video source device.
8. You will see the image from the video source device on the TV.
9. High Speed HDMI® with ethernet compliant 3D sources will be recognized and the converter box
will automatically switch to 3D mode. You can switch through available modes by pressing the
mode button on the front panel or the 2D/3D button on the remote control.
10. Otherwise, to change the 3D settings press the mode button on the front of the converter box or the
2D/3D button on the remote control. The 3D converter box supports FP, SBS and TAB formats
which can be accessed through the Mode Menu.
11. Put on your coloured 3D glasses to experience the 3D effect.
TV, monitor or projector
Set-top box
HDMI OUT
DVD or Blu-ray player
HDMI OUT
2D/3D converter box
HDMI IN
TV
HDMI
IN
HDMI OUT
Page 3
3
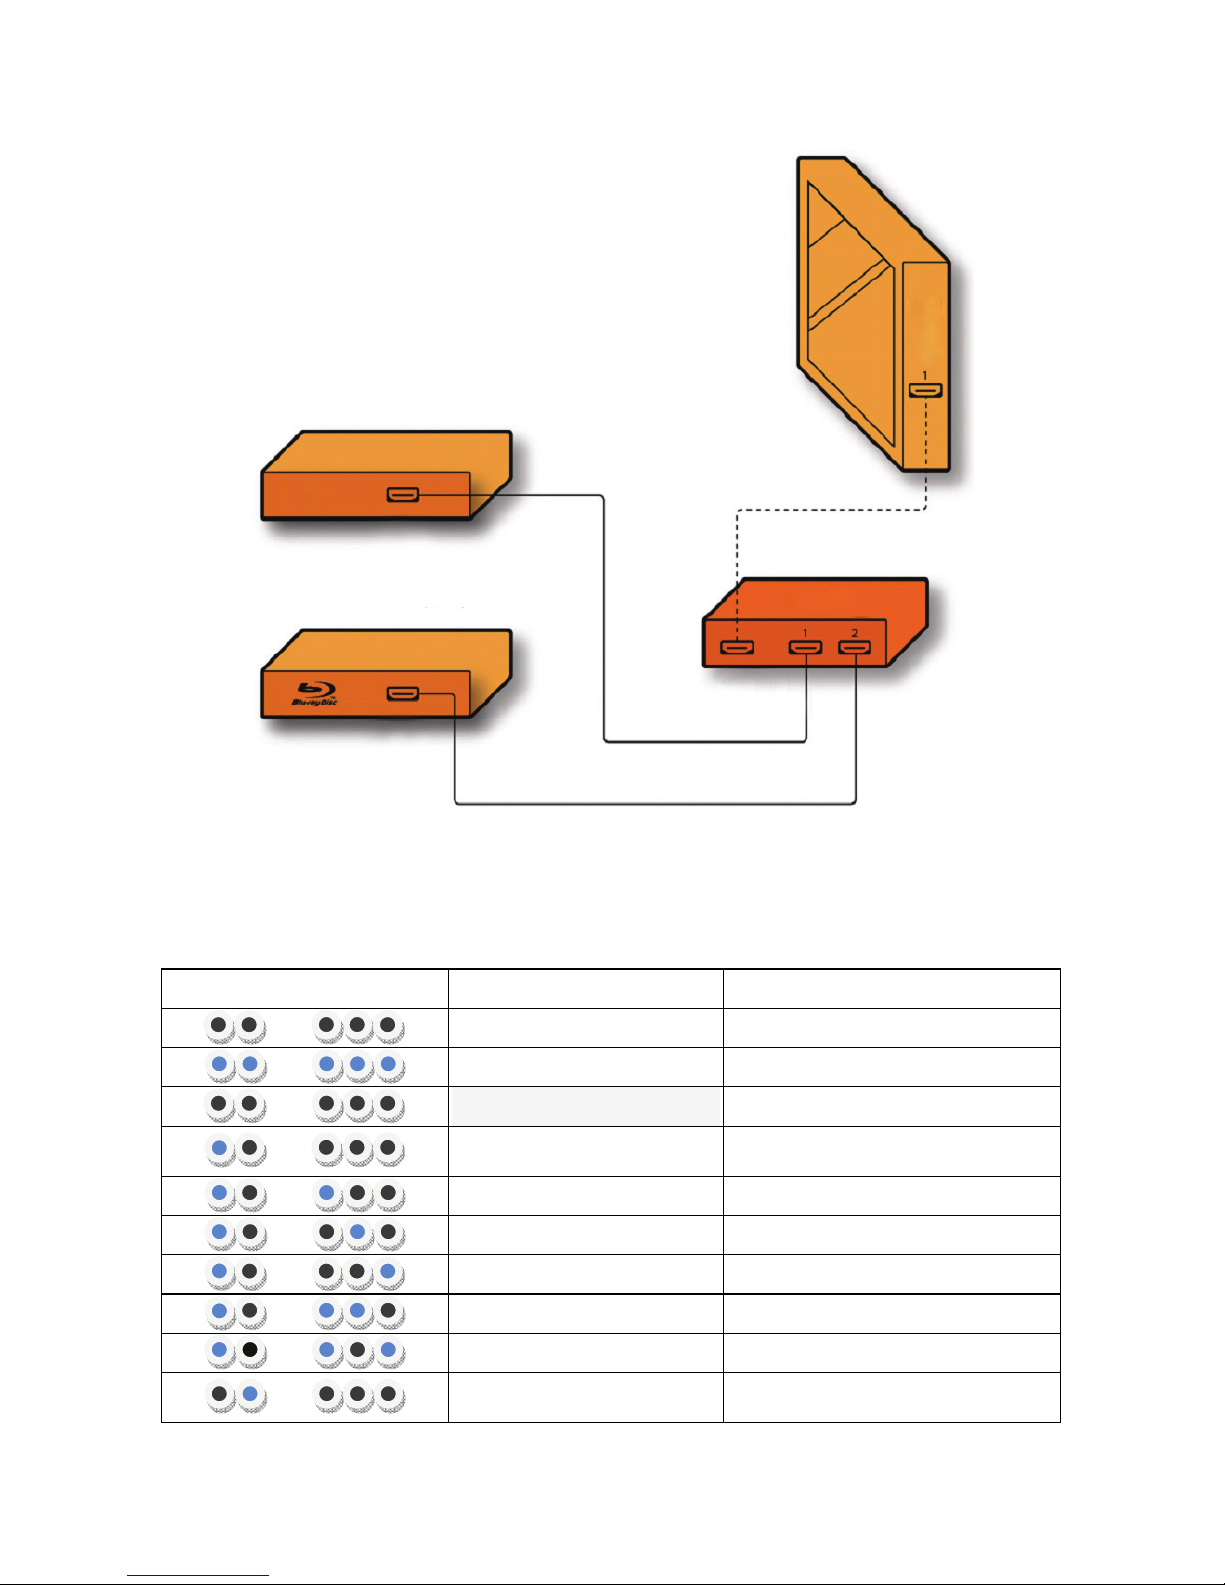
Procedure for switching sources:
You can connect a second source to the converter box. If both sources are connected and powered on,
you can switch between HDMI input channels by pressing the source button on the front panel or on the
remote.
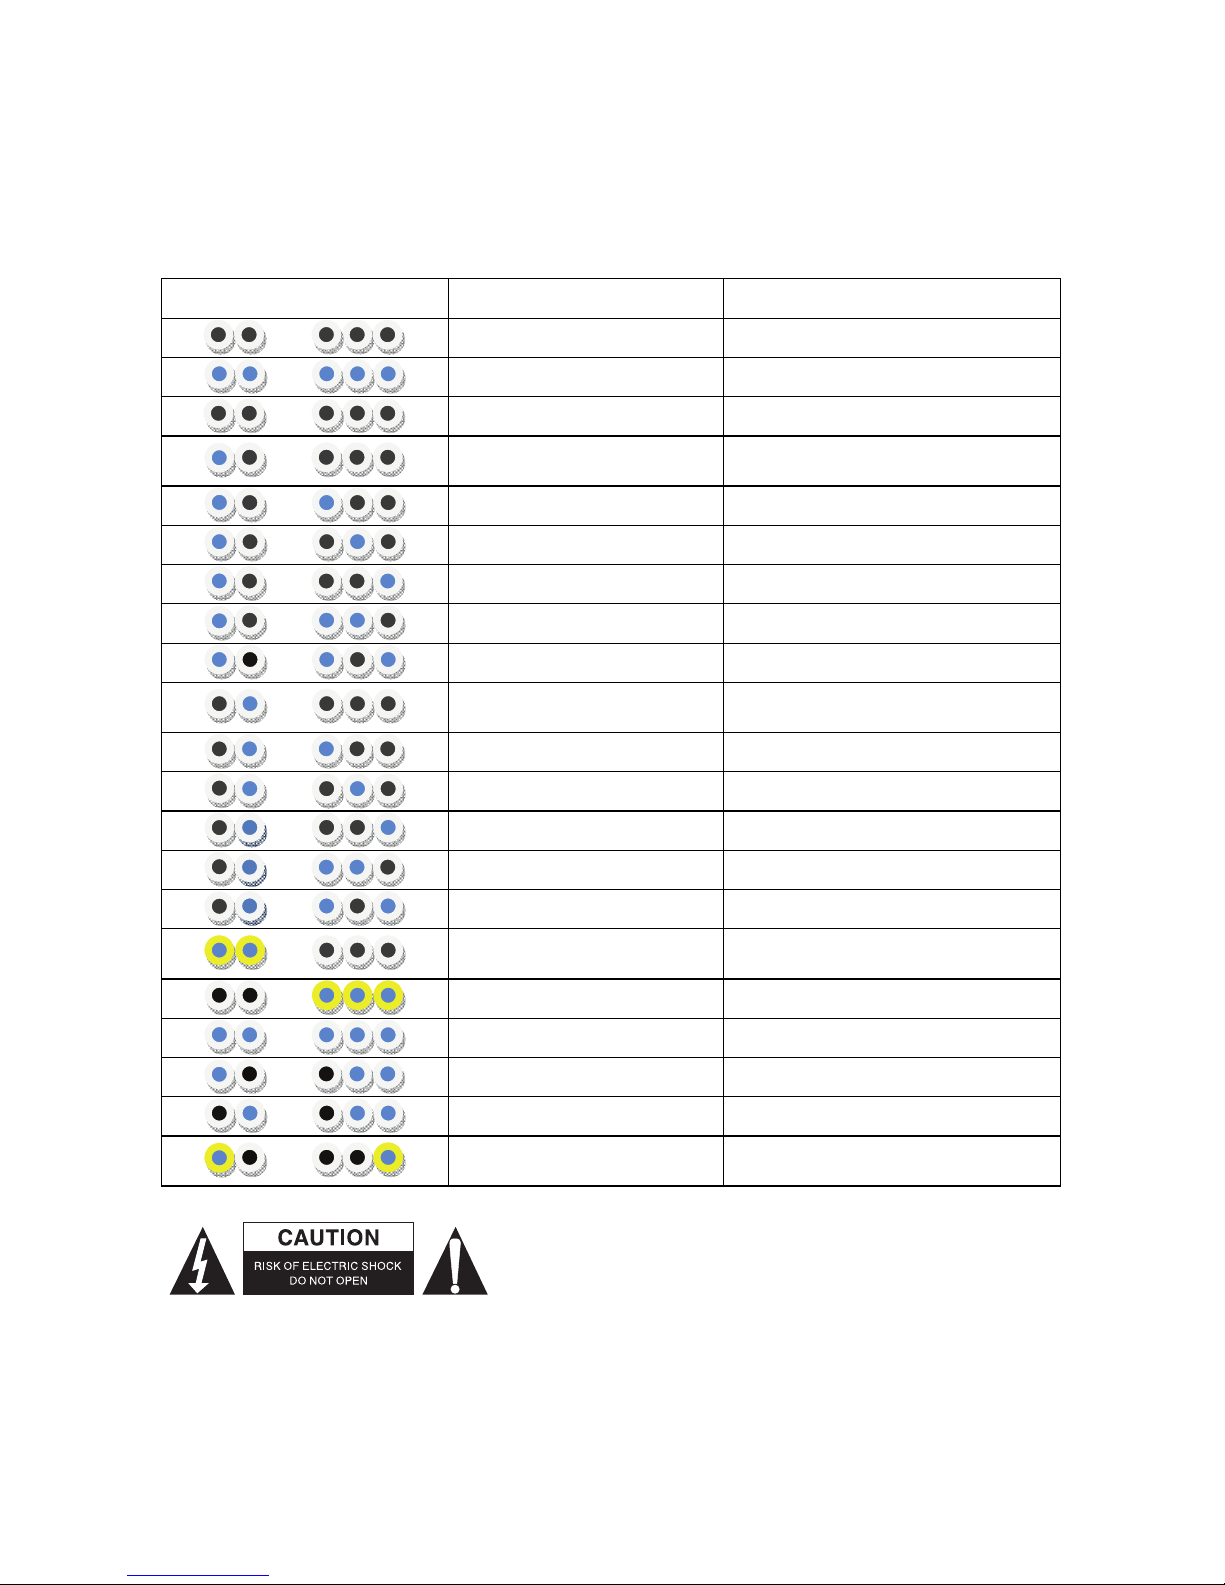
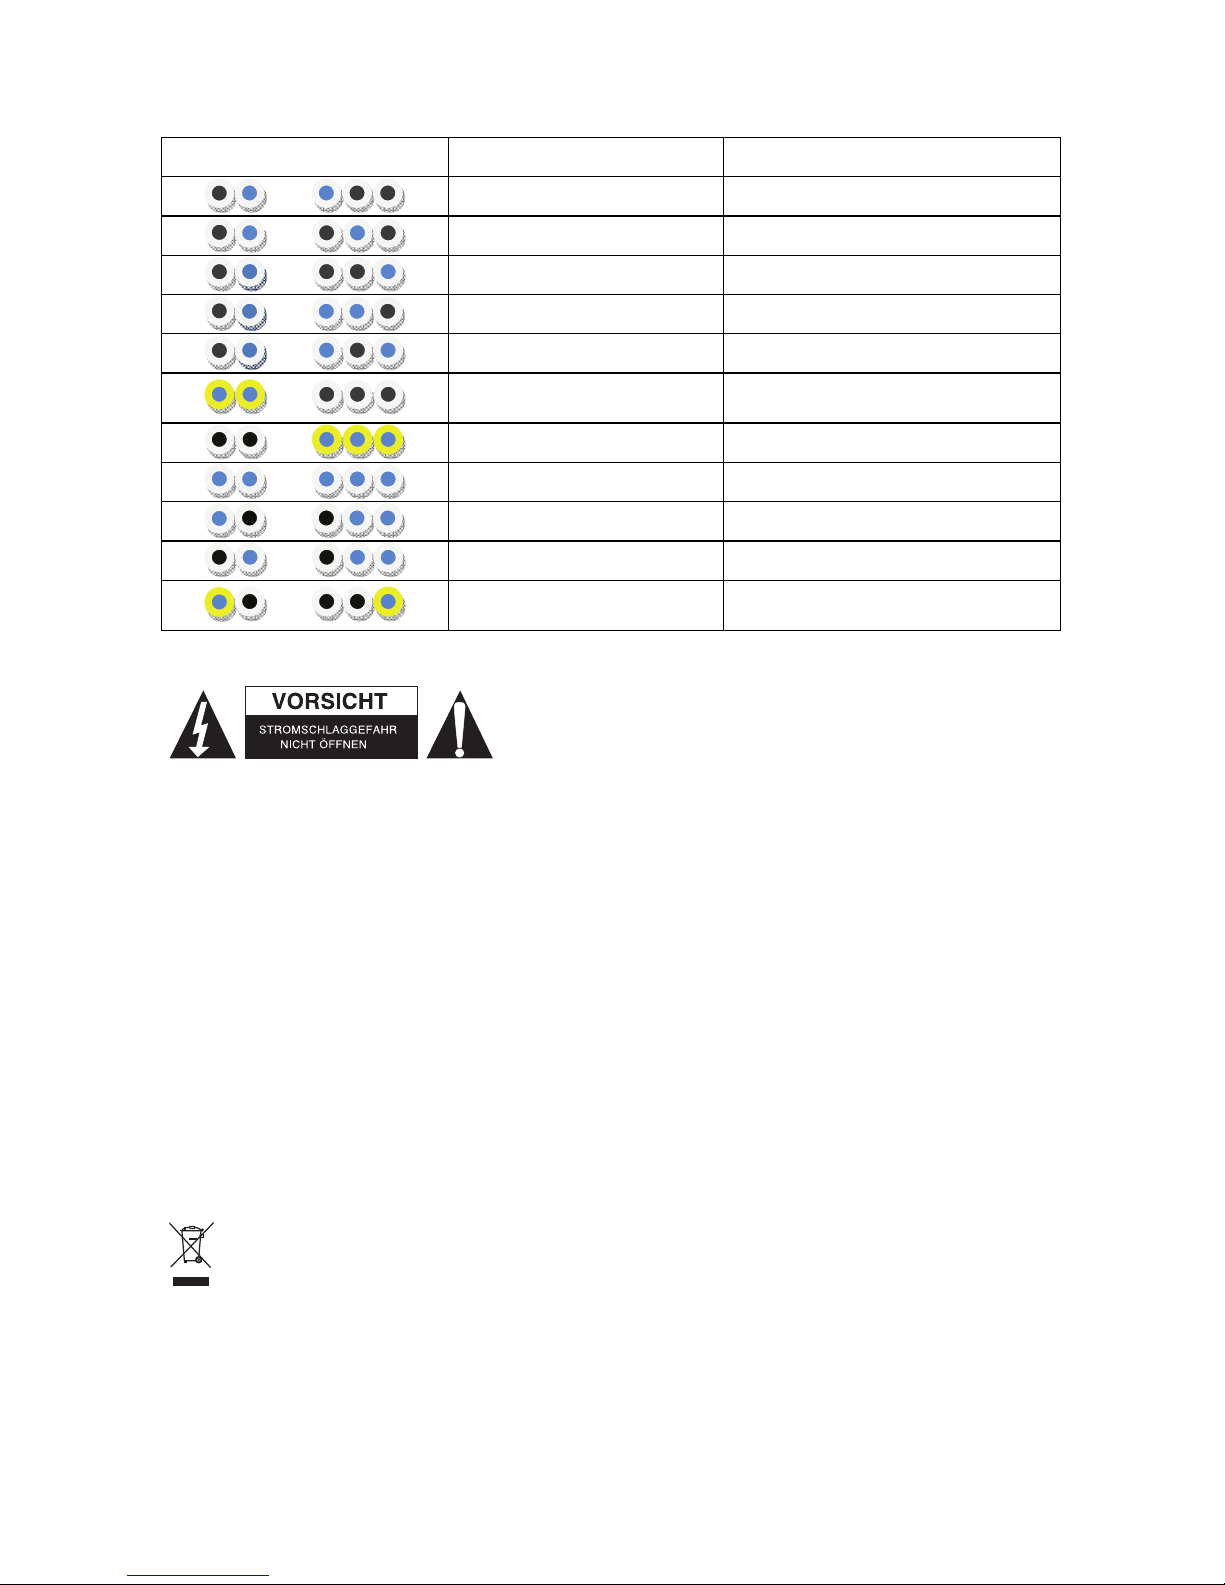
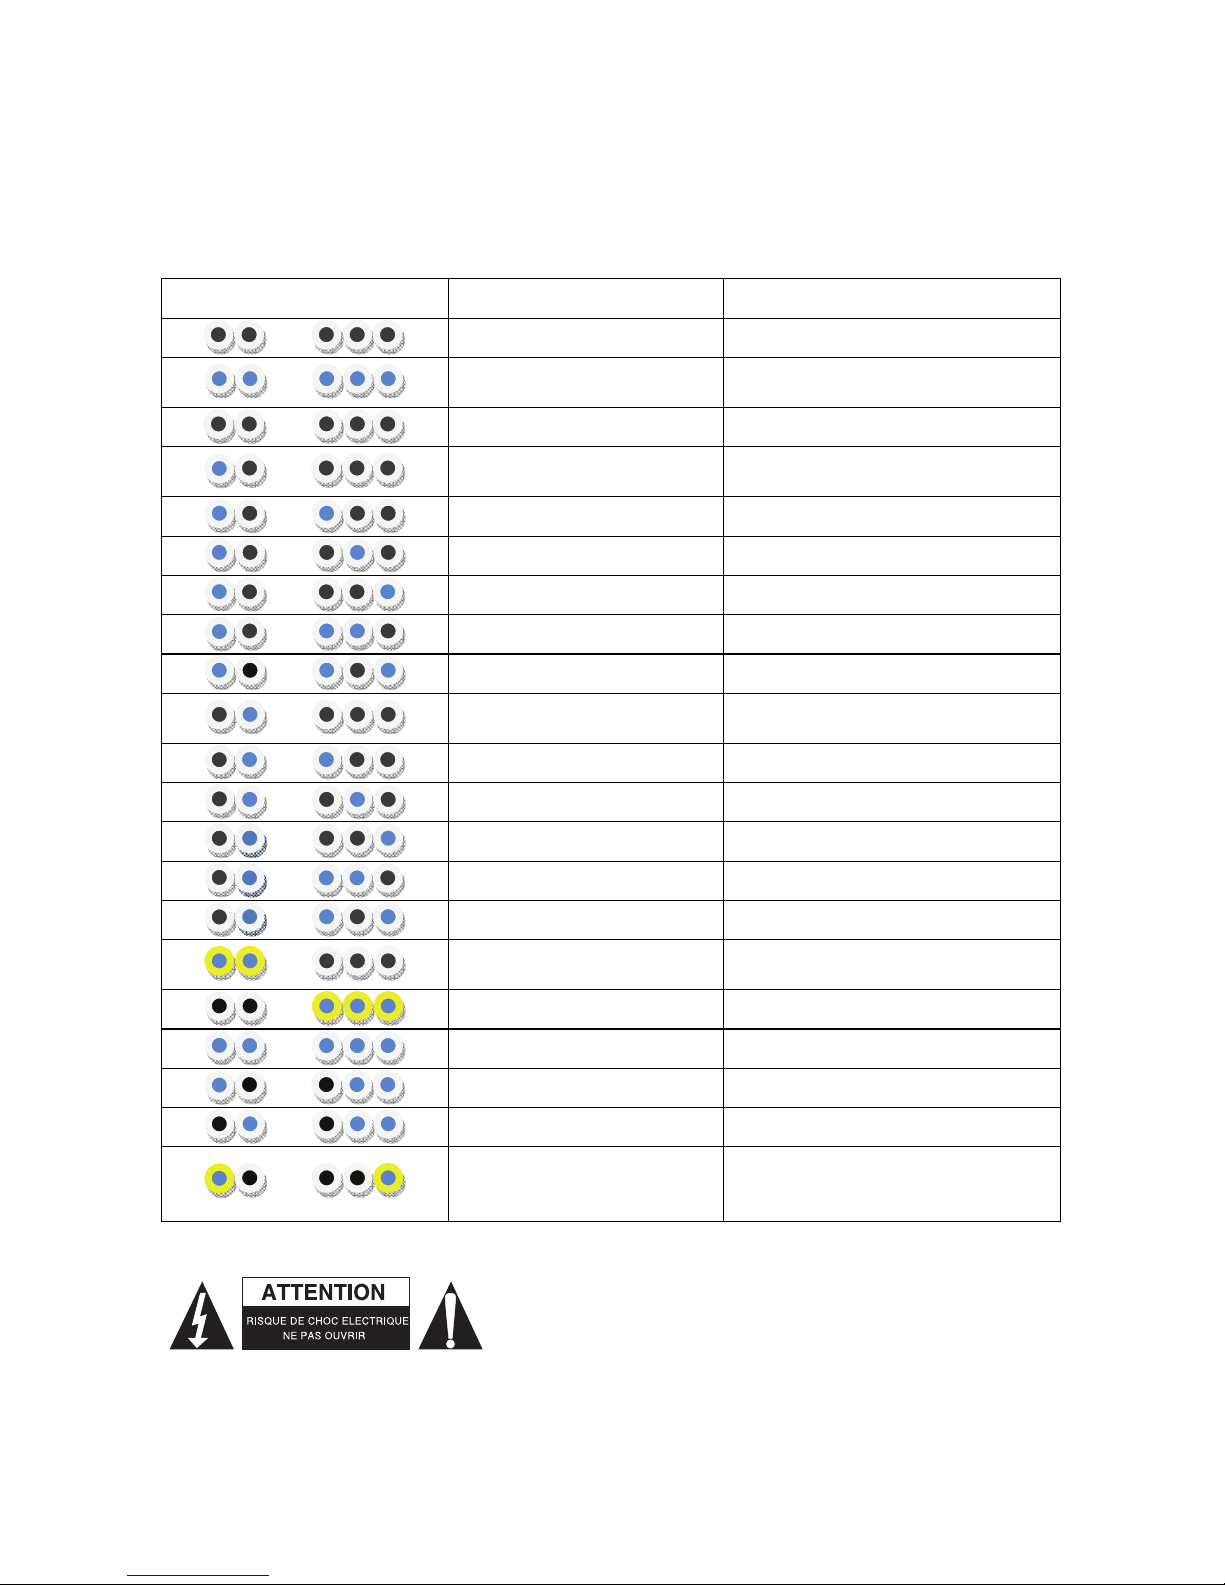
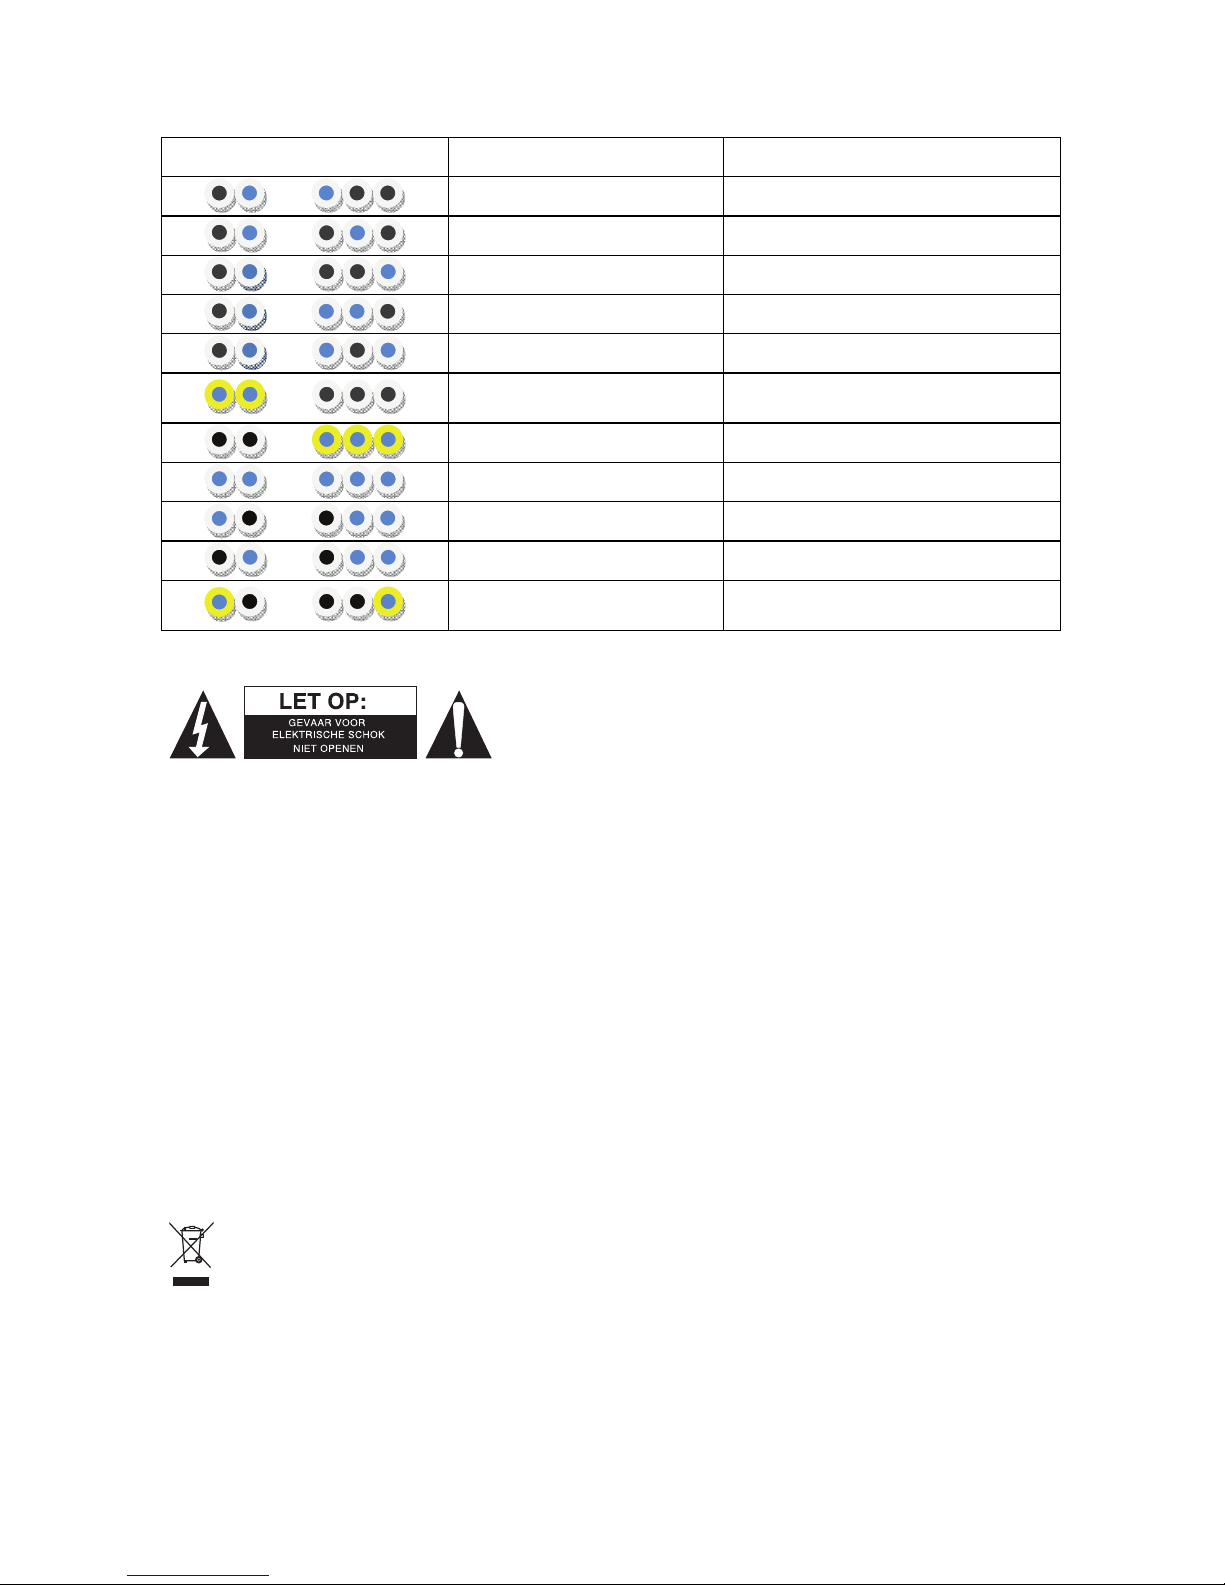
Front panel LED status indicator:
Action/ LED sequence State Notes
OFF
Connect power cable
Initialize
Should last no longer then 2 seconds
Ready, No TV
HDMI – 1, Bypass
Also default state if TV and no Rx
device
HDMI – 1, 2D > 3D
HDMI – 1, 3D (SBS) > 3D
HDMI – 1, 3D (TAB) > 3D
HDMI – 1, 3D (FP) > 3D
HDMI – 1, 3D > 2D
HDMI – 1, BYPASS
Also default state if TV and no Rx
device
HDMI – 2, 2D > 3D
HDMI – 2, 2D > 3D
HDMI – 2, 3D (SBS) > 3D
HDMI – 2, 3D (TAB) > 3D
HDMI – 2, 3D (FP) > 3D
Tx display invalid
Invalid display type connected
(flashing LEDs)
USB update in progress
Actualization USB completed
USB update cancelled
Bad USB key
USB update cancelled
Bad file
USB update failed
USB upgrade procedure must be
repeated (flashing LEDs)
Safety precautions:
To reduce risk of electric shock, this product should ONLY be
opened by an authorized technician when service is required.
Disconnect the product from mains and other equipment if a
problem should occur. Do not expose the product to water or
moisture.
Maintenance:
Clean only with a dry cloth. Do not use cleaning solvents or abrasives.
Page 4

4
Warranty:
No guarantee or liability can be accepted for any changes and modifications of the product or damage
caused due to incorrect use of this product.
General:
- Designs and specifications are subject to change without notice.
- All logos brands and product names are trademarks or registered trademarks of their respective
holders and are hereby recognized as such.
- This manual was produced with care. However, no rights can be derived. König Electronic can not
accept liability for any errors in this manual or their consequences.
- Keep this manual and packaging for future reference.
Attention:
This product is marked with this symbol. It means that used electrical and electronic products
should not be mixed with general household waste. There is a separate collections system for
these products.
DEUTSCH
2D in 3D Videokonverter
Erstinstallation
1. Schließen Sie den 3D-Converter über das Netzteil an eine Netzsteckdose an.
2. Am 3D-Converter leuchtet nun ein blaues Kontrolllämpchen auf.
3. Ziehen Sie das HDMI-Kabel vom Quellgerät (HD-Receiver, Blu-ray- oder Media-Player,
Spielkonsole) ab und schließen Sie es am Ausgang des 3D-Konverters an (das andere Ende des
Kabels kann im Fernseher verbleiben). Ein zweites blaues Kontrolllämpchen leuchtet nun an der
Vorderseite des 3D-Konverters auf.
4. Verbinden Sie nun mit einem zweiten HDMI-Kabel einen der HDMI-Eingänge am 3D-Konverter mit
dem ursprünglichen Quellgerät (HD-Receiver, Blu-ray- oder Media-Player, Spielkonsole).
5. Schalten Sie den Bildschirm/TV ein.
6. Wählen Sie am Bildschirm das Signal vom 3D-Konverter für die Wiedergabe aus (den gleichen
HDMI-Eingang wie zuvor) Auf dem Bildschirm müsste sich nun ein grünes Bild zeigen, das Ihnen
anzeigt, dass der 3D-Converter mit dem Bildschirm verbunden ist.
7. Schalten Sie, falls nötig, das Quellgerät ein.
8. Das Bildsignal des Quellgeräts wird nun auf dem Bildschirm angezeigt.
9. HDMI1.4a (High-Speed-HDMI® mit Ethernet) konforme 3D-Quellgeräte werden vom 3D-Konverter
automatisch erkannt und der 3D-Konverter schaltet sich in den 3D-Modus. Durch die einzelnen
Modis können Sie an der Vorderseite des 3D-Konverters durch Druck auf die Taste „Mode“ oder an
der Fernbedienung über die Taste „2D/3D“ schalten.
10. Anderenfalls können Sie die 3D-Einstellungen über die Taste „Mode“ an der Gerätefront oder an
der Fernbedienung über die Taste „2D/3D“ ändern. Der 3D-Konverter unterstützt die Formate FP,
SBS und TAB, die über das Modus-Menü aufgerufen werden können.
11. Setzen Sie nun Ihre 3D-Brille auf und erleben Sie den 3D-Effekt.
Page 5
5
Wechsel des Quellgeräts
Ein zweites Quellgerät kann am 3D-Converter angeschlossen werden. Wenn beide Quellgeräte
angeschlossen und eingeschaltet sind, können Sie zwischen den HDMI-Eingängen durch Drücken der
Tasten an der Gerätefront oder auf der Fernbedienung des Konverters umschalten.
Front-LED-Anzeige:
Aktion/ LED-Sequenz Status Hinweise
OFF (AUS)
Netzteil anschließen
Initialisierung
dauert ca. 2 Sekunden
Bereit,
ohne
TV
HDMI – 1, Bypass
Standardeinstellung bei TV und
Geräten ohne Rx.
HDMI– 1, 2D > 3D
HDMI – 1, 3D (SBS) > 3D
HDMI– 1, 3D (TAB) > 3D
HDMI – 1, 3D (FP) > 3D
HDMI – 1, 3D > 2D
HDMI – 1, Bypass
Standardeinstellung bei TV und
Geräten ohne Rx.
TV, Monitor oder Beamer
Sat-Receiver
HDMI AUSGANG
DVD- bzw. BluRay-Player
HDMI AUSGANG
2D/3D-Konverter
HDMI EINGANG
TV
Page 6
6
Aktion/ LED-Sequenz Status Hinweise
HDMI – 2, 2D > 3D
HDMI– 2, 2D > 3D
HDMI – 2, 3D (SBS) > 3D
HDMI – 2, 3D (TAB) > 3D
HDMI – 2, 3D (FP) > 3D
Tx Anzeigegerät ungültig
Ungültiges Anzeigegerät
angeschlossen (blinkende LEDs)
USB-Update läuft
USB-Update abgeschlossen
USB-Update abgebrochen
Fehlerhafter USB-Stick
USB-Update abgebrochen
Dateifehler
USB-Update fehlgeschlagen
USB-Update muss wiederholt
werden (blinkende LEDs)
Sicherheitsvorkehrungen:
Um das Risiko eines elektrischen Schlags zu verringern, sollte
dieses Produkt AUSSCHLIESSLICH von einem autorisierten
Techniker geöffnet werden. Bei Problemen trennen Sie das
Gerät bitte von der Spannungsversorgung und von anderen
Geräten ab. Stellen Sie sicher, dass das Gerät nicht mit
Wasser oder Feuchtigkeit in Berührung kommt.
Wartung:
Nur mit einem trockenen Tuch säubern. Keine Reinigungs- oder Scheuermittel verwenden.
Garantie:
Es kann keine Garantie oder Haftung für irgendwelche Änderungen oder Modifikationen des Produkts
oder für Schäden übernommen werden, die aufgrund einer nicht ordnungsgemäßen Anwendung des
Produkts entstanden sind.
Allgemeines:
- Design und technische Daten können ohne vorherige Ankündigung geändert werden.
- Alle Logos, Marken und Produktnamen sind Marken oder eingetragene Marken ihrer jeweiligen
Eigentümer und werden hiermit als solche anerkannt.
- Diese Bedienungsanleitung wurde sorgfältig verfasst. Dennoch können daraus keine Rechte und
Pflichten hergeleitet werden. König Electronic haftet nicht für mögliche Fehler in dieser
Bedienungsanleitung oder deren Folgen.
- Bitte bewahren Sie Bedienungsanleitung und Verpackung für spätere Verwendung auf.
Achtung:
Dieses Produkt ist mit diesem Symbol gekennzeichnet. Es bedeutet, dass die ausgedienten
elektrischen und elektronischen Produkte nicht mit dem allgemeinen Haushaltsmüll entsorgt
werden dürfen. Für diese Produkte stehen gesonderte Sammelsysteme zur Verfügung.
Page 7

7
FRANÇAIS
Boîtier vidéo convertisseur 2D vers 3D
Première installation :
1. Branchez le câble d’alimentation du boîtier convertisseur à l’alimentation.
2. Un seul voyant lumineux bleu s’allumera sur le devant du boîtier convertisseur.
3. Déconnectez le câble HDMI du dispositif vidéo source (Démodulateur Câble HD, Décodeur
Satellite HD, lecteur multimédia ou Blu-ray ou console de jeux) et branchez-le à la sortie du boîtier
convertisseur (laissez l’autre extrémité connectée à la TV). Un second voyant lumineux bleu
s’allumera sur le devant du boîtier convertisseur.
4. En utilisant un deuxième câble HDMI, connectez l’une des entrées HDMI du boîtier convertisseur
au dispositif vidéo source initial.
5. Allumez la TV.
6. Réglez la TV pour afficher l’entrée HDMI correspondante (la même que vous avez utilisée pour la
source vidéo). Vous devez voir un écran vert sur la TV qui indique que le boîtier convertisseur est
connecté à votre TV.
7. Si nécessaire, allumez le dispositif vidéo source.
8. Vous devez voir les images du dispositif vidéo source sur la TV.
9. Les sources compatibles HDMI 1.4a seront reconnues et le boîtier convertisseur basculera
automatiquement en mode 3D. Vous pouvez basculer entre les modes disponibles en appuyant le
bouton « mode » sur panneau avant ou le bouton « 2D/3D » de la télécommande.
10. Autrement, pour modifier les réglages 3D, appuyez le bouton « mode » du panneau avant du
boîtier convertisseur ou le bouton « 2D/3D » de la télécommande. Le boîtier convertisseur 3D
prend en charge les formats FP, SBS et TAB accessibles dans le menu Mode.
11. Endossez vos lunettes 3D colorées pour profiter des effets 3D.
TV, Moniteur ou Projecteur
Boîtier numérique
HDMI OUT
Lecteur DVD ou Blu-Ray
SORTIE HDMI
Boîtier convertisseur 2D/3D
ENTRÉE HDMI
TV
ENTRÉE
HDMI N
SORTIE HDMI
Page 8
8
Procédures de commutation de sources :
Vous pouvez brancher une deuxième source au boîtier convertisseur. Si les deux sources sont
connectées et allumées, vous pouvez basculer entre les canaux d’entrée HDMI en appuyant le bouton
source du panneau avant ou de la télécommande.
État de l’indicateur lumineux du panneau avant :
Séquence des voyants Action État Remarques
OFF (ARRÊT)
Branchez le câble d’alimentation
Initialisation
Ne doit pas prendre plus de
2 secondess
Prêt, pas de télé
HDMI – 1, ignoré
État par défaut également si aucun
dispositif Rx ou TV
HDMI – 1, 2D > 3D
HDMI – 1, 3D (SBS) > 3D
HDMI – 1, 3D (TAB) > 3D
HDMI – 1, 3D (FP) > 3D
HDMI – 1, 3D > 2D
HDMI – 1, IGNORÉ
État par défaut également si aucun
dispositif Rx ou TV
HDMI – 2, 2D > 3D
HDMI – 2, 2D > 3D
HDMI – 2, 3D (SBS) > 3D
HDMI – 2, 3D (TAB) > 3D
HDMI – 2, 3D (FP) > 3D
Écran Tx non valide
Type d’écran branché non valide
(voyants lumineux qui clignotent)
Mise à jour USB en cours
Mise à jour USB terminée
Mise à jour USB annulée
Clé USB incorrect
Mise à jour USB annulée
Fichier incorrect
Échec de mise à jour USB
La procédure de mise à niveau USB
doit être répétée (Voyants lumineux
qui clignotent)
Consignes de sécurité :
Pour réduire le risque de choc électrique, ce produit ne doit être
ouvert que par un technicien qualifié si une réparation s’impose.
Débranchez l’appareil et les autres équipements du secteur s’il
y a un problème. Ne pas exposer l’appareil à l’eau ni à
l’humidité.
Entretien :
Ne nettoyez l’appareil qu’avec un chiffon sec. N’utilisez pas de solvants ou de produits abrasifs.
Page 9

9
Garantie :
Aucune garantie ou responsabilité ne sera acceptée en cas de modification et/ou de transformation du
produit ou en cas de dommages provoqués par une utilisation incorrecte de l’appareil.
Généralités :
- Le design et les caractéristiques techniques sont sujets à modification sans notification préalable.
- Tous les logos de marques et noms de produits sont des marques déposées ou immatriculées dont
leurs détenteurs sont les propriétaires et sont donc reconnues comme telles dans ce documents.
- Ce manuel a été produit avec soin. Toutefois, aucun droit ne peut en dériver. König Electronic ne peut
être tenu responsable pour des erreurs de ce manuel ou de leurs conséquences.
- Conservez ce manuel et l’emballage pour toute référence ultérieure.
Attention :
Ce symbole figure sur l’appareil. Il signifie que les produits électriques et électroniques ne
doivent pas être jetés avec les déchets domestiques. Le système de collecte est différent pour
ce genre de produits.
NEDERLANDS
2D naar 3D videoconverter-box
Eerste installatie
1. Sluit de voedingskabel van converter-box aan op de converter-box en sluit aan op het
stopcontact.
2. Op de voorkant van de converter-box zult u een enkel ononderbroken blauw licht zien.
3. Ontkoppel de HDMI-kabel van het videobron-apparaat (HD kabelbox, HD satellietbox, Blu-ray of
mediaspeler of spelconsole en sluit deze aan op de uitgang van de converter-box (laat het andere
uiteinde op de TV aangesloten). Op de voorkant van de converter-box zult u een tweede enkel
ononderbroken blauw licht zien.
4. Sluit met een tweede HDMI-kabel één van de HDMI-ingangen van de convertor-box aan op het
oorspronkelijke videobron-apparaat.
5. Zet de TV aan.
6. Stel de TV in om de relevante HDMI-ingang (dezelfde als u eerder hebt gebruikt voor de
videobron) weer te geven. U zou een groen scherm op de TV moeten zien, dat aangeeft dat de
converter-box op uw TV aangesloten is.
7. Indien nodig, schakel het videobron-apparaat in.
8. U ziet het beeld van het videobron-apparaat op de TV.
9. High Speed HDMI® met ethernet compatibele 3D-bronnen zullen worden herkend en de
converter-box zal automatisch overschakelen naar de 3D-modus. U kunt door de beschikbare
modi schakelen door op de “Mode”-knop op het voorpaneel of de “2D/3D”-knop op de
afstandsbediening te drukken.
10. Druk anders op de “Mode”-knop op de voorkant van de converter-box of de “2D/3D”-knop op de
afstandsbediening om de 3D-instellingen te wijzigen. De 3D-converter-box ondersteunt FP-, SBSen TAB-formaten die het modusmenu toegankelijk zijn.
11. Zet uw gekleurde 3D-bril op om het 3D-effect te ervaren.
Page 10

10
Procedure voor het schakelen tussen bronnen:
U kunt een tweede bron op de converter-box aansluiten. Als beide bronnen aangesloten en
ingeschakeld zijn, kunt u tussen de HDMI-ingangskanalen schakelen door op de “Source”-knop op het
voorpaneel of op de afstandsbediening te drukken.
Voorpaneel LED statusindicator:
Actie/LED sequentie Toestand Opmerkingen
UIT
Sluit de voedingskabel aan
Initialiseren
Moet niet langer dan 2 seconden
duren
Gereed, Nee TV
HDMI-1, Bypass
Eveneens standaard stand als TV en
geen Rx-apparaat
HDMI – 1, 2D > 3D
HDMI – 1, 3D (SBS) > 3D
HDMI – 1, 3D (TAB) > 3D
HDMI – 1, 3D (FP) > 3D
HDMI – 1, 3D > 2D
HDMI – 1, BYPASS
Eveneens standaard stand als TV en
geen Rx-apparaat
TV, monitor of projector
HDMI OUT
HDMI OUT
DVD- of Blu-ray-speler
HDMI OUT
2D/3D converter-box
HDMI IN
TV
HDMI
IN
Set-top box
Page 11
11
Actie/LED sequentie Toestand Opmerkingen
HDMI – 2, 2D > 3D
HDMI – 2, 2D > 3D
HDMI – 2, 3D (SBS) > 3D
HDMI – 2, 3D (TAB) > 3D
HDMI – 2, 3D (FP) > 3D
TX scherm ongeldig
Ongeldig schermtype aangesloten
(knipperende LED’s)
USB-update aan de gang
USB update voltooid
USB update geannuleerd
Slechte USB-sleutel
USB update geannuleerd
Slecht bestand
USB update mislukt
USB-opwaardeerprocedure moet
worden herhaald (knipperende LED’s)
Veiligheidsvoorzorgsmaatregelen:
Om het risico op elektrische schokken te voorkomen mag dit
product ALLEEN worden geopend door een erkende technicus
wanneer er onderhoud nodig is. Koppel het product los van de
elektrische voeding en van andere apparatuur als zich
problemen voordoen. Stel het product niet bloot aan water of
vocht.
Onderhoud:
Uitsluitend reinigen met een droge doek. Gebruik geen reinigingsmiddelen of schuurmiddelen.
Garantie:
Voor wijzigingen en veranderingen aan het product of schade veroorzaakt door een verkeerd gebruik
van dit product, kan geen aansprakelijkheid worden geaccepteerd. Tevens vervalt daardoor de
garantie.
Algemeen:
- Wijziging van ontwerp en specificaties zonder voorafgaande mededeling onder voorbehoud.
- Alle logo’s, merken en productnamen zijn handelsmerken of geregistreerde handelsmerken van de
respectievelijke eigenaren en worden hierbij als zodanig erkend.
- Deze handleiding is met zorg samengesteld. Er kunnen echter geen rechten aan worden ontleend.
König Electronic kan geen aansprakelijkheid aanvaarden voor eventuele fouten in deze handleiding
of de gevolgen daarvan.
- Bewaar deze gebruiksaanwijzing voor latere raadpleging.
Let op:
Dit product is voorzien van dit symbool. Dit symbool geeft aan dat afgedankte elektrische en
elektronische producten niet met het gewone huisafval verwijderd mogen worden. Voor dit soort
producten zijn er speciale inzamelingspunten.
Page 12
12
ITALIANO
Box di conversione video da 2D a 3D
Prima installazione:
1. Collegare il cavo di alimentazione al convertitore.
2. Vedrete una luce blu singola continua sulla parte frontale del convertitore.
3. Scollegare il cavo di uscita HDMI che esce dal dispositivo sorgente (ricevitore satellitare HD,
riproduttore multimediale o Blu-ray o console giochi) e collegarlo all’uscita del convertitore (lasciare
l’altra estremità connessa alla TV). Vedrete una seconda luce blu continua sulla parte frontale del
convertitore.
4. Utilizzando un secondo cavo HDMI, collegare uno degli ingressi HDMI del convertitore al
dispositivo sorgente.
5. Accendere la TV.
6. Impostare la TV per visualizzare il relativo ingresso HDMI (lo stesso che utilizzavate prima per la
sorgente video). Dovreste vedere una schermata verde sulla TV, indicante che il convertitore è
collegato alla TV.
7. Accendere il dispositivo sorgente video.
8. Vedrete l’immagine del dispositivo sorgente video sulla TV.
9. Sorgenti HDMI1.4a compatibili con funzionalità 3D saranno riconosciute automaticamente dal
convertitore che passerà in modalità 3D. Potete passare attraverso le modalità disponibili
premendo il pulsante sul pannello frontale o il pulsante 2D/3D sul telecomando.
10. Altrimenti, per cambiare le impostazioni 3D premete il pulsante modalità sulla parte frontale del
convertitore o il pulsante 2D/3D sul telecomando. Il convertitore 3D supporta i formati FP, SBS e
TAB a cui si può accedere attraverso il Menu Modalità.
11. Indossate i vostri occhiali colorati 3D per provare l’esperienza dell’effetto 3D.
TV, Monitor o Proiettore
Decoder
HDMI OUT
HDMI OUT
Riproduttore DVD o Blu Ray
HDMI OUT
Convertitore 2D/3D
TV
HDMI IN
HDMI
IN
Page 13

13
Procedura per passare attraverso le sorgenti:
Potete connettere una seconda sorgente al convertitore. Se entrambe le sorgenti sono connesse ed
accese, potete passare attraverso i canali di ingresso HDMI premendo il pulsante sorgente del
pannello frontale o del telecomando.
LED indicatore di stato del pannello frontale:
Azione / Sequenza LED Stato Note:
SPENTO
Collegare il cavo di alimentazione
Inizializzazione
Dovrebbe durare non più di
2 secondi
Pronto, No TV
HDMI – 1, By-pass
Anche lo stato predefinito se la TV e
nessun dispositivo Rx
HDMI – 1, 2D > 3D
HDMI – 1, 3D (SBS) > 3D
HDMI – 1, 3D (TAB) > 3D
HDMI – 1, 3D (FP) > 3D
HDMI – 1, 3D > 2D
HDMI – 1, BY-PASS
Anche lo stato predefinito se la TV e
nessun dispositivo Rx
HDMI – 2, 2D > 3D
HDMI – 2, 2D > 3D
HDMI – 2, 3D (SBS) > 3D
HDMI – 2, 3D (TAB) > 3D
HDMI – 2, 3D (FP) > 3D
Visualizzazione Tx invalida
Tipo di visualizzazione connessa
non valida (LED lampeggianti)
Aggiornamento USB in corso
Aggiornamento USB
completato
Aggiornamento USB cancellato Chiave USB mal funzionante
Aggiornamento USB cancellato File corrotto
Aggiornamento USB fallito
La procedura di aggiornamento USB
deve essere ripetuta
(LED lampeggianti)
Precauzioni di sicurezza:
Per ridurre il rischio di shock elettrico, questo prodotto
dovrebbe essere aperto SOLO da un tecnico autorizzato
quando è necessario ripararlo. Scollegare il prodotto
dall’alimentazione e da altri apparecchi se dovesse esserci un
problema. Non esporre il prodotto ad acqua o umidità.
Manutenzione:
Pulire solo con un panno asciutto. Non utilizzare solventi detergenti o abrasivi.
Page 14

14
Garanzia:
Non sarà accettata alcuna garanzia o responsabilità in relazione a cambiamenti e modifiche del
prodotto o a danni determinati dall’uso non corretto del prodotto stesso.
Generalità:
- Il design e le caratteristiche tecniche sono soggetti a modifica senza necessità di preavviso.
- Tutti i marchi a logo e i nomi di prodotto sono marchi commerciali o registrati dei rispettivi titolari e
sono riconosciuti come tali in questo documento.
- Questo manuale è stato redatto con cura. Tuttavia da esse non possono essere avanzati diritti. König
Electronic non può accettare responsabilità per errori in questo manuale nè per eventuali
conseguenze.
- Tenere questo manuale e la confezione per riferimento futuro.
Attenzione:
Il prodotto è contrassegnato con questo simbolo, con il quale si indica che i prodotti elettrici ed
elettronici non devono essere gettati insieme ai rifiuti domestici. Per questi prodotti esiste un
sistema di raccolta differenziata.
ESPAÑOL
Convertidor de video 2D a 3D
Instalación:
1. Conecte el cable de alimentación del convertidor a la caja del convertidor y enchúfelo.
2. Usted verá una sola luz azul continua en la parte frontal del convertidor.
3. Desconecte el cable HDMI desde el dispositivo de la fuente de video (decodificador de cable HD,
sintonizador satelital HD, Blu-ray o reproductor de medios o consola de juegos) y conéctelo a la
salida de la caja del convertidor (deje el otro extremo conectado al televisor).
4. Use un segundo cable HDMI para conectar una de las entradas HDMI desde el convertidor al
dispositivo de fuente de video original.
5. Encienda el televisor.
6. Ajuste el televisor para visualizar la entrada HDMI correspondiente (la misma que utilizó antes para
la fuente de video). Debiera aparecer una pantalla verde en el televisor indicando que el
convertidor se encuentra conectado al televisor.
7. Si es necesario, encienda el dispositivo de fuente de video.
8. Usted visualizará en el televisor la imagen del dispositivo de fuente de video.
9. Las fuentes 3D compatibles con HDMI1.4a serán identificadas y el convertidor cambiará
automáticamente al modo 3D. Usted puede cambiar entre los modos disponibles oprimiendo el
botón “modo” en el panel frontal o el botón 2D/3D en el mando a distancia.
10. Alternativamente, para cambiar la configuración 3D oprima el botón “modo” en el panel frontal del
convertidor o el botón 2D/3D en el mando a distancia. El convertidor 3D es compatible con los
formatos FP, SBS y TAB, a los que puede acceder mediante el menú “modo”.
11. Póngase las gafas 3D de colores para experimentar el efecto 3D.
Page 15

15
Procedimiento para cambiar las fuentes:
Usted puede conectar una segunda fuente al convertidor. Si ambas fuentes están conectadas y
encendidas, puede cambiar los canales de entrada HDMI oprimiendo el botón de la fuente en el panel
frontal o en el mando a distancia.
Indicador LED de estado del panel frontal:
Acción/ Secuencia LED Estado Notas
Apagado (OFF)
Conecte el cable de alimentación
Inicializar
No debiera demorar más de
2 segundos
Listo, no TV
HDMI – 1, Bypass
También indica estado
predeterminado, si no hay TV o
dispositivo Rx
HDMI – 1, 2D > 3D
HDMI – 1, 3D (SBS) > 3D
HDMI – 1, 3D (TAB) > 3D
HDMI – 1, 3D (FP) > 3D
HDMI – 1, 3D > 2D
TV, Monitor o
Proyector
Módulo de conexión
Salida HDMI
Salida HDMI
Reproductor DVD o BluRay
Salida HDMI
Convertidor 2D/3D
Entrada HDMI
TV
Entrada HDMI
Page 16

16
Acción/ Secuencia LED Estado Notas
HDMI – 1, BYPASS
También indica estado
predeterminado, si no hay TV o
dispositivo Rx
HDMI – 2, 2D > 3D
HDMI – 2, 2D > 3D
HDMI – 2, 3D (SBS) > 3D
HDMI – 2, 3D (TAB) > 3D
HDMI – 2, 3D (FP) > 3D
Tipo de pantalla no es válida
Tipo de pantalla conectada no es
válida (las luces LED parpadean)
Actualización USB en proceso
Actualización USB completa
Actualización USB anulada
Clave USB no válida
Actualización USB anulada
Archivo no válido
Actualización USB falló
Es preciso repetir el procedimiento
de actualización USB (las luces LED
parpadean)
Medidas de seguridad:
Para reducir el peligro de descarga eléctrica, este producto
SÓLO lo debería abrir un técnico autorizado cuando necesite
reparación. Desconecte el producto de la toma de corriente y
de los otros equipos si ocurriera algún problema. No exponga
el producto al agua ni a la humedad.
Mantenimiento:
Límpielo sólo con un paño seco. No utilice disolventes de limpieza ni productos abrasivos.
Garantía:
No se aceptará ninguna garantía o responsabilidad derivada de cualquier cambio o modificaciones
realizadas al producto o daños provocados por un uso incorrecto del producto.
General:
- Las ilustraciones y las especificaciones podrán sufrir cambios sin previo aviso.
- Todas las marcas de logotipos y nombres de productos constituyen patentes o marcas registradas a
nombre de sus titulares correspondientes, reconocidos como tal.
- Este manual se ha redactado con sumo cuidado. Aún así, no se ofrece ninguna garantía. König
Electronic no será responsable de los errores de este manual o de las consecuencias derivadas de
los mismos.
- Conserve este manual y el embalaje en caso de futura necesidad.
Atención:
Este producto está señalizado con este símbolo. Esto significa que los productos eléctricos y
electrónicos usados no deberán mezclarse con los desechos domésticos generales. Existe un
sistema de recogida individual para este tipo de productos.
Page 17

17
MAGYAR
2D - 3D videó átalakító doboz
Üzembe helyezés:
1. Csatlakoztassa az átalakító doboz tápkábelét az Átalakító dobozba, majd a másik végét
csatlakoztassa a konnektorhoz.
2. Az Átalakító Doboz előlapján egy kék fény kezd el folyamatosan világítani.
3. Húzza ki a HDMI-kábelt a videóforrást biztosító eszközből (HS kábeldoboz, HD műholdas doboz,
Blu-ray lejátszó vagy játékkonzol), majd csatlakoztassa az Átalakító Doboz kimenetéhez (a másik
végét hagyja a TV-hez csatlakoztatva). Az Átalakító Doboz előlapján egy másik kék fény kezd el
folyamatosan világítani.
4. Egy második HDMI-kábel egyik végét csatlakoztassa az Átalakító Doboz egyik HDMI bemenetéhez,
a másik végét pedig az eredeti videóforráshoz.
5. Kapcsolja be a TV készüléket.
6. Állítsa be a TV-t, hogy a megfelelő HDMI bemenetet mutassa (ugyanaz, mint amit korábban a
videóforráshoz használt). A TV készüléken egy zöld képernyőnek kell megjelennie, ami azt mutatja,
hogy az Átalakító Doboz csatlakoztatva van a TV-hez.
7. Szükség esetén kapcsolja be a videóforrás készüléket.
8. A videóforrás képe megjelenik a TV készüléken.
9. A készülék a HDMI1.4a kompatibilis 3D forrásokat is felismeri és az Átalakító Doboz automatikusan
átkapcsol 3D módba. Az elérhető üzemmódok között az előlapon található gombok vagy a
távirányítón található 2D/3D gomb segítségével váltogathat.
10. A 3D beállítások módosításához nyomja meg az Átalakító Doboz előlapján lévő üzemmód gombot
vagy a távirányítón található 2D/3D gombot. A 3D Átalakító Doboz az FP, SBS és TAB
formátumokat támogatja, melye az Üzemmód Menüből érhetők el.
11. Vegye fel a színes 3D szemüveget és élvezze a 3D-s élményt.
TV, Monitor vagy Projektor
Set-top Box
HDMI KI
HDMI KI
DVD vagy BluRay lejátszó
HDMI KI
2D/3D Átalakító Doboz
HDMI BE
TV
HDMI
BE
Page 18

18
A források közti átkapcsolás:
Az Átalakító Dobozhoz egy második forrást is csatlakoztathat. Amennyiben két forrást csatlakoztatott
és a készülék be van kapcsolva, a HDMI bemeneti csatornák közt használja az előlapon vagy a
távirányítón található forrás gombot.
Előlapi LED-es állapotjelző:
Művelet/ LED sorozat Állapot Megjegyzések
KI
Csatlakozassa a tápkábelt
Inicializálás
Nem tarthat tovább 2 másodpercnél
Kész, nem TV
HDMI – 1, Bypass
Akkor is alapértelmezett állapot, ha
van TV, de nincs Rx eszköz
HDMI – 1, 2D > 3D
HDMI – 1, 3D (SBS) > 3D
HDMI – 1, 3D (TAB) > 3D
HDMI – 1, 3D (FP) > 3D
HDMI – 1, 3D > 2D
HDMI – 1, BYPASS
Akkor is alapértelmezett állapot, ha
van TV, de nincs Rx eszköz
HDMI – 2, 2D > 3D
HDMI – 2, 2D > 3D
HDMI – 2, 3D (SBS) > 3D
HDMI – 2, 3D (TAB) > 3D
HDMI – 2, 3D (FP) > 3D
Tx megjelenítés érvénytelen
Érvénytelen típusú képernyő lett
csatlakoztatva (villogó LED-ek)
USB frissítés folyamatban
USB frissítés befejezve
USB frissítés megszakítva
Rossz USB kulcs
USB frissítés megszakítva
Rossz fájl
USB frissítés sikertelen
Az USB frissítést ismét el kell végezni
(villogó LED-ek)
Biztonsági óvintézkedések:
Az áramütés veszélyének csökkentése érdekében ezt a
terméket KIZÁRÓL
A
G a márkaszerviz képviselője nyithatja fel.
Hiba esetén húzza ki a termék csatlakozóját a konnektorból,
és kösse le más berendezésekről. Vigyázzon, hogy ne érje a
terméket víz vagy nedvesség.
Karbantartás:
Csak száraz ronggyal tisztítsa. Tisztító- és súrolószerek használatát mellőzze.
Page 19

19
Jótállás:
Nem vállalunk jótállást és felelősséget a terméken végzett változtatás vagy módosítás vagy a termék
helytelen használata miatt bekövetkező károkért.
Általános tudnivalók:
- A kivitel és a műszaki jellemzők előzetes értesítés nélkül is módosulhatnak.
- Minden logó, terméknév és márkanév a tulajdonosának márkaneve vagy bejegyzett márkaneve,
azokat ennek tiszteletben tartásával említjük.
- Jelen útmutató nagy gonddal készült. Ennek ellenére abból jogok nem származnak. A König
Electronic nem felelős az útmutató hibáiért, vagy azok következményeiért.
- Őrizze meg ezt az útmutatót és a csomagolást.
Figyelem:
Ezt a terméket ezzel a jelölésel láttuk el. Azt jelenti, hogy az elhasznált elektromos és
elektronikus termékeket tilos az általános háztartási hulladékhoz keverni. Begyűjtésüket külön
begyűjtő létesítmények végzik.
SUOMI
2D -> 3D videomuunnin
Ensimmäinen asennus:
1. Liitä virtakaapeli muuntimeen.
2. Sininen merkkivalo syttyy.
3. Irrota HDMI-kaapeli videolähtölaitteesta (HD kaapeliboksi, HD satelliittiboksi, Blu-ray tai
mediasoitin tai pelikonsoli, ja liitä se muuntajalaitteen lähtöön (jätä toinen pää kiinni televisioon).
4. Käytettäessä toista HDMI-kaapelia liitä toinen muuntajalaitteen HDMI-tuloista alkuperäiseen
videolähdelaitteeseen.
5. Kytke TV päälle.
6. Aseta TV näyttämään oikeaa HDMI-tuloa (sama, mitä käytit aiemmin videolähteelle). Sinun tulisi
nähdä vihreä ruutu televisiossa, osoittaen, että muuntajalaite on liitetty televisioosi.
7. Jos tarpeen, kytke videolähdelaite päälle.
8. Näet kuvan videolähdelaitteesta televisiossa.
9. HDMI1.4a yhteensopivat 3D-lähteet tunnistetaan ja muuntajalaite vaihtaa automaattisesti 3D-tilaan.
Voit vaihtaa saatavilla olevia tiloja painamalla tilapainiketta etupaneelissa tai 2D/3D-painiketta
kaukosäätimessä.
10. Muutoin, vaihtaaksesi 3D-asetuksia, paina tilapainiketta muuntajalaitteen edessä tai
2D/3D-painiketta kaukosäätimessä. 3D-muunninlaite tukee FP-, SBS- ja TAB-formaatteja, joihin
pääsee tilavalikon kautta.
11. Laita 3D-lasit päähäsi kokeaksesi 3D-efektit.
Page 20

20
Lähdelaitteiden vaihto:
Voi liittää toisen lähteen muuntimeen, jos molemmat lähteet ovat liitettyinä ja virta on molemmissa
päällä, voit vaihtaa HDMI-tulokanavien välillä painamalla lähdepainiketta etupaneelissa tai
kaukosäätimessä.
Etupaneelin LED-tilan merkkivalo:
Toiminto/ LED-jakso Tila Huomautukset
POIS
Liitä virtakaapeli
Alusta
Ei pitäisi kestää kauempaa kuin
2 sekuntia
Valmis, Ei Tv
HDMI – 1, Ohitus
Myös oletustila, jos TV eikä
RX-laitetta
HDMI – 1, 2D > 3D
HDMI – 1, 3D (SBS) > 3D
HDMI – 1, 3D (TAB) > 3D
HDMI – 1, 3D (FP) > 3D
HDMI – 1, 3D > 2D
HDMI – 1, BYPASS
Myös oletustila, jos TV eikä
RX-laitetta
Tv, monitori tai projektori
Digiboksi
HDMI LÄHTÖ
HDMI LÄHTÖ
DVD- tai BluRay-soitin
HDMI LÄHTÖ
2D/3D-muunninlaite
HDMI IN
TV
HDMI
TULO
Page 21

21
Toiminto/ LED-jakso Tila Huomautukset
HDMI – 2, 2D > 3D
HDMI – 2, 2D > 3D
HDMI – 2, 3D (SBS) > 3D
HDMI – 2, 3D (TAB) > 3D
HDMI – 2, 3D (FP) > 3D
Väärä Tx-näyttö
Väärä näyttötyyppi yhdistetty
(välkkyvät LEDit)
USB-päivitys meneillään
USB-päivitys valmis
USB-päivitys peruttu
Väärä USB-avain
USB-päivitys peruttu
Väärä tiedosto
USB-päivitys epäonnistui
USB:n päivitysprosessi täytyy toistaa
(välkkyvät LED-valot)
Turvallisuuteen liittyvät varoitukset:
Sähköiskun riskin pienentämiseksi, AINOASTAAN valtuutettu
huoltohenkilö saa avata tämän laitteen huoltoa varten. Jos
ongelmia ilmenee, irrota laite verkkovirrasta ja muista laitteista.
Älä altista laitetta vedelle äläkä kosteudelle.
Huolto:
Puhdista ainoastaan kuivalla kankaalla. Älä käytä liuottimia tai hankausaineita.
Takuu:
Takuu ja vastuuvelvollisuus mitätöityvät, jos tuote vaurioituu siihen tehtyjen muutoksien tai sen
väärinkäytön takia.
Yleistä:
- Muutoksia malliin ja teknisiin ominaisuuksiin voidaan tehdä ilmoituksetta.
- Kaikki logot, merkit ja tuotenimet ovat niiden vastaavien omistajien tuotemerkkejä tai rekisteröityjä
tuotemerkkejä ja niitä on käsiteltävä sellaisina.
- Kaikki oikeudet pidätetään. König Electronic ei ole vastuussa mistään tämän käyttöohjeen
sisältämistä virheistä tai niiden seurauksista.
- Säilytä käyttöohjeet ja pakkaus myöhempää käyttötarvetta varten.
Huomio:
Tuote on varustettu tällä merkillä. Se merkitsee, ettei käytettyjä sähkö- tai elektronisia tuotteita
saa hävittää kotitalousjätteen mukana. Kyseisille tuotteille on olemassa erillinen
keräysjärjestelmä.
SVENSKA
Videoomvandlare för 2D till 3D
Första installationen:
1. Anslut videoomvandlarens strömkabel till videoomvandlarboxen och sätt i stickkontakten i
vägguttaget.
2. Lysdioden kommer att lysa med kontinuerligt blått ljus på framsidan av videoomvandlaren.
Page 22

22
3. Koppla från HDMI-kabeln från videokällan (HD-kabelbox, HD-satellitbox, Blu-ray-spelare,
mediaspelare eller spelkonsol) och anslut den till utgången på videoomvandlaren (låt den andra
änden vara ansluten till TV:n). En till lysdiod kommer att lysa med kontinuerligt blått ljus på
framsidan av videoomvandlaren.
4. Med hjälp av en andra HDMI-kabel ansluter du nu en av HDMI-ingångarna från videoomvandlaren
till den ursprungliga videokällan.
5. Slå på TV:n.
6. Ställ in TV:n så att den visar den relevanta HDMI-ingången (samma som du använde tidigare för
videokällan). Du bör se en grön skärm på TV:n vilket indikerar att videoomvandlaren är ansluten till
din TV.
7. Du kan nu slå på videokällan.
8. Bilden från videokällan kommer att visas på din TV.
9. HDMI-kompatibla 3D-källor kommer att kännas igen och videoomvandlaren kommer automatiskt
att växla till 3D-läge. Du kan växla mellan de lägen som finns genom att trycka på knappen Mode
(läge) på frontpanelen eller på knappen 2D/3D på fjärrkontrollen.
10. Eller så kan du ändra 3D-inställningarna genom att trycka på knappen Mode (Läge) på
videoomvandlarens framsida, eller på knappen 2D/3D på fjärrkontrollen. Videoomvandlaren för 3D
stöder formaten FP, SBS och TAB vilka kan ställas in via menyn Mode (läge).
11. Sätt på dig dina färgade 3D-glasögon för att uppleva 3D-effekten.
Procedur för byte av källa:
Du kan ansluta en andra källa till omvandlarboxen. Om båda källorna är anslutna och påslagna kan du
växla mellan HDMI-ingångskanaler genom att trycka på knappen Source (källa) på frontpanelen eller
på fjärrkontrollen.
TV, bildskärm eller projektor
Digitalbox
HDMI-UT
HDMI-UT
DVD- eller Blu-ray-spelare
HDMI-UT
Omvandlarbox 2D/3D
HDMI-IN
TV
HDMI-
IN
Page 23

23
Frontpanelens LED-indikator:
Tända lysdioder/LED-sekvens Läge/tillstånd Anmärkningar
AV
Anslut nätsladden
Initierar
Ska inte lysa längre än 2 sekunder
Videoomvandlaren redo,
ingen anslutning till TV
HDMI 1, förbikoppling
Även standardläge om TV och ingen
Rx-enhet
HDMI 1, 2D > 3D
HDMI 1, 3D (SBS) > 3D
HDMI 1, 3D (TAB) > 3D
HDMI 1, 3D (FP) > 3D
HDMI 1, 3D > 2D
HDMI 1, FÖRBIKOPPLING
Även standardläge om TV och ingen
Rx-enhet
HDMI 2, 2D > 3D
HDMI 2, 2D > 3D
HDMI 2, 3D (SBS) > 3D
HDMI 2, 3D (TAB) > 3D
HDMI 2, 3D (FP) > 3D
Tx-visning felaktig
Felaktig bildskärmstyp ansluten
(blinkande lysdioder)
USB-uppdatering pågår
USB-uppdateringen klar
USB-uppdatering avbryts
Defekt USB-nyckel
USB-uppdatering avbryts
Felaktig fil
USB-uppdateringen
misslyckades
USB-uppgraderingen måste
upprepas (blinkande lysdioder)
Säkerhetsanvisningar:
För att minska risken för elektriska stötar bör denna produkt
ENDAST öppnas av behörig tekniker när service behövs. Dra
ut strömkabeln från eluttaget och koppla ur all annan
utrustning om något problem skulle uppstå. Utsätt inte
produkten för vatten eller fukt.
Underhåll:
Rengör endast med torr trasa. Använd inga rengöringsmedel som innehåller lösningsmedel eller
slipmedel.
Garanti:
Ingen garanti gäller vid ändringar eller modifieringar av produkten eller för skador som har uppstått på
grund av felaktig användning av denna produkt.
Page 24

24
Allmänt:
- Utseende och specifikationer kan komma att ändras utan föregående meddelande.
- Alla logotyper och produktnamn är varumärken eller registrerade varumärken som tillhör sina ägare
och är härmed erkända som sådana.
- Den här bruksanvisningen producerades med omsorg. Dock kan inga rättigheter härröra. König
Electronic kan inte acceptera ansvar för några felaktigheter i denna manual eller dess konsekvenser.
- Behåll bruksanvisningen och förpackningen för eventuellt framtida behov.
Obs!
Produkten är märkt med denna symbol som betyder att använda elektriska eller elektroniska
produkter inte får slängas bland vanliga hushållssopor. Det finns särskilda återvinningssystem
för dessa produkter.
ČESKY
Video konvertor 2D na 3D
Instalace:
1. Připojte napájecí kabel ke konvertoru a zapojte ho do sítě.
2. Zapnutý konvertor indikuje modrá kontrolka v přední části boxu.
3. Odpojte HDMI kabel ze zdrojového video zařízení např. HD set top boxu, HD satelitního přijímače,
Blu-ray přehrávače nebo herní konzole a připojte ho k výstupu konvertoru (ponechejte druhý konec
připojen k televizoru). V přední části konvertoru se rozsvítí druhá modrá kontrolka.
4. Pomocí druhého HDMI kabelu připojte jeden z HDMI vstupů konvertoru k původnímu zdrojovému
video zařízení.
5. Zapněte televizor.
6. Přepněte televizor na příslušný HDMI vstup (stejný jaký jste použili pro zdrojové video zařízení).
Obrazovka vašeho televizoru by měla být zelená což znamená, že je konvertor správně připojen.
7. V případě potřeby zapněte zdrojové video zařízení.
8. Na televizní obrazovce uvidíte obraz ze zdrojového video zařízení.
9. Zdrojová 3D zařízení, která vyhovují HDMI 1.4a budou rozpoznána a konvertor je automaticky
přepne do 3D režimu. Mezi dostupnými režimy můžete přepínat stiskem tlačítka režimu (mode) na
předním panelu konvertoru nebo tlačítkem 2D/3D na dálkovém ovládání.
10. Pro případnou změnu 3D nastavení stiskn
ěte tlačítko režimu na předním panelu konvertoru nebo
tlačítko 2D/3D na dálkovém ovládání. Tento 3D konvertor podporuje formáty FP, SBS a TAB, které
jsou dosažitelné z nabídky režimu Mode.
11. K vychutnání zážitku 3D efektu si nasaďte 3D brýle.
Page 25

25
Postup přepínání zdrojů:
Ke konvertoru můžete připojit druhý zdroj. Jsou-li oba zdroje připojeny a zapnuty můžete přepínat mezi
vstupními kanály HDMI stiskem tlačítka zdroje (source) na předním panelu nebo na dálkovém
ovládání.
LED indikátory stavu konvertoru na předním panelu:
Provedená akce/LED
sekvence
Stav Poznámky
Konvertor je vypnut.
Připojte napájecí kabel
Inicializace
Neměla by trvat déle než 2 sekundy
Konvertor je připraven k
použití, není připojena televize.
HDMI – 1, vynechání zařízení
Také standardní stav jestliže televize
nepřijímá signál ze zařízení.
HDMI – 1, 2D > 3D
HDMI – 1, 3D (SBS) > 3D
HDMI – 1, 3D (TAB) > 3D
HDMI – 1, 3D (FP) > 3D
HDMI – 1, 3D > 2D
HDMI – 1, vynechání zařízení
Také standardní stav jestliže televize
nepřijímá signál ze zařízení.
TV, monitor nebo projektor
Set-top box
HDMI VÝSTUP
HDMI VÝSTUP
DVD nebo Blu-Ray přehrávač
HDMI VÝSTUP
2D/3D konvertor
HDMI VSTUP
TV
HDMI VSTUP
Page 26

26
Provedená akce/LED
sekvence
Stav Poznámky
HDMI – 2, 2D > 3D
HDMI – 2, 2D > 3D
HDMI – 2, 3D (SBS) > 3D
HDMI – 2, 3D (TAB) > 3D
HDMI – 2, 3D (FP) > 3D
Nesprávné zobrazení televize
Připojen nesprávný typ zobrazovacího
zařízení (blikající LED)
Probíhá aktualizace USB
Aktualizace USB dokončena
Aktualizace USB zrušena
Špatný USB klíč
Aktualizace USB zrušena
Špatný soubor
Aktualizace USB selhala
Proces aktualizace USB musí být
opakován (blikající LED)
Bezpečnostní opatření:
Abyste snížili riziko úrazu elektrickým šokem, měl by být tento
výrobek otevřen POUZE autorizovaným technikem, je-li to
nezbytné. V případě, že dojde k závadě, odpojte výrobek ze
sítě a od jiných zařízení. Výrobek nevystavujte vodě nebo
vlhkosti.
Údržba:
K čištění používejte pouze suchý hadřík. Nepoužívejte čisticí rozpouštědla ani abrazivní prostředky.
Záruka:
Jakékoli změny, modifikace nebo poškození zařízení v důsledku nesprávného zacházení se zařízením
ruší platnost záruční smlouvy.
Obecné upozornění:
- Design a specifikace výrobku mohou být změněny bez předchozího upozornění.
- Všechna loga a obchodní názvy jsou registrované obchodní značky příslušných vlastníků a jsou
chráněny zákonem.
- Prestože manuál byl zpracován s maximalní péčí, tiskové chyby nejsou vyloučeny. Konig Electronic
nepřebírá zodpovědnost za za škody vzniklé v souvislosti s chybami v manuálu.
- Pro budoucí použití uschovejte tento návod a obal.
Upozornění:
Tento výrobek je označen tímto symbolem. To znamená, že se s výrobkem musí zacházet jako s
nebezpečným elektrickým a elektronickým odpadem a nelze jej po skončení životnosti
vyhazovat s běžným domácím odpadem. Pro likvidaci těchto výrobků existují zvláštní sběrná
střediska.
ROMÂNĂ
Convertor video 2D/3D
Instalare iniţială:
1. Conectaţi cablul de alimentare la convertorul video şi introduceţi-l în priză.
2. Veţi vedea o singură lumină albastră continuă pe partea frontală a convertorului.
Page 27

27
3. Deconectaţi cablul HDMI de la aparatul sursei video (decodor HD, receptor de satelit HD, Blu-ray
sau media player sau consolă de jocuri) şi conectaţi-l la ieşirea convertorului video (lăsaţi celălalt
capăt conectat la televizor). Veţi vedea o a doua lumină albastră continuă pe partea frontală a
convertorului video.
4. Folosind un al doilea cablu HDMI, conectaţi una din intrările HDMI ale convertorului video la
aparatul original al sursei video.
5. Porniţi televizorul.
6. Setaţi televizorul să afişeze intrarea HDMI relevantă (aceeaşi pe care aţi folosit-o anterior pentru
sursa video). Ar trebui să vedeţi un ecran verde pe televizor indicând conectarea convertorului
video la televizorul dumneavoastră.
7. Dacă este necesar, porniţi aparatul sursei video.
8. Veţi vedea imaginea de pe aparatul sursei video la televizor.
9. Sursele HDMI1.4a compatibile cu 3D vor fi recunoscute şi convertorul video se va comuta automat
în modul 3D. Puteţi comuta între diferitele moduri disponibile apăsând butonul pentru selectarea
modului de pe panoul frontal sau butonul 2D/3D de pe telecomandă.
10. Altfel, pentru a schimba setările 3D apăsaţi butonul pentru selectarea modului de pe partea frontală
a convertorului video sau butonul 2D/3D de pe telecomandă. Convertorul video 3D acceptă
formate FP, SBS
şi TAB ce pot fi accesate prin modul meniu.
11. Puneţi-vă ochelarii coloraţi 3D pentru a experimenta efectele 3D.
Procedură pentru comutarea surselor:
Puteţi conecta o a doua sursă la convertorul video. Dacă ambele surse sunt conectate şi pornite, puteţi
comuta între canalele de intrare HDMI prin apăsarea butonului pentru selectarea sursei de pe panoul
frontal sau de pe telecomandă.
Televizor, monitor sau proiector
Cutie de recepţie STB
HDMI OUT
HDMI OUT
Player DVD sau Blu-ray
HDMI OUT
Convertor video 2D/3D
HDMI IN
Televizor
HDMI
IN
Page 28

28
LEDul indicator de stare de pe panoul frontal:
Activitate/ secvenţă LED Stare Observaţii
ÎNCHIS
Conectaţi cablul de alimentare
Iniţializare
Nu ar trebui să dureze mai mult de
2 secunde
Gata, Nu Televizor
HDMI – 1, Bypass
Tot stare implicită dacă există
televizor dar nu şi aparat Rx
HDMI – 1, 2D > 3D
HDMI – 1, 3D (SBS) > 3D
HDMI – 1, 3D (TAB) > 3D
HDMI – 1, 3D (FP) > 3D
HDMI – 1, 3D > 2D
HDMI – 1, Bypass
Tot stare implicită dacă există
televizor, dar nu şi aparat Rx
HDMI – 2, 2D > 3D
HDMI – 2, 2D > 3D
HDMI – 2, 3D (SBS) > 3D
HDMI – 2, 3D (TAB) > 3D
HDMI – 2, 3D (FP) > 3D
Afişaj Tx invalid
Afişaj invalid conectat
(LEDuri intermitente)
Actualizare prin USB în
desfăşurare
Actualizare prin USB
încheiată
Actualizare prin USB anulată
Cheie USB necorespunzătoare
Actualizare prin USB anulată
Fişier necorespunzător
Actualizare prin USB eşuată
Procedura de upgradare prin USB
trebuie repetată (LEDuri intermitente)
Măsuri de siguranţă:
Pentru a se reduce pericolul de electrocutare, acest produs va
fi desfăcut NUMAI de către un tehnician avizat, când este
necesară depanarea. Deconectaţi produsul de la priza de
reţea sau alte echipamente în cazul apariţiei unei probleme.
Nu expuneţi produsul apei sau umezelii.
Întreţinere:
Curăţarea trebuie făcută cu o cârpă uscată. Nu folosiţi solvenţi sau agenţi de curăţare abrazivi.
Garanţie:
Nu oferim nicio garanţie şi nu ne asumăm niciun fel de responsabilitate în cazul schimbărilor sau
modificărilor aduse acestui produs sau în cazul deteriorării cauzate de utilizarea incorectă a produsului.
Page 29

29
Generalităţi:
- Designul şi specificaţiile produsului pot fi modificate fără o notificare prealabilă.
- Toate siglele mărcilor şi denumirile produselor sunt mărci comerciale sau mărci comerciale
înregistrate ale proprietarilor de drept şi prin prezenta sunt recunoscute ca atare.
- Acest manual a fost conceput cu atenţie. Cu toate acestea, nu se pot oferi drepturi pe baza sa. König
Electronic nu acceptă răspunderea pentru nicio eroare din acest manual sau consecinţele ce decurg
din acestea.
- Păstraţi acest manual şi ambalajul pentru consultări ulterioare.
Atenţie:
Pe acest produs se află acest marcaj. Acesta semnifică faptul că produsele electrice şi
electronice nu trebuie eliminate odată cu gunoiul menajer. Aceste produse au un sistem separat
de colectare.
ΕΛΛΗΝΙΚA
Μετατροπέας εικόνας 2D σε 3D
Αρχική εγκατάσταση:
1. Συνδέστε το καλώδιο τροφοδοσίας του μετατροπέα και στη συνέχεια βάλτε το στην πρίζα.
2. Στη μπροστινή πλευρά του Μετατροπέα θα ανάψει σταθερά μια μπλε λυχνία.
3. Αποσυνδέστε το καλώδιο HDMI από τη συσκευή αναπαραγωγής (επίγειος αποκωδικοποιητής HD,
δορυφορικός αποκωδικοποιητής HD, Blu-ray, media player ή κονσόλα παιχνιδιών) και συνδέστε το
στην έξοδο του Μετατροπέα (αφήστε το άλλο άκρο
συνδεμένο στην τηλεόραση). Στη μπροστινή
πλευρά του Μετατροπέα θα ανάψει σταθερά μια δεύτερη μπλε λυχνία.
4. Με το δεύτερο καλώδιο HDMI συνδέστε μία από τις εισόδους HDMI του Μετατροπέα με την αρχική
συσκευή αναπαραγωγής.
5. Ενεργοποιήστε την τηλεόραση.
6. Ρυθμίστε την τηλεόραση ώστε να προβάλλει τη σχετική είσοδο HDMI (την ίδια που
χρησιμοποιήσατε για την
πηγή βίντεο). Η οθόνη της τηλεόρασης θα πρέπει να γίνει πράσινη,
υποδεικνύοντας ότι ο Μετατροπέας έχει συνδεθεί στην τηλεόρασή σας.
7. Αν είναι απαραίτητο, ενεργοποιήστε τη συσκευή αναπαραγωγής.
8. Η εικόνα από τη συσκευή αναπαραγωγής θα εμφανιστεί στην τηλεόραση.
9. Θα αναγνωριστούν οι πηγές 3D που είναι συμβατές με το HDMI1.4a και ο Μετατροπέας
θα επιλέξει
αυτόματα τη λειτουργία 3D. Μπορείτε να επιλέξετε διάφορες λειτουργίες μέσω του πλήκτρου
«mode» (λειτουργία) στο μπροστινό πίνακα ή μέσω του πλήκτρου 2D/3D στο τηλεχειριστήριο.
10. Διαφορετικά, για να αλλάξετε τις ρυθμίσεις 3D, πιέστε το πλήκτρο «mode» στη μπροστινή πλευρά
του Μετατροπέα ή το πλήκτρο 2D/3D του τηλεχειριστηρίου. Ο Μετατροπέας 3D υποστηρίζει τις
μορφές FP, SBS και TAB, στις οποίες
μπορείτε να μεταβείτε μέσω της επιλογής «Mode Menu»
(Μενού Λειτουργίας).
11. Φορέστε τα έγχρωμα γυαλιά 3D για να βιώσετε την εμπειρία 3D.
Page 30

30
Διαδικασία εναλλαγής πηγών:
Μπορείτε να συνδέσετε και δεύτερη πηγή στο Μετατροπέα. Όταν είναι συνδεμένες και ενεργοποιημένες
και οι δύο πηγές, μπορείτε να εναλλάσσετε τα κανάλια εισόδου HDMI πιέζοντας το πλήκτρο «source»
(πηγή) του μπροστινού πίνακα ή του τηλεχειριστηρίου.
LED ένδειξης κατάστασης στο μπροστινό πίνακα:
Ενέργεια/ Σειρά LED Κατάσταση Σημειώσεις
ΑΠΕΝΕΡΓΟΠΟΙΗΜΕΝΟ
Συνδέστε το τροφοδοτικό
Προετοιμασία
Δεν θα πρέπει να διαρκεί πάνω από
2 δευτερόλεπτα
Έτοιμο, Καμία Τηλεόραση
HDMI – 1, Παράκαμψη
Προεπιλεγμένη κατάσταση σε
περίπτωση σύνδεσης στην
τηλεόραση χωρίς συσκευή Rx
HDMI – 1, 2D > 3D
HDMI – 1, 3D (SBS) > 3D
HDMI – 1, 3D (TAB) > 3D
HDMI – 1, 3D (FP) > 3D
HDMI – 1, 3D > 2D
Τηλεόραση, Οθόνη ή Προβολέας
Αποκωδικοποιητής STB
Έ
ξοδος HDMI
Έ
ξοδος HDMI
DVD ή BluRay player
Έ
ξοδος HDMI
Μετατροπέας 2D/3D
Είσοδος HDMI
Είσοδος
HDMI
Τηλεόραση
Page 31

31
Ενέργεια/ Σειρά LED Κατάσταση Σημειώσεις
HDMI – 1, ΠΑΡΑΚΑΜΨΗ
Προεπιλεγμένη κατάσταση σε
περίπτωση σύνδεσης στην
τηλεόραση χωρίς συσκευή Rx
HDMI – 2, 2D > 3D
HDMI – 2, 2D > 3D
HDMI – 2, 3D (SBS) > 3D
HDMI – 2, 3D (TAB) > 3D
HDMI – 2, 3D (FP) > 3D
Μη έγκυρη οθόνη Tx
Σύνδεση μη έγκυρου τύπου οθόνης
(οι λυχνίες LED αναβοσβήνουν)
Ενημέρωση USB σε εξέλιξη
Η ενημέρωση του USB
ολοκληρώθηκε
Η ενημέρωση του USB
ακυρώθηκε
Κατεστραμμένο κλειδί USB
Η ενημέρωση του USB
ακυρώθηκε
Κατεστραμμένο αρχείο
Η ενημέρωση του USB
απέτυχε
Η διαδικασία αναβάθμισης του USB
πρέπει να επαναληφθεί (οι λυχνίες
LED αναβοσβήνουν)
Οδηγίες ασφαλείας:
Για να μειώσετε τον κίνδυνο ηλεκτροπληξίας, το προϊόν αυτό
θα πρέπει να ανοιχθεί ΜΟΝΟ από εξουσιοδοτημένο τεχνικό
όταν απαιτείται συντήρηση (σέρβις). Αποσυνδέστε το προϊόν
από την πρίζα και άλλο εξοπλισμό αν παρουσιαστεί πρόβλημα.
Μην εκθέτετε το προϊόν σε νερό ή υγρασία.
Συντήρηση:
Καθαρίστε μόνο με ένα στεγνό πανί. Μη χρησιμοποιείτε διαλύτες ή λειαντικά.
Εγγύηση:
Ουδεμία εγγύηση ή ευθύνη δεν είναι αποδεκτή σε περίπτωση αλλαγής ή μετατροπής του προϊόντος ή
βλάβης που προκλήθηκε λόγω εσφαλμένης χρήσης του προϊόντος.
Γενικά:
- Το σχέδιο και τα χαρακτηριστικά μπορούν να αλλάξουν χωρίς καμία προειδοποίηση.
- Όλα τα λογότυπα, οι επωνυμίες και οι ονομασίες προϊόντων είναι εμπορικά σήματα ή σήματα
κατατεθέντα των αντίστοιχων κατόχων και δια του παρόντος αναγνωρίζονται ως τέτοια.
- Αυτό το εγχειρίδιο συντάχτηκε με προσοχή. Ωστόσο, δεν προκύπτουν δικαιώματα. Η König
Electronic δεν φέρει
καμία ευθύνη για σφάλμα σε αυτό το εγχειρίδιο ή στις συνέπειές τους.
- Φυλάξτε το παρόν εγχειρίδιο και τη συσκευασία για μελλοντική αναφορά.
Προσοχή:
Το συγκεκριμένο προϊόν έχει επισημανθεί με αυτό το σύμβολο. Αυτό σημαίνει ότι οι
μεταχειρισμένες ηλεκτρικές και ηλεκτρονικές συσκευές δεν πρέπει να αναμειγνύονται με τα κοινά
οικιακά απορρίμματα. Υπάρχει ξεχωριστό σύστημα συλλογής για αυτά τα αντικείμενα.
Page 32

32
DANSK
2D til 3D video converterboks
Førstegangsopsætning:
1. Forbind converterboksens strømkabel til Converterboksen og en stikkontakt.
2. Du vil se et enkelt, konstant lysende, blåt lys på Converterboksens frontpanel.
3. Fjern HDMI-kablet fra video signalkilden (HD Kabelboks, HD Satellitboks, Blu-ray- eller
medie-afspiller eller spilkonsol) og forbind det til udgangen på Converterboksen (lad kablets andet
stik sidde i TV’et). Du vil nu se endnu et konstant blåt lys på Converterboksens front.
4. Med et andet HDMI-kabel forbindes en af HDMI-indgangene på Converterboksen til den
oprindelige video signalkilde.
5. Tænd TV’et.
6. Indstil TV’et til visning af den relevante HDMI-indgang (den samme som du tidligere anvendte til
video signalkilden). Din TV-skærm viser grøn skærm som tegn på, at Converterboksen er forbundet
til dit TV.
7. Om nødvendigt, tænd for video signalkilden.
8. Nu vises billedet fra videokilden på TV’et.
9. HDMI1.4a-kompatible 3D-kilder genkendes, og Converterboksen skifter automatisk til 3D-modus.
Du kan skifte mellem de tilgængelige modi ved at trykke på knappen Mode på frontpanelet eller
knappen 2D/3D på fjernbetjeningen.
10. Alternativt kan du ændre 3D-indstillingerne ved at trykke på knappen Mode på Converterboksens
frontpanel eller knappen 2D/3D på fjernbetjeningen. 3D Converterboksen understøtter formaterne
FP, SBS og TAB, der alle kan tilgås gennem menuen Mode.
11. Tag de farvede 3D-briller på for at opleve 3D-effekten.
TV, Skærm eller Projektor
Set-top Boks
HDMI OUT
HDMI OUT
DVD- eller Blu-Ray-afspiller
HDMI OUT
2D/3D Converterboks
HDMI IN
TV
HDMI
IN
Page 33

33
Ændring af signalkilde:
Du kan tilslutte en ekstra signalkilde til Converterboksen. Hvis begge signalkilder er tilsluttet og tændt,
kan du skifte mellem HDMI-indgangskanalerne ved at trykke på knappen Source på frontpanelet eller
på fjernbetjeningen.
LED statusindikatorer på frontpanelet:
Handling/ LED lyssignal Status Noter
SLUKKET
Tilslut strømkablet
Initialiserer
Bør ikke tage længere end
2 sekunder
Klar, ingen TV
HDMI – 1, Bypass
Også standardstatus, hvis du har TV
men ingen Rx-enhed
HDMI – 1, 2D > 3D
HDMI – 1, 3D (SBS) > 3D
HDMI – 1, 3D (TAB) > 3D
HDMI – 1, 3D (FP) > 3D
HDMI – 1, 3D > 2D
HDMI – 1, BYPASS
Også standardstatus, hvis du har TV
men ingen Rx-enhed
HDMI – 2, 2D > 3D
HDMI – 2, 2D > 3D
HDMI – 2, 3D (SBS) > 3D
HDMI – 2, 3D (TAB) > 3D
HDMI – 2, 3D (FP) > 3D
Tx display ugyldigt
Ugyldig displaytype tilsluttet
(LED’er blinker)
USB opgradering kører
USB opgradering gennemført
USB opgradering annulleret
Fejl på USB-nøgle
USB opgradering annulleret
Fejl i filen
USB opgradering afbrudt
USB opgraderingen skal gentages
(LED-lys blinker)
Sikkerhedsforholdsregler:
For at nedsætte risikoen for elektrisk stød, må dette produkt,
f.eks. når der kræves service, KUN åbnes af en autoriseret
tekniker. Frakobl produktet stikkontakten og andet udstyr, hvis
der opstår et problem. Udsæt ikke produktet for vand eller fugt.
Vedligeholdelse:
Rengør kun med en tør klud. Brug ikke opløsningsmidler eller slibende rengøringsmidler.
Page 34

34
Garanti:
Ingen garanti og ikke noget ansvar kan påtages for ændringer af produktet eller for skade på grund af
forkert brug af dette produkt.
Generelt:
- Design og specifikationer kan ændres uden varsel.
- Alle bomærker og produktnavne er varemærker eller registrerede varemærker tilhørende deres
respektive ejere og anses herved som sådan.
- Denne vejledning blev udført omhyggeligt. Imidlertid kan der ikke afledes nogen rettigheder. König
Electronic kan ikke holdes ansvarlig for eventuelle fejl i denne vejledning eller deres konsekvenser.
- Gem brugervejledningen og emballagen til senere brug.
Bemærk:
Dette produkt er mærket med dette symbol. Det betyder, at brugt elektrisk og elektronisk udstyr
ikke må bortskaffes sammen med almindeligt husholdningsaffald. Der findes særlige
indsamlingssystemer for disse produkter.
NORSK
2D til 3D-videokonverteringsboks
Førsteinstallasjon:
1. Koble konverteringsboksens strømkabel til konverteringsboksen og koble deretter til støpselet.
2. Du vil se ett enkelt, kontinuerlig blått lys på fremsiden av konverteringsboksen.
3. Koble HDMI-kabelen fra videokildeenheten (HD-kabelboks, HD-satelittboks, Blu-ray eller
media-spiller, eller spillkonsoll) og koble den til utgangen til konverteringsboksen (la den andre
enden være tilkoblet TV-en). Du vil se et nytt, kontinuerlig blått lys på fremsiden av
konverteringsboksen.
4. Ved å bruke en ytterligere HDMI-kabel, koble en av HDMI-inngangene på konverteringsboksen til
den opprinnelige videokildeenheten.
5. Skru på TV-en.
6. Sett TV-en til å vise den relevante HDMI-inngangen (den samme som du brukte før, for videokilden).
Du burde kunne se en grønn skjerm på TV-en, noe som indikerer at konverteringsboksen er
tilkoblet TV-en din.
7. Dersom det er nødvendig, skru på videokildenheten.
8. Du vil kunne se bildet fra videokildeenheten på TV-en.
9. HDMI1.4a-kompatible 3D-kilder vil gjenkjennes og konverteringsboksen vil automatisk bytte til
3D-modus. Du kan veksle mellom tilgjengelige moduser ved å trykke på modusknappen på
frontpanelet eller 2D/3D-knappen på fjernkontrollen.
10. Ellers, for å endre 3D-innstillingene, trykk på modusknappen på fremsiden av konverteringsboksen
eller 2D/3D-knappen på fjernkontrollen. 3D konverteringsboksen støtter FP-, SBS- og
TAB-formater som kan aksesseres gjennom modusmenyen.
11. Ta på deg dine fargede 3D-briller for å oppleve 3D-effekten.
Page 35

35
Prosess for bytting av kilder:
Du kan koble en ytterligere kilde til konverteringsboksen. Dersom begge kildene er tilkoblet og påslått,
kan du bytte mellom HDMI-inngangskanalene ved å trykke på kildeknappen på frontpanelet eller på
fjernkontrollen.
Frontpanelets LED-statusindikatorer:
Handling/ LED-sekvens Tilstand Merknader
AV
Koble til strømkabel
Starter opp
Burde ikke vare lenger enn
2 sekunder
Klar, nei TV
HDMI – 1, bypass
Også standardtilstand dersom TV og
ingen Rx-enhet
HDMI – 1, 2D > 3D
HDMI – 1, 3D (SBS) > 3D
HDMI – 1, 3D (TAB) > 3D
HDMI – 1, 3D (FP) > 3D
HDMI – 1, 3D > 2D
HDMI – 1, BYPASS
Også standardtilstand dersom TV og
ingen Rx-enhet
TV, skjerm eller projektor
Set-top-boks
HDMI-UTGANG
HDMI-UTGANG
DVD- eller BluRay-spiller
HDMI-UTGANG
2D/3D-konverteringsboks
HDMI-INNGANG
TV
HDMI-INNGANG
Page 36

36
Handling/ LED-sekvens Tilstand Merknader
HDMI – 2, 2D > 3D
HDMI – 2, 2D > 3D
HDMI – 2, 3D (SBS) > 3D
HDMI – 2, 3D (TAB) > 3D
HDMI – 2, 3D (FP) > 3D
Tx-visning ugyldig
Ugyldig visningstype tilkoblet
(blinkende LED-er)
USB-oppdatering pågår
USB-oppdatering fullført
USB-oppdatering kansellert
Dårlig USB-nøkkel
USB-oppdatering kansellert
Dårlig fil
USB-oppdatering mislykket
USB-oppgraderingsprosessen må
gjentas (blinkende LED-er)
Sikkerhetsforholdsregler:
For å redusere faren for strømstøt, skal dette produktet BARE
åpnes av en autorisert tekniker når vedlikehold er nødvendig.
Koble produktet fra strømmen og annet utstyr dersom et
problem oppstår. Ikke utsett produktet for vann eller fuktighet.
Vedlikehold:
Rens bare med en tørr klut. Ikke bruk rensemidler eller skuremidler.
Garanti:
Ingen garanti eller erstatningsansvar aksepteres ved endringer og modifiseringer av produktet eller
skade forårsaket av uriktig bruk av dette produktet.
Generelt:
- Utforming og spesifikasjoner kan endres uten forhåndsvarsel.
- Alle logoer, merker og produktnavn er varemerker eller registrerte varemerker til de respektive eierne,
og skal behandles som dette.
- Denne manualen ble laget med omhu. Imidlertid kan ingen rettigheter utledes. König Electronic kan
ikke ta ansvar for eventuelle feil i denne manualen eller konsekvenser som følger.
- Behold denne veiledningen og innpakningen for fremtidig referanse.
Forsiktig:
Dette produktet er markert med dette symbolet. Det betyr at brukte elektriske og elektroniske
produkter ikke må blandes med vanlig husholdningsavfall. Det finnes egne innsamlingssystem
for slike produkter.
Page 37

37
Declaration of conformity / Konformitätserklärung / Déclaration de conformité /
Conformiteitsverklaring / Dichiarazione di conformità / Declaración de conformidad /
Megfelelőségi nyilatkozat / Yhdenmukaisuusvakuutus / Överensstämmelseförklaring /
Prohlášení o shodě / Declaraţie de conformitate / Δήλωση συμφωνίας /
Overensstemmelse erklæring / Overensstemmelse forklaring
We, / Wir, / Nous, / Wij, / Questa società, / La empresa infrascrita, / Mi, / Me, / Vi, / Společnost, / Noi, /
Εμείς
Nedis B.V., De Tweeling 28, 5215MC, ’s-Hertogenbosch
The Netherlands / Niederlande / Pays Bas / Nederland / Paesi Bassi / Países Bajos / Hollandia /
Alankomaat / Holland / Nizozemí / Olanda / Ολλανδία
Tel. / Tél / Puh / Τηλ. : 0031 73 5991055
Email / Couriel / Sähköposti / e-post: info@nedis.com
Declare that product: / erklären, dass das Produkt: / Déclarons que le produit : / verklaren dat het
product: / Dichiara che il prodotto: / Declara que el producto: / Kijelentjük, hogy a termék, amelynek: /
Vakuutamme, että: / Intygar att produkten: / prohlašuje, že výrobek: / Declarăm că acest produs: /
Δηλώνουμε ότι το προϊόν: / Erklærer at produktet: / Forsikrer at produktet:
Brand: / Marke: / Marque : / Merknaam: / Marca: / Márkája: / Merkki: / Märke: / Značka: / Μάρκα: /
Mærke: / Merke: KÖNIG ELECTRONIC
Model: / Modell: / Modèle : / Modello: / Modelo: / Típusa: / Malli: / Μοντέλο: CMP-2DTO3DCONV
Description: 2D to 3D video converter box
Beschreibung: 2D in 3D Videokonverter
Description : Boîtier vidéo convertisseur 2D vers 3D
Omschrijving: 2D naar 3D videoconverter-box
Descrizione: Box di conversione video da 2D a 3D
Descripción: Convertidor de video 2D a 3D
Megnevezése: 2D - 3D videó átalakító doboz
Kuvaus: 2D -> 3D videomuunnin
Beskrivning: Videoomvandlare för 2D till 3D
Popis: Video konvertor 2D na 3D
Descriere: Convertor video 2D/3D
Περιγραφή: Μετατροπέας εικόνας 2D σε 3D
Beskrivelse: 2D til 3D video converterboks
Beskrivelse: 2D til 3D-videokonverteringsboks
Is in conformity with the following standards: / den folgenden Standards entspricht: / est conforme aux
normes suivantes : / in overeenstemming met de volgende normen is: / è conforme ai seguenti
standard: / es conforme a las siguientes normas: / Megfelel az alábbi szabványoknak: / Täyttää
seuraavat standardit: / Överensstämmer med följande standarder: / splňuje následující normy: / Este în
conformitate cu următoarele standarde: / Συμμορφώνεται
με τις ακόλουθες προδιαγραφές: /
Overensstemmelse med følgende standarder: / Overensstemmer med følgende standarder:
EN55013:2001+A1+A2, EN61000-3-3:2008, EN55020:2007, EN55022:2006:A1:2007,
EN55024:1998+A1:2001+A2:2003, EN61000-3-2:2006, EN61000-3-3:2008,
EN60950-1:2006+A11:2009
EU Directive(s) / EG-Richtlinie(n) / Directive(s) EU / EU richtlijn(en) / Direttiva(e) EU / Directiva(s) UE /
EU direktívák / EU Toimintaohje(et) / Eu Direktiv(en) / Směrnice EU / Directiva(e) UE / Οδηγία(ες) της
ΕΕ / EU direktiv(er) / EU-direktiv(ene): 2004/108/EC, 2002/95/EC, 2006/95/EC
Page 38

38
‘s-Hertogenbosch, 18-11-2011
Ms. / Frau / Mme. / Mevrouw / Sig.ra / D. / úrhölgy / Sl. / Frøken / Fru. /
Dna. / Κα: W. van Noorloos
Purchase Manager / Einkaufsleiterin / Responsable des achats /
Inkoopmanager / Responsabile degli acquisti / Administrador de
compras / Beszerzési vezető / Inköpschef / Ostopäällikkö / Nákupní
manažér / Innkjøpssjef / Indkøbschef / Manager achiziţii / Διευθύντρια
Αγορών
Copyright ©
 Loading...