

Page 1

Web Print Assistant
User’s Guide
Page 2

Contents
1 Introduction
1.1 Operating environment .....................................................................1-1
1.2 Main functions ...................................................................................1-1
2 Installation
2.1 Installation of Web Print Assistant ..................................................2-1
2.1.1 To install ......................................................................................... 2-1
2.2 Uninstallation of Web Print Assistant ..............................................2-2
2.2.1 To uninstall ..................................................................................... 2-2
3 Using Web Print Assistant
3.1 Web Print Assistant Tool Bar ...........................................................3-1
3.1.1 Tool Bar Functions .........................................................................3-1
3.1.2 Tool Bar Display On/Off .................................................................. 3-2
3.1.3 Temporarily disabling Web Print Assistant .....................................3-3
3.2 Printing ...............................................................................................3-4
3.2.1 Content to Print ..............................................................................3-4
3.2.2 Printing ...........................................................................................3-5
3.3 Preview then print .............................................................................3-6
3.3.1 Preview ........................................................................................... 3-6
3.3.2 Preview screen tool bar .................................................................. 3-8
3.3.3 Content scaling ...............................................................................3-9
4 Troubleshooting
Web Print Assistant i
Page 3
About this Product
“KONICA MINOLTA Web Print Assistant” is an application that is incorporated in the toolbar of Microsoft Internet Explorer, and prints Web pages displayed in Internet Explorer on a KONICA MINOLTA printer.
Because this automatically reduces displayed Web pages in order that they
can be printed, it eliminates the often-encountered annoyance in which the
right side of the pages are cut off.
Trademarks and registered trademarks
Trademark acknowledgements
KONICA MINOLTA and the KONICA MINOLTA logo are either registered
trademarks or trademarks of KONICA MINOLTA HOLDINGS, INC.
Microsoft
Microsoft Corporation in the United States and/or other countries.
All other company and product names are trademarks or registered trademarks of their respective companies.
Dialog boxes
The dialog boxes shown in this manual are those that appear in Windows XP.
®
and Windows® are either registered trademarks or trademarks of
2
Note
The dialog boxes that appear in this document may differ from those that
appear on your computer, depending on the installed devices and specified settings.
Unauthorized reproduction, translation or duplication of this document
whether in its entirety or in part, is strictly prohibited.
The content of this document is subject to change without notice.
Copyright © 2006 KONICA MINOLTA BUSINESS TECHNOLOGIES, INC. All
rights reserved.
Web Print Assistant ii
Page 4
Introduction
1 Introduction
1.1 Operating environment
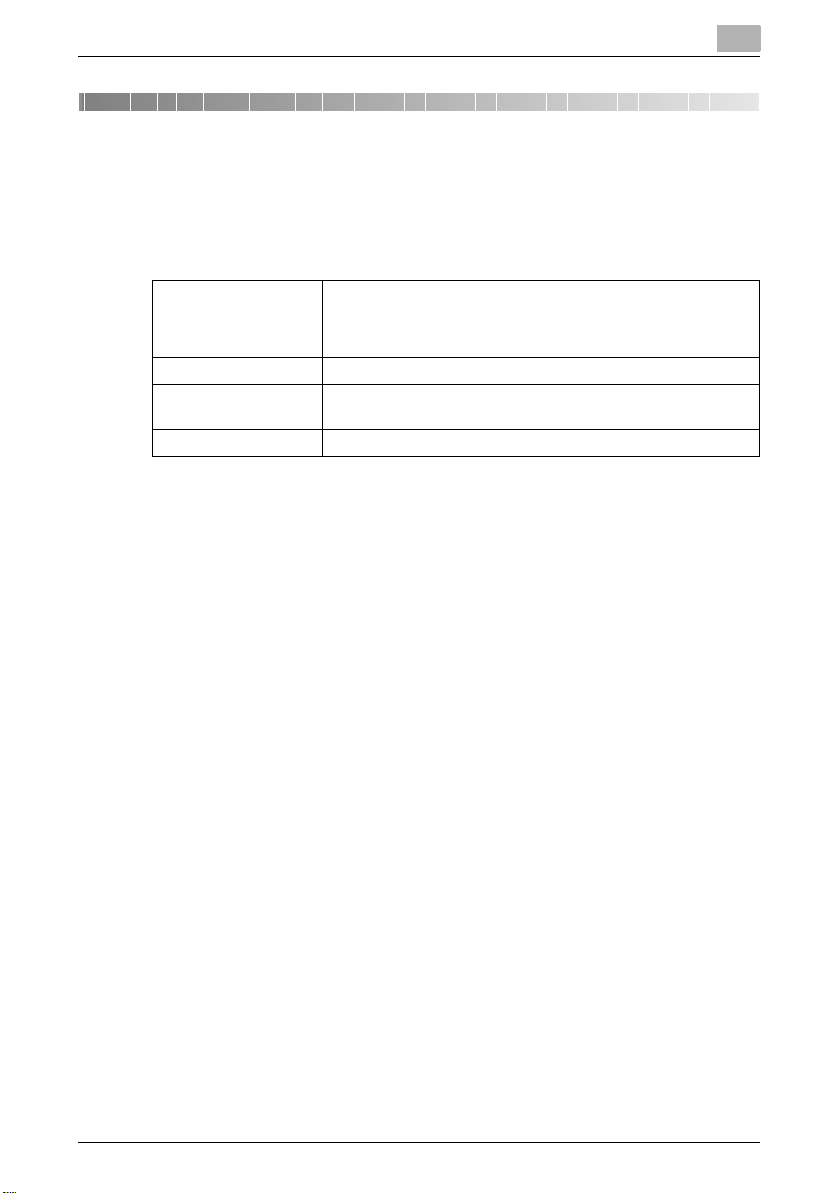
The operating environment of Web Print Assistant is described below.
1
Supported operating
system
Free hard disk space 0.9 MB or above (at installation)
Web browser Microsoft Internet Explorer Ver. 5.5 to Ver. 6.x (Internet Explorer Ver.
Other An installed KONICA MINOLTA printer driver.
1.2 Main functions
The main functions of Web Print Assistant are described below.
- Automatic reduction of Web pages for printing
When printing Web pages displayed using Microsoft Internet Explorer,
depending on their width, some pages may have part of their right edges
cut off.
Web Print Assistant can automatically reduce the size of the contents of
the page for printing depending on their widths, and upon the paper size.
- Printing of selected parts only
If you wish to print part of a Web page, then this part can be selected for
printing on its own.
- Preview for confirmation, then print
The preview function allows you to check the page before printing, which
can prevent printing errors.
Windows NT4.0 (Service Pack 6a or later)
Windows 2000 Professional (Service Pack 4 or later)
Windows XP Home Edition/Professional (Service Pack 2 or later)
Windows Server 2003
7.0 or later not supported)
Web Print Assistant 1-1
Page 5

Introduction
1
Web Print Assistant 1-2
Page 6
Installation
2 Installation
2.1 Installation of Web Print Assistant
Install Web Print Assistant using the following procedure.
2
Note
Login using a username with Administrator privileges is required when installing on Windows XP/Server 2003/2000/NT 4.0.
Be sure to quit all programs (including virus check programs) that are running.
2.1.1 To install
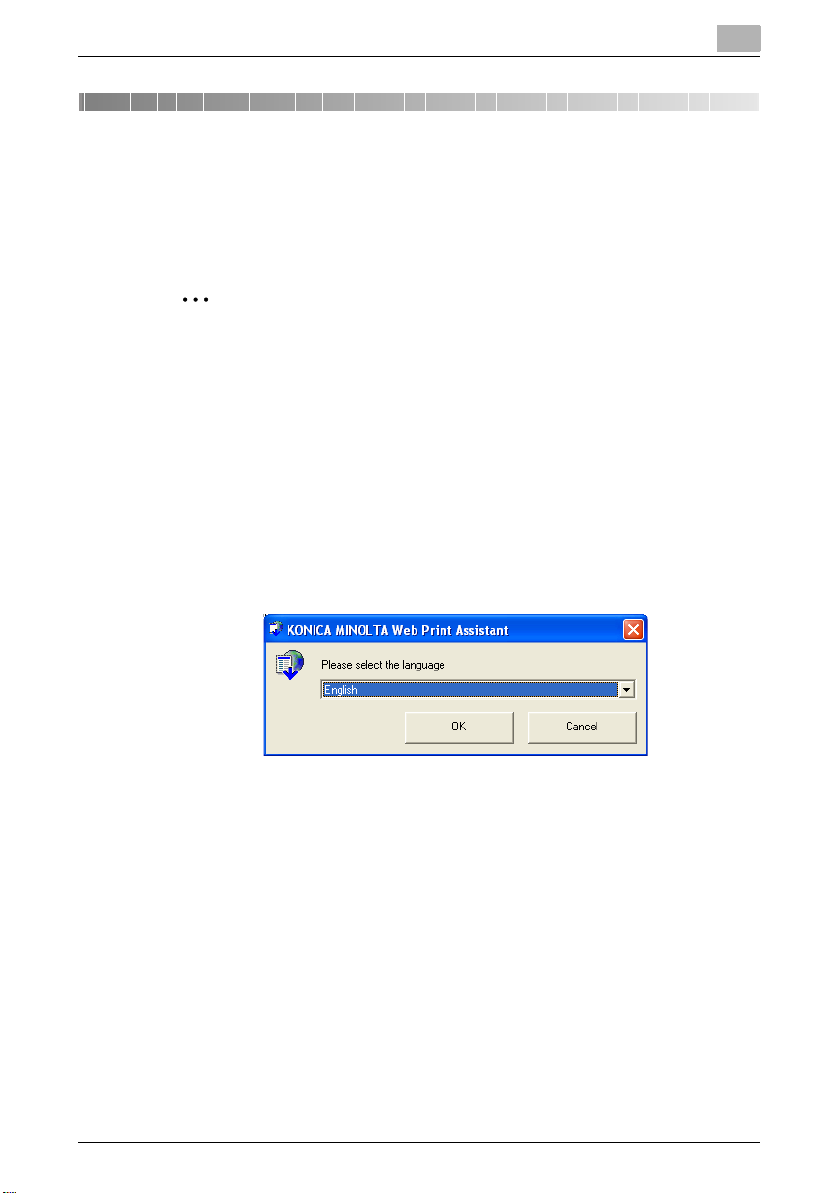
1 Double-click Setup.exe to start the installation program.
The installer starts.
2 Select the language, and OK.
2
3 Follow the on-screen instructions to install.
Web Print Assistant 2-1
Page 7

Installation
2.2 Uninstallation of Web Print Assistant
Uninstall Web Print Assistant using the following procedure.
2.2.1 To uninstall
1 For Windows XP/Server 2003, click Start, then Control Panel.
For Windows 2000/NT 4.0, click Start, then Settings, then Control
Panel.
2 Double-click Add or Remove Programs (for Windows 2000/NT 4.0,
Add/Remove Programs).
3 From the list of installed programs, select KONICA MINOLTA Web Print
Assistant, and click Change/Remove (or Remove).
4 When the Confirm Uninstall screen is displayed, click OK.
Uninstallation commences.
2
Web Print Assistant 2-2
Page 8

Using Web Print Assistant
3 Using Web Print Assistant
3.1 Web Print Assistant Tool Bar
Installing “KONICA MINOLTA Web Print Assistant” will display the Web Print
Assistant tool bar as a tool bar in Microsoft Internet Explorer, from where
print settings can be configured.
3
3.1.1 Tool Bar Functions
The Web Print Assistant tool bar has the following functions for proper printing of Web pages on KONICA MINOLTA printers.
Web Print Assistant 3-1
Page 9

Using Web Print Assistant
Print Print the content of the displayed Web page.
Preview Display an image of the printed results.
Print area
(All Content / Selected
Content)
Help Display help and version information.
Specify printing of either all, or a selected part of the displayed Web
page content.
3.1.2 Tool Bar Display On/Off
The display of the Web Print Assistant tool bar can be toggled on/off as required.
If the Web Print Assistant tool bar is not displayed after installation; or to temporarily hide the toolbar, follow the procedures as below.
1 In Microsoft Internet Explorer, click the View menu, then from Tool-
bars, select Web Print Assistant.
If the Web Print Assistant tool bar is displayed, then Web Print Assist-
ant will have a check mark beside it. If Web Print Assistant is not dis-
played, then this check mark will not be present.
3
2 Clicking Web Print Assistant toggles its display.
2
Tip
The Microsoft Internet Explorer
right-clicking the tool bar.
Web Print Assistant 3-2
View
menu can also be displayed by
Page 10

Using Web Print Assistant
3.1.3 Temporarily disabling Web Print Assistant
To temporarily disable Web Print Assistant, configure as in the procedure below.
1 In Microsoft Internet Explorer, click the Tools menu, then from Tool-
bars, select Manage Add-ons.
2 Select Web Print Assistant, then select Disable, then click OK.
Web Print Assistant will be temporarily disabled, and after restarting Internet Explorer, the Web Print Assistant tool bar will not be displayed.
3
2
Tip
To re-enable Web Print Assistant, select
Web Print Assistant 3-3
Enable
in step 2 above.
Page 11

Using Web Print Assistant
3.2 Printing
3.2.1 Content to Print
You can print either all, or just a selected part of content of displayed Web
pages.
The area for printed content is specified with the Web Print Assistant tool bar
Print area (All Content / Selected Content) button. Clicking the Print area
button toggles between displaying “All Content” and “Selected Content”.
When printing all content:
Click the Print area button to display All Content.
Then, either print or preview the content.
When printing a selected area of content:
Select the area to print with the mouse, and click the Print area button to
display Selected Content.
Then, either print or preview the content.
3
Web Print Assistant 3-4
Page 12

Using Web Print Assistant
3.2.2 Printing
Printing is carried out using the Print button on the Web Print Assistant tool
bar.
1 Display the Web page with Microsoft Internet Explorer.
When printing part of the content, select that area with the mouse, and
click the Print area button to display Selected Content.
2 Click Print on the Web Print Assistant tool bar.
The Print dialog box will be displayed.
3 Select the printer with which to print.
If there are multiple pages of content, then you can specify the pages
to print.
3
Web Print Assistant 3-5
Page 13

Using Web Print Assistant
2
Note
A KONICA MINOLTA printer supported by Web Print Assistant must be
selected in order to print.
2
Tip
In the Print dialog box, click
ences” screen, from which you can specify paper sizes and other printing
functions.
4 Click Print.
This will start printing. If the content is wider than the specified paper
size, then it will be automatically reduced to fit the paper.
3.3 Preview then print
3.3.1 Preview
You can preview the image to print for confirmation using the Preview button
on the Web Print Assistant tool bar. Previewing the image prior to printing
can prevent printing errors.
Additionally, from the preview screen, you can specify enlargement or reduction of print results, and print conditions for pages with frames.
Preferences
3
to display the “Printing Prefer-
1 Display the Web page with Microsoft Internet Explorer.
When printing part of the content, select that area with the mouse, and
click the Print area button to display Selected Content.
2 Click Preview on the Web Print Assistant tool bar.
A preview of the image to print will be displayed.
If the content is wider than the specified paper size, then it will be automatically reduced to fit the paper.
Web Print Assistant 3-6
Page 14

Using Web Print Assistant
3 Confirm the previewed image display, and click Print.
4 Select the printer to use, and click Print.
If there are multiple pages of content, then you can specify the pages
to print here.
3
2
Note
A KONICA MINOLTA printer supported by Web Print Assistant must be
selected in order to print.
Web Print Assistant 3-7
Page 15

Using Web Print Assistant
2
Tip
In the Print dialog box, click
ences” screen, from which you can specify paper sizes and other printing
functions.
3.3.2 Preview screen tool bar
In the “Print Preview” screen, the standard Microsoft Internet Explorer tool
bar is displayed above the Web Print Assistant tool bar.
Microsoft Internet Explorer standard tool bar functions:
Print Prints as is currently displayed.
Page Setup Displays the Microsoft Internet Explorer "Page Setup" screen, from
Pages Change the previewed pages.
[-]/[+], ratio Change the display scaling.
Frame selection Select the frame to print. Only displayed for pages using frames.
Close Closes the preview screen.
which paper sizes and margins, etc. can be changed.
Preferences
3
to display the “Printing Prefer-
2
Tip
Please refer to Microsoft Internet Explorer Help for details regarding functions of the Microsoft Internet Explorer standard tool bar.
Web Print Assistant tool bar functions:
Content Scaling Change the print scaling for the previewed content.
Web Print Assistant 3-8
Page 16

Using Web Print Assistant
3.3.3 Content scaling
You can change the print scaling from the Web Print Assistant tool bar on the
“Print Preview” screen.
Select the scaling from the “Content Scaling” box.
100% ~ 20%: Select 100% to have the size of the content automatically
scaled to the size of the paper.
Original: Displays the page without automatic size adjustment. If the content
is wider than the specified paper size, then the right side of the paper will be
cut off.
Custom: Specify a custom size from the displayed dialog box.
3
Web Print Assistant 3-9
Page 17

Using Web Print Assistant
3
Web Print Assistant 3-10
Page 18

Troubleshooting
4 Troubleshooting
This chapter describes possible problems that may occur when operating
Web Print Assistant, and remedies to solve the problem.
Symptoms Probable cause Remedy
Printing is not possible. A supported printer is not
The Web Print Assistant is
not displayed.
Color printing is not possible.
Moving images on the
screen can not be printed.
Printing as displayed is
not possible.
An error message is displayed, and the page
does not print.
selected.
Display for the Web Print
Assistant tool bar has
been offed.
Web Print Assistant has
been temporarily disabled.
Color printing is not selected in printer driver settings.
Microsoft Internet Explorer is configured to not
print backgrounds.
Some moving images on
the screen require special
software, and can not be
printed.
Pages that have frames
may be printed from the
top of the page.
It may not be possible to
print pages that use special applications, or special pages that use
functions that are not supported for printing in Microsoft Internet Explorer.
Select a KONICA MINOLTA printer
that is supported by Web Print Assistant.
Display the Web Print Assistant tool
bar from Toolbars in the View menu.
Enable Web Print Assistant from Man-
age Add-ons in the Tools menu.
In the Print dialog box, click Prefer-
ences, and check the print color.
From Tools, select Internet Options,
then the Advanced tab, and ensure
Print background colors and images is selected.
Confirm in print preview, and then
print.
Moving images will be printed as displayed in print preview.
Confirm in print preview, and then
print.
Pages with frames will be printed as
displayed in print preview.
Confirm in print preview, and then
print.
It may be possible to print pages as
they are displayed in print preview.
If a page is not displayed in print preview, then it can not be printed using
Web Print Assistant functionality.
4
Web Print Assistant 4-1
Page 19

Troubleshooting
4
Web Print Assistant 4-2
Page 20

2006
http://konicaminolta.com
Copyright
2006.104343-PS293-01
 Loading...