

Page 1

INSTALLATION MANUAL
MC-501
Mechanical Counter
for Product Code 4004/4025/4036
NOTES
• Before installing, be sure to unplug the power cord of the machine.
• Keep all packing materials out of the reach of children.
4004-7750-14 Printed in Japan
Page 2
MC-501
■ Unpacking the Mechanical Counter
Check that the following accessories are available in the box.
1 Mechanical counter ................................................................................1
2 Mounting bracket....................................................................................1
3 Screw .....................................................................................................2
4 Installation Manual (this manual) ...........................................................1
4
1
Pin on mechanical counter
3
2
C4004U272AA
■ Installing the Mechanical Counter
1. Using the screw furnished with the mechanical counter, secure the mounting bracket
to the mechanical counter.
NOTE
Make sure that the pin on the mechanical counter fits into the corner of the opening
in the mounting bracket.
2. Turn off the machine and unplug the power cord from the power outlet.
3. Open the front door.
* For 4004, open the front door and the toner hopper door.
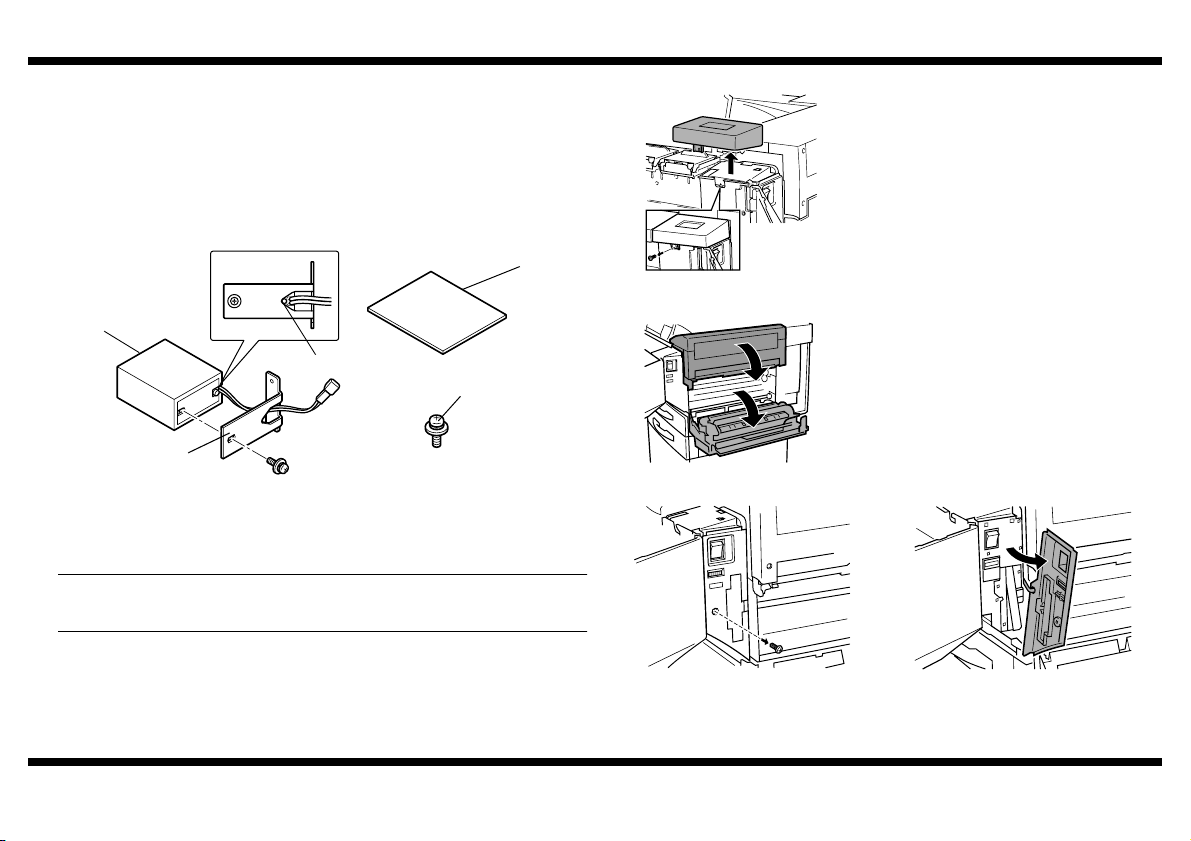
4. Remove the panel cover (one screw).
C4004U263AA
<for 4004/4025>
5. Pull the release lever and open the right
door.
6. Gently open the upper right door.
4025U014AB
7. Remove the cover from the handle of the machine (one screw).
C4004U265AA C4004U266AA
– 1 –
Page 3

MC-501
4004U005AA
C4004U267AA
4025U015AA
<for 4036>
5. Remove the cover from the handle of the
machine (one screw).
From here on, follow procedure starting with
step 8.
8. Cut out the knockout from the cover
removed.
9. Remove the interior cover shown on the left
(two screws).
10. Using the screw furnished with the
mechanical counter, secure the mechanical
counter in position.
11. Connect the connector on the mechanical
counter to the hookup cord of the machine.
C4004U270AA
12. Reinstall the interior cover (two screws).
13. Reinstall the cover to the handle of the
machine (one screw).
14. Close the right door and the upper right door.
* Perform this step only for 4004/4025.
15. Reinstall the panel cover (one screw).
16. Close the front door.
* For 4004, close the toner hopper door and
front door.
17. Plug the power cord into the power outlet
and turn on the machine.
4025U016AA
– 2 –
 Loading...