

Page 1
4034-7190-01
INSTALLATION MANUAL
HT-502
Applied Machine: / /
for Product Code 4034/4035
Heater
NOTE
• Before installing, be sure to unplug the power cord of the machine.
• Keep all packing materials out of the reach of children.
4034-7190-01E.fm 0 ページ 2005年3月18日 金曜日 午後12時59分
Page 2
HT-502
– 1 –
■ Introduction
Observe these precautions to prevent accidents.
Thoroughly understand the meanings of the symbols before reading the precautions.
■ Warning and Precaution Symbols
■ Meaning of Symbols
Ignoring this warning could cause
serious injury or even death.
Ignoring this caution could cause injury
or damage to property.
A triangle indicates a danger against which you
should take precaution.
A diagonal line indicates a prohibited course of
action.
A black circle indicates an imperative course of
action.
Before setting up this unit, be sure to turn OFF the Power Switch
of the machine and unplug the power cord of the machine.
Install this machine so that it can quickly be unplugged from the
electrical outlet in case of an emergency.
The socket-outlet shall be installed near the machine and shall
be easily accessible.
4034-7190-01E.fm 1 ページ 2005年3月18日 金曜日 午後12時59分
Page 3
HT-502
– 2 –
■ Unpacking
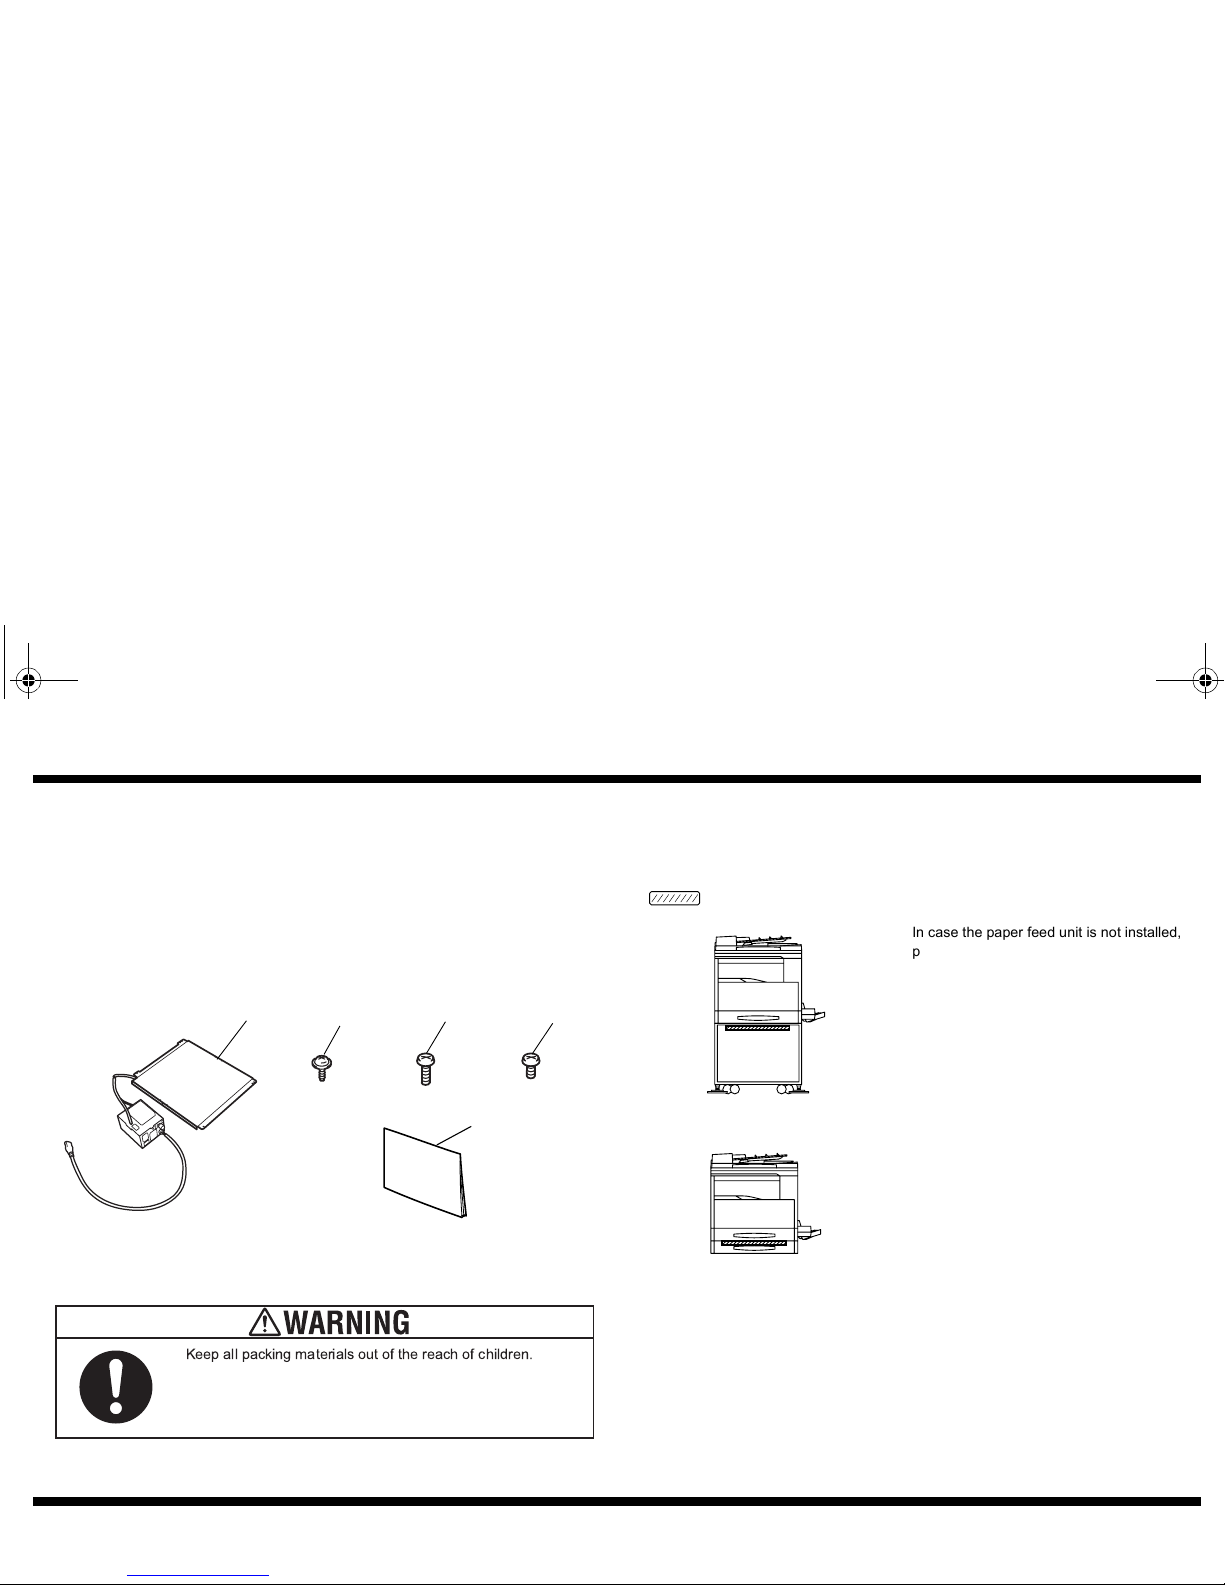
Check that the following accessories are available in the box.
■ Installation Position of the Dehumidifier Heater
The installation position of the dehumidifier heater differs according to the paper feed
unit or desk that are installed. Install the dehumidifier heater at the locations shown in
the illustrations below.
: Installation position of the dehumidifier heater
1. Heater .................................................................................................... 1
2. Screw A (3 × 8 mm)............................................................................... 4
3. Screw B (4 × 8 mm)............................................................................... 4
4. Screw C* (3 × 8 mm) ............................................................................. 4
5. Installation Manual (this manual)........................................................... 1
* Screws care not used
1
2
3
5
4
4034IXC013DA
4034IXC014DA 4034IXC015DA
4034IXC016DA
4980U021AA
Keep all packing materials out of the reach of children.
In case the paper feed unit is not installed,
purchase a desk and install the inner heater
in it.
4021U002AA
In case the paper feed unit is installed,
install the dehumidifier heater in the bottom
paper feed unit.
4021U003AB
4034-7190-01E.fm 2 ページ 2005年3月18日 金曜日 午後12時59分
Page 4
HT-502
– 3 –
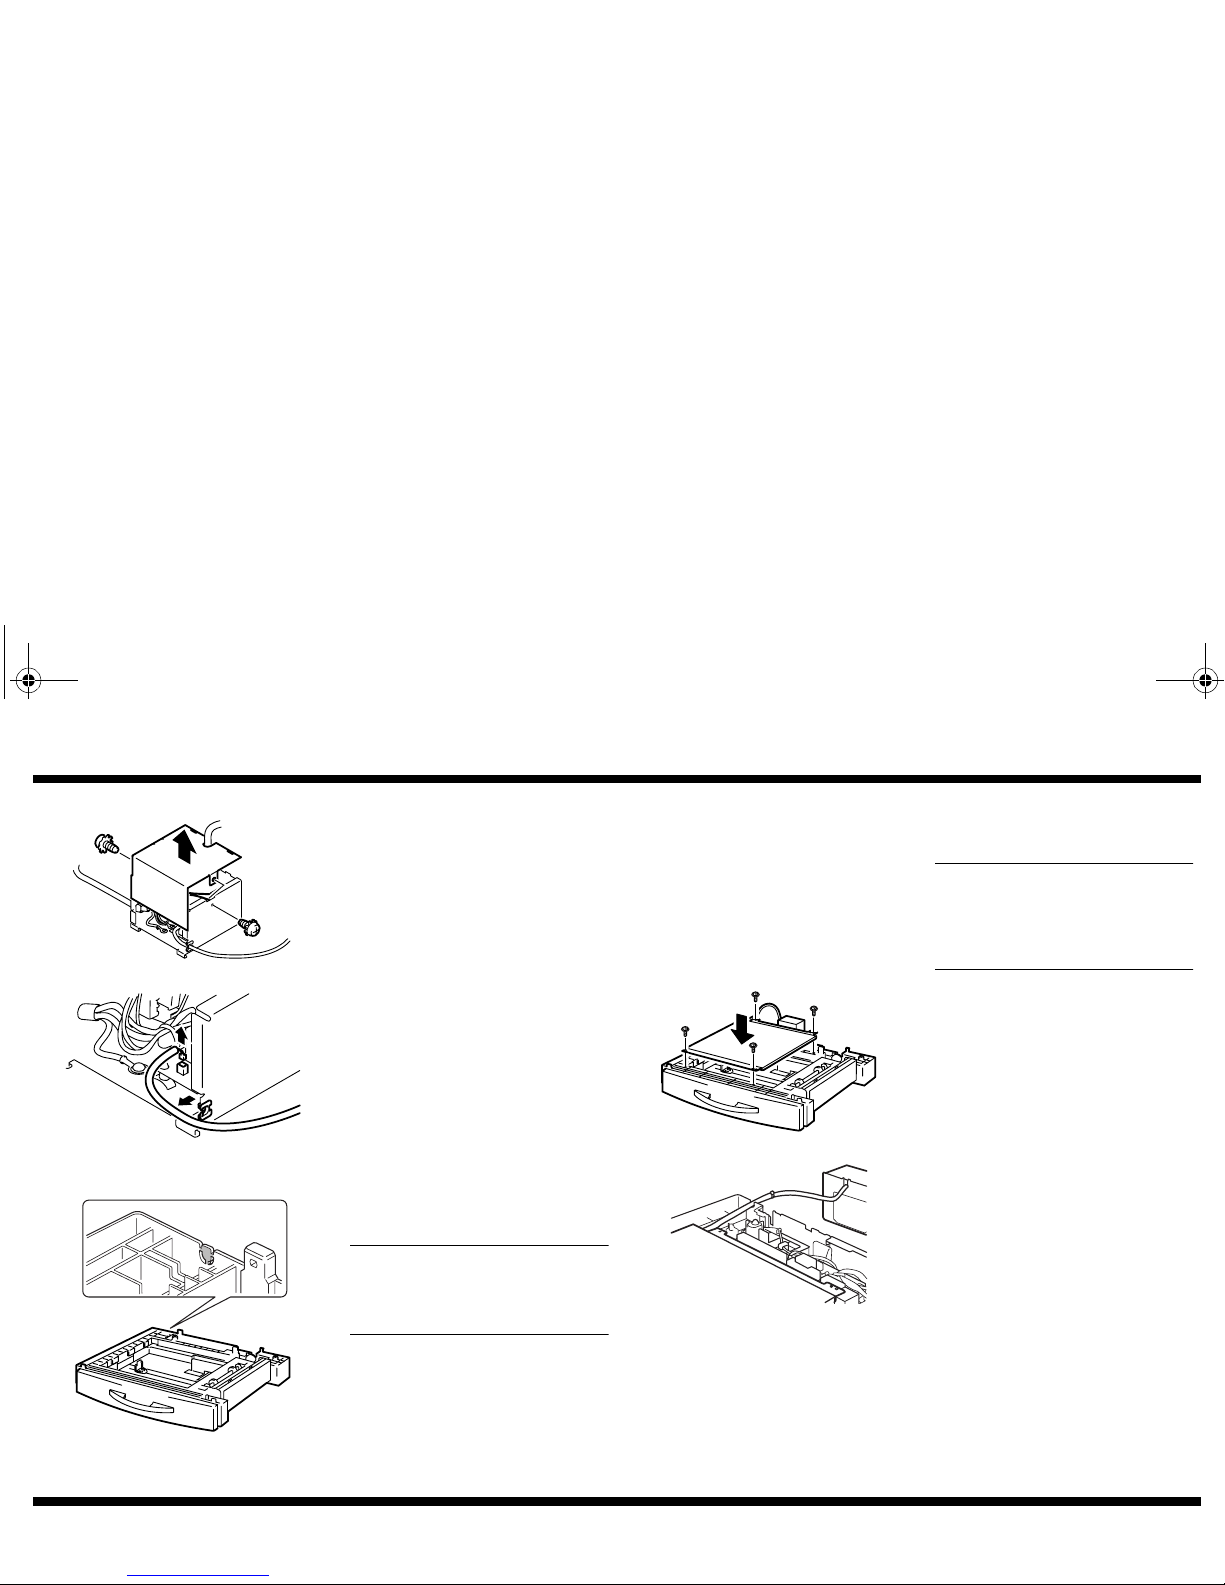
■ Removal of the Power Supply Unit Harness
■ Installing the Dehumidifier Heater
1. Remove two screws from the power box
and remove the cover.
4004U001AA
2. Remove the harness at power feed from
the edge cover and unplug the connector
from the board.
3. Install the cover using the two screws.
4004U002AA
1. Cut off the code cover at rear side of the
paper feeder unit with nipper.
NOTE
This step is not necessary when installing the dehumidifier heater onto the
desk.
4021U014AA
2. Place the dehumidifier heater on top of
the paper feed unit/desk, and then secure
it with the screws.
NOTE
Different types of screws are to be
used between when attaching the
dehumidifier heater to the paper feed
unit and when attaching it to the desk.
<When attaching the dehumidifier heater
to the paper feed unit>
(1) Use four screws A to secure the
dehumidifier heater to the paper feed
unit.
4021U015AA
(2) Pass the cord for the dehumidifier
heater through the notch made in step
1.
C4004U311AA
4034-7190-01E.fm 3 ページ 2005年3月18日 金曜日 午後12時59分
Page 5
HT-502
– 4 –
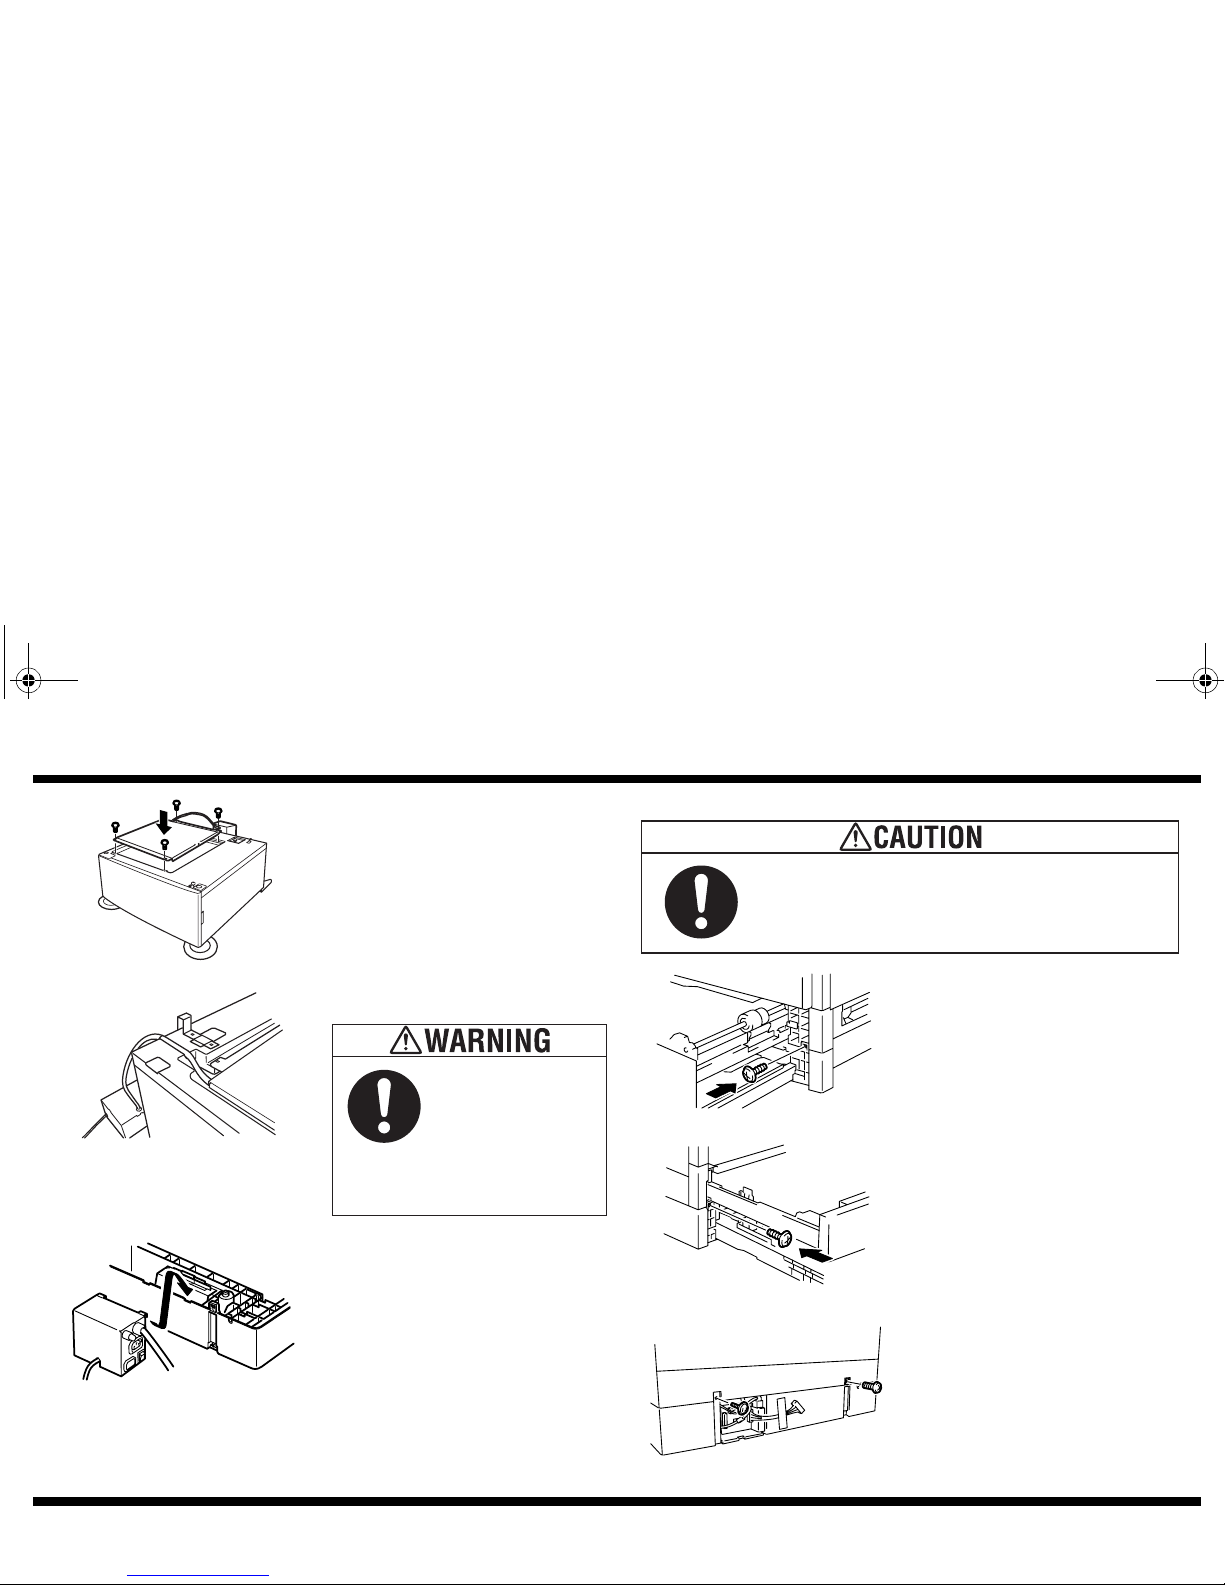
<When attaching the dehumidifier heater
to the desk>
(1) Use four screws C to secure the
dehumidifier heater to the desk.
4021U010AA
(2) Pass the cord for the dehumidifier
heater through the slot.
4021U006AA
3. Fit the hook of the power supply unit into
a ditch of the paper feed unit or the desk.
4021U009AA
Use care not to allow
the heater cord to be
wedged in mechanisms
during installation to the
machine. A fire could
result if the heater is
used with the heater
cord wedged in
mechanisms.
4. Fix the paper feed unit or the desk to the machine.
<The paper feed units to the machine>
(1) Open one of the paper feed units
attaching the inner heater and the
other paper feed unit. Fix the front of
them with two screws.
4686U023AD
4686U024AD
(2) Fix the back of the paper feed units
with two screws.
4686U003AB
Secure the paper feed unit/desk to the machine by using
screws.
Unstable Machine may cause injury.
4034-7190-01E.fm 4 ページ 2005年3月18日 金曜日 午後12時59分
Page 6
HT-502
– 5 –
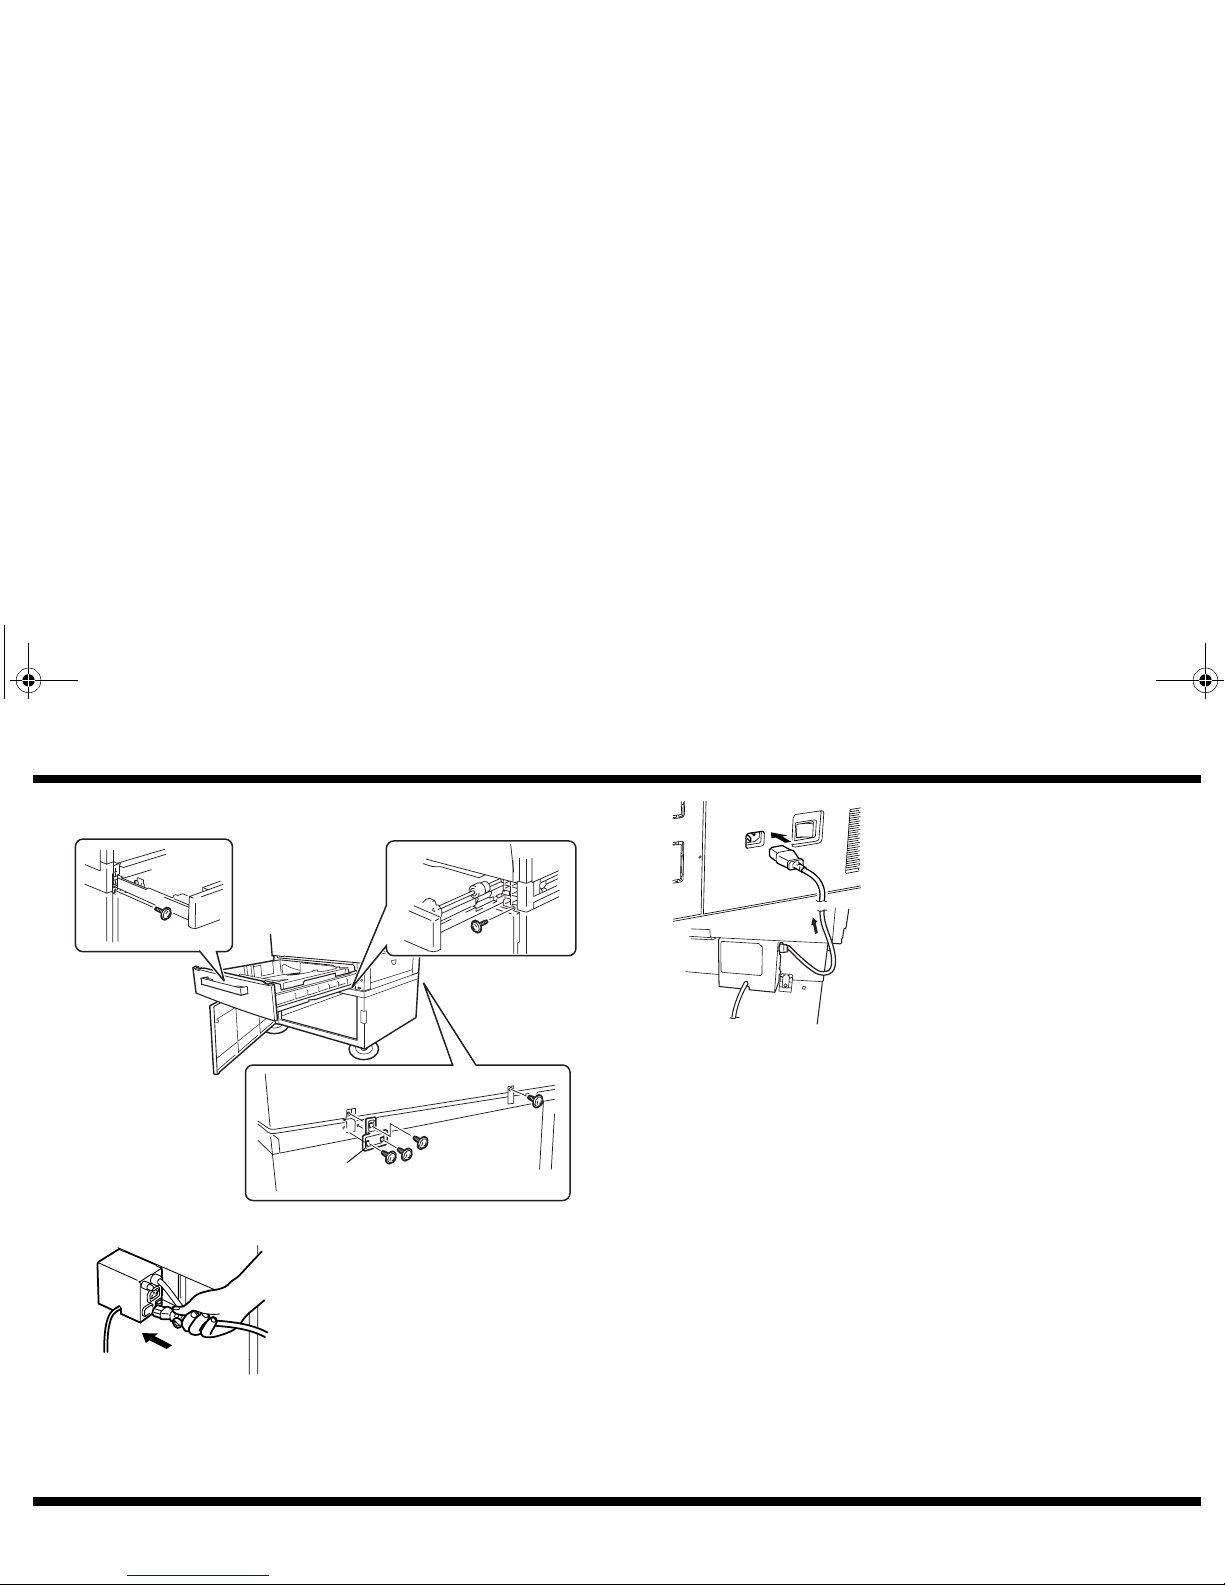
<The desk to the machine>
Open the cassette. Fix it with a Plastic Plate and six screws.
4034IXC018DA
5. Plug the power cord of the machine in the
power supply unit.
4021U020AA
Plastic Plate
6. Plug the power cord of the power supply
unit in the machine.
7. Turn on the power supply unit for the
dehumidifier heater.
4021U018AA
4034-7190-01E.fm 5 ページ 2005年3月18日 金曜日 午後12時59分
 Loading...