

Konica Minolta FIERY X4 User Manual
1
fiery. simply powerful.
Objectives
Fiery Driver Demo Guide
To illustrate the benefits of Fiery Dr iver and show the enhanced functionality of the bi-directional communication of Fiery Driver shortcuts, bitmap document diagrams and custom settings. Fiery Dr iver is
designed to provide a universal user experience,while providing visual feedback that makes it more
efficient to print accurate, predictable documents the first time and everytime.
About this module
Fiery Dr iver is currently available on PC workstations running Windows 95 and Windows 98.Future
versions will support other operating systems and additional platforms. Fiery Driver provides users with
the first bi-directional communication print dr iver that saves custom settings on the Fiery color server
and allows users across the network to connect and use the custom settings.Fiery Driver also provides
users with advanced shortcut features for quick and easy access to commonly used printer settings such as
duplex printing, paper source and layout.
Required Materials
• Fiery X4 color servers that support Fiery Driver
• PC workstation running Windows 95 or Windows 98
• Direct printing connection via TCP/IP using LPR or SMB printing protocols
• Fiery Dr iver printer files along with Adobe PostScript driver 4.x
Preparation
To begin the demonstration of Fiery Driver, make sure that you are connected to the Fiery using
TCP/IP and that you are using either LPR or SMB printing protocols with the Windows 95 or
Windows 98 workstation. You also want to install the Fiery Driver printer files using the Adobe PS 4.x
installer and select the appropriate network connection.Print out a test page after installation to ensure
the workstation is properly connected to the Fiery color server.
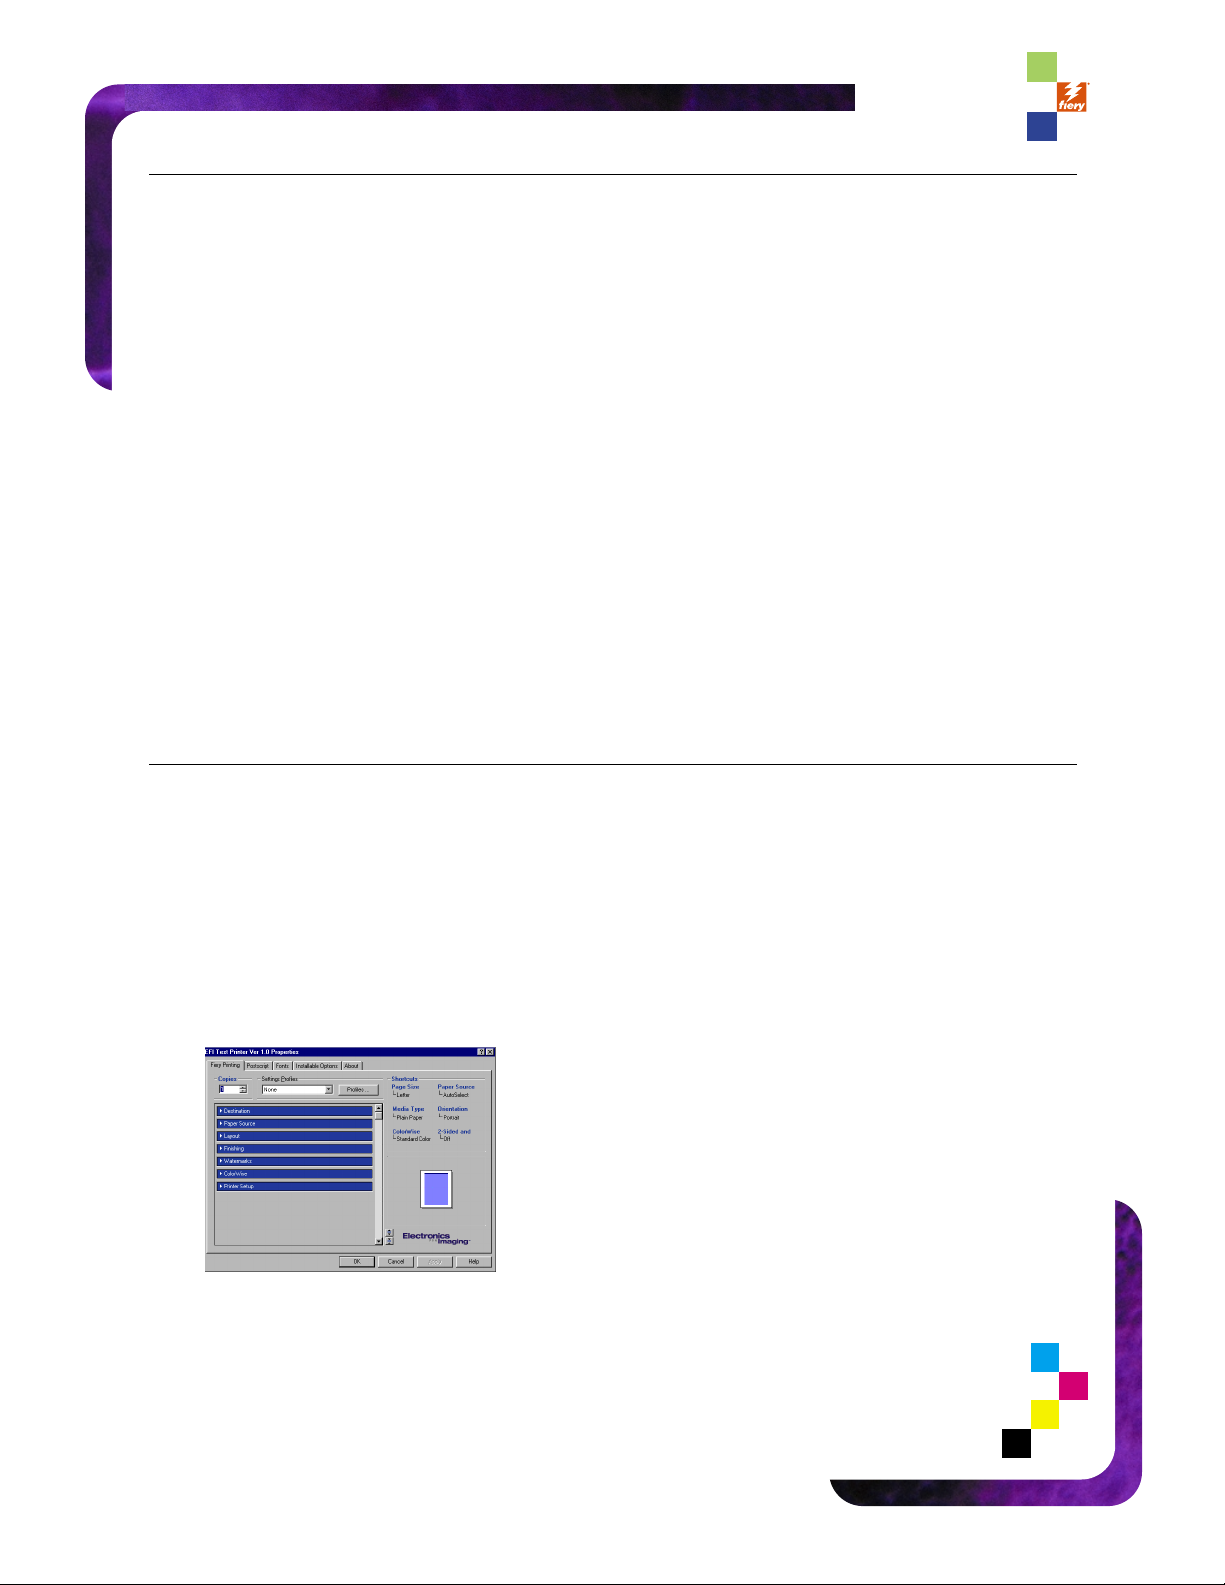
Main Window
1. Beg in the demonstration by launching any application and selecting the Print option. In the
Print dialog box,select the [Properties] button. Make sure that you have selected the [Fier y
Printing] tab,and this will take you to the Fier y Driver Main Window.
Point out that the Main Window is easy to use and has the most popular printing options right
at your finger tips. Also explain that Fiery Driver is the first bi-directional print driver that
allows users to customize the settings and save those options to the Fiery. If an administrator
wants to standardize on specific printing options, that person simply saves them directly to
the Fiery to make those options available to everybody printing to the Fiery. This
FIERY DRIVER
2
fiery. simply powerful.
eliminates the practice of installing each option on individual workstations, saving the
Administrator a lot of time.
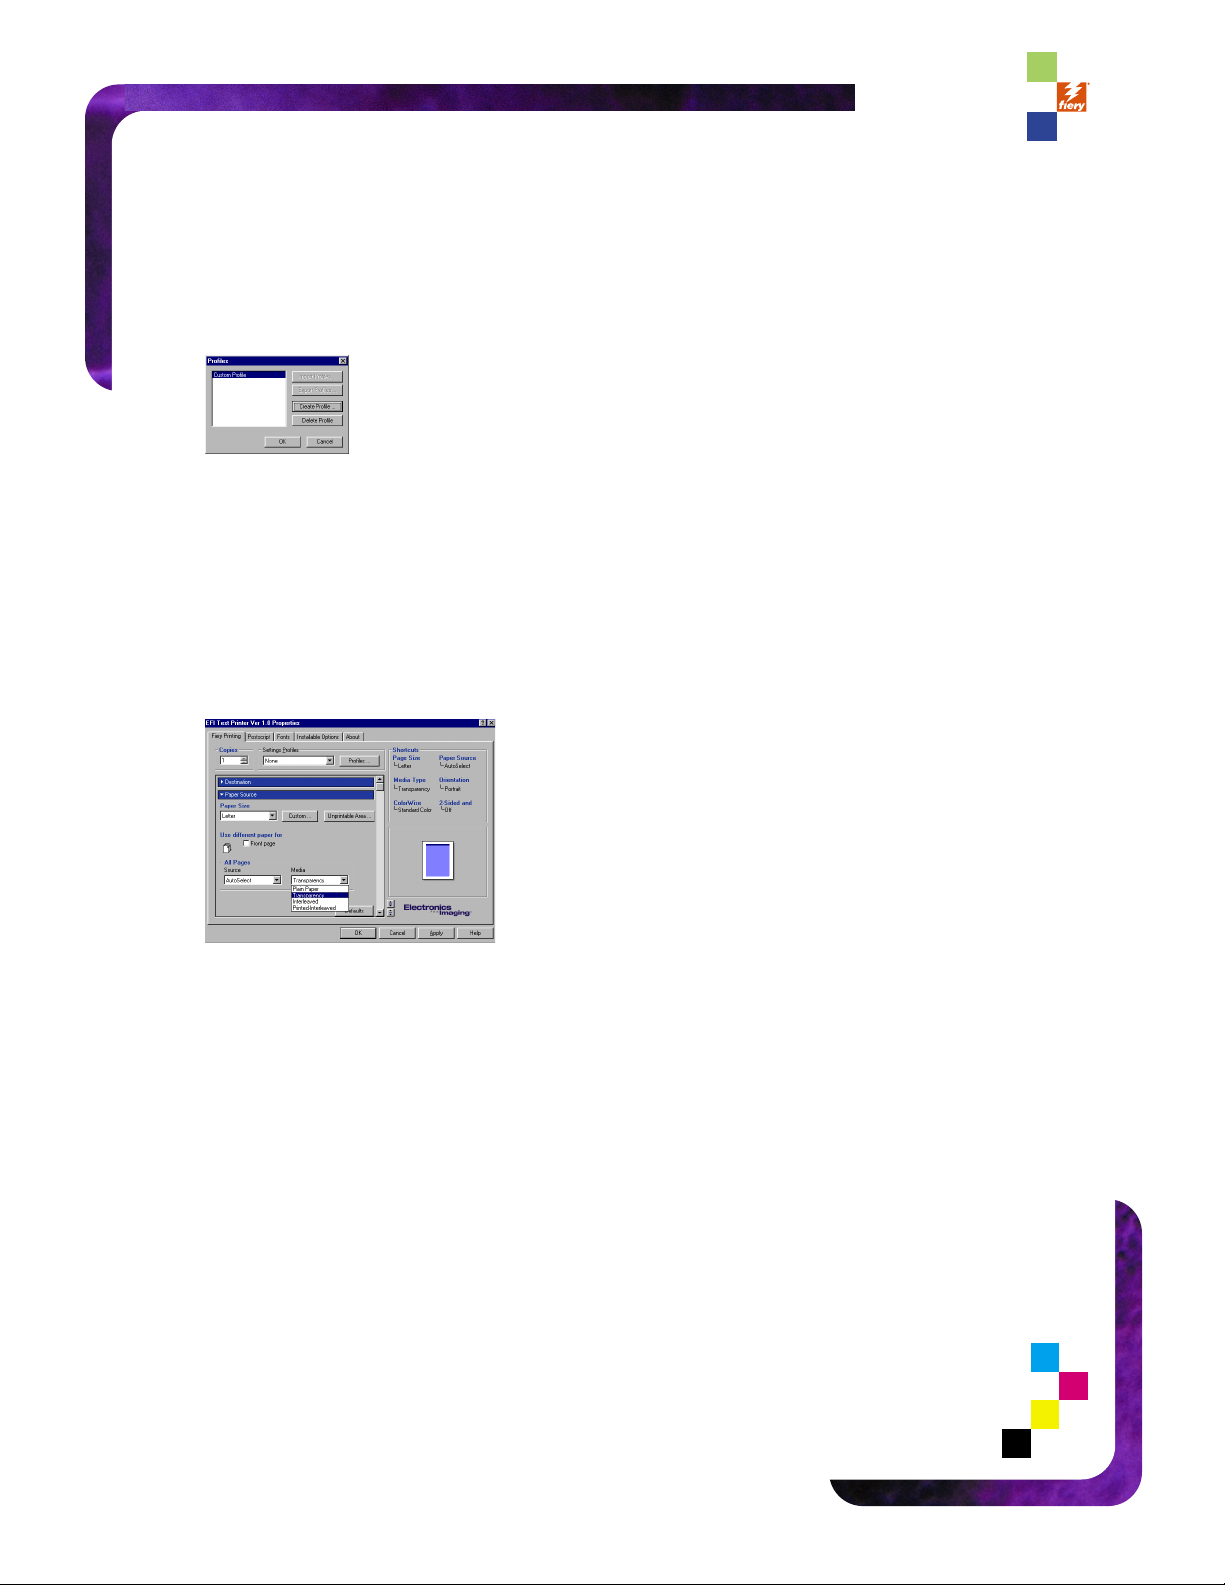
Custom Profiles
2. Click on the [Profiles...] button. This will bring up another dialog box that allows you to
manage the different custom settings (Profiles).Click on the [Create Profiles] button to create
and save the customized settings for that particular pr int job.
Explain that these custom settings will be saved for everybody connected to the
Fiery. Also point out that users can create as many custom profiles as necessary
and save the settings by using familiar names. Users can also delete and
modify each of the profiles
3. Click [OK] to save the custom [Profile].
4. Look at the [Shor tcut] area and click once on the [Media Type] shor tcut.This will br ing you
right to the [Media Type] section of the option bars.The user also has the option to right click
on the option.
Point out that the [Shortcuts] can be used to quickly access six commonly used printer
options. The user can customize these options based on their printing needs. Point out
that the [Media] options section allows users to change media type, which tray they are
printing to, and paper size.
Duplex settings
5. Click on the [Close Pr inter] bar s icon to collapse all of the extended bar s.Then r ight click on
the [2-Sided] option in the Shortcuts section.All of the [2-sided] options (none,Top-Top,TopBottom,Bottom-Bottom) will appear. Simply select the [Top-Top] option by clicking on it
with your left mouse button.
FIERY DRIVER
 Loading...