

Page 1

p
User Manual
Di250f/Di350f
www.minoltaeuro
e.com
The essentials of imaging
Page 2

Contents
1 Introduction
1.1 We Want You to be a Satisfied Customer.................................1 - 1
1.2 What Does the Energy Star® Mean?.........................................1 - 2
1.3 Legal Limitations........... ...... ..... ...... .................................. ..... ......1 - 3
What should not be copied?..........................................................1 - 3
Brief description of special writing styles and symbols.................1 - 4
Brief description of defined terms and symbols ............................1 - 5
1.4 How Does a Fax Machine Work?...............................................1 - 7
1.5 Certificate For Machines With CE Marking...............................1 - 8
CTR21 approval............................................................................1 - 8
1.6 Safety Precautions......................... ..... ...... ...... ..... ...... .................1 - 9
Laser safety...................................................................................1 - 9
Internal laser radiation...................................................................1 - 9
Ozone release.............................................................................1 - 10
1.7 Characteristics..........................................................................1 - 11
2 Installation
2.1 Location.......................................................................................2 - 1
Environment..................................................................................2 - 1
Power Supply................................................................................2 - 1
2.2 Machine Layout.................................................... ...... ...... ...........2 - 2
2.3 Transporting the Photocopier....................................................2 - 5
2.4 Optional Accessories .................................................................2 - 5
Document cover ............................................................................2 - 5
Automatic document feeder AF-6 (Di250f)
Automatic document feeder AF-7 (Di350f)....................................2 - 5
Finisher FN-100............................................................................2 - 5
Finisher FN-500............................................................................2 - 6
Offset tray OT-100 (only Di250f)...................................................2 - 6
Sorter JS-200................................................................................2 - 6
Duplex document feeder AFR-14..................................................2 - 7
Duplex unit AD-10 (only Di250f)....................................................2 - 7
Paper feed unit PF-108.................................................................2 - 7
Paper feed unit PF-110.................................................................2 - 8
Copy table CT-1............................................................................2 - 8
Copy desk CD-1M.........................................................................2 - 8
Rev. / Di250f/Di350f -1
Page 3

Large capacity cabinet PF-106.....................................................2 - 9
Memory upgrade..........................................................................2 - 9
Printer drive Pi3500......................................................................2 - 9
Transmission stamp.....................................................................2 - 9
2.5 Control Panel, Displays and Keys ..........................................2 - 10
2.6 Important Display Icons ..........................................................2 - 11
2.7 Toner Cartridge and Drum Cartridge......................................2 - 12
Installing the drum cartridge.......................................................2 - 13
Installing the toner cartridge.......................................................2 - 14
2.8 Adding Paper............................................................................2 - 16
Replacing paper in the IN tray....................................................2 - 16
Changing the paper size.............................................................2 - 17
2.9 Connecting the Power Cable and Telephone Line Cable.....2 - 18
Connecting the telephone line cable..........................................2 - 18
Connecting the power cable.......................................................2 - 18
3 Data Entry
3.1 Preparation..................................................................................3 - 1
3.2 Typing Conventions for Data Entry..........................................3 - 1
3.3 Entering Text.................................................... ...... ...... ..... ..........3 - 1
3.4 Entering the Administrator Numbe r..................................... ....3 - 2
3.5 Setting Up Users in Administrator Mode .................................3 - 4
3.6 User Settings..............................................................................3 - 8
3.7 Entering your Fax Number ...................................................... 3 - 10
3.8 Entering your Company Name (Header) ................................3 - 12
3.9 Entering your Company Name (Display)................................3 - 13
3.10 Entering the Date and Time.....................................................3 - 14
3.11 Setting the Phone Type............................................................3 - 15
3.12 Setting Standard Display.........................................................3 - 16
3.13 Setting the Standard Fax Display...........................................3 - 17
3.14 Storing Numbers .....................................................................3 - 18
Entering one-touch numbers......................................................3 - 18
Entering speed dial numbers......................................................3 - 21
Editing/erasing one-touch- or speed dial numbers.....................3 - 23
Setting one-touch dial index.......................................................3 - 24
Setting relay groups....................................................................3 - 25
Saving own speed dial number ..................................................3 - 26
Saving fax programs...................................................................3 - 27
-2 Di250f/Di350f Rev. /
Page 4

Transmission program................................................................3 - 27
Batch send program....................................................................3 - 30
Polling RX program............................... ...... ...... ..... ...... ...............3 - 33
Relay program.............................................................................3 - 35
3.15 Advanced Settings....................................................................3 - 38
Buzzer volume............................................................................3 - 38
Entering a password...................................................................3 - 39
Setting the memory time.............................................................3 - 40
Print settings...............................................................................3 - 41
Power save mode.......................................................................3 - 43
Setting box for confidential polling..............................................3 - 45
4Send
4.1 Transmission...............................................................................4 - 1
Notes on original documents...... ...... ..... ...... ...... ............................4 - 1
Using carrier film...........................................................................4 - 2
Feeding the document into the document feeder..........................4 - 2
Placing the document on the flatbed scanner...............................4 - 3
Inserting non-standard sized documents in the feeder.................4 - 4
4.2 Transmission Settings................................................................4 - 5
Resolution.....................................................................................4 - 5
Permanently changing the resolution............................................4 - 6
Contrast.........................................................................................4 - 7
Permanently changing the contrast...............................................4 - 8
Reducing the transmission............................................................4 - 9
Scanning area ............................................................................4 - 10
Transmission stamp (optional)....................................................4 - 11
Printing departments...................................................................4 - 12
Printing the recipient’s name.......................................................4 - 13
4.3 Dialling Modes...........................................................................4 - 14
Manual dialling using the numeric keypad..................................4 - 14
One-touch dialling.......................................................................4 - 15
Speed dialling..............................................................................4 - 15
Group dialling..............................................................................4 - 16
Program dialling..........................................................................4 - 16
4.4 Memory Transmission..............................................................4 - 17
4.5 Direct Transmission (real-time transmission) .......................4 - 18
4.6 Delayed Transmission (Timer).................................................4 - 19
4.7 Broadcasting.............................................................................4 - 20
4.8 Polling Transmission................................................................4 - 21
4.9 Mailbox Transmission ..............................................................4 - 23
Rev. / Di250f/Di350f -3
Page 5

4.10 Storing Documents for Confidential Polling..........................4 - 24
4.11 Password Transmissions........................................................ 4 - 26
4.12 Relay Transmission..................................................................4 - 27
4.13 Immediate Transmission .........................................................4 - 28
4.14 2 on 1 Transmission (Reduced Transmission)......................4 - 29
4.15 2-sided Transmission ..............................................................4 - 30
4.16 Remote Copy ............................................................................4 - 31
5 Reception
5.1 Manual Reception.......................................................................5 - 1
5.2 Automatic Reception..................................................................5 - 2
5.3 Password Reception (con fiden tial rece ption).........................5 - 3
5.4 Mailbox Reception...................................... ..... ...... .....................5 - 4
5.5 Polling Reception.......................................................................5 - 5
5.6 Confidential Polling Reception .................................................5 - 6
5.7 Settings for Receiving a Fax .....................................................5 - 8
Number of rings............................................................................5 - 8
Document identification................................................................5 - 9
Selecting paper for printing.........................................................5 - 10
Lock trays...................................................................................5 - 11
2 on 1 reception..........................................................................5 - 12
Rotational printing.......................................................................5 - 13
Reduction ...................................................................................5 - 14
Set the reduction factor ..............................................................5 - 15
Set cut-off length........................................................................5 - 16
Settings for incoming documents ...............................................5 - 17
6 Copy
6.1 Copying From The Document Feeder ......................................6 - 1
6.2 Copying Using The Flatbed Scanner........................................6 - 2
6.3 Settings For Copying.................................................................6 - 3
Selecting the paper.......................................................................6 - 3
Select special paper sizes............................................................6 - 4
Selecting zoom.............................................................................6 - 6
Setting the image density.............................................................6 - 7
Setting the resolution....................................................................6 - 8
Universal format recognition.........................................................6 - 9
6.4 Auxiliary Copy Functions........................................................6 - 10
Sort / Group................................................................................6 - 10
-4 Di250f/Di350f Rev. /
Page 6

Copying single-sided documents................................................6 - 12
Copying 2-sided documents........................................................6 - 12
Copying 2-sided documents onto one page................................6 - 13
Copying books............................................................................6 - 14
Copying multiple-sided documents onto one page.....................6 - 15
Producing booklets......................................................................6 - 16
Copying books in page order......................................................6 - 17
Setting the margin.......................................................................6 - 18
Selecting the cover page.............................................................6 - 19
Inserting a page..........................................................................6 - 21
Inserting OHP transparencies.....................................................6 - 22
File margin..................................................................................6 - 24
Frame/Edge erase......................................................................6 - 25
Image repeat...............................................................................6 - 26
Distribution..................................................................................6 - 27
Small original adjustments..........................................................6 - 28
Separate scanning......................................................................6 - 29
6.5 Copying programs....................................................................6 - 30
Storing copying programs...........................................................6 - 30
Calling up copy programs...........................................................6 - 31
6.6 Administrator settings..............................................................6 - 32
7 Reports and Lists
7.1 Transmission Report..................................................................7 - 1
7.2 Reception Report........................................................................7 - 2
7.3 Status List....................................................................................7 - 3
7.4 One-Touch List............................................................................7 - 4
7.5 Speed Dial List ............................................................................7 - 5
7.6 Fax Program List.........................................................................7 - 6
7.7 Relay Group List .........................................................................7 - 7
7.8 Confidential Polling List.............................................................7 - 8
7.9 User List.......................................................................................7 - 9
7.10 User Account Report................................................................7 - 10
7.11 Counter ......................................................................................7 - 11
7.12 Displaying the Communication Status ...................................7 - 12
7.13 Administrator Settings.............................................................7 - 13
Rev. / Di250f/Di350f -5
Page 7

8 Maintenance and Troubleshooting
8.1 Cleaning......................................................................................8 - 1
Cleaning the machine...................................................................8 - 1
Cleaning the casing......................................................................8 - 1
Cleaning the ADF.........................................................................8 - 2
Cleaning the scanner....................................................................8 - 3
Cleaning the control panel............................................................8 - 4
8.2 Replacing the Toner Cartridge.................................................. 8 - 5
Adding toner.................................................................................8 - 7
8.3 Replacing the Drum Cartridge...................................................8 - 8
8.4 Anti-Condensation................................................................... 8 - 10
Setting the heat timer.................................................................8 - 11
8.5 Removing Paper Jams.............................................................8 - 12
Paper jam inside the duplex feeder............................................8 - 13
Jam in automatic feeder.............................................................8 - 14
Paper jam inside the duplex unit ................................................8 - 15
Paper jam at the output tray.......................................................8 - 16
Paper jam in stapler....................................................................8 - 16
8.6 Troubleshooting.......................................................................8 - 18
8.7 Error Messages on the LCD ....................................................8 - 20
8.8 Poor Print Quality ..................................................................... 8 - 22
Low contrast...............................................................................8 - 22
Grey background........................................................................8 - 22
Black marks................................................................................8 - 23
Missing areas .............................................................................8 - 23
9 Appendix
9.1 Technical Specifications............................................................9 - 1
9.2 Index............................................................................................ 9 - 3
9.3 EC Marking (Declaration of Conformity).................................. 9 - 8
Di250f...........................................................................................9 - 8
Di350f.........................................................................................9 - 10
-6 Di250f/Di350f Rev. /
Page 8

Introduction
1 Introduction
1.1 We Want You to be a Satisfied Customer
Thank you for deciding to buy a Minolta copying system.
Read this User Manual carefully before using your photocopier and
always keep the instructions to hand. At the back of your photocopier
there is a space for storing the User Manual.
To achieve the best poss ible resul ts and effect ive use of the photoc opier,
this User Manual p rovide s you with inform ation on the follow ing sub jects :
G Installation
G Data entry
G Copying/sending/receiving
G Reports and lists
G Maintenance and troubleshooting.
Additional information and help in case of an error is available from:
G The Minolta technical service.
Please keep the serial number (see nam ep late on your phot oco pi er) a nd
the date of purchase of your photocopier to hand so that we can quickly
provide you with the right help in the event of an error.
. . . our aim is to please you.
1
Rev. / Di250f/Di350f 1-1
Page 9

1
1.2 What Does the Energy Star® Mean?
Photocopiers with the Energy Star® and which are not used for a long time
switch to a state with low power consumption or switch off. This function
reduces annual electricity costs by up to 60%.
When copying a t high spee ds, th e opera ting s ta te auto matic ally swi tches
to double-sided copying. This reduces not only the costs for photocopy
paper but also the amount of paper produced.
Did you know that the pr odu ction o f one piec e of pape r requires 10 time s
as much energy as the production of a photocopied piece of paper?
The use of less paper also has a direct influence on the cost-effective
power consumption.
This photocopier meets the energy efficiency criteria of Energy Star
Introduction
®
.
1-2 Di250f/Di350f Rev. /
Page 10

Introduction
1.3 Legal Limitations
What should not be copied?
The photocopier should not be used to duplicate certain types of
documents for the purpose of distributing them as originals.
The following list is by no means complete bu t is meant as a guideli ne for
responsible photocopying.
G Financial documentati on
❍ Cheques
❍ Instructions to pay
❍ Certificates of deposit
❍ Obligations or other debt certificates
❍ Stock/share certificates
G Legal documentation
❍ Lunch coupons
❍ Stamps (franked and unfranked)
❍ Cheques or bill of exchange from government authorities
❍ Tax stamps (stamped and unstamped)
❍ Passports
❍ Immigration papers
❍ Vehicle documentation
❍ House ownership, other documentation of ownership and legal
claims
G General documentation
❍ Identity cards or other forms of identification
❍ Copyright-protected work without permission of the copyright
holder.
In addition to this it is strictly forbidden to copy national or foreign art
without permission from the copyright holder.
In case of doubt ab out the type of do cument, please consult a legal expert.
1
Rev. / Di250f/Di350f 1-3
Page 11

1
Introduction
Brief description of special writing styles and symbols
The different topics in this User Manual are distinguished by special
writing styles and sy mbols. The follo wing examples hel p you to familiaris e
yourself with the most important topics and handle them appropriately.
CAUTION
This is a warning note
A warning note warns you of danger to life or possible damage to the
machine caused by incorrect operation.
➜ The arrow indicates a safety measure t hat must be take n to avoid such
danger.
[UTILITY] Key on the control pan el of the machi ne with the name “Utility“
[ENTER] Button on the display labelled “Enter“
➜ Individual operations to be carried out
(there are no more steps)
Step 1 of an operational sequence
1
Step 2 of an operational sequence
2
etc.
Here you can see what to do
✎
This is a helpful tip
Text marked in such a way suggests little tricks to use when copying
documents.
1-4 Di250f/Di350f Rev. /
Page 12

Introduction
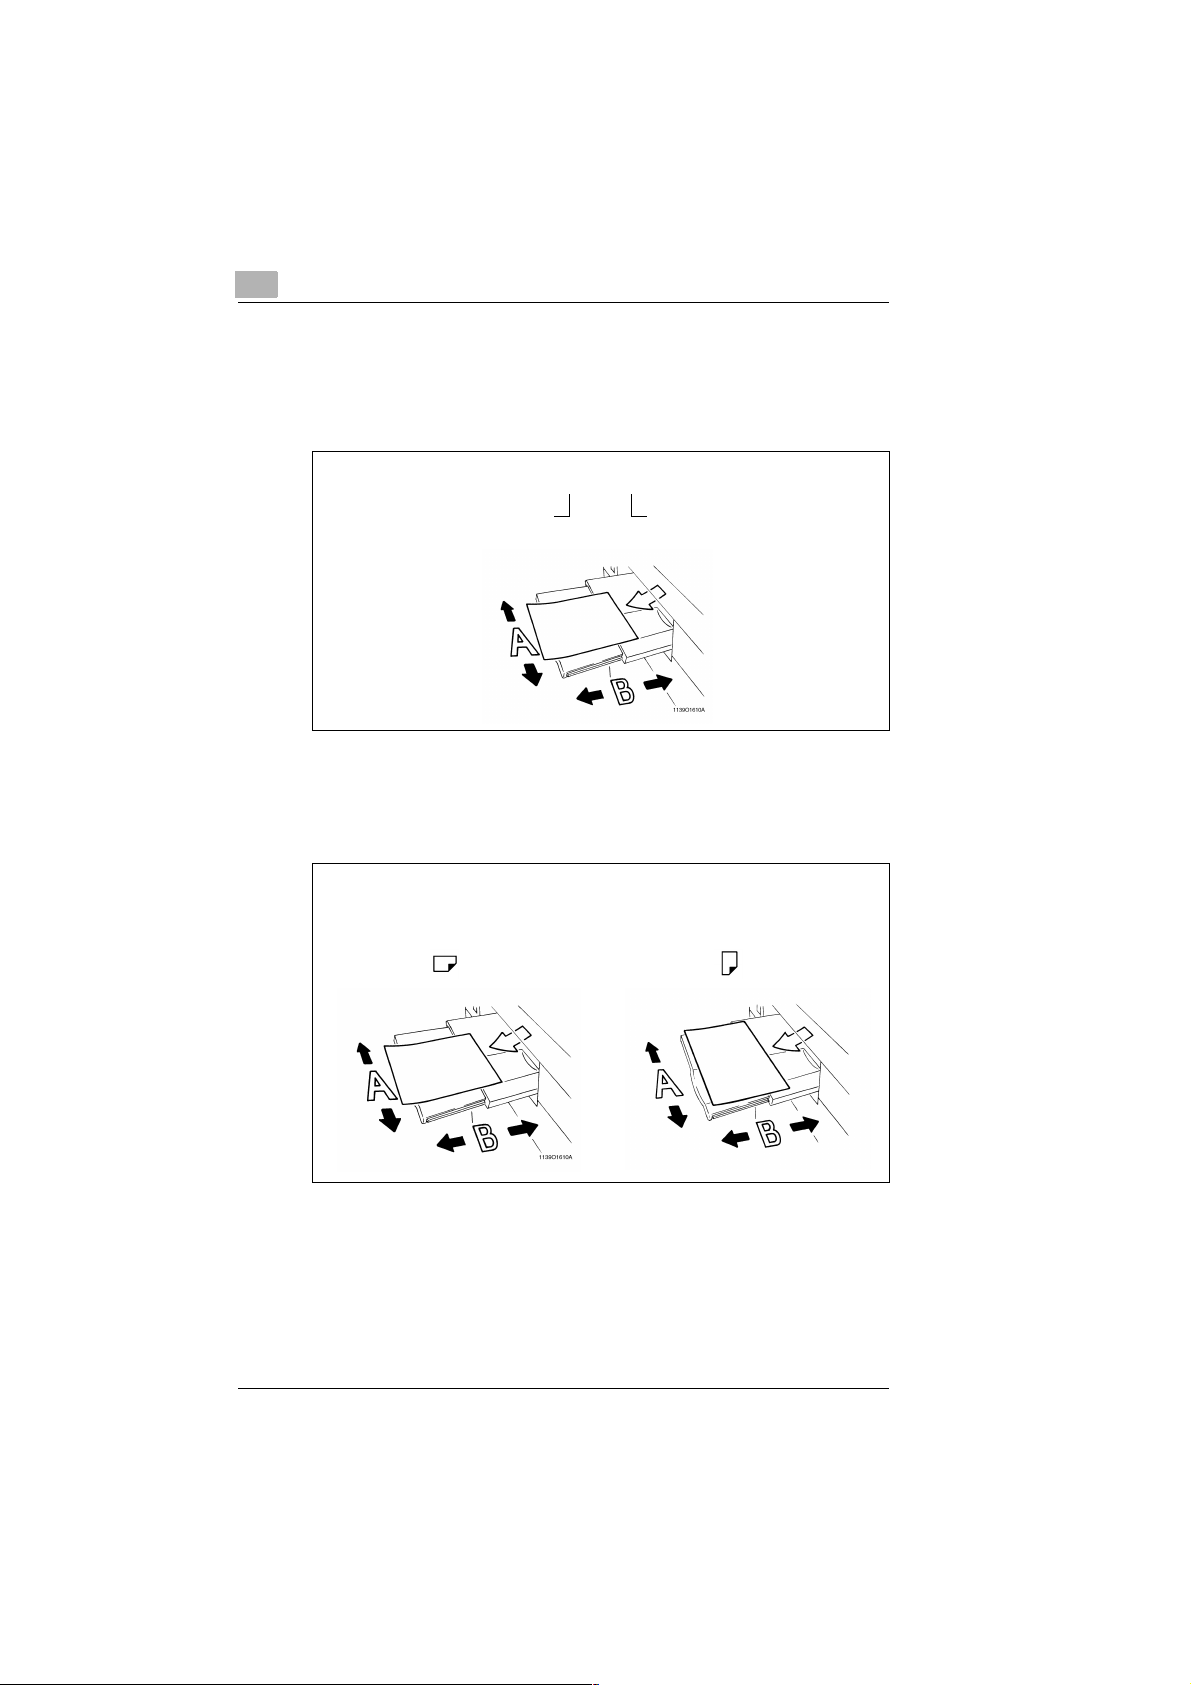
Brief description of defined terms and symbols
The symbols for direction, w idth, length, landscape a nd portrait are clearly
marked. These terms are defined on this page.
Document and copy
The original is the document from which a duplicate is produced during
copying.
1
Original
Copying process
Enlarge
Reduce
Sort
Staple
Hole punch, etc.
Direction
The direction is th e way in which the p aper is fed through the photocopier.
The direction of pap er i s ide nti fied in th e fo ll ow in g d iag ram by th e a rrows .
Copy
(duplicate of original copy)
Rev. / Di250f/Di350f 1-5
Page 13
1
Introduction
Width and length
When paper dimensio ns are refer red to in the U ser Manual, t he first valu e
always corresponds to the width of the paper (side A) and the second
value to the length of the paper (side B).
21 x 29.7 cm
Width of paper
(side A)
Landscape and portrait
If side A of a piece of paper is shorter than side B, it is called landscape.
If side A of a piece of paper is longer than side B, it is called portrait.
Length of paper
(side B)
21 x 29.7 cm 29.7 x 21 cm
Landscape Portrait
1-6 Di250f/Di350f Rev. /
Page 14

Introduction
1.4 How Does a Fax Machine Work?
A fax machine can be connected to a normal telephone system without
taking any special precautions. The fax machine operates similarly to a
telephone.
The way a fax machine works is qui te simple : Documents whic h are to be
transmitted are first scanned. The fax machine does not recognise the
individual letters but reads the picture , dot by dot. That is why yo u can not
only transmit texts but also pictures and photos.The information is then
written to a digital format (in other words, to black and white dots),
compressed so that the fax machine can then send it quickly over the
telephone line to another fax machine.
When you are "cal led" b y a fax mach ine, y our tele phone ring s as normal.
Therefore you ca nnot re cogni se wh ether a n inc oming call i s from a f ax or
a person before picking up the receiver.
At the beginning of a fa x transmission yo u wil l h ear high-pitched soun ds .
Those sounds are so called "hand shaking" and activate the
"conversation" be tween the trans mitti ng and rece iving fax mach ine , as is
the case with people who introduce themselves at the beginning of a
phone call. In the introductory sequence the technical features of both
machines are matched to make sure the transmission and the reception
are conducted to a high standard.
With your Di250f/Di350f you do not necessarily need to listen to this
"conversation". How to program th e machine accordin gly will be ex plained
later in this manual. Furthermore you will also find information about the
various settings w hich are use d during insta llation or at a later stage. Mo st
of the features of the fax machine work independently, so that you can
program the settings you need and bypass all others.
By the way, the word "fax" originates from the Latin word "facere" (to
make) and "simile" (similar), describing the process of making a copy
which is similar to the orig inal. F ax ma chines are nowa days also re ferred
to as facsimile machines or remote copiers.
Now, enjoy "communicating".
1
Rev. / Di250f/Di350f 1-7
Page 15

1
1.5 Certificate For Machines With CE Marking
CTR21 approval
Annex II
This device has been given the approval in accordance with the 98/482/
EC Council Decision to allow connection of a single terminal unit to the
public switched te lephone ne twork (PSTN) th roughout Euro pe. However,
due to difference s between the indiv idual PSTNs in diffe rent countries, the
approval does not, by itself, give a n unconditional assurance of succe ssful
operation on every PSTN network termination point.
In the event of problems, please contact your equipment supplier.
Introduction
1-8 Di250f/Di350f Rev. /
Page 16

Introduction
1.6 Safety Precautions
Follow the safety advice to ensure safe operation of the machine.
G Connect the machine only to an app roved 200 - 240 V/ 50 Hz earthed
power point.
G Ensure the power to this socket is not switched off over night.
G Always pull out the plug, n ever p ull the wire, if you w ant to disconn ect
the machine from the power supply. If possible, do not connect the
machine to a multi-socket wall outlet.
G Do not unscrew any parts, unless specifically requested in this
manual. If necessary contact your technical service.
G Never open the machine during transmission or printing.
G Take care not to let humidity into the machine.
G Ensure no objects fall into the machine.
G In the event of a problem, which cannot be solved following the
procedures described in this manual, contact the technical service.
G Follow the recommended maintenance procedures regularly.
G Do not open any parts of the machine or switch it off when the
photocopier is in use.
G Do not allow any magnetic objects near the photocopier.
G Switch the photocopier off immediately and remove the plug if the
machine becomes too hot or if smoke or an unusual smell occurs.
Used cartridges m ay be taken back by the techn ical se rvice as pa rt of the
maintenance procedures.
1
Laser safety
This fax machine contains a page printer which operates by means of a
laser. This laser does not impose any danger as long as it is used
according to the proce dures descri bed in this m anual. The laser is lim ited
to the interior of the machine. The laser emission is restricted by the
machine enclosure.
Internal laser radiation
Maximum radiation : 36.7 (mW) wave length : 770-810 (nm)
The machine operate s with an invi sible class IIIb la ser. The laser unit must
not under any circum stanc es be opene d, cle aned o r repaire d by t he use r.
Rev. / Di250f/Di350f 1-9
Page 17

1
Introduction
Ozone release
During printing, a small quantity of ozone is released which is nonhazardous. You should however ensure that the room in which the fax
machine is being used is adequately ventilated. In particular, if the
machine is printing continuously over a long period without a break.
1-10 Di250f/Di350f Rev. /
Page 18

Introduction
1.7 Characteristics
Your new copier is a compact multi-fun ctional devic e facilitating y our work
and reducing your fax transmission times. The characteristics of the unit
enable it to store do cuments for delayed trans mission, whi lst the mach ine
is receiving a faxed message, printing or copying, and vice versa.
Type
G A6 - A3 format
G Up to 33.600 bps transmission speed
G MH/MR/MMR/JBIG, ECM coding
G 3750 sheet paper capacity
G Double-spaced LCD display with 20 characters
G 16 MB standard memory for approximately 40 pages
G 600 dpi resolution in copy mode with 256 greyscale options.
Copying functions
G 2-sided copying
G 2 to 1 copies/4 to 1 copies
G Sorting and grouping function
G Hole punching (with optional acc es so rie s)
G Stapling (with optional acces s orie s)
G Reference number printing.
Fax functions
G Delayed transmission
G Relay transmission
G Multi-operations
G Polling RX/TX
G Confidential reception/mailbox transmission
G Confidential sending
G Remote copy function.
1
Rev. / Di250f/Di350f 1-11
Page 19

1
Introduction
1-12 Di250f/Di350f Rev. /
Page 20

Installation
2 Installation
2.1 Location
Please take into consideration the following recommendations.
G Avoid direct exposure to sunlight.
G Avoid humid or dusty locations.
G Install the machine on an even, non-vibrating surface.
G Keep the machine away from magnetic fields.
(TV sets, radio).
G Avoid installation close to air conditioning systems and heate rs.
G The machine should be accessible from all sides.
G Ensure no liquids can enter the machine.
G Keep all covers closed when the machine is in standby, as this will
prevent the transmission or receipt of documents. If the cover is
opened during transmission or reception, the connection will be
interrupted.
G Avoid extreme fluctuations in temperature as this could lead to
humidity inside the machine. This in turn could lead to incorrect
document scanning and printing.
G Ensure there is enough space (approx. 40 cm clearance around the
machine), for optimum operation and easy access.
2
Environment
The optimum environmental conditions for your copier are :
G Temperatures between 10°C and 32°C
(with a max. fluctuation of 10°C per hour)
G Humidity level between 15% and 85%
(with a max. fluctuation of 20% per hour).
Power Supply
The following tolerances apply :
G Voltage fluctuation : ±10%
G Frequency fluctuation : ±0.3%.
Rev. / Di250f/Di350f 2-1
Page 21
2
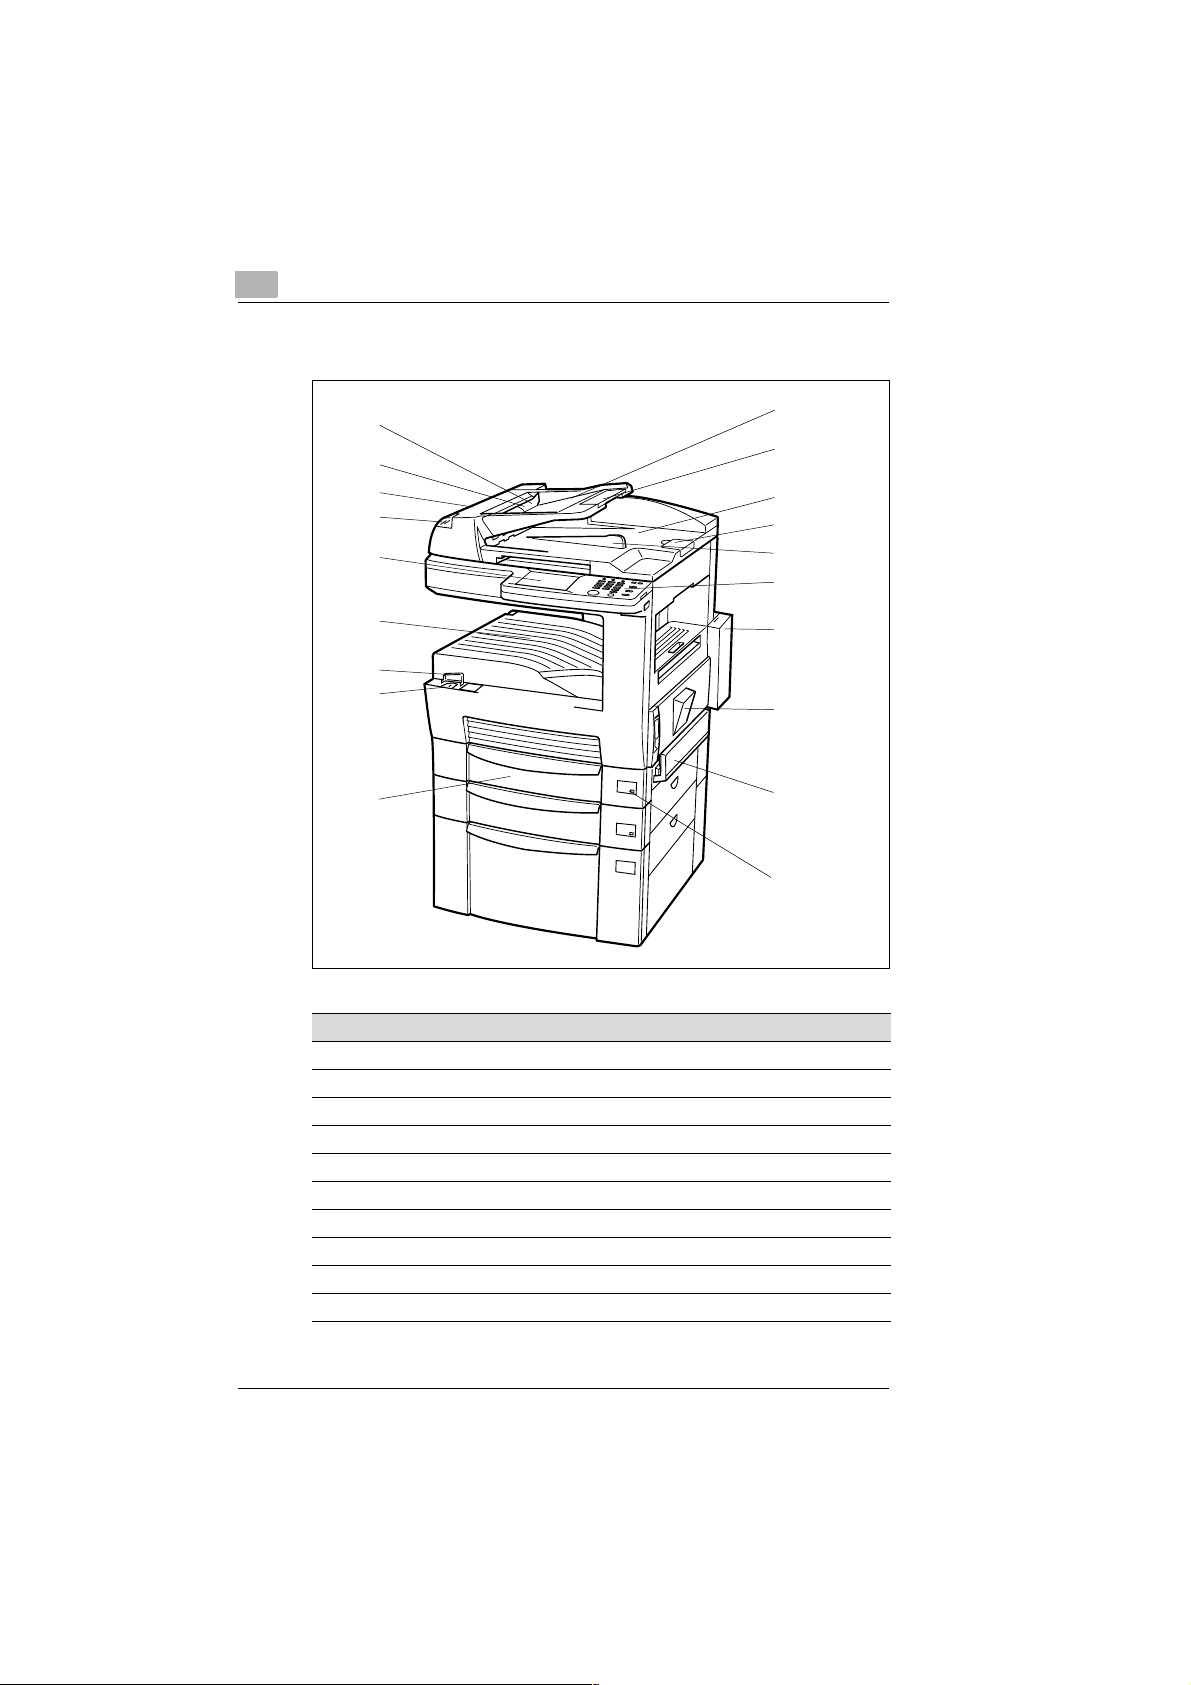
2.2 Machine Layout
Installation
19
18
17
16
15
14
13
12
11
1
2
3
4
5
6
7
8
9
10
No. Description No. Description
1 Document feed tray 11 Paper tray
2 Paper length adjuster 12 Mains switch
3 Document cover 13 Mains switch cover
4 Stopper 14 Paper OUT
5 Document OUT 15 LCD (Liquid Crystal Display)
6 Control panel 16 Copying light
7 Toner cartridge cover 17 Document feed cover
8 Side cover 18 Document guide
9 Single sheet feeder 19 Document feeder
10 Paper light
2-2 Di250f/Di350f Rev. /
Page 22
Installation
2
1
2
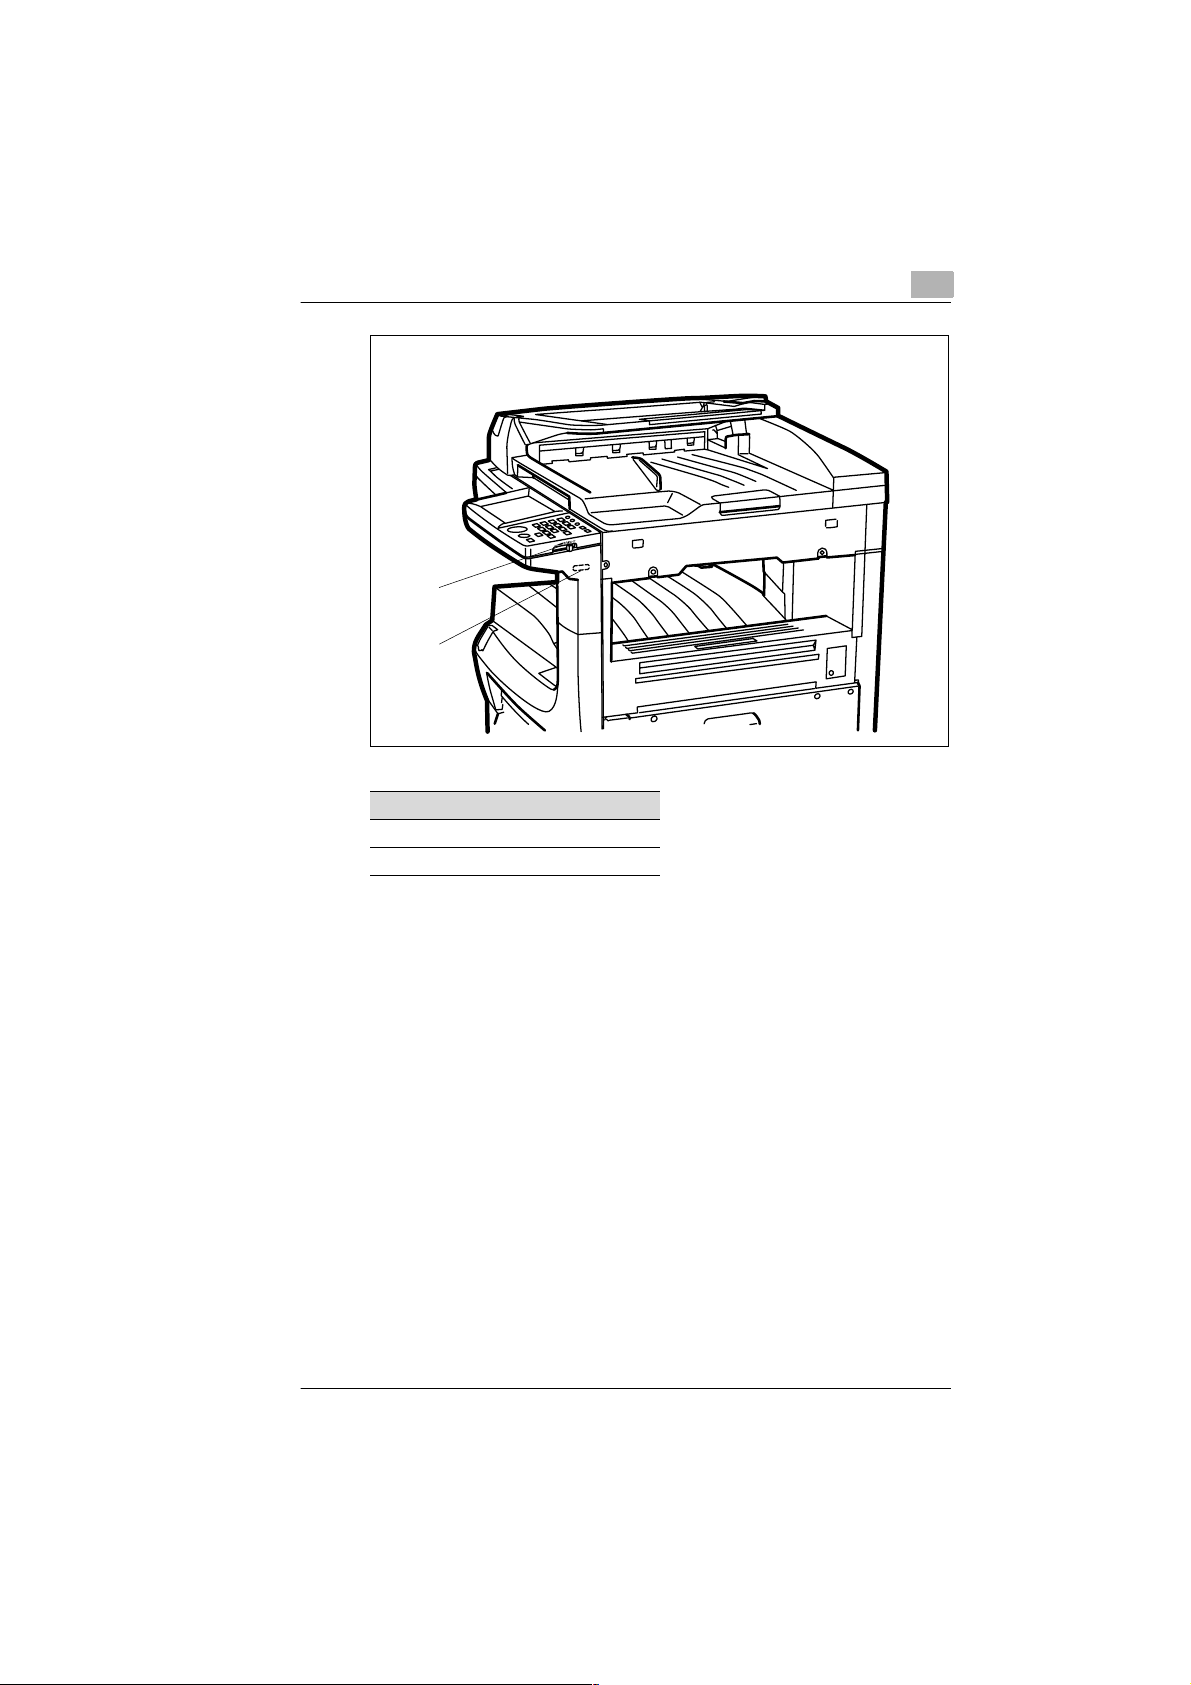
No. Description
1 Contrast LCD (Liquid Crystal Display)
2 Counter
Rev. / Di250f/Di350f 2-3
Page 23
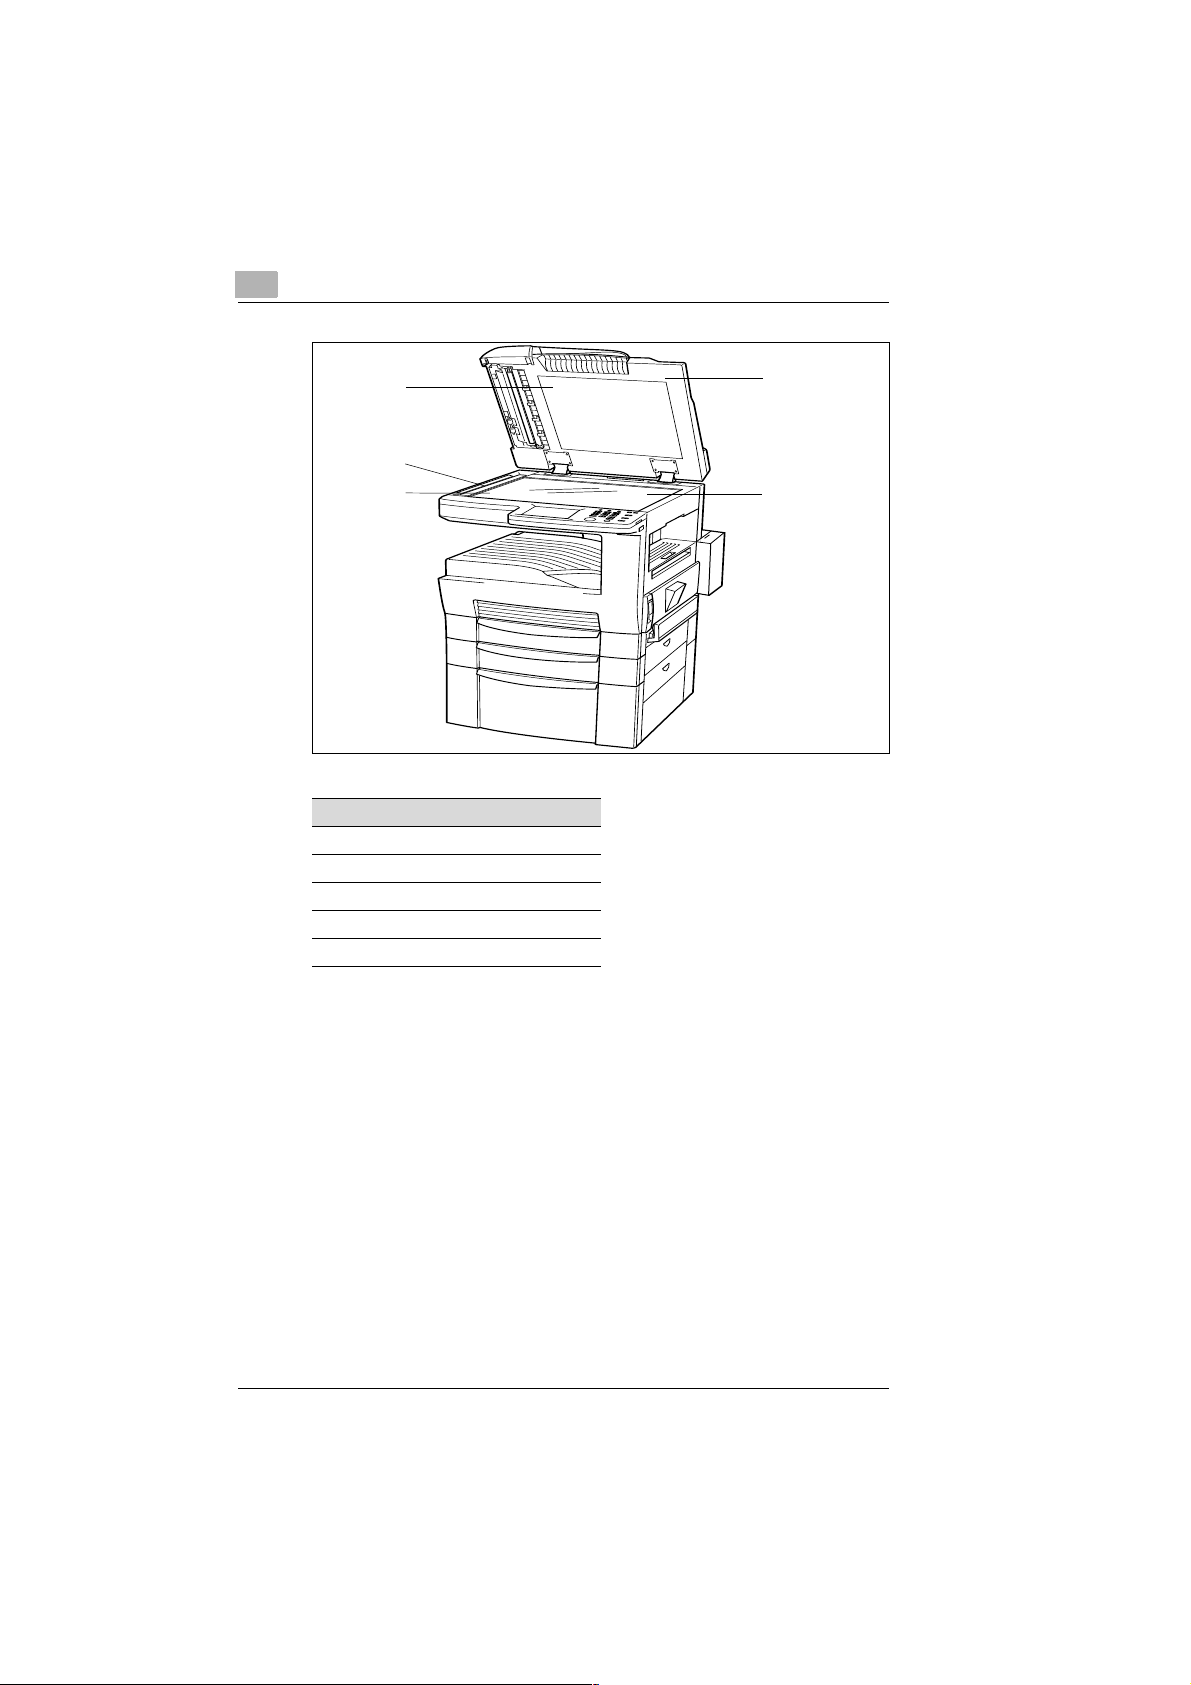
2
Installation
5
4
3
No. Description
1 Document cover
2 Original glass
3 Flatbed scanner
4 Document scanning area
5 Document pressure pad
1
2
2-4 Di250f/Di350f Rev. /
Page 24
Installation
2.3 Transporting the Photocopier
If you need to transport the photocopier, contact your technical service.
2.4 Optional Accessories
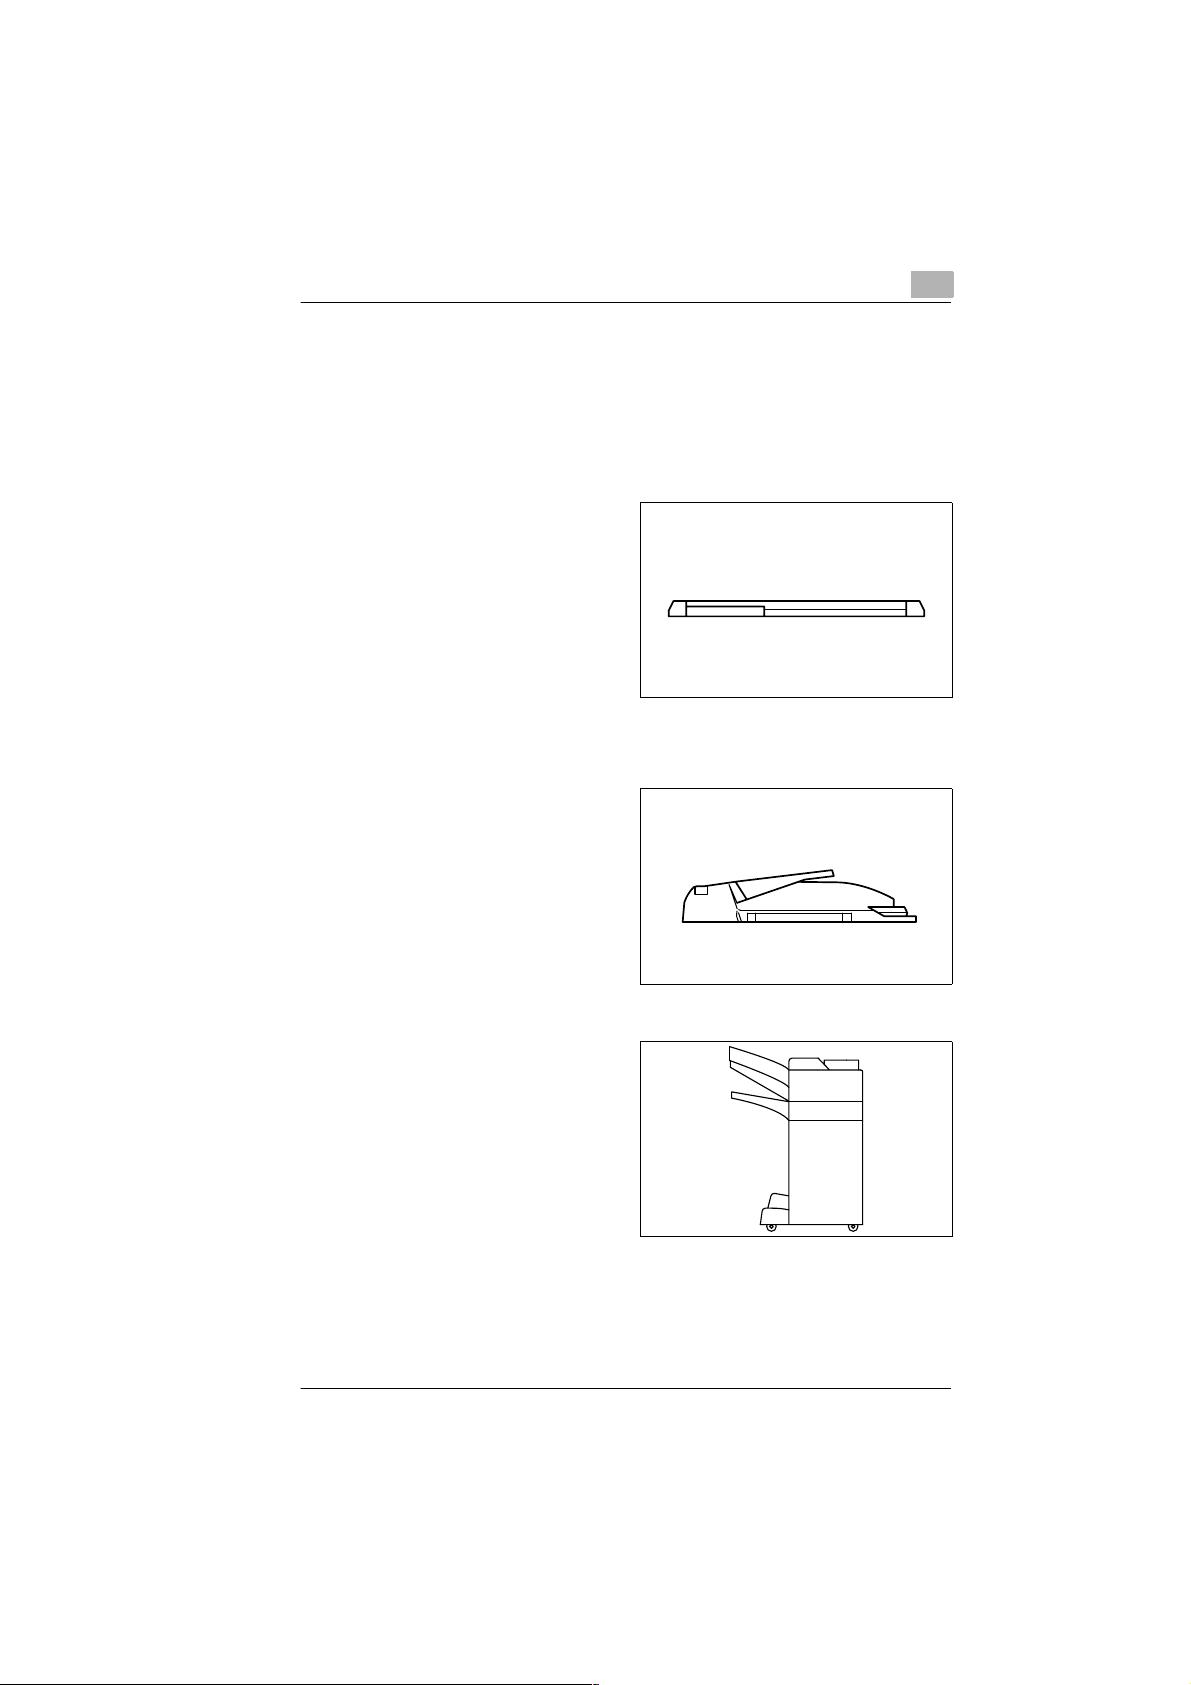
Document cover
Keeps the document in
position on the glass.
Automatic document feeder AF-6 (Di250f)
Automatic document feeder AF-7 (Di350f)
2
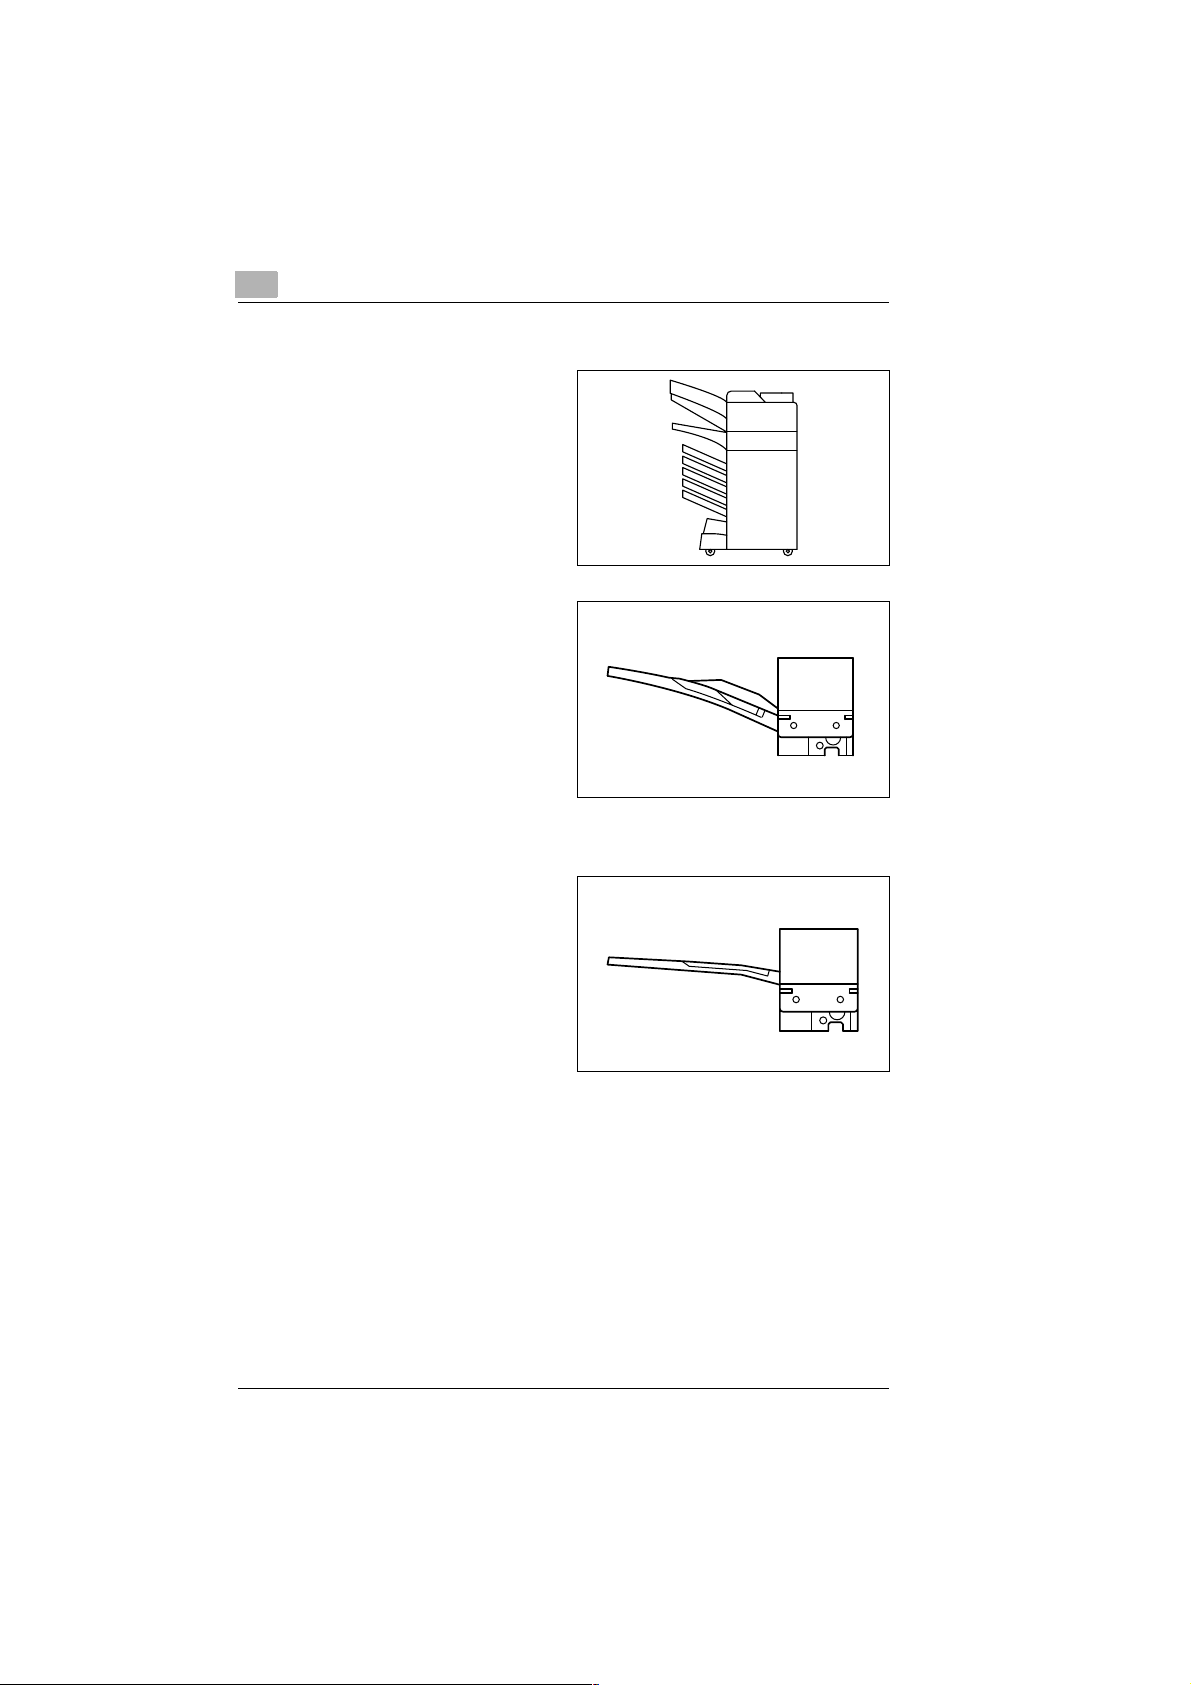
Finisher FN-100
Used for sorting, grouping,
stapling and punching.
Rev. / Di250f/Di350f 2-5
Page 25
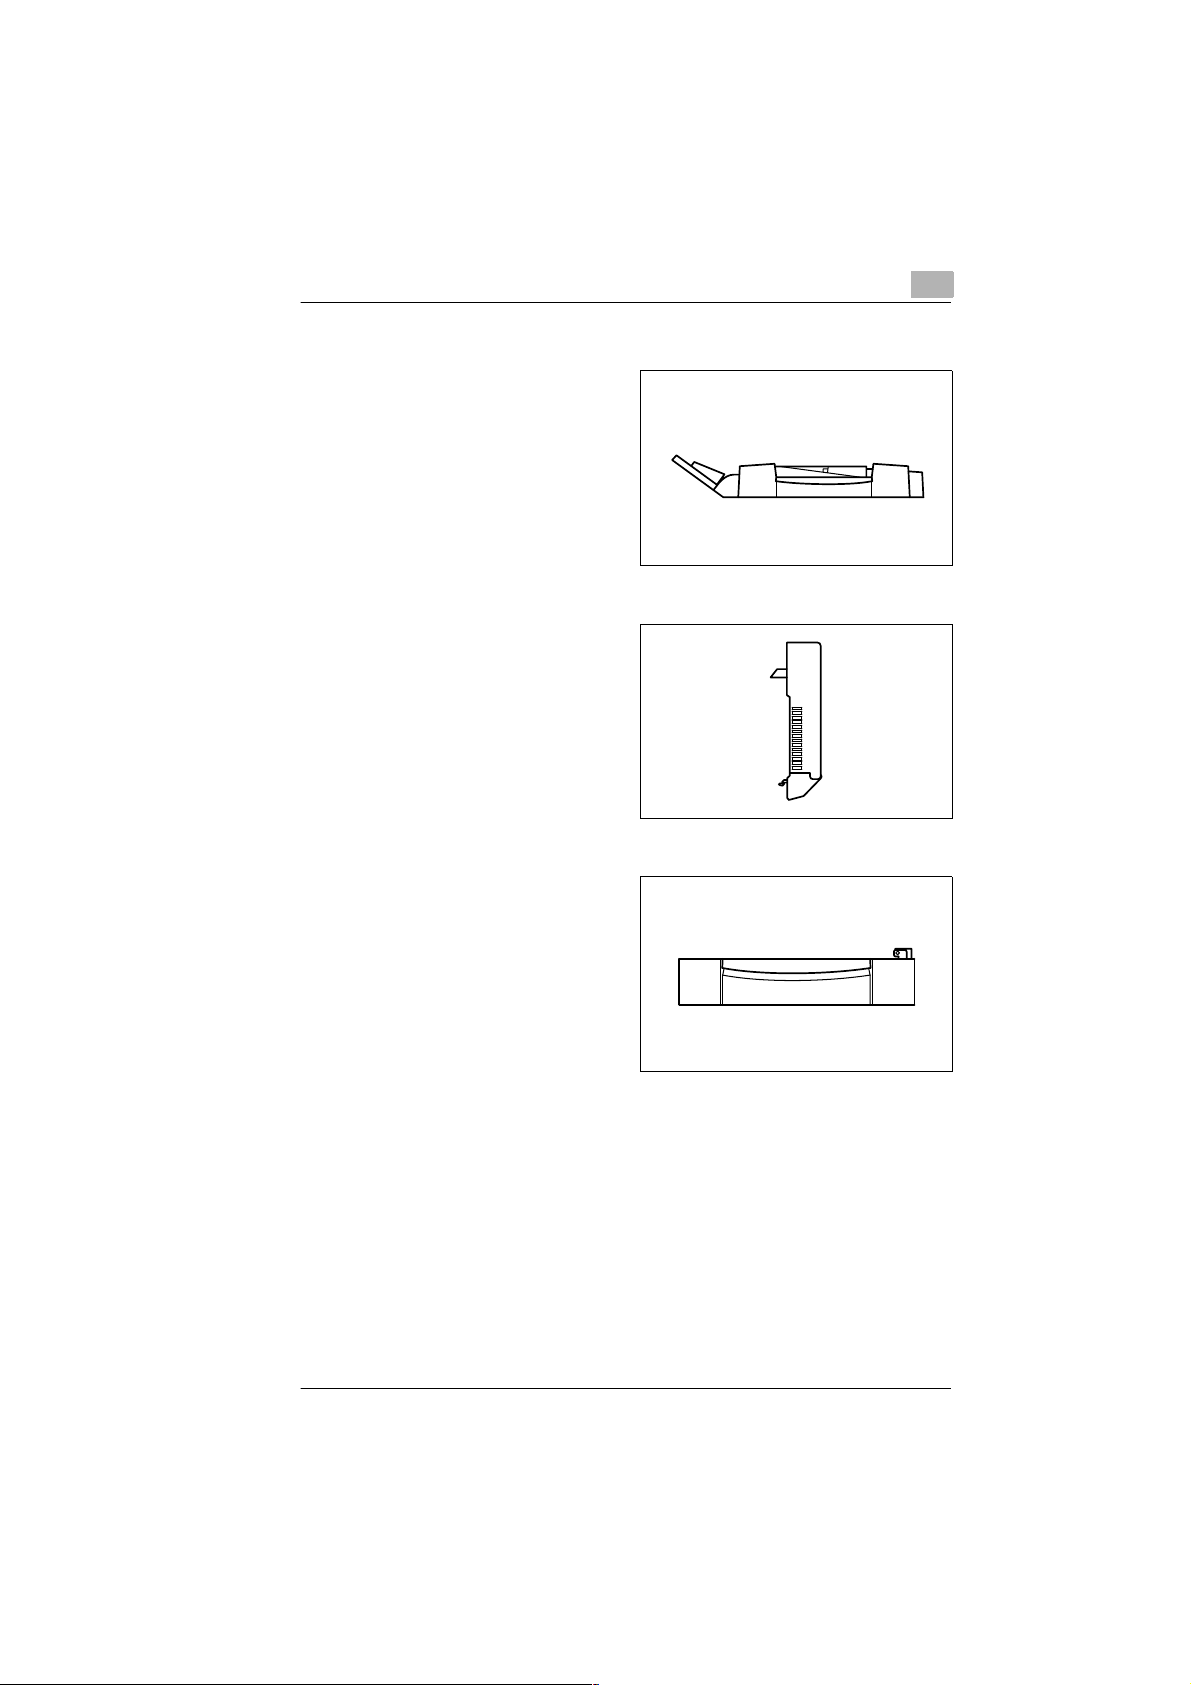
2
Installation
Finisher FN-500
Used for sorting, grouping,
stapling and punching as well
sorting into 5 different trays.
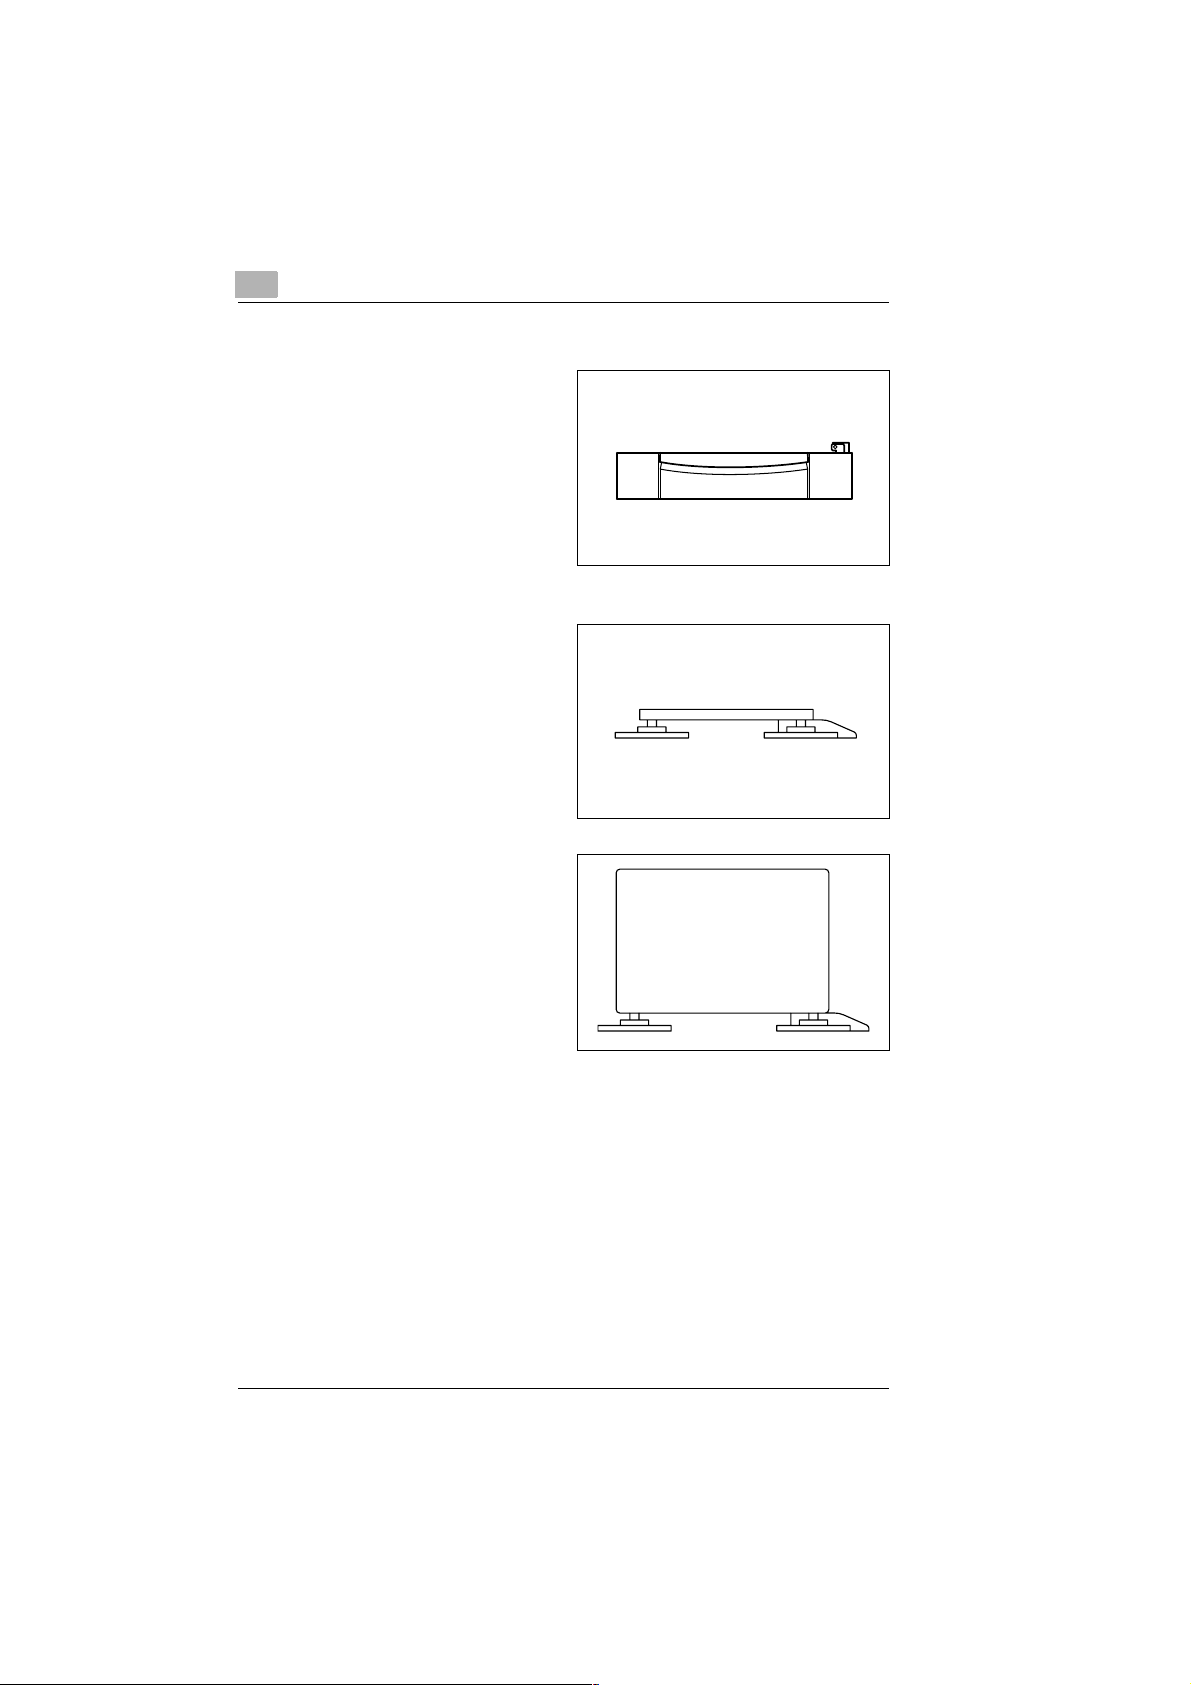
Offset tray OT-100 (only
Di250f)
Used for sorting and grouping
copies.
Sorter JS-200
Used for sorting and grouping
copies. You can select the
output trays in the operational
setting according to the
application.
2-6 Di250f/Di350f Rev. /
Page 26
Installation
2
Duplex document feeder AFR-14
In addition to the automatic
feeding of several documents,
it can turn 2-sided printed
documents to p roduce 2-sided
copies.
Duplex unit AD-10 (only Di250f)
Automatically turns the paper
to produce 2-sided copies.
Paper feed unit PF-108
Holds up to 500 sheets of
paper.
Rev. / Di250f/Di350f 2-7
Page 27
2
Installation
Paper feed unit PF-110
Holds up to 250 sheets of paper
and can be easily adjusted for
different sizes of paper.
Copy table CT-1
Adjusts to the height of the
copier.
Copy desk CD-1M
Adjusts to the height of the
copier.
2-8 Di250f/Di350f Rev. /
Page 28

Installation
2
Large capacity cabinet PF-106
Holds up to 2500 sheets of
paper.
Memory upgrade
Upgrades the memory to 16 MB, or 32 MB.
Printer drive Pi3500
Enables the copier to be used as a printer.
Transmission stamp
Used to stamp pages which have already been scanned.
Rev. / Di250f/Di350f 2-9
Page 29

2
2.5 Control Panel, Displays and Keys
Installation
Utility
Pause
3
4
Mode check
6
5
12
7
8
9
10
1112
No. Display/Key Function
1 LCD (Liquid Crystal
Display)
2 UTILITY Press this key to enter information and settings.
3 PAUSE Press this key to program a dialling pause.
4 MODE CHECK Press this key to confirm the settings.
5 Fax key Press this key to activate the fax function.
6 Copy key Press this key to activate the copy function.
7 NUMERIC KEYS Use these keys to enter numbers, e.g.
8 ID key Press this key to access the user administration mode.
9 Interrupt key Press this key to interrupt a current copying job, e.g. if
10 Reset key Press this key to activate the basic settings.
11 STOP Press this key to manually stop all operations.
12 START Press this key to start all functions of the machine such as
Pressure sensitive display, shows the status of the
machine and contains information about various
operating modes.
telephone numbers
another job should take precedence. Press the key again
to resume copying the first document.
transmission, receiving, copying, etc. Appears orange, if
the machine is not operational.
2-10 Di250f/Di350f Rev. /
Page 30
Installation
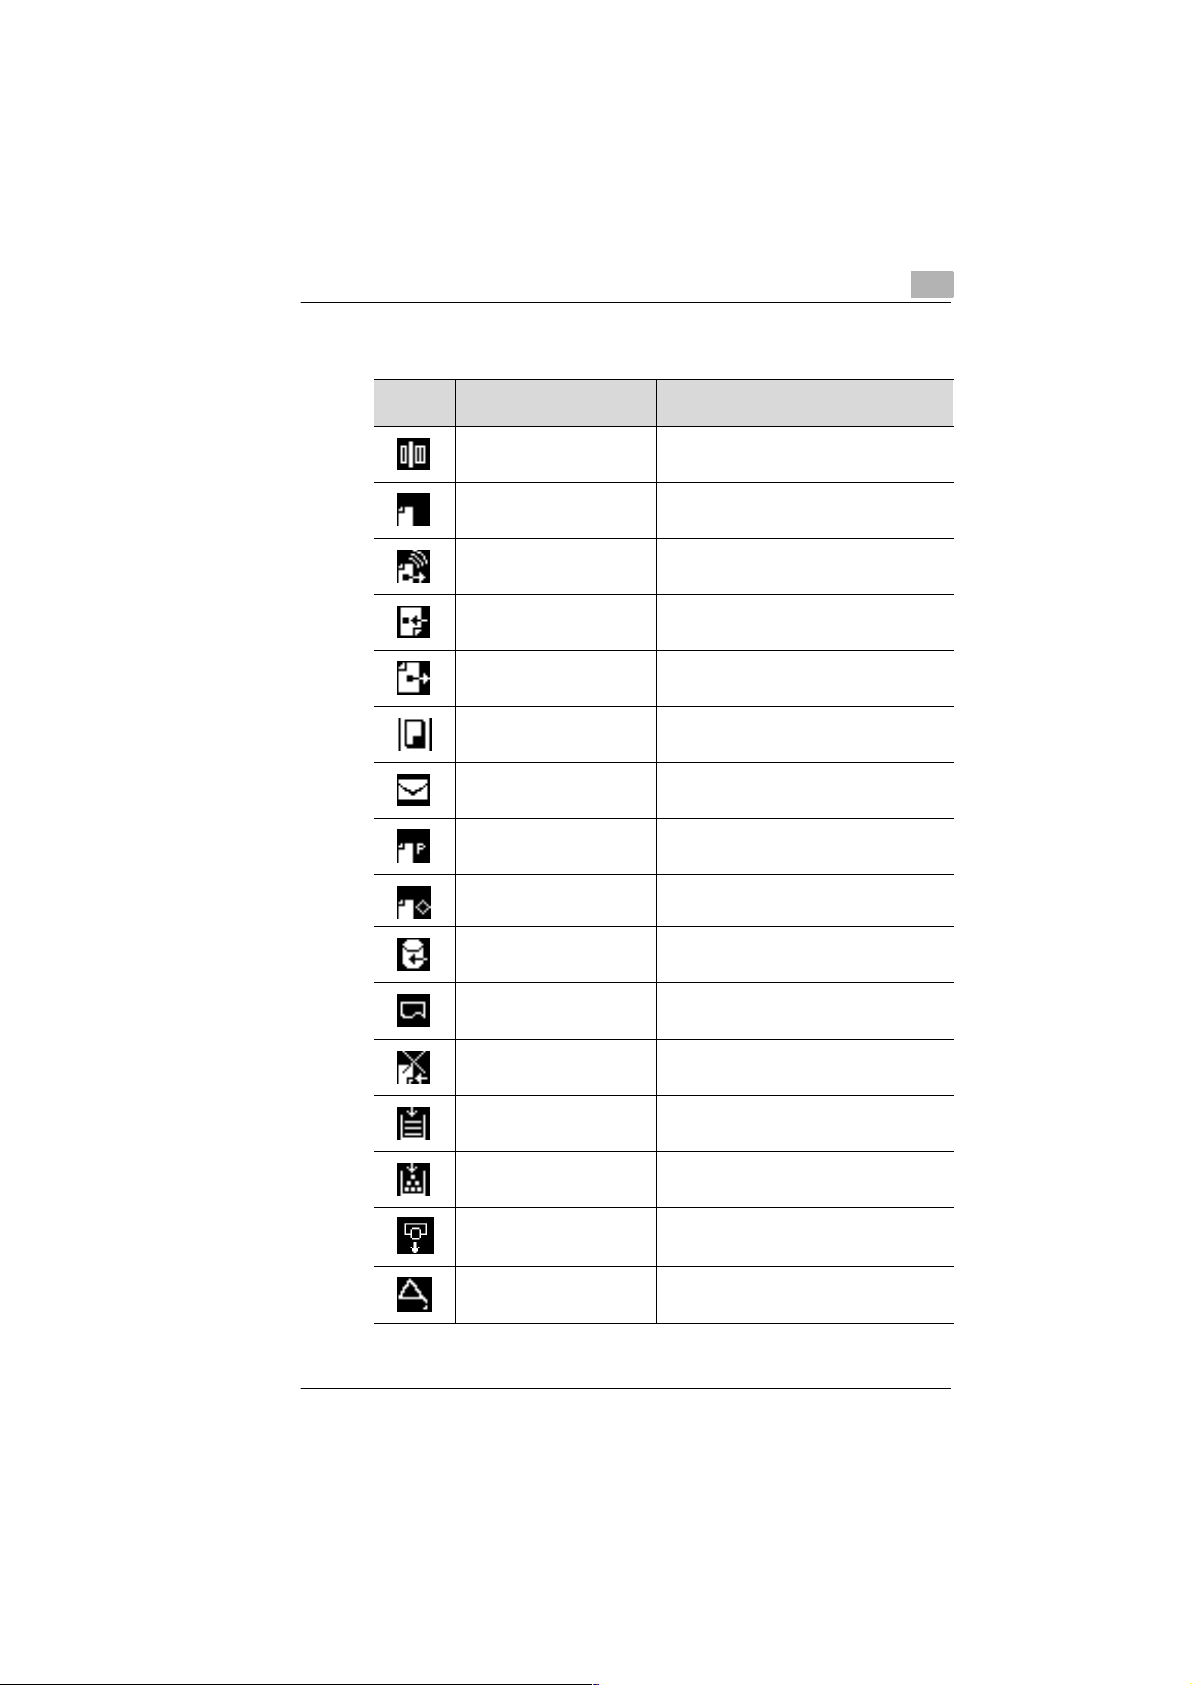
2.6 Important Display Icons
2
Display
Meaning
Scanning The document is being scanned.
Waiting for redial The machine is waiting for the redial.
Dialling The fax number entered is being dialled.
Receiving The machine is receiving a fax.
Sending A fax is being sent.
Copying Copies are being made.
Secure document The mailbox contains a secure document.
Waiting for polling The machine is waiting for the polling process.
Broadcast transmission A document has been stored for broadcast
transmission.
Receiving data from PC Data from the PC is being stored on the
machine.
Waiting to print A document is being prepared for printing.
Automatic reception OFF The machine is set for manual reception.
No paper Refill the paper tray.
No toner Replace the toner cartridge.
Drum empty Replace the image drum.
Maintenance Call the technical service for regular
maintenance checks.
Rev. / Di250f/Di350f 2-11
Page 31

2
2.7 Toner Cartridge and Drum Cartridge
This machine produces images and characters by applying the toner
through the drum cartridge onto the page to be printed.
The drum cartridge should always be handled with care when being
installed or replaced to ensure proper performance at all times. Never
expose the cartridge to direct sunlight or any other direct light. Store the
cartridge in an environment which is not subjected to extreme temperature
fluctuations (hea t, cold) or humid ity. D etail ed inf ormatio n on th e care and
handling of toner cartridges can be found in the actual packaging and
operating manual.
The toner cartridge s hould be replac ed when "toner low " is displayed. The
drum cartridge has a service life of approx. 20000 pages. Instructions on
how to replace the cartridges can be found in Section "Maintenance and
Troubleshooting".
Both cartridges are made of non-hazardous material and may be
disposed of freely.
Please consult the regulatio ns for dis po sal of such produ cts in your area.
Used toner and drum cartridges may be taken back by the technical
service station as a part of the maintenance procedures.
✎
Installation
Note
To avoid damage to the drum cartridge through light, cover it with a
cloth as soon as it is removed from the fax machine.
2-12 Di250f/Di350f Rev. /
Page 32

Installation
Installing the drum cartridge
Pull the lock release lever and
1
open the side panel.
Remove the drum cartridge from
2
its packaging. Hold the unit in
both hands and sh ake four or five
times.
Slide the drum cartridge along
3
the rails into the machi ne. Ensure
you hear a click and that the d rum
is secure.
2
Close the side panel.
4
Rev. / Di250f/Di350f 2-13
Page 33

2
Installing the toner cartridge
Open the panel to the
1
toner cartridge.
Remove the toner cartridge from
2
its packaging. Hold the unit in
both hands and sh ake four or five
times.
Carefully remove the toner seal.
3
Ensure that the toner opening is
facing upwards.
Installation
When fitting the toner cartridge
4
ensure that the "Up" marking is
facing you.
2-14 Di250f/Di350f Rev. /
Page 34

Installation
Close the panel.
5
2
Rev. / Di250f/Di350f 2-15
Page 35

2
2.8 Adding Paper
Replacing paper in the IN tray
The machine will print on plain paper between 60-90 g/m², overhead
transparencies and card.
The following sizes of paper can be used : A3, A4 (portrait and
landscape), B4, A5 (portrait and landscape).
Open the paper tray.
1
Press the paper plate down until
2
you hear a click.
Installation
Fill the paper tray. Make su re the
3
stack of paper does not exceed
the markings. Adjust the paper
guide according to the paper
size.
Close the paper tray.
4
2-16 Di250f/Di350f Rev. /
Page 36

Installation
Changing the paper size
If you want to use a different size of paper to the default setting, change
the settings as follows.
Close the paper tray.
1
Press [CHANGE] and select the
2
required format.
2
Press [ENTER] and [CHANGE]
3
under the heading "Copy Stock"
and select the required type of
paper.
Continue pressing [ENTER] until the standard display appears.
4
Rev. / Di250f/Di350f 2-17
Page 37

2
Installation
2.9 Connecting the Power Cable and Telephone Line Cable
Connecting the telephone line cable
Plug the other end of the
1
telephone cord into the terminal
on the machine.
Plug the wall end of the telephone cable into the wall socket
2
Connecting the power cable
Plug the power cable into the corres ponding terminal on the machine and
into the wall socket.
2-18 Di250f/Di350f Rev. /
Page 38

Data Entry
3Data Entry
3.1 Preparation
Before all functions of your fax machine can be used, you must enter
various settings. This section explains how to enter your name, line type
and the remote locations with which you may wish to communicate.
You can cancel the entry process at any time by pressing [STOP
setting will then not be saved. If you do not press a key within 30 seconds
the setting will also be cancelled.
3.2 Typing Conventions for Data Entry
If not specifica lly ind ica ted, a ll ke ys are to be press ed on e after the ot her,
even if there are separa ted by a " +" to facil itate the l ayout. " Pres s [0
+
[ENTER]" means : Press the numeric key [0], then the numeric key [5]
and then the button in the LCD marked [ENTER
3.3 Entering Text
Only numbers can be entered using the numeric keypad. Letters and
special characters are entered via the LCD. Press [ENTER] to save the
relevant setting. To add a s pace, press [SPACE
press [DEL.] in the LCD or [DELETE] on the control panel to correct the
mistake. Press [UC] to enter capitals and [LC] for lower case. The
alphanumeric display appears if you press [ALPHA]. To enter special
characters press [SYM BOL]. To m ove the cu rsor pres s the arrow keys in
the LCD.
3
]. The
] + [5]
].
]. If you make a mistake,
Rev. / Di250f/Di350f 3-1
Page 39

3
3.4 Entering the Administrator Number
The administrator manages certain user settings such as the maximum
number of copy sets, safety codes, etc. The administrator mode is
accessed by ente ring a pass word (ad minis trator n umber). Howe ver, if no
administrator number is saved, the menu can still be accessed without a
password.
Press [UTILITY].
1
Press the [MAINT.] tab and
2
[ADMINIST.].
Press [INITIAL SETTING] in the
3
administrator management
display.
Data Entry
Press the [MANAGE] tab and
4
[ADMINISTRATOR NUMBER].
3-2 Di250f/Di350f Rev. /
Page 40

Data Entry
Enter the required administrator
5
number (up to 8 di gits) and press
[] until the standard display
appears.
3
Rev. / Di250f/Di350f 3-3
Page 41

3
3.5 Setting Up Users in Administrator Mode
The administrator can enter the foll owing entries for th e user. The setti ngs
are optional, i.e . the admin istrator can only alloc ate user nu mbers and the
employees can save their pers onnel setting s (see se ction 3.6). Up to 100
users can be registered.
G User name
G Access number
G User number
G User recognition, e.g. department number
G F code (mailbox number)
G F code passw ord (mailbox password)
G Fax entry control. This function is used to set mailbox entries which
can only be opened using a password.
G Maximum number of copies.
Press [UTILITY].
1
Press the [MAINT.] tab and
2
[ADMINIST.].
❍ If necessary, enter the
administrator number.
Data Entry
Press [USER REG.] in the
3
administrator management
display.
3-4 Di250f/Di350f Rev. /
Page 42

Data Entry
Press the required button.
4
Press [USER NAME].
5
Enter the name and press
6
[ENTER].
3
Press [ACCESS NUMBER] and
7
enter the four digit number using
the numeric keys and press
[ENTER].
Rev. / Di250f/Di350f 3-5
Page 43

3
Press [USER NO.] and enter a
8
four-digit number using the
numeric keypad and press
[ENTER].
Press [USER.2] tab and
9
[USER TSI].
Enter the name and press
10
[ENTER].
Data Entry
Select the [F CODE ] tab and
11
press [F CODE].
3-6 Di250f/Di350f Rev. /
Page 44

Data Entry
Enter the F Code (up to 20
12
characters) using the numeric
keys and press [ENTER].
Select [F CODE PASSWORD].
13
Enter the password (up to 20
characters) using the numeric
keys and press [ENTER].
Select [REMOTE INPUT
14
CHECK]. Select the required
settings and press [ENTER].
3
Press the [PRINT LIMIT] tab and
15
[MAX. PRINT PAGE]. Enter the
required number and press
[ENTER] until the standard
display appears.
Rev. / Di250f/Di350f 3-7
Page 45

3
3.6 User Settings
The user can save his perso nal setti ngs usin g this func tion. The fo llowin g
entries are possible :
G User name
G Access number
G User number
G User recognition, e.g. department number
G F code (mailbox number)
G F code passw ord (mailbox password)
G Fax entry control. This function is used to set mailbox entries which
can only be opened using a password.
G Standard display
G Standard fax display
G Incoming docume nts. Here you c an set whe ther incom ing document s
should be printed st raight away, s ent to anoth er location , saved in th e
personal mailbox or moved to other mailboxes.
G Standard resolution
G Standard contrast
G Default sending settings (send manually or from the memory)
G Position recognition
G Transmission stamp
G Transmission report
G Copy of the original in the status report.
Data Entry
Press the [KEY] button.
1
Choose the required user key or if
2
you already have a user number
press [USER NUMBER] in the
lower right hand corner of the
display and enter your number.
❍ If necessary, enter your access
number.
Press the [KEY] button and [UTILITY].
3
3-8 Di250f/Di350f Rev. /
Page 46

Data Entry
Press [REG.] and
4
[USER REG.].
Enter your settings as described in section 3.5, point 4 or follow the
5
instructions in the display.
3
Rev. / Di250f/Di350f 3-9
Page 47

3
3.7 Entering your Fax Number
You can enter your name and fax number in the header. The header will
appear at the top of faxes you send. Up to 20 characters can be entered.
The information in the header helps the receiving station to identify the
sender.
To enter "+" use the special character display.
Press [SPACE
Press [UTILITY].
1
Press the [MAINT.] tab and
2
[ADMINIST.].
❍ If necessary, enter the
administrator number.
Press [INITIAL SETTING] in the
3
administrator management
display.
] to add blanks.
Data Entry
Press [SELF-TELEPHONE].
4
3-10 Di250f/Di350f Rev. /
Page 48

Data Entry
Enter your fax numbe r and press
5
[ENTER] until the standard
display appears.
3
Rev. / Di250f/Di350f 3-11
Page 49

3
3.8 Entering your Company Name (Header)
You can either enter your company name, your name or both. Up to 40
characters can be entered. The name appears in the header of the
received document.
Refer to Section 3.3 for instructions on how to make the entry.
Press [UTILITY].
1
Press the [MAINT.] tab and
2
[ADMINIST.].
❍ If necessary, enter the
administrator number.
Press [INITIAL SETTING] in the
3
administrator management
display.
Data Entry
Press [ID].
4
Enter your telephone n umber and
5
your name and press [ENTER]
until the standard display
appears.
3-12 Di250f/Di350f Rev. /
Page 50

Data Entry
3.9 Entering your Company Name (Display)
You can either enter your company name, your name or both. Up to 12
characters can be entered. The name appears in the display of the
recipient.
Refer to section 3.3 for instructions on how to make the entry.
Press [UTILITY].
1
Press the [MAINT.] tab and
2
[ADMINIST.].
❍ If necessary, enter the
administrator number.
Press [INITIAL SETTING] in the
3
administrator management
display.
3
Press [SELF ID].
4
Enter your name and press
5
[ENTER] until the standard
display appears.
Rev. / Di250f/Di350f 3-13
Page 51

3
3.10 Entering the Date and Time
The date and time appe ar on the disp lay, th e activ ity re port and the oth er
fax machine’s printout.
Press [UTILITY].
1
Press the [MAINT.] tab and
2
[TIME&DATE].
Press the underlying menu item s
3
and enter the d ate and time using
the numeric keypad. Press
[ENTER] until the standard
display appears.
Data Entry
3-14 Di250f/Di350f Rev. /
Page 52

Data Entry
3.11 Setting the Phone Type
Use this function to set the machine to PSTN or PBX. In PBX, line dial
numbers (prefix no.) or flash line access are possible.
Press [UTILITY].
1
Press the [MAINT.] tab and
2
[ADMINIST.].
❍ If necessary, enter the
administrator number.
Press [INITIAL SETTING] in the
3
administrator management
display.
3
Press the [LINE] tab and
4
[PSTN/EXT LINE SWITCH].
Select the r equired setting.
5
❍ When you have chosen PBX,
the prefix is requested in the
following display.
Press [ENTER] until the standard display appears.
6
Rev. / Di250f/Di350f 3-15
Page 53

3
3.12 Setting Standard Display
This function is used to s et th e di sp lay w hic h a ppe ars wh en t he m ac hin e
is switched on. There is a choice be tween the photocopier display, the f ax
display and a comb ina tio n of fax /photocopier display . T he de fau lt se tti ng
is the fax/photocopy display.
Press [UTILITY].
1
Press the [MAINT.] tab and
2
[ADMINIST.].
❍ If necessary, enter the
administrator number.
Press [INITIAL SETTING] in the
3
administrator management
display.
Data Entry
Press the [FUNC.] tab and
4
[PRIORITY SCREEN].
Select the required setting and
5
press [ENTER] until the s tandard
display appears.
3-16 Di250f/Di350f Rev. /
Page 54

Data Entry
3.13 Setting t he Standard Fax Display
This function is used to s et the displ ay which app ears when the fax key i s
pressed. There is a choice b etween t he one-touc h dial di splay, the speed
dial display, th e numeric keypad display and the in dex display. The default
setting is the one-touch dial display.
Press [UTILITY].
1
Press the [MAINT.] tab and
2
[ADMINIST.].
❍ If necessary, enter the
administrator number.
Press [INITIAL SETTING] in the
3
administrator management
display.
3
Press the [FUNC.] tab and
4
[PRIORITY FAX SCREEN].
Select the required setting and
5
press [ENTER] until the stand ard
display appears.
Rev. / Di250f/Di350f 3-17
Page 55

3
3.14 Storing Numb ers
Entering one-touch numbers
This function is used to store telephone nu mbers which you frequen tly dial
under the one-touch dial keys. Up to 300 telephone numbers can be
entered.
Press [UTILITY].
1
Press the [REG.] tab and [ONE-
2
TOUCH].
Press the required one-touch
3
key.
Data Entry
Enter the name of the recipient
4
and press [NEXT].
3-18 Di250f/Di350f Rev. /
Page 56

Data Entry
Enter the one-touch dial as a
5
three-digit number and press
[NEXT].
Enter the fax number of the
6
recipient using the numeric
keypad and press [SPEED].
Use the arrow keys to set the
7
modem speed and press
[ENTER].
3
Rev. / Di250f/Di350f 3-19
Page 57

3
Data Entry
Press [DEST.] and [ENTER].
8
Press [ENTER] until the standard display appears.
9
✎
Note
If you store overseas numbers press [OVERSEAS] + [CONTINUE]
after entering the fax number.
Under one-touch dia l, a subaddre ss ID or a pas sword for th e selective
call up can be stored by pressing [F CODE] after entering the
telephone number.
3-20 Di250f/Di350f Rev. /
Page 58

Data Entry
3
Entering speed dial numbers
Similar to the one-touch keys, you can store fax numbers as speed dial
numbers. You dial a spee d dial numb er by enterin g a th ree-dig it ide ntifier
code. Up to 200 speed dial numbers can be stored.
Press [UTILITY].
1
Press the [REG.] tab and
2
[ABBR.].
Press the required speed dial
3
key.
Enter the name of the recipient
4
and press [NEXT].
Press [NEXT].
5
Rev. / Di250f/Di350f 3-21
Page 59

3
Enter the fax number of the
6
recipient using the numeric
keypad and press [SPEED].
Use the arrow keys to set the
7
modem speed and press
[ENTER].
Press [DEST.] and [ENTER].
8
Data Entry
Press [ENTER] until the standard display appears.
9
✎
Note
If you store overseas numbers press [OVERSEAS] + [CONTINUE]
after entering the fax number.
Under speed dial, a subaddress ID or a passwo rd for the sel ective call
up can be stored by pressing [F CODE] after entering the telephone
number.
3-22 Di250f/Di350f Rev. /
Page 60

Data Entry
3
Editing/erasing one-touch- or speed dial numbers
You can erase or change one-touch- or speed dial numbers by following
the procedure below.
Press [UTILITY].
1
Press the [REG.] tab and [ONE-
2
TOUCH].
Press the required one-touch key.
3
Press the entry to be changed
4
and make the changes.
Press [ENTER] until the standard display appears.
5
Rev. / Di250f/Di350f 3-23
Page 61

3
Data Entry
Setting one-touch dial index
The classification of one-touch keys in groups such as branches,
customers, etc. under in dex keys facilitates fin ding the required one-touc h
key. Up to 300 locations can be stored under the 20 index keys.
Press [UTILITY].
1
Press the [REG.] tab and
2
[INDEX].
Press the re quired index key.
3
Use the numeric keypad to enter
4
the index name and press
[ENTER].
Press [ENTER] until the standard display appears.
5
3-24 Di250f/Di350f Rev. /
Page 62

Data Entry
3
Setting relay groups
This function is used to set up your D250f/350f as a hub for relay
transmissions. Up t o 5 relay groups with up to 200 locations per group can
be set. The receiver must be stored as a one-touch dial or speed dial
number in their machine.
Press [UTILITY].
1
Press the [REG.] tab an d [RELAY
2
GROUP.].
Press the required group key.
3
Press [ABBR.], enter the one-
4
touch or speed-dial number of the
required recipient and press
[ENTER]. To enter more onetouch dial and speed dial
numbers proceed as of point 3
again.
When you have finished entering all your entries into groups, press
5
[ENTER] until the standard display appears.
✎
Note
The most recent recipient can be displayed again by pressing
[DETAIL]. Press [DEL.] to delete the displayed recipient.
Rev. / Di250f/Di350f 3-25
Page 63

3
Data Entry
Saving own speed dial number
Save your own speed dial number to receive a relay transmission of a
relay status report sent from the hub.
Save your own telephone number as a speed dial number as
1
described in the speed dial entry section.
Press [UTILITY].
2
Press the [REG.] tab and
3
[SELF-ABBR.].
Enter your speed dial number
4
using the numeric keypad and
press [ENTER] until the s tandard
display appears.
3-26 Di250f/Di350f Rev. /
Page 64

Data Entry
3
Saving fax programs
Both the recipient and the transmission method can be saved under a
one-touch key usin g t his fu nc tion. This is useful w he n y ou reg ula rly s end
documents by the same method to the same recipient. The following
functions can be set : transmi ssion prog ram, batch se nd program, po lling
RX
program and relay program. Up to 30 programs can be saved under the
speed dial keys.
Transmission program
Press [UTILITY].
1
Press the [REG.] tab and [FAX
2
PROGRAM].
Press the required speed dial
3
key.
Enter the program names , wh ic h
4
should later appear in the displ ay,
and press [NEXT].
Rev. / Di250f/Di350f 3-27
Page 65

3
Press [TX] and [NEXT].
5
Select the type of telephone
6
number.
Select the required recipients.
7
Press [ENTER] and [NEXT].
Data Entry
Press [TRANSMISSION
8
SETTING].
3-28 Di250f/Di350f Rev. /
Page 66

Data Entry
Select the required functions
9
from the [FAX MENU] and press
[ENTER] until the standard
display appears.
3
Rev. / Di250f/Di350f 3-29
Page 67

3
Data Entry
Batch send program
Use this function to store several documents in memory and send all of
them at a specific time. In this way the receiving station need only be
called once.
Press [UTILITY].
1
Press the [REG.] tab and [FAX
2
PROGRAM].
Select the required speed dial
3
key.
Enter the program na me s, wh ic h
4
should later appear in the disp lay,
and press [NEXT].
Press [BATCH] and [NEXT].
5
3-30 Di250f/Di350f Rev. /
Page 68

Data Entry
Select the type of telephone
6
number.
Select the required recipients.
7
Press [ENTER] and [NEXT].
Enter the time and transmission
8
interval using the n umeric keypad
and press [NEXT]. The
transmission interval mu st be two
digits.
3
Press [TRANSMISSION
9
SETTING].
Rev. / Di250f/Di350f 3-31
Page 69

3
Select the required functions and
10
press [ENTER] until the s tandard
display appears.
Data Entry
3-32 Di250f/Di350f Rev. /
Page 70

Data Entry
Polling RX program
This function is useful if you often poll from the same location.
Press [UTILITY].
1
Press the [REG.] tab and [FAX
2
PROGRAM].
Select the required speed dial
3
key.
3
Enter the program names , wh ic h
4
should later appear in the displ ay,
and press [NEXT].
Press [POLLING RX] and
5
[NEXT].
Rev. / Di250f/Di350f 3-33
Page 71

3
Select the type of telephone
6
number.
Select the required numbers.
7
Press [ENTER] and [NEXT].
Press [TIMER SET], enter the
8
time using the numeric keypad
and press [ENTER] until the
standard display appears.
Data Entry
3-34 Di250f/Di350f Rev. /
Page 72

Data Entry
3
Relay program
This function is useful if you ofte n carry out rel ay transmi ssio ns using t he
same method.
Press [UTILITY].
1
Press the [REG.] tab and [FAX
2
PROGRAM].
Select the required speed dial
3
key.
Enter the programs, which s hould
4
later appear in the display, and
press [NEXT].
Press [RELAY TX] and [NEXT].
5
Rev. / Di250f/Di350f 3-35
Page 73

3
Select the type of telephone
6
number.
Select the required numbers.
7
Press [ENTER] and [NEXT].
Select up to 5 relay groups, pre ss
8
[ENTER] twice and press
[NEXT].
Data Entry
Press [TRANSMISSION
9
SETTING].
3-36 Di250f/Di350f Rev. /
Page 74

Data Entry
Select the required functio ns and
10
press [ENTER] until the stand ard
display appears.
3
Rev. / Di250f/Di350f 3-37
Page 75

3
3.15 Advanced Settings
You can adjust the machine to your personal requirements using the
following settings.
Buzzer volume
This function can be use d to set the buzzer volume, for ex ample, for when
an error occurs (alarm volume) or after receiving a transmission (gentle
volume). Proceed as follows.
Press [UTILITY].
1
Press the [MAINT.] tab and
2
[SOUND VOL.].
Press the re quired volum e key.
3
Data Entry
Select the required settings and
4
press [ENTER] until the s tandard
display appears.
3-38 Di250f/Di350f Rev. /
Page 76

Data Entry
Entering a password
This function is used to set a password for password transmissions.
Proceed as follows.
Press [UTILITY].
1
Press the [MAINT.] tab and
2
[ADMINIST.].
Press [INITIAL SETTING] in the
3
administrator management
display.
3
Press [MANAGE] and [COM.
4
PASSWORD].
Enter the two-digit password (01-
5
99) using the numeric keypad
and press [ENTER] until the
standard display appear s.
Rev. / Di250f/Di350f 3-39
Page 77

3
Data Entry
Setting the memory time
This function is used to set the time that documents are saved in the
memory, e.g. which due to engaged lin es co ul d no t be se nt. After the set
time is up, the documents are au tomatically deleted from the mem ory. The
default setting is 1 hour.
Press [UTILITY].
1
Press the [MAINT.] tab and
2
[ADMINIST.].
Press [INITIAL SETTING] in the
3
administrator management
display.
Press the [MANAGE] tab and
4
[INCOMPLETE TX HOLD].
Enter the time using the arrow
5
keys and press [ENTER] unt il the
standard display appears.
3-40 Di250f/Di350f Rev. /
Page 78

Data Entry
3
Print settings
This function is used to as sign the p aper to the correc t pape r tray, set the
print contrast and the paper tasks for the fax, printer and photocopier
function.
Press [UTILITY].
1
Press the [MAINT.] tab and
2
[ADMINIST.].
Press [PRINT SET] in the
3
administrator management
display.
Press [DEFAULT PAPER].
4
Select the required paper tray
5
and press [ENTER].
Rev. / Di250f/Di350f 3-41
Page 79

3
Press [SPECIAL PAPER], select
6
the required paper tray and the
required type of pap er a nd p res s
[ENTER].
Press [PRINT EXPOSURE],
7
select the required setting and
press [ENTER].
Press [OUTPUT TRAY], select
8
the required setting and press
[ENTER] until the standard
display appears.
Data Entry
✎
Note
The [RECYCLING PAPER] and [SPECIAL] settings ar e no t av ail abl e
using fax mode.
3-42 Di250f/Di350f Rev. /
Page 80

Data Entry
3
Power save mode
This function is used to set times after which the LCD returns to th e default
setting (default setting 1 minute); the warm-up function switches off
(default setting 15 minut es); th e heat la mp switc hes off ( default s etting 30
minutes) and the LCD switches off (default setting 1 minute).
Press [UTILITY].
1
Press the [MAINT.] tab and
2
[ADMINIST.].
Press [POWER SAVE] in the
3
administrator management
display.
Press [AUTO-RESET].
4
Use the numeric keypad to enter
5
the time and press [ENTER].
Rev. / Di250f/Di350f 3-43
Page 81

3
Press [PRE-HEAT], enter the
6
time using the numeric keypad
and press [ENTER].
Press [HEATER OFF], enter the
7
time using the numeric keypad
and press [ENTER].
Press [LCD BACK-LIGHT OFF],
8
enter the time using the numeric
keypad and press [ENTER] until
the standard display appears.
Data Entry
3-44 Di250f/Di350f Rev. /
Page 82

Data Entry
3
Setting box for confidential polling
Up to 10 boxes can be set for confide ntial pol ling. By us ing [FAX ENTRY
CONTROL] or [FAX OUTPUT CONTROL] it can be established whether
or not a password is ne eded to save a docum ent in a bo x or to pri nt it ou t.
Press [UTILITY].
1
Press the [REG.] tab and
2
[BULTN.].
Select a box.
3
Press [F CODE].
4
Enter the F code (up to 20
5
characters) using the numeric
keypad and press [ENTER].
Rev. / Di250f/Di350f 3-45
Page 83

3
Press [F CODE PASSWORD],
6
enter the password (up to 20
characters) using the numeric
keypad and press [ENTER].
Press [TITLE], enter the name
7
and press [ENTER].
Press [REMOTE INPUT
8
CHECK], select the required
setting and press [ENTER].
Data Entry
Press [REMOTE OUTPUT
9
CHECK], select the required
setting and press [ENTER] until
the standard display appears.
3-46 Di250f/Di350f Rev. /
Page 84

Send
4Send
4.1 Transmission
Notes on original documents
Your new fax machine can transmit the following document sizes. The
document feeder can hold up to 70 pages of A4 (50 pages in the duplex
feeder).
4
Effective
text size
max. 277 mm
Feeding
direction
1000 mm (AF)
420 mm (DIN A3) (AFR)
Maximum
document width
297 mm
Feeding
direction
Minimum
document width
128 mm
Feeding
direction
100 mm
If the document is longer than 1000 mm, the machine identifies a
document jam and stops scanning the document.
Use yellow, green-yellow or light blue colours for information you do not
want to be transmitted.
Make sure ink, glue, correction fluid, etc. are completely dry before
transmitting.
CAUTION
Staples and paper clips may damage the machine.
➜ Remove all staples and paper clips before sending a document.
Rev. / Di250f/Di350f 4-1
Page 85

4
Send
Using carrier film
The following documents must be placed onto carrier film or copied onto
normal paper before transmission :
G paper sizes less than 128 mm wide or 100 mm long;
G paper lighter than 50g/m²;
G folded, torn, wrinkled, damp, rough or curled documents;
G chemically treated and pressure sensitive copy paper.
Feeding the document into the document feeder
Insert the document
1
face up and lengthways into the
document feeder.
Place the document in the centre of the ADF and adjust the paper
2
guides so that they lightly touch the edges of the document.
You can insert up to 70 p ages of A4 i nto the doc ument fee der. Make sure
the pages are well placed and aligned before starting the transmission.
If the paper is curled or if pages are stuck together, more than one page
at a time could be fed into the machine which can lead to paper jams or
faulty transmissi ons. In thi s case you should in se rt the pages one by one
to ensure correct feeding.
4-2 Di250f/Di350f Rev. /
Page 86

Send
The standard transmission memory holds approx. 45 pages of the ITU
Test Document 1 (standard resolution). Ens ure the dis pl ayed mem ory
capacity does not drop to 0 (%) during scanning, as this may cancel the
process.
✎
Note
In the event of a recurrence, contact your technical service for a
memory upgrade. Until then, select direct transmission for large
volumes of data.
Placing the document on the flatbed scanner
Place the document face down
1
in the top right hand corner of the
flatbed scanner.
Ensure that lengthways, the document lies closely to the original
2
glass, then close the cover.
4
Rev. / Di250f/Di350f 4-3
Page 87

4
Inserting non-standard sized documents in the feeder
Insert the document face down
1
into the document feeder.
Centre the document and adjust the paper guides so that they just
2
touch the edges of the original document.
✎
Note
Most fax and copy functions do not support non-standard sized
documents.
Send
4-4 Di250f/Di350f Rev. /
Page 88

Send
4.2 Transmission Settings
Resolution
If you set the resolution following the procedures described below, it will
only apply to the current transmission.
First load the doc ument into the docu ment fe eder an d pr ess [FAX] on
1
the control panel.
Press the [QUALITY &
2
REDUCTION] tab.
Press the [QUALITY] tab, select
3
the required setting and start the
transmission.
4
If you send d ocuments with normal prin t or typed documents, ad justments
are not necessary.
There are six different resolution settings :
Standard This is the normal resolution for most typed documents and
Fine
S. Fine
Text+Photo Half tone mode captures shades in photographs.
GSR
Super GSR
Rev. / Di250f/Di350f 4-5
simple drawings (e.g. using typewriters).
Resolution used for fine print e.g. newspaper articles.
This is the finest resolution.
Page 89

4
✎
Note
The settings Text+Photo, GSR and Super GSR increase the
transmission time and cost.
Permanently changing the resolution
Press [TX SETTING] in the
1
Administrator Management
display.
Press the [SEND SET1] and
2
[PRIORITY QUALITY] tabs.
Send
Select the required setting and
3
continue pressing [ENTER] until
the standard display appears.
4-6 Di250f/Di350f Rev. /
Page 90

Send
Contrast
If you increase the contrast settings, fine differences in tone on the
document are enhanced and transmitted more clearly. However,
information may be lost during this process. If you set the contrast as
described below, the se tting will only apply to the current transmission.
First feed the document int o the documen t feeder and pr ess [FAX] on
1
the control panel.
Press the [QUALITY &
2
REDUCTION] tab.
Press the [CONTRAST] tab.
3
4
Select the required setting and
4
start the transmission.
Rev. / Di250f/Di350f 4-7
Page 91

4
Permanently changing the contrast
Press [TX SETTING] in the
1
Administrator Management
display.
Press the [S END SET 1] and
2
[PRIORITY QUALITY] tabs.
Select the required setting and
3
continue pressing [ENTER] until
the standard display appears.
Send
4-8 Di250f/Di350f Rev. /
Page 92

Send
4
Reducing the transmission
This function changes the size of the paper being sent to match the size
of paper at the receiving en d. If you selec t [DO NOT RED.], th e document
will be sent regardless of the size of paper at the receiving machine.
First feed the document int o the documen t feeder and pr ess [FAX] on
1
the control panel.
Press the [QUALITY &
2
REDUCTION] tab.
Press the [REDUCTION/AREA]
3
tab.
Press [REDUCTION].
4
Select the required setting and
5
start the transmission.
Rev. / Di250f/Di350f 4-9
Page 93

4
Send
Scanning area
Use this function to set the area w hich is to be scanned. Thi s enables you
to send sections from large documents.
First feed the document in to the docume nt feeder and pr ess [FAX] on
1
the control panel.
Press the [QUALITY &
2
REDUCTION] tab.
Press the [REDUCTION/AREA]
3
tab.
Press [SCAN AREA].
4
Select the required setting, press
5
[ENTER] and start the
transmission.
4-10 Di250f/Di350f Rev. /
Page 94

Send
4
Transmission stamp (optional)
This functions marks s canned documen ts with a stamp. This function can
only be used if a document is being sent from the document feeder.
First feed the document int o the documen t feeder and pr ess [FAX] on
1
the control panel.
Press the [FAX MENU] + [SET1] +
2
[TX MARKER] tabs.
Select the required setting, press
3
[ENTER] and start the
transmission.
Rev. / Di250f/Di350f 4-11
Page 95

4
Send
Printing departments
This function is used to print the name of your department on the copy
received by the other mac hine. Ens ure the nam e of you r departm ent has
been stored as the user ID in the ID settings menu.
First feed the document in to the docume nt feeder and pr ess [FAX] on
1
the control panel.
Press the [FAX MENU] + [SET2] +
2
[TSI] tabs.
Dial the destination number and press [START].
3
4-12 Di250f/Di350f Rev. /
Page 96

Send
4
Printing the recipient’s name
This function is used to print the recipient’s name on the incoming copy.
Ensure the recipient has been stored as a one-touch or speed dial
number. This functi on is o nly a va ila ble i f th e d epa rtm ent printing function
has been switched on.
First feed the document int o the documen t feeder and pr ess [FAX] on
1
the control panel.
Press the [FAX MENU] + [SET2] +
2
[DEST. INSERT] tabs.
Dial the destination number and press [START].
3
Rev. / Di250f/Di350f 4-13
Page 97

4
4.3 Dialling Modes
Five different dialling modes are available.
Insert the document fac e up into the ADF and dial usi ng the dialling mo de
of your choice.
Manual dialling using the numeric keypad
First feed the document in to the docume nt feeder and pr ess [FAX] on
1
the control panel.
Press [10-KEY DIALING].
2
Use the numeric keypad to enter
3
the number and press [START].
You can check the number on the
display and, if necessary, delete it
by pressing [DELETE].
Send
4-14 Di250f/Di350f Rev. /
Page 98

Send
One-touch dialling
First feed the document int o the documen t feeder and pr ess [FAX] on
1
the control panel.
Press one of the preprogrammed
2
one-touch keys + [START] +
[ENTER]. You can dial more than
one destination at a time.
Speed dialling
First feed the document int o the documen t feeder and pr ess [FAX] on
1
the control panel.
Press [ABBR.].
2
4
Use the numeric keypad to enter
3
the three digit speed dial number
and press [START].
Rev. / Di250f/Di350f 4-15
Page 99

4
Send
Group dialling
You can use th is fun ction to di al th e pre-d ial n umber you have stored in a
one-touch key or as a speed dial number.
First feed the document in to the docume nt feeder and pr ess [FAX] on
1
the control panel.
Press [CHAIN DIAL] and the one-
2
touch or speed dial key, w here the
number is stored.
Use the numeric keypad to enter
3
the extension number and press
[START].
Program dialling
This function is used to dial transm ission and receptio n modes which h ave
been stored as one-touch keys.
First feed the document in to the docume nt feeder and pr ess [FAX] on
1
the control panel.
Press the one-touch key w here the
2
function is stored and [START].
4-16 Di250f/Di350f Rev. /
Page 100

Send
4.4 Memory Transmission
The memory transmiss ion shou ld be selec ted as the default tra nsmission
mode. "Direct transmission" should only be used in exceptional
circumstances, e.g. if not enough memory is availab le. Since your fax has
several functions, it is po ssible to sca n documents to the m emory for later
transmission whils t your fax mach ine is sending , receiving or printi ng from
memory. As soon as the current operati on has been compl eted, the newly
scanned document will be processed. Memory transmission provides
advantages relating to time and reliability through quicker document
feeding and resending pages in the event of an error.
First feed the document int o the documen t feeder and pr ess [FAX] on
1
the control panel.
Manually enter the destination
2
number using the one-t ouch key or
speed dial and press [START].
4
✎
Note
If you want to send bou nd docume nts, use th e flatbed sca nner. In this
case you will have to sc an each page separately. Onc e the destin ation
number has been entere d, press [START] and once the document has
been scanned pr ess [END SCAN ]. Repe at this proc ess for each pa ge
and press [START] to start the transmission.
Rev. / Di250f/Di350f 4-17
 Loading...