

Konica Minolta 8031 User Manual
Basic Operations
8020/
8031

Contents
The topics listed below ar e described in the Basic Operations volume.
For details on other topics, refer to th e Administrator Operations volume and the Advanc ed Operations
volume.
1 Before Making Copies
1.1 Introduction.....................................................................................................................1-2
Structure of this Manual....................................................................................................1-2
1.2 Available Features...........................................................................................................1-4
Color Settings....................................................................................................................1-4
Sorting...............................................................................................................................1-4
Output Settings..................................................................................................................1-5
Zoom Settings...................................................................................................................1-5
Paper Settings...................................................................................................................1-6
Orig Ö Copy Settings .........................................................................................................1-7
Photo Settings...................................................................................................................1-9
Density Settings..............................................................................................................1-10
Glossy Mode Setting.......................................................................................................1-10
Screen Pattern Settings..................................................................................................1-10
1.3 Names of Control Panel Parts and Their Functions ..................................................1-12
1.4 Adjusting the Angle of the Control Panel...................................................................1-14
To adjust the angle of the control panel..........................................................................1-15
1.5 Turning the Copier On and Off.....................................................................................1-16
To turn the copier on.......................................................................................................1-16
When the copier is turned on ..........................................................................................1-16
Queuing a job during warm-up........................................................................................1-16
Auto Reset.......................................................................................................................1-16
Low Power Mode.............................................................................................................1-17
To recover from Low Power mode..................................................................................1-17
Shut off Mode..................................................................................................................1-17
To recover from Shut off mode........................................................................................1-17
To turn the copier off.......................................................................................................1-18
When the copier is turned off ..........................................................................................1-18
1.6 Using the Touch Panel..................................................................................................1-19
Description of the Touch Panel.......................................................................................1-19
Default Settings...............................................................................................................1-19
Structure of the Display....................................... ..... ...... .................................. ..... ...... ....1-20
Operating the Touch Panel .............................................................................................1-21
Konica 8020/8031 i

2 Basic Copy Operations
2.1 Making Basic Copies......................................................................................................2-2
2.2 Practical Copy Examples................................................................................................2-4
To make a copy that is the same size as the original........................................................2-4
To make an enlarged copy of the document.....................................................................2-5
To make a reduced copy of the document........................................................................2-6
To reduce paper use.........................................................................................................2-7
To make copies from a book or magazine........................................................................2-8
To copy a postcard............................................................................................................2-9
2.3 Stopping Printing..........................................................................................................2-11
To stop/restart/delete a print job......................................................................................2-11
2.4 Interrupting a Copy Job................................................................................................2-13
To interrupt copying.........................................................................................................2-13
2.5 Making Test Copies (Copy 1 Set).................................................................................2-14
To make a test copy........................................................................................................2-14
2.6 Making Copies Using Accounts...................................................................................2-15
Using the “Copy Track” Function.....................................................................................2-15
To make copies when accounts are specified ................................................................2-15
3 Loading Paper
3.1 Paper Specifications................................. ..... ...... ...... ................................. ...... ...... ..... ...3-2
Paper Types......................................................................................................................3-2
Paper Sizes.......................................................................................................................3-3
Paper Capacity..................................................................................................................3-4
3.2 Print Area.........................................................................................................................3-6
3.3 Paper Storage............................................ ..... ...... ...........................................................3-6
3.4 Automatically Selecting the Paper Source...................................................................3-7
Operating conditions.........................................................................................................3-7
Order for selecting another paper drawer .........................................................................3-7
3.5 Loading Paper .................................................................................................................3-8
Loading Paper Into the 1st Drawer....................................................................................3-8
Setting the Paper Size for the 1st Drawer..................................................... ...... ............3-12
To set the paper size............................. ...... ..... ...... .................................. ..... ...... ...... ..... .3-12
To set a paper size in metric measurements..................................................................3-13
To set a non-standard (custom) paper size.....................................................................3-13
To store a non-standard (custom) paper size.................................................................3-14
To select a stored non-standard (custom) paper size.....................................................3-15
Loading Paper Into the 2nd Drawer or a Paper Feed Unit..............................................3-16
To set the “Specialty Paper” function..............................................................................3-17
Loading Paper Into the Large Capacity Tray...................................................................3-18
To set the “Specialty Paper” function..............................................................................3-19
Loading Paper Into the Manual Bypass Tray..................................................................3-20
ii Konica 8020/8031

4 Original Documents
4.1 Document Feeding........................... ..... ...... ...... ..............................................................4-2
Document Types...............................................................................................................4-2
Mixed Originals Paper Sizes.............................................................................................4-3
Document Precautions (Multi-Sheet Feeding)..................................................................4-4
Document Precautions (Manual Feeding).........................................................................4-4
4.2 Feeding the Document..................... ..... ...... ...... ..............................................................4-5
Multi-Sheet Feeding..........................................................................................................4-5
To feed documents of mixed sizes....................................................................................4-8
Manual Feeding...............................................................................................................4-10
5 Specifying Copy Settings
5.1 Selecting a Color Setting................................................................................................5-2
To select the Color setting.................................................................................................5-2
5.2 Selecting an Output Setting...........................................................................................5-3
Automatic “Sort”/“Non-Sort” Setting Selection...................................................................5-3
Non-Sorting (“Non-Sort” Setting).......................................................................................5-3
Crisscross Non-Sorting (“Non-Sort” Setting).....................................................................5-4
Sorting (“Sort” Setting)......................................................................................................5-4
Crisscross Sorting (“Sort” Setting).....................................................................................5-4
Stapling (with finisher FS-135 installed)............................................................................5-4
Stapling (with finisher FS-231 installed)............................................................................5-5
Hole-Punching...................................................................................................................5-5
To specify Output settings.................................................................................................5-5
5.3 Specifying a Zoom Setting.............................................................................................5-7
Automatic Scaling (“Auto Size” Setting)............................................................................5-7
Specifying Full Size (“× 1.000” Setting).............................................................................5-7
Enlarging (“Enlarge” Settings)...........................................................................................5-7
Reducing (“Reduce” Settings)...........................................................................................5-7
Minimizing (“Minimal” Setting)...........................................................................................5-8
Zooming ............................................................................................................................5-8
Custom Sizing (“CustomZoom” Setting)............................................................................5-8
Vertical and Horizontal Scaling (“X/Y Zoom” Setting).......................................................5-8
To specify a Zoom setting.................................................................................................5-8
Specifying a Custom Zoom Ratio (“CustomZoom” Setting)..............................................5-9
To enter a custom zoom ratio............................................................................................5-9
To store “CustomZoom” and “Minimal” zoom ratios..........................................................5-9
To recall a stored custom zoom ratio..............................................................................5-10
To specify different vertical and horizontal scaling proportions (“X/Y Zoom” setting).....5-10
5.4 Selecting the Paper Setting............................................... ................................. ...... ....5-11
Selecting the Paper Setting Automatically (“Auto Paper” Setting) ..................................5-11
Selecting the Paper Manually..........................................................................................5-11
Selecting the Manual Bypass Tray (“Bypass” Setting)....................................................5-11
Small-Sized Documents..................................................................................................5-11
Centering.........................................................................................................................5-12
Auto Paper Source Selection Feature.............................................................................5-12
To select the Paper setting..............................................................................................5-12
Konica 8020/8031 iii

5.5 Selecting the Orig > Copy Settings (Original Settings).............................................5-13
Original Settings..............................................................................................................5-13
To specify an Original setting..........................................................................................5-15
5.6 Selecting the Orig > Copy Settings (Copy Settings)..................................................5-17
Copy Settings..................................................................................................................5-18
To specify a Copy setting................................................................................................5-21
5.7 Selecting the Orig > Copy Settings
(Original Direction and Margin Position Settings).....................................................5-23
Selecting the Document Orientation (“Original Direction” Setting)..................................5-24
Specifying the Document Binding Margin Position (“Margin” Setting) ............................5-25
Specifying Thick Documents (“Thick Original” Setting)...................................................5-25
To specify conditions for the original...............................................................................5-26
5.8 Selecting a Photo/Density Setting...............................................................................5-27
Specifying the Image Type (“Photo/Density” Settings)....................................................5-28
Specifying the Density Parameters.................................................................................5-29
Specifying a Glossy Finish (“Glossy Mode” Setting).......................................................5-29
Reducing Moire Effects (“Screen Pattern” Settings).......................................................5-29
To select a Photo/Density setting....................................................................................5-30
To select a glossy finish (“Glossy Mode” setting) ...........................................................5-31
To select a Screen Pattern setting..................................................................................5-31
5.9 Checking the Settings............................... ..... ...... .........................................................5-32
To check the settings......................................................................................................5-32
To change the settings....................................................................................................5-33
6 Controlling Jobs
6.1 Definition of Jobs............................................................................................................6-2
Job definition.....................................................................................................................6-2
Multi-job feature.................................................................................................................6-2
Queuing jobs.....................................................................................................................6-2
To change the status of a queued job...............................................................................6-3
To delete a queued job......................................................................................................6-3
To cancel a job that is being printed..................................................................................6-3
6.2 Job Log Screens .................................................. ...... ..... ...... ...... ....................................6-4
Print List Screen................................................................................................................6-4
Scan List Screen...............................................................................................................6-5
Job List Screen..................................................................................................................6-6
Print Log Screen................................................................................................................6-7
Scan Log Screen...............................................................................................................6-8
6.3 Job Control Screens...................... ..... ...... ......................................................................6-9
Scanned Job Screen.........................................................................................................6-9
To print scanned data
(move it from the list on the Scanned Job screen to the Print List screen).....................6-10
Unlock Job Screen..........................................................................................................6-11
To unlock a job (to print a locked document)..................................................................6-12
Increase Priority Screen..................................................................................................6-13
To increase the priority of (print) a job.............................................................................6-14
Combine Jobs Screen.....................................................................................................6-15
iv Konica 8020/8031

To combine jobs..............................................................................................................6-17
UserBox Screen............................................................. .................................................6-18
To print a job from a user box .........................................................................................6-19
Memory Recall Screen....................................................................................................6-20
To recall a job from the memory......................................................................................6-21
7 Index
7.1 Index.................................................................................................................................7-2
Konica 8020/8031 v

Administrator Operations
For details on the following topics, refer to the Administrator Operations
volume of this User’s Manual.
1Introduction
2 Safety Information
3 Precautions
4 Part Names and Their Functions
5 Utility Mode Operations
6 Touch Panel Messages
7 Troubleshooting
8 Appendix
Advanced Operations
For details on the followi ng topics , refer to the Adva nced Oper ations volum e
of this User’s Manual.
Available Features
1 Auxiliary Functions
2 Scanning Operations
Administrator Operations
vi Konica 8020/8031

1
Before Making
Copies
Before Making Copies Chapter 1
1

1
1.1 Introduction
1.1 Introduction
Structure of this Manual
This manual is divid ed i nto thre e pa rts : Adm in ist rato r Op erations, Basic Operat ion s a nd Ad va nce d O pe rations.
The Administrator Ope rations volume of this User’s Ma nual contains precautions on the use of this c opier.
Be sure to read this volume before using the machine. The Basic Operations and Advanced Operations
volumes of the User’s Manual contain information on the many features available. After readi ng the User’s
Manual, be sure to store it in a safe place for future reference.
G Administrator Operat ions
This volume provides precautions for using the machine, descriptions on functions for use by the ad-
Before Making Copies Chapter 1
ministrator (Utility Mode and Administrator Mode functions), procedures for replacing parts and supplies, troubleshooting pro cedures and machine spec ifications. Before using the copier, be sure to read
Chapters 1 through 4 of the Administrator Operations volume.
G Basic Operations
This volume contains pre cautions for using the m achine and descriptions on the proced ures for basi c
operations. The Basic Operations volume is a quick reference for immediate use of the copier.
G Advanced Operations
This volume includes descriptions on the Auxiliary functions in addition to precautions for the use of
the copier. Read the Advanced Op eration s volum e for more inform ation on the vario us functio ns that
this copier provides for any need.
1-2 Konica 8020/8031

1.1 Introduction
1
Before Making Copies Chapter 1
Konica 8020/8031 1-3
1
1.2 Available Features
1.2 Available Features
The main function s a va ila bl e with this machine a re d es cri bed below. Operating pro ce dures are provided
in chapter 2 “Basic Copy Operations” and chapter 5 “Specifying Copy Settings”.
Color Settings
“Auto Color” setting
G With this setti ng, the ty pe of doc umen t (color o r black and white) bein g copied i s detec ted and th e ap-
propriate Color setting (“Full Color” or “Black”) is automatically selected.
“Full Color” setting
G With this setting, copies are produced in full color, regardless of the document type.
“Black” setting
Before Making Copies Chapter 1
G With this se ttin g, c op ies are produced in blac k a nd white, regardless of th e d oc um ent typ e. If this set-
ting is selected, even a color document will be copied in black and white.
Sorting
“Non-Sort” setting
Copies are fed out as they are printed.
“Sort” setting
Copies are automati cally divi ded int o the spec ified n umber o f sets with eac h set c ontain ing
a copy of each page.
1-4 Konica 8020/8031
1.2 Available Features
1
Output Settings
Stapling
Copies are stapled together before they are output.
Stapling is only available if the optional finisher (FS-135 or FS-231) is installed.
Hole-punching
Holes are punched in copies before they are output.
Hole-punching is only available if the punch kit (PK-131) is installed in the optional finisher
(FS-231).
Zoom Settings
Auto Size
G This setti ng au tomati cally sele cts the m ost a ppr opriate zoom ratio based on the siz e of th e docu ment
loaded and the specified paper size.
Full Size
G This setting makes a copy that is the same size as the document (× 1.000).
Enlarged copies
G Zoom setti ngs for mak ing en larged copie s from com mon s tandard documen t size s to sta nda rd pape r
sizes are available.
H Example 1: A Letter-size document can be copied onto the larger 11 × 17-size paper.
H Example 2: A Legal-size document can be copied onto the larger 11 × 17-size paper.
Reduced copies
G Zoom settings for making reduced copi es fro m co mm on s tand ard docu ment sizes to standard paper
sizes are available.
H Example 1: A Legal-size document can be copied onto the smaller Letter-size paper.
H Example 2: An 11 × 17-size document can be copied onto the smaller Letter-size paper.
Minimal
G This setting slightly reduces the copy (×0.930).
H Selecting the “Minimal” setting ensures that any part of the original positioned at the edge of the
page will not be cut off in the copy.
Zoom copies
G Any zoom ratio (between ×0.250 and ×4.000) can be specified.
H Touch and to specify the desired zoom ratio.
“CustomZoom” setting
G Any zoom ratio (between ×0.250 and ×4.000) can be specified.
H Use the keypad to enter the desired zoom ratio.
H In addition, up to two zoom ratios specified using the keypad can be stored for later use.
“X/Y Zoom” function
G The copy size can be changed by specifying different scaling proportions (between ×0.250 and
×4.000) for the vertical and the horizontal dimensions.
Before Making Copies Chapter 1
Konica 8020/8031 1-5

1
Paper Settings
“Auto Paper” setting
G This setting automatically selects t he mos t appro priate p aper si ze based on t he s ize of the docum ent
loaded and the specified zoom ratio.
Manual paper selection
G The tray or drawer containing the appropriate paper that you wish to use can be selected.
“Bypass” setting
G Copies can be made onto the paper loaded into the manual bypass tray.
1.2 Available Features
Before Making Copies Chapter 1
1-6 Konica 8020/8031
1.2 Available Features
Orig Ö Copy Settings
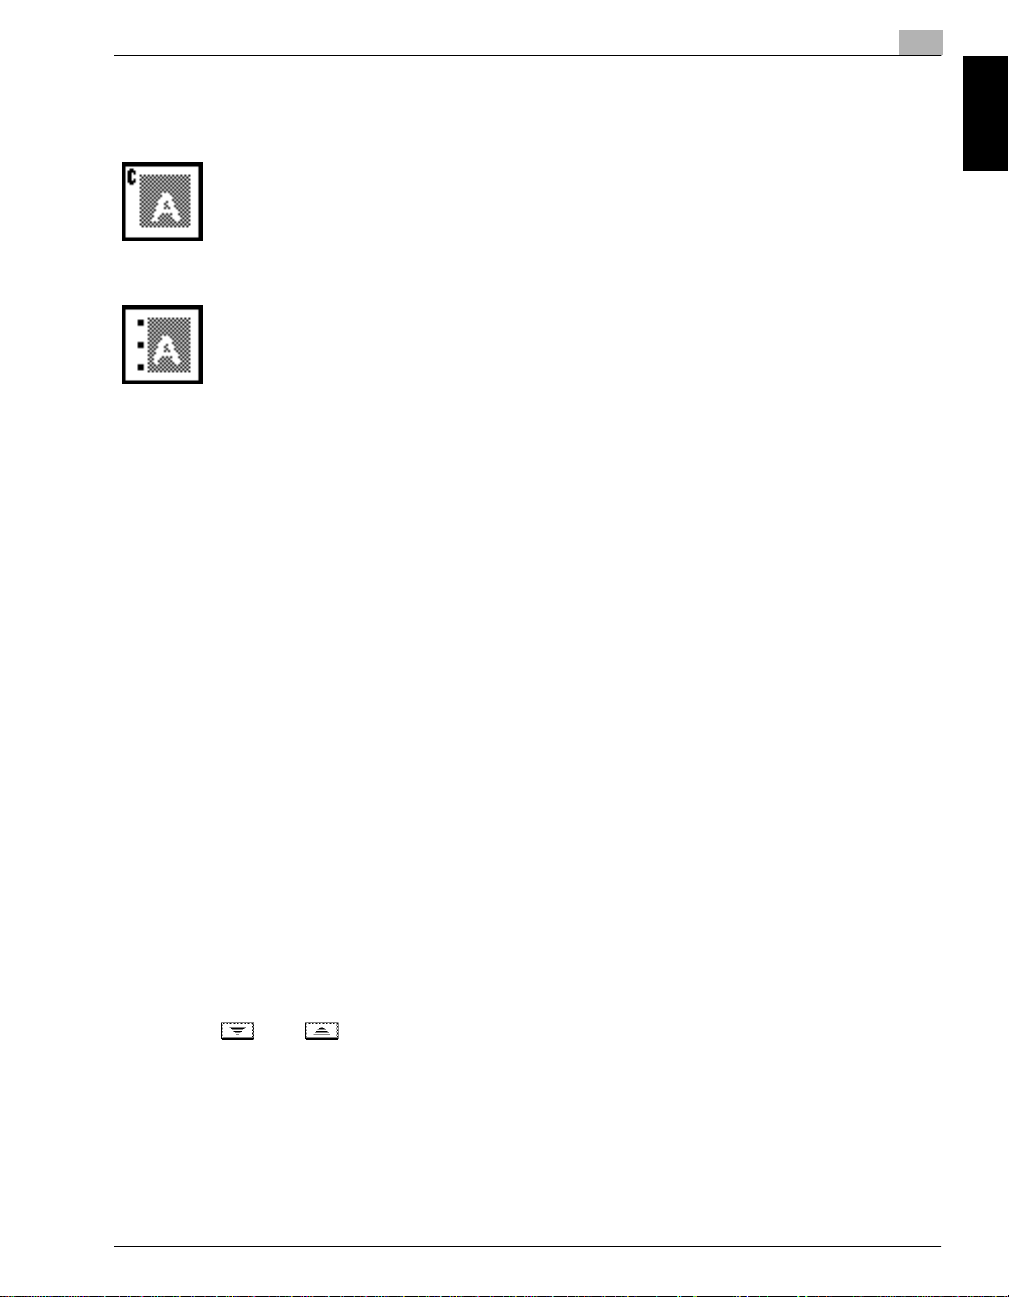
Single-sided originals
Select this setting to copy single-sided documents.
Double-sided originals
Select this setting to copy double-sided documents.
1
Single-sided copies
Select this setting to make single-sided copies.
Automatic double-sided copies
The duplex unit is used to make double-sided copies.
Manual double-sided copies
Feed a single-sided copy through the manual bypass tray or load it into the 1st drawer to make
a double-sided copy without using the duplex unit.
Single-sided 2 in 1 copies
Select this setting to reduce two document pages to fit one single-sided copy page.
Double-sided 2 in 1 copies
Select this setting to reduce four document pages to fit one double-sided copy page.
Before Making Copies Chapter 1
Booklet copies
Select this sett ing to make reduced double - si ded c opi es tha t are laid out to form a booklet.
Konica 8020/8031 1-7
1
Bound booklet copies
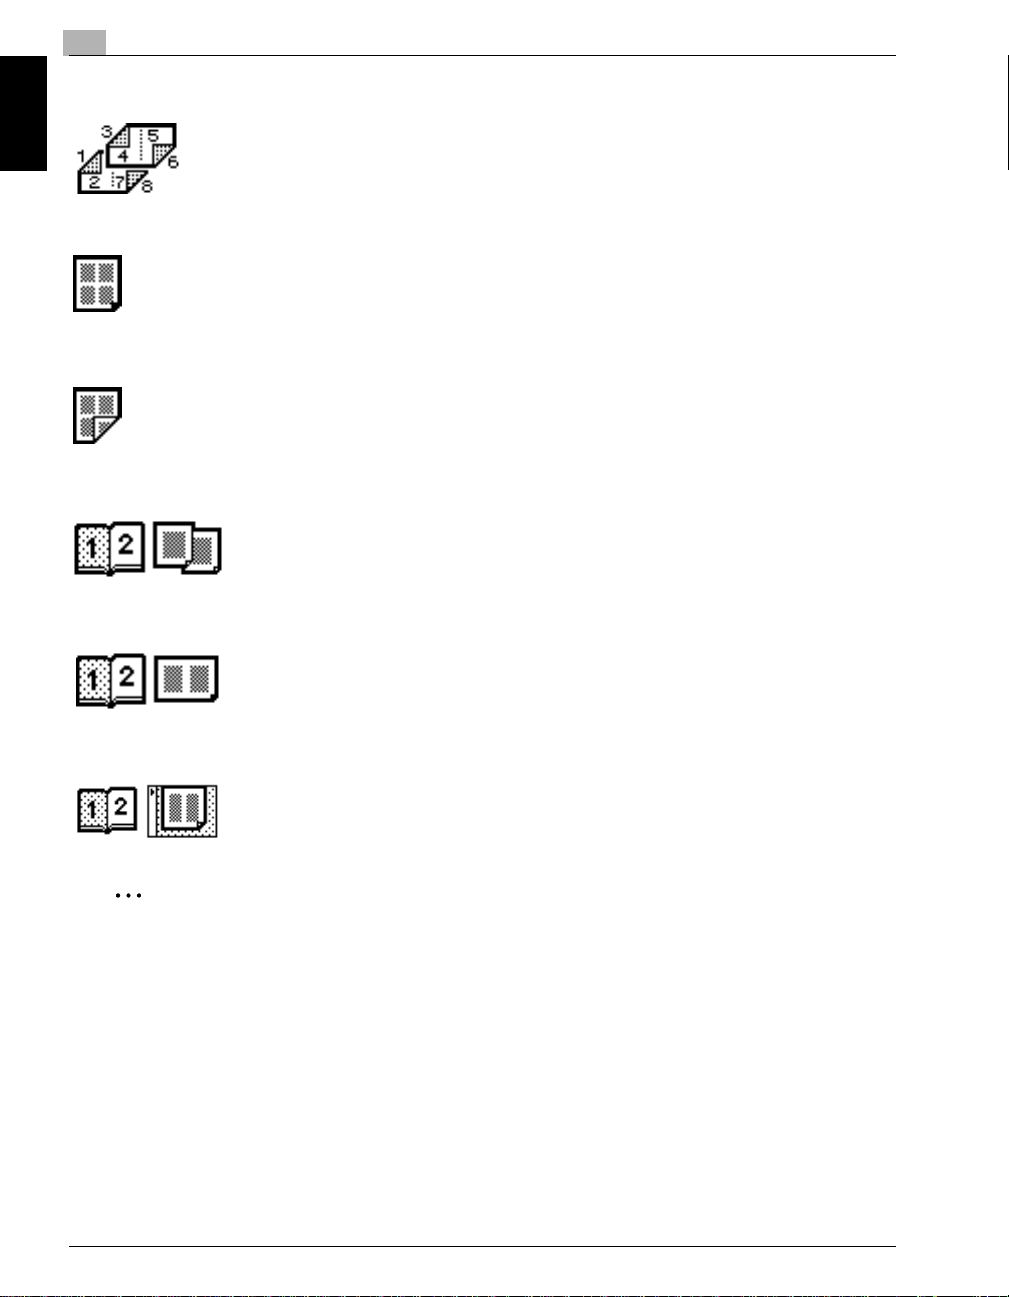
Single-sided 4 in 1 copies
Select this setting to reduce four document pages to fit one single-sided copy page.
Double-sided 4 in 1 copies
Before Making Copies Chapter 1
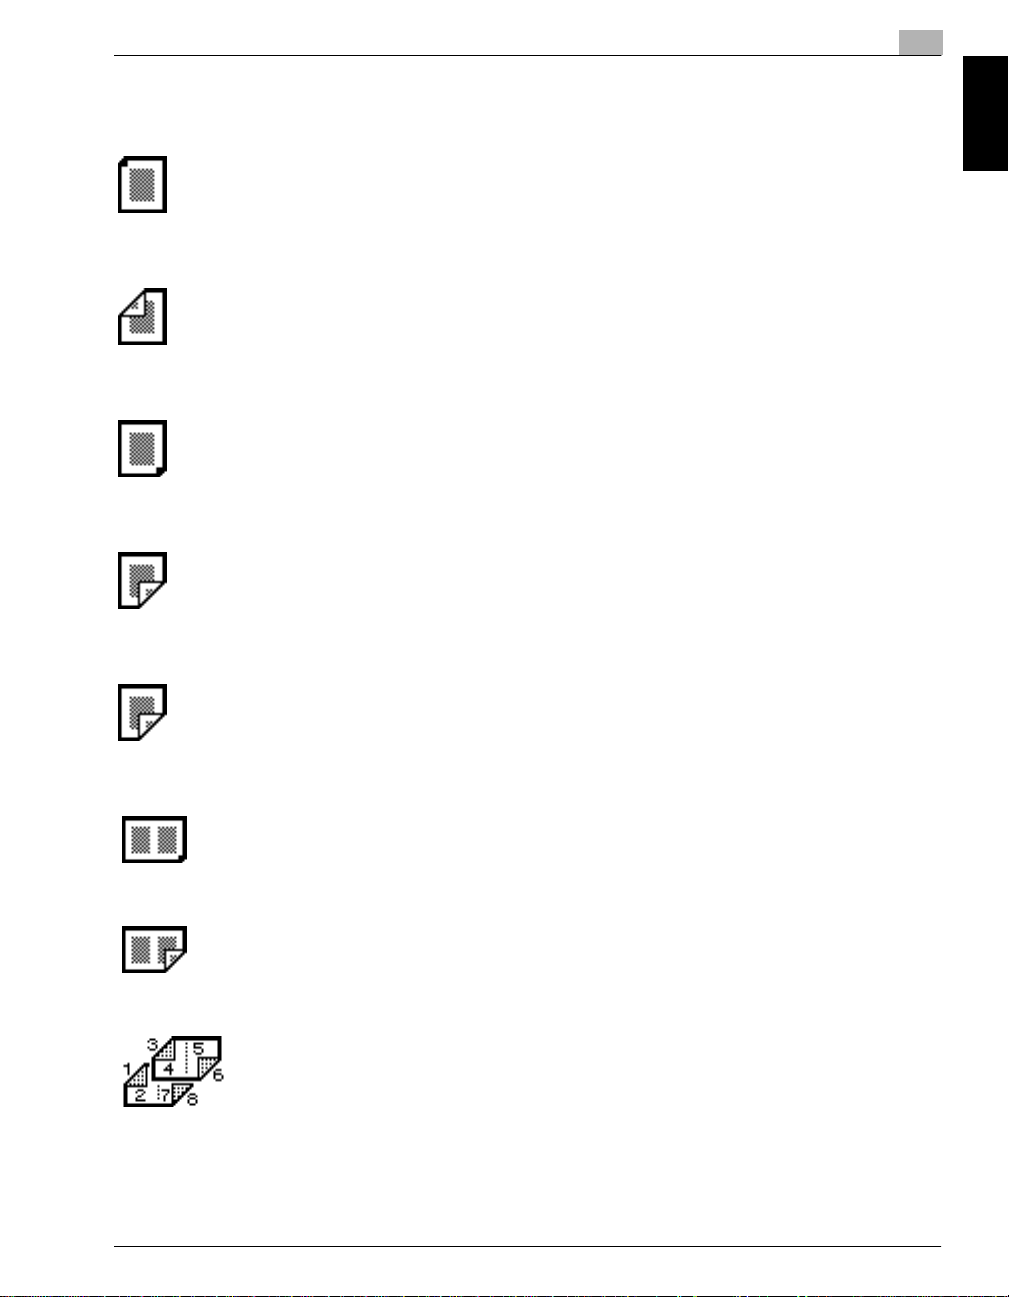
Book separation copies
Select this setting to reduce eight document pages to fit one double-sided copy page.
1.2 Available Features
Select this setting to make bound booklets from the copies.
Select this setting to make a single-sided copy of each of the two pages of an open
book.
Book spread copies
Select this setting to make a single-sided copy containing two pages side-by-side
from the two pages of an open book.
Book-margin-erasing
Select this setting to erase the area alon g th e bi nd ing an d around the text from the
copy.
Note
The double-sided original setting is only available if the optional duplexing document feeder is installed.
The double-sided copy settings are only available if the optional duplex unit is installed.
Booklet-binding is only available if both the optional finisher FS-231 and the duplex unit are installed.
1-8 Konica 8020/8031
1.2 Available Features
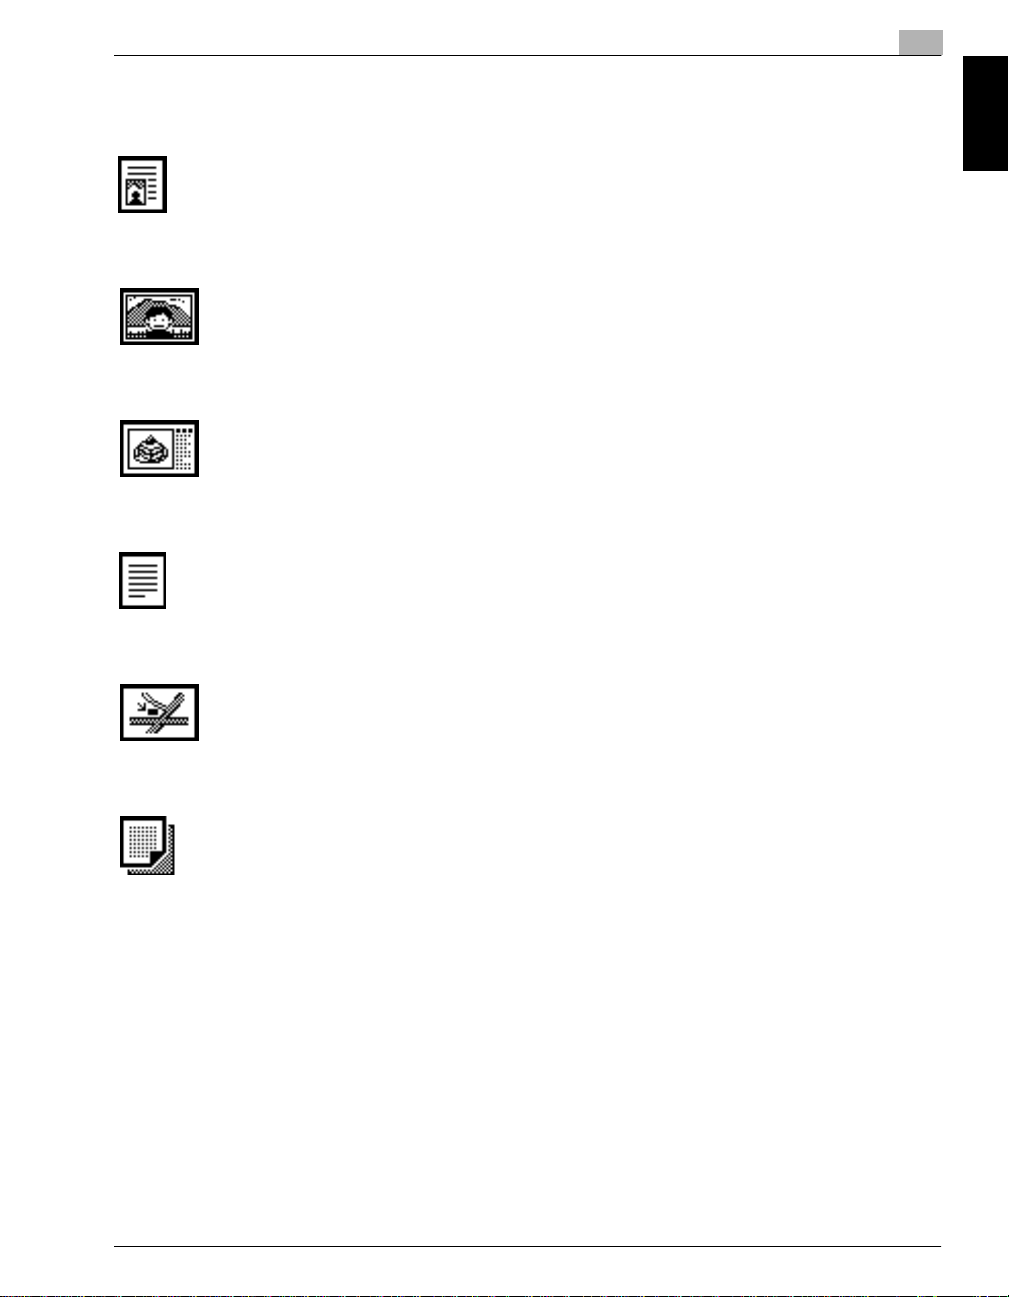
Photo Settings
“Text&Photo” setting
Select this setting when copying documents containing both text and images.
“Photo Image” setting
Select this setting when copying photographs (documents) printed on photographic paper.
1
“Printed Image” setting
Select this setting when copying printed documents, such as pamphlets or catalogs.
“Text” setting
Select this setting when copying documents containing only text.
“Map” setting
Select this setting wh en c op yi ng d oc um ents w it h a b ac kg roun d c olor or documents conta in ing pencil markings or fine colored lines.
“Copied Image” setting
Select this setting when copying images (documents) printed with this copier.
Before Making Copies Chapter 1
Konica 8020/8031 1-9

1
1.2 Available Features
Density Settings
“Background” parameter (“Density” function)
G This parameter can be used to adjust the den si ty o f the background color for d oc ume nts with a ba ck -
ground color.
“Density” parameter (“Density” function)
G This parameter can be used to adjust the density of the copy.
Glossy Mode Setting
G Select this setting when copying glossy images.
Screen Pattern Settings
Before Making Copies Chapter 1
G These settings reduce moire patterns* that occur when copying printed photographs (which contain
shading) or documents containing lines.
* Moire patterns: Pattern that occasionally appears when images containing a repeating pattern or
lines are copied
1-10 Konica 8020/8031

1.2 Available Features
1
Before Making Copies Chapter 1
Konica 8020/8031 1-11
1
1.3 Names of Control Panel Parts and Their Functions
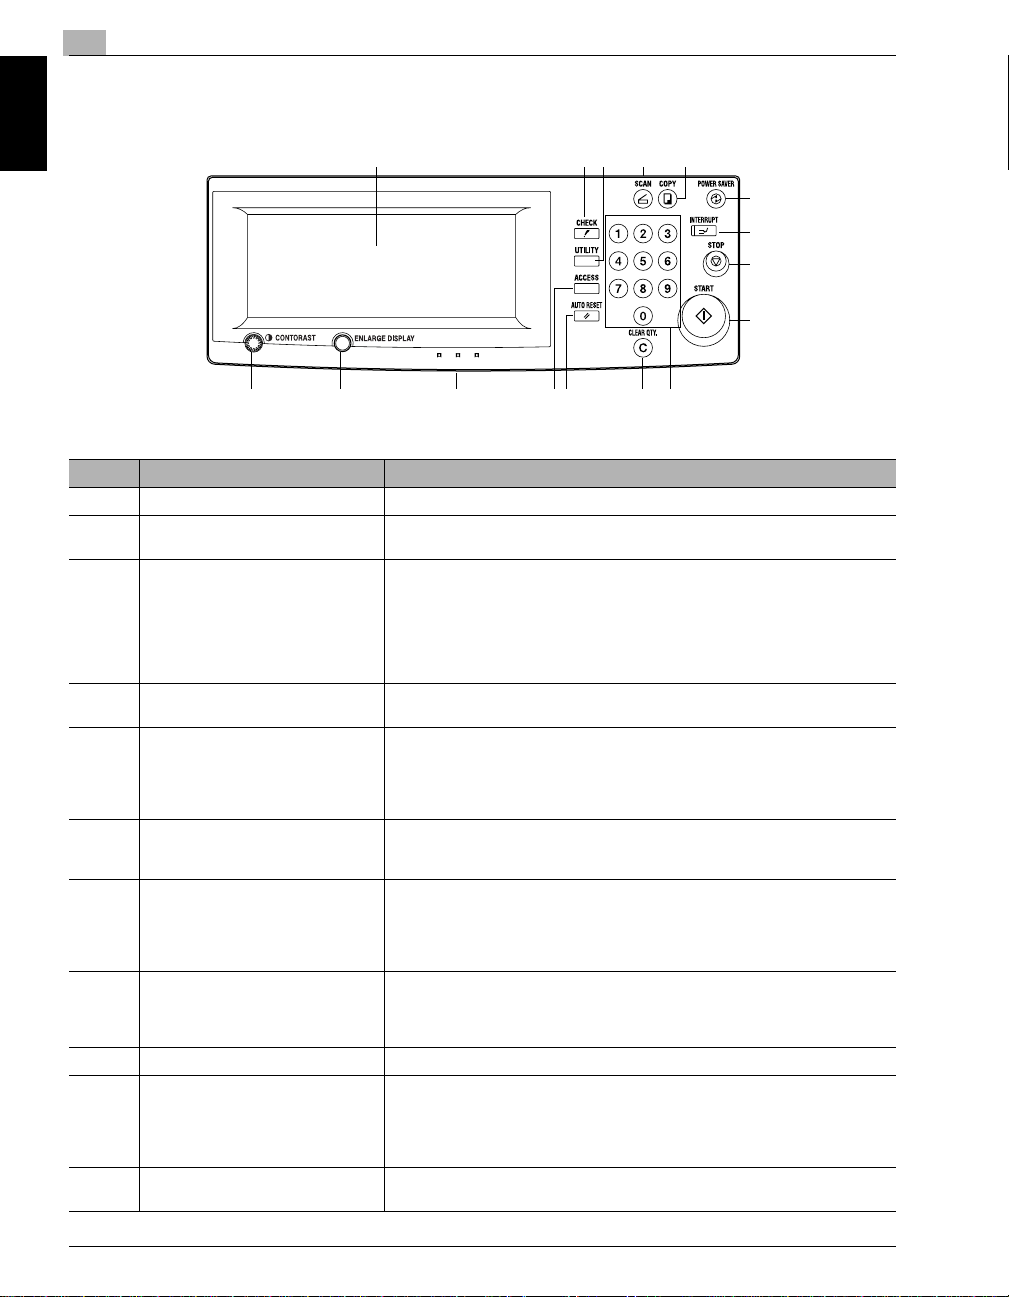
1.3 Names of Control Panel Parts and Their Functions
1 23 7
A
Before Making Copies Chapter 1
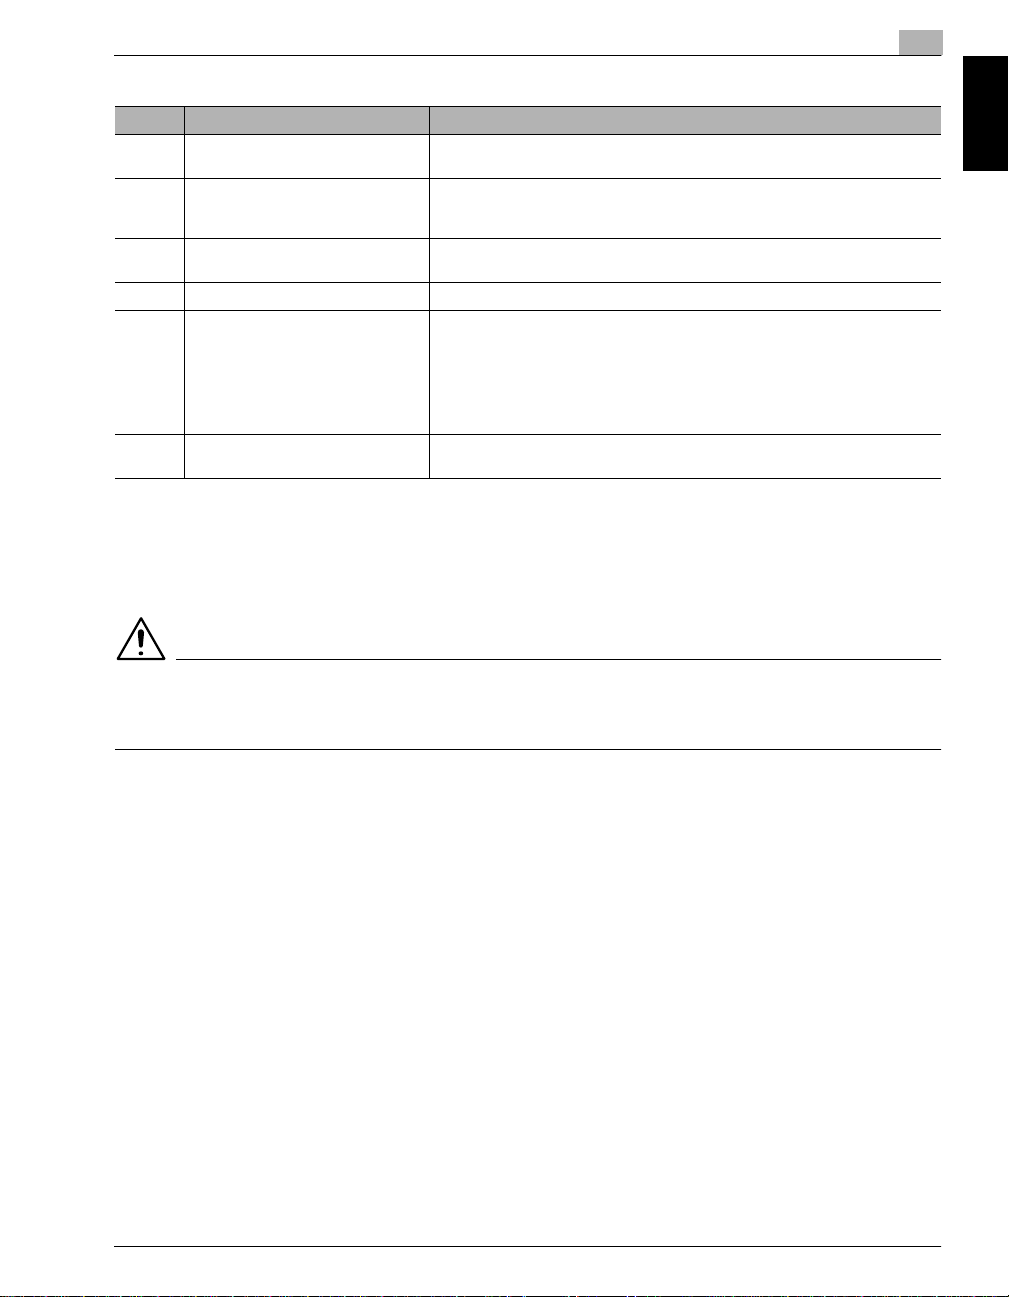
No. Part Name Description
1 Touch panel • Displays various screens and messages See p. 1-19
2 [CHECK] key • Press to display the specified settings in Copy mode.
3 [UTILITY] key • Press to display the Utility screen.
4 [ACCESS] key • Press to enter an access code.
5 [AUTO RESET] key • Press to reset all copy modes and functions to their default settings. (All
6 Keypad • Use to type in the number of copies to be made.
7 [SCAN] key • Press to use this machine as a color scanner.
8 [COPY] key • Press to use this machine as a copier.
9 [POWER SAVER] key • Press to enter and recover from Low Power mode and Shut off mode.
10 [INTERRUPT] key • Press to enter Interrupt mode.
11 [STOP] key • Press to stop a copy operation.
14 45
• Press to display the specified transmission settings in Scan mode.
Input
Meter Count
User’s Choice 1 & 2
Copy Program Recall
Unit life indicator
Admin. Mode
• If no access codes have been set, nothing happens when this key is pressed.
selected settings* are canceled.)
• The current job is c anceled.
*Stored zoom ratios, stored job settings, and interrupted or delayed jobs are not
canceled.
• Use to type in the zoom ratio.
• Use to type in the various settings.
• When the [SCAN] key is pressed, the key indicator lights up in green to indicate
that the machine is in Scan mode.
• Scan mode is only available if the optional printer controller is installed. If the
printer controller is not installed, scanning cannot be performed.
• When the [COPY] key is pressed, the key indicator lights up in green to indicate
that the machine is in Copy mode.
*Copy mode is selected as a default.
• When the [INTERRUPT] key is pressed, the key indicator lights up in green to
indicate that the machine is in Interrupt mode. In addition, the message “Now
in the Interrupt mode” appears on the touch panel.
• To cancel Interrupt mode, press the [INTERRUPT] key again.
• Scanning of a document is stopped.
8
6131516
9
10
11
12
1-12 Konica 8020/8031
1.3 Names of Control Panel Parts and Their Functions
No. Part Name Description
12 [START] key • Press to start a job.
13 [C] (CLEAR QTY.) key • Press to reset the number of copies to “1”.
14 Control panel release lever • Use when adjusting the angle of the control panel.
15 [ENLARGE DISPLAY] key • Will be used to enlarge the display. (Currently not available)
16 Touch panel contrast-adjusting dial • Use to adjust the contrast of the touch panel.
* Job: Any set of consecutive operations, such as those for making copies, scans or computer printouts
• If this key is pressed during a continuous copy operation, scanning for the job
begins. (Queued copy) See p. 6-2.
• Press to c ontinue an i nterrupted copy job.
• If this key is pressed while the copier is warming up, scanning for the job
begins. (Queued copy) See p. 1-16.
• The key indicator lights up in green to indicate that jobs can be queued. The
key indicator lights up in orange to indicate that no jobs can be queued.
• Press to erase a setting, such as the zoom ratio or size, selected using the
keypad.
• The scanned image is erased.
• Pull the release lever, and then push down on the control panel to adjust its
angle.
1
Before Making Copies Chapter 1
Konica 8020/8031 1-13
1
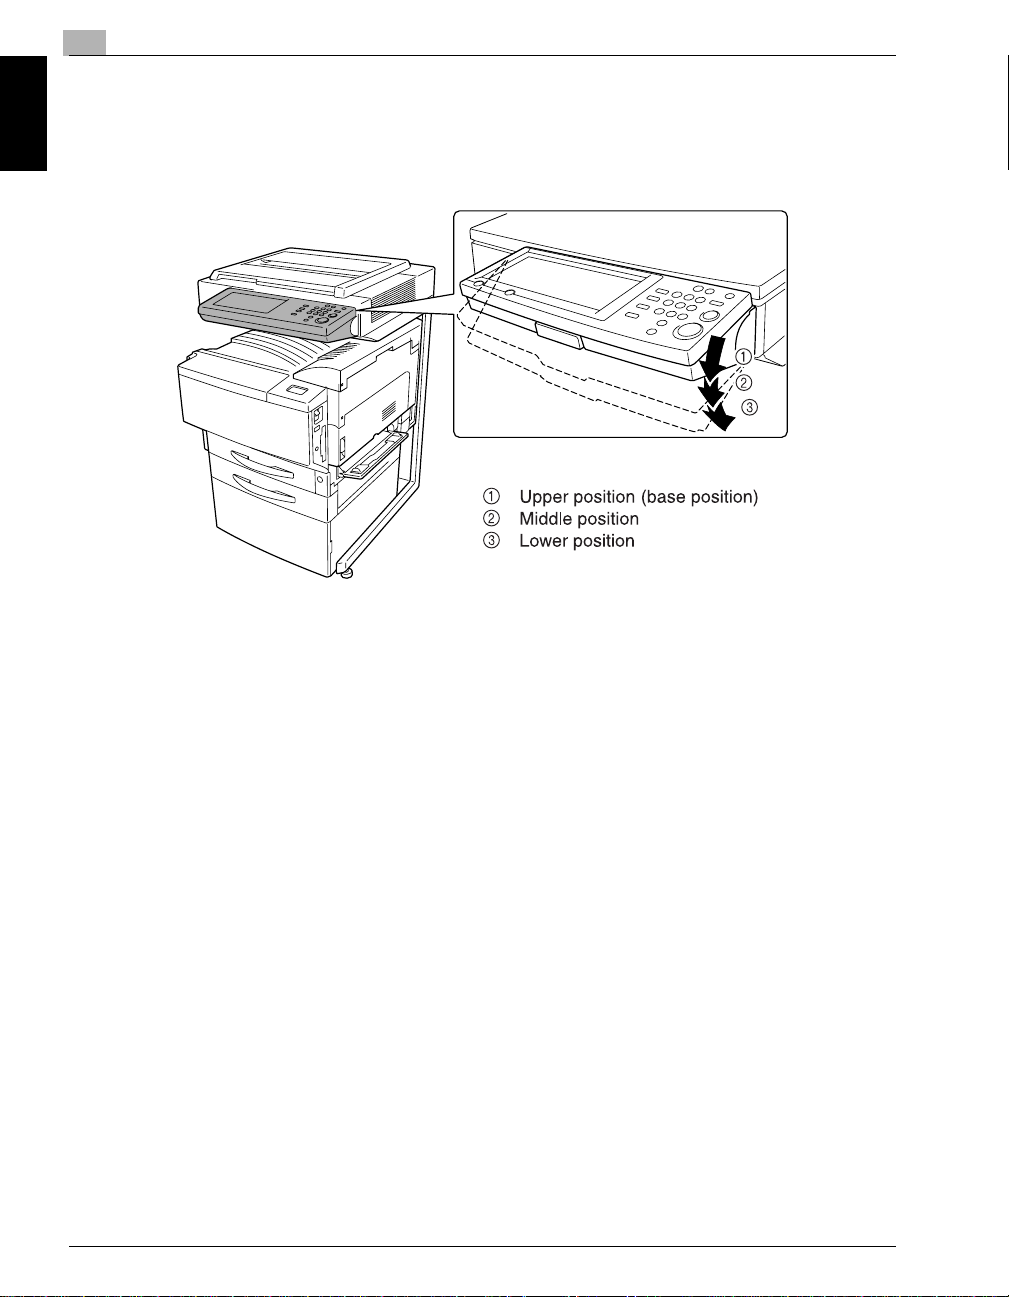
1.4 Adjusting the Angle of the Control Panel
The control panel can be adjusted to any of three angles.
Adjust the control panel to the angle that allows for easy operation.
Before Making Copies Chapter 1
1.4 Adjusting the Angle of the Control Panel
1-14 Konica 8020/8031
1.4 Adjusting the Angle of the Control Panel
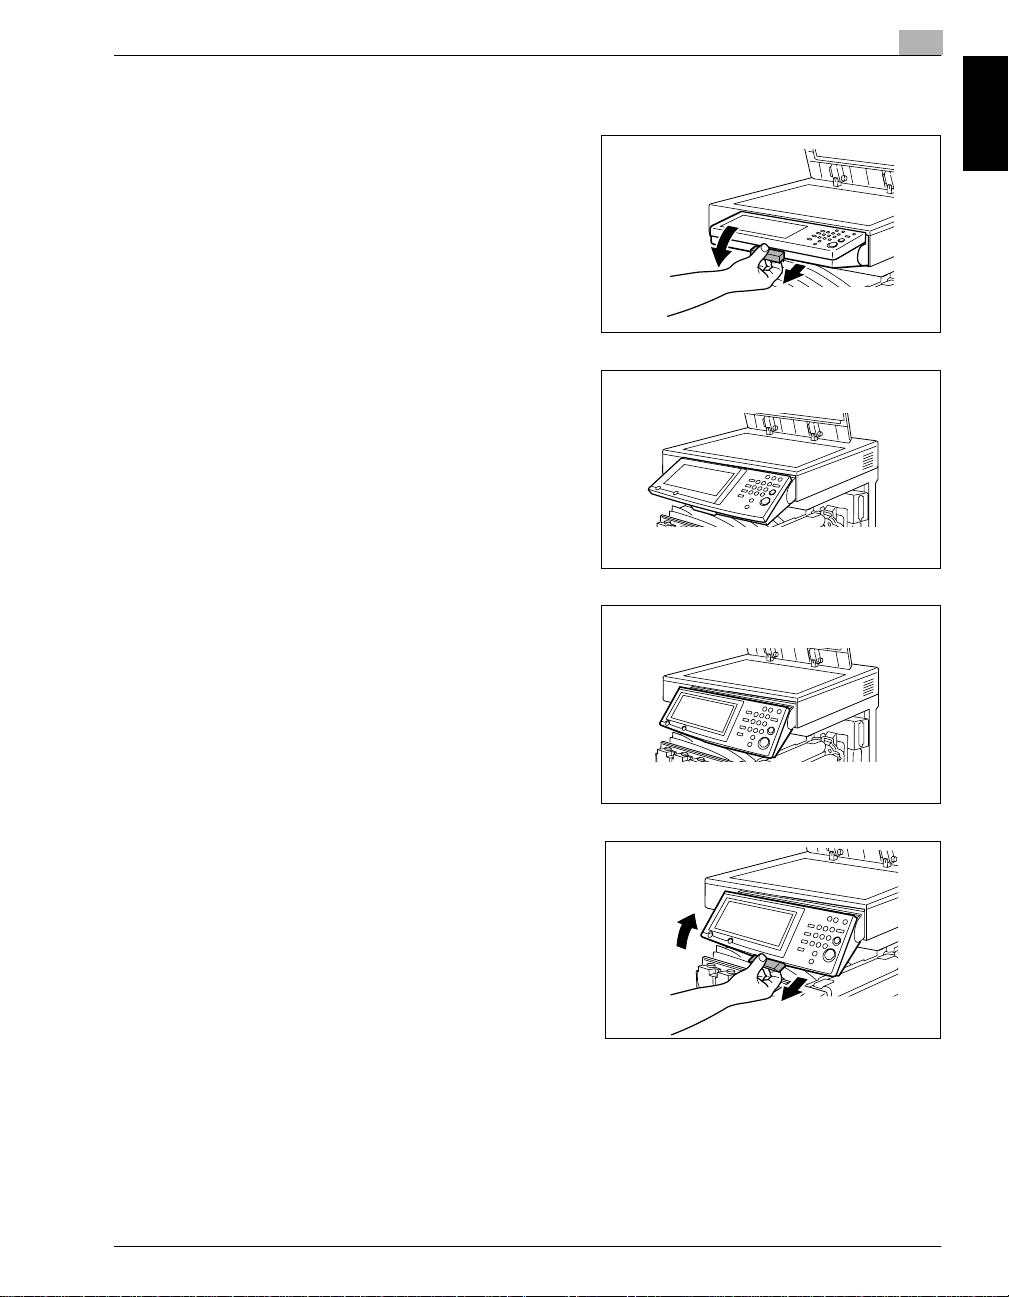
To adjust the angle of the control panel
1
Pull the control panel releas e lever toward you, and t hen
push down on the control panel.
2
The angle of the control panel stops at the middle position.
3
To adjust the control pan el to an even steeper angle, pu ll
the control panel release lever toward you, and then
push down on the control panel.
1
Before Making Copies Chapter 1
4
The angle of the control panel stops at the lower position.
5
To return the control panel to the upper position, pull the
control panel release lever toward you, and then pull up
on the control panel.
Konica 8020/8031 1-15
1
1.5 Turning the Copier On and Off
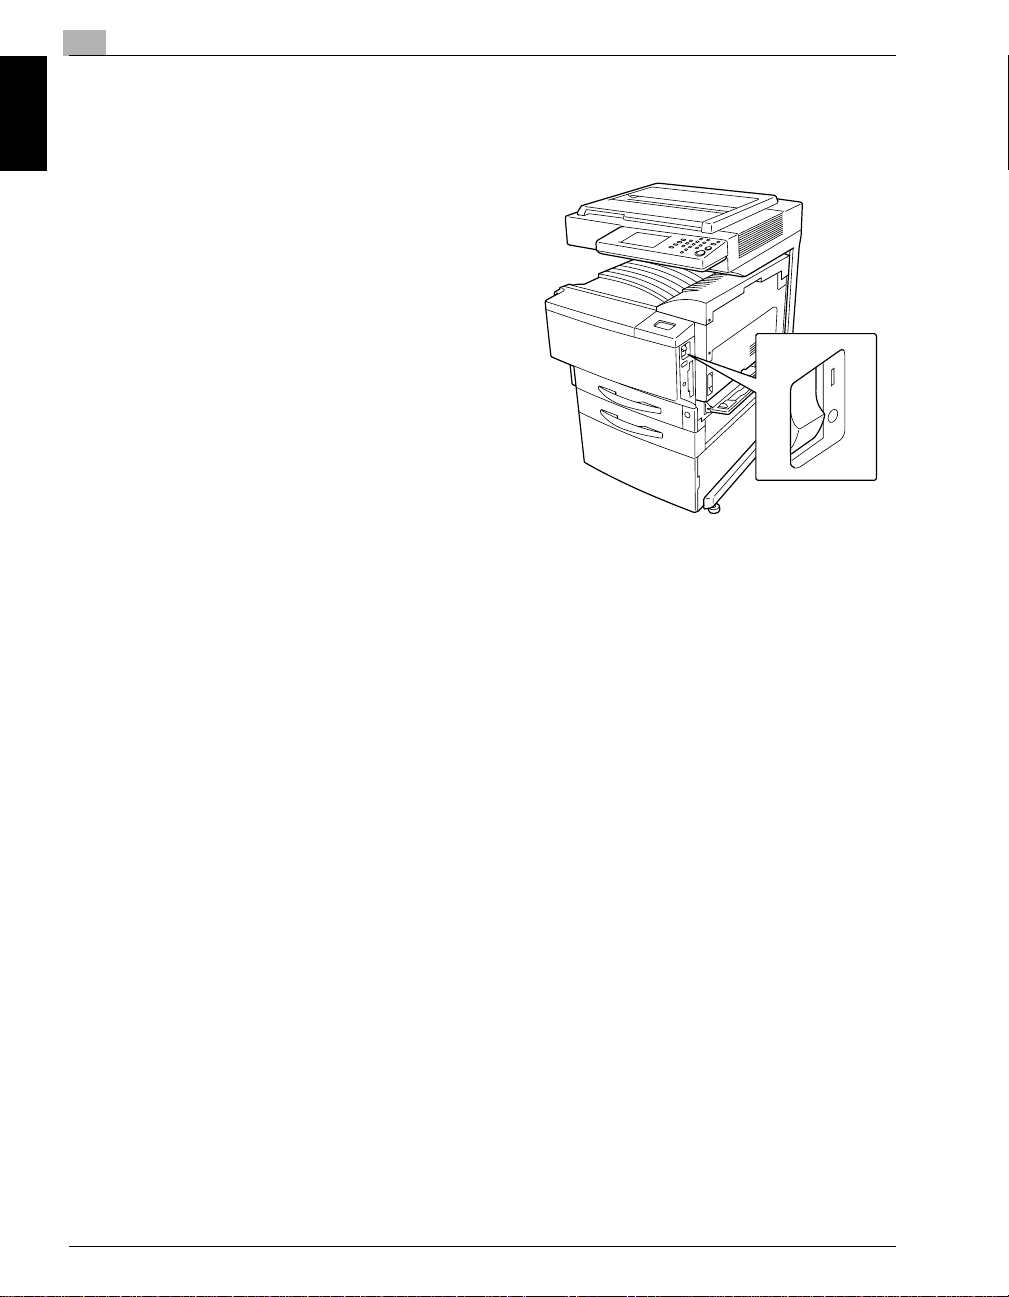
To turn the copier on
§ Set the power switch to “I”.
Before Making Copies Chapter 1
When the copier is turn ed on
1
The indicator on the [START] key lights up in orange.
A screen indicating that the machine is starting up appears.
1.5 Turning the Copier On and Off
2
After a few seconds, the message “Now warming-up. Ready to scan.” appears on the touch panel.
When the indicator on the [START] key lights up in green, a job can be queued.
Queuing a job during warm-up
§ An image can be scanned (a job can be queued) while the machine warms up after it is turned on. If
a job is queued, printing begins afte r the copier has fin ished wa rming up (aft er about 5 minutes at normal room temperature (68°F)).
Auto Reset
G The machine automatically resets all modes and functions to their default settings if one minute has
passed without the machine performing any operations.
G If the optional key counter is removed, the machine assumes that the user has changed and
automatically resets all modes and functions to their default settings.
G When the touch panel is reset, all settings that have not been stored, such as the number of copies,
return to their default settings (p. 1-19).
G The conditions for all modes and func tions automati cally returning to their default set tings can be sp ec-
ified using the “Auto Reset” function on the User’s Choice: 1 screen. For more details, refer to “Specifying Default Settings (“User’s Choice” Functions)” of “Utility Mode Operations” in the Administrator
Operations volume.
1-16 Konica 8020/8031

1.5 Turning the Copier On and Off
Low Power Mode
If the copier is not used for 15 minutes, it automatically enters Low Power mode.
When the copier enters Low Power mode, the indicator on the [START] key remains lit in green and the
touch panel goes off. The copier conserves energy and waits to receive a job.
If the copier is not used for 30 minutes, it automatically enters Shut off mode.
The length of time after th e last opera tion u ntil th e cop ier ent ers Low Pow er mode can b e spe cifie d usi ng
the “Low Power” function on the User’s Choice: 1 screen. For more details, refer to “Specifying Default
Settings (“User’s Choice” Fu nctions)” o f “Utility M ode Opera tions”in th e Adminis trator Oper ations volum e.
To recover from Low Power mode
1
Press the [START] key. (The Low Power mode can also be canceled by pressing any key on the
operation panel or by touching the touch panel.)
2
The touch panel comes on again, and then after th e copier has finished warming up, it is ready to be gin
printing (after about 30 seconds at normal room temperature (68°F)).
Shut off Mode
If the copier is not used for 30 minutes, the copier automatically enters Shut off mode.
The length of time after the last operat ion until the copier ente rs Sh ut off mode c an be spec ified usin g the
“Shut off” function o n th e U ser ’s Cho ice : 1 sc reen . Fo r more details, refer to “Spec if yi ng D e faul t Set tin gs
(“User’s Choice” Functions)” of “Utillity Mode Operations” in the Administrator Operations volume.
1
Before Making Copies Chapter 1
To recover from Shut off mode
§ Press the [START] key.
(The Low Power mod e can also be cancele d by pressing any key on the operatio n panel or by touchi ng
the touch panel.)
Then, continue with the operations described in “To turn the copier on” on page 1-16.
Konica 8020/8031 1-17
1
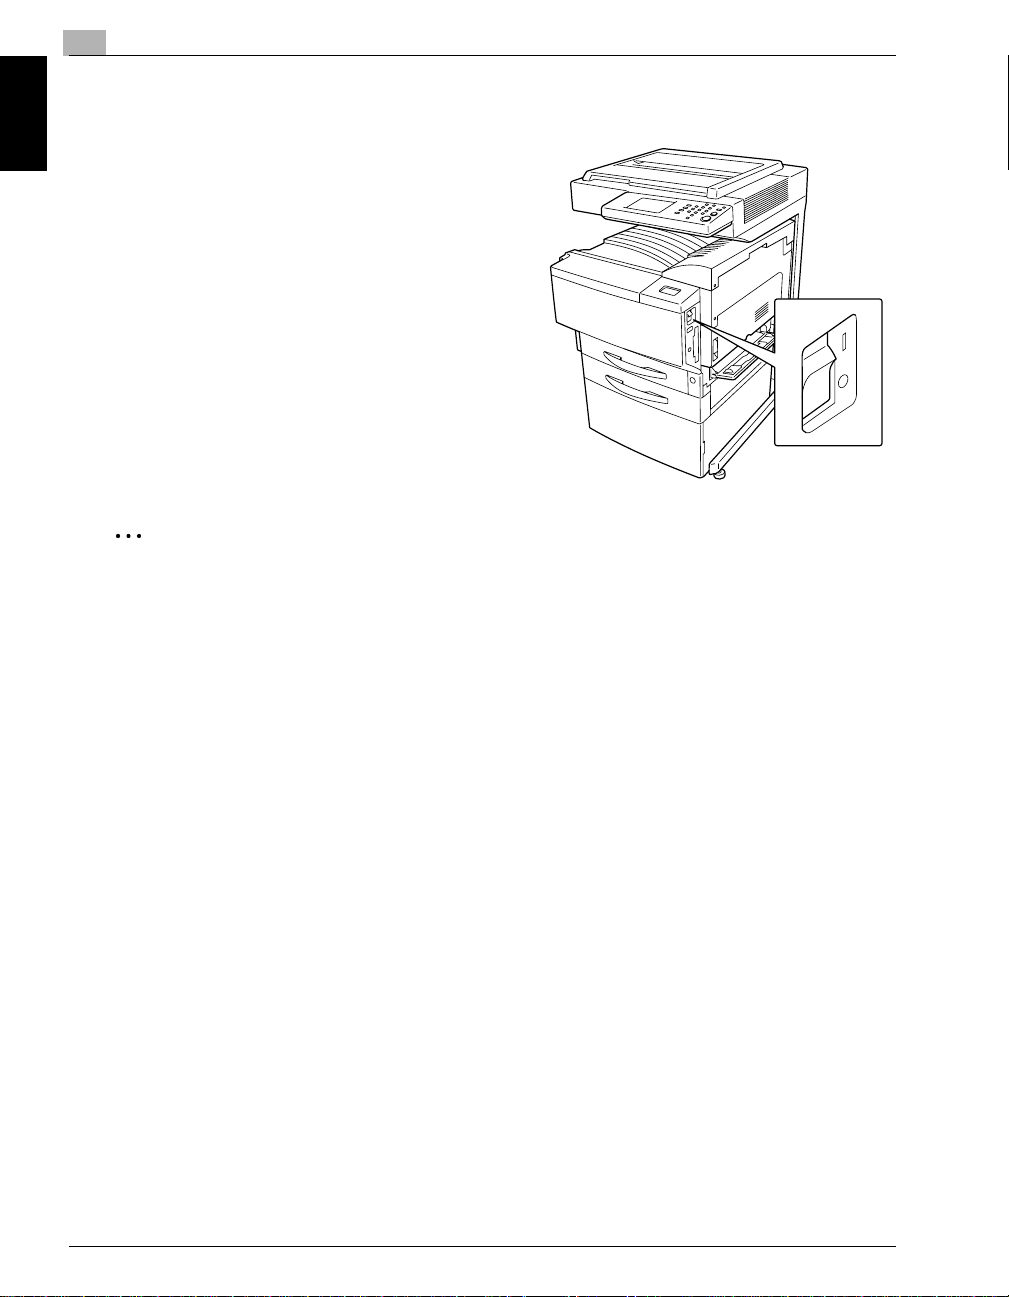
To turn the copier off
1
Touch [Job Log] to check that no jobs are queued.
2
If any copies or printouts remain in the output tray,
remove them.
3
Set the power switch to “O”.
Before Making Copies Chapter 1
Note
Do not turn off the copier while it is making copies or printing, otherwise a paper misfeed may occur.
Do not turn off the copi er wh ile it is scan nin g or se nding or rece iving data, o therw ise al l scanne d d ata
or transmission data will be deleted.
Do not turn off the copier wh ile a queue d job or stored data is waiting t o be printed , otherwise th e jobs
will be deleted.
1.5 Turning the Copier On and Off
When the copier is turn ed off
G
The following are cleared.
H
Settings that are not programmed, such as the number of copies
H
Jobs queued to be printed
H
Data scanned using the “Scan to Memory” function
H
Jobs saved with “Memory Recall” function
G
Stored zoom ratios, programm ed Copy mode settings, U tility mode settin gs and User Box settings are
not erased.
1-18 Konica 8020/8031
1.6 Using the Touch Panel
1
1.6 Using the Touch Panel
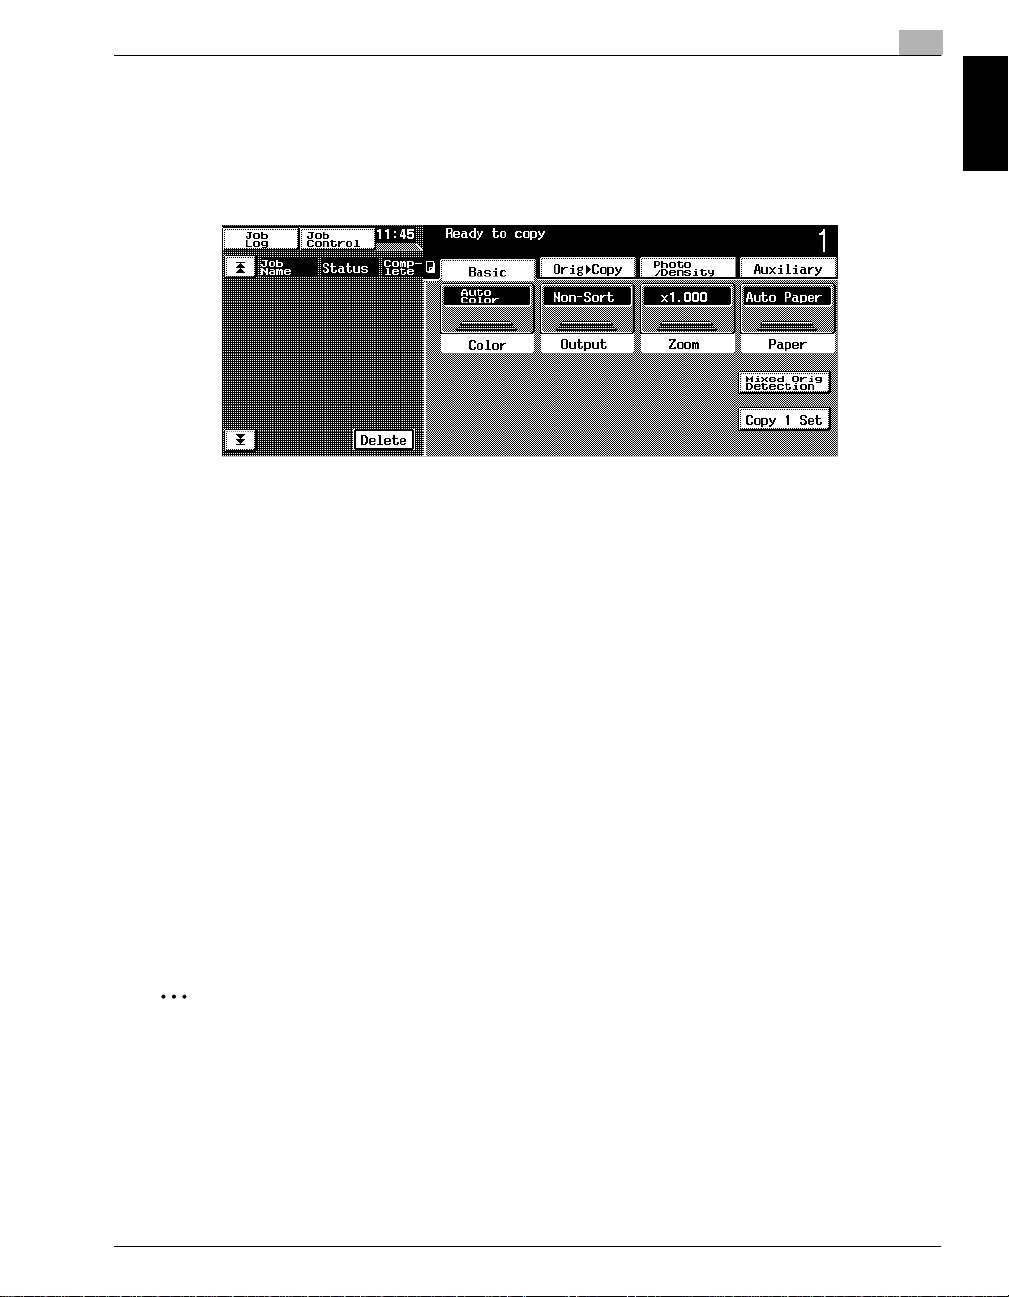
Description of the Touch Panel
When the copier is turned on (when th e power switch is set to “I”), the screen shown below appears in th e
touch panel.
This screen is the Basic screen.
It shows, with mes sages a nd graphi cs, the currently select ed settin gs, the settings that are availab le, and
the copier status.
Default Settings
The settings selecte d wh en the c opi er is turn ed on (when the powe r sw itc h i s se t to “I”) are called the default settings.
The default settings serve as a reference for all settings that are to be made.
Before Making Copies Chapter 1
G Number of copies: 1
G Color: Auto Color
G Output: Non-Sort
G Zoom: 1.000 (Full Size)
G Paper: Auto Paper
G Mixed Orig Detection: Off
G Copy 1 Set: Off
G Original: Single-sided
G Copy: Single-sided
G Original Direction: None specified
G Margin: None
G Thi c k Original: Off
G Photo/Density: Text&Photo
G Background density: Standard
G Density: Standard
G Glossy Mode: Off
G Auxiliary functions: All off
G Color Image Adjust: Standard
Tip
The language of the displays in the touch panel can be changed using the “Language Selected”
function on the Admin. Mode: Admin. set screen. For more details, refer to “Administrator Mode
Operations” of “Utility Mode Operations” in the Administrator Operations volume.
The default sett ing s that the c opi er resets all functio ns to c an be sp eci fie d using the Utility m od e. For
more details, refer to “Utility Mode Operations” in the Administrator Operations volume.
Konica 8020/8031 1-19
1
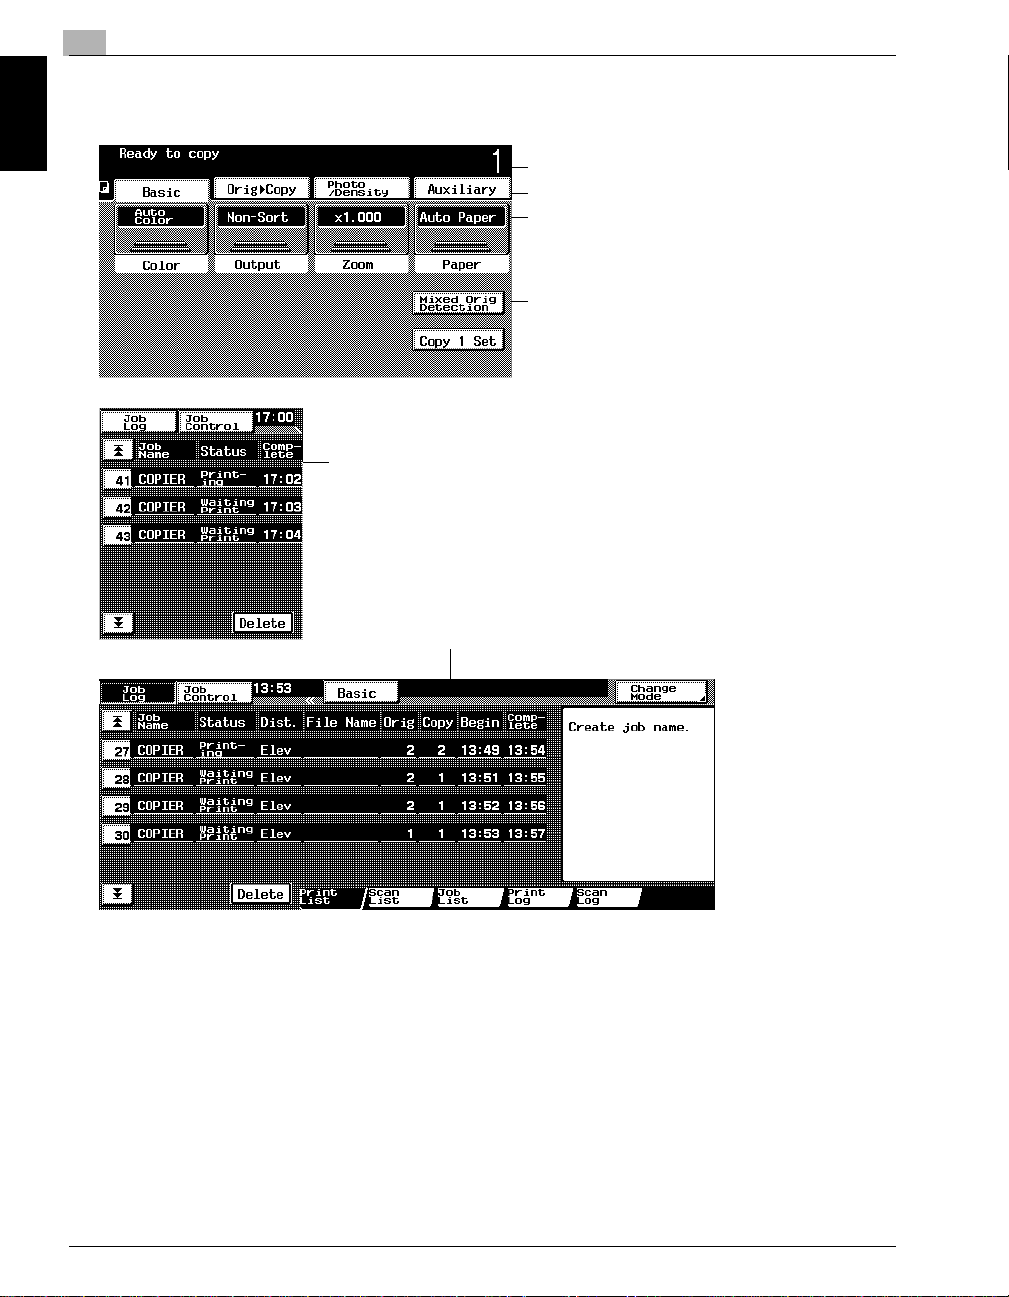
Structure of the Display
Settings screen
Before Making Copies Chapter 1
1.6 Using the Touch Panel
1 Message display
2 Screen tabs
3 Available functions/settings
4 Selected settings
5 Job display
6 Job Log screen
1-20 Konica 8020/8031
1.6 Using the Touch Panel
No. Item Name Description
1 Message display The current copier status, operating instructions, warnings/precautions, and other
2 Screen tabs Each screen contains functions that can be specified.
3 Available functions/settings Selecting a screen displays various functions that can be specified.
4 Selected settings The current settings are shown by messages and graphics.
5 Job display • Jobs* currently being performed or waiting to be performed are displayed (if
6 Job Log screen In addition to displaying the current jobs, various functions for checking and
* Job: Any set of consecutive operations, such as those for making copies, scans, or computer printouts, etc.
data including the number of copies selected are displayed here.
Touch a tab to display the corresponding screen.
*The Basic screen is displayed as a default.
Select a different function to display the corresponding settings.
printer controller IP-711 is installed).
• The current sending/receiving status is shown by an icon (if printer controller
Fiery X3e 31C-M is installed).
• Touch [Job Log] or [Job Control] to display either the Job Log or the Job Control
screen. To return to the Basic screen, touch [Basic] in either the Job Log or the
Job Control screen.
controlling jobs are available.
1
Operating the Touch Panel
To activate a function or to sel ect a setting, lightl y touch the desired func tion or setting shown on the touch
panel.
Before Making Copies Chapter 1
CAUTION
Be careful not to damage the touch panel.
§ Never push down on the touch panel with force, and never press it using a hard or pointed object.
Konica 8020/8031 1-21

Before Making Copies Chapter 1
1
1.6 Using the Touch Panel
1-22 Konica 8020/8031

2
Basic Copy
Operations
Basic Copy Operations Chapter 2
2
 Loading...