

Page 1
7216 / 7218 / 7220
User’s
Guide
GDI Printer Controller
Page 2

Contents
Contents
1 Getting Ready
1.1 System Requirements ..................................................................1-1
Minimum System Requirements.................................................1-1
Recommended System Requirements.......................................1-1
2 Connecting to a Computer
2.1 Types of Connections...................................................................2-1
Parallel Port Connection.............................................................2-1
USB Port Connection .................................................................2-1
2.2 Parallel Port Connection ..............................................................2-2
2.3 USB Port Connection....................................................................2-3
3 Installing the Printer Driver
3.1 Installing the Printer Driver Using Plug and Play ......................3-1
Installing the Printer Driver Using Plug and
Play Under Windows XP ............................................................3-1
Installing the Printer Driver Using Plug and
Play Under Windows 2000 .........................................................3-3
Installing the Printer Driver Using Plug and
Play Under Windows Me/98 .......................................................3-4
3.2 Installing the Printer Driver Using the Add Printer Wizard .......3-5
Installing the Printer Driver Using the Add Printer Wizard
Under Windows XP ....................................................................3-5
Installing the Printer Driver Using the Add Printer Wizard
Under Windows 2000/NT 4.0/Me/98/95 .....................................3-6
4 Configuring Printer Driver Settings
4.1 Displaying Printer Driver Properties for Configuring Global
Settings..........................................................................................4-1
Displaying Settings Under Windows XP.....................................4-1
Displaying Settings Under Windows 2000/NT 4.0/Me/98/95......4-2
4.2 Common Operations.....................................................................4-3
OK ..............................................................................................4-3
Cancel ........................................................................................4-3
Apply...........................................................................................4-3
Help ............................................................................................4-3
7216/7218/7220 i
Page 3

Contents
Easy Set.....................................................................................4-3
Page Layout/Printer Figure........................................................ 4-4
4.3 “Setup” Tab................................................................................... 4-5
4.3.1 N-up ........................................................................................... 4-5
N-up list...................................................................................... 4-6
Border Line ................................................................................ 4-6
N-up Style .................................................................................. 4-6
4.3.2 Watermark ................................................................................. 4-7
Watermark list ............................................................................ 4-7
First Page Only .......................................................................... 4-7
Edit Watermark .......................................................................... 4-7
New............................................................................................ 4-7
Delete......................................................................................... 4-8
Shading...................................................................................... 4-8
Style ........................................................................................... 4-8
Font............................................................................................ 4-8
Angle.......................................................................................... 4-8
Position ...................................................................................... 4-8
4.3.3 Paper Source ............................................................................. 4-9
Detail of Paper Source............................................................... 4-9
Front Cover Page....................................................................... 4-9
With Image................................................................................. 4-9
Cover Paper Source .................................................................. 4-9
Cover Paper Media Type........................................................... 4-9
4.3.4 Media Type .............................................................................. 4-10
4.3.5 Duplex...................................................................................... 4-10
4.4 “Paper” Tab................................................................................. 4-11
4.4.1 Original Document Size ........................................................... 4-11
4.4.2 Output Paper Size.................................................................... 4-11
Fit to Paper .............................................................................. 4-11
Output Paper List..................................................................... 4-12
Scaling ..................................................................................... 4-12
4.4.3 Copies...................................................................................... 4-12
4.4.4 Collate...................................................................................... 4-12
4.4.5 Orientation ............................................................................... 4-12
4.5 “Quality” Tab .............................................................................. 4-13
4.5.1 Resolution ................................................................................ 4-13
4.5.2 Adjustment ............................................................................... 4-13
Contrast ................................................................................... 4-13
Brightness ................................................................................ 4-13
ii 7216/7218/7220
Page 4

Contents
4.6 “Device Options” Tab.................................................................4-14
4.6.1 Device Options .........................................................................4-14
4.6.2 About ........................................................................................4-14
5 Copier Control Panel Operations (PC Print Mode)
5.1 Printer Operations.........................................................................5-1
General Guide ............................................................................5-2
[PRINT] Indicator........................................................................5-3
Entering and Exiting the PC Print Mode.....................................5-3
Canceling a Print Job .................................................................5-4
Using the Bypass Tray ...............................................................5-5
Energy Save...............................................................................5-6
6 Troubleshooting
6.1 Correcting Errors..........................................................................6-1
6.1.1 Checking Error Messages ..........................................................6-1
6.1.2 Main Error Messages .................................................................6-2
6.1.3 Errors and Print Data..................................................................6-3
“MACHINE TROUBLE” Error......................................................6-3
Temporary Errors .......................................................................6-3
7 Specifications
7216/7218/7220 iii
Page 5

Contents
iv 7216/7218/7220
Page 6

Getting Ready
1 Getting Ready
1.1 System Requirements
Minimum System Requirements
The following operating environment is required in order to use the printer
driver.
G Intel Pentium 200 MHz
G Windows XP (SP1 or later)/Windows 2000 (SP3 or later)/Windows NT
Workstation Version 4.0 (SP6a or later)/Windows Me/Windows 98/
Windows 98 Second Edition/Windows 95 (OSR 2.5 with Internet
Explorer 4.01 or later)
G 128 MB RAM (Windows XP), 64 MB RAM (Windows 2000/NT 4.0/Me/
98/95)
G IEEE 1284 parallel port (ECP/Nibble-compatible) or USB Revision 1.1
port
G CD-ROM drive
Recommended System Requirements
G Pentium 4/1.6 GHz
G 256 MB RAM
1
7216/7218/7220 1-1
Page 7

1
Getting Ready
1-2 7216/7218/7220
Page 8

Connecting to a Computer
2 Connecting to a Computer
2.1 Types of Connections
You can use either of the following two methods to connect the copier to
a computer.
Parallel Port Connection
Use this type of connection when you want to connect the copier directly
to a computer’s parallel port.
Refer to “Parallel Port Connection” on page 2-2.
USB Port Connection
Use this type of connection when you want to connect the copier directly
to a computer’s USB port. Refer to “USB Port Connection” on page 2-3.
2
7216/7218/7220 2-1
Page 9

2
2.2 Parallel Port Connection
Use the parallel cable to connect the parallel port of the copier to the
parallel port of the computer.
✎
Important!
Be sure to use a shielded parallel cable. Use of an unshielded cable
may result in radio frequency interference.
The parallel port is compatible with IEEE1284 Type B standards.
1 Turn off both the copier and your computer.
2 Connect one end of the parallel cable to the parallel port (printer port)
of the computer.
3 Connect the other end of the cable to the parallel port on the left side
of the copier. Secure the interface cable connectors using the two
clips.
Connecting to a Computer
This completes connection of the copier to the computer.
2-2 7216/7218/7220
Page 10
Connecting to a Computer
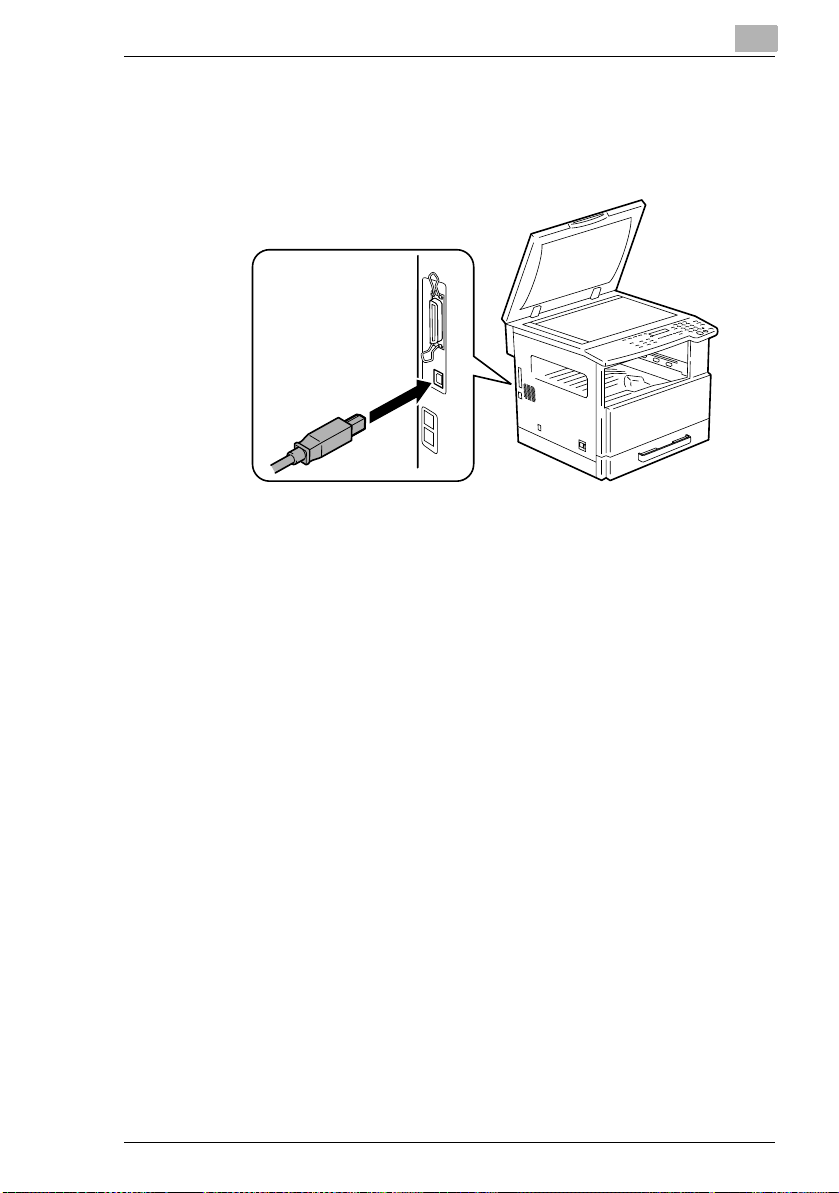
2.3 USB Port Connection
Use the USB cable (Type B) to connect the copier’s USB port to the USB
port on your computer.
2
7216/7218/7220 2-3
Page 11

2
Connecting to a Computer
2-4 7216/7218/7220
Page 12
Installing the Printer Driver
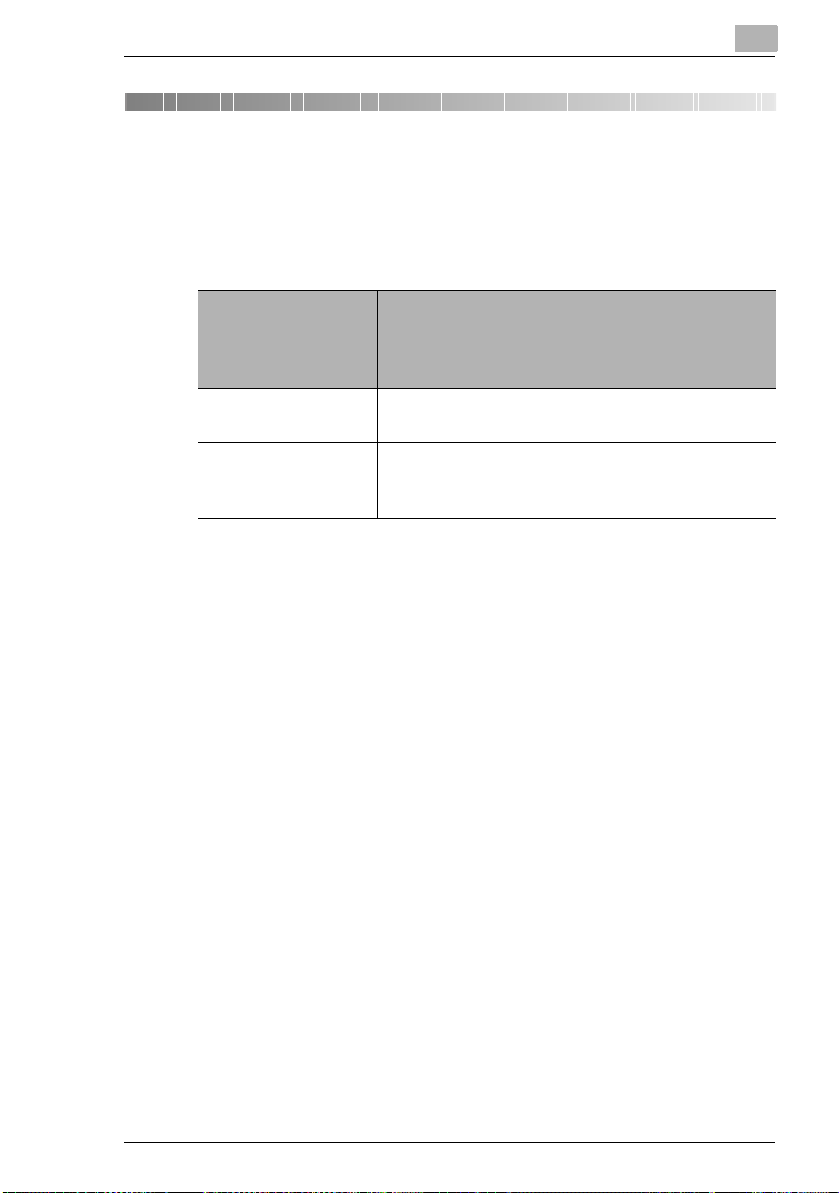
3 Installing the Printer Driver
This section describes the procedure for installing the printer driver. The
printer driver can be installed in two ways: by using Plug and Play or by
using the Add Printer Wizard.
3
If you want to use
this function to
install the printer
driver:
Plug and Play
(for USB connection)
Add Printer Wizard
(for parallel
connection)
Follow this procedure:
“Installing the Printer Driver Using Plug and Play”
on page 3-1
“Installing the Printer Driver Using the Add
Printer Wizard” on page 3-5
3.1 Installing the Printer Driver Using Plug and Play
Installation using Plug and Play is not possible on Windows 95 and
NT 4.0. Refer to the procedure for using the Add Printer Wizard.
For a parallel connection, quit the Add Printer Wizard that started up with
Plug and Play, and then install the printer driver by clicking the Add Printer
icon.
Installing the Printer Driver Using Plug and Play Under Windows XP
1 With Windows running, insert the CD-ROM into your computer’s CD-
ROM drive.
2 Turn on the copier.
3 When the copier is ready, connect it to the computer with the USB
cable.
The “Found New Hardware Wizard” dialog box appears.
4 Select Install from a list or specific location [Advanced], and then
click [Next].
5 Select Include this location in the search: under Search for the
best driver in these locations., and then click [Browse].
7216/7218/7220 3-1
Page 13
3
Installing the Printer Driver
6 Browse to “Driver\(language)\WinXP” on the CD-ROM, and then click
[OK].
✎
Tip
Select the language you prefer. For example, if you prefer English,
browse to:
Driver\English\WinXP
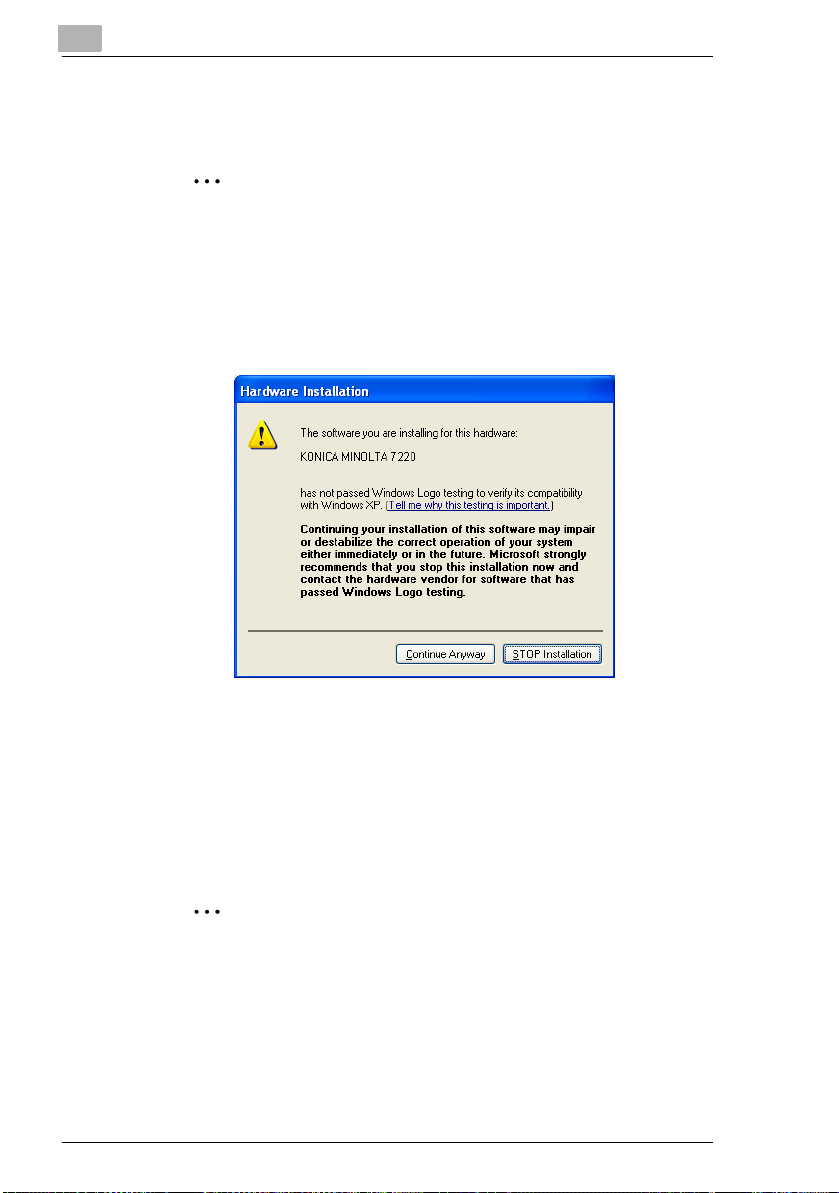
7 Click [Next].
❍ The following dialog appears, click [Continue Anyway].
8 The “Completing the Found New Hardware Wizard” dialog box
appears.
❍ Click [Finish].
9 The “Found New Hardware Wizard” dialog box appears again.
❍ Repeat steps 4 through 7.
✎
Note
This completes the installation of the printer driver.
3-2 7216/7218/7220
Page 14

Installing the Printer Driver
Installing the Printer Driver Using Plug and Play Under Windows 2000
1 With Windows running, insert the CD-ROM into your computer’s CD-
ROM drive.
2 Turn on the copier.
3 When the copier is ready, connect it to the computer with the USB
cable.
The “Found New Hardware Wizard” dialog box appears.
4 Select Search for a suitable driver for my device (recommended)
in the “Install Hardware Device Drivers” dialog box, and then click
[Next].
The “Locate Driver Files” dialog box appears.
5 Select Specify a location, and click [Next].
6 Click [Browse...] on the next dialog box, browse to
“Driver\(language)\Win2000” on the CD-ROM, and then click [OK].
✎
3
Tip
Select the language you prefer. For example, if you prefer English,
browse to:
Driver\English\Win2000
7 Click [OK], and follow the instructions that appear on the screen until
the “Completing the Found New Hardware Wizard” dialog box
appears.
❍ Click [Finish].
8 The “Found New Hardware Wizard” dialog box appears again.
❍ Repeat steps 4 through 7.
✎
Note
This completes the installation of the printer driver.
7216/7218/7220 3-3
Page 15

3
Installing the Printer Driver
Installing the Printer Driver Using Plug and Play Under Windows Me/ 98
1 With Windows running, insert the CD-ROM into your computer’s CD-
ROM drive.
2 Turn on the copier.
3 When the copier is ready, connect it to the computer with the USB
cable.
The “Add New Hardware Wizard” dialog box appears.
4 Click [Next], and then select Search for the best driver for your
device (Recommended) on the next dialog box.
❍ Click [Next] again.
5 Select [Specify a location], and then click [Browse…].
6 Browse to “Driver\(language)\Win9x” on the CD-ROM, and then click
[OK].
✎
Tip
Select the language you prefer. For example, if you prefer English,
browse to:
Driver\English\Win9x
7 Click [Next], and then follow the instructions that appear on the screen
until you can click [Finish].
8 The “Add New Hardware Wizard” dialog box appears again.
❍ Repeat steps 4 through 7.
✎
Note
Repeat steps 4 through 7 until the installation is completely
finished. This completes the installation of the printer driver.
3-4 7216/7218/7220
Page 16

Installing the Printer Driver
3.2 Installing the Printer Driver Using the Add Printer Wizard
Installing the Printer Driver Using the Add Printer Wizard Under Windows XP
1 With Windows running, insert the CD-ROM into the CD-ROM drive of
your computer.
2 Click the Windows [Start] button, and then click [Printers and Faxes].
3 Select [Add a printer] from the [Printer Tasks] menu.
3
The Add Printer Wizard starts.
4 Follow the instructions that appear on your computer screen.
✎
Note
When instructed to specify the driver, browse to
“Driver\English\WinXP” (for Windows XP) on the CD-ROM.
7216/7218/7220 3-5
Page 17

3
Installing the Printer Driver
Installing the Printer Driver Using the Add Printer Wizard Under Windows 2000/NT 4.0/Me/98/95
1 With Windows running, insert the CD-ROM into the CD-ROM drive of
your computer.
2 Click the Windows [Start] button, point to [Settings], and then click
[Printers].
The “Printers” window appears.
3 Double-click the “Add Printer” icon.
The Add Printer Wizard starts.
4 Follow the instructions that appear on your computer screen.
✎
Note
When instructed to specify the driver, browse to
“Driver\English\Win2000” (for Windows 2000),
“Driver\English\WinNT” (for Windows NT 4.0), or
“Driver\English\Win9x” (for Windows Me, 98, and 95) on the CD-
ROM.
3-6 7216/7218/7220
Page 18

Configuring Printer Driver Settings
4 Configuring Printer Driver Settings
The printer driver “Properties” dialog box appears when you display
printer driver properties from the Windows “Printers” window. The settings
you make on the “Properties” dialog box are applied globally to all
applications.
4.1 Displaying Printer Driver Properties for Configuring Global Settings
Displaying Settings Under Windows XP
1 Click the Windows [Start] button, and then click [Printers and Faxes].
2 In the “Printers and Faxes” window, select the “KONICA MINOLTA
****” icon.
✎
Note
The name of the copier displayed will vary depending on the model
being used.
4
KONICA MINOLTA ****
Model name of the copier
3 To display the printer driver settings, click [Printing Preferences...]
from the [File] menu.
7216/7218/7220 4-1
Page 19

4
Configuring Printer Driver Settings
Displaying Settings Under Windows 2000/NT 4.0/Me/98/95
1 Click the Windows [Start] button, point to [Settings], and then click
[Printers].
2 Select the “KONICA MINOLTA ****” icon.
✎
Note
The name of the copier displayed will vary depending on the model
being used.
KONICA MINOLTA ****
Model name of the copier
3 To display the printer driver settings:
❍ Windows 2000 — Select [Printing Preferences...] from the [File]
menu.
❍ Windows NT 4.0 — Select [Document Defaults...] from the [File]
menu.
❍ Windows Me/98/95 — Select [Properties] from the [File] menu.
The following printer setup dialog box appears.
✎
Note
Use the five rightmost tabs of this dialog box to configure the
printer driver settings.
4-2 7216/7218/7220
Page 20

Configuring Printer Driver Settings
4.2 Common Operations
This section describes settings and buttons that are common to all four of
the tabs (“Setup”, “Paper”, “Quality”, and “Device Options”).
OK
Click this button to exit the “Properties” dialog box and apply all settings
you changed.
4
Cancel
Click this button to exit the “Properties” dialog box without applying any
changes.
Apply
Click this button to apply all settings you changed without exiting the
“Properties” dialog box.
Help
Click this button to view help information about the items in the currently
displayed screen.
Easy Set
Easy Set lets you save the setup of each tab for later recall, when you
want to use it again. To save the current settings, click the [Save] button.
Afterward, you can recall the settings by selecting them from a list.
7216/7218/7220 4-3
Page 21

4
Configuring Printer Driver Settings
Select “Factory Defaults” from the list to reset all settings on the tab to their
default values.
The button changes to [Delete] while an Easy Set setup is selected from
the list. Clicking the [Delete] button deletes the currently highlighted setup.
Page Layout/Printer Figure
The Page Layout image shows what the printed document will look like
using the current printer driver settings. The Page Layout image changes
as you select different settings.
The Printer Figure image shows a graphic image of what trays, and other
options are currently installed on the copier. All installed options are
displayed, and the tray currently selected under Paper Source on the
“Setup” tab appears in light blue.
4-4 7216/7218/7220
Page 22

Configuring Printer Driver Settings
4.3 “Setup” Tab
The “Setup” tab contains settings for N-up, Watermark, Paper Source,
Media Type, and Duplex.
✎
Note
The “Duplex” option can be used only if the 7218/7220 is equipped
with the optional Duplex Unit.
4
4.3.1 N-up
The settings in this group box are for configuring how multiple pages of
the document should be printed on a single sheet of paper.
✎
Note
The settings in the N-up group box are not available when either of the
following conditions exists.
The Fit to Paper check box on the “Paper” tab is selected.
The Scaling setting on the “Paper” tab is anything other than “100%”.
7216/7218/7220 4-5
Page 23

4
Configuring Printer Driver Settings
N-up list
Click the down arrow button, and then select the number of document
pages that should be printed on each sheet of paper.
Selecting “2 up”, for example, prints two document pages on each sheet
of paper. Selecting “Off” prints one document page per sheet.
Border Line
Select this check box to print a border around each page when printing
more than one document page on each sheet of paper.
✎
Note
This option is not available when “Off” is selected in the N-up box.
N-up Style
Clicking this button displays the dialog box shown below.
Click the style you want to use when printing multiple document pages on
each sheet of paper.
✎
Note
This button is not available when “Off” is selected in the N-up box.
4-6 7216/7218/7220
Page 24

Configuring Printer Driver Settings
4.3.2 Watermark
Use the settings in this group box to select the watermark text (such as
“CONFIDENTIAL”, “DRAFT”, etc.) and to control whether it is printed on
all pages or only the first page.
Watermark list
Click the down arrow button, and then select the watermark text from the
list that appears.
First Page Only
Select this check box when you want the watermark to be printed on the
first page only. Clear the check box to print the watermark on all pages.
Edit Watermark
Clicking this button displays the “Watermark” dialog box.
4
1 To edit a watermark, click the applicable watermark name in the list.
2 Make any settings you want.
New
1 Click the [New] button to type new watermark text into the box.
2 Type in the watermark text that you want to use.
✎
Note
Watermark text can be up to 20 characters long.
You can have up to 30 different watermarks configured at one time.
7216/7218/7220 4-7
Page 25

4
Configuring Printer Driver Settings
Delete
Click this button to delete the watermark that is selected in the list.
Shading
Specify a relative density for the watermark text between 10% and 100%.
Style
Use these check boxes to turn bold style and italic style on (check box
selected) or off (check box cleared).
Font
Use the settings in this group box to specify the typeface and the point size
of the watermark text.
Type Face: You can specify any of the typefaces currently installed on
your computer’s operating system as the typeface of the watermark text.
Size: Specify a font size. The sizes you can specify depend on the sizes
currently installed on your computer’s operating system.
Angle
Use this setting to specify the angle of the watermark text relative to the
paper. The setting range is -90° to +90°.
A negative (-) value rotates the characters clockwise, 0 specifies the text
should be parallel to the paper, and a positive (+) value rotates the
characters counterclockwise.
Position
Use this setting to specify the position where the watermark text should be
printed. You can specify a position by using horizontal and vertical values.
Horizontal: 0 to 100
Vertical: 0 to 100
4-8 7216/7218/7220
Page 26

Configuring Printer Driver Settings
4.3.3 Paper Source
Click the down arrow button, and then select the tray on the copier from
which paper should be fed.
Selecting “Auto” tells the copier to use the tray that contains paper of the
size specified under Output Paper Size on the “Paper” tab.
Detail of Paper Source
If the first is to be supplied from a tray different from the tray supplying
paper for the rest of the document, click this button. The “Detail of Paper
Source” dialog appears.
4
Front Cover Page
Check this option when printing the first page on paper from a different
paper tray.
With Image
Check this option to print the front cover page.
Cover Paper Source
Select the paper tray for printing the specified front cover page.
Cover Paper Media Type
Select the type of media that will be used for printing the specified front
cover page.
7216/7218/7220 4-9
Page 27

4
4.3.4 Media Type
Click the down arrow button, and then select the type of media to be used
for printing.
✎
Note
If “Auto” or “Tray 2” to “Tray 5” is selected in the Paper Source box,
the Media Type setting cannot be changed. (“Tray 3” to “Tray 5” are
available only for 7218 and 7220.)
4.3.5 Duplex
✎
Note
The “Duplex” option can be used only if the 7218/7220 is equipped
with the optional Duplex Unit.
Click the down arrow button, and then select the settings for duplex (twosided) printing.
If “Off” is selected, the printer does not print on both sides of the paper.
When duplex printing is selected, select “Long Edge” or “Short Edge” for
the binding position.
Configuring Printer Driver Settings
✎
Note
The Duplex Unit is required in order to use duplex printing. In addition,
the “Duplex” option must be added to the list of Installed Options in the
“Device Options” tab for the printer driver. When using duplex printing,
select “Plain Paper” as the Media Type.
4-10 7216/7218/7220
Page 28

Configuring Printer Driver Settings
4.4 “Paper” Tab
Use this tab to configure settings related to your original and to the
medium on which you are printing. You can also specify the number of
copies to be printed and the orientation of the print image.
4.4.1 Original Document Size
The list that appears when you click the down arrow button shows all of
the paper sizes that are supported by your printer. Specify the original
document size by clicking it in the list.
To specify a custom document size, click the [Edit Custom...] button, and
then specify the desired document size. The specified custom document
size appears in the Original Document Size list.
4
4.4.2 Output Paper Size
Use the settings in this group box to specify the size of paper you want to
use for printing. You can also configure other settings that affect the size
of the print image on the paper.
✎
Note
Output Paper Size group box settings are not available whenever the
N-up setting on the “Setup” tab is anything besides “Off”.
Fit to Paper
Selecting this check box causes the printed image to be resized
automatically so it matches the size of the paper being printed on.
7216/7218/7220 4-11
Page 29

4
✎
Note
Scaling is not available while the Fit to Paper check box is selected.
Output Paper List
To specify a paper size that is different from the size specified under
Original Document Size, click the down arrow button, and then select a
paper size from the list that appears.
Scaling
Specify the zoom ratio for enlarging or reducing the print image.
Type or select a value between 35% and 400%.
4.4.3 Copies
Use this setting to specify the number of copies to be printed.
Type or select a value between 1 and 99.
4.4.4 Collate
Use this setting when printing multiple copies of the same document, to
specify whether each copy of the document should be printed individually
or if all copies of each page should be printed as a set.
Selecting On prints each copy of the document separately. If you have “5”
specified for Copies, for example, this setting would print the document
from the first page to the last page five times.
Selecting Off prints all copies of each page as a set. If you have “5”
specified for Copies, for example, this setting would print five copies of
page one, followed by five copies of page two, etc.
Configuring Printer Driver Settings
✎
Note
The Collate setting may not be available with some applications.
If Collate is set to “On” in the printer driver, be sure to disable the
application’s Collate function.
4.4.5 Orientation
Use this setting to specify whether your document should be printed in
portrait (vertical) or landscape (horizontal) format.
Select the Rotated check box to rotate the print image 180° to the paper
orientation.
4-12 7216/7218/7220
Page 30

Configuring Printer Driver Settings
4.5 “Quality” Tab
Use the settings on this tab to control the quality of the printed output.
4.5.1 Resolution
Click the down arrow button, and then select either “600 × 600 dpi” or “300
× 300 dpi” as the printing resolution.
4
✎
Note
×
600 dpi” provides better quality, but it also takes longer to print
“600
at this setting than at “300
4.5.2 Adjustment
Contrast
Use this setting to adjust the contrast of the print image. Type or select a
value between 0 and 100.
Brightness
Use this setting to adjust the brightness of the print image. Type or select
a value between 0 and 100.
7216/7218/7220 4-13
×
300 dpi”.
Page 31

4
4.6 “Device Options” Tab
4.6.1 Device Options
✎
Note
The “Duplex” option can be selected from the Installable Options list
only if the 7218/7220 is equipped with the optional Duplex Unit.
Configuring Printer Driver Settings
“Tray 3” to “Tray 5” are available only for 7218 and 7220.
Use this setting to specify the options installed in your copier.
To add an available option from the Installable Options list to the
Installed Options list, select the option, and then click the [Add] button.
To remove an option from the Installed Options list, select the option,
and then click the [Remove] button.
4.6.2 About
To display version and copyright information about this printer driver, click
the [About] button.
4-14 7216/7218/7220
Page 32

Copier Control Panel Operations (PC Print Mode)
5 Copier Control Panel Operations
(PC Print Mode)
This section covers printer operations you can perform on the control
panel of the copier.
5.1 Printer Operations
The copier’s default mode is the copy mode. As a general rule, the copier
automatically switches to the PC print mode (indicated by “PC:PRN”
appearing on the copier’s display) and starts printing whenever a print
operation is executed from the connected computer.
See “Entering and Exiting the PC Print Mode” on page 5-3 for more
information.
5
7216/7218/7220 5-1
Page 33

5
Copier Control Panel Operations (PC Print Mode)
General Guide
2145
Number Name Description
1[PRINT]
indicator
2[PRINT] key• Press while the copier is receiving print
3Display•“PC:PRN” is on the display while the copier
4[NO] key• Press to reply “NO” to the confirmation
5 [YES] key • Press to reply “YES” to the confirmation
6 [START]
indicator
7[STOP] key• Press while the copier is in the PC print
3
7
6
• Blinks while the copier is receiving print
data.
• Lights while the copier is performing a print
operation (even if data is being received
simultaneously).
• Goes out when there is no print data.
• See “[PRINT] Indicator” on page 5-3.
data (indicated by the [PRINT] indicator
blinking) to display the PC print mode
screen.
• Press while the PC print mode screen is
displayed to return to the previous screen.
is in the PC print mode.
• The display also shows the paper source
and paper size for the print job.
message that appears when a print job is
canceled.
message that appears when a print job is
canceled.
• Lights orange when the copier is in the PC
print mode.
mode to cancel the current print job. See
“Canceling a Print Job” on page 5-4.
5-2 7216/7218/7220
Page 34

Copier Control Panel Operations (PC Print Mode)
[PRINT] Indicator
The [PRINT] indicator shows the current status of PC printing.
[PRINT] Indicator Description
Blinking • Copier is receiving print data, even while in
another mode.
• A printer error has occurred (indicated by
“PRN Err” on the display).
On • Copier is printing print data. The indicator
remains lit (without blinking) even if data is
being received while printing is in progress.
Off • No print data in copier memory.
Entering and Exiting the PC Print Mode
As a general rule, the copier automatically switches to the PC print mode
(indicated by “PC:PRN” appearing on the copier’s display) and starts
printing whenever a print operation is executed from the connected
computer. The following are the rules that govern switching to or from the
PC print mode.
G Normally, executing a print operation on the connected computer
causes the copier to enter the PC print mode.
G If the copier is in the copy mode when a print operation is executed on
the connected computer, it switches to PC print mode if no operation
is performed in the copy mode for 30 seconds. This copier can receive
print data 30 seconds after it has completed its last copy operation.
G If there is print data in the copier
memory, the PC print mode screen
appears when the [PRINT] key is
pressed. If there is no print data in
the copier memory, the PC print
mode screen will not appear even if
the [PRINT] key is pressed.
G When the PC print mode screen is
displayed, press the [PRINT],
[SCAN], or [COPY] key to exit the PC print mode screen.
G After printing is finished, the copier automatically switches to the copy
mode.
5
7216/7218/7220 5-3
Page 35

5
Copier Control Panel Operations (PC Print Mode)
Canceling a Print Job
You can cancel a print job from the control panel only when the PC print
mode screen is displayed.
1 Make sure the copier’s display
shows “*PC PRINT* PRINTING”.
2 Hold down the [STOP] key for five
seconds, until the “PC JOB
CANCEL?” confirmation message
appears on the display.
3 Press the [YES] key to cancel the
print job or the [NO] key to resume
printing.
YES
NO
CLEAR
✎
Note
You can use steps 2 and 3 of the above procedure to cancel a print job
while any of the following errors is indicated on the display: PAPER
EMPTY, INCORRECT PAPER SIZE, NO SUITABLE PAPER, PAPER
SIZE ERROR, LOAD PAPER, PAPER JAM, COVER OPEN, TONER
EMPTY, MEDIA TYPE ERROR.
A print job cannot be canceled while print data is being received by the
copier.
5-4 7216/7218/7220
Page 36

Copier Control Panel Operations (PC Print Mode)
Using the Bypass Tray
Use the procedure described below to print onto paper that is fed (one
sheet at a time) from the bypass tray.
1 On your computer, display the “Setup” tab of the printer driver, and
then specify “Bypass” for the Paper Source setting (page 4-9).
2 Execute the print operation from your computer.
3 When the message “LOAD PAPER”
appears on the copier’s display,
load paper onto the bypass tray.
❍ This causes the print operation
to be performed using the paper
from the bypass tray.
4 Repeat step 3 as many times as necessary until printing of the
document is complete.
5
✎
Note
Be sure to execute the print operation from the computer first, and then
place the paper onto the bypass tray. If there is already paper on the
bypass tray when you execute the print operation, remove it, wait for
the message “LOAD PAPER” to appear, and then place it again onto
the bypass tray.
Load the paper into the manual bypass tray one sheet at a time.
If the multiple bypass tray (optional) is installed, it can used in the
same way as any other paper tray since the multiple bypass tray can
hold 100 sheets of paper.
The multiple bypass tray can be loaded with a maximum of 10
envelopes, 20 OHP transparencies, 20 postcards, 20 label sheets, or
100 sheets of plain paper.
7216/7218/7220 5-5
Page 37

5
Copier Control Panel Operations (PC Print Mode)
Energy Save
When print data is received while the copier is in energy save mode,
energy save mode is canceled.
The operation mode changes to print mode immediately when print data
is received, waits for the copier to warm up, and then prints the data.
5-6 7216/7218/7220
Page 38

Troubleshooting
6 Troubleshooting
If a problem occurs during PC printing, check the following.
6.1 Correcting Errors
This section describes the errors that can appear during PC printing and
what you need to do to correct the situation.
6.1.1 Checking Error Messages
“PRN Err” appears in the lower right
corner of the display when a PC print
error occurs while a screen other than
the PC print mode screen is displayed.
If this happens, follow the procedure
below.
1 Press the [PRINT] key to display the
PC print mode screen.
6
2 View the error message on the
display.
7216/7218/7220 6-1
Page 39

6
6.1.2 Main Error Messages
The table below describes the main error messages that may appear
while the PC print mode screen is displayed.
Error Message Cause Action
PAPER SIZE
ERROR
NO SUITABLE
PAPER
INCORRECT
PAPER SIZE
PAPER EMPTY There is no paper in the
MEDIA TYPE
ERROR
MEMORY FULL The memory is full of
The paper size
specified with the
printer driver differs
from the size of paper
that is loaded.
“Auto” is selected for
Paper Source with the
printer driver properties,
but none of the copier’s
trays contain paper of
the size specified for
printing.
Paper size specified by
the printer driver is not
loaded in the specified
paper tray.
specified tray or the
specified tray is not
loaded in the copier.
Media type specified by
the printer driver is not
loaded in the specified
paper tray.
stored data.
Troubleshooting
Pull open the paper tray
with the size error, and
then close it again.
Check if a custom
paper size has been
entered, and correct the
paper size using the
appropriate Utility mode
function.
Load paper of the
specified size.
Load paper of the
specified size into the
specified paper tray.
Change the media type
in the Utility mode and
load the correct paper
into the tray.
If using the Multiple
Bypass to print, load the
correct paper to begin
printing.
Press any key.
6-2 7216/7218/7220
Page 40

Troubleshooting
6.1.3 Errors and Print Data
What happens to your print data when an error occurs depends on the
error type.
“MACHINE TROUBLE” Error
This error indicates a serious operational problem. The copier is unable to
receive any data while this error message is on the display.
Temporary Errors
The copier retains current print data in memory whenever any of the easily
correctable errors listed below occurs. As soon as the condition causing
the error is corrected, the copier automatically resumes printing.
G PAPER JAM
G INCORRECT PAPER SIZE
G PAPER SIZE ERROR
G COVER OPEN
G NO SUITABLE PAPER
G PAPER EMPTY
G MEDIA TYPE ERROR
✎
6
Note
You can cancel a print job stored in memory due to one of the above
errors. See “Canceling a Print Job” on page 5-4 for more information.
7216/7218/7220 6-3
Page 41

6
Troubleshooting
6-4 7216/7218/7220
Page 42

Specifications
7 Specifications
Print speed 20/18/16 pages/min. (A4, 300 dpi)
12 pages/min. (A4, 600 dpi)
RAM Share with copier.
Interfaces IEEE 1284 (Parallel), USB Revision 1.1 (except
for Windows 95 and Windows NT)
Printer Language GDI
Fonts Windows
Supported
Operating Systems
Web Browser Internet Explorer 4.0 or later
Windows XP (SP1 or later)/Windows 2000 (SP3
or later)/Windows NT Workstation Version 4.0
(SP6a or later)/Windows Me/Windows 98 (SP1)/
Windows 98 Second Edition/Windows 95 OSR
2.5
7
7216/7218/7220 7-1
Page 43

7
Specifications
7-2 7216/7218/7220
Page 44

MANUFACTURER
•
•
TOKYO JAPAN
4398-7704-01
2004. 02 1
 Loading...