Konica Minolta 6100 User Manual

®

The following are trademarks or registered trademarks of their respective owners. Other product names mentioned in this manual may also be trademarks or registered trademarks of their respective owners. Registered trademarks are registered in the United States Patent and Trademark Office; some trademarks may also be registered in other countries. QMS, Crown, CrownAdmin, CrownCopy, CrownNet, the QMS logo, magicolor, and the Crown seal are registered trademarks of QMS, Inc., and CrownView, ImageServer, Multi-Res, PS Executive Series, QCOLOR, and QFORM are trademarks of QMS, Inc. PostScript is a trademark of Adobe Systems Incorporated for a page description language and may be registered in certain jurisdictions. Throughout this manual, “PostScript Level 2” is used to refer to a set of capabilities defined by Adobe Systems for its PostScript Level 2 page description language. These capabilities, among others, are implemented in this product through a QMS-developed emulation that is compatible with Adobe's PostScript Level 2 language. Adobe, Acrobat, the Acrobat logo/Adobe Systems Incorporated. 3Com, 3+Open/3Com Corporation. Aldus, Aldus PageMaker, Aldus FreeHand/Aldus Corporation. Apple, AppleTalk, EtherTalk, LaserWriter, LocalTalk, Macintosh, TrueType/Apple Computer, Inc. VINES/Banyan. Centronics/Centronics. Color Solutions, ColorBlind/Color Solutions. DEC, DECnet, LN03, LN03 Plus, VMS/Digital Equipment Corporation. PhoneNET/Farallon Computing, Inc. CompuServe / H & R Block. Hewlett-Packard, HP, PCL, HP-GL, LaserJet/Hewlett-Packard Co. IBM, OS/2, Token-Ring/ International Business Machines Corporation. Intel/Intel Corporation. Iomega, Jaz, Zip/Iomega. Microsoft, MS-DOS/Microsoft Corporation. Novell and NetWare/Novell, Inc. Pantone, PANTONE/Pantone. PANTONE is Pantone, Inc.’s check-standard trademark for color reproduction and color reproduction materials. QuarkXPress/ Quark, Inc. TOPS/Sun Microsystems, Inc. UNIX/UNIX Systems Laboratories. SIMM/Wang Laboratories. Ethernet/Xerox. All other trademarks are the property of their respective owners.

The digitally encoded software included with your magicolor 6100 Print System is Copyrighted © 2000 by QMS, Inc. All Rights Reserved. This software may not be reproduced, modified, displayed, transferred, or copied in any form or in any manner or on any media, in whole or in part, without the express written permission of QMS, Inc.

This manual is Copyrighted © 2000 by QMS, Inc., One Magnum Pass, Mobile, AL 36618. All Rights Reserved. This manual may not be copied in whole or in part, nor transferred to any other media or language, without the express written permission of QMS, Inc.

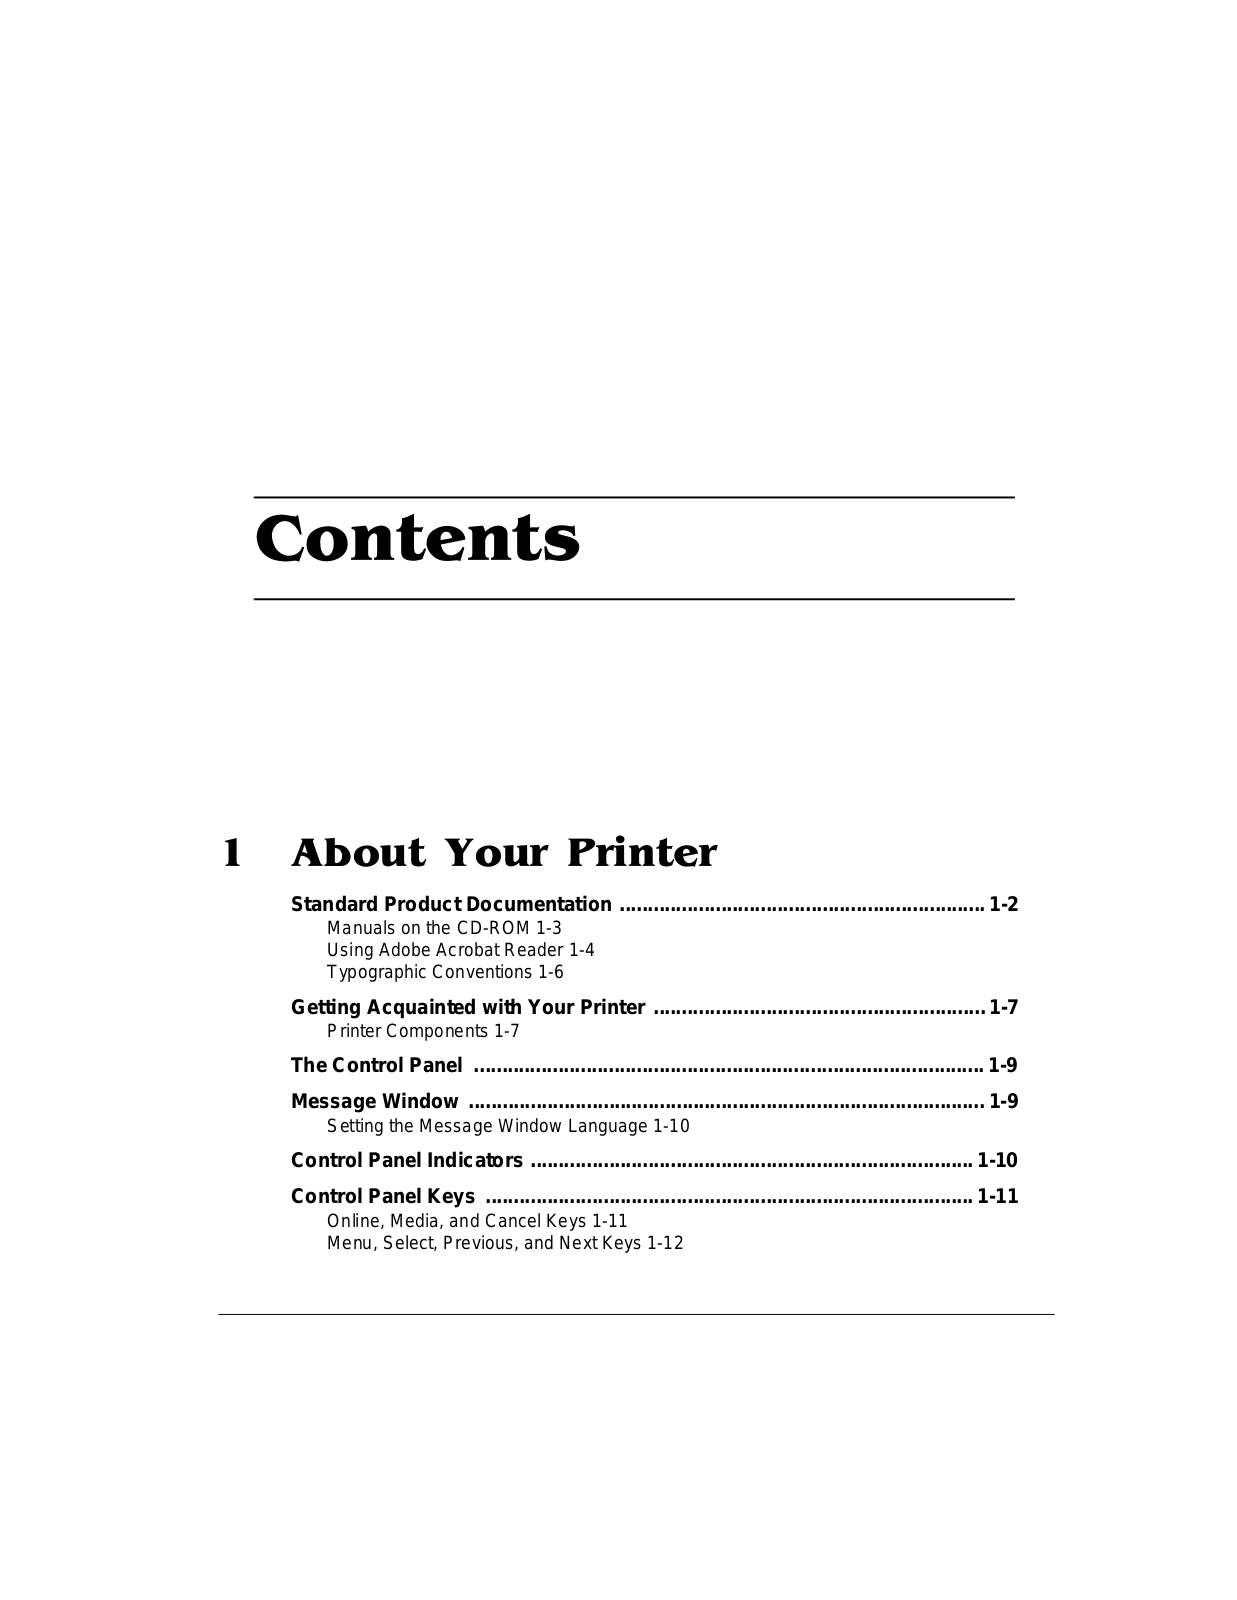
! " # "

Standard Product Documentation .................................................................

1-2

Manuals on the CD-ROM 1-3


Using Adobe Acrobat Reader 1-4


Typographic Conventions 1-6


Getting Acquainted with Your Printer ...........................................................

1-7

Printer Components 1-7


The Control Panel ...........................................................................................

1-9

Message Window ............................................................................................

1-9

Setting the Message Window Language 1-10


Control Panel Indicators ...............................................................................

1-10

Control Panel Keys .......................................................................................

1-11

Online, Media, and Cancel Keys 1-11


Menu, Select, Previous, and Next Keys 1-12


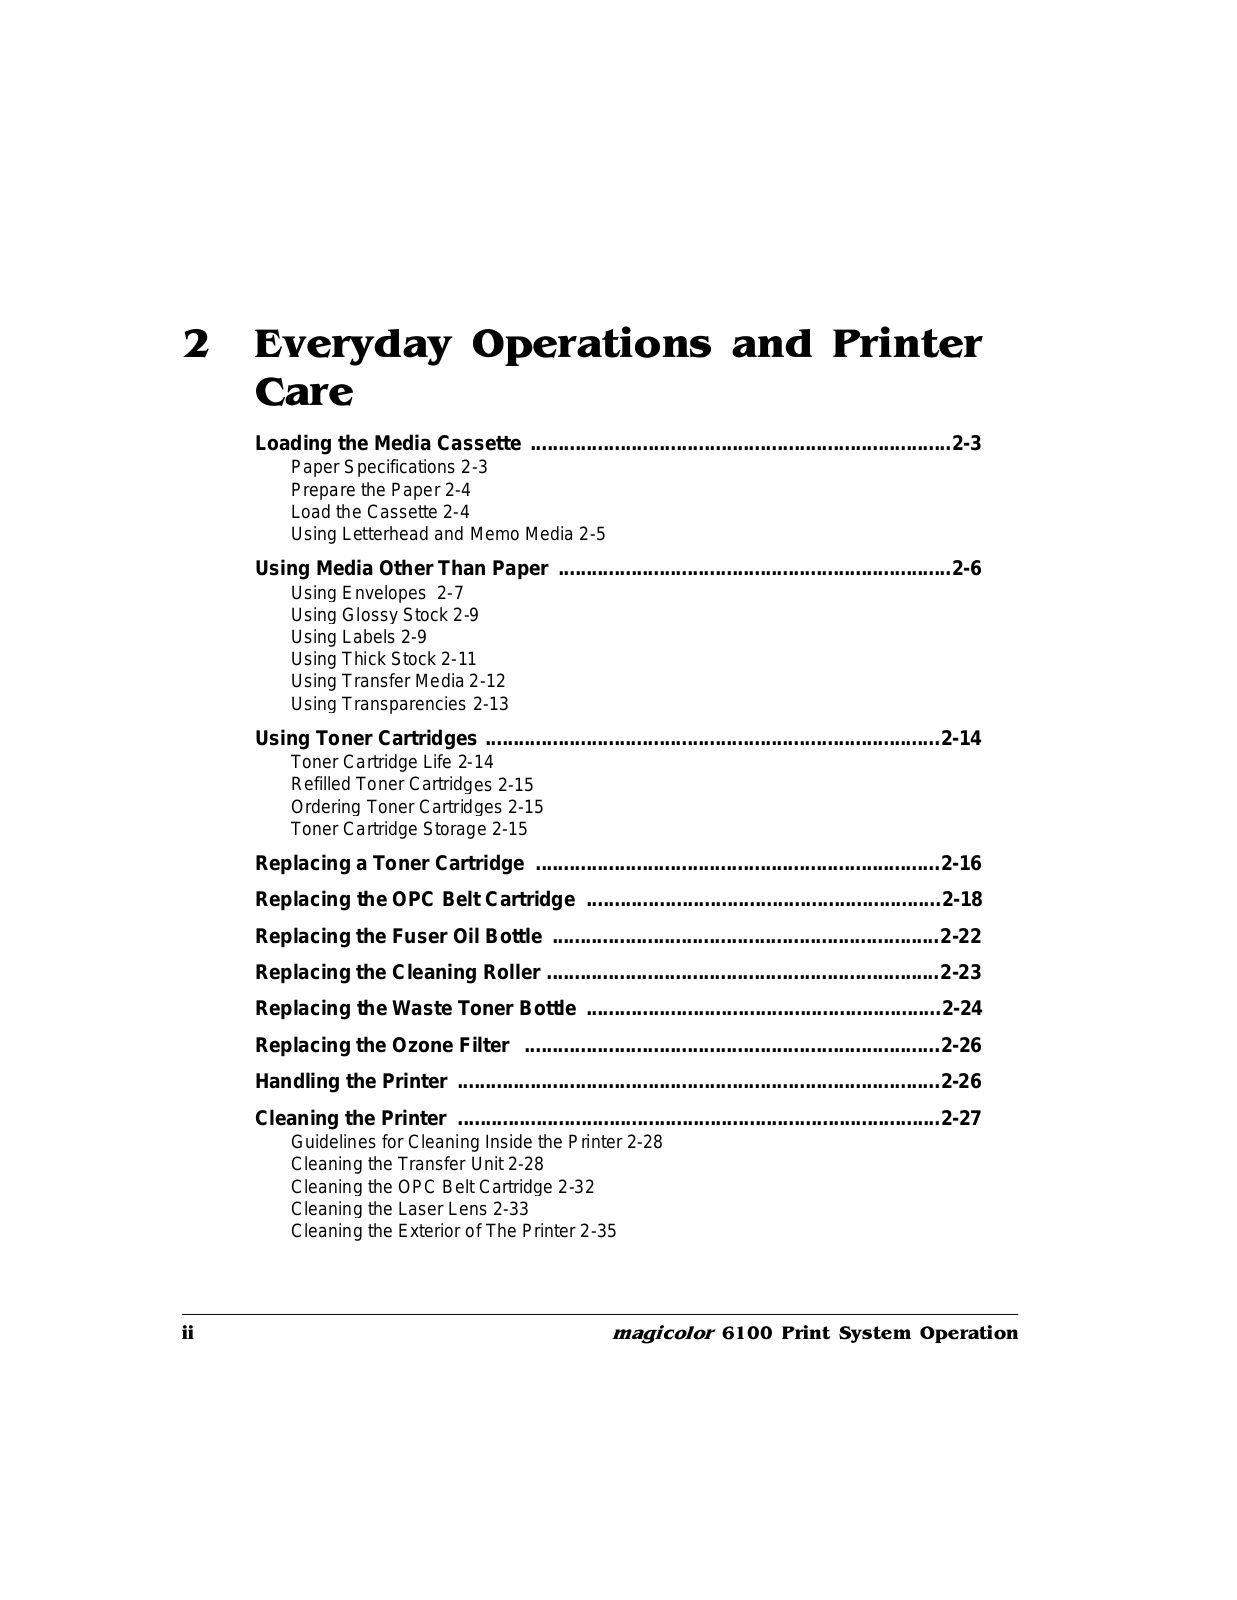
$ %&

Loading the Media Cassette ...........................................................................

2-3

Paper Specifications 2-3


Prepare the Paper 2-4


Load the Cassette 2-4


Using Letterhead and Memo Media 2-5


Using Media Other Than Paper ......................................................................

2-6

Using Envelopes 2-7


Using Glossy Stock 2-9


Using Labels 2-9


Using Thick Stock 2-11


Using Transfer Media 2-12


Using Transparencies 2-13


Using Toner Cartridges .................................................................................

2-14

Toner Cartridge Life 2-14


Refilled Toner Cartridges 2-15


Ordering Toner Cartridges 2-15


Toner Cartridge Storage 2-15


Replacing a Toner Cartridge ........................................................................

2-16

Replacing the OPC Belt Cartridge ...............................................................

2-18

Replacing the Fuser Oil Bottle .....................................................................

2-22

Replacing the Cleaning Roller ......................................................................

2-23

Replacing the Waste Toner Bottle ...............................................................

2-24

Replacing the Ozone Filter ..........................................................................

2-26

Handling the Printer ......................................................................................

2-26

Cleaning the Printer ......................................................................................

2-27

Guidelines for Cleaning Inside the Printer 2-28


Cleaning the Transfer Unit 2-28

Cleaning the OPC Belt Cartridge 2-32

Cleaning the Laser Lens 2-33

Cleaning the Exterior of The Printer 2-35


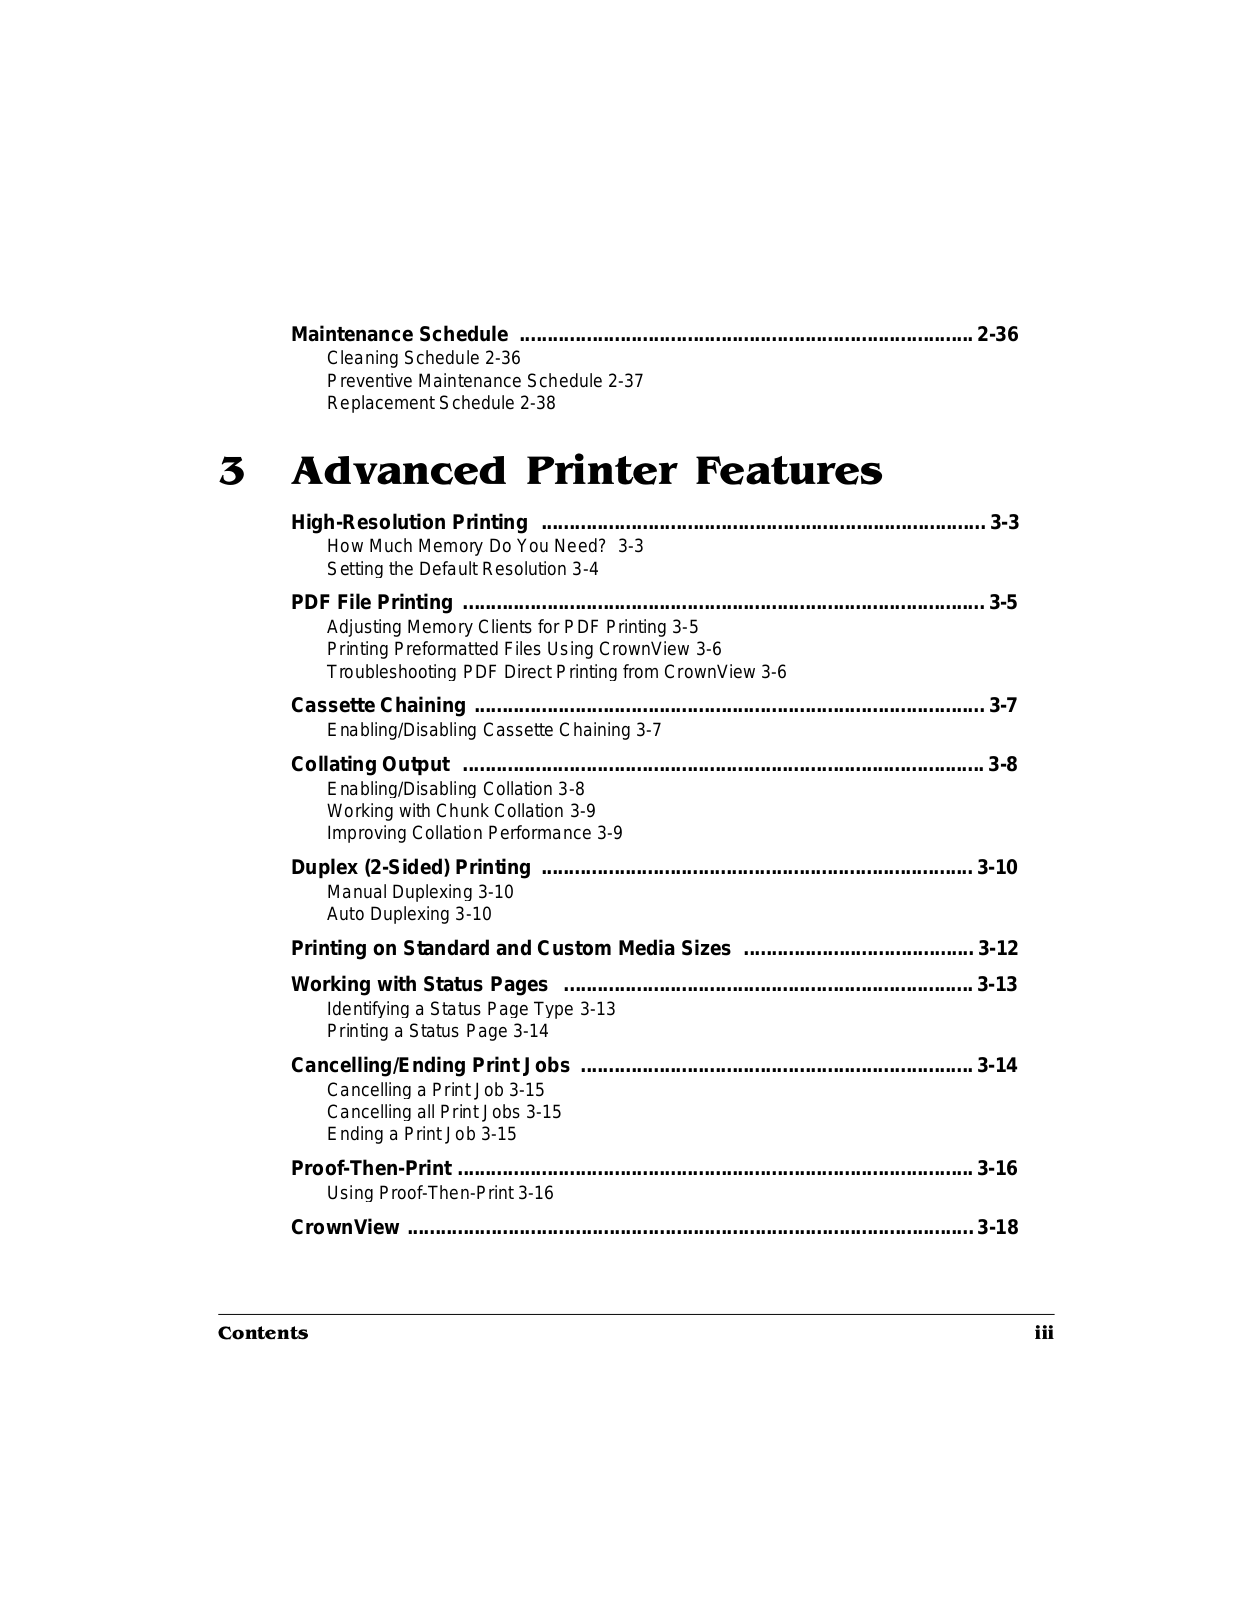
Maintenance Schedule .................................................................................

2-36

Cleaning Schedule 2-36

Preventive Maintenance Schedule 2-37

Replacement Schedule 2-38

'& ( "

High-Resolution Printing ...............................................................................

3-3

How Much Memory Do You Need? 3-3


Setting the Default Resolution 3-4


PDF File Printing .............................................................................................

3-5

Adjusting Memory Clients for PDF Printing 3-5


Printing Preformatted Files Using CrownView 3-6


Troubleshooting PDF Direct Printing from CrownView 3-6


Cassette Chaining ...........................................................................................

3-7

Enabling/Disabling Cassette Chaining 3-7


Collating Output .............................................................................................

3-8

Enabling/Disabling Collation 3-8


Working with Chunk Collation 3-9


Improving Collation Performance 3-9


Duplex (2-Sided) Printing .............................................................................

3-10

Manual Duplexing 3-10


Auto Duplexing 3-10


Printing on Standard and Custom Media Sizes .........................................

3-12

Working with Status Pages .........................................................................

3-13

Identifying a Status Page Type 3-13


Printing a Status Page 3-14


Cancelling/Ending Print Jobs ......................................................................

3-14

Cancelling a Print Job 3-15


Cancelling all Print Jobs 3-15


Ending a Print Job 3-15


Proof-Then-Print ............................................................................................

3-16

Using Proof-Then-Print 3-16


CrownView .....................................................................................................

3-18


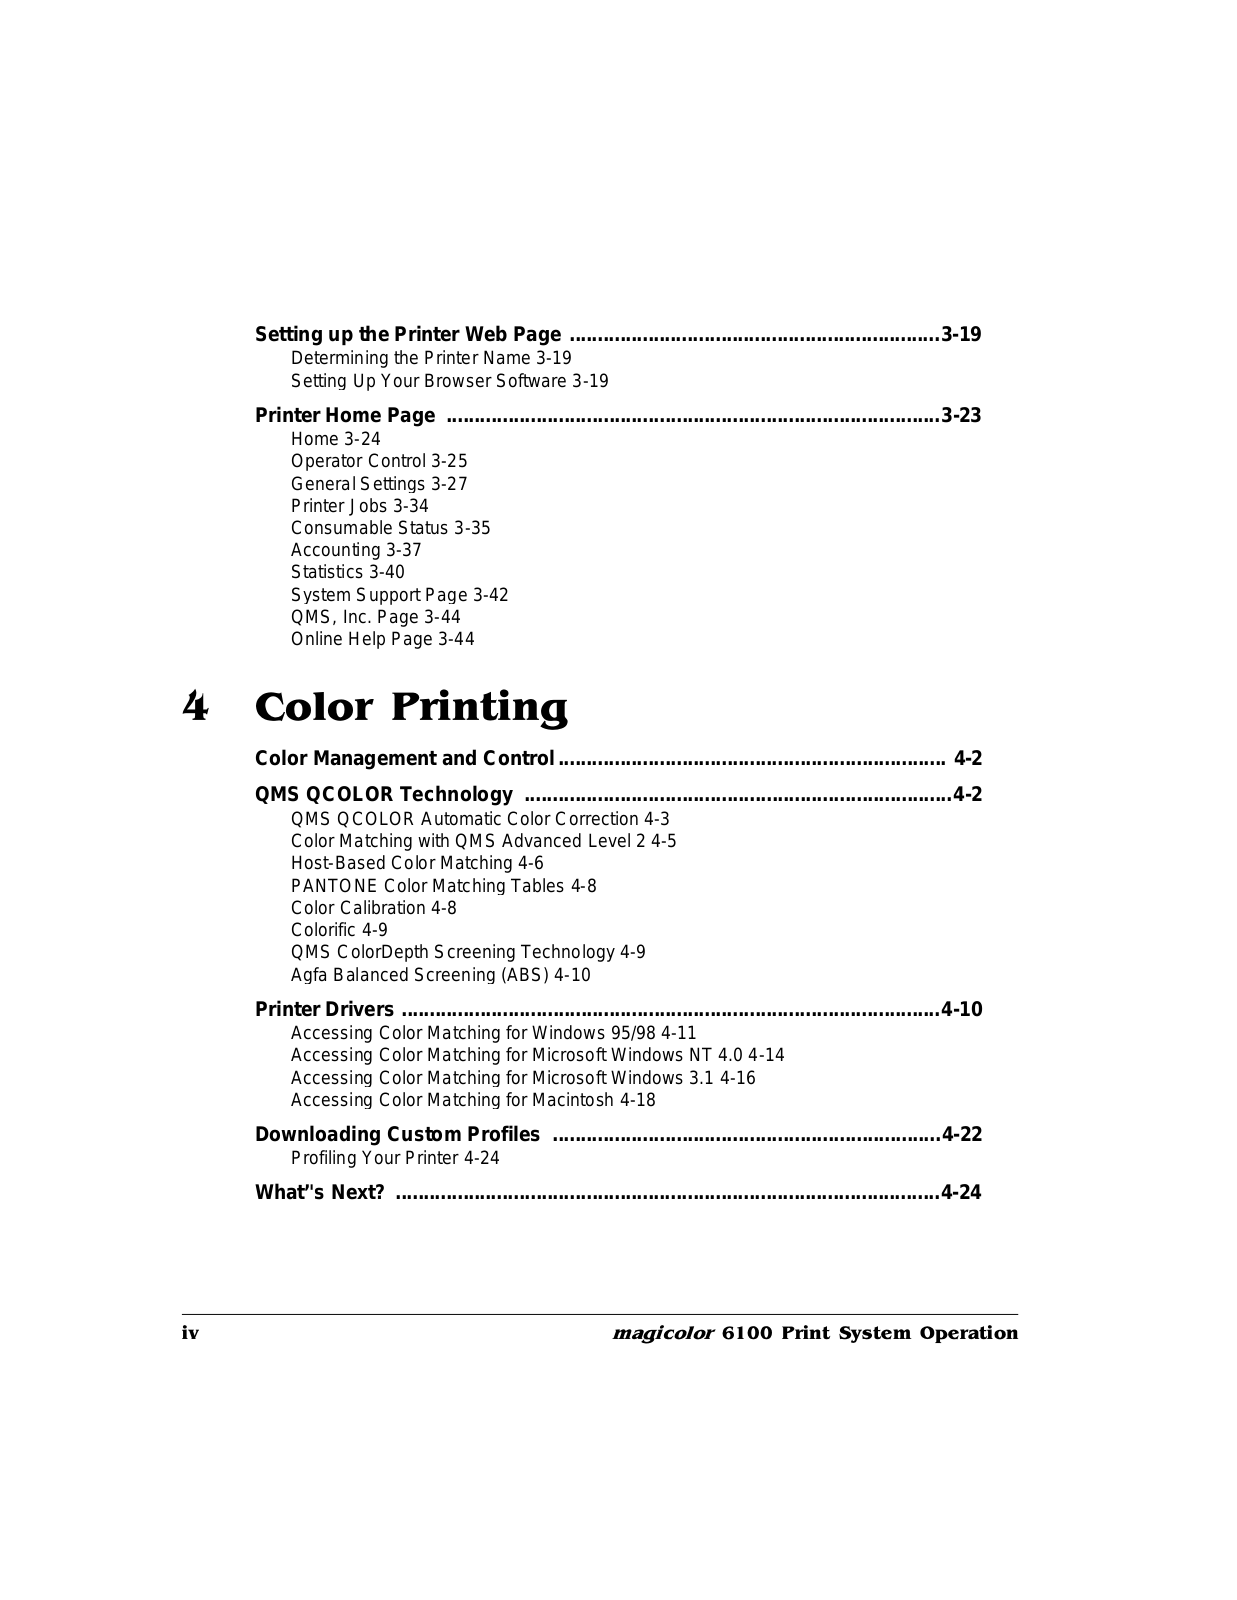
Setting up the Printer Web Page ..................................................................

3-19


Determining the Printer Name 3-19


Setting Up Your Browser Software 3-19


Printer Home Page ........................................................................................

3-23


Home 3-24


Operator Control 3-25


General Settings 3-27


Printer Jobs 3-34


Consumable Status 3-35


Accounting 3-37


Statistics 3-40


System Support Page 3-42


QMS, Inc. Page 3-44


Online Help Page 3-44


)

*


Color Management and Control .....................................................................

4-2


QMS QCOLOR Technology ............................................................................

4-2


QMS QCOLOR Automatic Color Correction 4-3


Color Matching with QMS Advanced Level 2 4-5


Host-Based Color Matching 4-6


PANTONE Color Matching Tables 4-8


Color Calibration 4-8


Colorific 4-9


QMS ColorDepth Screening Technology 4-9


Agfa Balanced Screening (ABS) 4-10


Printer Drivers ................................................................................................

4-10


Accessing Color Matching for Windows 95/98 4-11


Accessing Color Matching for Microsoft Windows NT 4.0 4-14


Accessing Color Matching for Microsoft Windows 3.1 4-16


Accessing Color Matching for Macintosh 4-18


Downloading Custom Profiles .....................................................................

4-22


Profiling Your Printer 4-24


What’'s Next? .................................................................................................

4-24

&


+ "!*

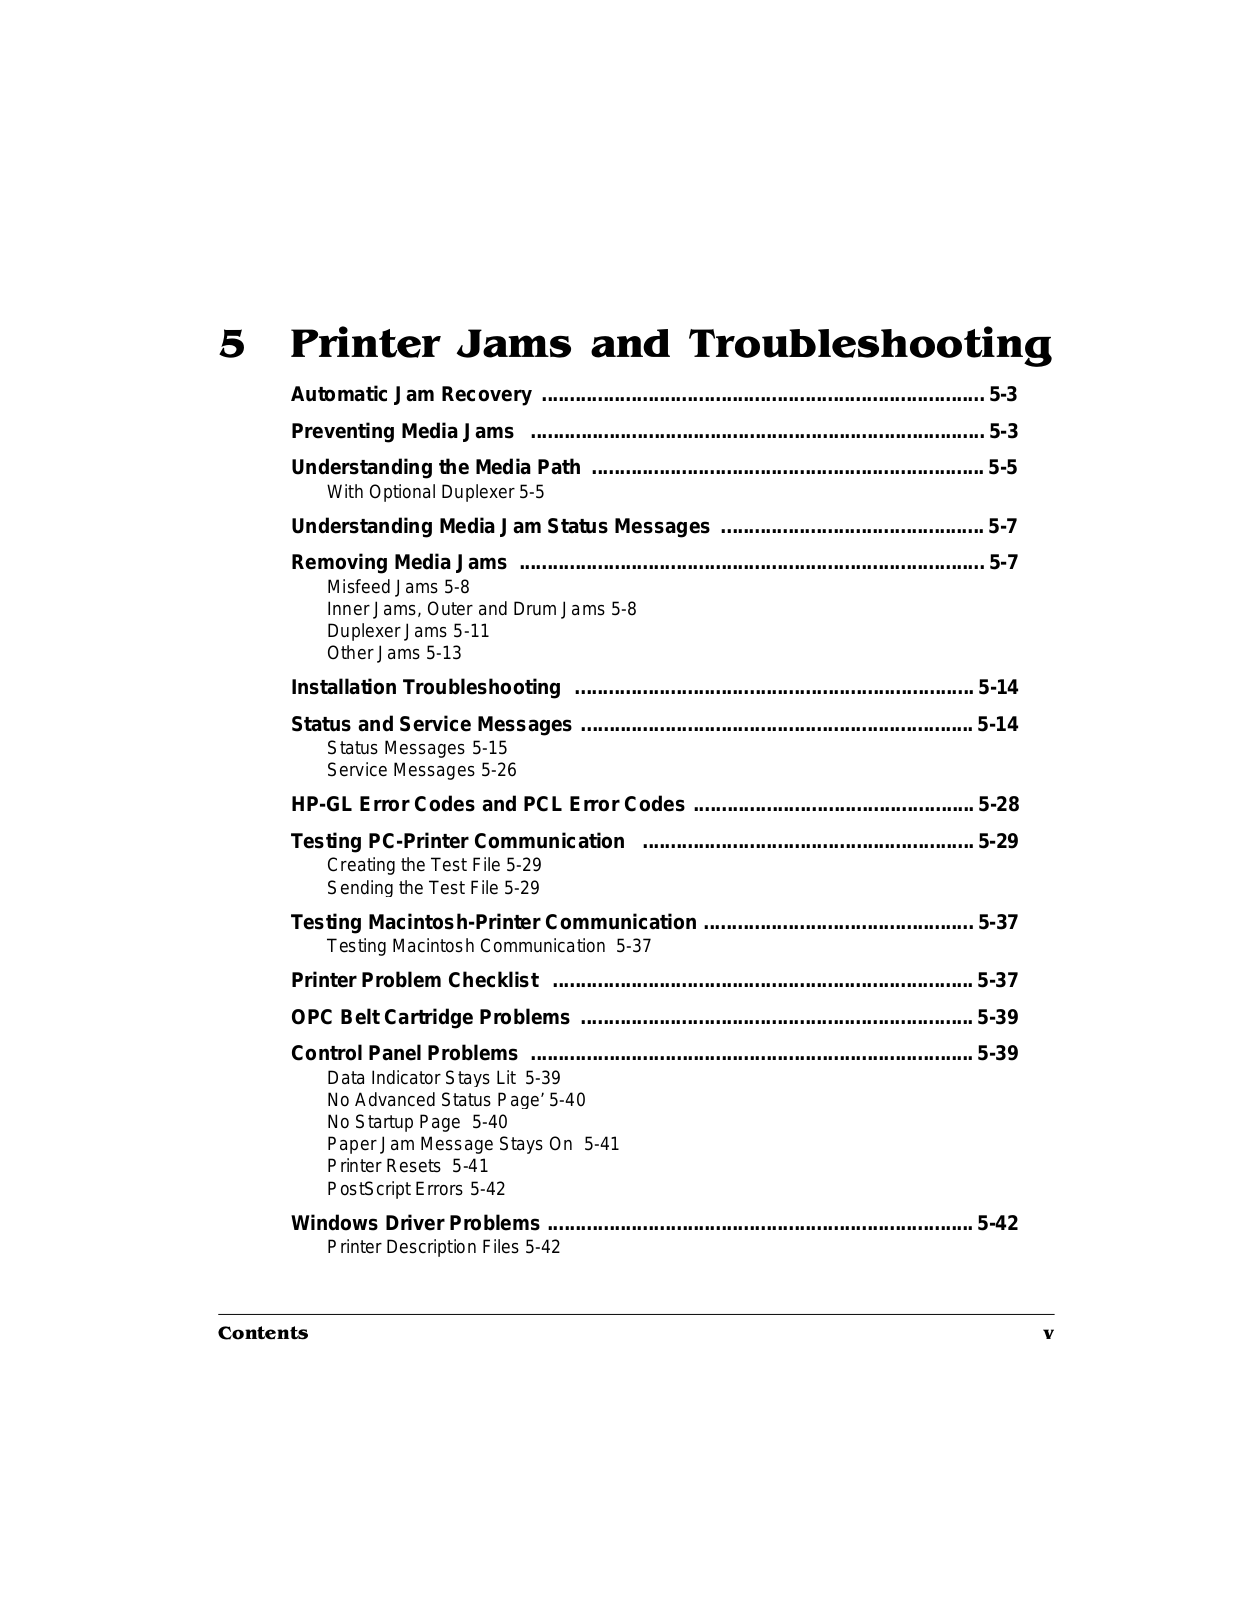
Automatic Jam Recovery ...............................................................................

5-3

Preventing Media Jams .................................................................................

5-3

Understanding the Media Path ......................................................................

5-5

With Optional Duplexer 5-5


Understanding Media Jam Status Messages ...............................................

5-7

Removing Media Jams ...................................................................................

5-7

Misfeed Jams 5-8


Inner Jams, Outer and Drum Jams 5-8


Duplexer Jams 5-11


Other Jams 5-13


Installation Troubleshooting .......................................................................

5-14

Status and Service Messages ......................................................................

5-14

Status Messages 5-15


Service Messages 5-26


HP-GL Error Codes and PCL Error Codes ..................................................

5-28

Testing PC-Printer Communication ...........................................................

5-29

Creating the Test File 5-29


Sending the Test File 5-29


Testing Macintosh-Printer Communication ................................................

5-37

Testing Macintosh Communication 5-37


Printer Problem Checklist ...........................................................................

5-37

OPC Belt Cartridge Problems ......................................................................

5-39

Control Panel Problems ...............................................................................

5-39

Data Indicator Stays Lit 5-39


No Advanced Status Page’ 5-40


No Startup Page 5-40


Paper Jam Message Stays On 5-41


Printer Resets 5-41


PostScript Errors 5-42


Windows Driver Problems ............................................................................

5-42

Printer Description Files 5-42


&


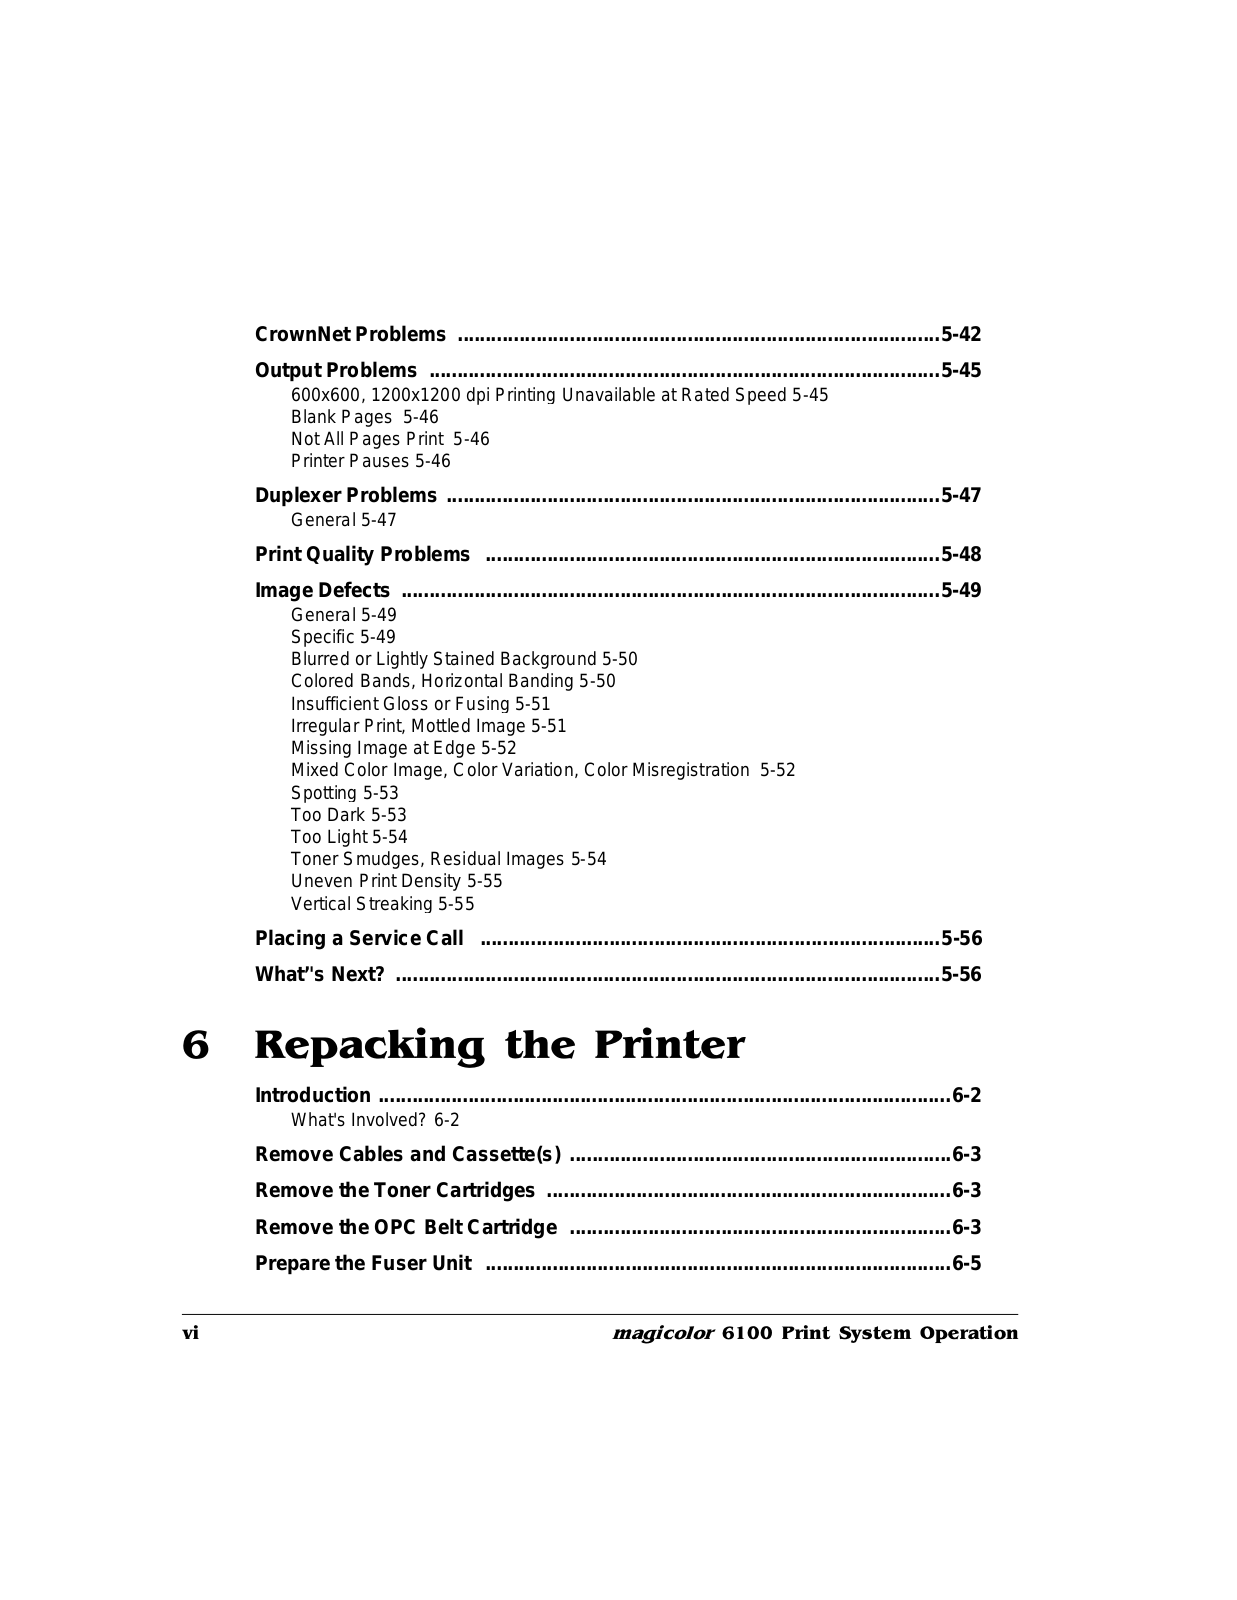
CrownNet Problems ......................................................................................

5-42


Output Problems ...........................................................................................

5-45


600x600, 1200x1200 dpi Printing Unavailable at Rated Speed 5-45


Blank Pages 5-46


Not All Pages Print 5-46


Printer Pauses 5-46


Duplexer Problems ........................................................................................

5-47


General 5-47


Print Quality Problems .................................................................................

5-48


Image Defects ................................................................................................

5-49


General 5-49


Specific 5-49


Blurred or Lightly Stained Background 5-50


Colored Bands, Horizontal Banding 5-50


Insufficient Gloss or Fusing 5-51


Irregular Print, Mottled Image 5-51


Missing Image at Edge 5-52


Mixed Color Image, Color Variation, Color Misregistration

5-52


Spotting 5-53


Too Dark 5-53


Too Light 5-54


Toner Smudges, Residual Images 5-54


Uneven Print Density 5-55


Vertical Streaking 5-55


Placing a Service Call ..................................................................................

5-56


What’'s Next? .................................................................................................

5-56


,


Introduction ......................................................................................................

6-2


What's Involved? 6-2


Remove Cables and Cassette(s) ....................................................................

6-3


Remove the Toner Cartridges ........................................................................

6-3


Remove the OPC Belt Cartridge ....................................................................

6-3


Prepare the Fuser Unit ...................................................................................

6-5

&


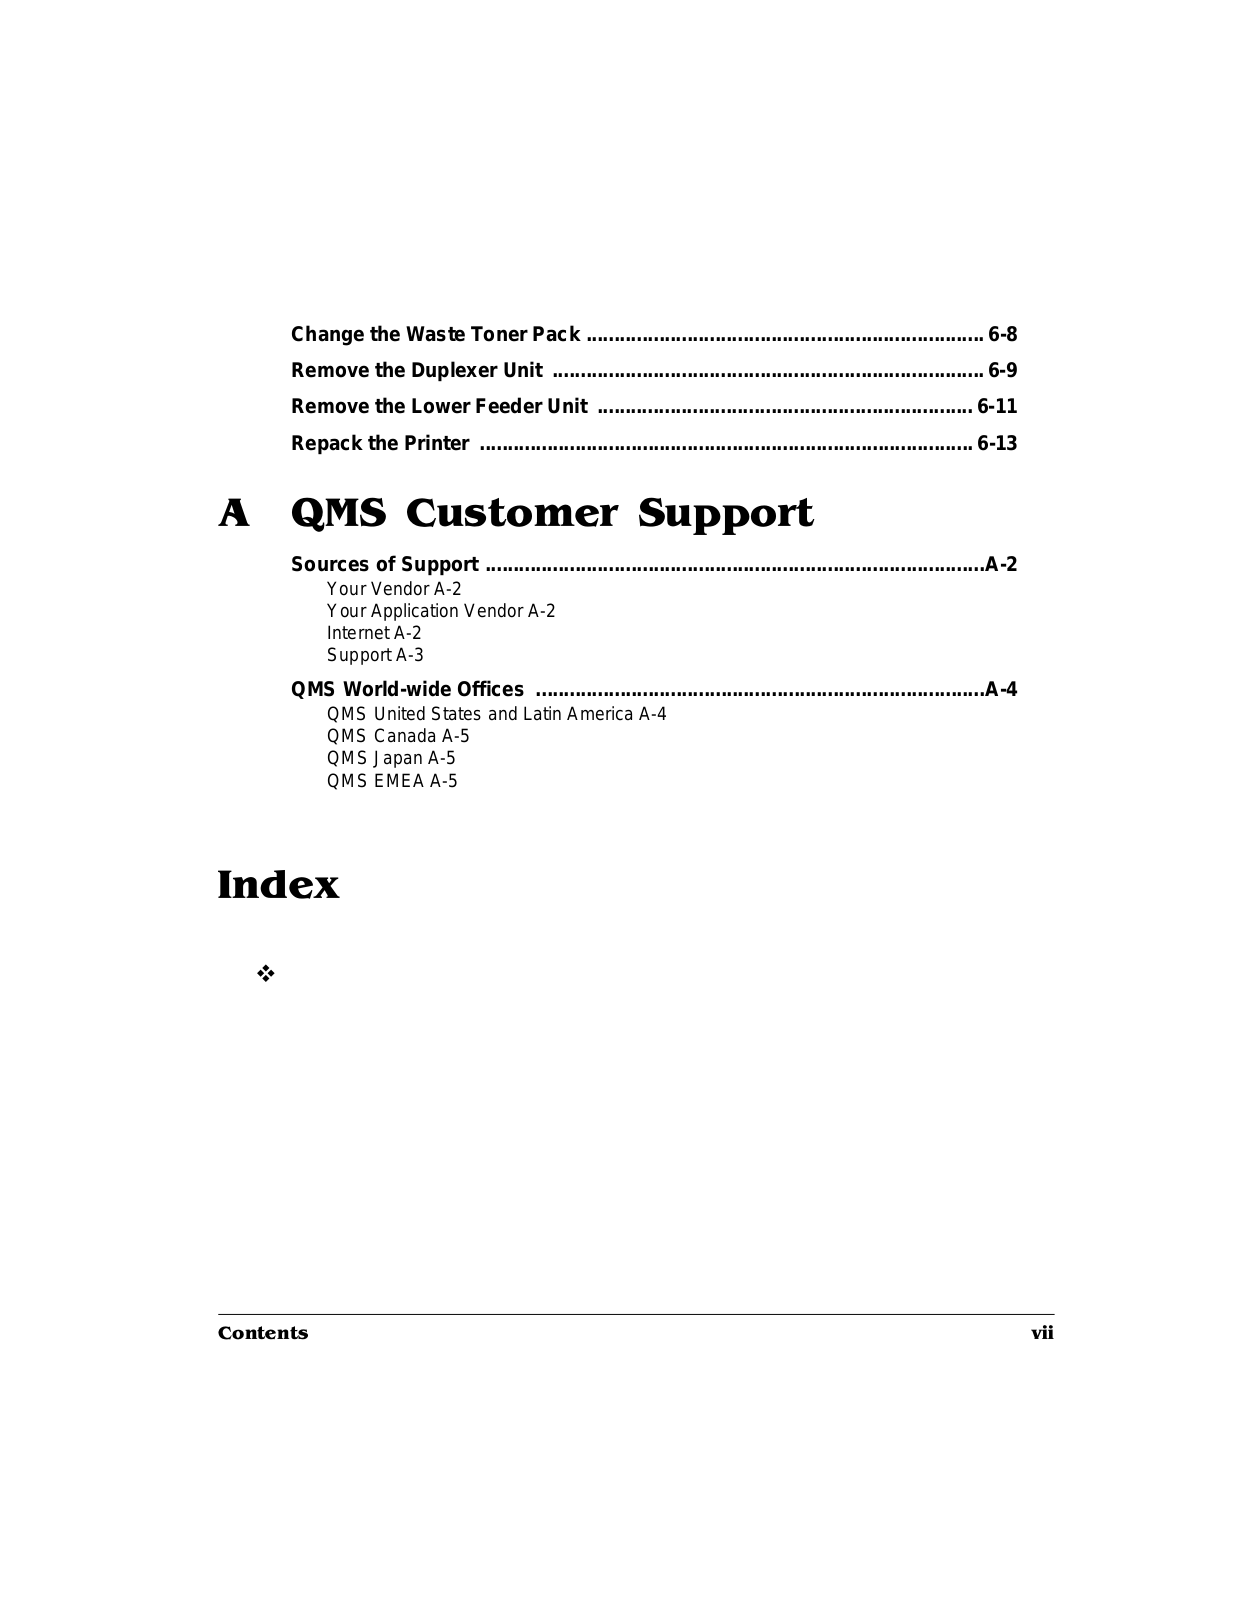
Change the Waste Toner Pack .......................................................................

6-8

Remove the Duplexer Unit .............................................................................

6-9

Remove the Lower Feeder Unit ...................................................................

6-11

Repack the Printer ........................................................................................

6-13

-. " "

Sources of Support .........................................................................................

A-2

Your Vendor A-2


Your Application Vendor A-2


Internet A-2


Support A-3


QMS World-wide Offices ................................................................................

A-4

QMS United States and Latin America A-4


QMS Canada A-5


QMS Japan A-5


QMS EMEA A-5


/ 0


&

! " # "

/ 1 1 1

“Getting Acquainted with Your Printer” on page 1-7

“The Control Panel” on pa ge 1-9

“Message Window” on page 1-9

“Control Panel Indicators” on pa ge 1-10

“Control Panel Keys” on page 1-11

"

2 "

/ "

This chapter provides information about your product documentation, your printer and introduces the parts of the printer control panel.

" 2 "

m agicolor 6100 magicolor 6100 Print This guide assists in getting the printer up and

Documentation System Installation running. It is to be used as a quick setup

CD-ROM

Guide

reference only and should be used in


conjunction with the full manuals.

3magicolor 6100 magicolor 6100 Print You’re looking at this document right now. It Documentation System Operation introduces the printer and documentation and

CD -ROM


explains the control panel. This manual guides


you through the day-to-day operation of your


printer. It includes information on printing files,


adding print media, and replacing toner. It also


includes information on handling, cleaning,


and maintaining your printer; improving print


quality; and troubleshooting printer problems.


magicolor 6100

Connecting Your

This manual guides you through connecting

Documentation

QMS Print System

your printer to a computer or a network and

CD-ROM


configuring your printer for network printing.


magicolor 6100

magicolor 6100 Print Refer to this manual for information on

Documentation

System Options

installing and using printer options:

CD-ROM


emulations, security key, memory upgrades,


fonts, interfaces, hard disks, and system


software updates.


magicolor 6100

magicolor 6100 Print Refer to this manual when you need to

Documentation

System Reference

change your printer’s configuration. It also

CD-ROM


provides information on typefaces and fonts,


job accounting, printer memory, and other


advanced printer features.

$


"


2 "


Q M S

QMS Document

This manual lists and explains all QMS

Software Utilities

Options Commands

Document Option Commands (DOCs),

CD-ROM


software codes you insert in documents to


enable printer features that can’t be accessed


by your application or page description


language. Printer-supported DOCs are listed


in appendix C, “Document Option


Commands,” of the Reference manual. In


most cases only advanced users or system


administrators need this information.


QMS

QMS Crown Network

Refer to this document for network tips. It

Software Utilities

Notes

discusses 3Com 3+Open, Banyan VINES,

CD-ROM


LAN Manager-based LANs, Novell NetWare,


TCP/IP, UNIX, DECnet, and VMS. In most


cases, only advanced network users and


system administrators need this information.


QMS

Colorific User’s

Contains instructions for using Colorific’s

Software Utilities

Manual

monitor calibration software and helpful

CD-ROM


information about color management, ICC


profiles and color matching.


. " * 2 , .

The manuals included on the magicolor 6100 Print System Documentation and QMS Software Utilities CD-ROMs are in Adobe Acrobat PDF format. We’ve also provided the Acrobat Reader and QuickTime programs on both CD-ROMs. The CD-ROM insert provides instructions on installing them.

! " ! ! ,

Adobe Acrobat PDF-formatted manuals give you more flexibility and convenience than do hardcopy manuals when you have to access information. Here are some of the advantages PDF-formatted manuals provide:

You can store the PDF manuals in a central location for access by anyone on the network.

You can view and print the manuals on Windows, Macintosh, and UNIX platforms.

You can view the manuals on web browsers using the Acrobat plug-in.

! " # "

'

"

2 "

You can view the manuals on-screen in different formats (side-by-side or two-up, one page at a time, scrolling two-up, article flow, and zooming capability up to 800%).

You can conduct full-text searches through all of the manuals.

You can watch QuickTime video clips on Windows and Macintosh platforms that enhance the text and illustrations for a number of commonly performed procedures. (When installing the Reader, be sure to select the option to install QuickTime.)

You can print only the manual pages that you need.

The PDF-formatted manuals have been enhanced for on-screen viewing and navigation. Throughout each manual are numerous hotlinks to cross-reference points. The table of contents and the index are fully hotlinked to their respective page references, and all World Wide Web addresses are linked to their respective home pages.

We hope you enjoy using the Acrobat software to access the information in your manuals. They’ll never become dog-eared and yellowed or collect dust on some forgotten shelf with quick online access. Your PDF-formatted manuals will empower you to take full advantage of all the capabilities of your printer.

4 ! ! ,

When you use Acrobat to view your manuals, keep the following tips in mind for using some of the navigation features built into Acrobat and your manuals.

You may view the document in three different styles: page only, with bookmarks, or with thumbnails. Try each to see which you like best. Viewing with bookmarks will enable you to use a quick table of contents to move around the document.

The toolbar also gives you quick access to page navigation features. For example, you may click a button to advance (>) or reverse (<) one page, go to the start (|<) or end (>|) of the document, or use the history button (<<) to go to the previous pages you viewed. There are other buttons in the toolbar to change view or magnification of the document.

As you browse through the document the open hand tool will sometimes turn into a pointing hand. You have discovered an embedded link in the manual. You will

)


"

2 "

find these links in the table of contents, index, www addresses, and cross references. Click on the link to jump to a new location.

You may discover a movie camera icon on Windows and Macintosh platforms. Click the icon to play a QuickTime video clip of the procedure described in the text.

Use the Acrobat Reader Online Help for a more complete explanation of these features.

, 5 "

Don’t forget that your application documentation, host operating system documentation, and network documentation all contain useful printing information. Further information on QMS printers is available through the Internet. See appendix A, “QMS Customer Support” for details.

! " # "


"

2 "

&

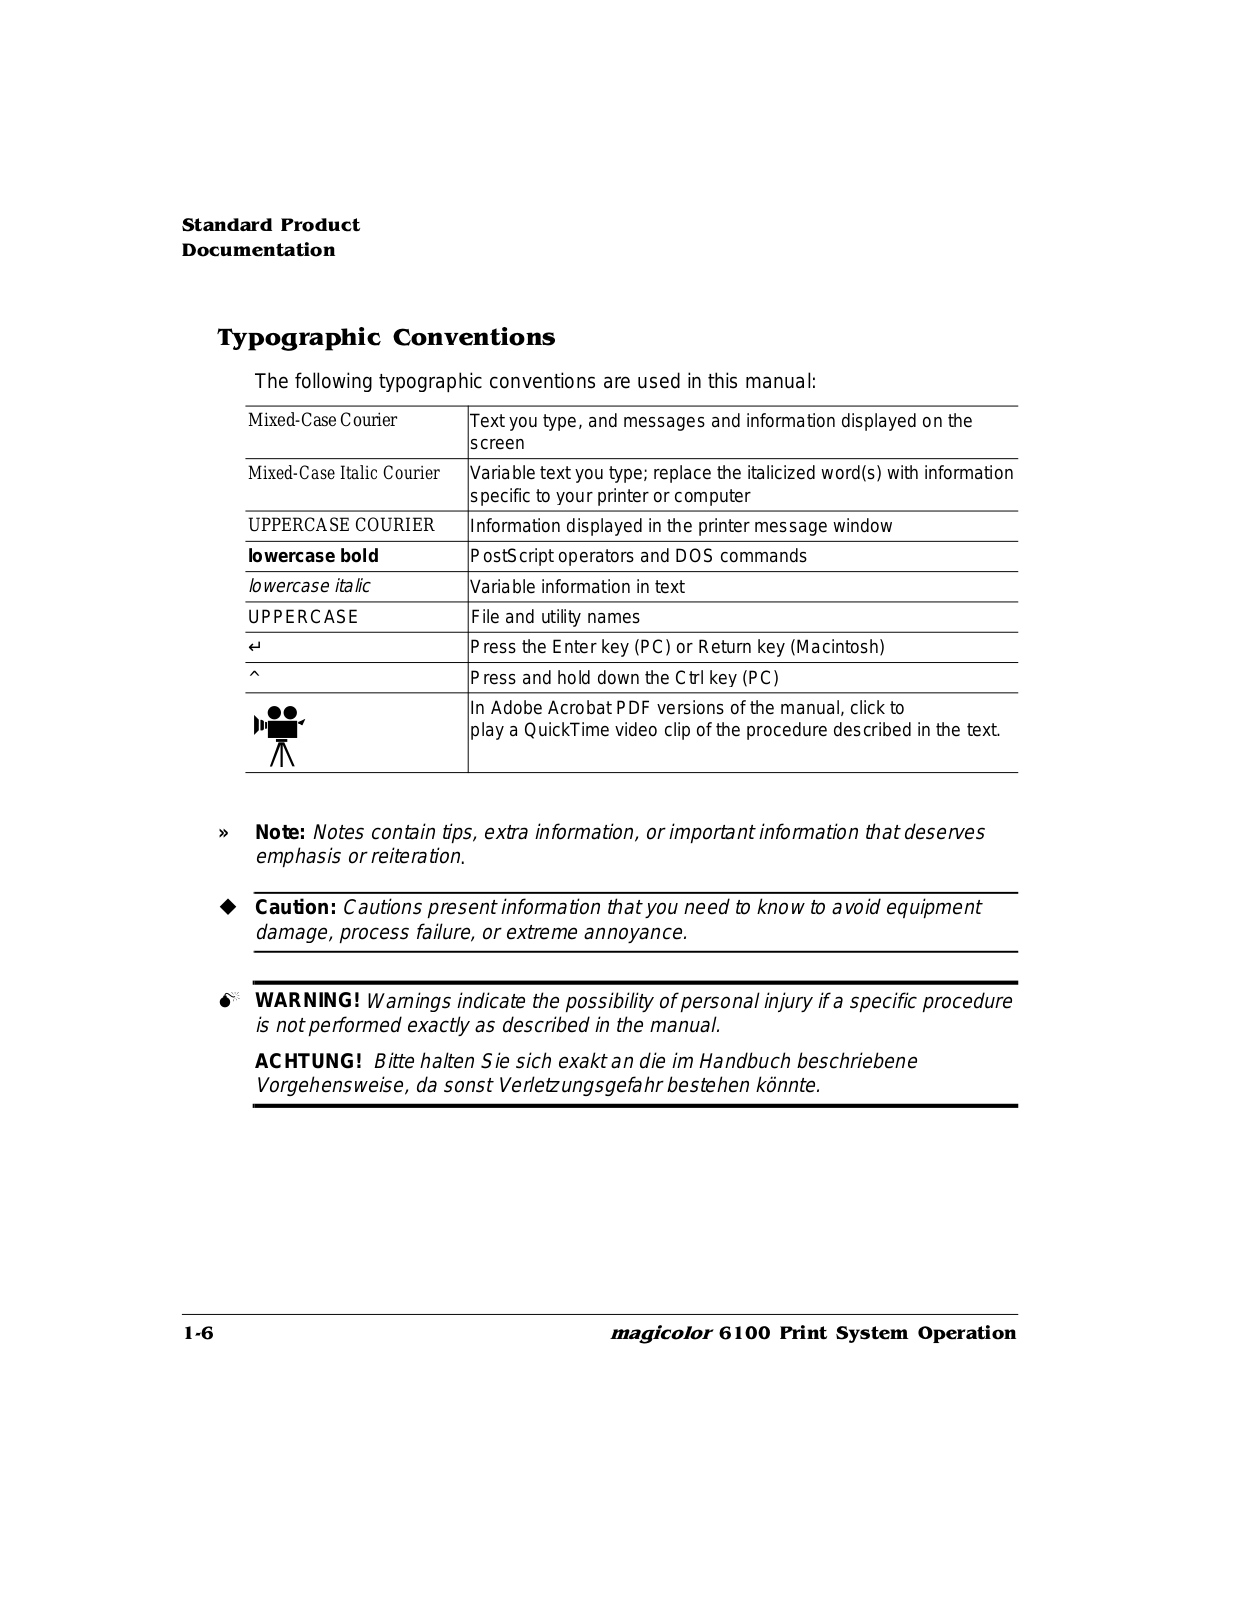
The following typographic conventions are used in this manual:

Mixed-Case Courier

Text you type, and messages and information displayed on the


screen


Mixed-Case Italic Courier

Variable text you type; replace the italicized word(s) with information


specific to your printer or computer


UPPERCASE COURIER

Information displayed in the printer message window


lowercase bold

PostScript operators and DOS commands


lowercase italic

Variable information in text


UPPERCASE

File and utility names


Press the Enter key (PC) or Return key (Macintosh)


^


Press and hold down the Ctrl key (PC)


In Adobe Acrobat PDF versions of the manual, click to


play a QuickTime video clip of the procedure described in the text.


»Note: Notes contain tips, extra information, or important information that deserves emphasis or reiteration.

Caution: Cautions present information that you need to know to avoid equipment damage, process failure, or extreme annoyance.

WARNING! Warnings indicate the possibility of personal injury if a specific procedure is not performed exactly as described in the manual.

ACHTUNG! Bitte halten Sie sich exakt an die im Handbuch beschriebene Vorgehensweise, da sonst Verletzungsgefahr bestehen könnte.


6 7" 8 # "

6 7" 8 # "

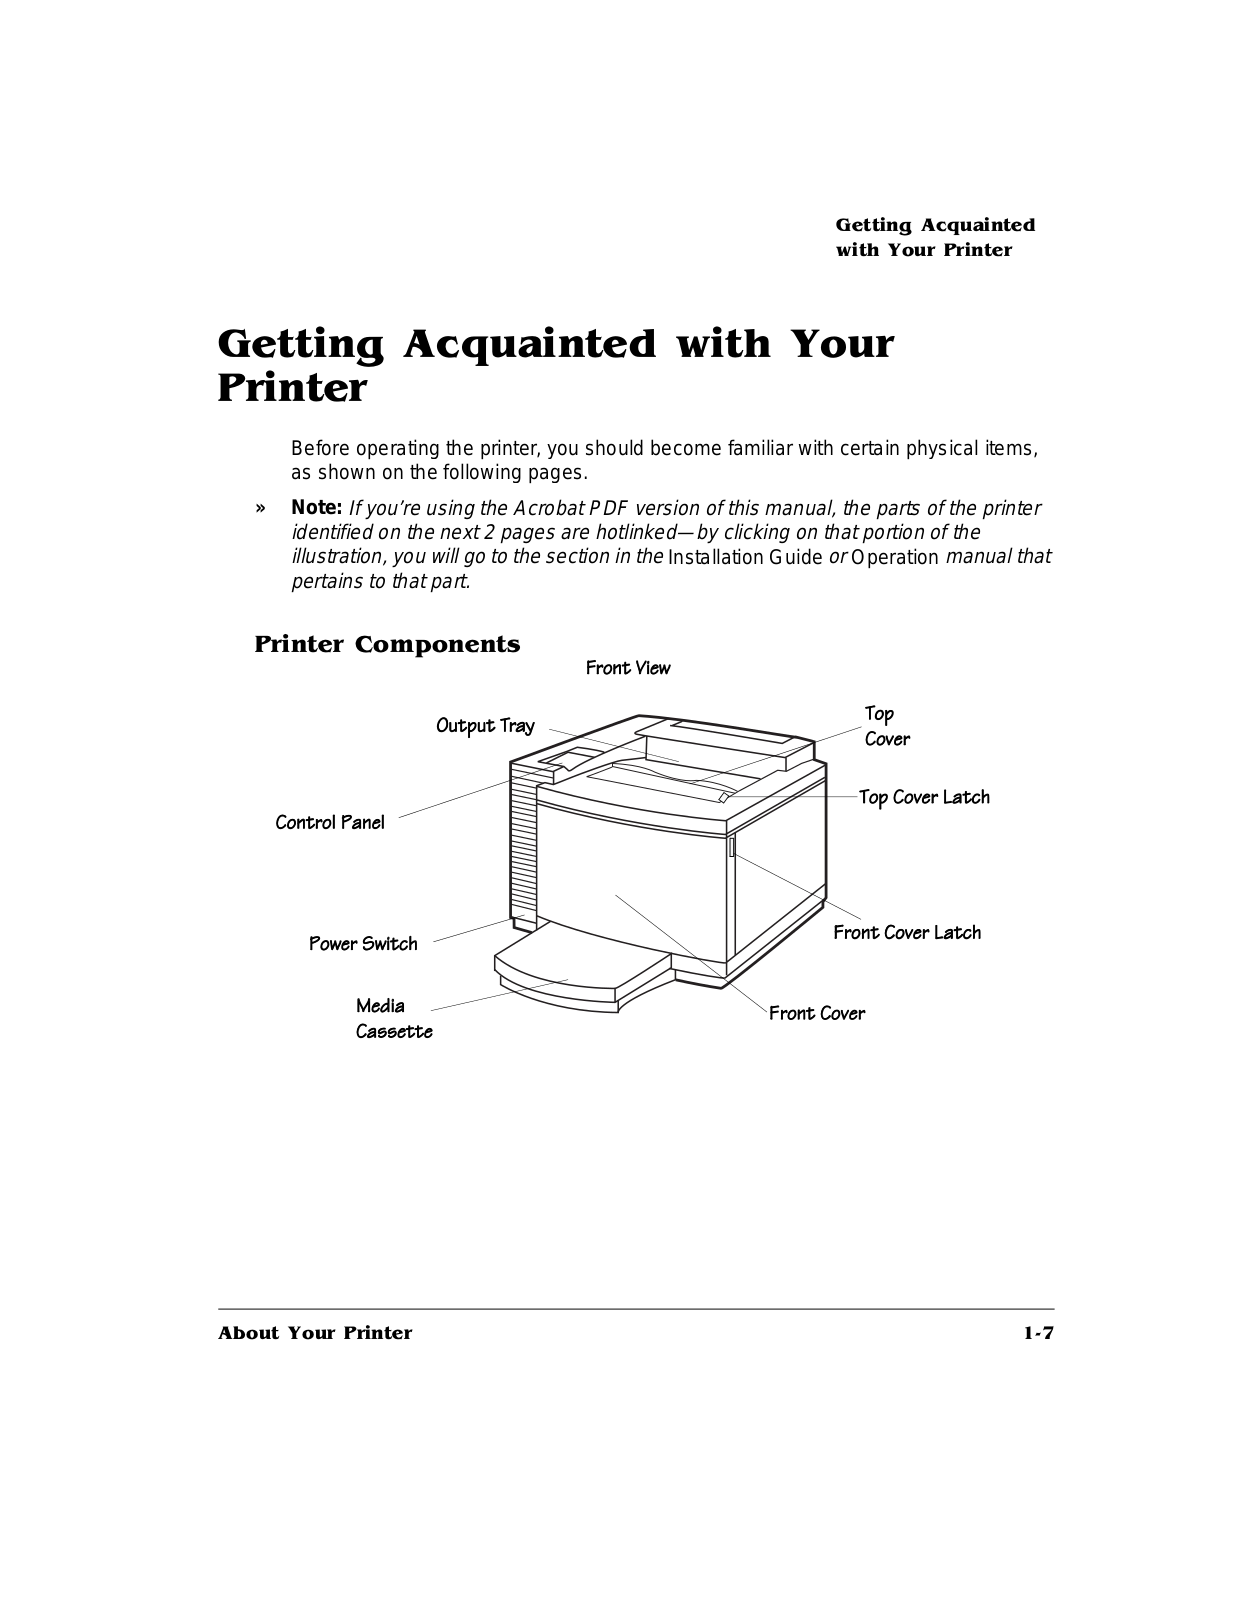
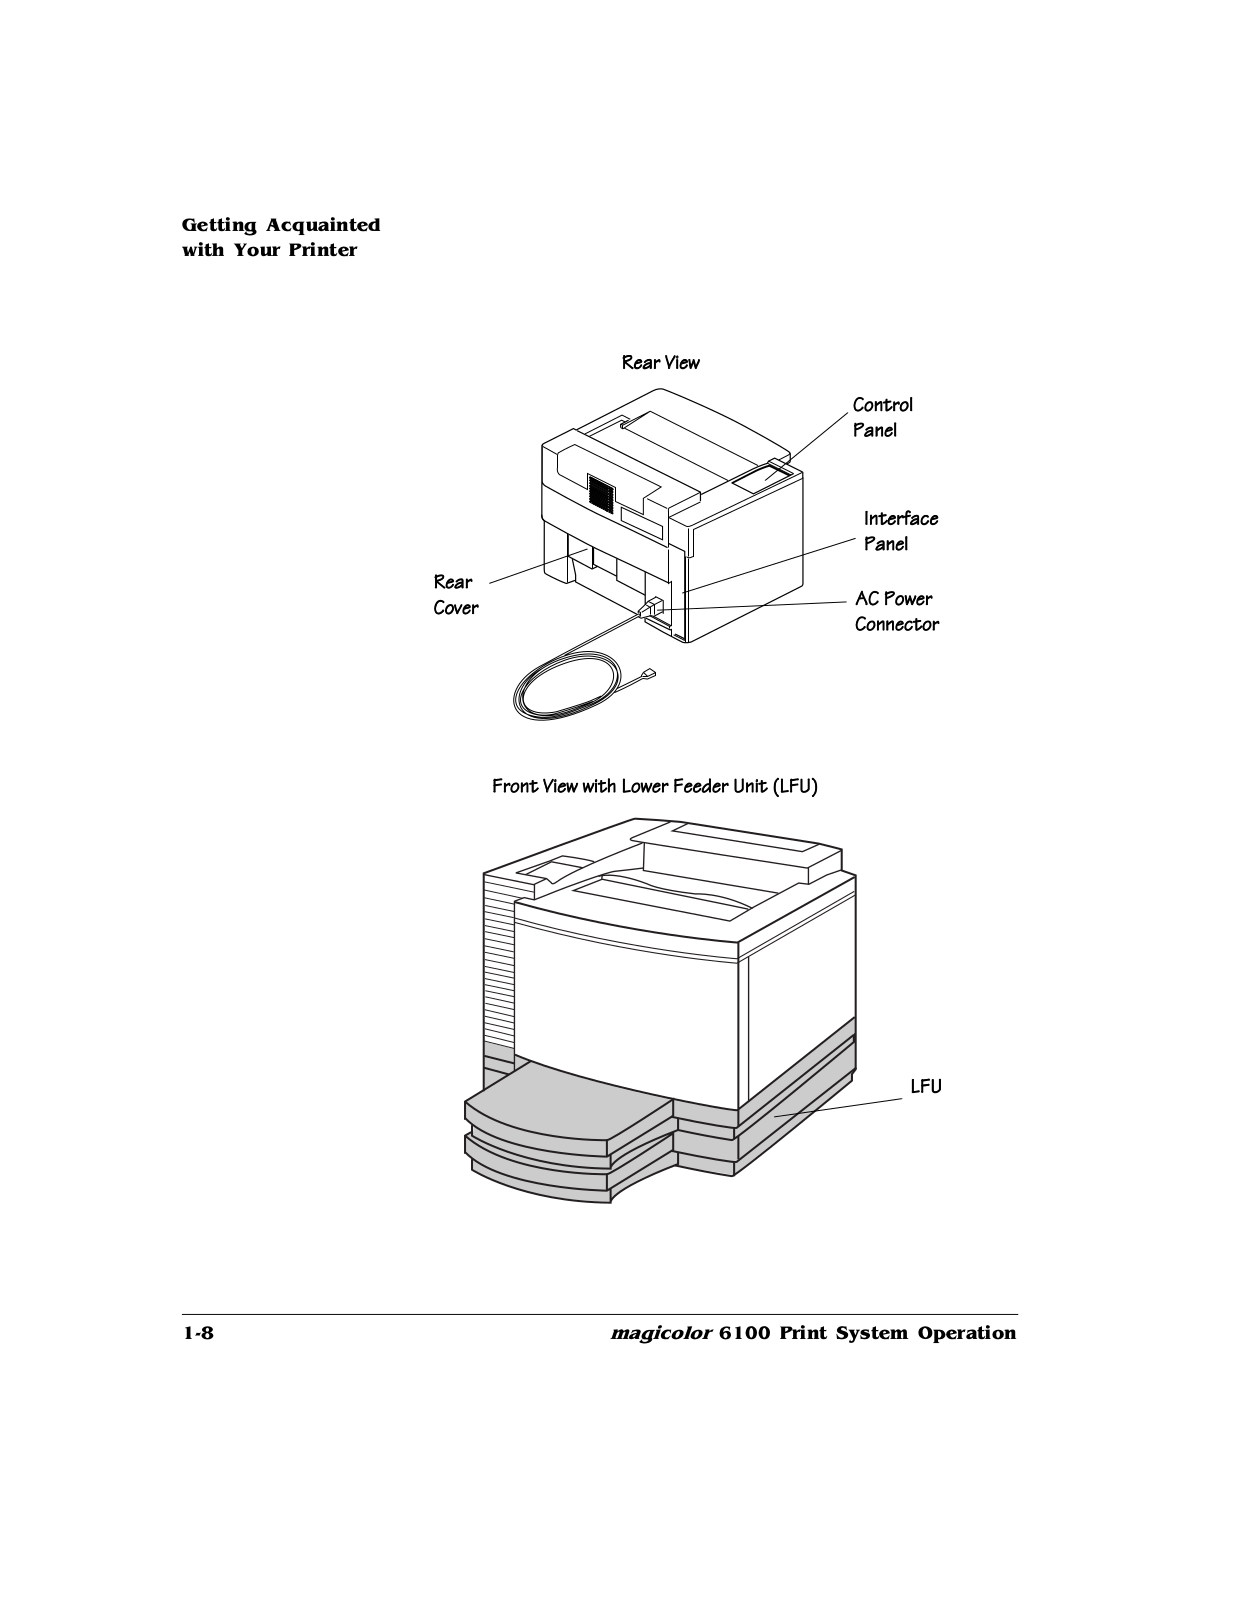
Before operating the printer, you should become familiar with certain physical items, as shown on the following pages.

»Note: If you’re using the Acrobat PDF version of this manual, the parts of the printer identified on the next 2 pages are hotlinked—by clickin g on that portion of the illustration, you will go to the section in the Installation Guide or Operation manual that pertains to that part.


! " # "


Konica Minolta 6100 User Manual

6 7" 8 # "


! "


* *

* *

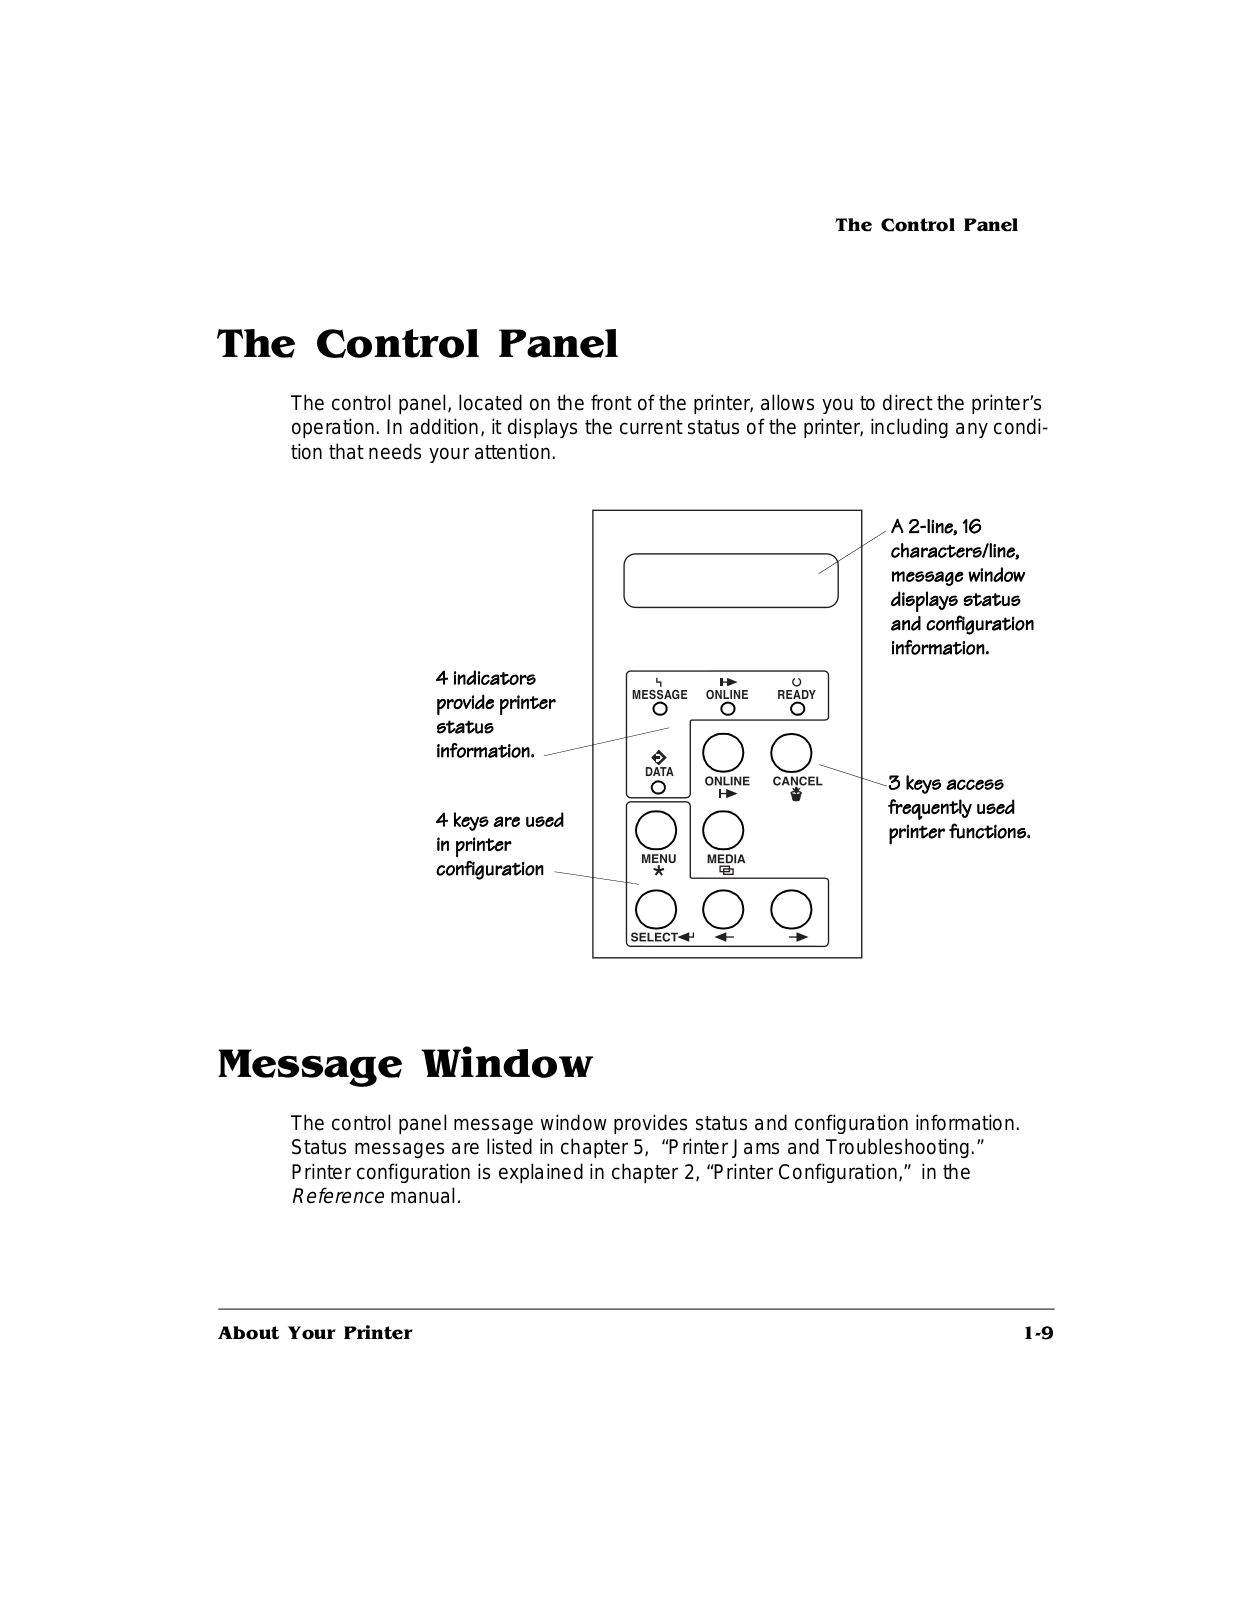
The control panel, located on the front of the printer, allows you to direct the printer’s operation. In addition, it displays the current status of the printer, including any condition that needs your attention.

#$% &'

( %

) *

*

) +

,

) +


-.

, .

/

+


*


. : 8

The control panel message window provides status and configuration information. Status messages are listed in chapter 5, “Printer Jams and Troubleshooting.” Printer configuration is explained in chapter 2, “Printer Configuration,” in the

Reference manual.

! " # "

9

* *

/

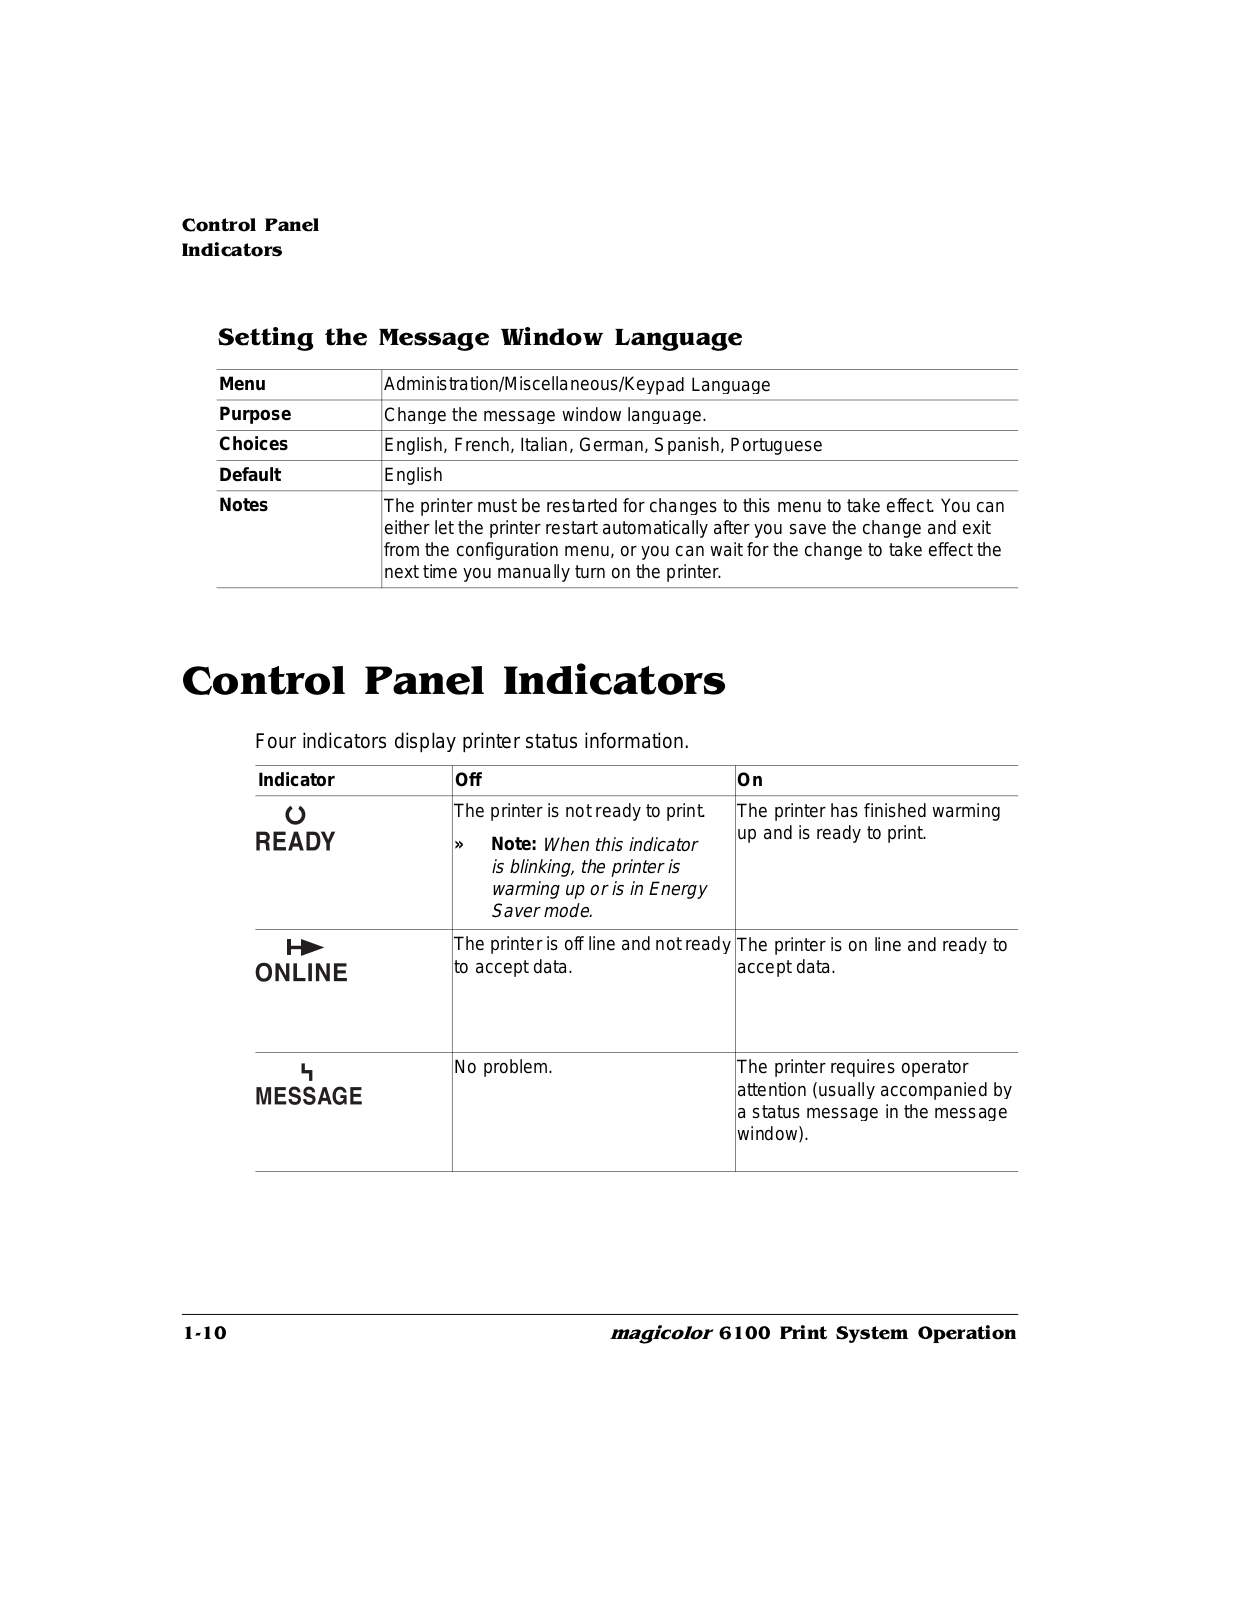
. : 8 ; "

Menu

Administration/Miscellaneous/Keypad Language


Purpose

Change the message window language.


Choices

English, French, Italian, German, Spanish, Portuguese


Default

English


Notes

The printer must be restarted for changes to this menu to take effect. You can


either let the printer restart automatically after you save the change and exit


from the configuration menu, or you can wait for the change to take effect the


next time you manually turn on the printer.


* * /

Four indicators display printer status information.

Indicator

Off

On


The printer is not ready to print.

The printer has finished warming


» Note: When this indicator

up and is ready to print.


is blinking, the printer is


warming up or is in Energy


Saver mode.


The printer is off line and not ready The printer is on line and ready to


to accept data.

accept data.


No problem.

The printer requires operator


attention (usually accompanied by


a status message in the message


window).


* * <

Indicator

Off

On


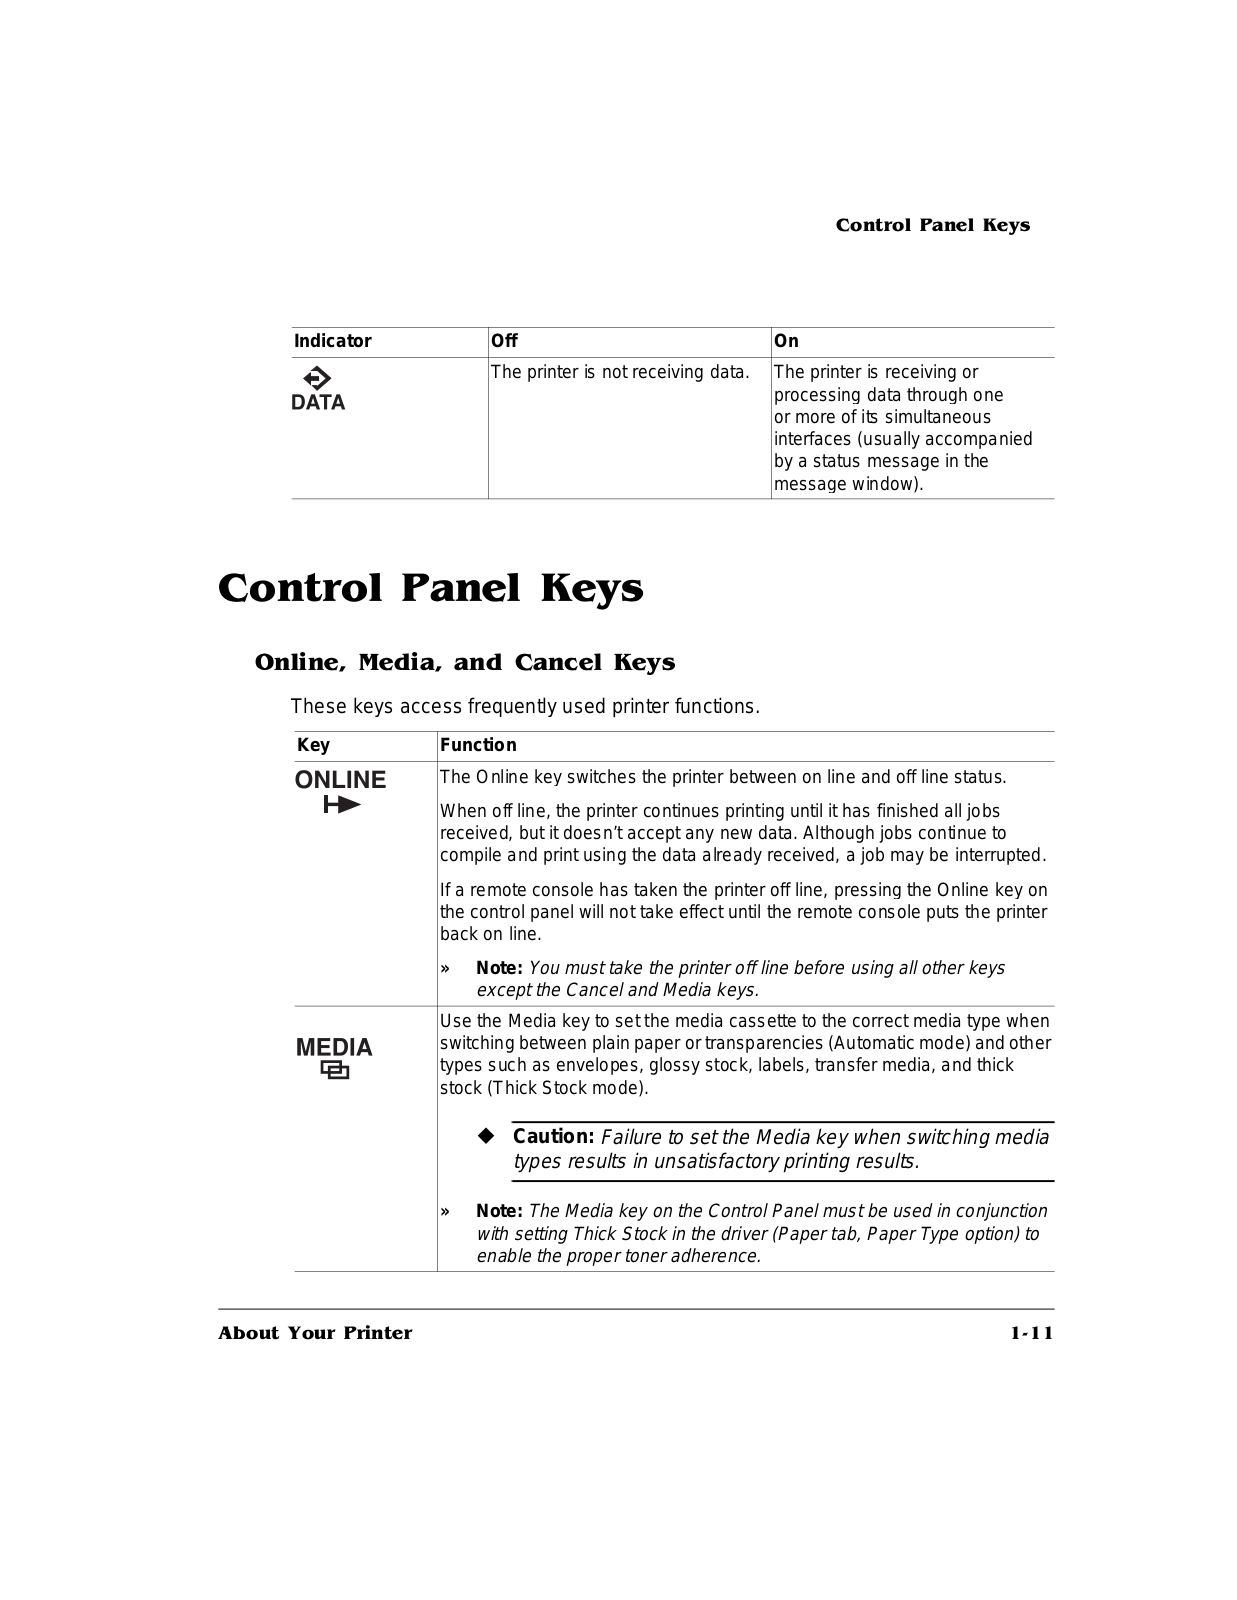
The printer is not receiving data.

The printer is receiving or


processing data through one


or more of its simultaneous


interfaces (usually accompanied


by a status message in the


message window).


* * <

* = . = * <

These keys access frequently used printer functions.

Key

Function


The Online key switches the printer between on line and off line status.


When off line, the printer continues printing until it has finished all jobs


received, but it doesn’t accept any new data. Although jobs continue to


compile and print using the data already received, a job may be interrupted.


If a remote console has taken the printer off line, pressing the Online key on


the control panel will not take effect until the remote console puts the printer


back on line.


» Note: You must take the printer off line before using all other keys


except the Cancel and Media keys.


Use the Media key to set the media cassette to the correct media type when


switching between plain paper or transparencies (Automatic mode) and other


types such as envelopes, glossy stock, labels, transfer media, and thick


stock (Thick Stock mode).

Caution: Failure to set the Media key when switching media types results in unsatisfactory printing results.

» Note: The Media key on the Control Panel must be used in conjunction with setting Thick Stock in the driver (Paper tab, Paper Type option) to enable the proper toner adherence.

! " # "


* * <

Key

Function


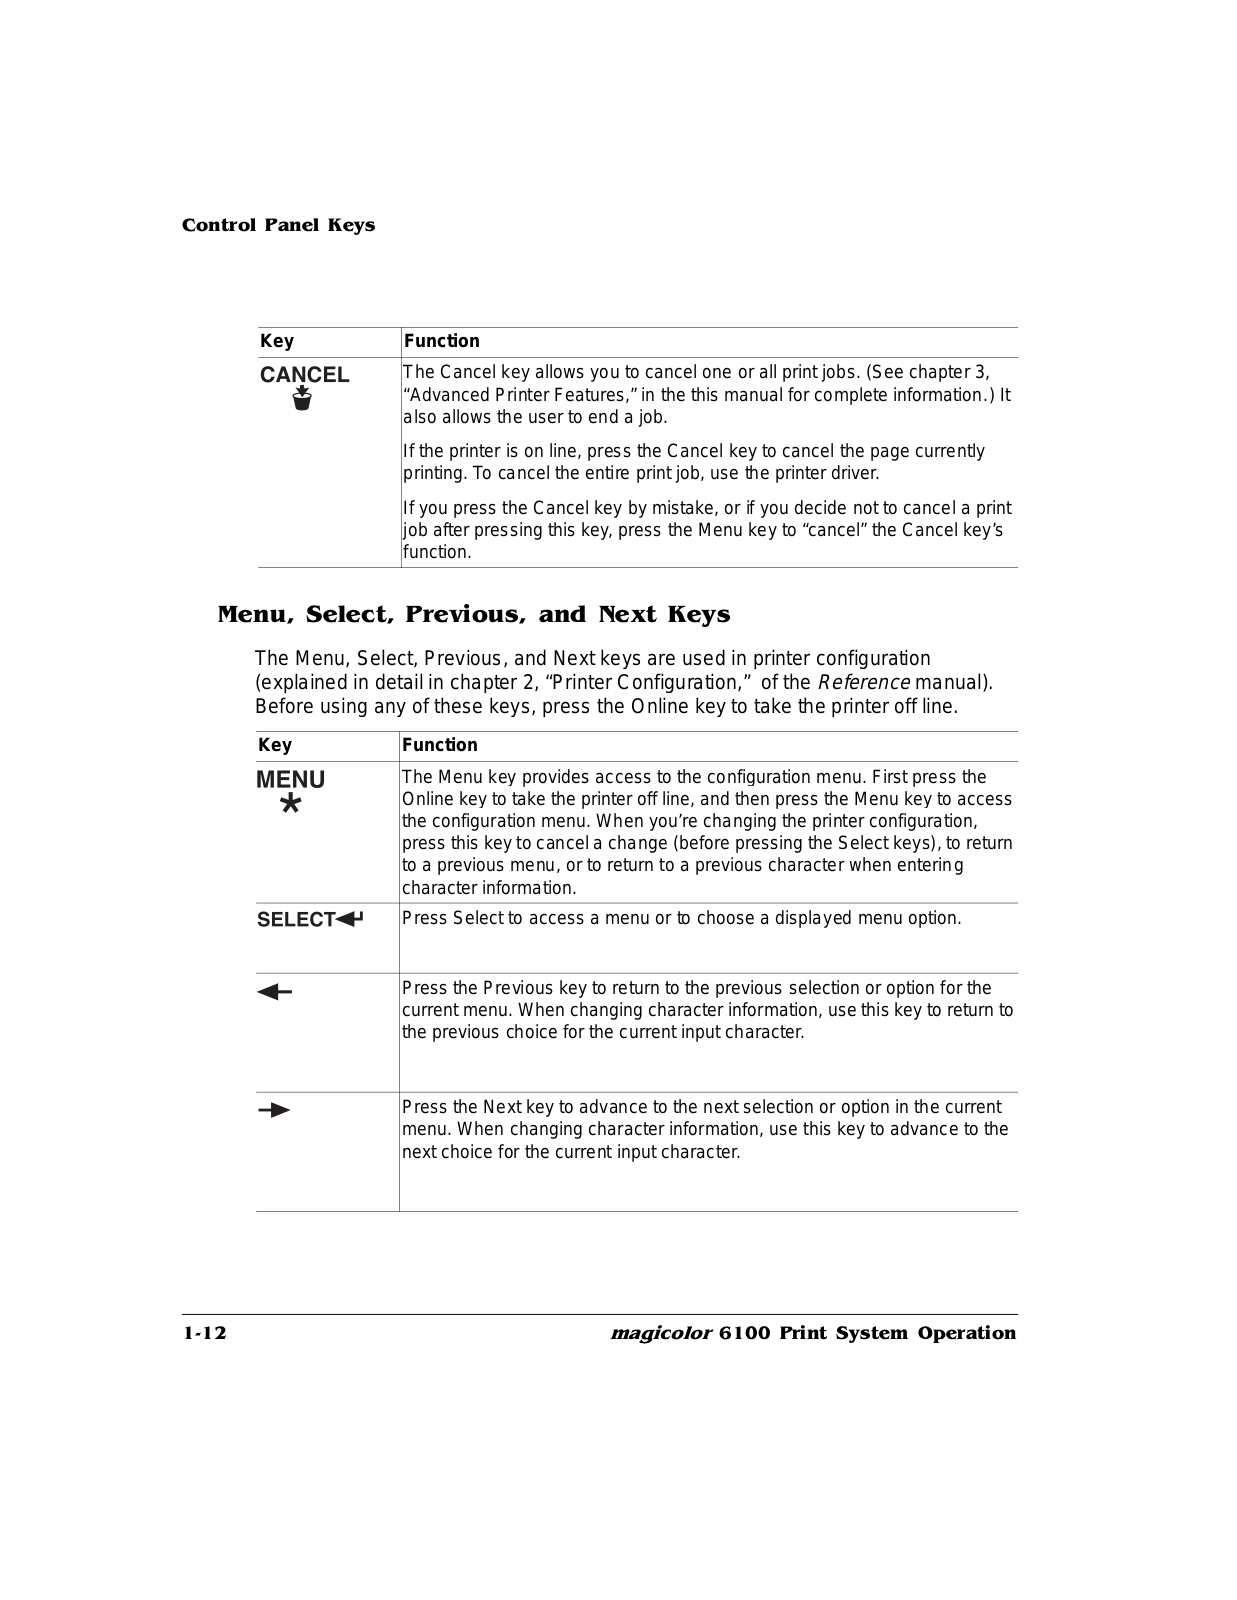
The Cancel key allows you to cancel one or all print jobs. (See chapter 3,


“Advanced Printer Features,” in the this manual for complete information. ) It


also allows the user to end a job.


If the printer is on line, press the Cancel key to cancel the page currently


printing. To cancel the entire print job, use the printer driver.


If you press the Cancel key by mistake, or if you decide not to cancel a print


job after pressing this key, press the Menu key to “cancel” the Cancel key’s


function.


. "= * = & " = 0 <

The Menu, Select, Previous, and Next keys are used in printer configuration (explained in detail in chapter 2, “Printer Configuration,” of the Reference manual). Before using any of these keys, press the Online key to take the printer off line.

Key

Function


The Menu key provides access to the configuration menu. First press the


Online key to take the printer off line, and then press the Menu key to access


the configuration menu. When you’re changing the printer configuration,


press this key to cancel a change (before pressing the Select keys), to return


to a previous menu, or to return to a previous character when entering


character information.


Press Select to access a menu or to choose a displayed menu option.


Press the Previous key to return to the previous selection or option for the


current menu. When changing character information, use this key to return to


the previous choice for the current input character.


Press the Next key to advance to the next selection or option in the current


menu. When changing character information, use this key to advance to the


next choice for the current input character.


$


* * <

: >>>>>? 0 @

Now that you’ve become acquainted with your printer, refer to chapter 2, “Everyday Operations and Printer Care,” for general use and care instructions.

! " # "

'

$

%&

/ 1 1 1

“Loading the Media Cassette” on page 2-3

“Using Media Other Than Paper” on page 2-6

“Using Toner Cartridges” on page 2-14

“Replacing the OPC Belt Cartridge” on page 2-18

“Replacing the Fuser Oil Bottle” on page 2-22

“Replacing the Cleaning Roller” on page 2-23

“Replacing the Waste Toner Bottle” on page 2-24

“Replacing the Ozone Filter” on page 2-26

“Handling the Printer” on page 2-26

“Handling the Printer” on page 2-26

“Cleaning the Printer” on page 2-27

“Maintenance Schedule” on page 2-36

$ $


; .

/ "

This chapter covers basic printer operation, such as loading paper, transparencies, labels, and envelopes; and how to replace a toner cartridge, the OPC belt cartridge, the fuser oil bottle, the cleaning roller, and the waste toner pack.

; .

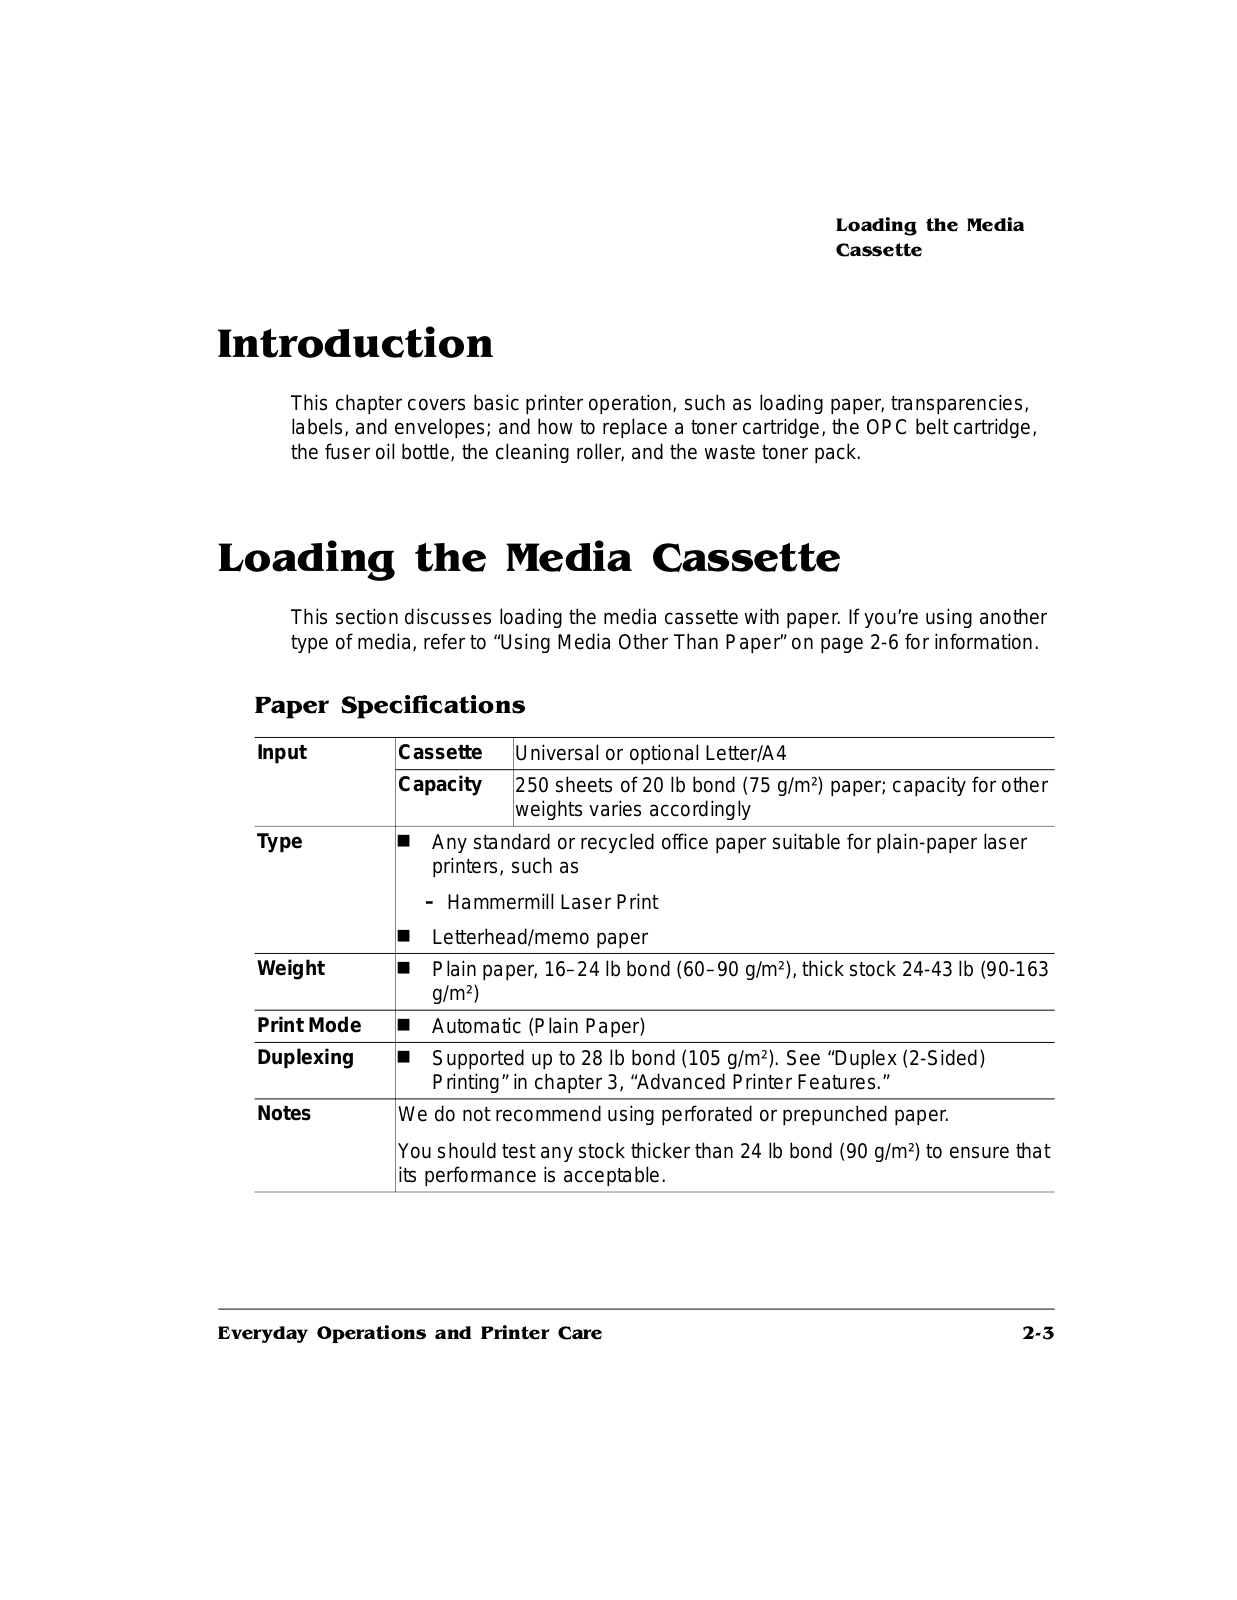
This section discusses loading the media cassette with paper. If you’re using another type of media, refer to “Using Media Other Than Paper” on page 2-6 for information.

5

Input

Cassette

Universal or optional Letter/A4


Capacity

250 sheets of 20 lb bond (75 g/m²) paper; capacity for other


weights varies accordingly


Type

Any standard or recycled office paper suitable for plain-paper laser


printers, such as


Hammermill Laser Print


Letterhead/memo paper


Weight

Plain paper, 16–24 lb bond (60–90 g/m²), thick stock 24-43 lb (90-163


g/m²)


Print Mode


Automatic (Plain Paper)


Duplexing

Supported up to 28 lb bond (105 g/m²). See “Duplex (2-Sided)


Printing” in chapter 3, “Advanced Printer Features.”


Notes

We do not recommend using perforated or prepunched paper.


You should test any stock thicker than 24 lb bond (90 g/m²) to ensure that


its performance is acceptable.


%&

$'

; .

1Take a stack of about 250 sheets (½ ream).

»Note: Don’t unwrap the paper above the printer as this might cause paper particles to fall into the printer.

2Holding the stack with one hand, fan the paper with the other.

This gets air through the sheets and prevents static buildup.

3Take off the top and bottom sheets.

Residual glue buildup on these sheets may cause media jams.

;

1Remove the media cassette from the printer.

2Adjust the media guides to fit the size paper you’re loading.

Squeeze the retainers at the ends of the left guide and/or the center guide, move the guide to the appropriate location (media sizes are listed on the cassette), and release the retainers.

*

*


3 Push the media pressure plate down to lock it in position.

$)


; .

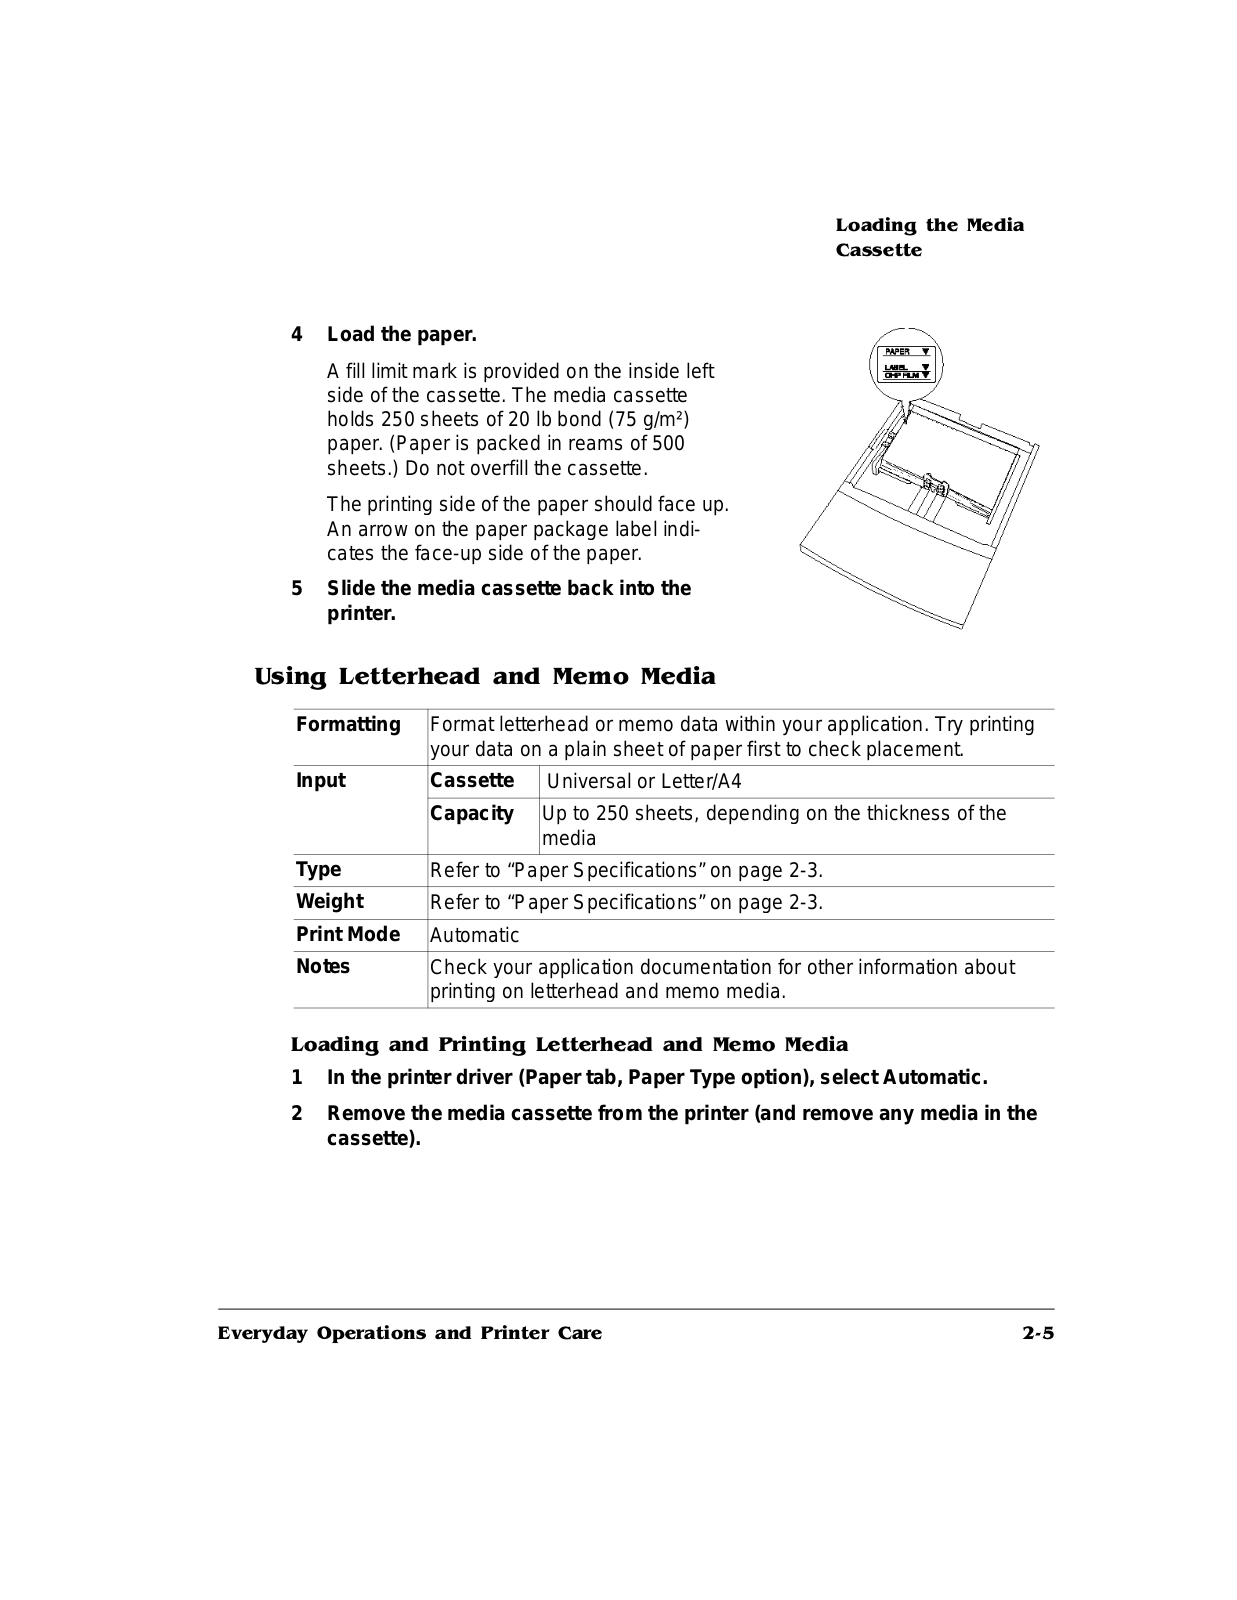
4Load the paper.

A fill limit mark is provided on the inside left side of the cassette. The media cassette holds 250 sheets of 20 lb bond (75 g/m²) paper. (Paper is packed in reams of 500 sheets.) Do not overfill the cassette.

The printing side of the paper should face up. An arrow on the paper package label indicates the face-up side of the paper.

5Slide the media cassette back into the printer.

4 ; . .

Formatting

Format letterhead or memo data within your application. Try printing


your data on a plain sheet of paper first to check placement.


Input

Cassette

Universal or Letter/A4


Capacity

Up to 250 sheets, depending on the thickness of the


media


Type

Refer to “Paper Specifications” on pa ge 2-3.


Weight

Refer to “Paper Specifications” on pa ge 2-3.


Print Mode

Automatic


Notes

Check your application documentation for other information about


printing on letterhead and memo media.


; ; . .

1In the printer driver (Paper tab, Paper Type option), select Automatic.

2Remove the media cassette from the printer (and remove any media in the cassette).

%&

$

4 .

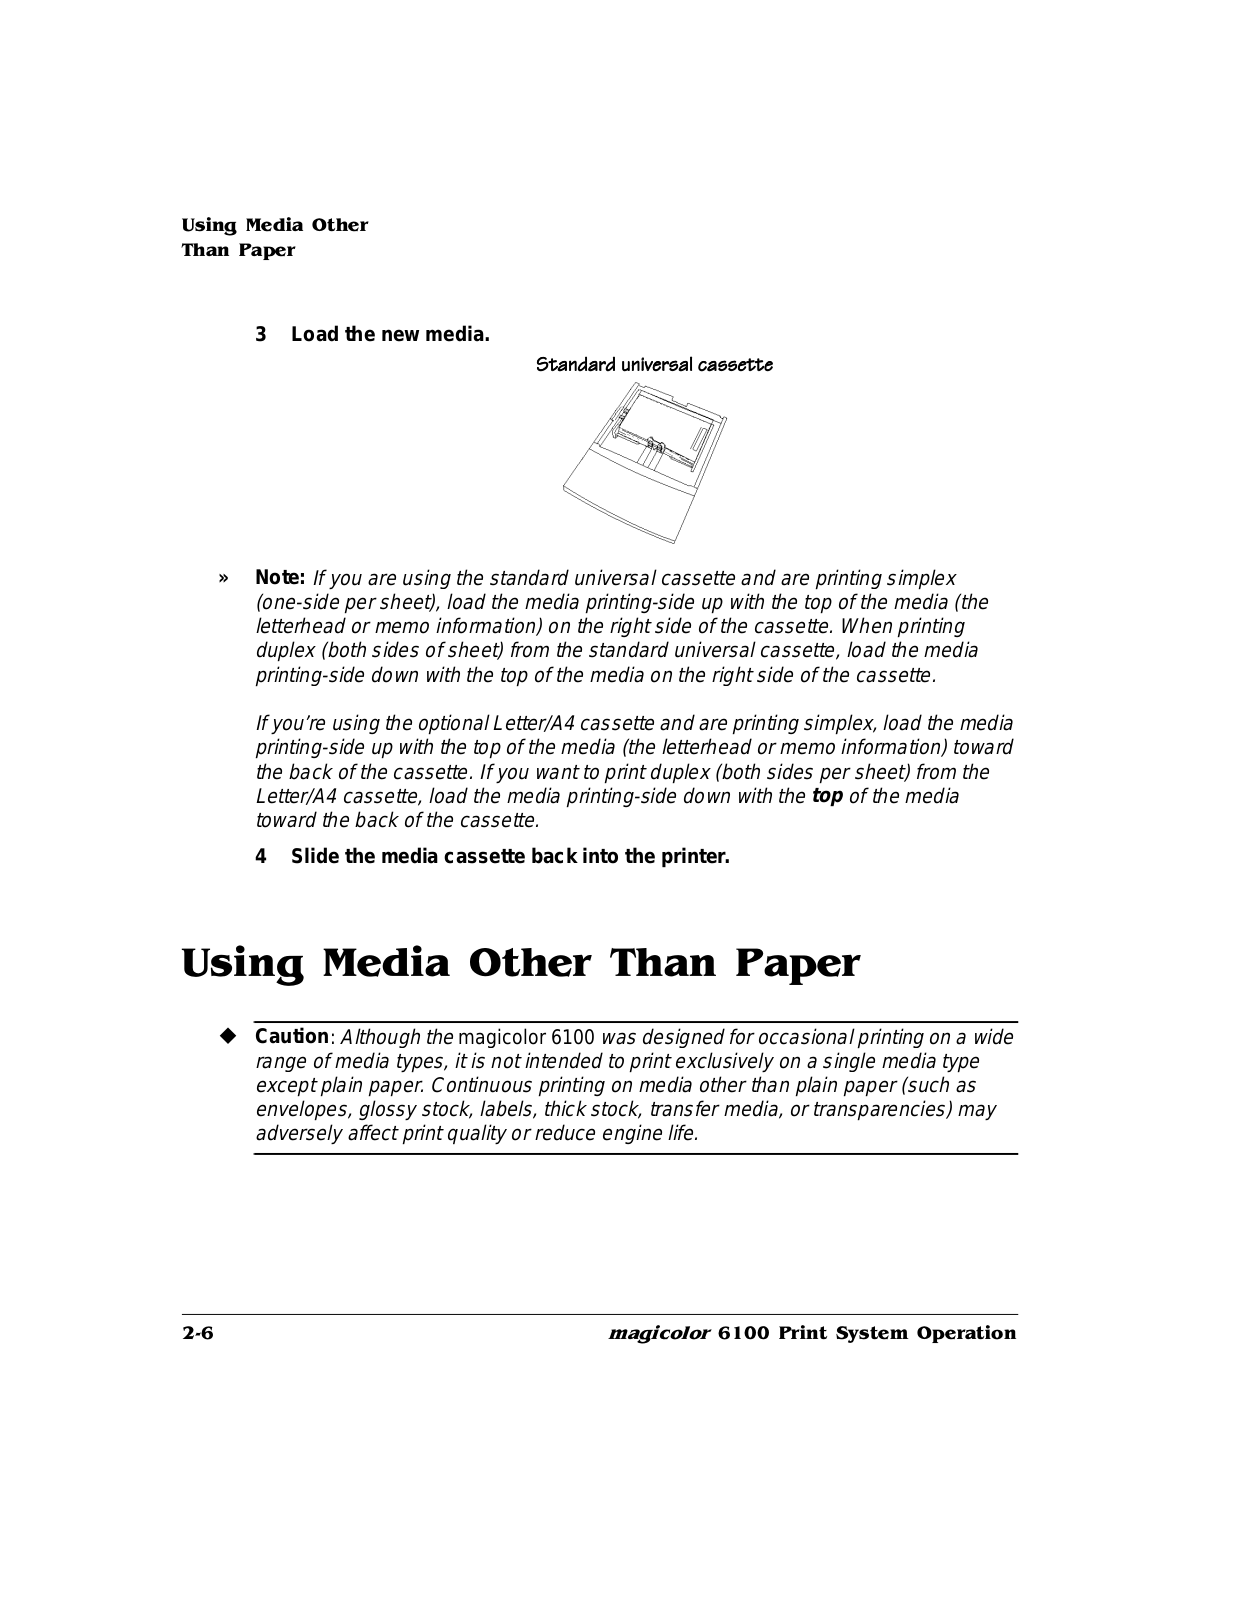
3 Load the new media.

»Note: If you are using the standard universal cassette and are printing simplex (one-side per sheet), load the media printing-side up with the top of the media (the letterhead or memo information) on the right side of the cassette. When printing duplex (both sides of sheet) from the standard universal cassette, load the media printing-side down with the top of the media on the right side of the cassette.

If you’re using the optional Letter/A4 cassette and are printing simplex, load the media printing-side up with the top of the media (the letterhead or memo information) toward the back of the cassette. If you want to print duplex (both sides per sheet) from the Letter/A4 cassette, load the media printing-side down with the top of the media toward the back of the cassette.

4 Slide the media cassette back into the printer.

4 .

Caution: Although the magicolor 6100 was designed for occasional printing on a wide range of media types, it is not intended to print exclusively on a single media type except plain paper. Continuous printing on media other than plain paper (such as envelopes, glossy stock, labels, thick stock, transfer media, or transparencies) may adversely affect print quality or reduce engine life.

$


Loading...
+ 194 hidden pages