How it Works
Log In / Sign Up
Buy Points
How it Works
FAQ
Contact Us
Questions and Suggestions
Users
Konica Minolta
Loading...
#
30
2425 TURBO
2430 DL
7
2480 MF
5
2490 MF
6
2500W
3
2530 DL
6
2550DN
2590 MF
3
280PX
300l
3730DN
2
3-D Scanner
4000 PARTES
40p
40PX
250
5
253
282
283
287
288
308
350
4
360
361
362
363
2
367
368
406
420
421
2
423
451
500
501
2
4139-7733-01A
2
4343-PS038-07
4343 PS040 05
4343 PS051 08
4343-PS114-04
45021881 RNV101Z4 MIN
45021889 RNV101X3E MIN
45021948 RNV101Z4 MIN
45022460 RNV101X3E MIN
4556-9598-01A
4650DN
5
4650EN
9
4690MF
7
4695MF
3
4750DN
5
4750EN
4
505si
2450
2
2500
2550
3
2560
3
2900
3000
3100
3225
2
3240
3300
4
3320
3340
3500
3700
3825
3900
4020
4032
4
4050
3
4060
4
4750
3
43417990
4024777901
4027777301
4030-7764-02
4030-7765-02
4031-7785-02
4052-7771-02
4052-7780-02
4052-7795-01
4343-7704-02
4343-7708-01
4508779201
4513-7734-01
4513-7734-02
4514-7706-02
4514-7706-13
4514770701
4514-7707-02
4514770801
4514-7739-01
4698-7707-02
4980-7761-02
4980776301
4980778501
4980778601
Loading...
Loading...
Nothing found
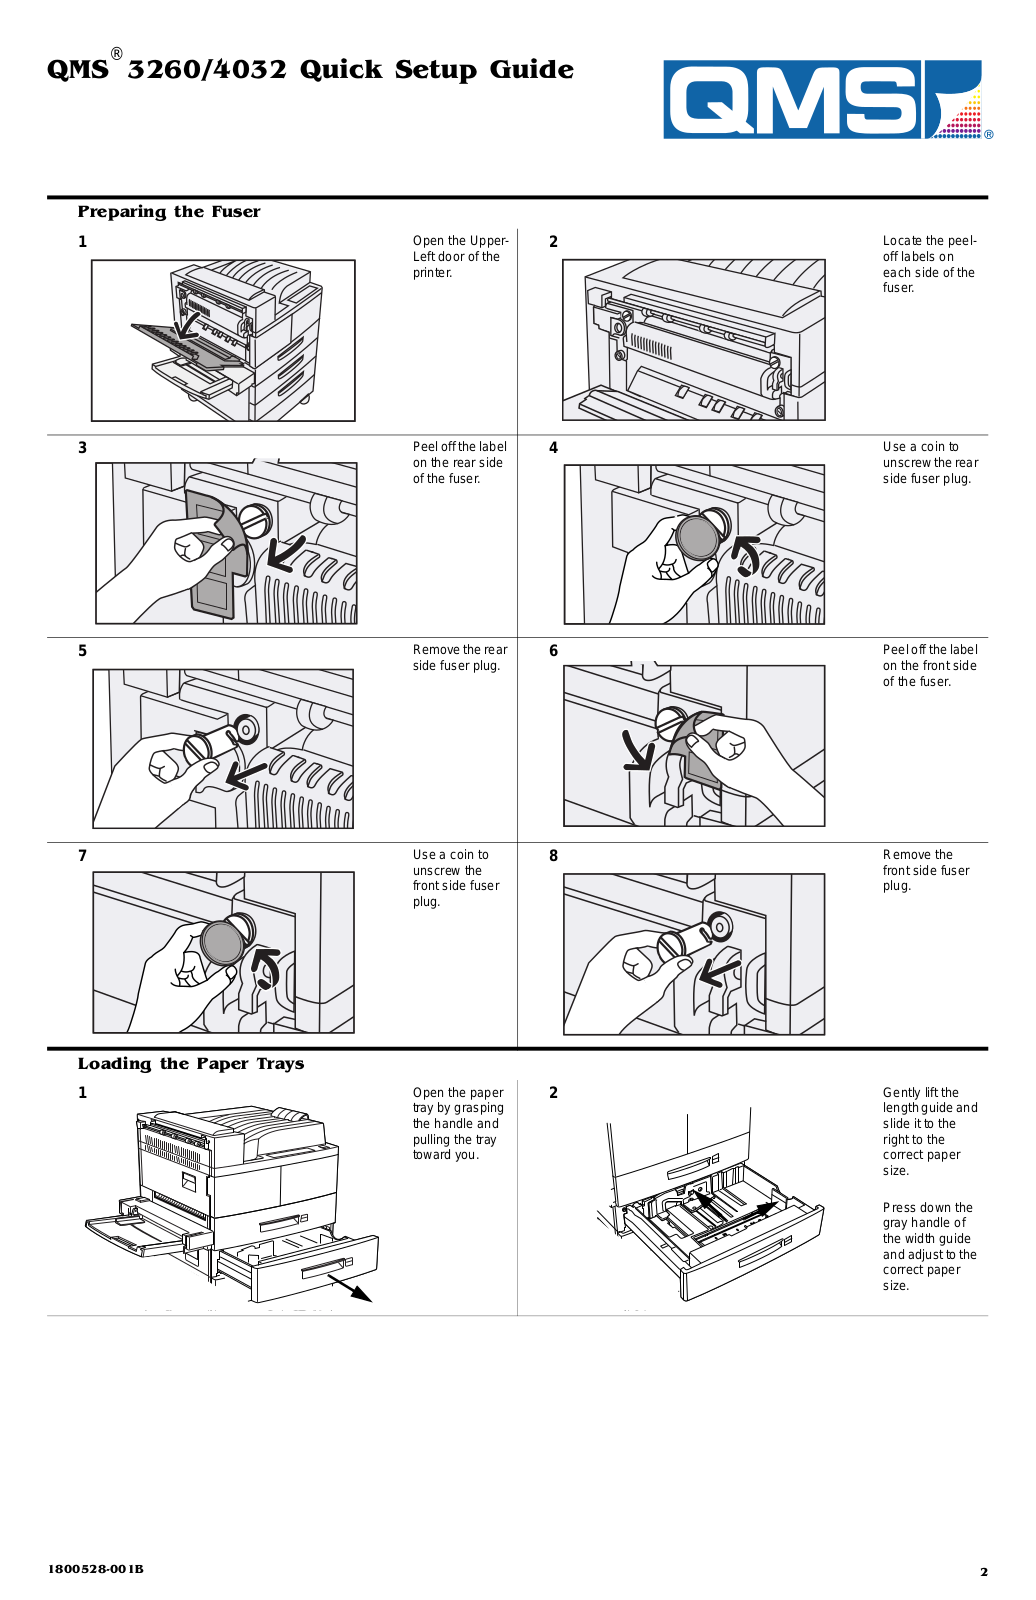
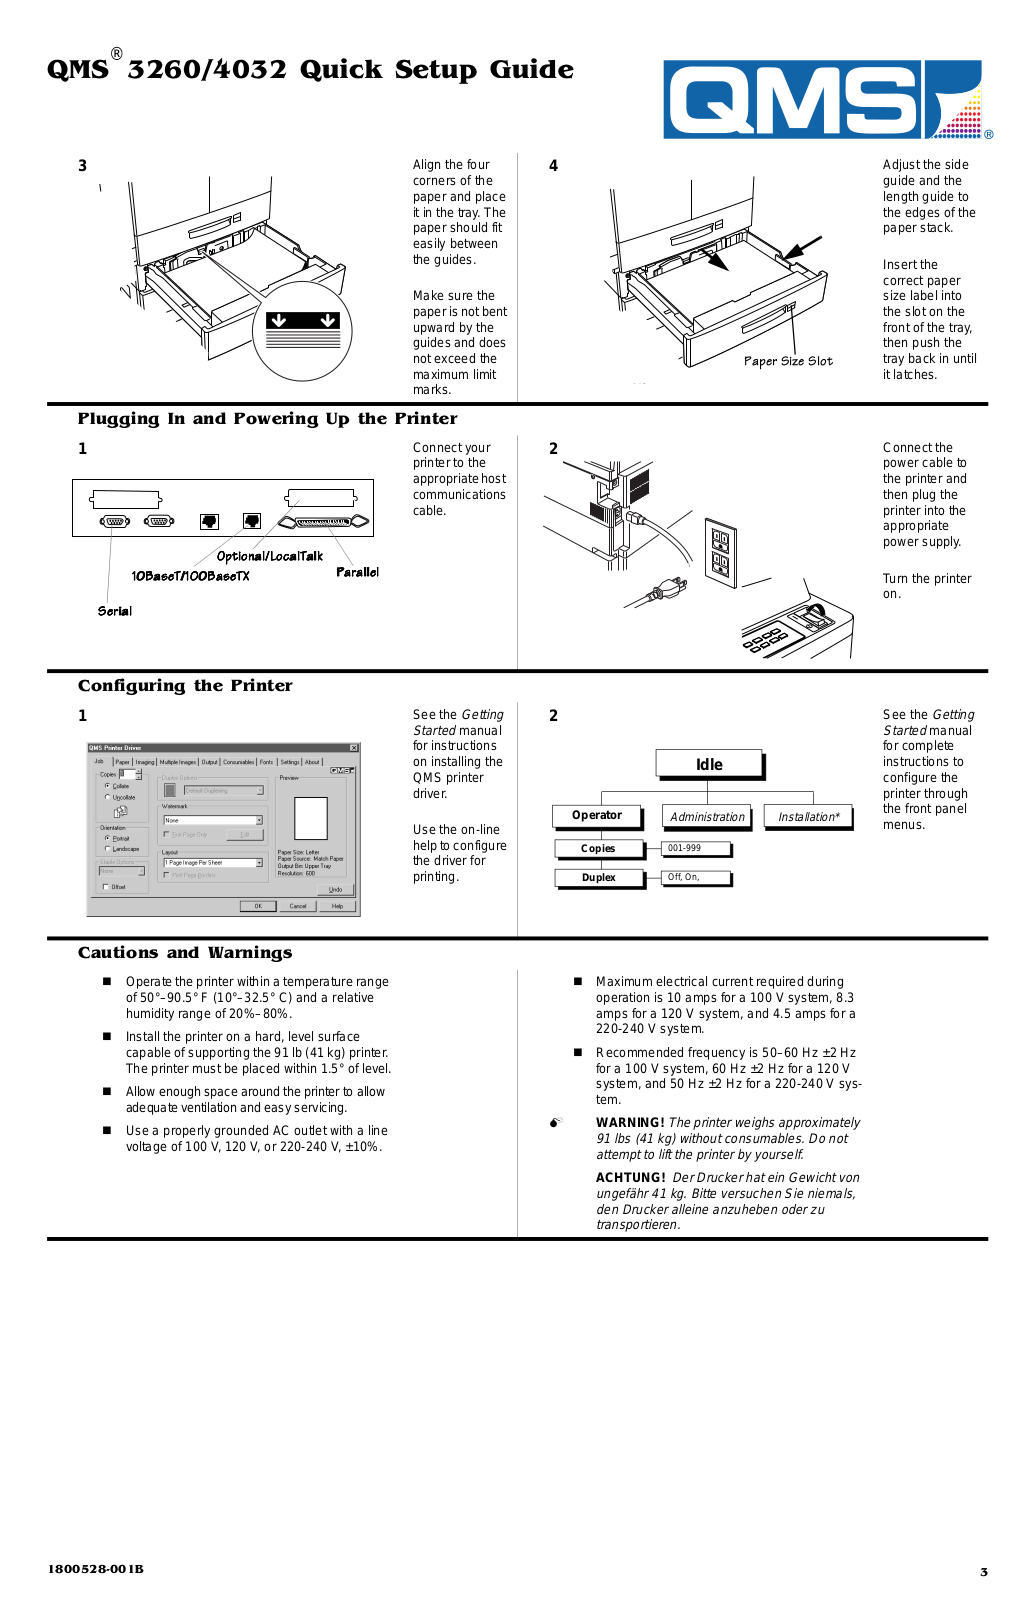
4032
parts manual
3 pgs
39.18 Kb
0
schematic
218 pgs
5.76 Mb
0
schematic
318 pgs
4.54 Mb
0
User Manual
8 pgs
829.58 Kb
0
Table of contents
Loading...
Konica Minolta 4032 User Manual
...
Konica Minolta User Manual
Download
Specifications and Main Features
Frequently Asked Questions
User Manual
Download
Loading...
+
5
hidden pages
Unhide
You need points to download manuals.
1 point = 1 manual.
You can buy points or you can get point for every manual you upload.
Buy points
Upload your manuals