

Konica Minolta 4024777901 User Manual

Di551/Di650 Additional Information
The following items should be revised and added to the Di551/Di650 User
Manual, Section 10: Network Function and Section 13: Key Operator Mode.
Please use the web browser of Internet Explorer 5.5 / Netscape 4.7 or later
to access the Web Utilities.
- Revised -
Setting E-Mail Transmission Function (Environment Setup) .......................1
- Added -
Setting E.K.C. Function (Environment Setup) .............................................3
Setting Scan Transmission Function (Environment Setup) .......................13
Transmitting/Editing Machine Setting File (Environment Setup)................17
Key Operator Mode [19] Scan Transmission Setting.................................22
2003.04
4024-7779-01
Setting E-Mail Transmission Function (Environment Setup)
Perform the Key Operator setting concerning the network environment using the web
browser.
For details of the E-Mail Transmission Setting, refer to p. 13-8 of Di551/Di650 User
Manual.
The Mail Server (SMTP Server) is necessary to use the E-Mail Transmission
Function.
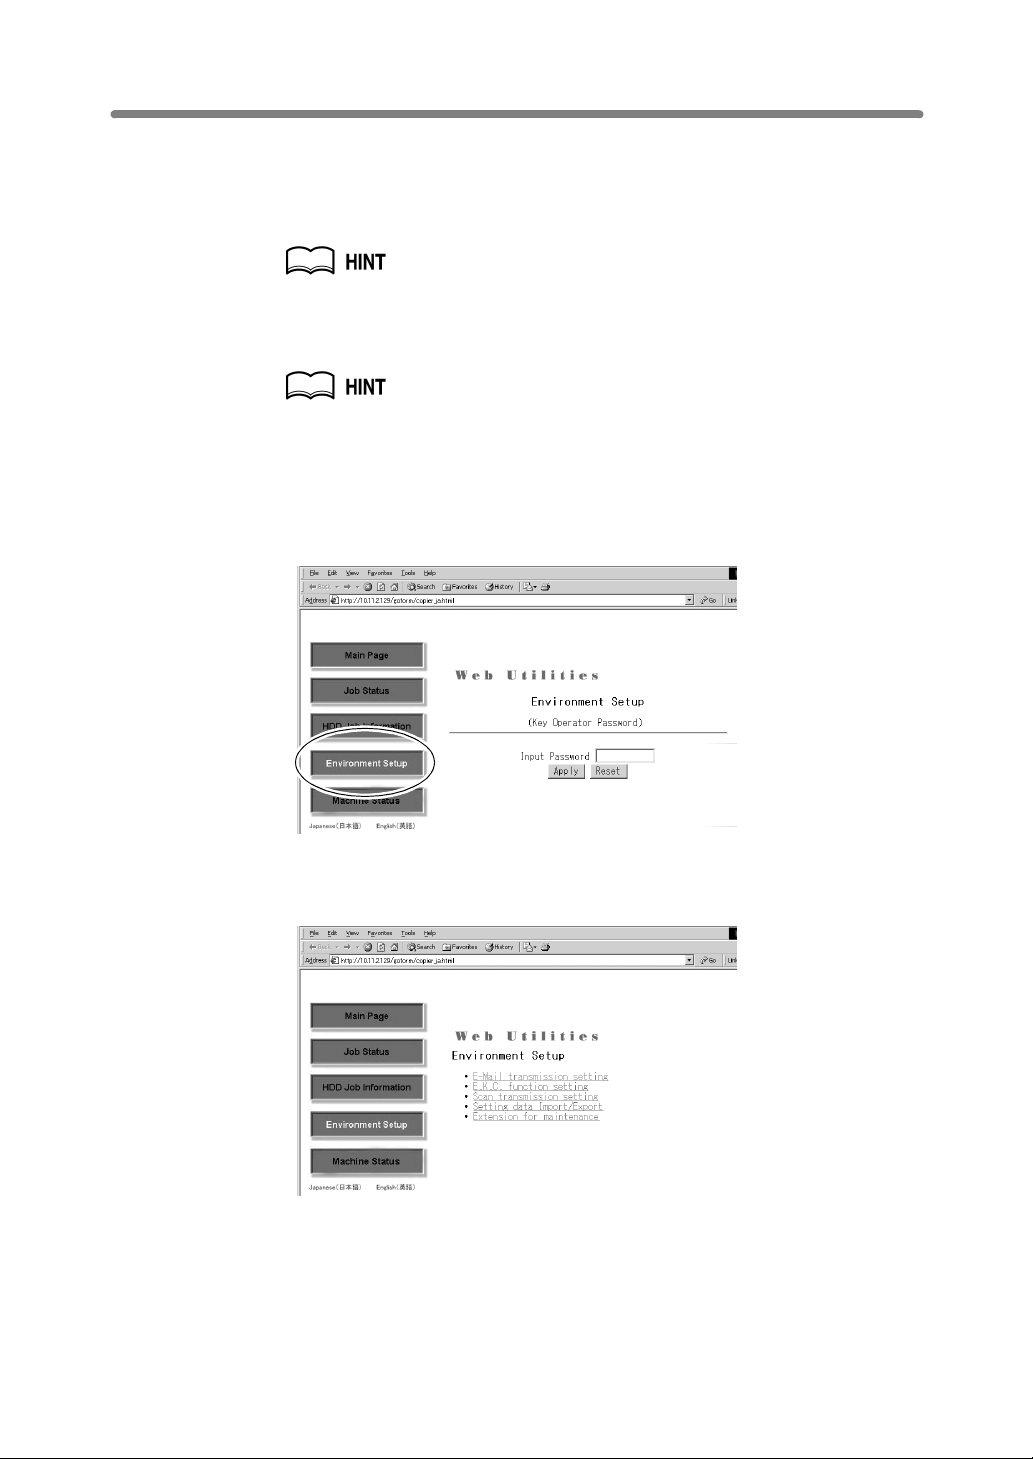
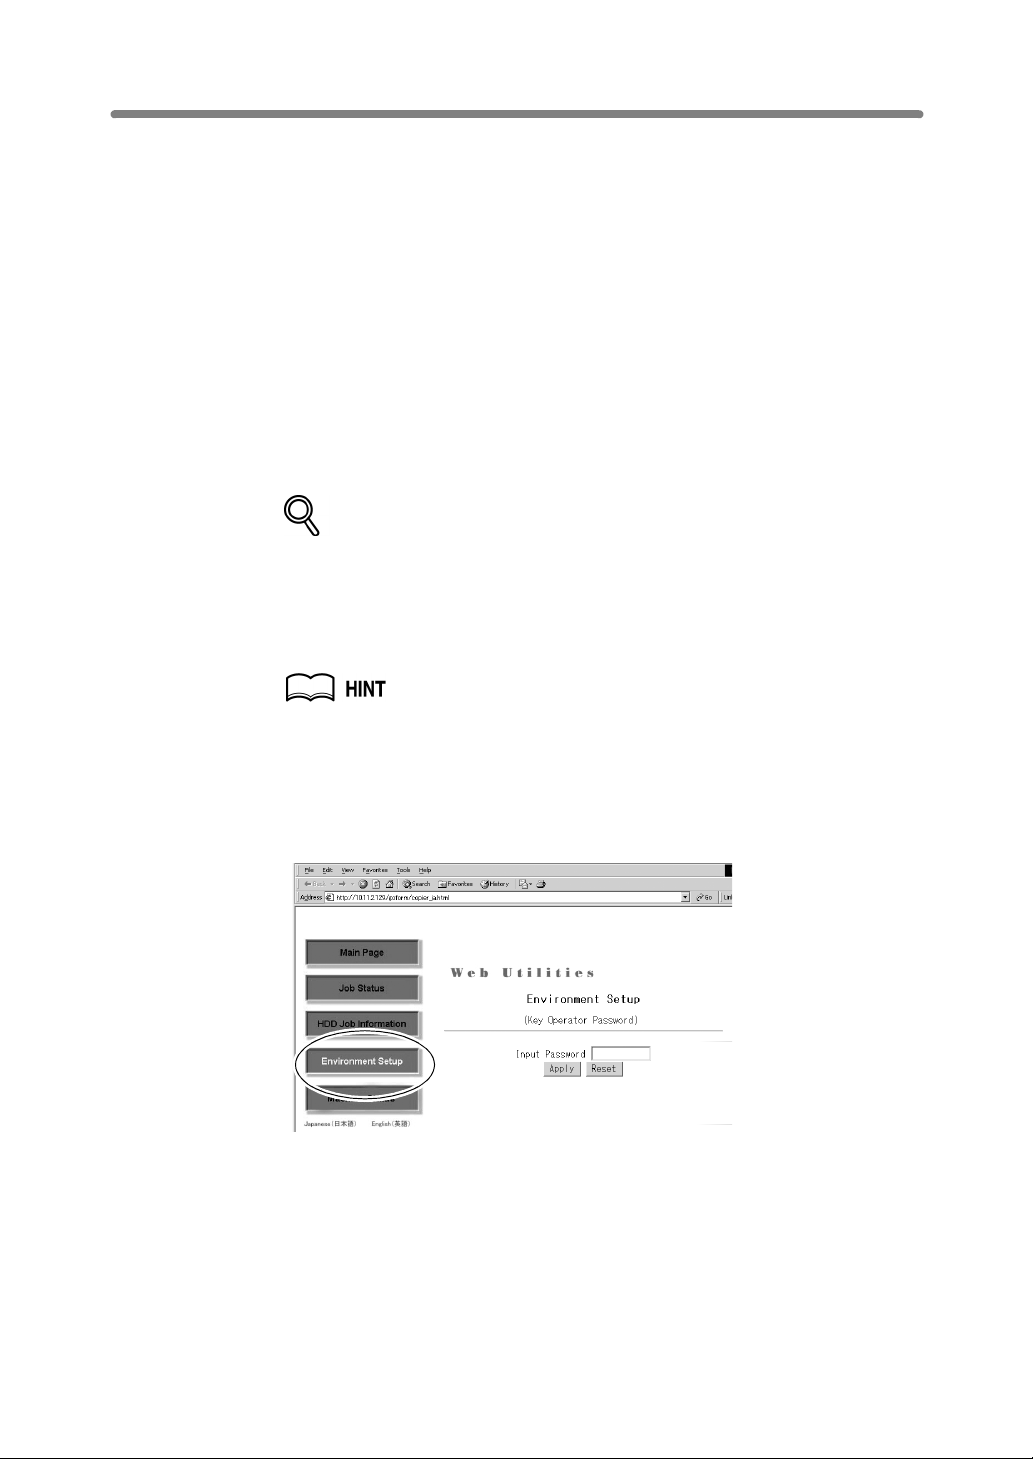
1. Open the Web Utilities window.
For detailed procedure to access the Web Utilities, refer to p. 10-17 of
Di551/Di650 User Manual.
2. Click on [Environment Setup].
3. Display the E-Mail Transmission Setting window.
Enter the 4-digit Key Operator password, then click on [Apply].
Click on [E-Mail transmission setting].
The E-Mail Transmission Setting window will be displayed.
1

Setting E-Mail Transmission Function (Environment Setup) (continued)
DETAILS
The Extension for maintenance option will be exclusively used by a service
representative.
4. Perform the setting.
Enter the IP address of the mail server, and E-mail address to be informed of the
machine status.
Click on the check box of the desired transmission item.
Click on [Apply] to complete the setting and return to the Web Utilities window.
Clicking on [Reset] will void the setting and restore the Web Utilities window.
Clicking on [Sending data] will send a test mail to the manager.
2
Setting E.K.C. Function (Environment Setup)
Perform the following Key Operator settings concerning the E.K.C. function using the
web browser on a PC.
• E.K.C. Data Add (see step 4.)
Add a new E.K.C. data (password, name, and copy limit) to the E.K.C. list.
• E.K.C. Data List (see step 5.)
Change or delete the E.K.C. data (password, name, or copy limit) in the list, or reset
the counters.
• E.K.C. Function Setting (see step 6.)
Specify the following E.K.C. function settings.
Switching the E.K.C.: ON/OFF
Effect when the copy limit is reached: Immediately / After job / Warning
E.K.C. password: 8 digits / under 8 digits
E.K.C. password input timing: Auto reset timer/ Complete job
Wrong E.K.C. password (from printer): Accept / Reject
DETAILS
The above settings can also be performed on the machine itself, except for
the Wrong E.K.C. password (from printer) setting. Some setting may require
operations on the machine.
Refer to Di551/Di650 User Manual, pages 13-15 and 13-39 to 13-45.
1. Open the Web Utilities window.
For detailed procedure to access the Web Utilities, refer to p. 10-17 of
Di551/Di650 User Manual.
2. Click on [Environment Setup].
3. Display the E.K.C. Function Setting menu window.
Enter the 4-digit Key Operator password, then click on [Apply].
3
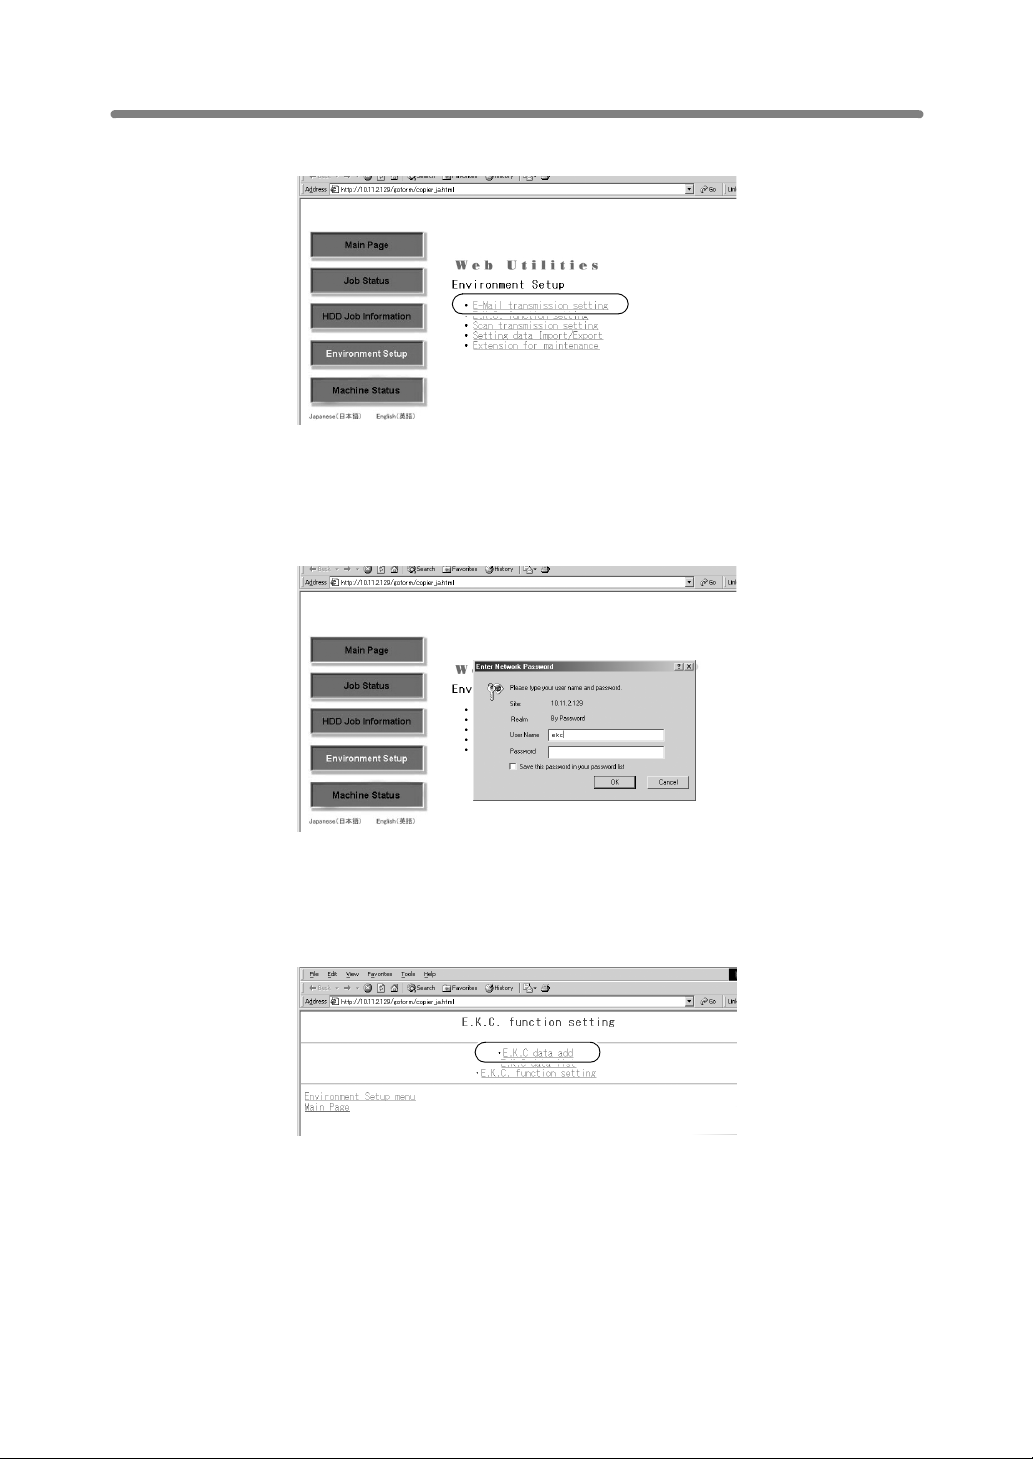
Setting E.K.C. Function (Environment Setup) (continued)
Click on [E.K.C. function setting].
The Enter Network Password dialog box will be displayed.
Enter “ekc” in the User Name text box, and an 8-digit master key code in the Password
text box, then click on [OK].
Default setting is “00000000”.
The E.K.C. Function Setting menu window will be displayed.
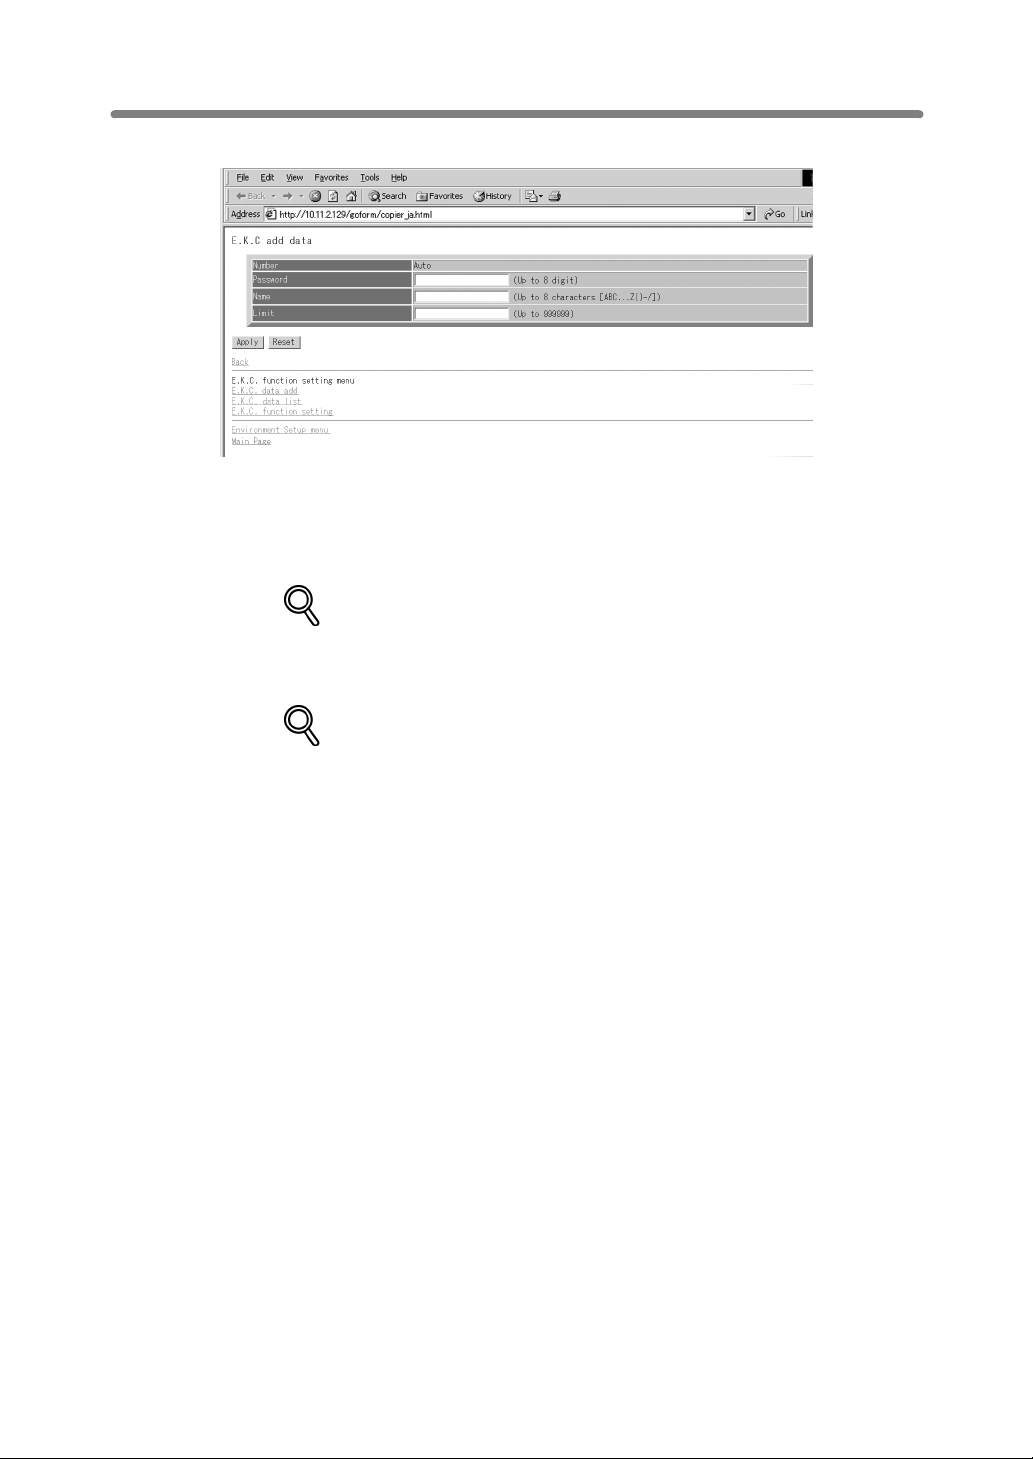
4. Add an E.K.C. data.
Click on [E.K.C. data add].
4
Setting E.K.C. Function (Environment Setup) (continued)
The E.K.C. Data Setting window will be displayed.
Enter the following items to register a new E.K.C. data, then click on [Apply].
Number: Automatically assigned
Password: 8 digits max.
Name: 8 characters max.
Limit: 999,999 copies max.
DETAILS
To clear the text boxes, click on [Reset].
To cancel adding a new E.K.C. data, click on [Back], or any E.K.C. Function
Setting menu item to jump to the desired window.
DETAILS: Error Message
• A duplicate password or name will be rejected with an error message.
However, duplicating a password is possible using the Key Operator
setting. Refer to Di551/Di650 User Manual, p. 13-18.
• The Name entry box accepts letters (capital letters only), numbers, and
four symbols: (, ), -, and /. Any other symbols will be rejected with an error
message displayed in the window.
• Max. 1,000 E.K.C. entries can be registered. An error message will be
displayed if the above limit is exceeded.
• An error message may be displayed when the data entry has not been
completed due to the machine operation in progress. Please click on
[Apply] while the machine is in an idle state.
5
Setting E.K.C. Function (Environment Setup) (continued)
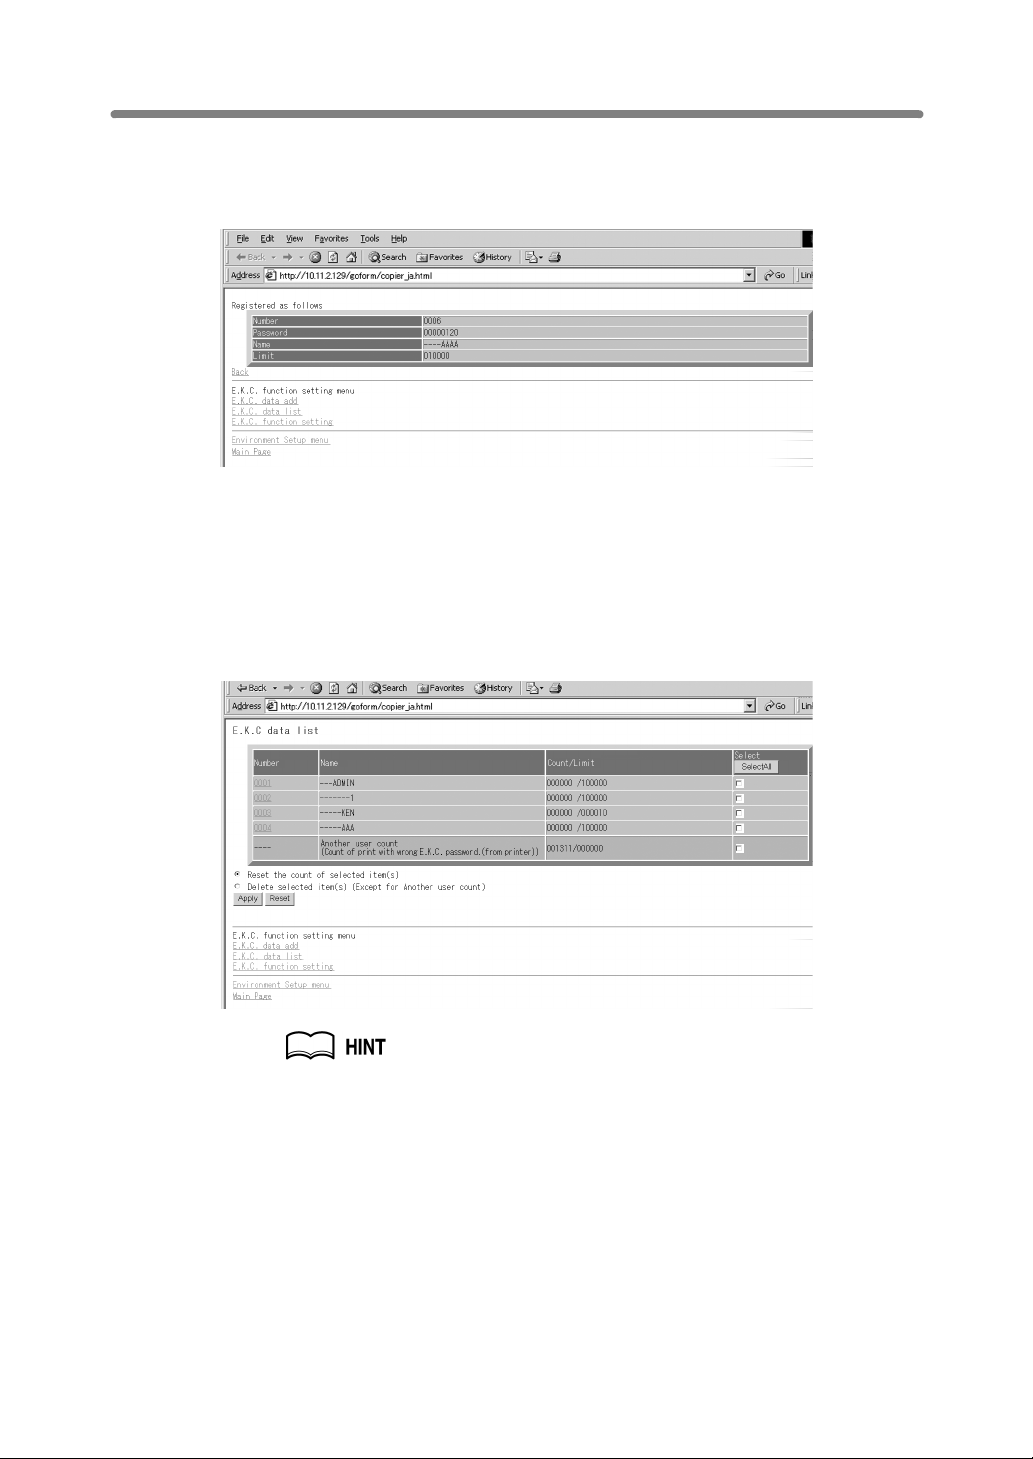
The registered content will be displayed in the window.
The new E.K.C. data will be transmitted to the machine immediately so that is valid for
the user operations.
Click on [Back] to return to the E.K.C. Function Setting menu window, or any menu
item to jump to the desired window.
5. Edit the E.K.C. data.
Click on [E.K.C. data list] in the E.K.C. Function Setting menu window (see p. 4) or
from the menu in any subsequent window..
The E.K.C. Data List window will be displayed.
The “Another user count” in the list indicates the count accumulated for the
jobs performed by non-registered users. This data cannot be edited other
than resetting the counter.
6
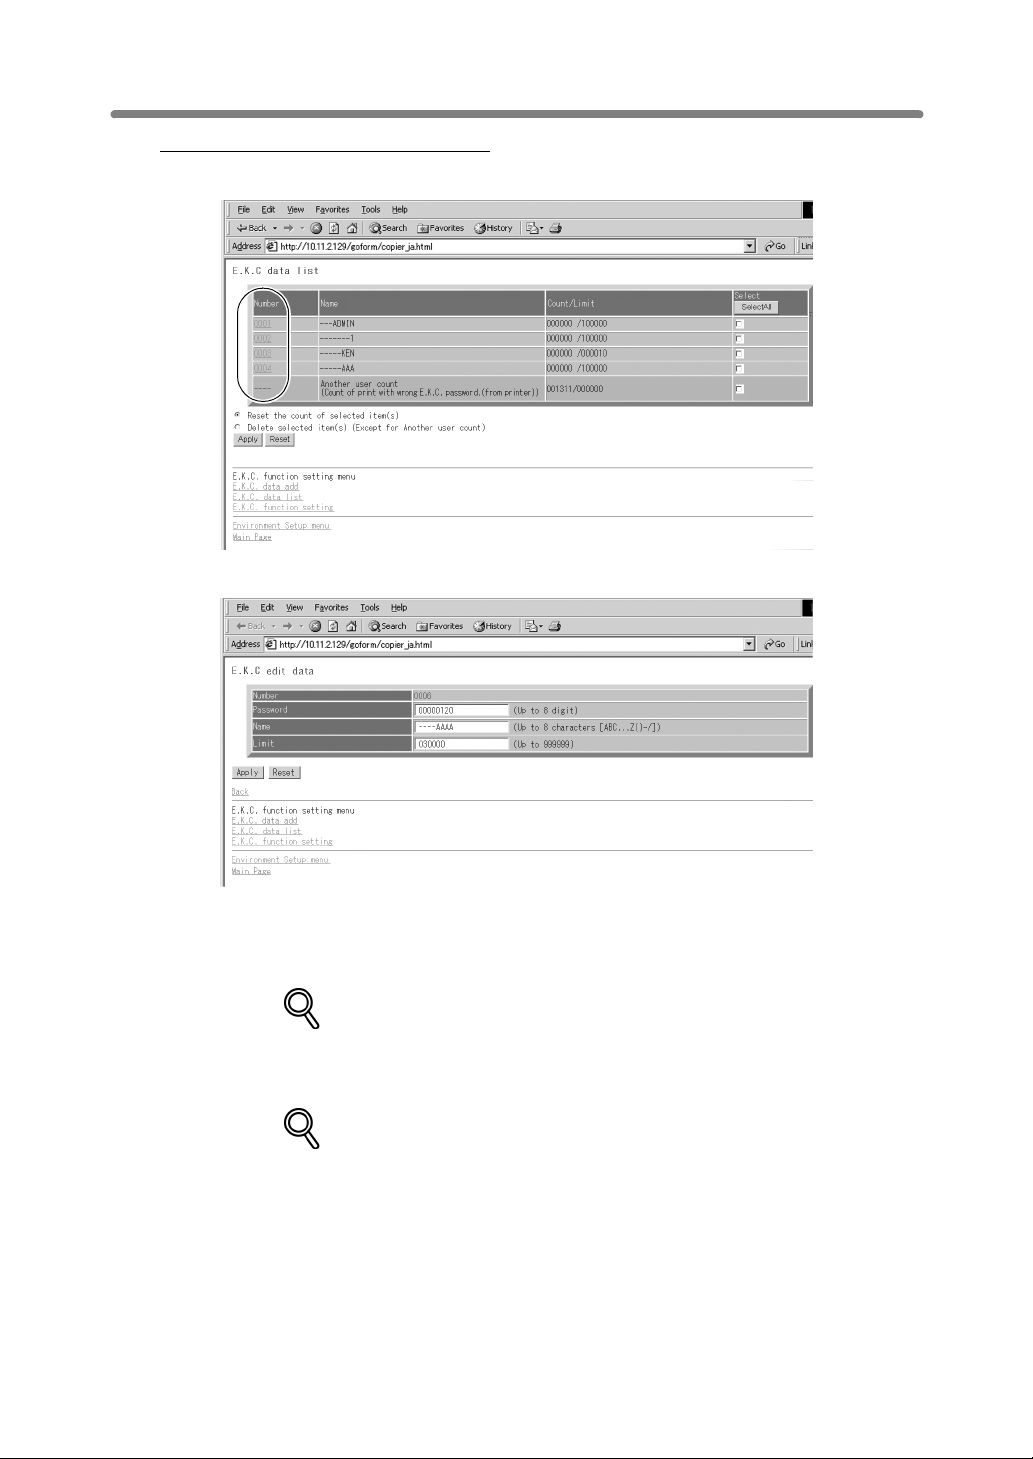
Setting E.K.C. Function (Environment Setup) (continued)
To change Password, Name, or Limit:
(1) Click on the number of the data to be edited.
The E.K.C. Edit Setting window will be displayed.
(2) Change the password, name, or limit, as desired. For details in entering
procedure, refer to p. 5.
(3) Click on [Apply].
DETAILS
To clear the text boxes, click on [Reset].
To cancel editing the E.K.C. data, click on [Back], or any E.K.C. Function
Setting menu item to jump to the desired window.
DETAILS: Error Message
See “Details” on p. 5 if an error message is displayed after clicking on
[Apply].
7
 Loading...