

Page 1
Quick Guide
Page 2

Page 3

Table of contents
1 Introduction
1.1 Regulatory information................................................................................................................... 1-3
1.2 Safety information........................................................................................................................... 1-5
1.2.1 Safety information for proper use ...................................................................................................... 1-5
1.3 How to read this manual ................................................................................................................ 1-9
1.3.1 Symbols ............................................................................................................................................. 1-9
1.3.2 Key descriptions .............................................................................................................................. 1-11
1.4 Getting started .............................................................................................................................. 1-12
1.4.1 Installation precautions.................................................................................................................... 1-12
1.4.2 Power source................................................................................................................................... 1-12
1.4.3 Battery.............................................................................................................................................. 1-12
1.4.4 Recycling ......................................................................................................................................... 1-13
1.4.5 Space requirements......................................................................................................................... 1-13
1.4.6 Operation precautions ..................................................................................................................... 1-14
1.5 Overview of manuals .................................................................................................................... 1-17
2 Common settings
2.1 Part names and functions .............................................................................................................. 2-3
2.2 Overview of Message Board.......................................................................................................... 2-6
2.3 Control panel................................................................................................................................... 2-7
2.4 Operation screens........................................................................................................................... 2-8
2.4.1 Ready screen ..................................................................................................................................... 2-8
2.4.2 My MFP screen................................................................................................................................ 2-13
2.5 Connection and main settings..................................................................................................... 2-14
2.5.1 Connecting the power cord ............................................................................................................. 2-14
2.5.2 Connecting the LAN cable............................................................................................................... 2-14
2.5.3 Connecting the modular cable......................................................................................................... 2-15
2.5.4 Connecting an external phone (answering machine) ....................................................................... 2-15
2.5.5 Adjusting the screen contrast.......................................................................................................... 2-16
2.5.6 Setting the language........................................................................................................................ 2-16
2.5.7 Setting the date and time................................................................................................................. 2-18
2.5.8 Specifying the network settings....................................................................................................... 2-19
2.5.9 Manually setting the IP address....................................................................................................... 2-20
2.6 Power switch and energy save mode ......................................................................................... 2-22
2.6.1 Turning the power ON and OFF....................................................................................................... 2-22
2.6.2 <Energy Save> and Energy save mode........................................................................................... 2-24
2.7 Loading paper ............................................................................................................................... 2-25
2.7.1 Acceptable paper............................................................................................................................. 2-25
2.7.2 Items to avoid .................................................................................................................................. 2-26
2.7.3 Printable area................................................................................................................................... 2-26
2.7.4 Cautions when loading paper .......................................................................................................... 2-27
2.7.5 Loading paper into the paper cassettes.......................................................................................... 2-28
2.7.6 Loading paper into the bypass tray ................................................................................................. 2-29
2.7.7 Setting the paper size ...................................................................................................................... 2-30
2.8 Loading documents ...................................................................................................................... 2-31
2.8.1 Acceptable documents.................................................................................................................... 2-31
2.8.2 Items to avoid .................................................................................................................................. 2-31
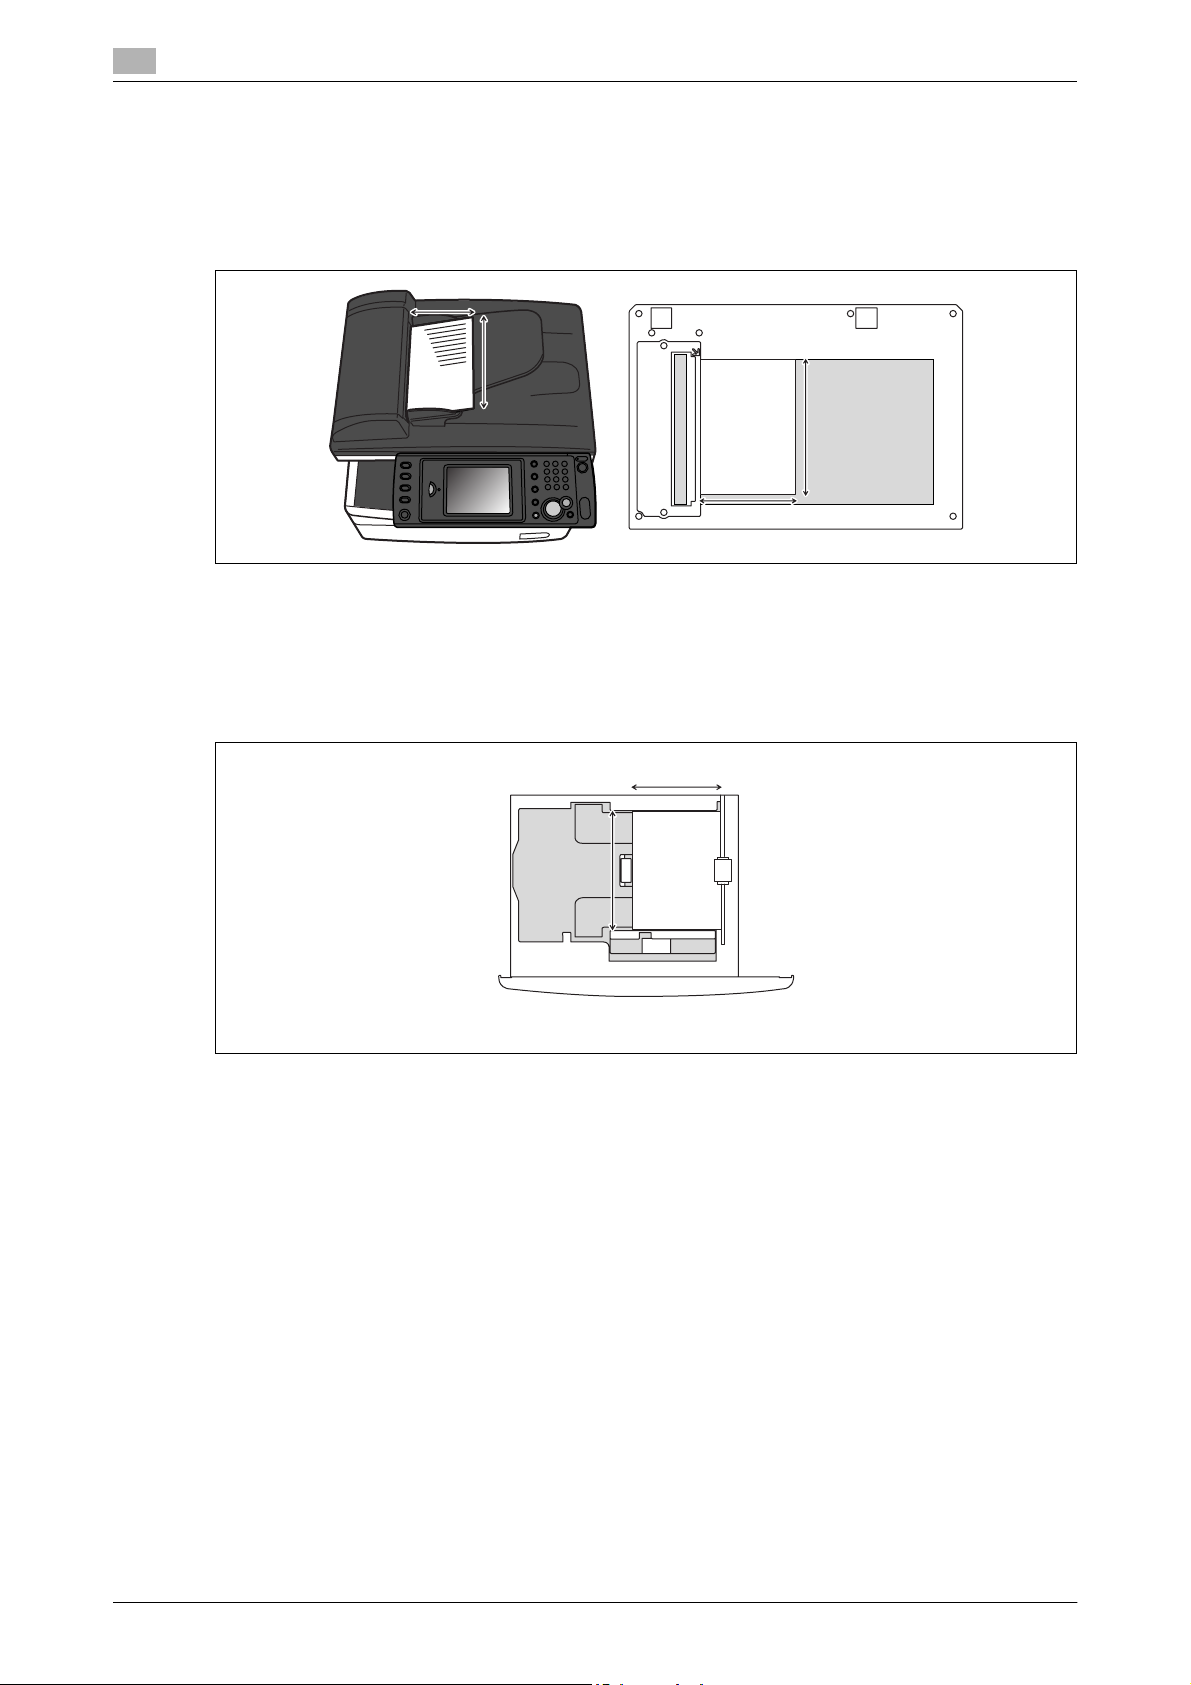
2.8.3 Scanning area .................................................................................................................................. 2-32
2.8.4 Loading documents in the Auto Document Feeder (ADF) ............................................................... 2-32
2.8.5 Loading the document on the document glass ............................................................................... 2-33
Konica Minolta 240f Contents-1
Page 4

3 Operating the machine
3.1 Making copies ................................................................................................................................. 3-3
3.1.1 Basic copying .................................................................................................................................... 3-3
3.1.2 Duplex copying .................................................................................................................................. 3-4
3.1.3 Introduction to advanced functions................................................................................................... 3-6
3.2 Performing scanning ...................................................................................................................... 3-7
3.2.1 Attaching scanned documents to E-mail........................................................................................... 3-7
3.2.2 Saving scanned documents to a shared folder ............................................................................... 3-10
3.2.3 Saving scanned documents to an FTP server................................................................................. 3-13
3.2.4 Saving a scanned document to USB memory................................................................................. 3-16
3.2.5 Introduction to advanced functions................................................................................................. 3-17
3.3 Transmitting faxes ........................................................................................................................ 3-19
3.3.1 Transmitting faxes............................................................................................................................ 3-19
3.3.2 Canceling faxes................................................................................................................................ 3-20
3.3.3 Transmitting PC faxes...................................................................................................................... 3-21
3.3.4 Introduction to advanced functions................................................................................................. 3-24
3.4 Performing printing....................................................................................................................... 3-26
3.4.1 Basic printing ................................................................................................................................... 3-26
3.4.2 Introduction to advanced functions................................................................................................. 3-27
4 Registration
4.1 Registering destinations ................................................................................................................ 4-3
4.2 Registering folder shortcuts .......................................................................................................... 4-6
4.3 List of settings................................................................................................................................. 4-8
4.3.1 [Register] screen ................................................................................................................................ 4-8
4.3.2 [Default Settings] screen.................................................................................................................. 4-10
4.3.3 [Management] screen ...................................................................................................................... 4-12
4.3.4 [Paper Settings] screen.................................................................................................................... 4-14
4.3.5 [List] screen...................................................................................................................................... 4-15
4.3.6 [Personal Settings] screen ............................................................................................................... 4-17
5 Maintenance
5.1 Replacing the toner cartridge........................................................................................................ 5-3
5.2 Replacing the drum cartridge........................................................................................................ 5-5
5.3 Cleaning the printer ........................................................................................................................ 5-7
5.3.1 Cleaning the drum charge wire and the print head ........................................................................... 5-7
6 Troubleshooting
6.1 Document jams ............................................................................................................................... 6-3
6.1.1 Jam in the document feeder.............................................................................................................. 6-4
6.1.2 Document jammed in the feed area................................................................................................... 6-5
6.1.3 Document jammed in the exit area.................................................................................................... 6-5
6.2 Paper jams....................................................................................................................................... 6-6
6.2.1 Removing jammed paper................................................................................................................... 6-6
6.3 Alarms .............................................................................................................................................. 6-8
6.3.1 Errors that go out by pressing <Stop> .............................................................................................. 6-8
6.3.2 Errors that do not go out by pressing <Stop>................................................................................... 6-8
6.4 If you cannot solve the problem .................................................................................................... 6-8
Contents-2 Konica Minolta 240f
Page 5

7 Specifications
7.1 Specifications.................................................................................................................................. 7-3
7.1.1 General............................................................................................................................................... 7-3
7.1.2 Options............................................................................................................................................... 7-8
7.1.3 External dimensions........................................................................................................................... 7-9
7.1.4 Energy and noise data according to RAL-UZ 122........................................................................... 7-10
8Index
Konica Minolta 240f Contents-3
Page 6

Contents-4 Konica Minolta 240f
Page 7

1
Introduction
Page 8

Page 9
1.1 Regulatory information
1 Introduction
Thank you for choosing the KONICA MINOLTA 240f.
This User's Guide describes the functions, operating procedures, and precautions for the
KONICA MINOLTA 240f.
Before using this machine, be sure to read the User's Guide thoroughly in order to ensure that you use the
machine efficiently. After you have gone through the manual, keep it handy at all times.
Note that some of the illustrations of the machine used in the User's Guide may be different from what you
actually see on your machine.
1.1 Regulatory information
CE declaration of conformity
This product complies in accordance with Council Decision
1999/5/EC for pan-European single terminal connection to the
public switched telephone network (PSTN).
ES 203 021-1, ES 203 021-2, ES 203 021-3
EG201 120, EG201 121
IEC 60950-1 / EN 60950-1
EN 55022, EN 55024
EN 61000-3-2, EN 61000-3-3
This product has DTMF (Dial Tone Multi Frequency) dialing only.
In the event of problems or questions, you should contact your equipment supplier in the first instance.
This product complies with the COMMISSION REGULATION (EC) No.1275/2008 implementing the EuP
Directive (2005/32/EC).
1
RoHS declaration of conformity
This product complies with the RoHS directive (2002/95/EC).
WEEE directive
WEEE: Waste of Electrical and Electronic Equipment law
This Equipment is marked with the European Directive 2002/96/EC
recycling symbol. It indicates that at the end of the equipments life
you must dispose of it separately at an appropriate collection point.
This equipment must not be disposed of in the normal domestic
unsorted waste stream.
European Union only
Batteries directive
Batteries incorporated into this equipment are disposed in an environmentally friendly manner during the
treatment phase of the equipment. For replacement batteries, please contact your local technical
representative.
Konica Minolta 240f 1-3
Page 10
1
Regulatory information
1.1
Acoustic noise
Machine Noise Regulation 3 GPSGV, the sound pressure level at the operator position according to
EN ISO 7779 is equal to or less than 70dB(A).
Ozone release
6 LOCATE THE MACHINE IN A WELL VENTILATED ROOM.
A negligible amount of ozone is generated during normal operation of this machine. An unpleasant
odor may, however, be created in poorly ventilated rooms during extensive machine operations.
- For a comfortable, healthy, and safe operating environment, it is recommended that the room be well
ventilated.
ENERGY STAR
As an ENERGY STAR® partner, we have determined that this
product meets the ENERGY STAR® guidelines for energy
efficiency.
What is an ENERGY STAR® program?
The international ENERGY STAR® program is the international
program to promote energy efficient consumer products. This
program aims the reduction of power consumption of office
equipments, of which power are often turned ON for a long time,
from the energy saving view that "efficiently use the energy when needed". It adopts the voluntary system a
manufacturer can join by its independent decision.
®
Ergonomische Grundlagen für die GS-Prüfung von IT Geräten in Verbindung mit Bildschirmgeräten
Das Gerät ist nicht für die Benutzung im unmittelbaren Gesichtsfeld am Bildschirmarbeitsplatz vorgesehen.
Um störende Reflexionen am Bildschirmarbeitsplatz zu vermeiden, darf dieses Produkt nicht im
unmittelbaren Gesichtsfeld platziert werden.
1-4 Konica Minolta 240f
Page 11
1.2 Safety information
1.2 Safety information
1.2.1 Safety information for proper use
This section contains detailed instructions on the operation and maintenance of this machine.
To achieve optimum utility of this device, all operators should carefully read and follow the instructions in this
manual. Please keep this manual in a handy place near the machine.
Please read the next section before using this device. It contains important information related to user safety
and preventing equipment problems.
Make sure you observe all of the precautions listed in this manual.
Please note that some parts of the contents of this section may not correspond with the purchased product.
Warning and precaution symbols
7 WARNING Ignoring this warning could cause serious injury or even death.
7 CAUTION Ignoring this caution could cause injury or damage to property.
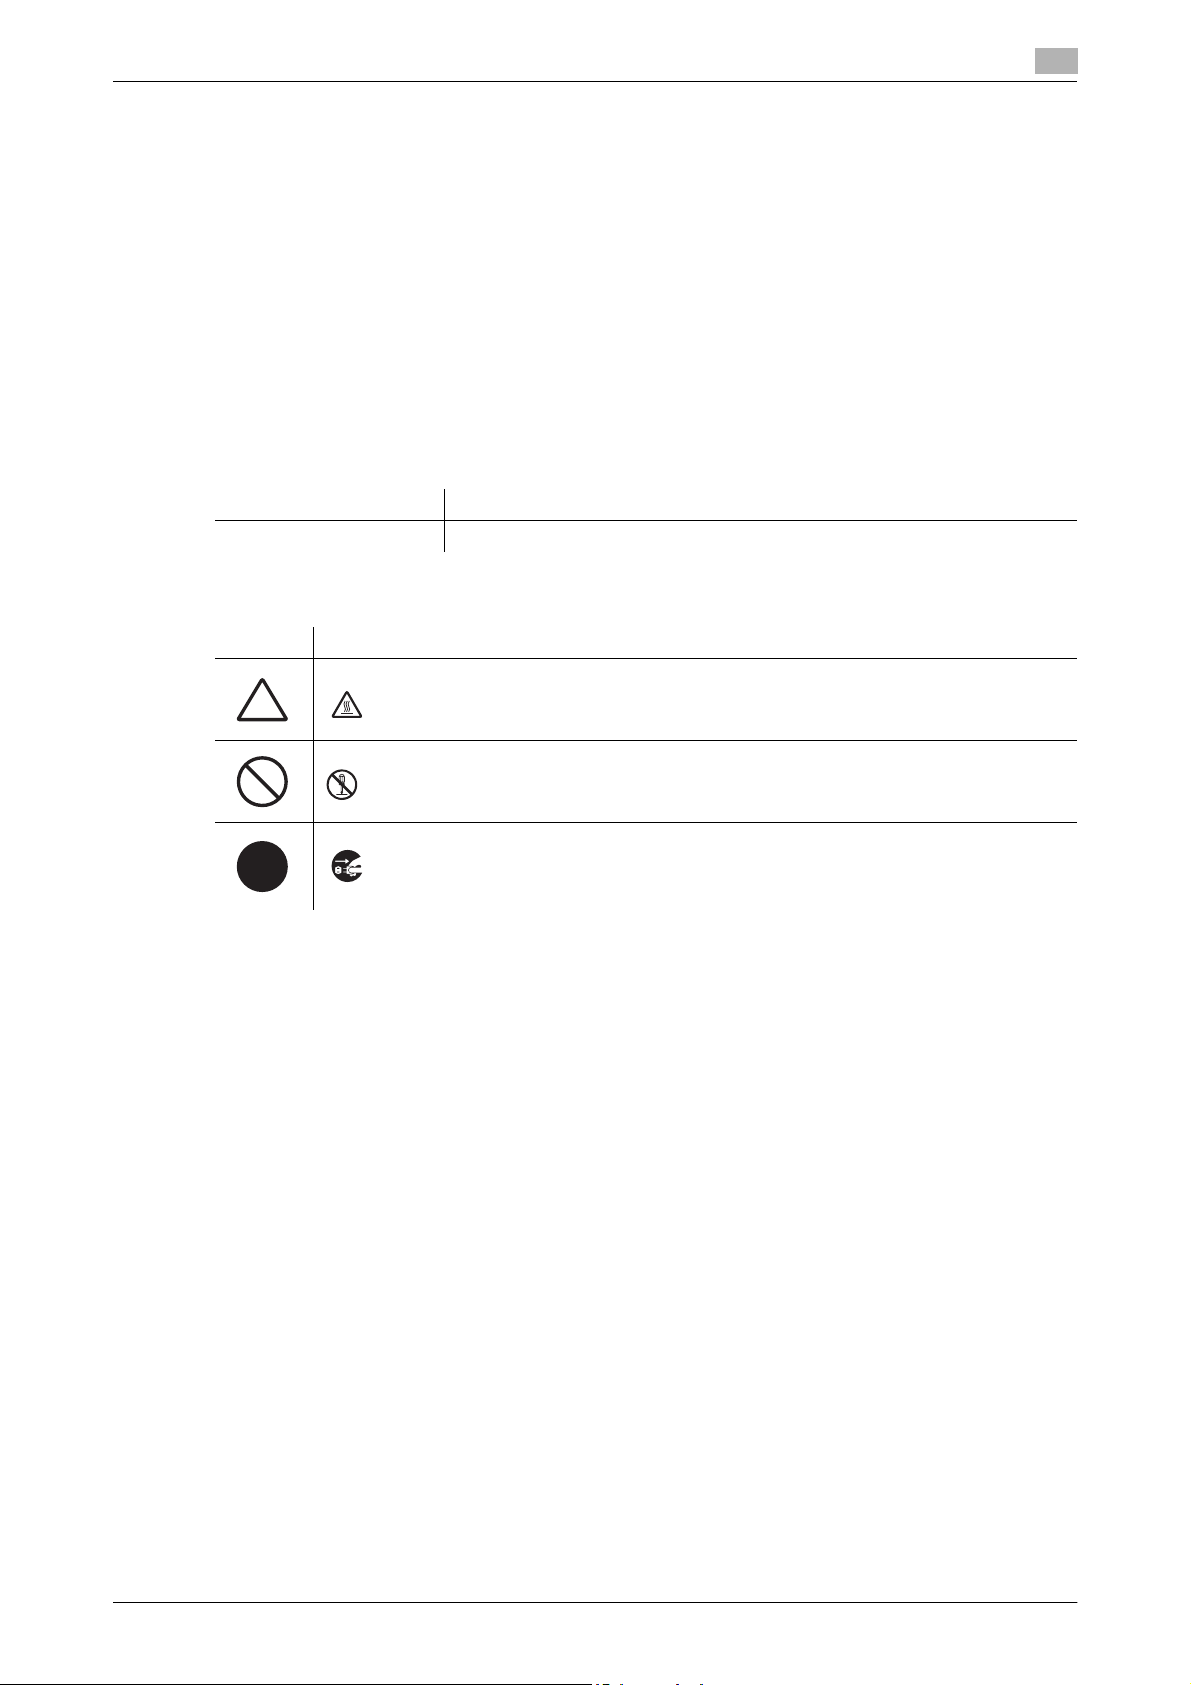
Meaning of symbols
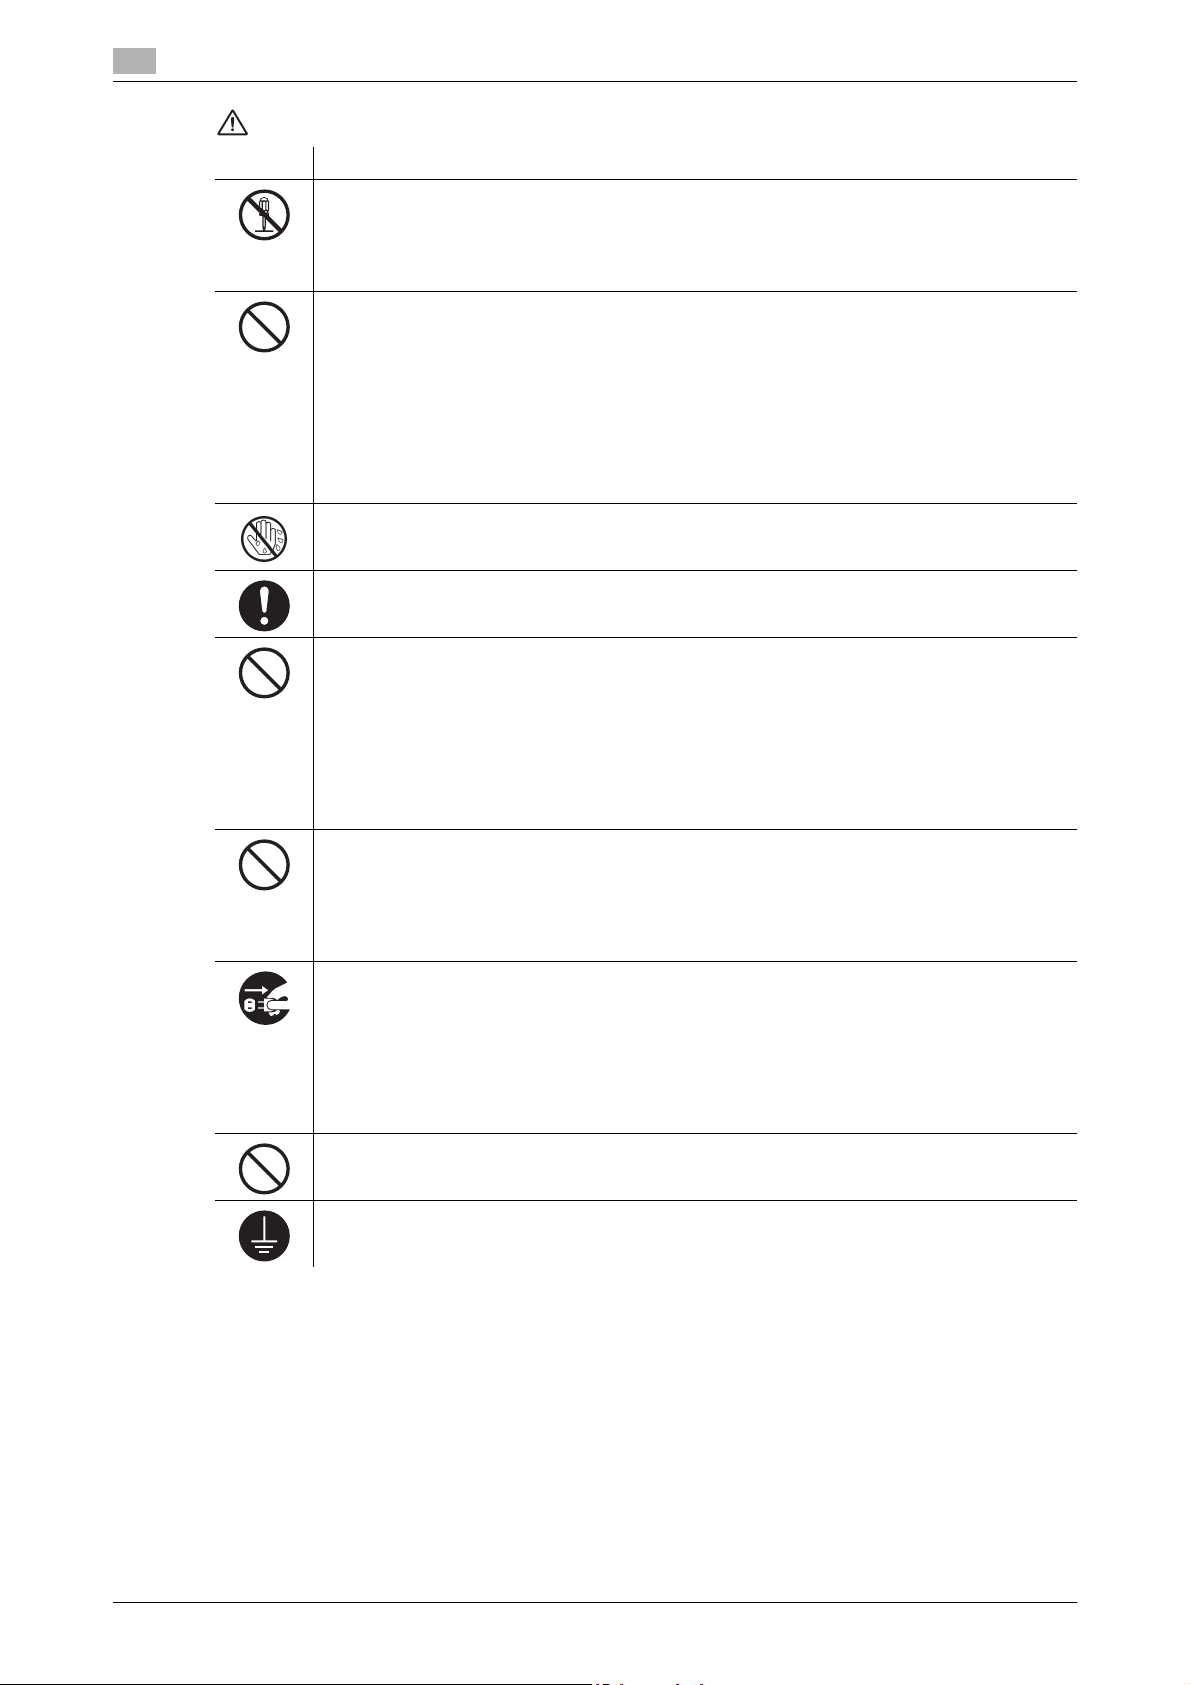
Symbol Meaning
A triangle indicates a danger against which you should take precaution.
This symbol warns against cause burns.
1
A diagonal line indicates a prohibited course of action.
This symbol warns against dismantling the device.
A black circle indicates an imperative course of action.
This symbol indicates you must unplug the device.
Konica Minolta 240f 1-5
Page 12
1
WARNING
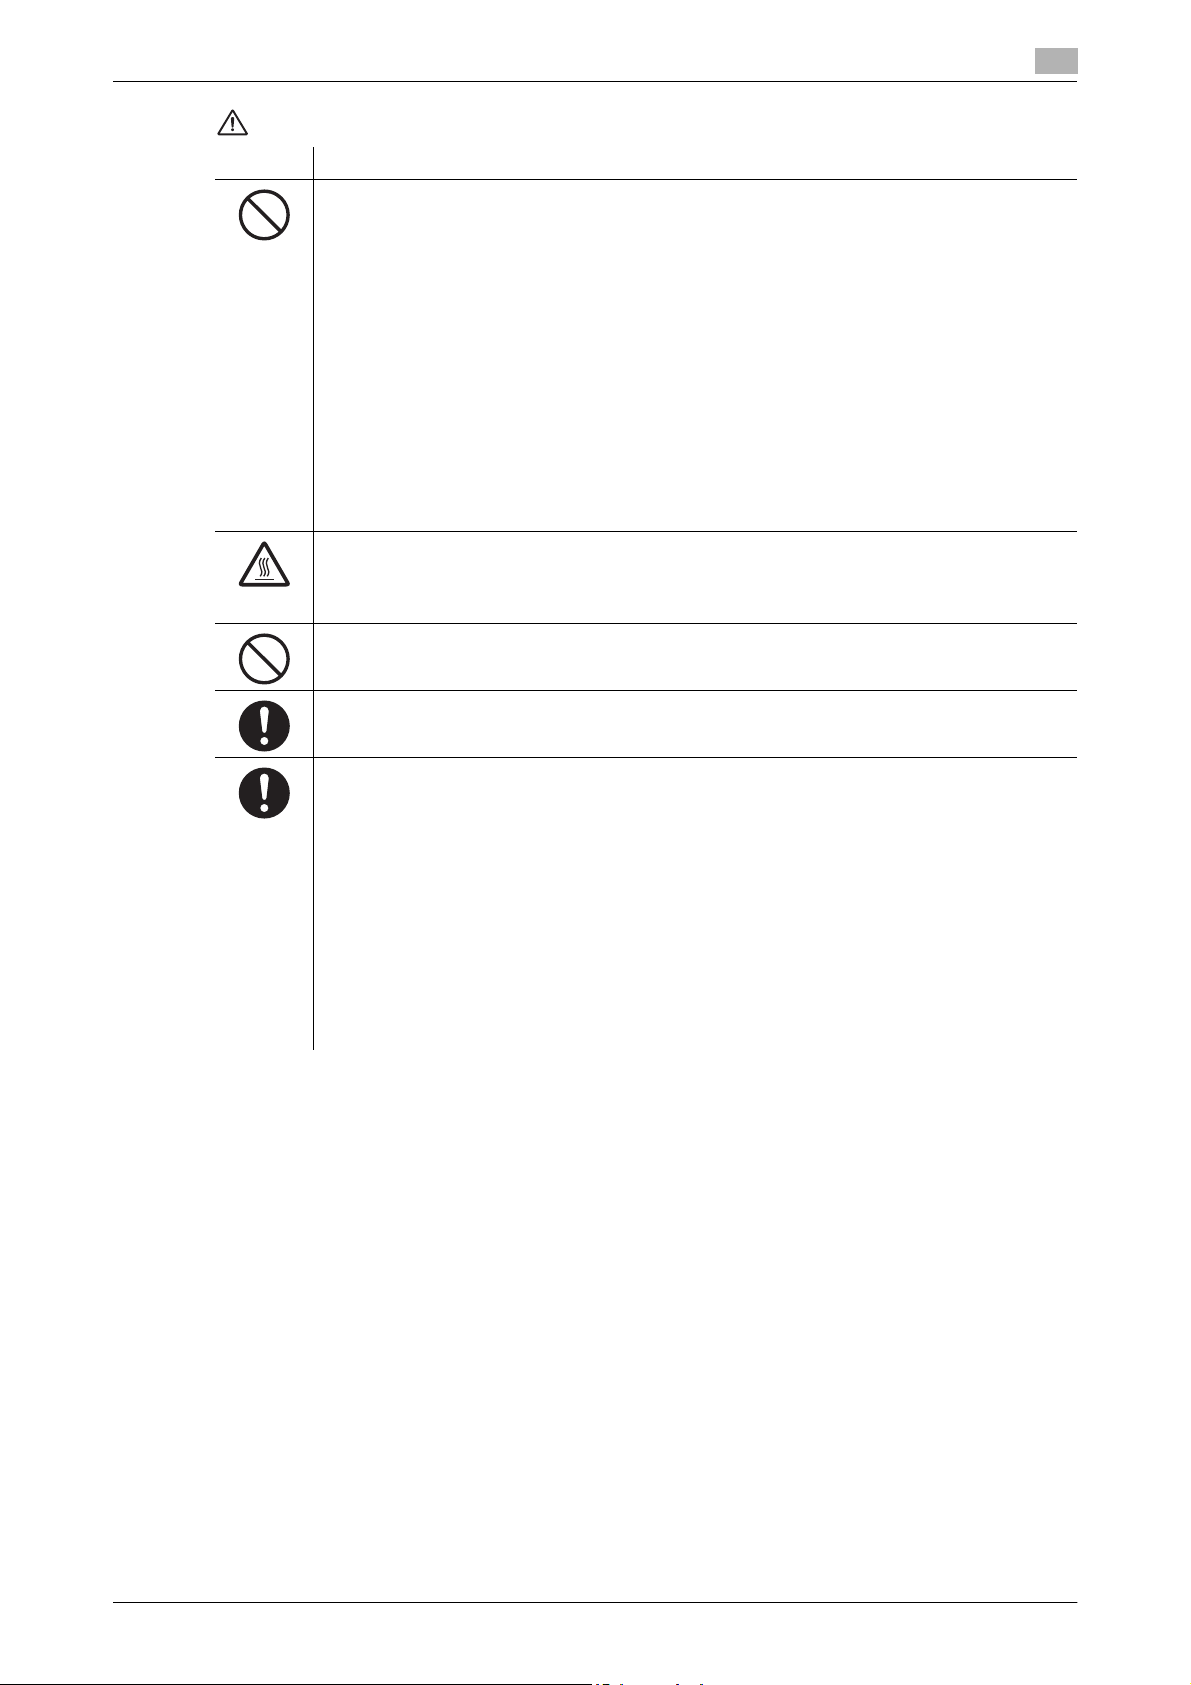
Symbol Meaning
• Do not modify this product, as a fire, electrical shock, or breakdown could result. If the
product employs a laser, the laser beam source could cause blindness.
• Do not attempt to remove the covers and panels which have been fixed to the product.
Some products have a high-voltage part or a laser beam source inside that could cause
an electrical shock or blindness.
• Use only the power cord supplied in the package. Failure to use this cord could result in
a fire or electrical shock.
• Use the power cord supplied in the package only for this machine and NEVER use it for
any other product. Failure to observe this precaution could result in a fire or electrical
shock.
• Use only the specified power source voltage. Failure to do that could result in a fire or
electrical shock.
• Do not use a multiple outlet adapter to connect any other appliances or machines. Use of
a power outlet for more than the marked current value could result in a fire or electrical
shock.
Do not unplug and plug in the power cord with a wet hand, as an electrical shock could result.
Plug the power cord all the way into the power outlet. Failure to do this could result in a fire
or electrical shock.
Safety information
1.2
• Do not scratch, abrade, place a heavy object on, heat, twist, bend, pull on, or damage the
power cord. Use of a damaged power cord (exposed core wire, broken wire, etc.) could
result in a fire or breakdown.
Should any of these conditions be found, immediately turn OFF the power switch, unplug
the power cord from the power outlet, and then call your authorized service representative.
• Do not use an extension cord, in principle. Use of an extension cord could cause a fire or
electrical shock. Contact your authorized service representative if an extension cord is required.
• Do not place a flower vase or other container that contains water, or metal clips or other
small metallic objects on this product. Spilled water or metallic objects dropped inside the
product could result in a fire, electrical shock, or breakdown.
• Should a piece of metal, water, or any other similar foreign matter get inside the product,
immediately turn OFF the power switch, unplug the power cord from the power outlet, and
then call your authorized service representative.
• Do not keep using this product, if this product becomes inordinately hot or emits smoke,
or unusual odor or noise. Immediately turn OFF the power switch, unplug the power cord
from the power outlet, and then call your authorized service representative. If you keep on
using it as is, a fire or electrical shock could result.
• Do not keep using this product, if this product has been dropped or its cover damaged.
Immediately turn OFF the power switch, unplug the power cord from the power outlet, and
then call your authorized service representative. If you keep on using it as is, a fire or electrical shock could result.
Do not throw the toner cartridge or toner into an open flame. The hot toner may scatter and
cause burns or other damage.
Connect the power cord to an electrical outlet that is equipped with a grounding terminal.
1-6 Konica Minolta 240f
Page 13
1.2 Safety information
CAUTION
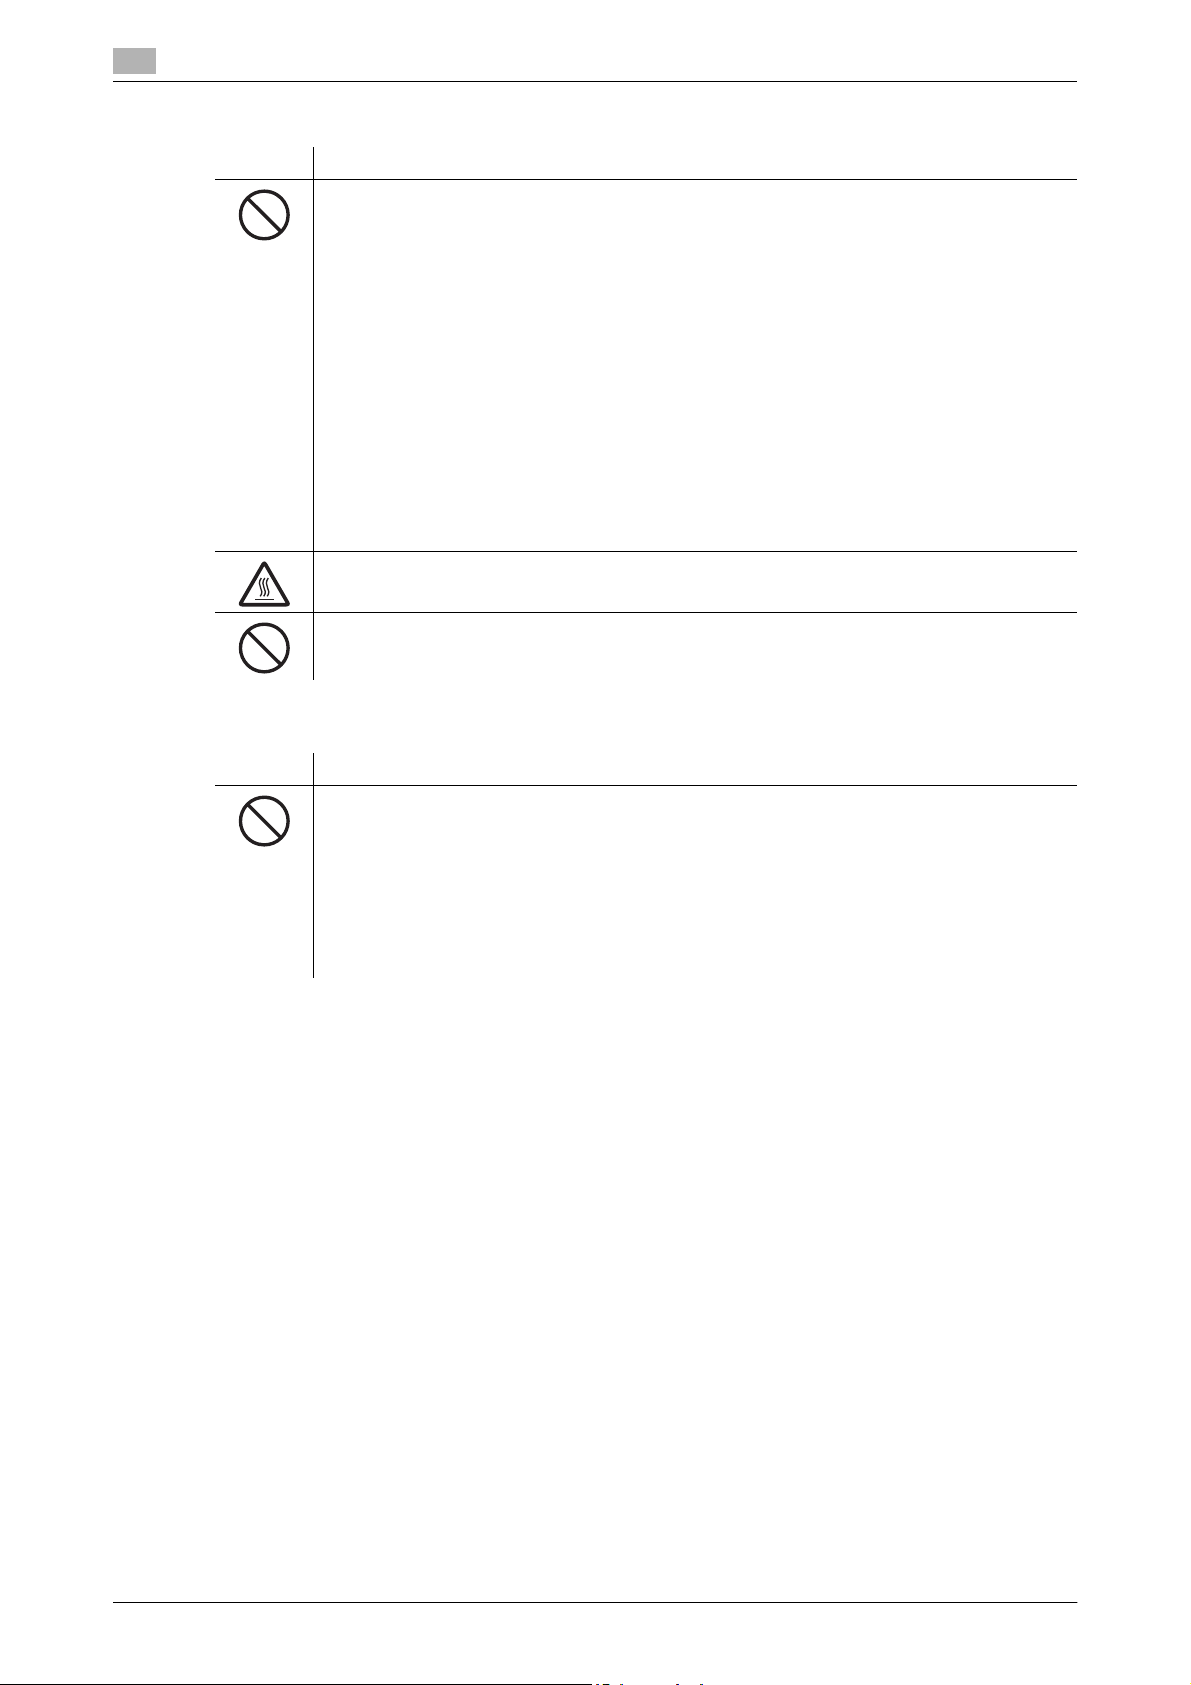
Symbol Meaning
1
• Do not use flammable sprays, liquids, or gases near this product, as a fire could result.
• Do not leave a toner cartridge or drum cartridge in a place within easy reach of children.
Licking or ingesting any of these things could injure your health.
• Do not let any object plug the ventilation holes of this product. Heat could accumulate inside the product, resulting in a fire or malfunction.
• Do not install this product at a site that is exposed to direct sunlight, or near an air conditioner or heating apparatus. The resultant temperature changes inside the product could
cause a malfunction, fire, or electrical shock.
• Do not place the product in a dusty place, or a site exposed to soot or steam, near a kitchen table, bath, or a humidifier. A fire, electrical shock, or breakdown could result.
• Do not place this product on an unstable or tilted bench, or in a location subject to a lot
of vibration and shock. It could drop or fall, causing personal injury or mechanical breakdown.
• After installing this product, mount it on a secure base. If the unit moves or falls, it may
cause personal injury.
• Do not store toner cartridges and drum cartridges near a floppy disk or watch that are susceptible to magnetism. They could cause these products to malfunction.
The inside of this product has areas subject to high temperature, which may cause burns.
When checking the inside of the unit for malfunctions such as a paper misfeed, do not touch
the locations (around the fusing unit, etc.) which are indicated by a "CAUTION HOT" caution
label.
Do not place any objects around the power plug as the power plug may be difficult to pull out
when an emergency occurs.
The power outlet should be installed near the machine and should be easily accessible so that
the power plug can easily be pulled out if an emergency occurs.
• Always use this product in a well ventilated location. Operating the product in a poorly
ventilated room for an extended period of time could injure your health. Ventilate the room
at regular intervals.
• Whenever moving this product, be sure to disconnect the power cord and other cables.
Failure to do this could damage the cord or cable, resulting in a fire, electrical shock, or
breakdown.
• When moving this product, always hold it by the locations specified in the User manual or
other documents. If the unit falls it may cause severe personal injury. The product may
also be damaged or malfunction.
• Remove the power plug from the outlet more than one time a year and clean the area between the plug terminals. Dust that accumulates between the plug terminals may cause
a fire.
• When unplugging the power cord, be sure to hold onto the plug. Pulling on the power cord
could damage the cord, resulting in a fire or electrical shock.
Konica Minolta 240f 1-7
Page 14
1
Precautions for routine use
Symbol Meaning
• Do not store toner cartridges, drum cartridges, and other supplies and consumables in a
place subject to direct sunlight and high temperature and humidity, as poor image quality
and malfunction could result.
• Do not attempt to replace the toner cartridge and drum cartridge in a place exposed to
direct sunlight. If the drum is exposed to intense light, poor image quality could result.
• Do not unpack a toner cartridge or drum cartridge until the very time of use. Do not leave
an unpacked unit standing. Install it immediately or poor image quality could result.
• Do not keep toner cartridges and drum cartridges in an upright position or upside down,
as poor image quality could result.
• Do not throw or drop a toner cartridge or drum cartridge as poor image quality could result.
• Do not use this product in an area where ammonia or other gases or chemicals are
present. Failure to do so may shorten the service life of the product, cause damage or decrease performance.
• Do not use this product in an environment with a temperature outside the range specified
in the User manual, as a breakdown or malfunction could result.
• Do not attempt to feed stapled paper, carbon paper or aluminum foil through this product,
as a malfunction or fire could result.
Do not touch or scratch the surface of the toner cartridge developing roller and the drum, as
poor image quality could result.
Use the supplies and consumables recommended by the dealer. Use of any supply or consumable not recommended could result in poor image quality and breakdown.
Safety information
1.2
Miscellaneous
Symbol Meaning
• Do not rest your weight on the control panel, as a malfunction could result.
• Normal international communications may at times not be possible depending on line
conditions.
• If tap or well water is used in a humidifier, impurities in the water are discharged into the
air and may be deposited inside the printer, resulting in poor image quality. It is recommended that pure water that does not contain any impurities be used in the humidifier.
• The cooling fan may be activated automatically, but this suggests no problems.
• Ni-MH (Nickel Metal Hydride) Batteries are installed inside machine as back up memory
batteries. Please dispose according to local, state and federal regulations.
1-8 Konica Minolta 240f
Page 15
1.3 How to read this manual
1.3 How to read this manual
1.3.1 Symbols
Operational and safety information
In this manual, the following symbols are used with the items where important operational and safety
information must be observed.
Symbol Meaning
7 WARNING Describes warnings to protect yourself and others from serious or potentially fatal
injury if you handle the machine incorrectly. For safe operation, please follow instructions carefully.
7 CAUTION Describes cautions to protect yourself and others from personal injury or damage
to properties if you handle the machine incorrectly. For safe operation, please follow instructions carefully.
d Describes reference information and additional notes for operations.
Please note that we will not be held responsible for any loss including pure economic loss that occurs due to
the machine missing an opportunity to perform transmission or recording of data, caused by damage to the
machine, a malfunction, or external factors such as a power failure.
1
Terms, symbols, and abbreviations
The following terms, symbols and abbreviations are used in this manual.
Symbol,Terms Meaning
Document Original(s) that you are copying, faxing or scanning.
Paper Paper to be printed on.
Tx Denotes sending.
Rx Denotes receiving.
ADF Denotes Auto Document Feeder.
v Shows the direction of the document.
w Shows the direction of the paper.
Konica Minolta 240f 1-9
Page 16
1
How to read this manual
About v symbol
v symbol indicates the direction of the document.
When the document has a length longer than its width, we use the v symbol.
When the document has a length shorter than its width, we use no symbol.
Length
Width
About w symbol
1.3
w symbol indicates the direction of the paper.
When the paper has a length longer than its width, we use the w symbol.
When the paper has length shorter than its width, we use no symbol.
Width
Length
(Paper loaded in the cassette)
1-10 Konica Minolta 240f
Page 17
1.3 How to read this manual
1.3.2 Key descriptions
In this manual, the operating keys are described as follows:
The key names on the control panel are shown in < >, and the key names on the touch panel are in [ ].
Keys on the control panel
Enclosed in < >, for example, <Job Confirm. ) Fax Cancel>.
Touch panel keys
Enclosed in [ ], for example, [Contrast].
Screens
This manual uses the screens of the KONICA MINOLTA 240f standard model, unless otherwise stated. The
screens you see may differ, depending on the options installed.
1
Konica Minolta 240f 1-11
Page 18

1
1.4 Getting started
Observe the following precautions to maintain the machine in its best possible condition.
1.4.1 Installation precautions
Installation site
To ensure utmost safety and prevent possible malfunctions, install the machine in a location that meets the
following requirements:
- A location away from curtains, etc. that may catch fire and burn easily
- A location that is not exposed to water or other liquids
- A location free from direct sunlight
- A location out of the direct airflow of an air conditioner or heater, and not exposed to extremely high or
low temperatures
- A well-ventilated location
- A location that is not exposed to high humidity
- A location that is not extremely dusty
- A location not subjected to undue vibrations
- A stable and level location
- A location where ammonia or other organic gases are not generated
- A location that does not put the operator in the direct airflow of exhaust from the machine
- A location that is not near any kind of heating devices
Getting started
1.4
1.4.2 Power source
The power source requirements are as follows.
- Voltage Fluctuation: AC 220-240 V ± 10 Hz
- Frequency Fluctuation: Within ± 3Hz
- Use a power source with as few voltage or frequency fluctuations as possible.
1.4.3 Battery
A lithium battery and Ni-MH (Nickel Metal Hydride) batteries are installed inside machine as back up memory
batteries.
1-12 Konica Minolta 240f
Page 19
1.4 Getting started
1.4.4 Recycling
Old machines, batteries, empty toner cartridges and drum cartridges will be return to your local technical
representative and will be recycled. Machines for consumer usage can be recycled at local recycling stations
without any charge. Batteries should not be thrown in the usual waste.
d
For details, contact your local technical representative.
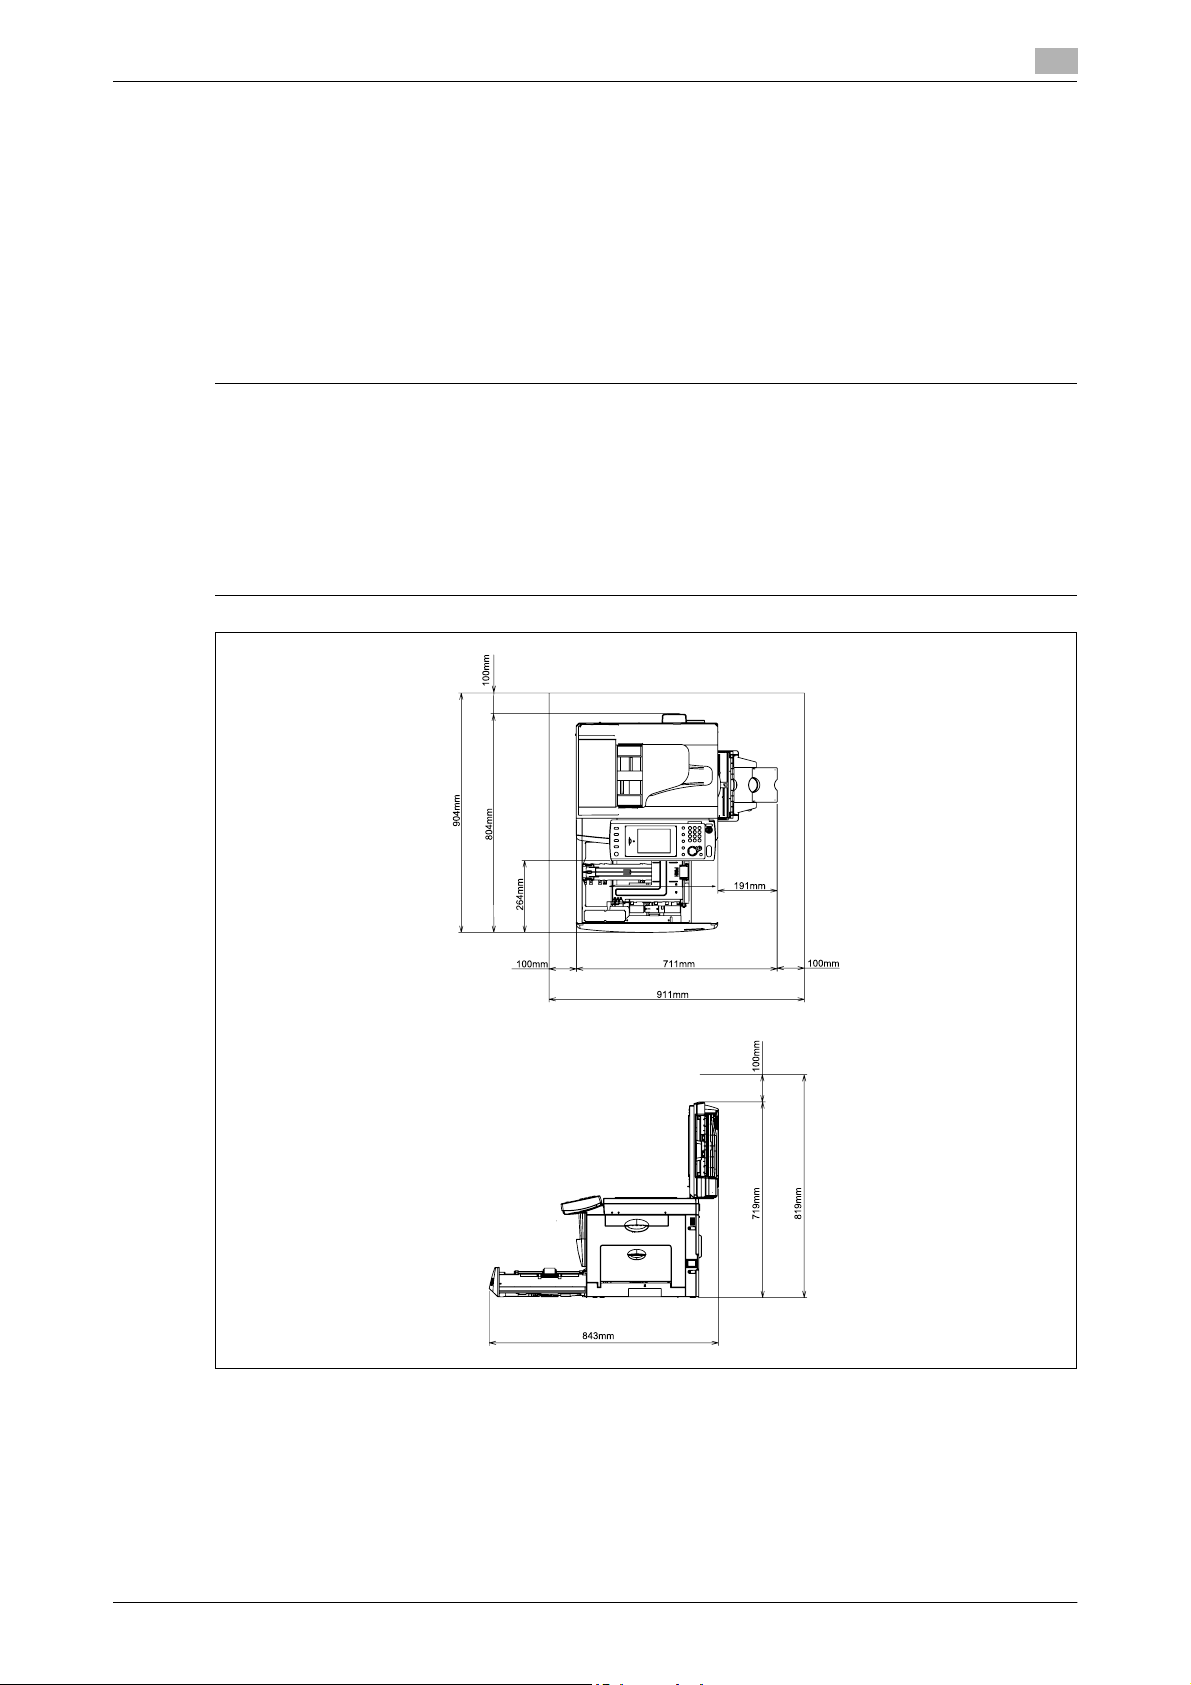
1.4.5 Space requirements
6 CAUTION
- Do not let any object obstruct or plug the ventilation holes of this product. Accumulated heat inside the
product could result in a malfunction.
- Install the machine to keep the ventilating slot of the machine at least 100 mm away from walls or other
devices.
- To ensure proper ventilation and easy operation, secure an adequate installation space around the
machine.
- Avoid installing or using outdoors.
1
Unit: mm
Konica Minolta 240f 1-13
Page 20

1
1.4.6 Operation precautions
6 CAUTION
- A negligible amount of ozone is generated during normal operation of this machine. An unpleasant odor
may, however, be detected in poorly ventilated rooms during extensive machine operations.
For a comfortable operating environment, it is recommended that the room be well ventilated.
- New machines are emitting some gases in general. According to this please take care of air fluctuations
in the room for the first days. At high usage it is recommended to keep a distance to the working places.
- The area around the Fusing Unit is extremely hot.
In order to reduce the risk of burns, do not touch any area other than those indicated in the manual. Be
especially careful not to touch parts marked with warning labels, and their surrounding areas.
Operating environment
The environmental requirements for correct operation of the machine are as follows:
- Temperature: 10°C to 32°C (50°F to 89.6°F) with fluctuations of no more than 10°C (18°F) within an hour
- Humidity: 20% to 80% with fluctuations of no more than 10% within an hour
Proper use
To ensure the optimum performance of the machine, follow the precautions listed below:
- Never place heavy objects on the document glass or subject it to shocks.
- Never open any machine doors or turn off the machine while it is making copies/printing, as a paper
misfeed could result.
- Never bring any magnetized object, or use flammable sprays or liquids, near the machine.
- Always make sure that the power plug is completely plugged into the electrical output.
- Always make sure that the machine's power plug is visible and not hidden by the machine.
- Always provide good ventilation when making a large number of continuous copies/printed pages.
- Cleaning, maintenance and recycling that are not described in the manuals should only be done by a
trained person.
Getting started
1.4
Transporting the machine
If you need to transport the machine over a long distance, contact your local technical representative.
Care of machine supplies
6 CAUTION
Toner cartridges should not be opened with force. Leaking toner should not be inhaled. Contact with
skin should also be avoided. Cartridges should be stored out of children reach. If your skin get in
contact with toner clean it under floating water and soap. In case of skin irritation please consult a
doctor.
Use the following precautions when handling the machine supplies (toner, paper, etc.).
- Store the supplies in a location that meets the following requirements: Free from direct sunlight, Away
from any heating apparatus, Not subjected to high humidity, Not extremely dusty
- Paper that has been removed from its wrapper but not loaded in the machine should be stored in a
sealed plastic bag in a cool, dark place.
- Use only toner that has been manufactured specifically for this machine. Never use other types of toner.
- Keep all supplies out of the reach of children.
1-14 Konica Minolta 240f
Page 21

1.4 Getting started
Legal restrictions on copying
Certain types of documents must not be copied with the purpose or intent to pass copies of such documents
off as the originals.
The following is not a complete list, but is meant to be used as a guide to responsible copying.
Financial Instruments
- Personal checks
- Travelers checks
- Money orders
- Certificates of deposit
- Bonds or other certificates of indebtedness
- Stock certificates
Legal Documents
- Food stamps
- Postage stamps (canceled or uncanceled)
- Checks or drafts drawn by government agencies
- Internal revenue stamps (canceled or uncanceled)
- Passports
- Immigration papers
- Motor vehicle licenses and titles
- House and property titles and deeds
General
- Identification cards, badges, or insignias
- Copyrighted works without permission of the copyright owner
In addition, it is prohibited under any circumstances to copy domestic or foreign currencies, or works of art,
without permission of the copyright owner. When in doubt about the nature of a document, consult with legal
counsel.
1
Konica Minolta 240f 1-15
Page 22
1
Getting started
1.4
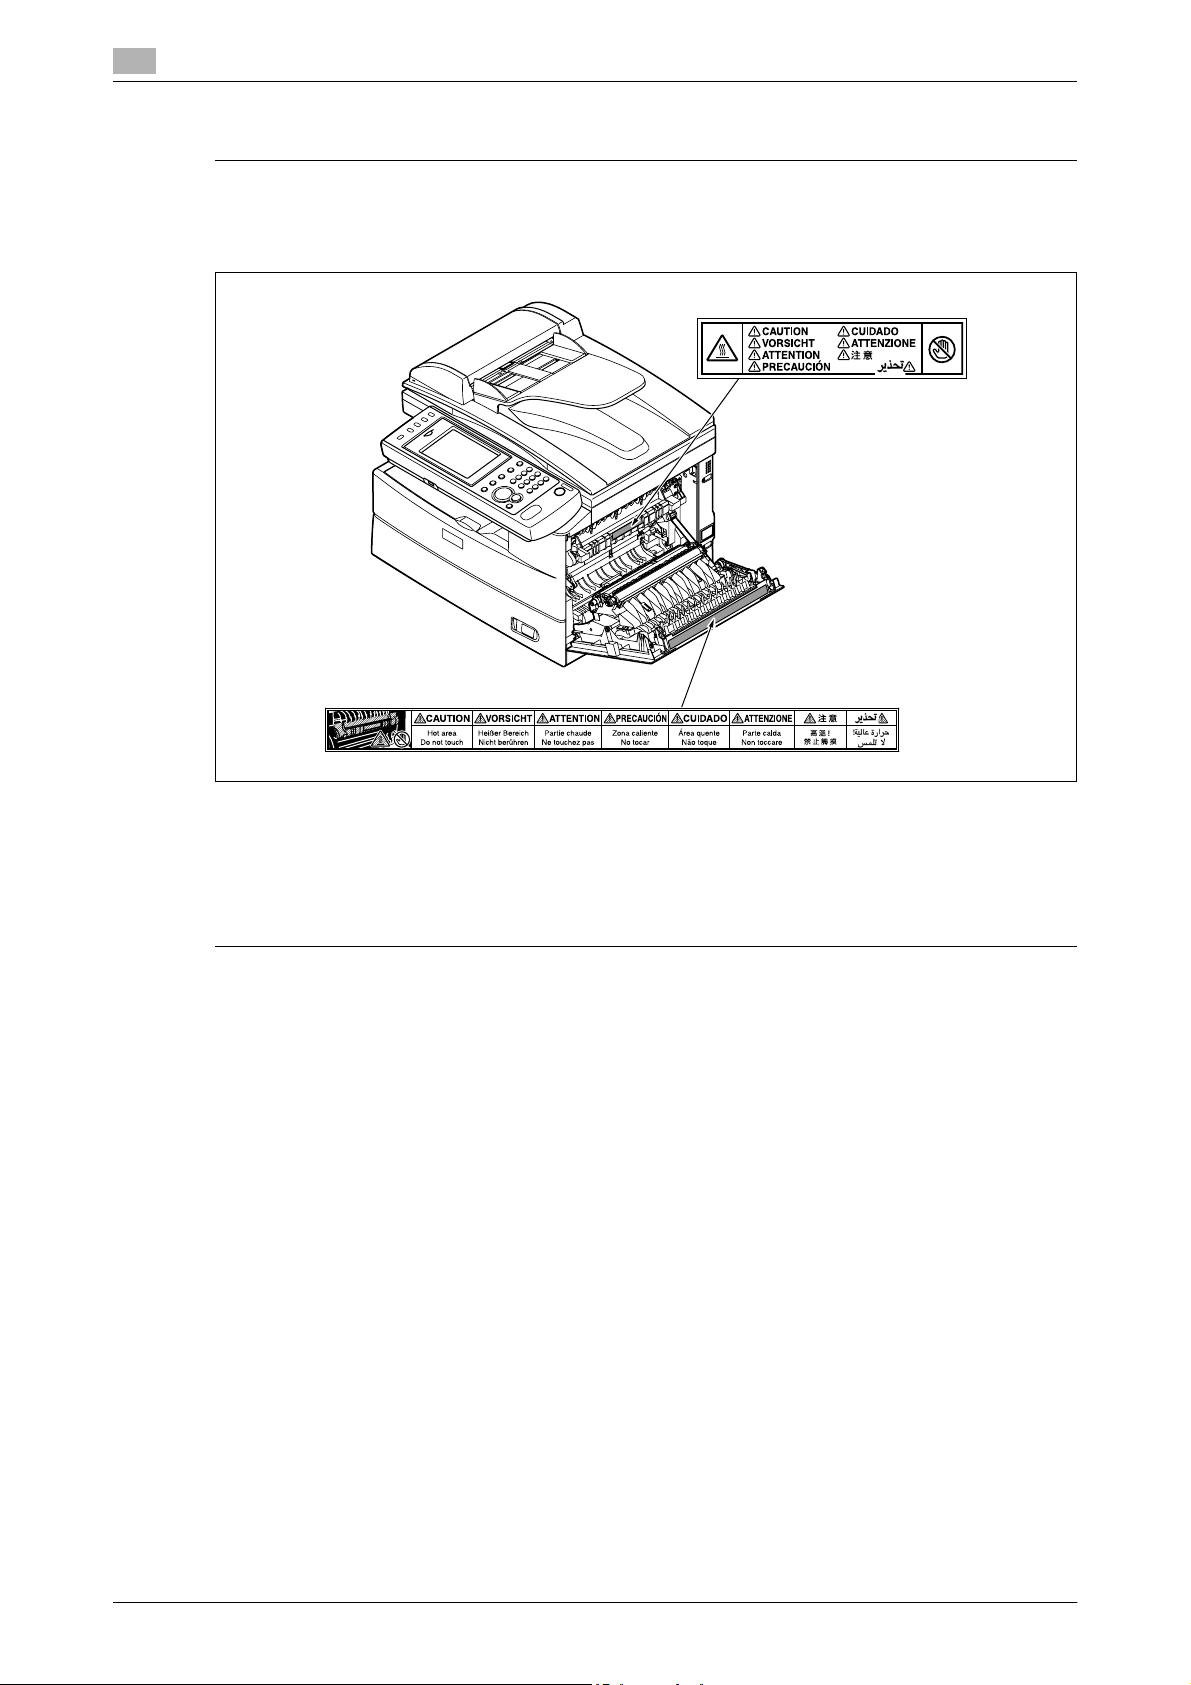
Caution labels and indicators
6 CAUTION
The area around the fuser unit becomes extremely hot during operation. Do not touch the area around
the fuser unit when removing paper jams or inspecting the inside of the machine. Doing so may cause
burns.
- When removing paper jams and replacing toner cartridges, be careful that toner does not get into your
eyes or mouth. If the toner gets in your eyes or mouth, immediately flush them with clean water and
seek medical assistance.
- Be careful not to stain your hands or clothes with the toner. If your hands or clothes get stained, wash
them using clean cold water. The stains may become permanent if washed using warm water.
- Do not perform operations that are not described in the instruction manuals.
1-16 Konica Minolta 240f
Page 23

1.5 Overview of manuals
1.5 Overview of manuals
The instruction manuals for this product describe the detailed operating and setting procedures, and are
included on a DVD. Refer to them as required.
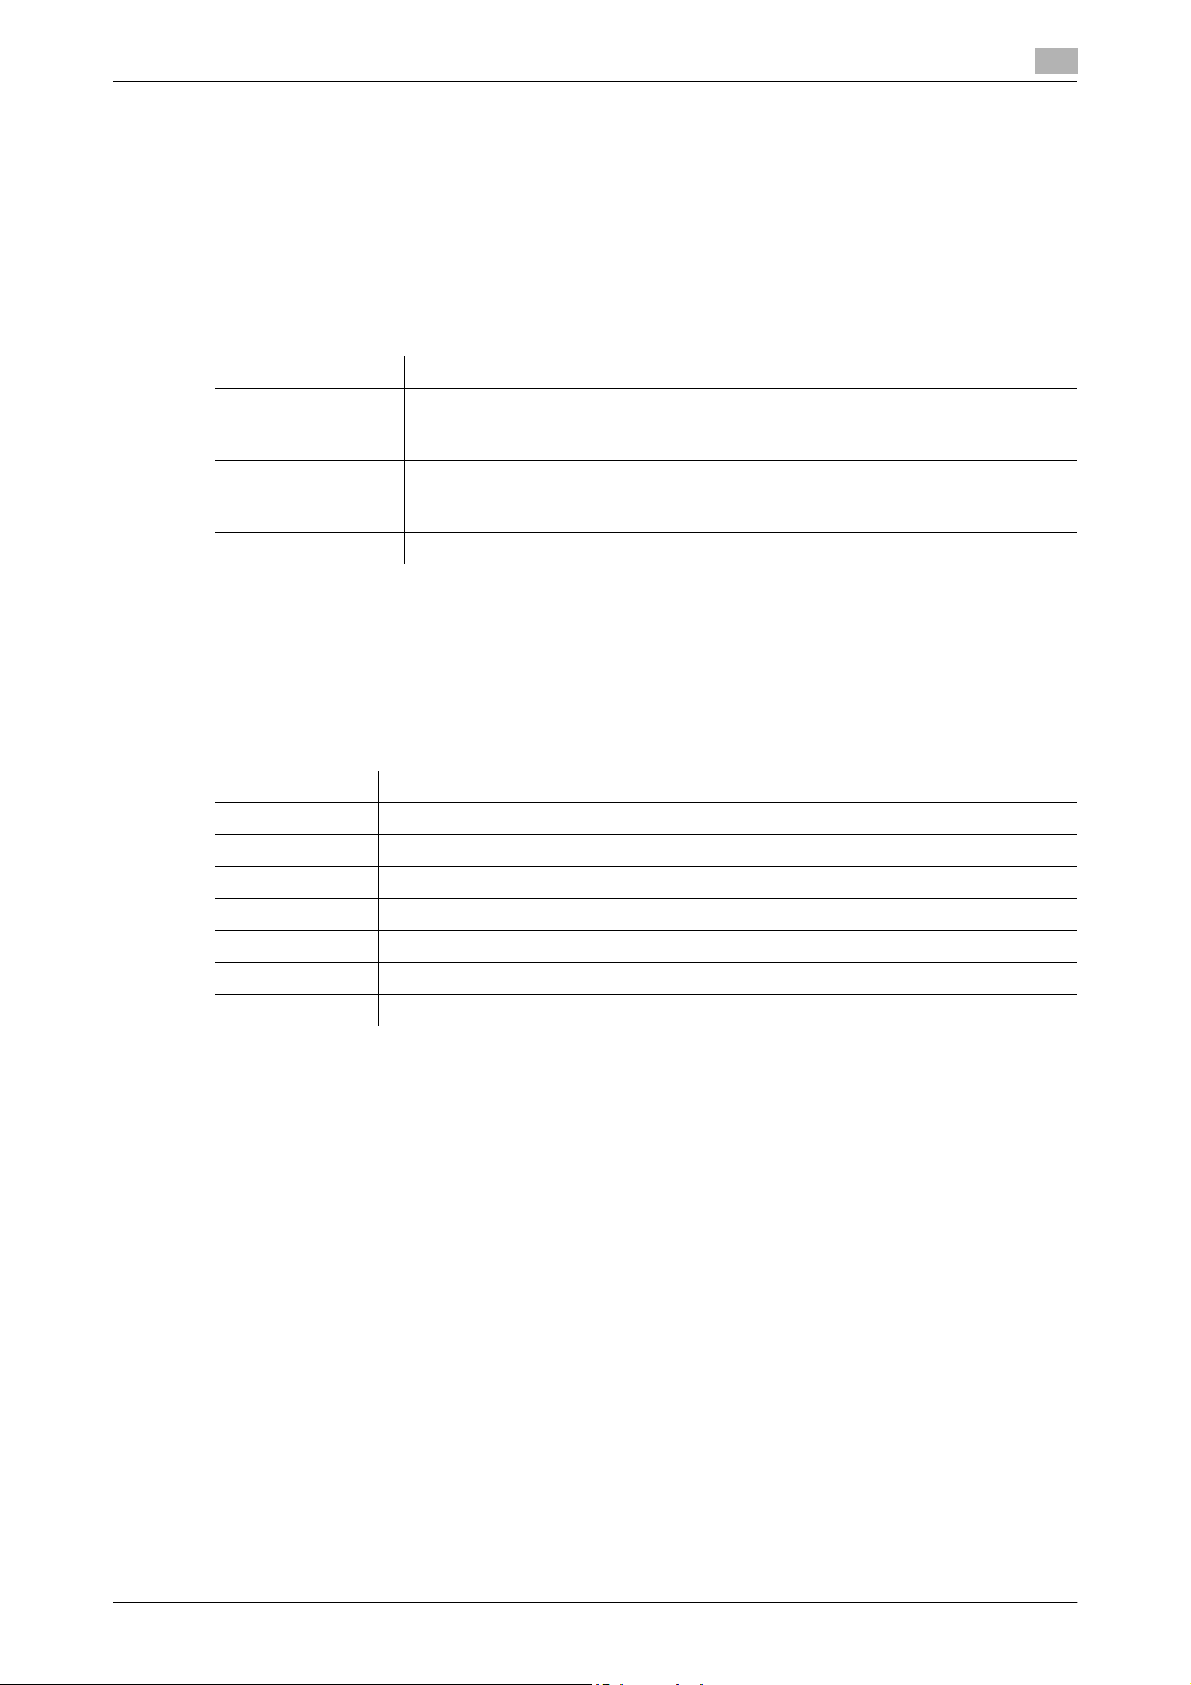
Manual Description
Quick Guide (this manual)
Method for installing the machine, basic operating procedures, and the method for
clearing paper jams
User's Guide Administrator Operations
Setting, cleaning, and troubleshooting the machine
User's Guide Copy Operations
Using the machine as a copier
User's Guide Scan and Fax Operations
Using the machine as a scanner
or fax machine, checking communication, specifying settings
User's Guide Print Operations
Using the machine as a printer
User's Guide Message Board
Operations
Using the functions of the machine via a Web browser
User's Guide Barcode/OCR Font
Settings
1
Part names and functions
Connecting the machine and major settings
Paper / document loading method
Making copies
Performing scanning
Transmitting faxes
Performing printing
Registering destinations and folder shortcuts
Replacing the toner cartridge and drum cartridge
Clearing document jams and paper jams
Alarms
Main specifications
Using common functions
• Entering characters
• Changing advanced functions
• Logging in / logging out, etc.
Management settings
• Function protect settings
• Setting user authentication, etc.
Maintenance
• Cleaning the machine, etc.
Troubleshooting
• Communication errors
• Items to check when trouble occurs
Advanced copy functions
•Card copy
• Combine copy, etc.
Specifying default settings
Advanced scanner functions
• Changing the file format
• Changing the filename, etc.
Advanced fax functions
• Broadcast transmission
• Attaching a cover page
• PC Fax, etc.
Specifying default settings
Advanced printer functions
• Security print
• Print on Demand, etc.
Printing from application software
Installing drivers and utilities
Transmitting faxes and e-mail from Message Board
Registering users
Specifying e-mail and internet connection settings
Creating cover pages, etc.
This manual provides descriptions for types of barcode, character
code and samples of font usage, etc. for models equipped with the
Barcode/OCR font option.
Konica Minolta 240f 1-17
Page 24

1
Overview of manuals
1.5
1-18 Konica Minolta 240f
Page 25

2
Common settings
Page 26

Page 27
2.1 Part names and functions
2 Common settings
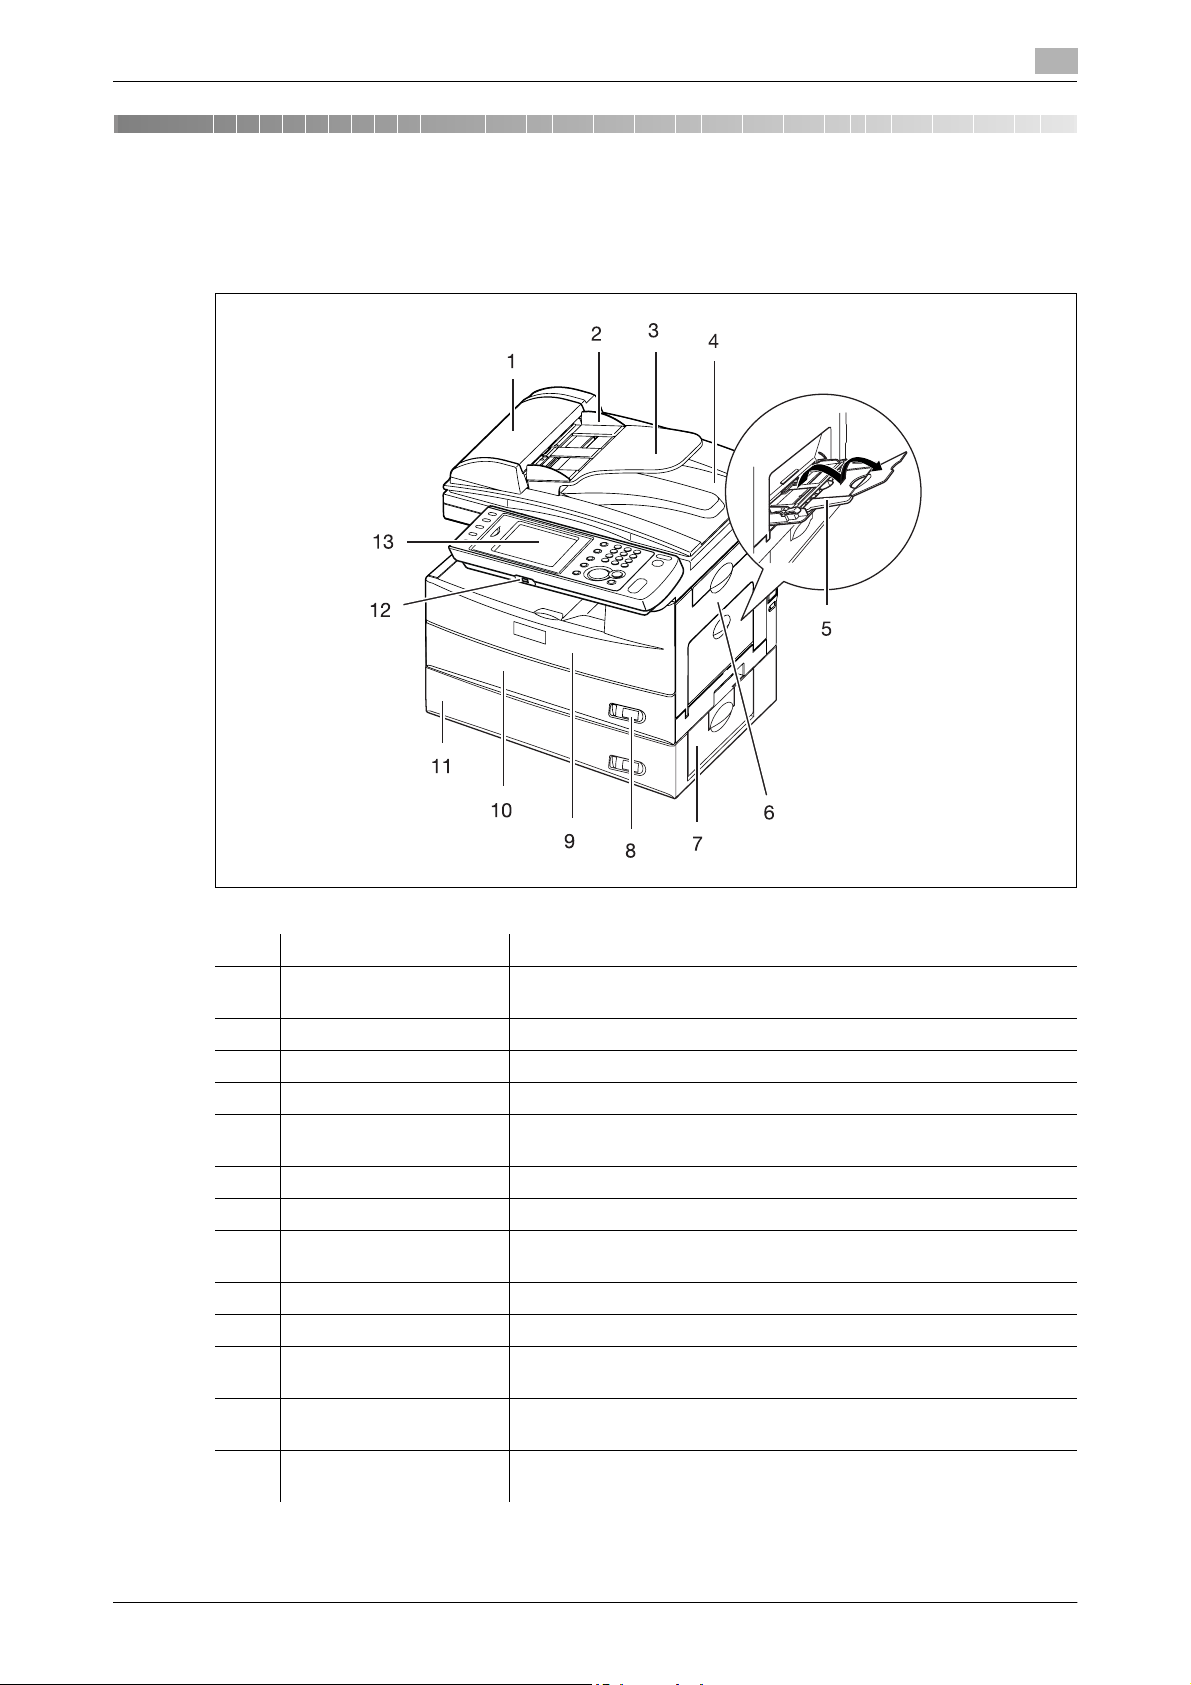
2.1 Part names and functions
2
No. Name Description
1 ADF cover Open this when a document jams and when cleaning the scanning
area.
2 Document guide This supports the document so that it is fed straight.
3 Document tray Load the document here face up.
4 Document output tray Scanned documents are output here.
5 Bypass tray Used when printing on envelopes, transparencies, and custom pa-
6 Side cover 1 Open this when paper jams and when replacing the drum cartridge.
7 Side cover 2 An optional paper cassette. Open this when paper jams.
8 Paper level indication
window
9 Front cover Open this when replacing the toner cartridge or drum cartridge.
10 Paper cassette 1 This holds approximately 500 sheets of paper.
11 Paper cassette 2 This holds approximately 500 sheets of paper. This cassette is op-
12 USB connector Connect USB memory here to save scanned images to USB mem-
13 Control panel This panel includes the touch panel and the keys required for oper-
per sizes.
The areas indicated in red increase as the paper level in the paper
cassette decreases.
tional.
ory or print images stored on USB memory.
ation.
Konica Minolta 240f 2-3
Page 28
2
Part names and functions
2.1
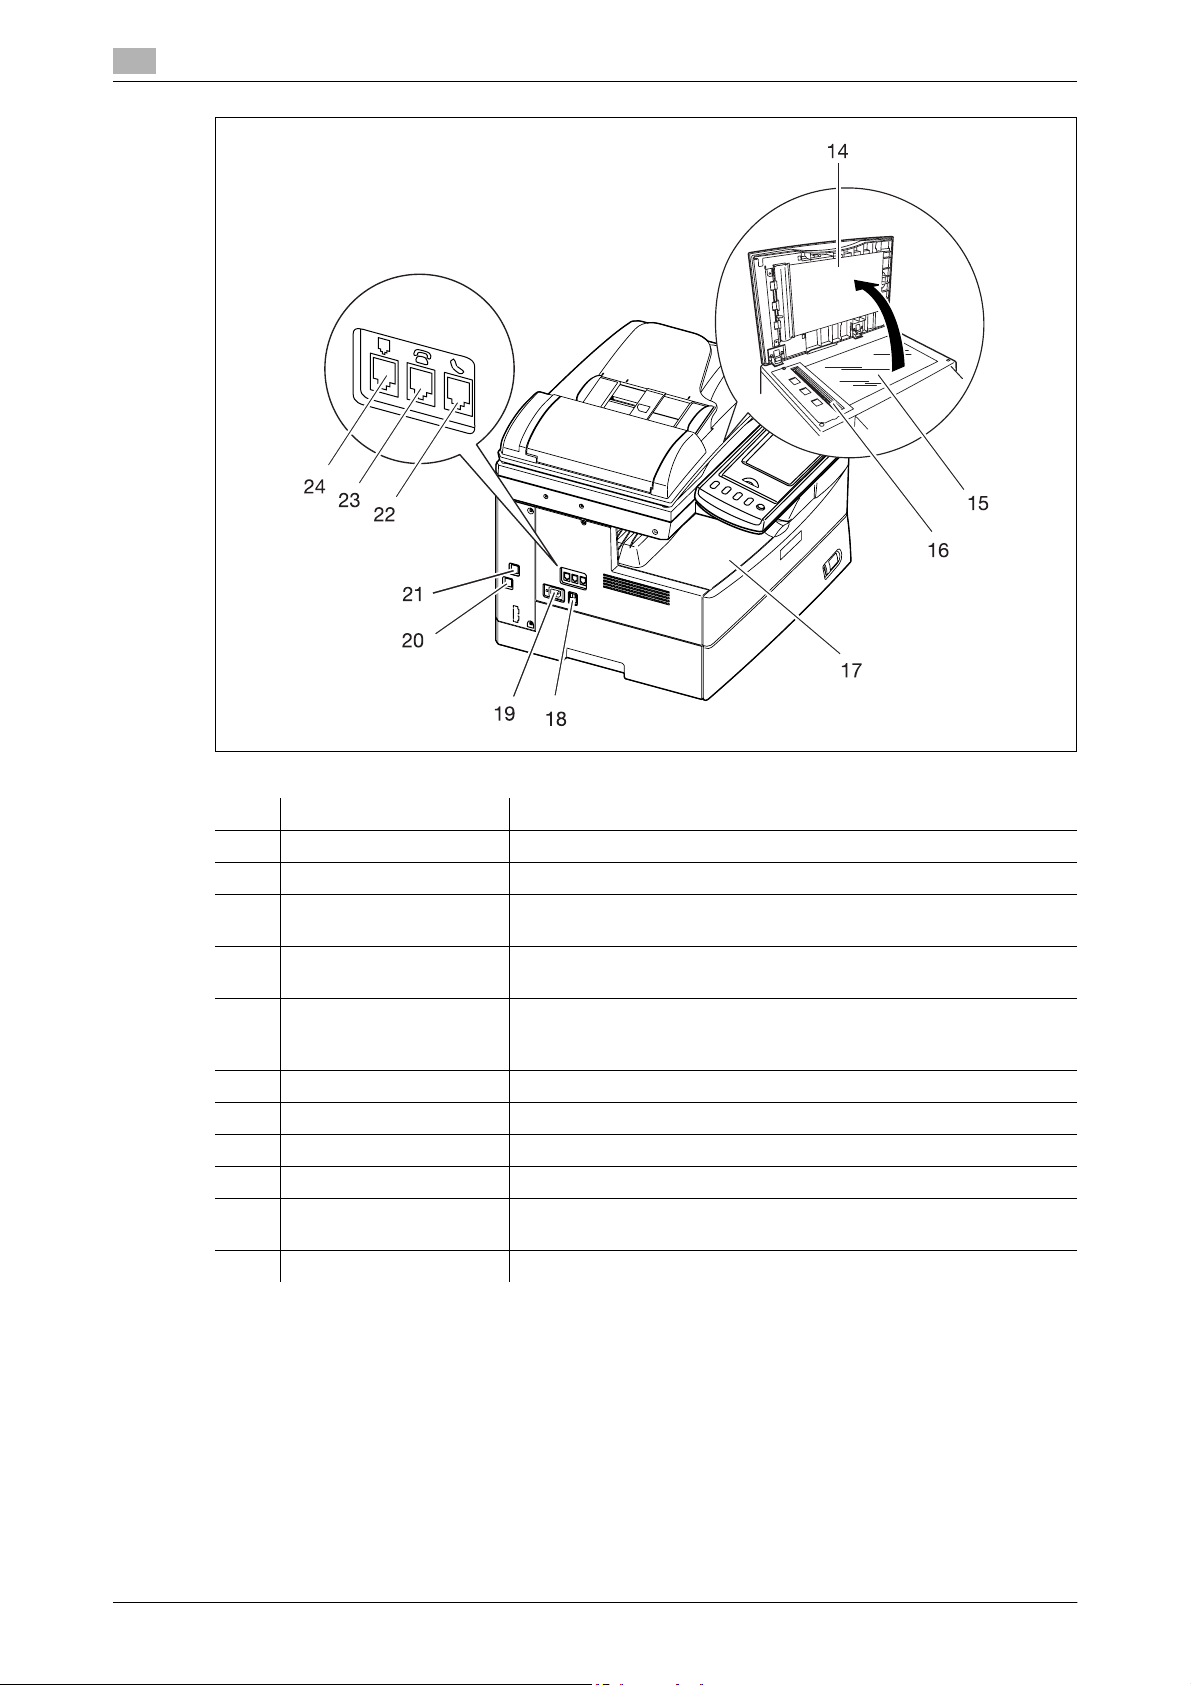
No. Name Description
14 Platen cover This holds down the document.
15 Document glass Load the document here aligned to the top left of the glass.
16 ADF glass This is where documents loaded in the ADF (Auto Document Feeder)
are scanned.
17 Paper exit tray The copied or printed paper exits with the printed side down in this
tray.
18 Main power switch This switch is used to turn the machine ON and OFF. Normally, leave
19 Power jack Connect the power cord here. For details, refer to page 2-14.
20 Network connector Connect the LAN cable here. For details, refer to page 2-14.
21 USB port Connect the USB cable here.
22 Phone jack Connect a handset here.
23 External phone jack Connect an external phone (such as an answering machine) here.
24 Telephone line jack Connect the modular cable here. For details, refer to page 2-15.
the power ON. Turn it OFF if you do not use the machine for a long
period of time or move it. For details, refer to page 2-22.
For details, refer to page 2-15.
2-4 Konica Minolta 240f
Page 29
2.1 Part names and functions
2
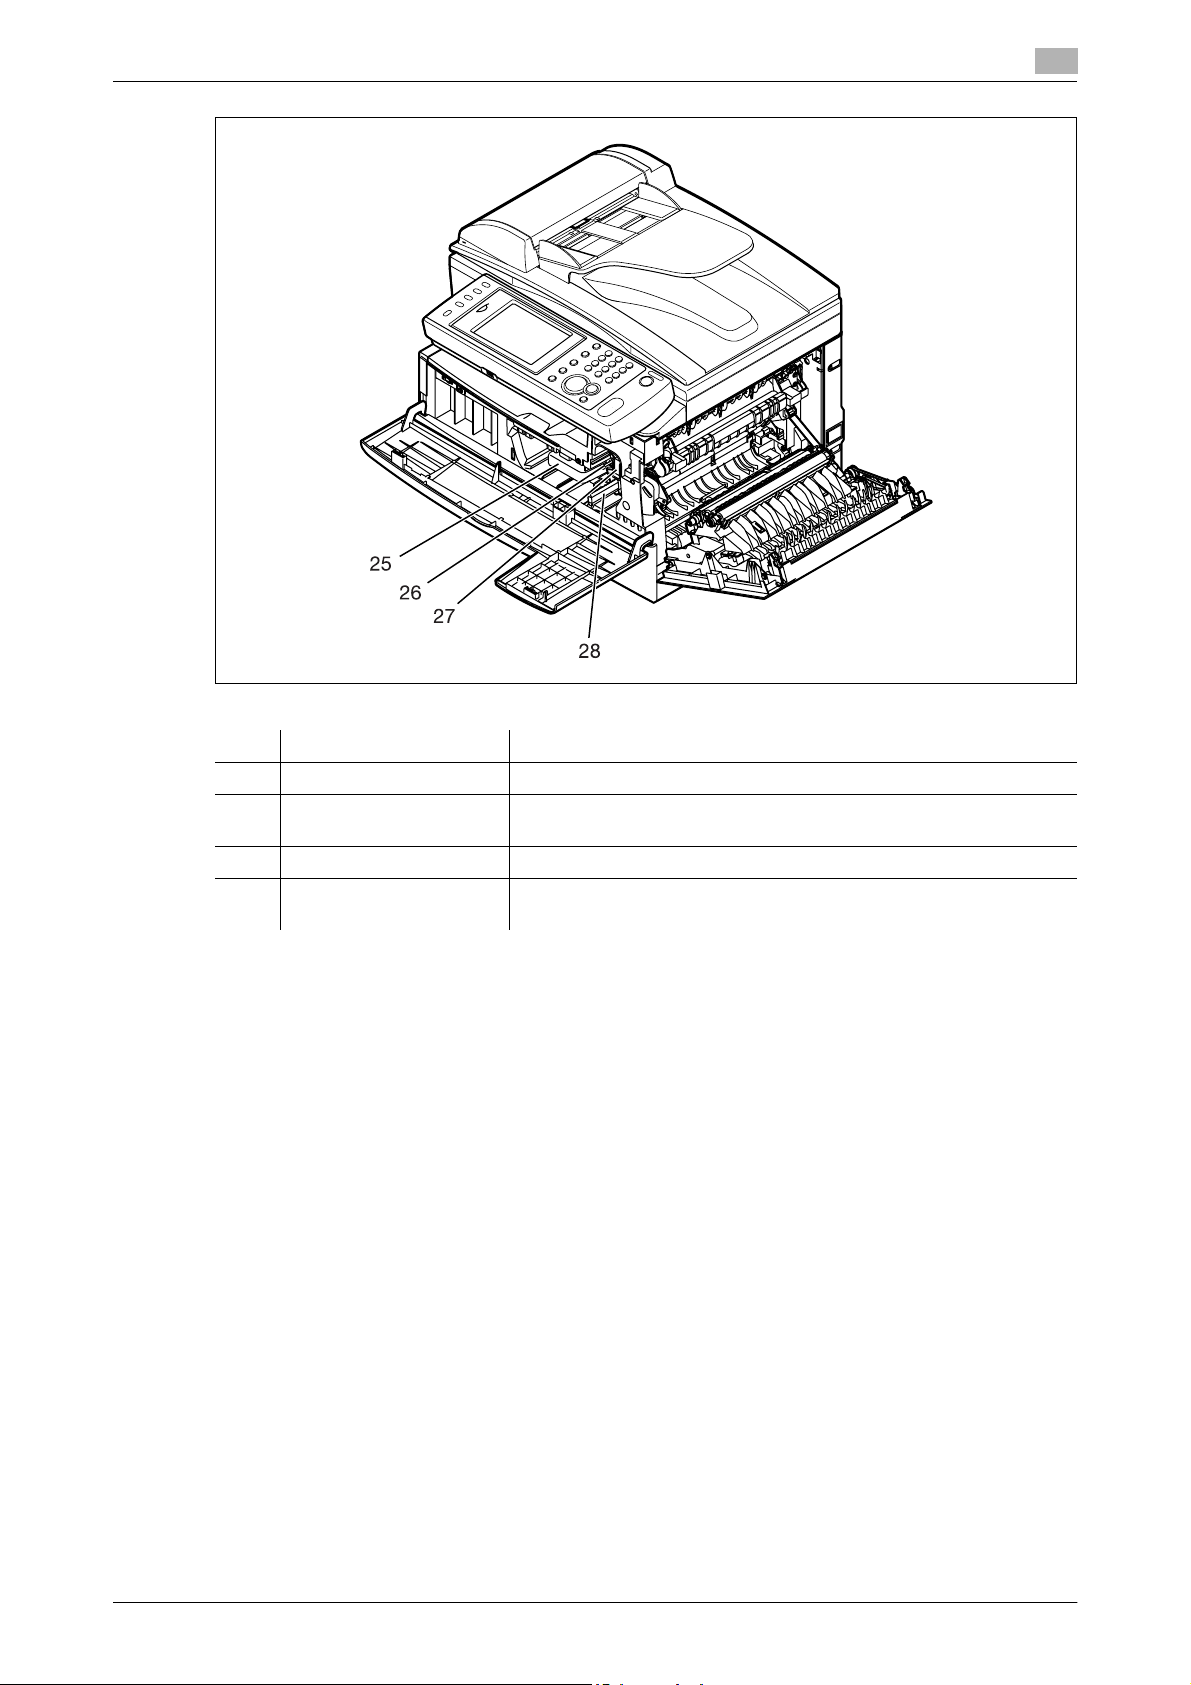
No. Name Description
25 Toner cartridge Load the toner cartridge here.
26 Charge wire cleaning rod When the print quality drops, move this rod back and forth to clean
the charging needle.
27 Drum cartridge Load the drum cartridge here.
28 Toner cartridge lock lever When replacing the toner cartridge, push this lever down the left
side, and then pull out the cartridge.
Konica Minolta 240f 2-5
Page 30
2
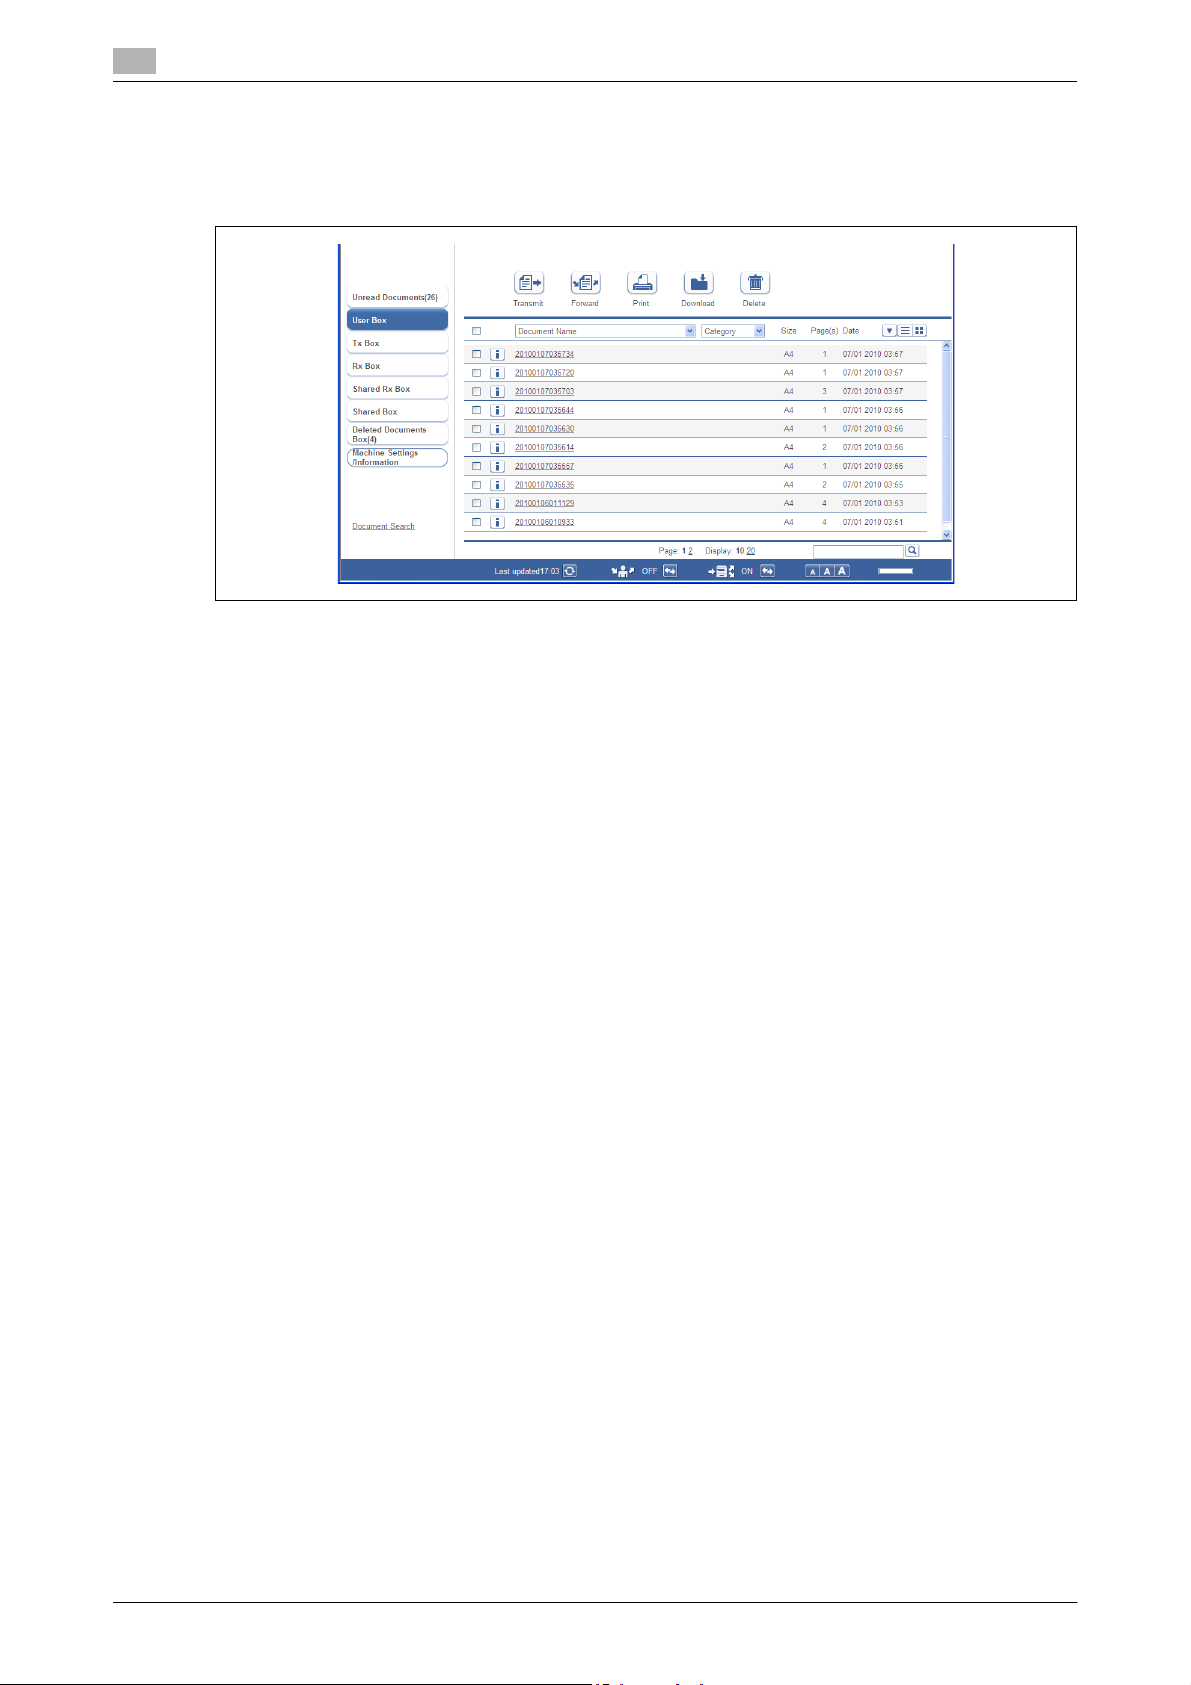
2.2 Overview of Message Board
When the machine is connected to a network, you can operate it using the Web browser on a computer.
Message Board is a management system that enables you to manage documents from a Web browser.
If you save the documents scanned on the machine in a user box in Message Board, you can transmit the
data for the scanned documents via e-mail and fax.
You can also save received faxes in the shared reception box and user box without printing them. Since the
documents can be checked on a computer, you can save the paper usually used to print them.
Overview of Message Board
2.2
d
For details on using Message Board, refer to the User’s Guide Message Board Operations included on the
DVD.
2-6 Konica Minolta 240f
Page 31

2.3 Control panel
2.3 Control panel
No. Name Description
1 Mode keys Switches the machine to the Copier, Scanner, Fax and Printer mode.
2 Display Contrast dial Adjusts the contrast of the display. For details, refer to page 2-16.
3 Display Displays machine status, interactive displays, and touch keys for se-
4 <Job Confirm. ) Fax
Cancel>
5 <Personal Mode> Press this key to switch between the personal screen and shared
6 <Login> Press this to perform user authentication.
7 <Setting> Press this to specify the various settings.
8 Information lamp This flashes green to inform you of the operation when performing
9 <Power> This switch is used to turn the machine ON and OFF. For details, re-
10 Numeric keys Use these keys to enter numerical values, such as fax/phone num-
11 <Stop> Stops the machine's operation. To stop a fax transmission, press
12 <Energy Save> Puts the machine into the energy save mode and reduce power con-
13 <Start> Executes the operation.
14 <Reset> Returns the menu to the ready screen and resets all settings back to
15 <My MFP> Press this key to use shortcut functions and check the usage status
2
lecting all functions.
Press this key to cancel or review stored jobs, or to review the results
of communication.
screen.
scanning or transmission. It also illuminates green when there is a received document in memory, and flashes red when an error has occurred.
fer to page 2-22.
bers.
<Job Confirm. ) Fax Cancel>.
sumption. For details, refer to page 2-24.
their defaults.
of the machine. For details, refer to page 2-12.
Konica Minolta 240f 2-7
Page 32

2
2.4 Operation screens
The machine can be operated by directly touching the keys and tabs displayed on the screen with your finger.
2.4.1 Ready screen
You can use the various functions of the machine by operating the keys displayed on the screen. The ready
screen is displayed when you press a mode key or press <Reset> during an operation.
Switching screens
Press the mode keys to switch between the copy, scan, fax, and print screens.
Operation screens
2.4
2-8 Konica Minolta 240f
Page 33

2.4 Operation screens
Copy Ready screen names and functions
2
1
2
7
3
6
5
No. Name Description
1 Status display "Copy Ready" is displayed for the ready screen.
2 Set Displays the number of copy sets.
3 Memory Displays the remaining amount of memory.
4 Paper selection key Selects the cassette or tray containing the paper you want to use for
copying.
5 Advanced key Press this to display a list of the advanced copy functions.
6 Soft keys You can display up to five frequently used functions here.
7 Date Displays the current date and time. You can change the current date
and time in the Initial setup (User Install). For details, refer to
page 2-18.
4
Konica Minolta 240f 2-9
Page 34

2
Scan Ready screen names and functions
Operation screens
2.4
1
9
8
7
6
No. Name Description
1 Status display "Scan Ready" is displayed for the ready screen.
2 Shared/Personal display Displays whether the shared screen or personal screen is displayed.
3 Memory Displays the remaining amount of memory.
4 Add/Edit key Press this to add or edit destinations.
5 Address Book Displays the registered destinations.
6 Operation screen
switching tabs
7 Advanced key Press this to display a list of the advanced scan functions.
8 Soft keys You can display up to five frequently used functions here.
9 Date Displays the current date and time. You can change the current date
Press these to switch the operation screen.
and time in the Initial setup (User Install). For details, refer to
page 2-18.
2
3
4
5
2-10 Konica Minolta 240f
Page 35

2.4 Operation screens
Fax Ready screen names and functions
2
1
10
9
8
7
2
3
4
5
6
No. Name Description
1 Status display "Fax Ready" is displayed for the ready screen.
2 Shared/Personal display Displays whether the shared screen or personal screen is displayed.
3 Memory Displays the remaining amount of memory.
Search Press this to search for destinations.
4 Index Press this to sort or filter the destinations.
Add/Edit Press this to add or edit destinations.
5 Address Book Displays the registered destinations.
6 MB Doc. Press this to display the documents saved in Message Board.
7 Address Book switching
tabs
Use these tabs to switch the Address Book display between all, fax,
and e-mail destinations.
8 Advanced key Press this to display a list of the advanced fax functions.
9 Soft keys You can display up to five frequently used functions here.
10 Date Displays the current date and time. You can change the current date
and time in the Initial setup (User Install). For details, refer to
page 2-18.
Konica Minolta 240f 2-11
Page 36

2
Print Ready screen names and functions
1
Operation screens
2.4
6
5
No. Name Description
1 Status display "On Line Mode" is displayed for the ready screen.
2 Memory Displays the remaining amount of memory.
3 Paper selection key Select the cassette containing the paper you want to use for printing.
4 Advanced keys The advanced print functions are displayed here.
5 Date Displays the current date and time. You can change the current date
and time in the Initial setup (User Install). For details, refer to
page 2-18.
2
3
2-12 Konica Minolta 240f
Page 37

2.4 Operation screens
2.4.2 My MFP screen
Press <My MFP> to switch to the My MFP screen. "Shortcuts" that enable you to directly call functions are
displayed on the My MFP screen. You can also use "My Jobs" functions to recall a series of operations, and
display the usage status of the machine.
You can also use personal settings to switch the shortcuts for each user.
2
2
1
345
No. Name Description
1 My MFP shortcuts These enable you to directly call functions that are registered.
2 Shared/Personal "Personal" is displayed when the personal settings are displayed,
3 [Add/Edit] Enables you to add or edit My MFP screen shortcuts.
4 [Machine information] This displays internal machine information, such as the number of
5 [My Jobs] This enables you to execute or register My Jobs functions.
and "Shared" is displayed when the shared settings are displayed.
pages the machine has printed.
d
For details on registering shortcuts, My Jobs, or personal settings, refer to the User's Guide Administrator
Operations.
Konica Minolta 240f 2-13
Page 38

2
2.5 Connection and main settings
2.5.1 Connecting the power cord
6 WARNING
- Connect the power cord to the power jack, and confirm that it is firmly inserted. Loose connections may
cause fires.
- Make sure to connect the ground wire to prevent electrocution in case of electrical leakage.
- Confirm that there is no dust attached to the power plug before inserting it into the outlet. Also remove
the power plug from the outlet to inspect and clean it once every six months to a year. Dust attached
to the power plug may cause fires or electrocutions.
1 Connect the power cord to the power jack on the left side of
the machine.
% Secure the power cord using the included clamp.
Connection and main settings
2.5
2 Insert the power plug into the power outlet.
2.5.2 Connecting the LAN cable
1 Attach a ferrite core to the LAN cable.
% Make a loop near the connector of the cable.
2 Connect the LAN cable to the network connector, as indicated
in the diagram.
2-14 Konica Minolta 240f
Page 39

2.5 Connection and main settings
2.5.3 Connecting the modular cable
1 Attach two ferrite cores to the modular cable.
% Make three loops for each ferrite core near the connector
of the cable.
2 Connect the modular cable to the telephone line jack, as
indicated in the diagram.
2
2.5.4 Connecting an external phone (answering machine)
Connect an external phone (answering machine) to the external phone jack, as necessary.
d
The external phone (answering machine) may partially or completely not function, depending on the type of
external phone (answering machine).
1 Attach a ferrite core to the modular cable of the external
phone.
% Make three loops near the connector of the cable.
2 Connect an external phone (answering machine) to the
external phone jack.
Konica Minolta 240f 2-15
Page 40

2
2.5.5 Adjusting the screen contrast
You can adjust the Display Contrast dial on the control panel to change the contrast of the display. Turn the
dial up to increase the contrast, or down to decrease the contrast.
Connection and main settings
Display contrast dial
2.5
2.5.6 Setting the language
Select the language on display. The selected language will be applied to the list printouts as well.
1 Press <Setting>.
2 Press [Management].
3 If an administrator password is set, enter the password and
press [Enter].
% If an administrator password is not set, proceed to step 4.
2-16 Konica Minolta 240f
Page 41

2.5 Connection and main settings
4 Press [User Install].
5 Press [Language].
% Languages available to use are displayed.
2
6 Select the language, and press [Enter].
7 If "The language was changed. Try to turn on power." is displayed on the screen, turn the power of the
machine OFF and then ON again.
% If a message is not displayed, this step is not required.
Konica Minolta 240f 2-17
Page 42

2
2.5.7 Setting the date and time
Set the current time in the order of year (4 digits), month (2 digits), day (2 digits), hour (24-hour clock, 2 digits),
and minutes (2 digits).
1 Press <Setting>.
2 Press [Management].
3 If an administrator password is set, enter the password and press [Enter].
% If an administrator password is not set, proceed to step 4.
4 Press [User Install].
5 Press [Time Setting].
Connection and main settings
2.5
6 Enter the current date and time, and press [Enter].
% You can use [,], [+], [*], [)], and the numeric keys.
2-18 Konica Minolta 240f
Page 43

2.5 Connection and main settings
2.5.8 Specifying the network settings
You can automatically or manually set the IP address of the machine.
d
If you set the IP address described below, you can operate the machine from the Web browser on a
computer. Connect to the machine from a Web browser to specify the required network settings and e-mail
settings, etc. For details, refer to Chapter 3, "Setting the Connection Environment" in the User’s Guide
Message Board Operations.
Automatically setting the IP address
If DHCP (Dynamic Host Configuration Protocol) server is enabled, an IP address is automatically assigned to
the machine.
A gateway address and DNS server address will also be assigned if they are set on the DHCP server.
d
The IP address and subnet mask assigned by the DHCP server cannot be changed.
1 Press <Setting>.
2 Press [Management].
2
3 If an administrator password is set, enter the password and press [Enter].
% If an administrator password is not set, proceed to step 4.
4 Press [Network Settings].
5 Press [TCP/IP Settings].
6 Press [Obtain IP address].
Konica Minolta 240f 2-19
Page 44

2
7 Select [ON] and press [Enter].
2.5.9 Manually setting the IP address
Disable DHCP, and manually set the IP address.
1 Press <Setting>.
2 Press [Management].
3 If an administrator password is set, enter the password and press [Enter].
% If an administrator password is not set, proceed to step 4.
Connection and main settings
2.5
4 Press [Network Settings].
5 Press [TCP/IP Settings].
6 Press [Obtain IP address].
7 Select [OFF] and press [Enter].
8 Press [IP Address].
9 Enter the IP address, and press [Enter].
2-20 Konica Minolta 240f
Page 45

2.5 Connection and main settings
10 Press [Subnet Mask].
11 Enter the Subnet Mask, and press [Enter].
2
Konica Minolta 240f 2-21
Page 46

2
2.6 Power switch and energy save mode
The machine has three power-related switches; the main power switch, the power switch and <Energy
Save>.
2.6.1 Turning the power ON and OFF
The machine has both a "main power switch" and "power switch".
Turning the power ON
Turn the main power ON when using the machine for the first time. Normally, this switch is left ON.
1 Switch the main power switch to ON ( | ).
Power switch and energy save mode
2.6
2 Press the power switch to turn the machine ON.
d
If an error message is displayed, refer to Chapter 5, "Error Messages" in the User's Guide Administrator
Operations to resolve the error.
2-22 Konica Minolta 240f
Page 47

2.6 Power switch and energy save mode
Turning the power OFF
Turn the main power OFF when not using the machine for an extended period of time or when moving them
machine.
6 CAUTION
- Make sure to turn the main power switch OFF after turning the power switch OFF.
d
Faxes cannot be received when the power switch is turned OFF.
1 Press the power switch to turn the machine OFF.
% The message "Shutting down" is displayed on the touch
panel.
2
2 Switch the main power switch to OFF (O) when the "Shutting
down" message disappears.
Konica Minolta 240f 2-23
Page 48

2
2.6.2 <Energy Save> and Energy save mode
When the machine has been idle for a long period of time, the energy save mode will activate to reduce power
consumption. The energy save mode consists of the "low power mode" and the "sleep mode", which further
reduces power consumption. Use <Energy Save> to activate or cancel the energy save mode.
Low power mode
- When <Energy Save> is pressed, the touch panel display and the various lamps are turned off and the
printer enters a dormant state (the low power mode) to reduce power consumption.
- If the machine is not used for one minute, it will automatically enter the low power mode. This value can
be changed in <Setting> ) [Default Settings] ) [Energy Save Mode] ) [Low Power Mode].
- <Energy Save> illuminates green while the machine is in the low power mode.
- When a key is pressed while in the low power mode, the machine will return to the normal ready state.
Sleep mode setting
- Press and hold <Energy Save> for three seconds to make the machine enter the sleep mode.
- If the machine is not used for one minute in the low power mode, it will automatically enter the sleep
mode. This value can be changed in <Setting> ) [Default Settings] ) [Energy Save Mode] ) [Sleep
Mode].
- When in the sleep mode, all power is turned OFF, but documents scanned into memory can be
transmitted and received documents can be printed.
(The number of rings becomes more than the set number when the machine is in the low power mode.)
- <Energy Save> illuminates red while the machine is in the sleep mode.
- When <Energy Save> is pressed while in the sleep mode, the machine will return to the normal ready
state.
Power switch and energy save mode
2.6
d
The energy save mode does not activate when all the paper has run out, a printing error such as a paper jam
has occurred, or when paper in the bypass tray runs out while performing bypass copying.
The time to cancel or start the energy save mode can be set. For details, refer to Chapter 2, "Setting the
Default Values" in the User's Guide Administrator Operations.
When you are using the machine while logged in, the machine does not enter the sleep mode. Also, the
<Login> button does not go out when the machine is in the low power mode. The <Personal Mode> button
does not go out when using the machine with personal settings.
2-24 Konica Minolta 240f
Page 49

2.7 Loading paper
2.7 Loading paper
2.7.1 Acceptable paper
Paper cassette
Paper type Paper size Quantity
Plain paper
(weight: 60-90g/m
Bypass tray
Paper type Paper size Quantity
Plain paper
(weight: 60-90g/m2)
Pasteboard
(weight: -120g/m
Envelopes DL: 110 e 220 mm
Postcard 100 e 148 mm 20 sheets
Transparency A4 20 sheets
2
)
2
)
A4, F4, A5 v 500 sheets
A4, A5, A5 v, A6, F4, Letter, Legal,
Half-letter v, Executive
Custom sizes
Width: 97 to 216 mm
Length: 140 to 356 mm
A4, A5, A5 v, A6, F4, Letter, Legal,
Half-letter v, Executive
Com#10: 105 e 241 mm
Monarch: 98.4 e 190.5 mm
(weight: 64g/m2)
50 sheets
(weight: 64g/m2)
1 sheet
20 sheets
1 envelope
2
d
Custom-sized paper can be used for PC printing only.
Do not use envelopes with double flaps or pressure seals since these do not feed properly.
When printing on transparency (OHP film), the quality may differ according to the type of OHP film and the
usage environment. (Confirmed OHP film: PP2500 from 3M.) Be sure that the film does not have a paper
backing and/or leading strip. If it does, remove the paper backing and/or strip before loading. Only the film
should go in, film with paper backing or a leading strip should not be fed.
Duplex printing
Paper type Paper size
Plain paper
(weight: 60-90g/m
2
)
A4, F4
Konica Minolta 240f 2-25
Page 50

2
2.7.2 Items to avoid
To prevent jams and damage to your machine, do not use the following:
- Creased paper
- Wrinkled paper
- Folded paper
- Curled paper
- Torn paper
- Carbon paper
- Moist paper
- Paper previously printed on by a printer
- Paper with holes
- Envelopes with pressure seals
- Extremely shiny or highly textured paper
- Paper which has been printed on using a thermal transfer printer
- Back side of printed paper
2.7.3 Printable area
The printable area is shown below.
Loading paper
2.7
3 mm
3 mm
printable area
3 mm 3 mm
2-26 Konica Minolta 240f
Page 51

2.7 Loading paper
2.7.4 Cautions when loading paper
- When paper is curled, stretch the paper into shape before loading it.
- When you insert paper in the cassette, stack it so the leading edge and sides of the paper are even.
2
- Do not stack the paper over the limit mark inside of the cassette.
- To prevent paper jams, do not refill the paper cassette without removing any remaining paper. In other
words, do not just add sheets to an already-loaded stack.
Konica Minolta 240f 2-27
Page 52

2
2.7.5 Loading paper into the paper cassettes
1 Pull the handle to open the paper cassette.
2 Press down the paper lifting plate until it locks in position.
Loading paper
2.7
3 Adjust the rear paper guide to the desired paper length.
4 Load the paper into the cassette.
5 Pinch the side paper guide and adjust to the width of the stack.
2-28 Konica Minolta 240f
Page 53

2.7 Loading paper
6 Close the paper cassette.
7 Set the paper size.
% See page 2-30 how to set it.
8 Attach the paper size sticker supplied with your machine to the front of the cassette.
d
When setting paper longer than A4 paper size, remove the guide stopper from the back of the end guide, and
then replace and secure it on the groove in front of the end guide (the guide stopper will be under the paper).
2
guide stopper
2.7.6 Loading paper into the bypass tray
When you need to use a paper size that is not currently loaded in the paper cassette, or when you want to
print on an envelope, transparency film or custom sized paper, use the bypass tray.
d
Only use print media specified on page 2-25 to avoid paper jams and print quality problems.
1 Open the bypass tray on the right side of your machine. Unfold the paper support extension.
2 To set the paper, 1) raise the flapper release lever 2) load paper until it comes to a stop. Be sure to place
the printing surface down.
Konica Minolta 240f 2-29
Page 54

2
Loading paper
3 1) Adjust the paper guides to fit the paper, 2) then lower the flapper release lever.
4 Set the paper size.
% See page 2-30 how to set it.
2.7
2.7.7 Setting the paper size
After loading paper into the paper cassette/bypass tray, you need to set the correct paper size on the control
panel by using the following procedure.
1 Press <Setting>.
2 Press [Paper Settings].
3 Select the paper cassette you want to set.
% [Cassette 2] appears only when the optional second
cassette has been installed on the machine.
% Select [Bypass] to load paper in the bypass tray.
2-30 Konica Minolta 240f
Page 55

2.8 Loading documents
4 Select the paper size, and press [Enter].
2.8 Loading documents
Be sure to read the following guidelines before you begin faxing, copying or scanning.
2.8.1 Acceptable documents
Auto document feeder (ADF)
Single-sheet Multiple-sheet
Size
(Width e Length)
Quantity 1 sheet Max. 80 sheets of A4, F4, A5 v,
Weight 35.0 to 128.0 g/m
Thickness 0.05 to 0.15 mm 0.07 to 0.12 mm
Document type Plain paper Plain paper
Max. : 216 e 900 mm
Min. : 120 e 100 mm
2
*1
2
Max. : 216 e 356 mm
Min. : 216 e 139.5 mm
Letter, Legal, Half-letter v
(75 g/m2 or 20lb. paper)
52.0 to 105.0 g/m
2
*1 Real time transmission with super-fine resolution, 216 e 356mm.
Document glass
Size
(Width e Length)
Quantity 1 sheet
Thickness When using the platen cover: Max 28 mm
2.8.2 Items to avoid
The following documents cannot be loaded into the Auto document feeder (ADF). Use the document glass.
- Torn documents or those with holes
- Extremely wrinkled or curled documents
- Documents which are moistened, or stuck with static electricity
- Documents with carbon on the back or no-carbon documents
- Cloth, metal sheets
- Documents with staples, paper clips, or adhesive tape attached
- Documents pasted or glued together
- Glossy documents or documents with a special coating
If you load the following types of documents on the document glass, the glass surface could be damaged or
cracked.
- Do not strongly press down a document when copying a thick document.
- When a hard object is used as a document, load it carefully on the document glass.
- Sharp protrusions could scratch the glass surface.
Max. : 216 e 356 mm
Min. : Unlimited
Konica Minolta 240f 2-31
Page 56

2
2.8.3 Scanning area
The scanned area is shown below.
Fax: 3 mm
Copy, Scan: 0 mm
A4 Letter
Loading documents
2.8
Fax: 3 mm
Copy, Scan: 2 mm
Fax: A4 208 mm/Letter 214 mmm
Copy, Scan: A4 210 mm/Letter 216 mmm
Scanned area
2.8.4 Loading documents in the Auto Document Feeder (ADF)
1 Place the document face up, and lightly insert the document until the document edge stops on the ADF.
2 Adjust the document guides to the document width.
d
Be sure any correction fluid, ink, or stamps on the document are completely dry before loading.
Remove all metals (staples, paper clips, etc.) before loading the documents. Failure to do so may cause a
malfunction.
Do not load the document with the document guide extended. The document may be reduced and printed.
Doing so may result in skewed feeding.
Do not add or remove the documents while they are being scanned. A document jam may occur.
Do not leave too many scanned documents on the document outlet. A document jam around the outlet may
occur.
When scanning is complete, remove the documents from the document exit tray to avoid document jams.
2-32 Konica Minolta 240f
Page 57

2.8 Loading documents
2.8.5 Loading the document on the document glass
1 Make sure that documents are not loaded in the Auto document feeder (ADF).
2 Lift up the platen cover.
3 Place the document face down. Align the top edge of the document with the back edge of the
document glass (by the arrow in the top left corner).
4 Gently close the platen cover.
2
6 CAUTION
- When copying a bound document, such as a book, the copied image may contain some black areas.
To reduce this effect, hold down the document to prevent its bound part from rising. However, do not
press too strongly. This may break the document glass and cause an injury.
d
Be sure any correction fluid, ink, or stamps on the document are completely dry before loading.
Be sure that the ADF is empty. If a document has been left in the ADF, the scanner glass cannot be used.
When you load a thick document, do not force the platen cover closed. Doing so may cause a malfunction.
When the cover is open or slightly open while copying, try not look at the light.
When scanning is complete, remove the documents from the document glass.
Konica Minolta 240f 2-33
Page 58

2
Loading documents
2.8
2-34 Konica Minolta 240f
Page 59

3
Operating the machine
Page 60

Page 61

3.1 Making copies
3 Operating the machine
3.1 Making copies
This section describes the basic procedure for making copies. For the detailed procedure, see the User’s
Guide Copy Operations.
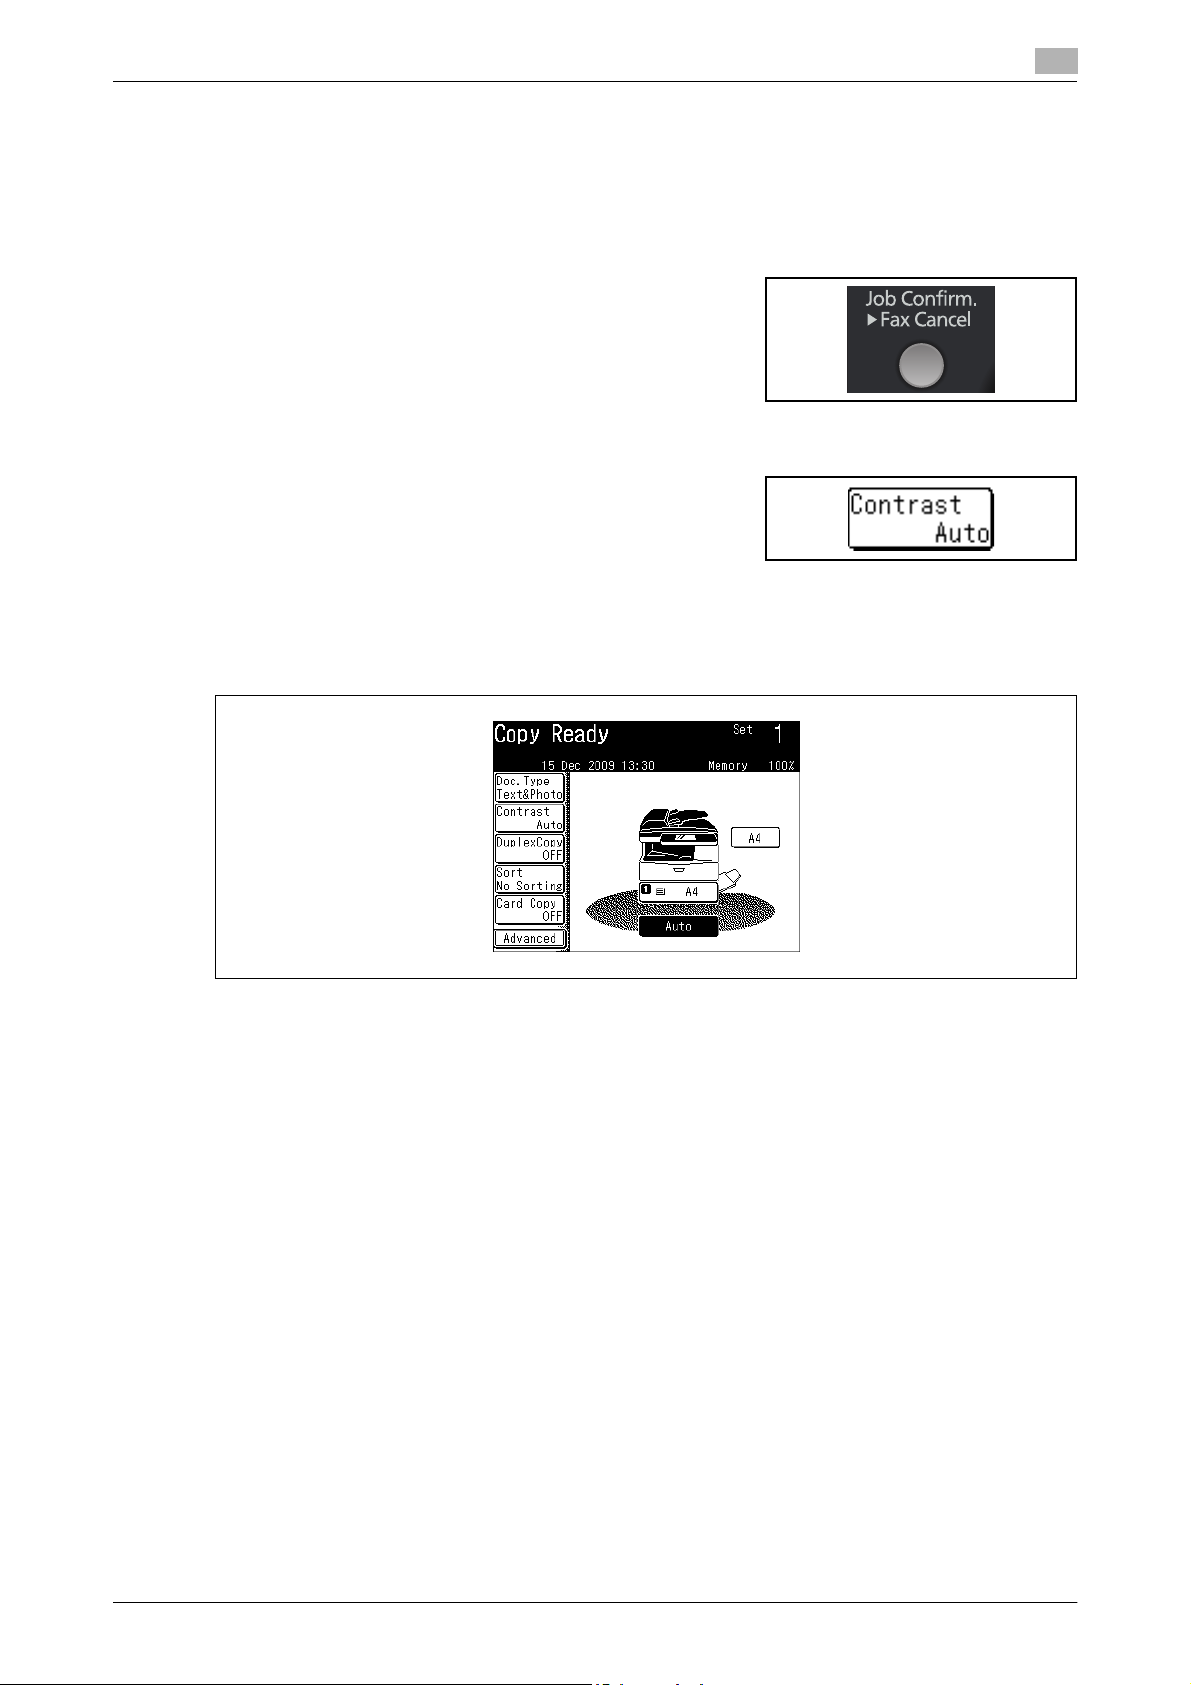
3.1.1 Basic copying
1 Load the document, and press <Copy>.
% For details on loading documents, refer to page 2-25.
3
2 Set the document type and contrast as necessary.
"Doc. Type" setting key
"Contrast" setting key
% To set the document type, press [Doc. Type], and select the desired document type. Press [Enter].
% To set the contrast, press [Contrast], and select the desired contrast. Press [Enter].
3 Use the numeric keys to enter the number of copies.
% You can set 1 to 99 copies.
% When the number of copies is not set, one copy will be
made.
4 Press <Start>.
Konica Minolta 240f 3-3
Page 62

3
3.1.2 Duplex copying
You can use this function to perform:
- One-sided copying of a duplex document (2 ) 1sided)
Making copies
3.1
- Duplex copying of a duplex document (2 ) 2sided)
- Duplex copying of a one-sided document (1 ) 2sided)
d
Enlargement copy is only available when you perform the duplex copy of one-sided documents (1 ) 2 sided)
using the document glass.
)
You cannot use the document glass when performing one-sided copying of a duplex document (2
and duplex copying of a duplex document (2 ) 2 sided). Only the ADF can be used for copying.
A4 and F4 paper are available for duplex printing.
1 Load the document, and press <Copy>.
% When using 2 ) 1 sided or 2 ) 2 sided copying, load the document in the ADF.
1 sided)
2 Press [DuplexCopy].
% If [DuplexCopy] is not displayed, press [Advanced] and
then select [DuplexCopy].
3 Select the copying method.
3-4 Konica Minolta 240f
Page 63

3.1 Making copies
4 Select [Long Edge] or [Short Edge], and press [Enter].
% Refer to the description on the next page to select the
binding position. When copying a two-sided document,
select the binding position of the document. When copying
a one-sided document, select the binding position of the
copy.
5 Press <Start>.
% When the front side scan is over, the machine shows the
following screen:
% If you selected [1 ) 2sided] in step 3, the procedure is
complete.
3
6 Set the backside of the duplex document, and press <Start>.
d
Refer to the following table when selecting the binding position.
Binding position Image
Long Edge
Short Edge
Konica Minolta 240f 3-5
Page 64

3
3.1.3 Introduction to advanced functions
This product includes the following copy functions. For detailed procedures, refer to the User’s Guide Copy
Operations.
Sort Copying
The copied documents can be sorted in the order of page.
Zoom Copying
Zoom copying can be performed by setting the magnification.
Next Document
When the scanning of a document has finished, you can start scanning the next document for copying.
Copy Reservation
Making copies
3.1
Another document can be loaded and reserved for copying even while printing copies.
Duplex Copying
You can copy to the front and back of the paper.
Combine
You can copy a two page or four page document to a single page.
Scan Size
You can erase the black shadows that appear when copying with the platen cover open.
3-6 Konica Minolta 240f
Page 65

3.2 Performing scanning
Card Copying
You can copy the front and back of ID cards, checks, and custom size documents so that both sides are
printed together on a single page.
Using DocIndex
The DocIndex feature allows you to enter and send a metadata tag automatically to a network computer.
3.2 Performing scanning
This section describes the basic procedure for performing scanning. For details on other operations, see the
User’s Guide Scan and Fax Operations.
3.2.1 Attaching scanned documents to E-mail
You can attach the data for a scanned document to an e-mail for transmission.
3
Internet
Entering an E-mail address for transmission
1 Load the document, and press <Scan>.
% For details on loading documents, refer to page 2-31.
Konica Minolta 240f 3-7
Page 66

3
2 Press [Advanced].
3 Press [Mail Address].
Performing scanning
3.2
4 Enter the e-mail address, and press [Enter].
% Up to 50 characters can be entered for an
e-mail address.
5 Press <Start>.
% If you loaded the document in the ADF, this concludes the procedure.
% If you loaded the document on the document glass, load the next document, and press [Next Doc].
To finish scanning, press [Complete].
3-8 Konica Minolta 240f
Page 67

3.2 Performing scanning
Using the address book for transmission
1 Load the document, and press <Scan>.
2 For details on loading documents, refer to page 2-31.
3 Press the [e-mail] tab.
4 Specify the destination.
% If you loaded the document in the ADF, this concludes the
procedure.
% If you loaded the document on the document glass, load
the next document, and press [Next Doc]. To finish
scanning, press [Complete].
d
For details on registering destinations, refer to page 4-3.
3
Konica Minolta 240f 3-9
Page 68

3
3.2.2 Saving scanned documents to a shared folder
You can save a scanned document to a shared folder in a computer on the network.
Shared folder
d
Set the shared settings for the folder to save the data to in advance on your computer.
Performing scanning
Network
3.2
Manually specifying a folder
1 Load the document, and press <Scan>.
% For details on loading documents, refer to page 2-31.
2 Press the [PC/USB] tab, and then [Folder].
3-10 Konica Minolta 240f
Page 69

3.2 Performing scanning
3 Press [Browse].
% The list of computers or networks is displayed.
3
4 Specify the shared folder to save the data to, and press
[Enter].
% Press [Root] to return to the list of computers or networks.
% Press [Back] to return to the previous screen.
5 Press <Start>.
% If you loaded the document in the ADF, this concludes the procedure.
% If you loaded the document on the document glass, load the next document, and press [Next Doc].
To finish scanning, press [Complete].
Konica Minolta 240f 3-11
Page 70

3
Using a folder shortcut for transmission
1 Load the document, and press <Scan>.
% For details on loading documents, refer to page 2-31.
2 Press the [PC/USB] tab, and then [Folder].
3 Specify the folder shortcut.
% If you loaded the document in the ADF, this concludes the
procedure.
% If you loaded the document on the document glass, load
the next document, and press [Next Doc]. To finish
scanning, press [Complete].
d
For details on registering folder shortcuts, refer to page 4-6.
Performing scanning
3.2
3-12 Konica Minolta 240f
Page 71

3.2 Performing scanning
3.2.3 Saving scanned documents to an FTP server
You can save a scanned document to a specific folder on an FTP (File Transfer Protocol) server.
FTP server
Manually specifying an FTP server
3
Network
1 Load the document, and press <Scan>.
% For details on loading documents, refer to page 2-31.
2 Press the [PC/USB] tab, and then [FTP].
Konica Minolta 240f 3-13
Page 72

3
3 Press [Host].
4 Press [Link].
Performing scanning
3.2
5 Enter the link to the FTP server, and press [Enter].
% Start the link with two slashes ("//").
6 Press [UserName].
7 Enter the user name, and press [Enter].
8 Press [Password].
9 Enter the password, and press [Enter].
3-14 Konica Minolta 240f
Page 73

3.2 Performing scanning
10 Press [Enter].
11 Press <Start>.
% If you loaded the document in the ADF, this concludes the procedure.
% If you loaded the document on the document glass, load the next document, and press [Next Doc].
To finish scanning, press [Complete].
Using an FTP shortcut for transmission
1 Load the document, and press <Scan>.
% For details on loading documents, refer to page 2-31.
2 Press the [PC/USB] tab, and then [FTP].
3 Specify the FTP shortcut.
% If you loaded the document in the ADF, this concludes the
procedure.
% If you loaded the document on the document glass, load
the next document, and press [Next Doc]. To finish
scanning, press [Complete].
3
Konica Minolta 240f 3-15
Page 74

3
3.2.4 Saving a scanned document to USB memory
You can save a scanned document to USB memory connected to the machine.
USB memory
d
Only USB memory formatted with FAT12, FAT16, or FAT32 can be used.
USB memory with a security function, memory card readers connected via USB, USB memory via an
extension cable and USB hub, and USB memory that does not meet the USB standards, are all unsupported.
If the USB memory becomes full while the data is being saved, the data that is being written is all deleted.
Therefore, make sure that the USB memory has enough free space in advance.
Performing scanning
3.2
If you want to connect the USB memory via an extension cable, use a cable that is shorter than 3 meters.
1 Load the document, and press <Scan>.
% For details on loading documents, refer to page 2-31.
2 Press the [PC/USB] tab, and then [USB].
3-16 Konica Minolta 240f
Page 75

3.2 Performing scanning
3 Connect the USB memory to the machine.
4 Press <Start>.
% If you loaded the document in the ADF, this concludes the procedure.
% If you loaded the document on the document glass, load the next document, and press [Next Doc].
To finish scanning, press [Complete].
% When the message "Scan Ready" is displayed on the screen, remove the USB memory.
3.2.5 Introduction to advanced functions
This product includes the following scan functions.
3
Resolution
You can set the resolution for scanning. If you set a high resolution, the document will be scanned clearly,
but the size of the created data will be large.
Scan Format
You can set whether to scan the document in color or monochrome.
Scan Size
You can transmit or save an image scanned using a scan size set in advance. This is useful when you want
to scan a part of the document or want to specify the document size.
Zoom
You can transmit or save an image scanned with an enlargement ratio or reduction ratio.
Broadcast
This function enables you to transmit the same document to many destinations in one operation, thereby
eliminating the need to scan and transmit it for each destination.
Next Document
You can transmit or save separate documents scanned in a row as a single set of data. Since you can scan
using both the document glass and the ADF, this is useful for transmitting / saving a combination of
documents such as an invoice and a map together.
Duplex Scan
You can transmit or save after scanning both the back and front sides of the paper.
Color Adjust
When performing color scanning, you can adjust the image to suit your requirements.
Konica Minolta 240f 3-17
Page 76

3
Performing scanning
3.2
E-mail Subject
When transmitting a scanned image via e-mail, you can edit the body and subject of the e-mail to send. You
can also enter the body of the e-mail using a template registered in advance.
File Name
You can edit the file name for the scanned image data. You can also enter the file name using a file name
registered in advance.
Batch Scan
When the "Batch Scan" function is on, it means that all scanned pages will be saved as one file. If you turn
this function off, each scanned page will be saved as an individual file.
Attachment
You can attach a file on the network (data from Word or Excel, etc.) when transmitting or saving a scanned
document.
File Format
You can select the file format to save the file for the scanned document in.
Scan Path Notification
You can receive e-mail regarding the location that the scanned document was saved to.
Document Category
You can add a category name (document category) to the scanned document. Setting a document category
enables you to filter the documents displayed in the list of documents saved in a box, and enables you to
search for documents via their category.
Hold Time
You can set the storage period (hold time) for documents saved in a box.
Comments
You can enter comments for documents saved in a box.
Using DocIndex
The DocIndex feature allows you to enter and send a metadata tag automatically to a network computer.
TWAIN
You can use application software that supports TWAIN devices to use this product as a scanner. The
scanned documents are stored in a TWAIN box, and then imported by the application software.
3-18 Konica Minolta 240f
Page 77

3.3 Transmitting faxes
3.3 Transmitting faxes
This section describes the basic procedure for transmitting faxes. For details on other operations, see the
User’s Guide Scan and Fax Operations.
3.3.1 Transmitting faxes
This section describes the often-used basic procedure for transmitting faxes.
Entering a fax number for transmission
1 Load the document, and press <Fax>.
% For details on loading documents, refer to page 2-31.
3
2 Set the resolution and contrast as necessary.
"Resolution" setting key
"Contrast" setting key
3 Use the numeric keys to enter the number of the destination.
4 Press <Start>.
% If you loaded the document in the ADF, this concludes the procedure.
% If you loaded the document on the document glass, load the next document, and press [Next Doc].
Press [Tx Start] to start transmission.
Konica Minolta 240f 3-19
Page 78

3
Using the address book for transmission
1 Load the document, and press <Fax>.
% For details on loading documents, refer to page 2-31.
2 Set the resolution and contrast as necessary.
3 Specify the destination.
% If you loaded the document in the ADF, this concludes the
procedure.
% If you loaded the document on the document glass, load
the next document, and press [Next Doc]. Press [Tx Start]
to start transmission.
d
For details on canceling transmission, refer to page 3-20.
For details on registering destinations, refer to page 4-3.
Transmitting faxes
3.3
3.3.2 Canceling faxes
This section describes the procedure for canceling faxes that are being transmitted. For details on canceling
faxes reserved with delayed transmission, etc., refer to Chapter 4, "Canceling / Checking Faxes" in the User’s
Guide Scan and Fax Operations.
1 Press <Job Confirm. ) Fax Cancel>.
% The information for the current document is displayed.
2 If you want to cancel the current trasmission, press [Delete],
and proceed to step 5.
% When performing broadcast transmission, "Broadcast" is
displayed on the screen. To individually check or delete
destinations for the broadcast, proceed to step 3.
% Transmission will not be canceled if you press [Close]. The
display switches to the Fax Ready screen.
3 Press [Detail].
4 Select the destination you want to cancel, and press [Delete].
% If you do not want to cancel a destination, press [Close].
This ends the procedure.
% You can select multiple destinations.
5 Press [Close].
3-20 Konica Minolta 240f
Page 79

3.3 Transmitting faxes
3.3.3 Transmitting PC faxes
The machine has the following two PC fax transmission modes:
This section describes the procedure for transmitting a document you create using the simple mode.
Mode Description
Simple Mode This mode is available when you are registered as a user on Message Board.
In addition to specifying the destination, enables you to set the paper and resolution, a cover page, the scanned image file format, and transmission report settings.
Advanced Mode In addition to what can be set with the simple mode, enables you to specify the fax
transmission time and edit the subject and text of the e-mail.
You can also save the created document in a user box in order to transmit it together with other documents later.
d
Install the KONICA MINOLTA Fax to the computer before using this function. For details on installing the
driver, refer to Chapter 3, "Installing to Windows" in the User’s Guide Print Operations.
For details on setting the cover page, file format, and transmission report, and the procedure for using the
advanced mode for transmission, refer to Chapter 4, "Transmitting Faxes from a Computer" in the User’s
Guide Scan and Fax Operations.
1 Create and edit the document to transmit.
3
2 Execute a print command in the application software.
3 Select "KONICA MINOLTA Fax" as the printer.
4 Press [Properties] to open the detailed settings screen.
5 Click the [Paper] tab, and specify the detailed settings, as necessary.
6 Click the [Fax Settings] tab.
Konica Minolta 240f 3-21
Page 80

3
Transmitting faxes
7 If it is necessary to change the user information, click [Select] and select the user.
3.3
8 Select "Advance Mode".
9 Click [OK].
10 Start printing in the application software.
% When no user is selected in step 7, the login screen is displayed. Log in to Message Board.
% When you have selected a user in step 7, proceed to step 11.
3-22 Konica Minolta 240f
Page 81

3.3 Transmitting faxes
11 Enter the fax number in the "Fax Destination" entry box, and click [FAX].
% Pauses and other dialing options can be also entered using the keyboard. For details on dialing
options, refer to Chapter 4, "Basic Transmission Settings" in the User’s Guide Scan and Fax
Operations.
% When you select "Share Address Book" from the "Select Destinations" list, you can select
destinations from the registered Address Book. Click [Back] to return to this screen.
3
12 Enter the e-mail address in the "E-mail Destination" entry box, and click [TO].
% Press [CC] or [BCC] to set the destination as a CC or BCC destination.
% When you select "Share Address Book" from the "Select Destinations" list, you can select
destinations from the registered Address Book. Click [Back] to return to this screen.
13 Repeat steps 11 and 12 to specify all the destinations.
14 Click [Send].
Konica Minolta 240f 3-23
Page 82

3
3.3.4 Introduction to advanced functions
This product includes the following fax functions. For details, refer to the User’s Guide Scan and Fax
Operations.
Broadcast
This function enables you to transmit the same fax to many destinations in one operation, thereby eliminating
the need to scan and transmit the fax for each destination.
Scan Size
You can transmit an image scanned using a scan size set in advance. This is used when you want to scan a
part of the document or want to specify the document size.
Next Document
You can transmit separate documents scanned in a row as a single set of data. For example, this enables
you to scan an invoice using the ADF and a map using the document glass, and send them together with a
single transmission. The settings can be specified separately for the ADF and the document glass.
TTI
You can select from three types of sender names registered in advance. You can also transmit without adding
a sender name.
Transmitting faxes
3.3
Cover Page
A cover page containing a simple message can be automatically attached to the documents. You can either
enter a subject and message or use a template registered in advance to input the cover page document.
Delayed Transmission
You can use this function to specify the date and time to perform transmission.
E-mail Gateway
If you enable this function, you can transmit to a fax server as if you were transmitting to a regular telephone
line.
Polling Communication
Polling enables you to use the machine to request a document that is stored on another machine. The phone
call is charged to the receiving party (this machine side). Also, if polling documents are stored in the machine,
they can be transmitted automatically when requested by another machine. The phone call is charged to the
other party.
F-Code Communications
This function performs communications using a sub-address or password conforming to ITU-T (International
Telecommunication Union) standards. By creating F-code boxes for which a sub-address or password has
been registered, you can perform communications regardless of the manufacturer or machine type.
Closed Transmission
When closed transmission is set, fax messages cannot be transmitted to machines other than this product.
If a passcode is set, faxes can only be transmitted to machines that are the same product that also have a
security function and have the same passcode registered.
3-24 Konica Minolta 240f
Page 83

3.3 Transmitting faxes
ID Check Transmission
ID check transmission limits fax transmission to when the lower four digits of the fax number you dialed and
those registered in the destination machine match. Transmission is allowed only when both digits are
matched.
Confirmation Dial
When the confirmation dial function is set, a screen requiring you to reenter the destination fax number will
be displayed before starting transmission. Transmission is allowed only when the first and second numbers
match. Entering the destination twice enables you check whether there has been a mistake when entering
the number. This prevents faxes from being transmitted to the wrong destination by mistake.
Secure Reception
If security reception is set, documents received after the specified security reception starting time are stored
in memory and not printed. Since it is necessary to enter a passcode to print the documents, this prevents
received documents from being taken away.
PIN mask
Your machine's PIN masking feature helps you keep that PIN (personal identification number) private. With
PIN masking activated, you can dial a number plus a PIN, but the PIN will not appear in the journal, error
message printout, delayed command list or transmission report.
3
Auto Distribution
When a fax is received, it is distributed to a specified destination if its information matches the conditions
registered in advance. Up to 200 distribution settings can be registered.
Separator Page
You can change the first sheet of paper with another type of paper to make it easier to separate received
documents. For example, if you use colored paper for the separator page, it is easy to identify each individual
fax job.
Box Documents
Documents transmitted or received with Message Board can be printed and transmitted.
E-mail Subject
When transmitting a scanned image via internet fax, you can edit the body and subject of the e-mail to send.
You can also enter the body of the e-mail using a template registered in advance.
Batch Transmission
When transmitting an Internet Fax, you can transmit the divided pages of a scanned document.
File Format
When transmitting an internet fax, select the file format for saving the file.
Offramp Transmission
If you transmit an e-mail to the machine, you can transmit the mail text and attached file via fax.
Konica Minolta 240f 3-25
Page 84

3
3.4 Performing printing
This section describes the basic procedure for performing printing. For the detailed procedure, see the User’s
Guide Print Operations.
d
Install the printer to the computer before using this function. For details on installing the driver, refer to
Chapter 3, "Installing to Windows" and Chapter 4, "Installing to Mac OS X" in the User’s Guide Print
Operations.
3.4.1 Basic printing
Opening the printer properties window varies by application software. See your application software user's
manual for assistance.
The following example utilizes Microsoft Notepad on Windows Vista.
1 Select "Print" from the File menu.
2 In "Select Printer" field, select your printer name.
3 Click [Properties].
4 Specify each setting, and click [OK].
Performing printing
3.4
5 Execute a print command in the application software.
3-26 Konica Minolta 240f
Page 85

3.4 Performing printing
3.4.2 Introduction to advanced functions
This product includes the following print functions. For detailed procedures, refer to the User’s Guide Print
Operations.
Security Print
You can print documents stored in the machine with the security print function.
Print MB Document
You can print a document stored in the Message Board shared box or in a user's scan box.
Print on Demand
Documents scanned by your machine can be stored in a shared folder in a personal computer. You can then
browse your network from your machine and initiate a print job.
USB Memory
You can print documents saved in USB memory.
3
Konica Minolta 240f 3-27
Page 86

3
Performing printing
3.4
3-28 Konica Minolta 240f
Page 87

4
Registration
Page 88

Page 89

4.1 Registering destinations
4 Registration
4.1 Registering destinations
To use the address book or speed-dial, it is necessary to register a destination in the Address Book Entry in
advance. Up to 2,000 destinations can be registered.
d
Either a fax number or e-mail address must be registered.
You can register destinations using methods other than that described here. For details, refer to Chapter 8,
"Registering Destinations" in the User’s Guide Scan and Fax Operations.
1 Press <Setting>.
2 Press [Register].
4
3 Press [Address Book Entry].
4 Press [Enter/Edit].
Konica Minolta 240f 4-3
Page 90

4
5 Press a new button.
6 Enter the name, and press [Enter].
% Up to 30 characters can be entered.
Registering destinations
4.1
7 Press [Fax No.].
% If you do not want to register a fax number, proceed to
step 9.
8 Use the numeric keys to enter the fax number, and press
[Enter].
% Also register dialing options if you want to use them.
% Up to 40 digits can be entered.
9 Press [e-mail].
% If you do not want to register an e-mail address, proceed to step 11.
10 Enter the e-mail address, and press [Enter].
% Up to 50 characters can be entered.
4-4 Konica Minolta 240f
Page 91

4.1 Registering destinations
11 Press [Super G3].
12 Select [ON] to enable transmission with Super G3 or [OFF] to
disable it, and press [Enter].
13 If "Mode 1" is set for the PIN mode, press [PIN].
% Otherwise, proceed to step 15.
14 Use the numeric keys to enter the PIN, and press [Enter].
4
15 Press [Enter].
% To continue to register address book destinations, repeat the procedure in steps 5 to 15.
d
Refer to Chapter 3 "Activating PIN" in the User's Guide Administrator Operations, how to set the PIN mode.
Konica Minolta 240f 4-5
Page 92

4
4.2 Registering folder shortcuts
Up to 300 frequently used shared folders can be registered as shortcuts.
d
Specify the shared folder settings on the computer you are using in advance.
You can register folder shortcuts using methods other than that described here. For details, refer to
Chapter 8, "Registering Destinations" in the User’s Guide Scan and Fax Operations.
1 Press <Setting>.
2 Press [Register].
3 Press [Folder Shortcut].
Registering folder shortcuts
4.2
4 Press [Add].
5 Press [Shortcut Name].
% If you do not want to register the shortcut name, proceed
to step 7.
6 Register the shortcut name, and press [Enter].
% Up to 24 characters can be entered.
4-6 Konica Minolta 240f
Page 93

4.2 Registering folder shortcuts
7 Press [Link].
8 Browse to the folder you want to register, specify the folder,
and press [Enter].
% Press [Keypad] to manually enter or edit the link. After
entry, press [Enter]. If you are using Windows Vista or
Windows Server 2008, specify the computer name instead
of the IP address when manually entering the path to the
link. Start the link with two slashes ("//").
% Press [Root] to return to the list of computers or networks.
9 Press [UserName].
% If a user name and password are not required, proceed to step 15.
10 Enter the user name, and press [Enter].
% Up to 64 characters can be entered.
4
11 Press [Password].
12 Enter the password, and press [Enter].
% Up to 28 characters can be entered.
Only ASCII characters are available.
13 Press [Auto Network Login].
14 Select [ON] to set the auto network login function or [OFF] to
disable it, and press [Enter].
% Select [ON] to automatically perform the login procedure
using a registered user name and password.
15 Press [Enter].
% To continue to register or edit shortcuts, repeat the procedure in steps 4 to 15.
Konica Minolta 240f 4-7
Page 94

4
4.3 List of settings
If you press <Setting> on the control panel, the Settings screen is displayed. On this screen, you can specify
various settings according to your needs, such as specifying the common settings of the machine, setting
the default values of the various functions, outputting lists, and specifying settings related to paper.
4.3.1 [Register] screen
You can register useful functions to use with each mode, such as address book destinations, My Jobs, and
various shortcuts.
List of settings
4.3
Address Book Entry
You can register, edit, and delete address book destinations.
d
Refer to page 4-3.
Group
You can register, edit, and delete groups.
d
Refer to Chapter 8, "Registering Destinations" in the User’s Guide Scan and Fax Operations.
Soft Key
You can set frequently used functions as soft keys.
d
Refer to Chapter 2, "Editing the Soft Keys" in the User's Guide Administrator Operations.
My Jobs
You can register, edit, and delete My Jobs, or print a list of the My Jobs.
d
Refer to Chapter 2, "Using My Jobs" in the User's Guide Administrator Operations.
Favorite Address
You can register, edit, and delete destinations to display in the [Faves] tab on the scanner screen.
d
Refer to Chapter 8, "Registering Destinations" in the User’s Guide Scan and Fax Operations.
4-8 Konica Minolta 240f
Page 95

4.3 List of settings
Folder Shortcut
You can register, edit, and delete shortcuts to shared folder paths.
d
Refer to page 4-6.,
FTP Shortcut
You can register, edit, and delete shortcuts to FTP servers.
d
Refer to Chapter 8, "Registering Destinations" in the User’s Guide Scan and Fax Operations.
TWAIN Box
You can register or edit the name and I.D. code for a TWAIN box.
d
Refer to Chapter 3, "Scanning Documents Using a TWAIN Box" in the User’s Guide Scan and Fax
Operations.
4
Auto Distribute
You can register conditions to determine whether to distribute a received fax. You can also edit, delete, and
print a list of the conditions.
d
Refer to Chapter 5, "Useful Reception Functions" in the User’s Guide Scan and Fax Operations.
File Name
You can register the file name for the scanned image data in advance.
d
Refer to Chapter 8, "Registering Other Settings" in the User’s Guide Scan and Fax Operations.
Document Category
You can register, edit, and delete document categories to use when saving scanned documents in a box.
d
Refer to Chapter 8, "Registering Other Settings" in the User’s Guide Scan and Fax Operations.
Domain Name
You can register the domain names to display on the character entry screen.
d
Refer to Chapter 8, "Registering Other Settings" in the User’s Guide Scan and Fax Operations.
My MFP Shortcut
You can change the My MFP shortcut keys.
d
Refer to Chapter 2, "Editing the My MFP Shortcuts" in the User's Guide Administrator Operations.
Konica Minolta 240f 4-9
Page 96

4
F-Code Box
You can register, edit, and delete F-Code boxes, or print a list of the F-code boxes.
d
Refer to Chapter 5, "F-Code Communications" in the User’s Guide Scan and Fax Operations.
Template
You can register a subject and mail text for Internet Faxes and Scan to E-Mail.
d
Refer to Chapter 8, "Registering Other Settings" in the User’s Guide Scan and Fax Operations.
4.3.2 [Default Settings] screen
The default values are those used when you press <Reset> to return to the ready screen. The machine returns
to the default settings if is left without any operation for a designated period of time. Changing the default
values of often-used functions can shorten the time required to adjust settings.
List of settings
4.3
Default Mode
You can set the ready screen to display when the power switch is turned ON and when the specified auto
reset time has elapsed.
d
Refer to Chapter 2, "Specifying Default Settings" in the User's Guide Administrator Operations.
Auto Reset Time
You can set the time until each screen returns to the ready screen.
d
Refer to Chapter 2, "Specifying Default Settings" in the User's Guide Administrator Operations.
Copy Settings
You can set the default values for the copy function, such as the document type and contrast for the
documents to be copied.
d
Refer to Chapter 4, "Specifying Default Copy Settings" in the User’s Guide Copy Operations.
4-10 Konica Minolta 240f
Page 97

4.3 List of settings
Scanner Settings
You can set the default values for the scanner function, such as the document type and contrast for the
documents to be scanned.
d
Refer to Chapter 8, "Specifying Default Settings" in the User’s Guide Scan and Fax Operations.
E-mail Settings
You can set the default settings for divided transmission, templates, and the file format for the Scan to E-Mail
function and Internet Faxes.
d
Refer to Chapter 8, "Specifying Default Settings" in the User’s Guide Scan and Fax Operations.
Fax Settings
You can set the default values for the fax function, such as the document type and contrast for the documents
to be faxed.
d
Refer to Chapter 8, "Specifying Default Settings" in the User’s Guide Scan and Fax Operations.
4
Printer Settings
You can set the default values for the printer function, such as the printer controller settings and the auto
deletion time setting for security printing.
d
Refer to Chapter 10, "Setting the Print Controller" and "Setting the Auto Deletion Time for Security Printing"
in the User’s Guide Print Operations.
Sound Settings
You can set the various sound settings.
d
Refer to Chapter 2, "Specifying Default Settings" in the User's Guide Administrator Operations.
Energy Save Mode
You can specify the settings for the low power mode or sleep mode including the time it takes to switch to
those modes, or the time it takes to start the energy save mode. Regardless of this setting, if you press
<Energy Save>, the low power mode will start immediately.
d
Refer to Chapter 2, "Specifying Default Settings" in the User's Guide Administrator Operations.
Konica Minolta 240f 4-11
Page 98

4
4.3.3 [Management] screen
You can specify the important settings related to the machine, such as the user install mode and security
communication settings, and network settings, etc.
If you set an administrator password, a screen for entering the administrator password is displayed whenever
[Management] is pressed, which enables you to prevent users other than the administrator from changing the
settings.
Security Communication
List of settings
4.3
You can specify the various security communication settings, such as closed transmission, ID check
transmission, destination checking, and security reception settings.
d
Refer to Chapter 3 in the User's Guide Administrator Operations.
Function Protect Setting
You can manage the various settings using an administrator password and protect codes.
d
Refer to Chapter 3, "Function Protect Settings" in the User's Guide Administrator Operations.
Mode Protect Setting
You can set the machine to prohibit the copy, scanner, fax, or printer mode from being used.
d
Refer to Chapter 3, "Setting Mode Protection" in the User's Guide Administrator Operations.
User Access/Cost Accounting
You can check the total number of pages and communication time used by each user for copies and faxes,
set a charge per page, and calculate the total cost each user has incurred for copies, faxes, scan and prints.
d
Refer to Chapter 3, "Managing User Access/Cost Accounting" in the User's Guide Administrator Operations.
Network Settings
You can specify the network settings for using Message Board and transmitting Internet Faxes.
d
Refer to Chapter 3, "Specifying the Network Settings" in the User's Guide Administrator Operations.
4-12 Konica Minolta 240f
Page 99

4.3 List of settings
User Install
You can specify the settings required for using the machine.
d
Refer to Chapter 4, "Initial Setup (User Install)" in the User’s Guide Scan and Fax Operations.
Mirroring
You can copy the setting information to another machine of the same model.
d
Refer to Chapter 3, "Mirroring the Machine Settings" in the User's Guide Administrator Operations.
Initialize all data
You can erase the data set in <Setting>, such as the address book and copy/fax function settings, and the
data saved in the machine, such as the stored documents. Data that has been cleared cannot be restored.
d
Refer to Chapter 3, "List of Machine Management Settings" in the User's Guide Administrator Operations.
4
PIN Mode
The entered PIN (personal identification number) will not appear in the journal, error message printout,
delayed command list or TCR (transmit confirmation report).
d
Refer to Chapter 3, "Activating the PIN Mask" in the User's Guide Administrator Operations.
Admin Password
You can set the administrator password. You can set an administrator password to prevent users other than
the administrator from editing the settings in the [Management] screen.
d
Refer to Chapter 3, "Setting Security Codes" in the User's Guide Administrator Operations.
Protect Passcode
You can set the protect passcode. A protect passcode is required when using function protect settings.
d
Refer to Chapter 3, "Setting Security Codes" in the User's Guide Administrator Operations.
Konica Minolta 240f 4-13
Page 100

4
4.3.4 [Paper Settings] screen
You can make paper settings for receiving faxes and making copies. You can also insert the paper for sorting.
Cassette1
You can set the paper size used in Cassette 1.
d
Refer to Chapter 2, "Paper Settings" in the User's Guide Administrator Operations.
List of settings
4.3
Cassette2
You can set the paper size used in Cassette 2. This is only displayed when Cassette 2 is installed in the
machine.
d
Refer to Chapter 2, "Paper Settings" in the User's Guide Administrator Operations.
Bypass
You can set the type and size of paper used in the bypass tray.
d
Refer to Chapter 2, "Paper Settings" in the User's Guide Administrator Operations.
Select Print Cass
You can specify the cassette or tray to be used for copying, faxing, and printing lists.
d
Refer to Chapter 2, "Paper Settings" in the User's Guide Administrator Operations.
Separate Rx Page
Set the cassette to use for printing the first page of a received document. This enables you to separate
received documents by using paper with a different size or color for the first page and subsequent pages of
the documents.
d
Refer to chapter 5, "Useful Reception Functions" in the User’s Guide Scan and Fax Operations.
4-14 Konica Minolta 240f
 Loading...