How it Works
Log In / Sign Up
Buy Points
How it Works
FAQ
Contact Us
Questions and Suggestions
Users
KONICA MINOLTA
Loading...
#
30
152f
160
2
160f
162
2
163
2
164
180
2
181
195
210
2
211
2
215
222
223
224e
227
250
5
253
282
283
287
288
308
350
4
360
361
362
363
2
367
368
1510
1600F
3
1600W
4
1650EN
4
1660E
1680MF
2
1690MF
7
1700
1725E
2
1900
2001Pps
2001
2010 Gen Mec
2010 Switches
2010 Trouble
2025
2060
4
2152 Reconstruccion
2200
2
2200 DL
2223
2230
2300 DL
6
2400 W
5
240F
14
2300
2300 W
3
2330
2350
2
2425 TURBO
2425
2
2430 DL
7
3-D Scanner
2450
2
2480 MF
5
2490 MF
6
2500W
3
2530 DL
6
2550DN
280PX
300l
2500
2550
3
2560
3
2590 MF
3
2900
3000
3100
3225
2
3240
3300
4
3320
3340
3500
3700
3730DN
2
3825
3900
4000 PARTES
4020
211-163
15012001
7
15012001Auxfunct
15012001PgScope
1800767-001A
1800771-074B
1800816-001A
4024777901
4027777301
Loading...
Loading...
Nothing found
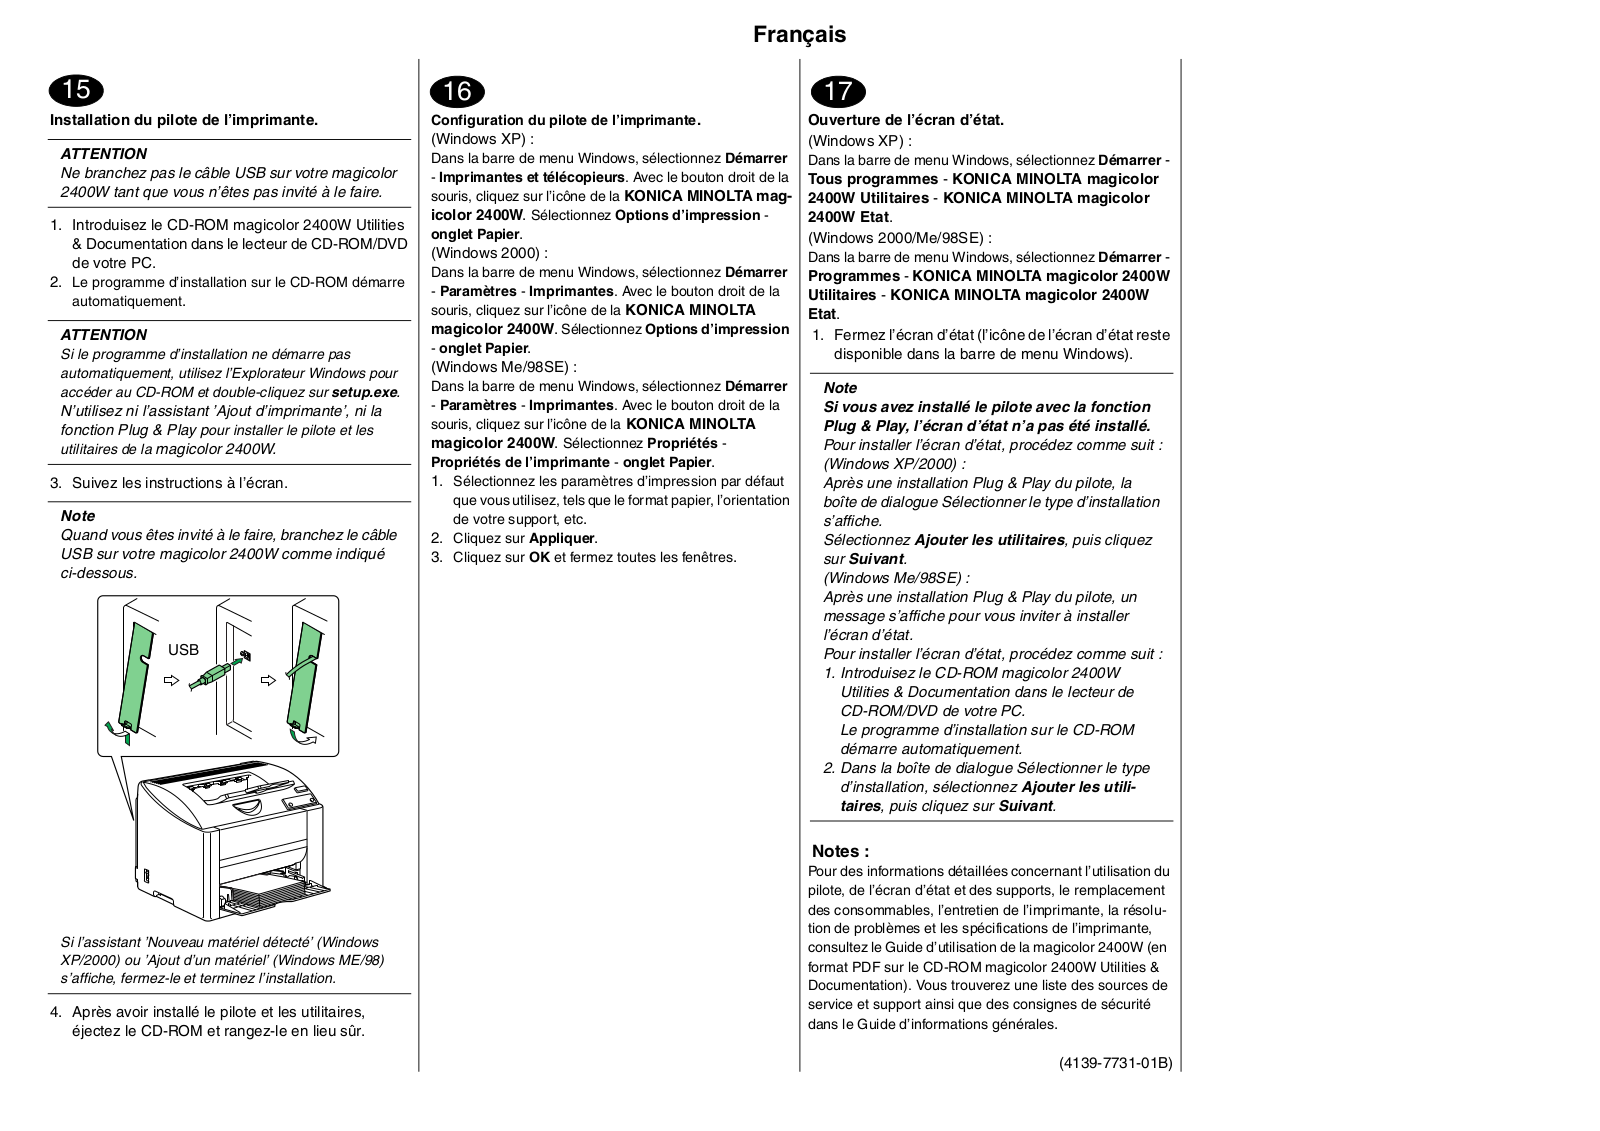
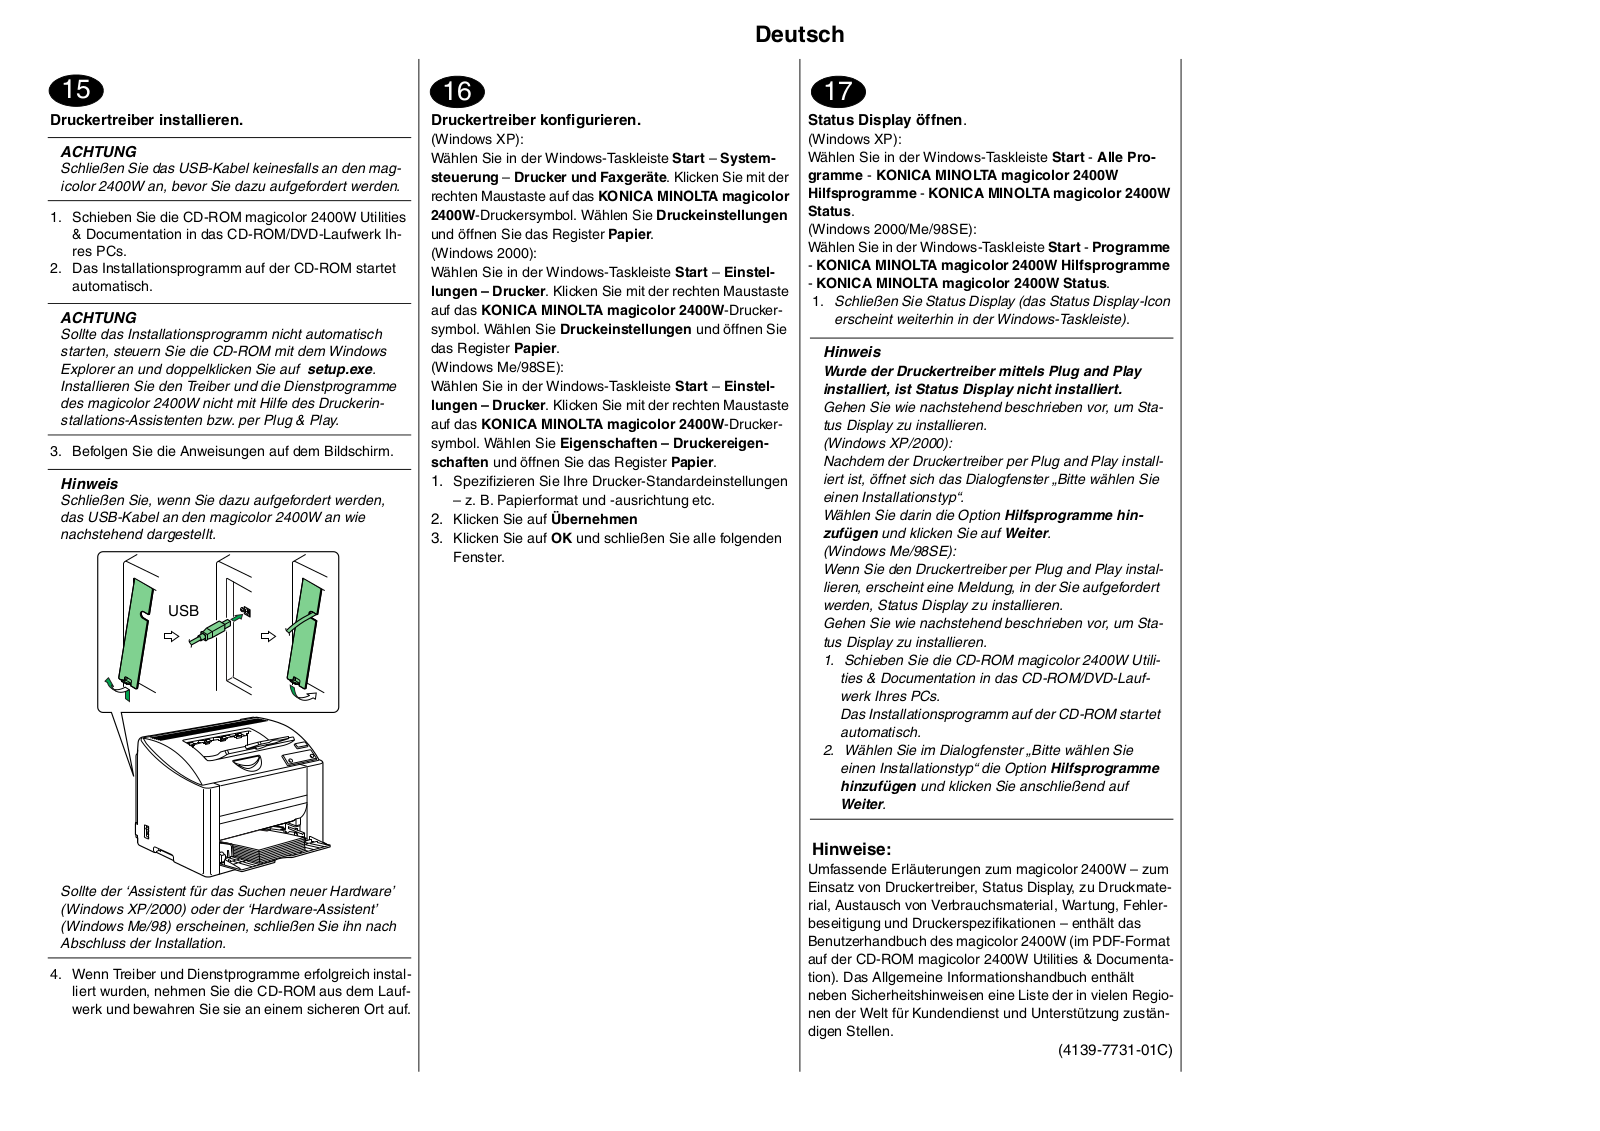
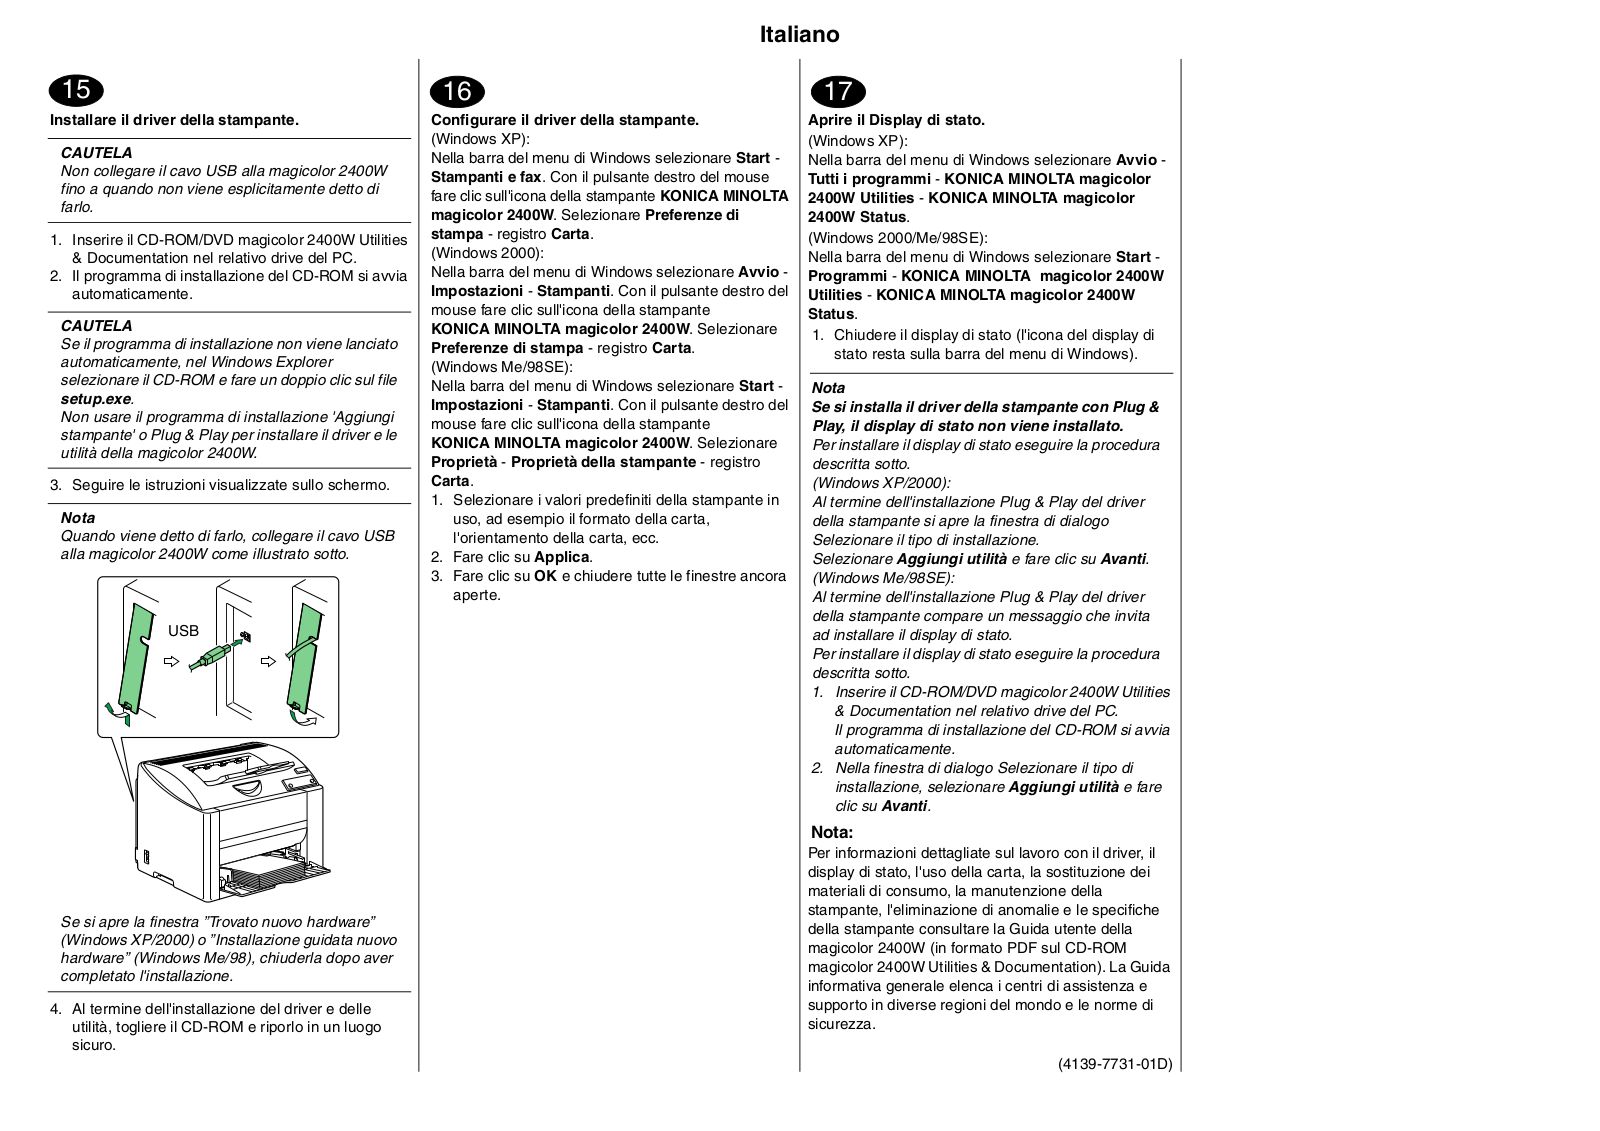
2400 W
service manual
26 pgs
2.36 Mb
1
User Guide
92 pgs
5.75 Mb
0
User Manual
133 pgs
5.86 Mb
1
User Manual
2 pgs
1.58 Mb
0
User Manual [fr]
96 pgs
2.35 Mb
0
Table of contents
Loading...
KONICA MINOLTA 2400W service manual
...
KONICA MINOLTA service manual
Download
Specifications and Main Features
Frequently Asked Questions
User Manual
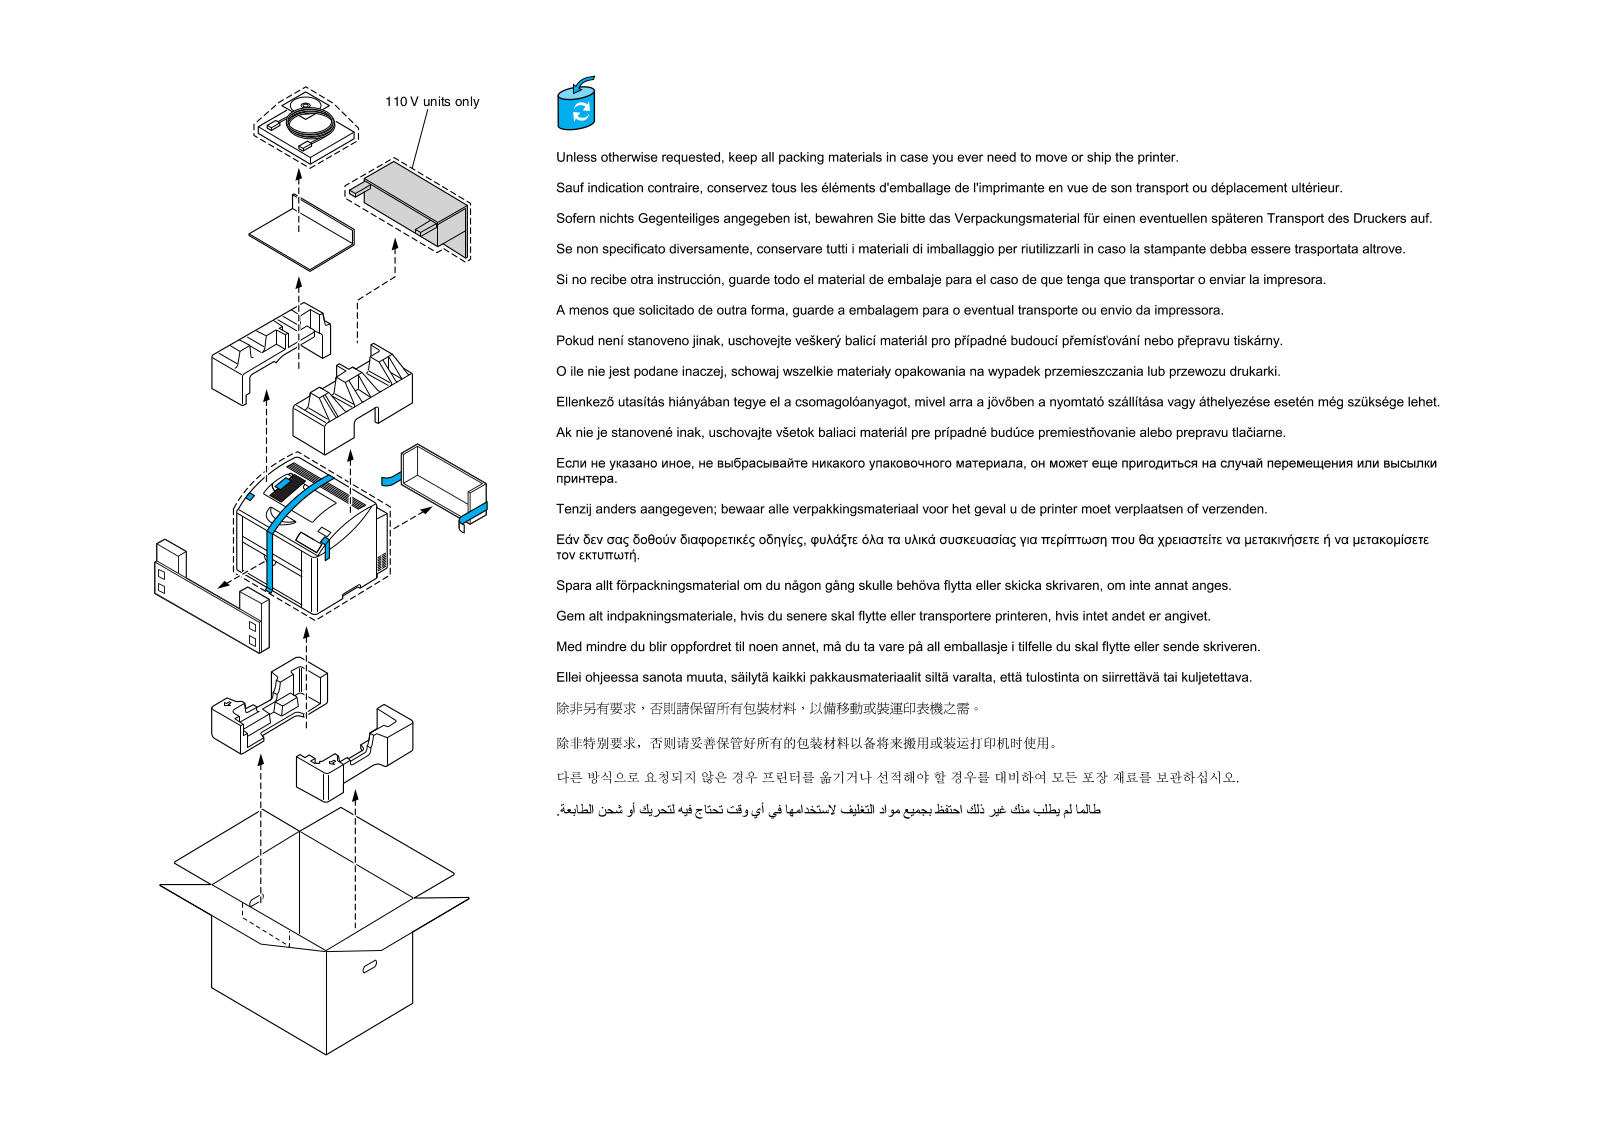
Download
Loading...
+
18
hidden pages
Unhide
You need points to download manuals.
1 point = 1 manual.
You can buy points or you can get point for every manual you upload.
Buy points
Upload your manuals