

Page 1

Konica Console Application
User’s Manual
Revision 1.0
Written by Jimmy Yu
KSTC
Huntington Beach, CA.
Page 2
Introduction:
This document is meant to supplement the usage of Konica’s Console Application
program, details of various function and buttons are described in detail along with
pictures of the screen the user(s) will see when they access a specific function in the
Console Application
All text(s) enclosed in square brackets, [] are key(s) on the keyboard the user(s)
can use, and all texts enclosed in curly brackets, {} are the options presented by the
Console Application that the user(s) can choose from.
For user at sites that do NOT have mouse support, to navigate around the screen
can be done via the [TAB] key. Each key press will move the highlighted selection to the
next selectable selection. Anything that is view only will NOT be highlighted. E.g.
controller status, Image Processor name, etc. For drop down choices, use the up and
down arrow to navigate to the appropriate selection, and then hit [ENTER] or [RETURN]
will do the job.
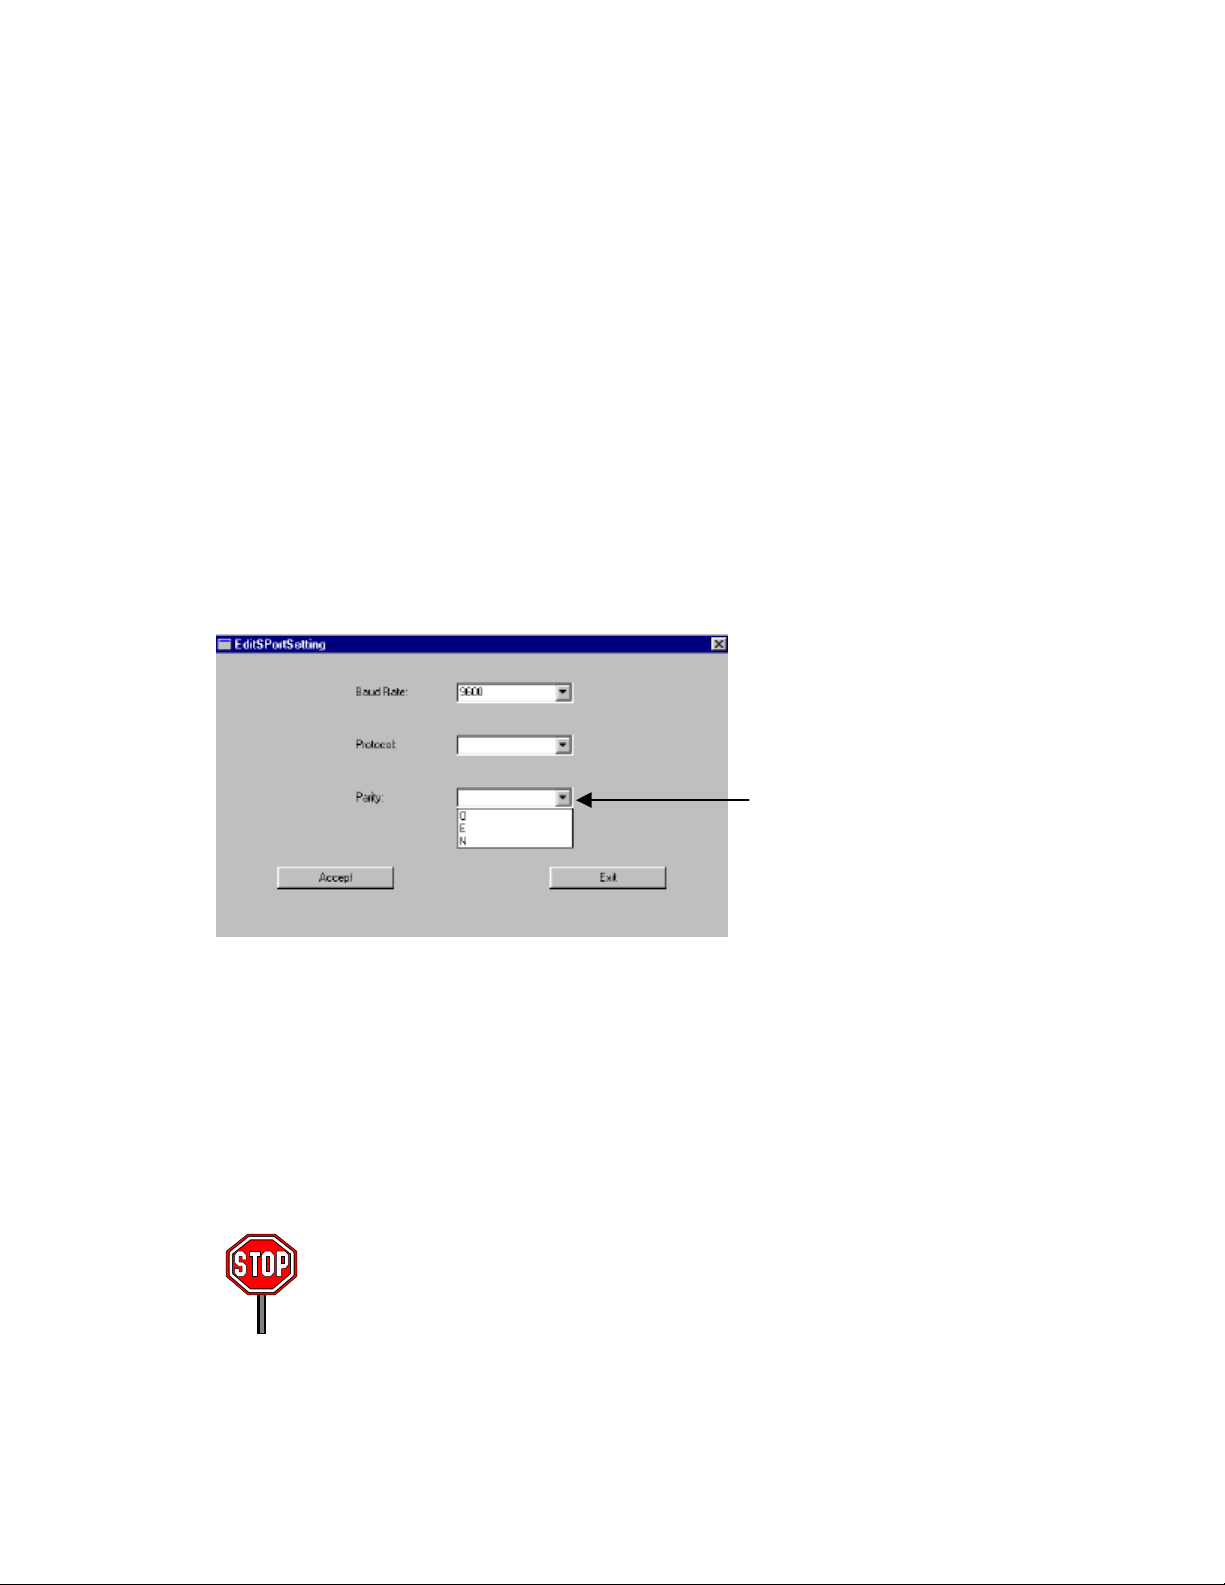
Drop Down Menu
In the above picture, we have five possible choices, by hitting the [TAB] key
repeatedly, we will move from the Exit button to Baud Rate, to Protocol, to Parity, to
Accept button. If the user chooses to modify the Parity, they would then use the arrow
keys to move up or down the list {O, E, and N}. Once they have made the selection, they
would hit [ENTER] or [RETURN] on their keyboard.
For user at sites that DO have mouse support, click on the appropriate choice and
selection will activate that function. Just as one would in a regular windows system.
All-important notices will be accompanied by this stop sign.
Page 3

All potential dangerously commands or conflicting settings will be accompanied
by this picture.
Page 4

I. Main Screen
A
B
C
D
E
F
G
A. This is the type of controller you have. It can be IP-302, IP-402, IP-502, IP-302J, etc.
B. This is the type of finisher you have. It can be FS-103, FS-104A, etc.
C. This tells you the status of the printer/copier that you have. It can be PRINTING,
JAM, RECEIVING INFORMATION, etc. (Consult your model’s user manual for more
information.)
D. This tells the type of printer/copier that you have. It can be 7060, 7050, Force 50,
Force 60, etc. This information should also be in front of your machine.
E. This tells you the size of paper in that tray, (if applicable). It can be LETTER,
LEGAL, TABLOID, etc. (For non-American machines, this can be A3, B5, etc.)
F. This tells you the type of paper is in that tray. It can be NORMAL, THICK, OHP, etc.
This field is usually pre-programmed. (Consult your model’s user manual for more
information.)
G. This tells you the status of that tray. It can be OK, or EMPTY. No other choices are
possible.
NOTE:
In the Above picture, tandem mode is displayed. (Two printers
and/or copiers hooked up to the same Image Processor. If you do not have
this setup, only the status and the configuration of ONE printer/copier will be
shown.
Page 5

II. Diagnostic (Password Protected)
A
B
C
D
E
F
A. File Capture.
This function is designed to let the field technician capture a particular file. As in
the case of a specific file causing the system to crash. Below is the picture of the File
Capture Screen.
The instructions to capture the file(s) will
appear on the blank part of the screen as
the program walks the technician through.
Once the file is captured they will have
the option to transfer this file to a floppy.
If the files that were captured are not transferred to floppy, they will reside on
the hard disk. This will, over time, cause the Image Processor to run out of
hard disk space!
Page 6

B. Transfer File
The file, once transferred to the floppy disk, will remain on the hard disk.
C, D, E. View IP Err, Debug, Modification Logs.
This is used to transfer a
specific file to the floppy
disk. The user must know
the file name, e.g.
Myfile.txt, and the
subdirectory, e.g. bin.
If the file is not located in
a subdirectory this field
may be left blank.
C, D, and E are all covered here,
since all three are the same window,
same functions, just that the
window labels are different, (Hence
this screen capture does not contain
the title bar.)
The Exit Button will close this
window.
The Transfer Me button will ask the
user to insert a floppy to have this
file, (corresponds to the window) transferred to the floppy.
Next Page and Previous Page will allow the user to view different pages. If there is no
next page or previous page, these two buttons will not be visible to the user.
Page 7

F. Clear All Logs
III. System Configuration
Once the logs are cleared, (by
choosing YES). They are
gone FOREVER. They can
not be undone. Use this when
only absolutely sure.
One may either
view the system’s
configuration, or edit
them. The View
Configuration will
give you this
window:
There is no way for user to modify/change
any of the fields in this window. They can
only view the available information, and
exit.
Page 8

Edit Configuration:
A. Edit Serial Settings
A
B
C
D
User can set the serial port setting via this window. Baud rate, Protocol, and Parity can be
modified by using the drop down menu, all the choices and options are listed. In order to
get these settings to take affect, use the ACCEPT button to update the values. Or use
EXIT to cancel the operations.
Page 9

B. Print Controller Settings
With this screen, the user can change the Copier time-out mode, (How long it takes for
the copier mode to change back to printing mode.) Spooling mode, On/Off, Banner Page
for jobs, On/Off. And a print job time out value, between 5 to 300 seconds. Accept button
will update the system’s database and exit will cancel all actions.
C. Print Job Settings
Page 10

This window will allow the user to change settings on all print jobs as default. (If the
print job’s owner did not specify) It ranges from default paper size, Resolution to Form
Lines. With explanation of each one below.
Default Paper: This can go from A3, A4, A4R, to Letter, Letter-R, and legal. This
feature’s capability supports all possible paper sizes U.S. and abroad.
Resolution: 400 dpi/ 600 dpi.
Print Quality: Text, medium, high. This is for the word that appears on the page and their
quality.
Duplex: Off, Long Edge, or Short Edge. Long Edge duplex will allow both sides of the
page to be printed and you can read it like a book.
Point Size: This value is between 0.4 to 999.75. They are the equivalent of font size in a
word processor program. (The font size may NOT always correspond to Point Size
value.) The bigger the Point Size value, the bigger the font will be.
Font Number: Each number corresponds to a specific font, to find out what the
corresponding ones are, consult the font test print from your copier/printer engine’s
display.
Copies: This is the default value of the number of copies will be produced if the user or
the print job specifies no values.
CR/LF Mapping: This is the mapping used by print engine for line feed while rasterizing
the page. Default value should suffice the need. User should not change this value unless
they are sure.
Orientation: The output of the pages will be portrait or landscape.
Courier Style: By choosing dark, the text on your print job will look almost as if they are
in bold setting.
Pitch: This number means the number of characters per inch. Higher the number, more
the characters will be inside an inch of space. The lowest value, 0.44 will be almost ½ a
character inside an inch of space.
Form Lines: Number of lines on a page. Lowest number, 5, would then be fives line on a
page, evenly spaced. Normal state of operation would be 120.
Page 11

D. Finishing Settings
Output Tray: There are at most three trays available for output pending on which system
you might have.
Offset: If the user wishes to print multiple copies of a print job, with this feature turned
on, the machine will offset each set of the print job. This is very useful for easy
separation of each set, stapled or not.
Output Order: You may choose to have your output to be face up (text side facing up.) or
face down. (Text side facing down.)
Staple Position: There are four options for this feature, No Staple. Single Staple, Double
Top, and Top Side. Single staple will cause print jobs to be stapled at the upper left-hand
corner, regardless of orientation of the print job.
Page 12

III. System Update
A. Change Password
A
B
C
To use this feature, the user must enter their original password, and the new password
twice, once in the New Password field and then in the Again password field.
Click/choose accept for the change to take effect.
If the old password does not match what is on record or the two new passwords does not
match, you will see an error window. If the operation was successful, you will see a
confirmation window.
Page 13

B C. Change Module/Undo Change Module
These two windows are identical, exception to the instructions given, therefore they will
be covered by using the same window picture.
For a change in module, insert the floppy disk that contains the appropriate module’s .o
file and then choose a button that corresponds to the name that is on the floppy. E.g. if
you are changing the FBC module, your floppy should have FBC.O on the floppy disk.
Choose/highlight FBC button, and click it.
Error/Confirmed window will pop up if the operation was not successful/successful.
To undo a module, floppy disk is not needed, click the module you wish to undo, (You
must have changed it before, see above.) in order to undo a change. If you have not made
a change before, and attempt to do an undo, you will see an Error window.
If not, you will see a confirmed window upon success.
 Loading...