

Page 1

WILD-/ÜBERWACHUNGSKAMERA
Bedienungsanleitung
IAN 94376
RIISTA- JA VALVONTAKAMERA
Käyttöohje
VILT-/ÖVERVAKNINGSKAMERA
Bruksanvisning
VILDT-/OVERVÅGNINGSKAMERA
Betjeningsvejledning
GAME/SURVEILLANCE CAMERA WK 5 A1
GAME/SURVEILLANCE
CAMERA
Operating instructions
Page 2

GB / IE Operating instructions Page 1
FI Käyttöohje Sivu 43
SE Bruksanvisning Sidan 85
DK Betjeningsvejledning Side 125
DE / AT / CH Bedienungsanleitung Seite 167
Before reading, unfold both pages containing illustrations and familiarise
yourself with all functions of the device.
Käännä ennen lukemista molemmat kuvalliset sivut esiin ja tutustu seuraavaksi
laitteen kaikkiin toimintoihin.
Vik ut båda bildsidorna och ha den till hands när du läser igenom anvisningarna och gör dig bekant med apparatens / maskinens funktioner.
Før du læser, vend begge sidene med billeder frem og bliv bekendt med alle
apparatets funktioner.
Klappen Sie vor dem Lesen die beiden Seiten mit den Abbildungen aus und
machen Sie sich anschließend mit allen Funktionen des Gerätes vertraut.
Page 3

8
14
15 16
1
2
3
4
201817
7
13
A B
C
D
5
6
9
10
11
12
19 21
Page 4

E
22
23
24
25
3x 3x
26 27
28
29
31
32
33
34
35
F
30
36
Page 5

1
WK 5 A1
GB
IE
Contents
Introduction .................................. 3
Information concerning these operating instructions ...........3
Copyright ............................................3
Intended use ..........................................3
Notes on trademarks ...................................4
Warning notices .......................................4
Safety ....................................... 5
Basic safety guidelines ..................................5
Risk of injury if batteries are improperly handled ..............7
Mishandling memory cards can lead to a risk of injury .........7
Possible infringements of the rights of third parties .............8
Descriptions of components ....................10
Initial operation .............................. 12
Package contents and transport inspection .................12
Disposal of packaging materials .........................13
Set-up location requirements ............................13
Opening and closing the camera .........................14
Inserting the batteries/connecting power supply .............14
Video connection .....................................15
Inserting storage media ................................15
Using an adapter card .................................17
Handling and operation ....................... 18
Switching on and off, changing settings ....................18
Attaching with the securing strap .........................27
Using the wall bracket .................................27
Aligning the camera ...................................29
Page 6

GB
IE
2
WK 5 A1
Activating live mode ...................................30
Night exposures ......................................30
Displaying recordings on the screen ......................31
Showing recordings on an external monitor .................34
Transferring recordings to a computer .....................34
Cleaning ....................................35
Troubleshooting .............................36
Fault causes and rectification ............................36
Storage/disposal ............................38
Storage .............................................38
Disposal of the device .................................38
Disposal of (rechargeable) batteries ......................38
Appendix ...................................39
Notes on the Declaration of Conformity ...................39
Technical data .......................................39
Warranty ...........................................41
Service .............................................42
Importer ............................................42
Page 7

3
WK 5 A1
GB
IE
Introduction
Information concerning these operating instructions
Congratulations on the purchase of your new device.
You have selected a high-quality product. The operating instructions
are part of this product. They contain important information on safety,
usage and disposal. Before using the product, familiarise yourself
with all handling and safety guidelines. Use the product only as
described and for the range of applications specified. Please pass
on all documentation incl. these operating instructions to any future
owner(s) if you sell this product or give it away.
Copyright
This documentation is copyright protected.
Any copying or reproduction, including in the form of extracts, or any
reproduction of images (even in a modified state), is permitted only
with the written authorisation of the manufacturer.
Intended use
This device is an information technology device intended only for
recording digital photos and videos, and particularly for observing
wildlife. It is not intended for any other or more extensive use. This
device is not intended for use in commercial or industrial environments.
The manufacturer accepts no responsibility for damage caused by
failure to observe these instructions, improper use or repairs, unauthorised modifications or the use of unapproved replacement parts.
The risk shall be borne solely by the user.
Page 8

GB
IE
4
WK 5 A1
Notes on trademarks
- USB is a registered trademark of USB Implementers Forum, Inc.
All other names and products may be trademarks or registered
trademarks of their respective owners.
Warning notices
The following warning notice types are used in these operating
instructions:
DANGER
A warning notice at this hazard level indicates an
imminently hazardous situation.
If the hazardous situation is not avoided, it could result in death
or serious physical injury.
► Follow the instructions in this warning notice to avoid the risk of
death or serious injury.
WARNING
A warning notice at this hazard level indicates a
potentially hazardous situation.
Failure to avoid this hazardous situation could result in injury.
► Follow the instructions in this warning notice to prevent injury.
Page 9

5
WK 5 A1
GB
IE
CAUTION
A warning notice at this hazard level indicates a
potential for property damage.
Failure to avoid this situation could result in property damage.
► Follow the instructions in this warning notice to prevent prop-
erty damage.
NOTICE
► A notice provides additional information that will assist you in
using the device.
Safety
In this section, you will find important safety instructions for using the
device.
The device complies with statutory safety regulations. Improper use
may result in personal injury and property damage.
Basic safety guidelines
To ensure safe operation of the device, follow the safety guidelines
set out below:
■ Check the device for visible external damage before use. Do not
operate a device that has been damaged or dropped.
■ If the cables or connections are damaged, have them replaced
by an authorised specialist or the Customer Service department.
■ People who, due to their physical, intellectual or motor abilities,
are incapable of operating the device safely may only use the
device under the supervision or direction of a responsible person.
Page 10

GB
IE
6
WK 5 A1
■
Do not attach the device to free-standing or extremely tall trees,
since these are particularly susceptible to lightning strikes. If the tree
that the camera is attached to is struck by lightning, the device
may be destroyed.
■ Allow children to use the device only with supervision. Children
are not always able to correctly recognise potential dangers.
■ All repairs must be carried out by authorised specialist companies
or by the Customer Service department. Failure to make proper
repairs may put the user at risk. It will also invalidate any warranty
claims. This device may not be used by children.
■ Repairs to the device during the warranty period may only be
carried out by a customer service department authorised by the
manufacturer. Otherwise no warranty claims can be considered
for subsequent damage.
■ Defective components must always be replaced with original
replacement parts. Compliance with the safety requirements can
only be guaranteed by using these replacement parts.
■ Do not place any objects on the device.
■ Do not operate or place the device close to open flames
(e.g. candles).
■ If you notice any unusual noises, smoke or similar unusual situa-
tions, remove the batteries and disconnect any attached mains
adapter from the power supply and contact Customer Service
(see Chapter "Service").
■
DANGER! Packaging material may not be used as a toy.
Risk of suffocation!
Page 11

7
WK 5 A1
GB
IE
Risk of injury if batteries are improperly
handled
■ Keep batteries out of the reach of children. Children might put
batteries into their mouth and swallow them. If a battery has been
swallowed, seek medical assistance IMMEDIATELY.
■ Do not throw batteries into a fire. Never subject batteries to high
temperatures.
■ Risk of explosion! Do not charge batteries unless they are explicitly
labelled as "rechargeable".
■ Do not open the batteries or short-circuit them.
■ Do not mix different types of batteries. Due to increased risk
of leakage, empty batteries should be removed. The batteries
should also be removed from the device if it is not being used for
long periods.
■ Battery acid leaking from a battery can cause skin irritation. In
the event of contact with the skin, rinse with plenty of water. If the
liquid comes into contact with your eyes, rinse thoroughly with
water, do not rub and consult a doctor immediately.
■ The chapter titled "Power Supply" describes how to correctly
insert and remove batteries.
Mishandling memory cards can lead to a
risk of injury
■ Children should be supervised to ensure they do not play with the
memory card. Seek medical help immediately if the memory card
is accidentally swallowed.
Page 12

GB
IE
8
WK 5 A1
Possible infringements of the rights of third parties
Please note the following when using the game camera:
Copyright protection
Every person owns the rights to their own image. According to copyright law, pictures of people may only be published without their
permission if the affected person appears merely as an incidental
feature in a landscape or other location. The question as to whether
a person is merely an incidental feature must be ascertained on a
case by case basis. To avoid any legal uncertainty, a warning notice
about the game camera should be provided in all cases in which
recordings that could feature images of potentially identifiable persons are possible (see Chapter "Duty of notification").
Protection of privacy
The privacy of others may not be infringed by any recorded images.
Do not set up the camera so it points to the garden or an entrance
of a neighbouring residence, even if these locations are easily visible
from your own residence or to the general public. This does not a
constitute a right to publish these views.
Personal identifiability
Personal identifiability exists when it can be established that a certain
person was at a certain location at a certain time. This identification
can be made by means of an identifier related to a specific person,
e.g. a car number plate. Personal identifiability must avoided under
all circumstances.
Page 13

9
WK 5 A1
GB
IE
Surveillance cameras at the workplace
Surveillance at the workplace is subject to particularly strict legislation in Germany. Employers should not use surveillance cameras
in the workplace in any cases where this could lead to a possible
infringement of legal rights.
Road traffic surveillance cameras
In case of surveillance cameras directed at road traffic, it is advisable that the location of the camera and the framing of the image be
selected so that the road users cannot be identified by means of the
registration plates. Inscriptions/logos on vehicles may also serve as
a means of identifying a road user.
Duty of notification
If it is not possible to preclude the identification of persons, a notification informing of the presence of the surveillance camera must be
placed at clearly visible locations on all access routes to the area
within the filming range of the camera. Pedestrians must also be
informed that by entering the filming range of the camera they give
their consent to be filmed/photographed and if they do not consent
then they should not access the affected area. The voluntary nature
of this consent must be considered. If the camera is located such
that an affected person must pass by in order to reach a destination
(e.g. at the entrance to a place of interest) then the absence of voluntariness precludes the granting of an effective consent.
The respective legal requirements of the country in which the camera
is being used should always be observed to avoid possible infringements of the rights of third parties.
Page 14

GB
IE
10
WK 5 A1
Descriptions of components
(For illustrations see fold-out pages)
1
Infrared LEDs
2
Standby indicator, red LED
3
Motion indicator, green and blue LED
4
Camera lens
5
Locking eyelet
6
Front motion sensor
7
Side motion sensors
8
Tree bracket
9
Locking screw
10
Screen
11
Battery compartment
12
Locking clamps
13
Speaker
14
Control panel buttons
15
Memory card slot (microSD)
16
AV socket
17
Mini-USB socket
18
Mode selector switch (OFF - TEST - ON)
19
Microphone
20
DC connection socket (for mains adapter; not supplied)
21
Tripod thread
22
Tripod screw
23
Locking washer
24
Joint wing screws
Page 15

11
WK 5 A1
GB
IE
25
Drilled holes
26
Anchors
27
Screws
28
TV cable (miniature stereo phone plug to cinch; audio/video)
29
Mini USB to USB 2.0 connection cable
30
Securing strap
31
Strap latch
32
Storage box
33
Adapter card (microSD to SD)
34
microSDHC memory (4 GB)
35
8x1.5V type AA/Mignon/LR6 batteries
36
Operating instructions
Page 16

GB
IE
12
WK 5 A1
Initial operation
Package contents and transport inspection
Please check the contents of the package (see fold-out pages).
The following components are included in delivery:
▯ Game/surveillance camera WK 5 A1
▯ Wall bracket
▯ 3 x anchors
26
▯ 3 x screws
27
▯ TV cable (miniature stereo phone plug to cinch; audio/video)
28
▯ Mini USB to USB 2.0 connection cable
29
▯ Securing strap (2.5cm wide, approx. 190cm long)
30
▯ Storage box
32
▯ Adapter card (microSD to SD)
33
▯ microSDHC memory (4 GB)
34
▯ 8x1.5V type AA/Mignon/LR6 batteries
35
▯ Operating instructions
36
NOTICE
► Check the package for completeness and for signs of visible
damage.
► If the delivery is incomplete or damaged due to defective
packaging or carriage, contact the Service hotline (see the
section Service).
♦ Remove all parts of the device and the operating instructions from
the box.
♦ Remove all packaging materials and the protective film from the
device.
Page 17

13
WK 5 A1
GB
IE
Disposal of packaging materials
The packaging protects the device from damage during carriage.
The packaging materials have been selected for their environmental
friendliness and ease of disposal, and are therefore recyclable.
Returning the packaging to the material cycle conserves
raw materials and reduces the amount of waste that is
generated. Dispose of packaging materials that are no
longer needed in accordance with applicable local
regulations.
NOTICE
► If possible, keep the original packaging of the device during
the warranty period so that the device can be packed properly
for return shipment in the event of a warranty claim.
Set-up location requirements
This device complies with protection class IP54. This means that the
camera is protected from dust and water spray, and can be used
regardless of the weather conditions. However, proper protection
from dust and water spray is only provided if the camera is correctly
closed and all seals are intact and clean.
Please be aware that protection from dust and water spray will be
limited when used with an external mains adapter.
Page 18

GB
IE
14
WK 5 A1
Opening and closing the camera
The control buttons, connections and the battery compartment are
inside the camera.
♦ Undo both of the side locking clamps
12
to open the camera.
♦ To close the camera, hook the metal bars of the locking clamps
into the brackets and then press the plastic latch downwards.
There is a locking eyelet
5
between the two locking clamps with
which you can securely close the camera with the help of a padlock.
Inserting the batteries/connecting power supply
♦ To insert batteries 35 in the device, open the camera.
♦ Now press the latch on the upper side of the battery compartment
down a little way and lift the battery compartment cover off.
♦ Insert 4 or 8 x 1.5V AA/mignon batteries into the battery com-
partment
11
. Ensure that the polarity is correct.
NOTICE
►
When using 4 batteries, these can either all be inserted in the
upper part or all in the lower part of the battery compartment.
Other combinations are not possible.
♦ Close and secure the battery compartment. Ensure that the bat-
tery compartment cover clicks firmly in place.
♦ If you are operating the device on a mains adaptor (not supplied),
open the rubber seal on the bottom of the camera and insert the
plug of the AC adapter cable into the DC socket
20
. The mains
adapter must supply a direct-current voltage of 6V with at least
1.5 A. Use a barrel jack whose interior polarity is connected to
the plus pole ( ).
Page 19

15
WK 5 A1
GB
IE
Operation via a mains adapter is possible even with batteries
inserted. If one power source fails, operation will be maintained
using the other.
Video connection
NOTICE
►
The camera can transfer the video signal to an external monitor
or the video/audio input of a television set. Please also follow
the instructions of the respective playback device.
♦ Use the supplied TV cable
28
to connect to a suitable external
monitor via the camera’s AV socket
16
.
Inserting storage media
NOTICES
► Since the camera has no built-in memory, it can only work if an
microSDHC memory card
34
is inserted.
► The device supports microSDHC memory cards with a capacity
of up to 32GB.
Page 20

GB
IE
16
WK 5 A1
CAUTION
► To avoid malfunctions, keep the memory card away from
moisture and avoid strong vibration, dust, heat sources and
direct sunlight.
► Insert the memory card as indicated by the icon on the slot.
Never force the memory card into the slot. Never bend or twist
the memory card.
► After transport, wait until the memory card has reached ambient
temperature before using it for the first time. Major fluctuations
in temperature or humidity can lead to condensation which
could cause an electrical short-circuit. Keep the memory card
in the storage box
32
.
♦ To remove a microSDHC memory card
34
from the memory card
slot 15 of the device, press the protruding edge of the memory
card in a little way until it pops out. Then remove the memory card.
♦ To insert a microSDHC memory card into the memory card slot of
the device, push it into the slot until it clicks into place. The electrical contact of the memory card must be facing towards the front
of the camera.
Page 21

17
WK 5 A1
GB
IE
Using an adapter card
The microSDHC memory card 34 is delivered with a useful adapter
card (microSD to SD) 33, so that you can use the microSDHC memory
card in any device with an SD card slot and access the data.
♦ Insert the microSD memory card into the adapter card as shown
in the figure.
NOTICE
► The adapter card has a write-protect lock. To protect the
microSDHC memory card from write access, slide the switch
on the side of the card to the "LOCK" position (see figure).
► The write-protect switch protects the microSDHC memory
card only as long as it is in the adapter. As soon as you
remove the microSDHC memory card, the write protection
will no longer be available.
Page 22

GB
IE
18
WK 5 A1
Handling and operation
In this chapter you will receive important information about proper
handling and operation of the device.
Switching on and off, changing settings
After connecting a power supply, move the mode selector switch 18
to the "TEST" position to adjust the settings described on the following
pages using the control panel buttons
14
:
♦ Press the button to switch from video to photo mode.
♦ Press the
button to switch from photo to video mode.
♦ Press the
button to take a photo/record a video manually.
Pressing the button again ends the recording.
♦ Press the
button to open the settings menu.
Settings
Mode
Photo resolution
Photo series
Video resolution
Video length
Audio recording
Back
Select
Page 23

19
WK 5 A1
GB
IE
♦
Press the
/
buttons to select the desired menu entry which
you can then activate with the button. If you change settings,
you must always confirm your changes with the button.
Use the button to navigate one menu level backwards.
Mode
To select whether photos or videos will be recorded when motion is
detected. In "Photo & Video" mode, the camera first takes a photo
and then starts filming video.
Photo resolution
Select a photo size: 1MP, 3MP, 5MP (preset), 8MP or 12MP.
The larger the file size, the more detailed the image. However, the
maximum number of high-resolution images that can be stored
before the memory card is full is much lower.
Photo series
Select the number of photos that are to be taken in succession when
the camera is activated in photo mode. In addition to single shot mode
(1 photo), you can take "2 photos in series" or "3 photos in series".
Video resolution
Select the screen resolution: 1920×1080P, 1280×720P,
720×480P, 640×480P or 320×240P.
Here too, the higher the resolution, the sooner the capacity limit
of the memory card will be reached.
Page 24

GB
IE
20
WK 5 A1
Video length
Use the
/ buttons to select the length of the video recording
(between 3–59 seconds or 1–10 minutes) that will be made when
video recording is activated. The longer the recording time selected,
the shorter the operating time. The preset video length is 5 seconds.
Audio recording
If you want the camera to record sound when recording videos,
select "On" here.
Shot lag
Use the
/ buttons to select the minimum time period that the
camera should wait before reacting to subsequent activation of the
main sensor after the initial recording. During the selected interval,
the camera will not record any images or videos. This prevents the
memory card from being filled up with too many recordings of the
same event. You can select between 5–59 seconds or 1–60 minutes.
Side motion sensors
The two side motion sensors
7
can be switched on or off here.
If the side motion sensors are being affected by branches blowing
in the wind, for example, select "Off", confirm with the button to
deactivate the side motion sensors. Otherwise the moving branches
will trigger recordings. The default setting is "On".
Page 25

21
WK 5 A1
GB
IE
Sensitivity motion sensors
Set the sensitivity of the front motion sensor 6 here.
For inside spaces
and environments with little interference, such as branches blowing
in the wind, select "High". Select "Medium" for outdoor spaces and
environments with a normal amount of interference, and select "Low"
for environments with a high level of interference. Temperature can
also affect the sensitivity. The "High" setting is suitable for warm
ambient temperatures, whereas "Low" should be selected for cold
environments.
NOTICE
► The sensitivity of the front motion sensor
6
is factory-set to
medium. This setting is suitable for most applications.
► Note that the setting of "high" increases the likelihood of the
camera being triggered unintentionally. The setting "Low" can
lead to small animals not being detected at all.
Target recording time
Select "On" if the camera should only be active during a certain time
period. In the screen menu that subsequently appears, you can then
set the start and end time for the active phase:
Stop:Start:
Hr:Min Hr:Min
Set
target recording time
♦ Press the / buttons to set the hour for the start of the active
phase.
Page 26
GB
IE
22
WK 5 A1
♦
Then switch to the next field using the button. Press the
/
buttons to set the minutes for the start of the active phase.
♦ Then switch to the next field using the
button. Press the /
buttons to set the hour for the end of the active phase.
♦ Then switch to the next field using the
button. Press the /
buttons to set the minutes for the end of the active phase.
The settings made here apply every day. The camera will not record
any images outside of the active phase.
♦ Confirm your selection with the
button. Afterwards, press the
button to close this sub-menu.
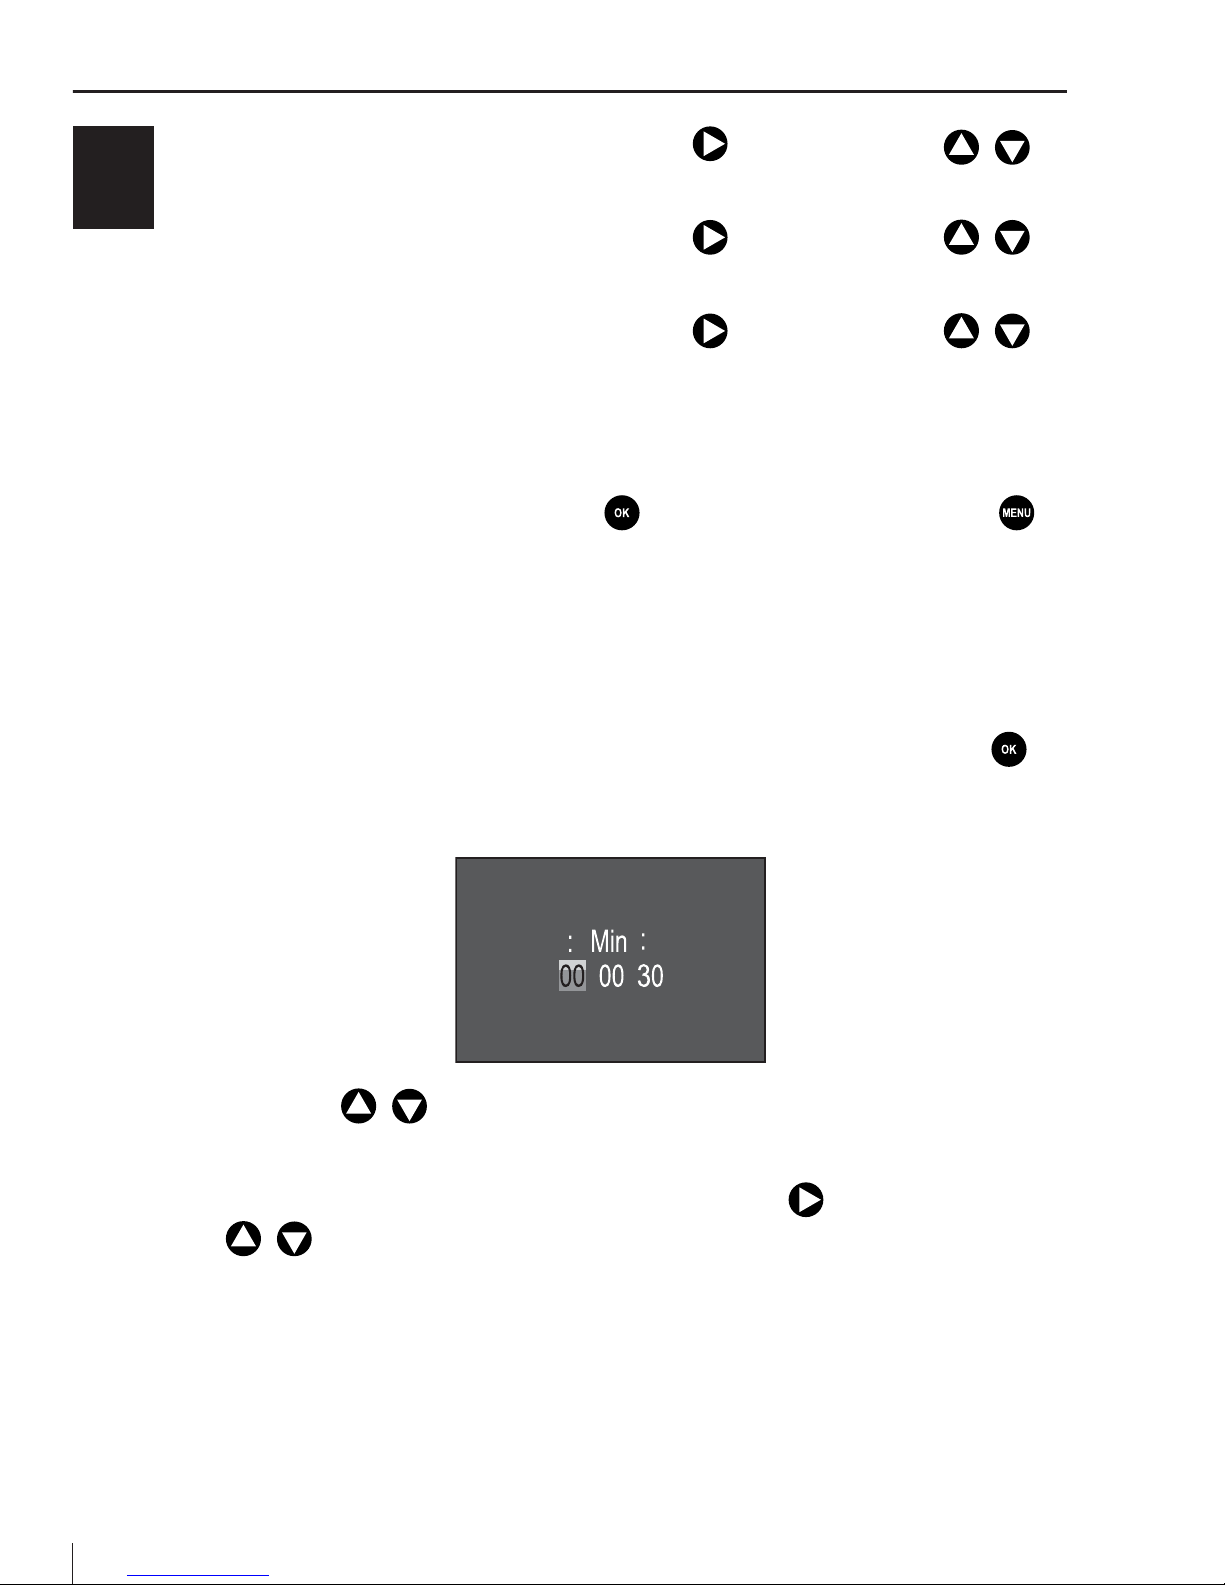
Time lapse
With this function the camera automatically takes pictures at an
adjustable interval. This is useful if you want to observe the blooming
of plants or the like, for example. After you confirm "On" with the
button, you can set the desired time interval in the menu that now
appears:
Set time lapse
Hr
Notification: Motion
sensors deactivated
Sec
♦ Press the / buttons to set the hour of the desired time
interval.
♦ Now switch to the next field, "Min", using the
button. Press the
/ buttons to set the minutes of the desired time interval.
Page 27

23
WK 5 A1
GB
IE
♦
Now switch to the next field, "Sec", using the button. Press the
/ buttons to set the seconds of the desired time interval.
♦ Confirm your selection with the
button. Afterwards, press the
button to close this sub-menu.
NOTICE
►
When time lapse is activated, the motion sensors are deactivated.
Language
Here you can set English, German, Finnish, Swedish, Danish, French,
Italian, Dutch, Spanish or Portuguese as the menu language.
Time & date
Here you can set the date and time, the time format (12/24 hr) as
well as the date format (DD/MM/YYYY, YYYY/MM/DD or MM/
DD/YYYY).
♦ Use the / buttons to switch between the values and change
the selected value with the / buttons.
♦ Confirm your settings with the
button.
Photo stamp
Here you can choose whether to save your photos with a time stamp.
You can choose whether the stamp consists of the time and date
(default setting) or just the date.
Page 28
GB
IE
24
WK 5 A1
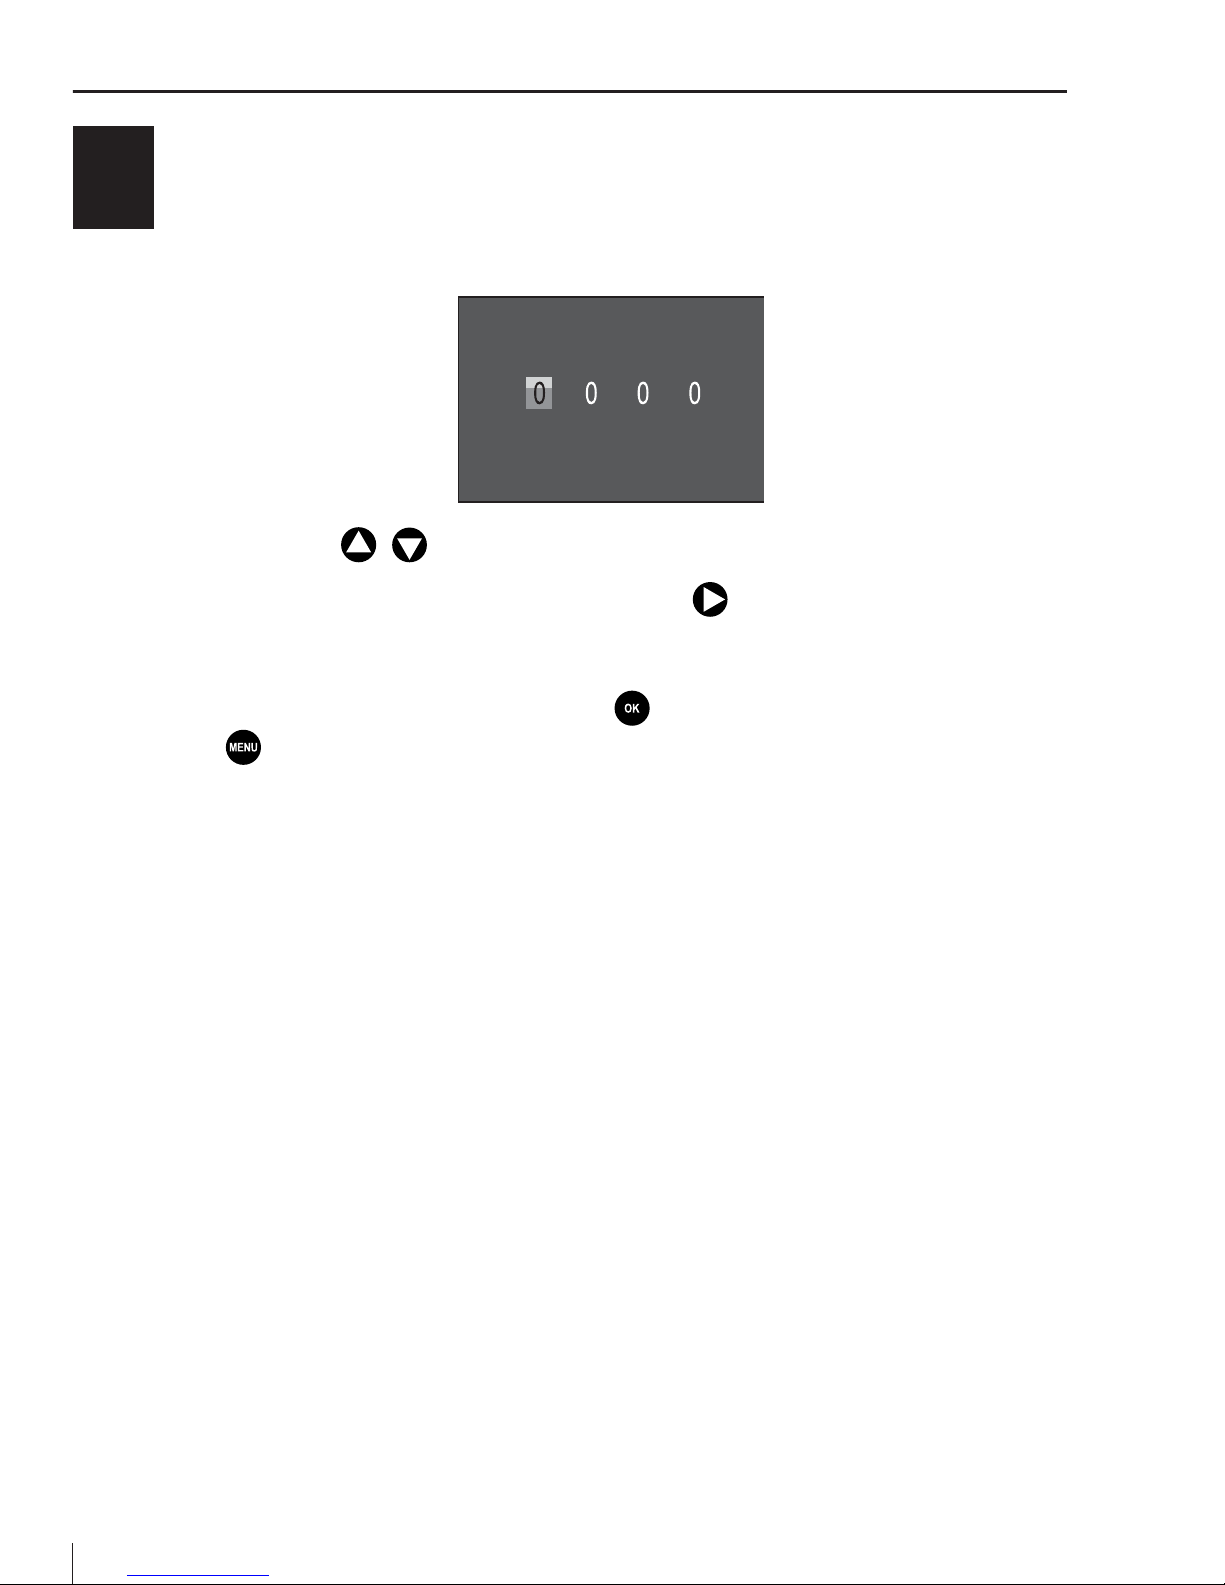
Password protection
Select "On" if you want to use a password to protect the camera
from unauthorised access. In the following screen menu, you can set
a 4-digit combination:
Set password
♦ Press the / buttons to select the first digit between 0–9.
♦ Then switch to the next field using the
button.
♦ Repeat the steps described above to set all four digits.
♦ Confirm your selection with the
button. Afterwards, press the
button to close this sub-menu.
The selected number combination must now be entered each time
the camera is switched on in TEST mode before the unit can be
operated.
If you forget the number combination, proceed as follows to unlock
the camera and to reset it to its factory default settings:
♦ Download the game camera software from the product support
page on www.kompernass.com.
♦ Unzip the file and copy the files "ISP_SD.bin" and
"Rom_CodeWK5A1.bin" onto a blank memory card.
Page 29

25
WK 5 A1
GB
IE
♦
Insert the memory card into the device while the mode selector
switch
18
is set to the OFF position.
♦ Keep the
button pressed while moving the mode selector
switch to the TEST position. Keep the button pressed down
until the display 10 shows the notification "Firmware upgrading...
Keep table".
♦ After around 25 seconds the camera switches off.
♦ Switch the camera back on by moving the mode selector switch
to the OFF position and then to the TEST position. The camera
can now be used without entering a password.
NOTICE
► This procedure will permanently delete any previously made
settings and return the device to the factory settings.
Beep sound
The device allows you to select whether or not you wish to hear an
audible signal (default setting) when you press a button.
Format memory card
Formatting the microSDHC memory card
34
will permanently delete
all data on it. Before you use a new memory card in the camera or
a card that has previously been used in another device, you should
first format the memory card.
♦ In this case, select the setting "YES" with the
button. The
formatting process starts. While the card is being formatted,
the message "Please wait" appears.
Page 30

GB
IE
26
WK 5 A1
CAUTION
► Ensure that the memory card does not contain any files that
you need!
Reset settings
If you select "Yes" and confirm with the
button, all settings you
have made (incl. any passwords you have set) will be deleted and
the factory settings restored.
Version
In this menu item, you can view the version of the camera software.
Page 31

27
WK 5 A1
GB
IE
Attaching with the securing strap
Use the supplied securing strap 30 to fasten the camera to a tree or
other object.
The following illustrations show you how to guide the securing strap
through the tree bracket
8
and the strap latch 31.
♦ Now hang the camera as desired and press the clip of the strap
latch downwards.
♦ Pull the securing strap tight until the camera is fastened firmly and
then release the clip.
♦ To remove the camera, press the clip of the strap latch down and
pull the securing strap out of the strap latch.
Using the wall bracket
You can mount the camera permanently on a wall or ceiling using
the supplied wall bracket. Before mounting the wall bracket you
should ensure that all screws are tight.
Page 32

GB
IE
28
WK 5 A1
CAUTION
► Ensure that there are no electric lines, water or heating pipes
installed at the proposed drilling location!
► The supplied anchors are only suitable for mounting on
concrete or stone. Before starting the installation, please check
your installation location carefully for its suitability for the anchors. The assembly material must be suitable for the respective
location. If in doubt, consult a professional.
♦ Mark the drill holes
25
by holding the foot of the wall bracket at
the desired mounting location and marking the hole positions.
♦ Use a drill with a 6 mm drill bit to drill the required holes and
insert the plugs and insert the anchors
26
flush with the wall.
♦ Screw the wall bracket to the wall using the supplied screws
27
.
♦ Mount the camera with the tripod thread
21
on the tripod screw 22
and screw the camera a little way on (about three turns).
♦ Turn the camera in the desired direction and lock it with the locking
washer
23
.
♦ To move the camera into its final position, undo the two joint
wing screws
24
a little, position the camera and fix the position
by tightening the two joint wing screws.
Page 33

29
WK 5 A1
GB
IE
Aligning the camera
In test mode, you can work out the optimum exposure angle and the
range of the motion sensors 6, 7.
NOTICE
► During alignment, consider whether the use of the side motion
sensors may be useful for attaining the desired observation
results. You can activate/deactivate the side motion sensors
using the above-described menu.
Align the camera as follows:
Fasten the camera to a tree or similar object at a height of 1–2 metres
and align the camera in the desired direction. Then move slowly
from one side of the target area to the other side. While doing this,
monitor the motion indicator
3
. If this lights up blue, you have been
detected by one of the activated side motion sensors 7. If it lights
up red, you have been detected by the front motion sensor 6.
Repeat this process to find the best alignment for the camera.
The motion indicator only lights up when the mode selector switch 18
is in the TEST position and one of the motion sensors has detected
movement. During normal operation, there will be no LED display in
this case.
To ensure that the camera does not make unwanted recordings of
irrelevant movements, it should not be set up in a sunny location nor
close to branches that can move in the wind. The recording angle of
the sensors is about 100° from corner to corner; and the recording
field for photos and videos is around 89°.
Page 34

GB
IE
30
WK 5 A1
Activating live mode
Live mode is the standard operating mode of the camera. In this
mode, recordings are triggered via the motion sensors 6, 7. To set
live mode, slide the operating mode selector switch
18
to the "ON"
position. After fifteen seconds the red LED of the standby indicator
2
will go off. Then the camera will start to operate independently and
will go into standby mode. As soon as any wild or other animals or
people enter the detection range of the central sensor zone, the
camera will start capturing photos and/or videos (depending on
the configuration).
If wild animals enter the detection range of the side motion sensors
7
, these will detect the motion and activate the camera. If the wild
animals continue to move in front of the front motion sensor 6, the
camera will continue taking photos/videos. When the wild animals
leave the detection range of the side motion sensors 7, the camera
switches off and goes back into standby mode.
Night exposures
During night exposures the infrared LEDs 1 on the front of the camera
provide the required light for making recordings possible. The LEDs
emit light over a wide angle. This makes it possible to make night
recordings at a distance of about 3 m to 20 m without overexposing the subject. However, reflective objects such as traffic signs can
cause overexposure if they are located within the recording range.
Please note that night exposures are made in black and white.
Page 35

31
WK 5 A1
GB
IE
Displaying recordings on the screen
♦ Slide the mode selector switch to the "TEST" position. Now you
will see the live picture from the camera.
♦ Press the
button to enable playback mode. Depending on the
set mode one of the following displays will be shown:
A: Display for video recording
B: Video resolution display
C: Write protection status of the shown file
D: Number of the current recording/total number of recordings
E: Battery level display
F: Date and time of recording
G: Start playback by pressing the button
H: Video length
I: Display for photo recording
J: Display of the photo resolution
K: Date and time of recording
♦ You can use the
/ buttons to scroll through the recordings
and view them on the display 10.
AB C
D
EFG
H
IJ
K
Page 36

GB
IE
32
WK 5 A1
♦
Press the button to zoom in on the image on the display.
♦ Press the
button to zoom out again.
♦ Press the
or button to move the image section up or down.
♦ Press the
or button to move the image section sideways.
If the picture is zoomed on the display, the current position of the
zoomed section is indicated on the top right of the display
10
.
♦ If the currently selected recording is a video, press the
button
to play back the video.
♦ Press the
button again to pause the video.
♦ Press the
button to stop video playback.
♦ If you now press the
button, the settings menu opens:
Settings
Back Select
Delete current file
Delete all files
Activate slide show
Write protect
♦ Press the / buttons to select the desired menu entry which
you can then activate with the button. Use the button to
navigate one menu level backwards.
Page 37

33
WK 5 A1
GB
IE
Delete current file
You can use this function to delete individual recordings from the
memory card. After you have called up this function, move the select
bar to "Delete" and press the
button to delete the selected recording.
Delete all files
You can use this function to delete all recordings from the memory
card. After you have called up this function, move the select bar to
"Delete" and press the
button to delete all recordings.
Activate slide show
This function can be used to automatically play back the photos
stored on the memory card. Each photo is shown for about 2 seconds.
To stop the slide show and keep the current image on the screen,
press the
button.
Write protect
This function can be used to protect individual recordings or all
saved recordings from accidental deletion.
Write-protect current file
Write-protect all files
Unlock current file
Unlock all files
♦ Select "Write-protect current file" to protect the currently selected
recording from accidental deletion.
♦ Select "Write-protect all files" to protect all saved recordings from
accidental deletion.
♦ Select "Unlock current file" to remove the write protection for the
currently selected recording.
Page 38

GB
IE
34
WK 5 A1
♦
Select "Unlock all files" to remove the write protection for all
saved recordings.
If you select a write-protected file, the write protection symbol
appears on the display 10.
Showing recordings on an external monitor
♦ Move the mode selector switch 18 to the TEST position.
♦ Attach the mini jack plug of the supplied TV cable
28
to the AV
socket 16 of the camera and the cinch plugs to the audio and
video inputs on a TV set or other device. As soon as the mini
jack plug is connected to the AV socket, the built-in screen 10 is
deactivated and the image is played back via the AV socket.
Transferring recordings to a computer
♦ Connect the mini USB connector of the supplied USB cable 29
to the mini USB port 17 on the camera.
♦ Connect the USB connector to a free USB 2.0 port of a powered-on
computer.
This now detects the device as a "Removable Disk" and automatically
installs the necessary drivers. Afterwards, you can use your file explorer
to display the contents of the microSDHC memory card
34
.
Now carry out the desired file operations.
Page 39

35
WK 5 A1
GB
IE
Cleaning
CAUTION
Damage to the device!
► To avoid irreparable damage to the device, ensure that no
moisture gets into it during cleaning.
■ Clean the surfaces of the device with a soft, dry cloth. Use a normal
commercial detergent and water to remove stubborn residue.
Ensure that no water gets into the device.
■ Always keep the seal between the camera housing and the tree
bracket clean so that no moisture gets into the device and damages it. Contamination of the seal can impair the dust and water
spray protection (IP54).
■ Always keep the base plate seal that protects the DC connection
socket
20
clean.
■ Clean the seal regularly with a small amount of Vaseline to keep
it malleable. This is the only way to ensure that the interior of the
device is adequately protected from moisture.
■ If you need to replace the seal, contact customer service (see the
Service chapter).
Page 40

GB
IE
36
WK 5 A1
Troubleshooting
This section contains important information about fault identification
and rectification. Follow the instructions to avoid hazards and damage.
WARNING
Observe the following safety information to avoid hazards and
property damage:
► Repairs to electrical devices should only be carried out by
specialists trained by the manufacturer. Improper repairs can
cause considerable risks to users and damage to the device.
Fault causes and rectification
The following table will help to identify and rectify minor malfunctions:
Malfunction Possible cause Remedy
The camera does
not work.
No batteries inserted. Insert 4x1.5V batteries
into the battery compartment
11
.
The batteries are
exhausted.
Replace the batteries. If
you are unsatisfied with
the service life of the batteries, insert an additional
4 x 1.5V batteries in the
battery compartment.
The images are
overexposed.
The camera is pointing
at reflective objects.
Change the alignment of
the camera.
Direct sunlight may be
shining onto the device,
possibly only at certain
times of the day (pay
attention to the position
of the sun).
Page 41

37
WK 5 A1
GB
IE
Malfunction Possible cause Remedy
There are no
pictures on the
memory card
even though
the settings of
the camera are
correct.
You have installed the
camera such that no
wildlife can enter the
detection range of the
motion sensors.
Change the installation
location of the camera.
The camera is
making too many
unwanted recordings.
The camera may be
being triggered by
branches moving in the
wind.
Change the installation
location and/or the alignment of the camera.
The sensitivity of the
motion sensors may be
set too high.
Reduce the sensitivity of
the motion sensors.
NOTICE
► If you are unable to resolve the problem by taking any of the
aforementioned steps, please contact the Customer Service
department.
Page 42
GB
IE
38
WK 5 A1
Storage/disposal
Storage
If you decide not to use the device for a long period, remove the batteries and store it in a clean, dry place away from direct sunlight.
Disposal of the device
Never dispose of the device in the normal
domestic waste. This product is subject to the
provisions of the European WEEE (Waste
Electrical and Electronic Equipment) Directive
2012/19/EU.
Dispose of the device via an approved waste disposal company or
your municipal waste disposal facility. Please observe applicable
regulations. Please contact your waste disposal facility if you are in
any doubt.
Disposal of (rechargeable) batteries
Used batteries may not be disposed of in domestic waste. Batteries
can contain poisons which are damaging to the environment. Therefore, dispose of the batteries/rechargeable batteries in accordance
with statutory regulations.
All consumers are statutorily obliged to dispose of batteries at a
collection site in their community/city district or with a collection
company. The purpose of this requirement is to ensure that batteries
are disposed of in an environmentally friendly manner.
Only dispose of batteries when they are fully discharged.
Page 43

39
WK 5 A1
GB
IE
Appendix
Notes on the Declaration of Conformity
This device complies with the basic requirements
and other relevant provisions of the Electromagnetic
Compatibility Directive 2004/108/EC and the RoHS
Directive 2011/65/EU.
The complete Declaration of Compliance, in its original
form, is available from the importer.
Technical data
Game camera
Operating voltage and
current consumption
6V , max. 1.5 A
4 or 8 x 1.5V AA/Mignon batteries
microSDHC card slot Supports cards from 2GB to 32GB
Screen
2.4" TFT colour LC display
(approx. 6.1 cm screen diagonal)
Standby time
Up to 6 months
(with 8 battery operation)
Photo resolutions
Res. 1: 12 megapixels
(4000 x 3000 pixels)
Res. 2: 8 megapixels
(3264 x 2448 pixels)
Res. 3: 5 megapixels
(2592 x 1944 pixels)
Res. 4: 3 megapixels
(2048 x 1536 pixels)
Res. 5: 1 megapixel
(1280 x 960 pixels)
Page 44

GB
IE
40
WK 5 A1
Recording format JPEG
Video resolution
Res. 1: 1920 x 1080 pixels
Res. 2: 1280 x 720 pixels
Res. 3: 720 x 480 pixels
Res. 4: 640 x 480 pixels
Res. 5: 320 x 240 pixels
Video recording format AVI
Video frame rate 30 fps
Detection angle approx. 100° from corner to corner
Detection range for
photos and videos
approx. 89°
Protection class IP54
Operating temperature –15 to +60°C
Storage temperature –25 to +70°C
Humidity
(no condensation)
5 to 75 %
Dimensions (W x H x D) approx. 13.7 x 9.5 x 8.1 cm
Weight approx. 360 g
Page 45

41
WK 5 A1
GB
IE
Warranty
You are provided a 3-year warranty on this device, valid from the
date of purchase.
This device has been manufactured with care and inspected meticulously prior to delivery.
Please retain your receipt as proof of purchase. In the event of a
warranty claim, please contact your Customer Service department
by telephone. This is the only way to guarantee free return of your
goods.
NOTICE
► The warranty only covers claims for material and manufacturing
defects, not for transport damage, worn parts or damage to
fragile components such as buttons or rechargeable batteries.
This product is intended solely for private use and not for commercial
purposes. The warranty shall be deemed void in cases of misuse or
improper handling, use of force and interventions which have not
been carried out by one of our authorised Service centres.
Your statutory rights are not restricted by this warranty. The warranty
period is not prolonged by warranty performances. This also applies
to replaced and repaired components.
Any damage and defects present at the time of purchase must be
reported immediately after unpacking, but no later than two days
after the date of purchase.
Repairs carried out after expiry of the warranty period shall be
subject to charge.
Page 46

GB
IE
42
WK 5 A1
Service
Service Great Britain
Tel.: 0871 5000 720 (£ 0.10/Min.)
E-Mail: kompernass@lidl.co.uk
IAN 94376
Service Ireland
Tel.: 1890 930 034
(0,08 EUR/Min., (peak))
(0,06 EUR/Min., (off peak))
E-Mail: kompernass@lidl.ie
IAN 94376
Hotline availability: Monday to Friday 08:00 - 20:00 (CET)
Importer
KOMPERNASS HANDELS GMBH
BURGSTRASSE 21
44867 BOCHUM
GERMANY
www.kompernass.com
Page 47

43
WK 5 A1
FI
Sisällysluettelo
Johdanto ...................................45
Tätä käyttöohjetta koskevia tietoja ........................45
Tekijänoikeus ........................................45
Määräystenmukainen käyttö ............................45
Tavaramerkkejä koskevat huomautukset ....................46
Varoitukset ..........................................46
Turvallisuus ................................. 47
Tärkeitä turvallisuusohjeita ..............................47
Paristojen virheellisen käsittelyn aiheuttama loukkaantumisvaara 49
Muistikorttien virheellisen käsittelyn aiheuttama loukkaantumisvaara 49
Kolmansien osapuolien oikeuksien mahdollinen loukkaaminen . . 50
Osat ....................................... 52
Käyttöönotto ................................54
Toimituslaajuus ja kuljetustarkastus ........................54
Pakkauksen hävittäminen ...............................55
Sijoituspaikkaa koskevat vaatimukset ......................55
Kameran avaaminen ja sulkeminen .......................56
Paristojen asettaminen/virtalähde ........................56
Videoliitäntä .........................................57
Tallennusvälineiden käyttäminen .........................57
Adapterikortin käyttäminen .............................59
Käyttö ja toiminta ............................ 60
Kytkeminen päälle ja pois päältä, asetusten tekeminen ........60
Kiinnityshihnan asentaminen ............................69
Seinäpidikkeen käyttäminen .............................69
Kameran suuntaaminen ................................71
Page 48

FI
44
WK 5 A1
Live-tilan aktivointi .....................................72
Yöotokset ...........................................72
Otosten näyttäminen kuvaruudulla ........................73
Tallenteiden näyttäminen ulkoisessa monitorissa .............76
Tallenteiden siirtäminen tietokoneelle ......................76
Puhdistaminen ...............................77
Vian korjaus ................................78
Vikojen syyt ja korjaus .................................78
Varastointi/Hävittäminen .....................80
Varastointi ...........................................80
Laitteen hävittäminen ..................................80
Paristojen/akkujen hävittäminen ..........................80
Liite ........................................81
Vaatimustenmukaisuusvakuutusta koskevia ohjeita ............81
Tekniset tiedot ........................................81
Takuu ..............................................83
Huolto ..............................................84
Maahantuoja ........................................84
Page 49

45
WK 5 A1
FI
Johdanto
Tätä käyttöohjetta koskevia tietoja
Onnittelut uuden laitteen hankinnasta.
Olet valinnut laadukkaan tuotteen. Käyttöohje on osa tätä tuotetta.
Se sisältää turvallisuutta, käyttöä ja hävittämistä koskevia tärkeitä
ohjeita. Tutustu ennen tuotteen käyttöä kaikkiin käyttö- ja turvallisuusohjeisiin. Käytä tuotetta vain kuvatulla tavalla ja vain mainittuihin
käyttötarkoituksiin. Kun luovutat tai myyt tuotteen edelleen, luovuta
sen mukana myös kaikki asiakirjat tämä käyttöohje mukaan lukien.
Tekijänoikeus
Tämä asiakirja on tekijänoikeudellisesti suojattu.
Kaikenlainen monistaminen tai jälkipainatus, myös osittainen, sekä
kuvien toistaminen, myös muutetussa tilassa, on sallittua ainoastaan
valmistajan kirjallisella suostumuksella.
Määräystenmukainen käyttö
Tämä on informaatioteknologinen laite ja tarkoitettu ainoastaan
digitaalikuvien ja -videoiden tallennukseen, erityisesti riistaeläinten
ja -lintujen tarkkailuun. Muu tai tämän ylittävä käyttö katsotaan määräystenvastaiseksi. Laitetta ei saa käyttää kaupallisissa tai teollisissa
tarkoituksissa. Emme vastaa mistään määräystenvastaisesta käytöstä,
asiattomista korjauksista, luvattomasti suoritetuista muutoksista tai
muiden kuin sallittujen varaosien käytöstä johtuvista vahingoista.
Vastuu on yksinomaan käyttäjällä.
Page 50

FI
46
WK 5 A1
Tavaramerkkejä koskevat huomautukset
- USB on USB Implementers Forum Inc:n rekisteröity tavaramerkki.
Kaikki muut nimet ja tuotteet voivat olla kulloisenkin omistajan tavara-
merkkejä tai rekisteröityjä tavaramerkkejä.
Varoitukset
Tässä käyttöohjeessa käytetään seuraavia varoituksia:
VAARA
Tämän vaara-asteen varoitus on merkkinä uhkaavasta vaarallisesta tilanteesta.
Jos vaarallista tilannetta ei vältetä, se voi johtaa kuolemaan tai
vakaviin vammoihin.
► Noudata tämän varoituksen ohjeita kuolemanvaaran tai vaka-
vien henkilövahinkojen välttämiseksi.
VAROITUS
Tämän vaara-asteen varoitus on merkkinä mahdollisesti vaarallisesta tilanteesta.
Jos vaarallista tilannetta ei vältetä, se voi johtaa loukkaantumisiin.
► Noudata tämän varoituksen ohjeita henkilövahinkojen välttä-
miseksi.
Page 51

47
WK 5 A1
FI
HUOMIO
Tämän vaara-asteen varoitus on merkkinä mahdollisista aineellisista vahingoista.
Jos tilannetta ei vältetä, se voi johtaa aineellisiin vahinkoihin.
► Noudata tämän varoituksen ohjeita aineellisten vahinkojen
välttämiseksi.
OHJE
► Ohje on merkkinä lisätiedoista, jotka helpottavat laitteen
käsittelyä.
Turvallisuus
Tässä luvussa annetaan tärkeitä laitteen käsittelyä koskevia turvallisuusohjeita.
Tämä laite vastaa annettuja turvallisuusmääräyksiä. Asiaton käyttö
voi johtaa henkilö- ja esinevahinkoihin.
Tärkeitä turvallisuusohjeita
Huomioi seuraavat laitteen turvallista käyttöä koskevat turvallisuusohjeet:
■ Tarkasta laite näkyvien vaurioiden varalta ennen laitteen
käyttöönottoa. Älä käytä vaurioitunutta tai maahan pudonnutta
laitetta.
■ Jos johto tai liitännät ovat vaurioituneet, anna valtuutetun ammatti-
henkilöstön tai huoltopalvelun vaihtaa ne uusiin.
■ Henkilöt, joilla ei ole riittäviä fyysisiä, psyykkisiä tai motorisia
edellytyksiä laitteen turvalliseen käyttöön, saavat käyttää laitetta
vain valvonnan alaisena tai vastuullisen henkilön opastuksessa.
Page 52

FI
48
WK 5 A1
■
Älä kiinnitä laitetta yksinään seisoviin tai hyvin korkeisiin puihin,
sillä ne ovat erityisen alttiita salamaniskuille. Jos salama iskee
puuhun, johon kamera on kiinnitetty, kamera saattaa tuhoutua.
■ Lapset saavat käyttää laitetta vain valvonnan alaisena. Lapset
eivät aina osaa tunnistaa mahdollisia vaaroja oikein.
■ Korjauta laite ainoastaan valtuutetussa alan liikkeessä tai huolto-
liikkeessä. Epäasianmukaiset korjaukset voivat aiheuttaa vaaroja
käyttäjälle. Tällöin myös laitteen takuu raukeaa. Käyttäjä ei saa
avata laitetta.
■ Laitteen korjauksen saa takuuaikana suorittaa vain valmistajan
valtuuttama huoltoliike, muussa tapauksessa takuu ei enää korvaa
seuraamusvahinkoja.
■ Laitteen vialliset osat saa vaihtaa vain alkuperäisvaraosiin.
Vain nämä osat takaavat, että turvavaatimukset täyttyvät.
■ Älä aseta laitteen päälle esineitä.
■ Älä käytä laitetta avotulen (esim. kynttilöiden) lähellä.
■ Jos havaitset epätavallisia ääniä, savua tai muita poikkeavuuksia,
poista paristot tai irrota mahdollisesti liitetty verkkolaite virtalähteestä ja ota yhteys huoltoon (katso luku ”Huolto”).
■
VAARA! Pakkausmateriaaleilla ei saa leikkiä.
Tukehtumisvaara!
Page 53

49
WK 5 A1
FI
Paristojen virheellisen käsittelyn
aiheuttama loukkaantumisvaara
■ Varmista, etteivät paristot päädy lasten käsiin. Lapset saattavat
laittaa paristot suuhunsa ja niellä ne. Jos paristo on joutunut
nieluun, hakeudu välittömästi lääkärin hoitoon.
■ Älä heitä paristoja tuleen. Älä altista paristoja korkeille lämpötiloille.
■ Räjähdysvaara! Ainoastaan paristoja, joissa on merkintä ”uudelleen
ladattava”, saa ladata uudelleen.
■ Älä avaa tai oikosulje paristoja.
■ Erilaisia paristo- ja akkutyyppejä ei saa käyttää sekaisin. Tyhjät
paristot on poistettava lisääntyneen vuotovaaran vuoksi. Paristot
on poistettava kamerasta myös, kun laitetta ei käytetä.
■ Paristosta valuva happo saattaa ärsyttää ihoa. Jos happoa joutuu
iholle, huuhtele kohta runsaalla vedellä. Jos nestettä on päässyt
silmiin, huuhtele silmät runsaalla vedellä, mutta älä hiero.
Hakeudu välittömästi lääkärin hoitoon.
■ Paristojen asettamis- ja poisto-ohjeet löytyvät luvusta ”Virtalähde”.
Muistikorttien virheellisen käsittelyn
aiheuttama loukkaantumisvaara
■ Lapsia on valvottava ja on varmistettava, etteivät he pääse
leikkimään muistikortilla. Jos muistikortti on joutunut vahingossa
nieluun, on hakeuduttava välittömästi lääkärin hoitoon.
Page 54

FI
50
WK 5 A1
Kolmansien osapuolien oikeuksien mahdollinen
loukkaaminen
Riistakameran käytössä on huomattava seuraavaa:
Tekijänoikeudet
Yleisesti jokaisella henkilöllä on oikeus omiin kuviinsa. Tekijänoikeuslainsäädännön mukaisesti kuvia saa julkaista ilman niissä olevien
henkilöiden suostumusta ainoastaan silloin, kun henkilöt eivät ole
kuvien pääasiallinen kuvauskohde, vaan esiintyvät sattumalta
kuvatussa maisemassa tai muussa paikassa. Tämä on ratkaistava
kulloisessakin tapauksessa erikseen. Riistakamerasta tulisi oikeusturvasyistä ilmoittaa kaikissa sellaisissa tapauksissa, joissa henkilöiden
tunnistaminen otoksista saattaa olla mahdollista (katso myös kohta
”Ilmoitusvelvollisuus”).
Yksityisyyden suoja
Kuvien tallentaminen ei saa loukata toisten yksityisyyttä. Älä suuntaa
kameraa naapuriasunnon puutarhaan tai ulko-ovelle, vaikka näihin
paikkoihin olisikin näkyvyys omasta asunnostasi tai julkisista paikoista
käsin. Se ei oikeuta näiden näkymien julkaisemiseen.
Henkilön tunnistettavuus
Henkilö voidaan tunnistaa, jos voidaan todeta, että tietty henkilö on
ollut tiettyyn aikaan tietyssä paikassa. Tunnistus voi tällöin tapahtua
myös henkilöön liittyvän tunnuksen, esim. auton rekisterinumeron,
perusteella. Henkilöiden tunnistettavuuden mahdollisuutta tulee
ehdottomasti välttää.
Page 55

51
WK 5 A1
FI
Valvontakamerat työpaikalla
Valvonnasta työpaikalla on annettu Saksassa erityisen tiukat määräykset. Työnantajien tulisi pidättäytyä valvontakameroiden käytöstä
työpaikalla, jos oikeuksien loukkaamisen mahdollisuutta ei voida
täysin sulkea pois.
Valvontakamerat maantieliikenteessä
Maantieliikenteeseen suunnattujen valvontakameroiden kohdalla on
suositeltavaa valita kameran sijaintipaikka ja kuvakulma siten, ettei
tienkäyttäjien tunnistaminen ole kuvissa näkyvien autojen rekisteritunnusten perusteella mahdollista. Myös ajoneuvojen mainostekstit
saattavat johtaa tienkäyttäjien tunnistukseen.
Ilmoitusvelvollisuus
Jos henkilöiden tunnistamista ei voida sulkea pois, valvontakamerasta
on ilmoitettava selkeästi havaittavalla tavalla kaikilla kameralle johtavilla tuloreiteillä. Ohikulkijoille on tiedotettava, että kuvausalueelle
astuessaan he antavat luvan kuvien ottamiseen. Mikäli he eivät halua
tulla kuvatuiksi, heidän on pysyttävä poissa kuvausalueelta. Tällöin
on huomioitava luvan vapaaehtoisuus. Jos kamera on paikassa, jonka ohi henkilöiden on kuljettava päästäkseen päämääräänsä (esim.
nähtävyyden sisääntulossa), ei voimassa olevaa lupaa ole, koska
vapaaehtoisuus ei toteudu.
Huomioi kolmansien osapuolten oikeuksien loukkauskysymysten
yhteydessä aina kunkin käyttömaan lakisääteiset määräykset.
Page 56

FI
52
WK 5 A1
Osat
(Kuvat, katso kääntösivut)
1
Infrapuna-LEDit
2
Valmiusnäyttö, punainen LED-valo
3
Liikenäyttö, vihreä ja sininen LED-valo
4
Kameran objektiivi
5
Lukkosilmukka
6
Eteenpäin osoittava liikkeentunnistin
7
Sivuille osoittavat liikkeentunnistimet
8
Kiinnityslaite kameran puuhun kiinnittämistä varten
9
Varmistusruuvi
10
Näyttö
11
Paristokotelo
12
Kiinnityshakaset
13
Kaiuttimet
14
Käyttöpainikkeet
15
Muistikortin korttipaikka (microSD)
16
AV-liitäntä
17
Mini-USB-liitäntä
18
Käyttötilan valintakytkin (OFF - TEST - ON)
19
Mikrofoni
20
DC-liitäntä (verkkoadapterille; ei sisälly toimitukseen)
21
Ruuvikierre statiivin kiinnitystä varten
22
Statiivin ruuvi
23
Vastalaikka
24
Siipiruuvit
Page 57

53
WK 5 A1
FI
25
Porausreiät
26
Vaarnatappi
27
Ruuvit
28
TV-kaapeli (minijakki cinch-liitäntään; audio/video)
29
USB 2.0 -liitäntäkaapeli, jossa mini-USB-liitin
30
Kiinnityshihna
31
Hihnan solki
32
Säilytyslaatikko
33
Adapterikortti (microSD SD-korttipaikkaan)
34
microSDHC-muistikortti (4 Gt)
35
8x1,5V:n AA/Mignon/LR6 -paristo
36
Käyttöohje
Page 58

FI
54
WK 5 A1
Käyttöönotto
Toimituslaajuus ja kuljetustarkastus
Tarkasta toimituslaajuus (katso kääntösivut).
Toimitukseen sisältyvät seuraavat osat:
▯ Riistakamera WK5A1
▯ Seinäpidike
▯ 3 x vaarnatappi
26
▯ 3 x ruuvi
27
▯ TV-kaapeli (minijakki cinch-liitäntään; audio/video)
28
▯ USB 2.0 -liitäntäjohto ja mini-USB-liitin
29
▯ Kiinnityshihna (2,5cm leveä, n. 190cm pitkä)
30
▯ Säilytyslaatikko
32
▯ Adapterikortti (microSD SD-korttipaikkaan)
33
▯ microSDHC-muistikortti (4 GB)
34
▯ 8x1,5V:n paristo, tyyppiä AA/Mignon/LR6
35
▯ Käyttöohje
36
OHJE
► Tarkista, ettei toimituksesta puutu osia eikä tuotteessa ole
näkyviä vaurioita.
► Jos havaitset toimituksessa puutteita tai vaurioita, jotka johtuvat
puutteellisesta pakkauksesta tai jotka ovat syntyneet kuljetuksen
aikana, soita huollon palvelunumeroon (ks. luku Huolto).
♦ Ota kaikki laitteen osat ja käyttöohje pakkauksesta.
♦ Poista laitteesta kaikki pakkausmateriaalit ja suojakelmut.
Page 59

55
WK 5 A1
FI
Pakkauksen hävittäminen
Pakkaus suojaa laitetta kuljetusvaurioilta. Pakkausmateriaalit on valittu
ympäristöystävälliset ja jätehuoltotekniset näkökulmat huomioiden, ja
ne voidaan kierrättää.
Pakkauksen palauttaminen materiaalikiertoon säästää
raaka-aineita ja vähentää jätteiden syntymistä. Hävitä
tarpeettomat pakkausmateriaalit paikallisten voimassa
olevien määräysten mukaisesti.
OHJE
► Säilytä alkuperäispakkaus mahdollisuuksien mukaan laitteen
takuuajan, jotta voit takuutapauksessa pakata tuotteen asian-
mukaisesti.
Sijoituspaikkaa koskevat vaatimukset
Laitteen suojaluokka on IP54. Tämä tarkoittaa, että kamera on pölyja roiskevesisuojattu, ja että sitä voidaan käyttää säästä riippumatta.
Täysi pöly- ja roiskevesisuojaus on taattu kuitenkin vain silloin, kun
kamera on suljettu oikein ja tiivisteet ovat ehjiä ja puhtaita.
Huomaa, että pöly- ja roiskesuojaus pätee vain rajoitetusti, kun
laitetta käytetään ulkoisen verkkolaitteen kanssa.
Page 60

FI
56
WK 5 A1
Kameran avaaminen ja sulkeminen
Käyttöpainikkeet, liitännät ja paristokotelo ovat kameran sisällä.
♦ Avaa kamera avaamalla molemmat sivuilla olevat kiinnitysha-
kaset
12
.
♦ Kun haluat sulkea kameran uudelleen, kiinnitä kiinnityshakasten
metallinen sanka pidikkeisiin ja paina muoviläppä alas.
Kiinnityshakasten välissä on lukkosilmukka
5
, josta kamera voidaan
lukita riippulukon avulla.
Paristojen asettaminen/virtalähde
♦ Avaa kamera ja aseta paristot 35 laitteeseen.
♦ Paina nyt paristokotelon yläosassa olevaa lukkoa hieman alaspäin
ja nosta paristokotelon kansi.
♦ Aseta 4 tai 8 AA/Mignon-tyypin 1,5V:n paristoa paristokoteloon
11
. Huomioi ilmoitettu napaisuus.
OHJE
►
Jos käytät neljää paristoa, voit asettaa ne kaikki joko paristoko-
telon ylä- tai alaosaan. Muita mahdollisuuksia ei ole.
♦ Sulje sen jälkeen paristokotelo. Varmista, että paristokotelon kansi
lukittuu kuuluvasti.
♦ Jos käytät laitetta verkkoadapterin (ei sisälly toimitukseen) kanssa,
avaa kumitiiviste kameran alaosassa ja työnnä verkkoadapterin
pistoke DC-liitäntään 20. Verkkoadapterin on tuotettava 6V:n
jännitettä ja vähintään 1,5 A:n virtaa. Käytä DC-pistoketta, jonka
sisänavassa on plusnapa ( ).
Page 61

57
WK 5 A1
FI
Käyttö verkkoadapterin kanssa on mahdollista myös paristojen
ollessa paikoillaan. Jos jokin jännitelähteistä katkeaa, käyttöä
jatketaan toisen jännitelähteen avulla.
Videoliitäntä
OHJE
►
Kamera voi siirtää videokuvan ja äänen ulkoiseen monitoriin
tai television videotuloon. Huomioi tällöin myös kulloisenkin
toistolaitteen ohje.
♦ Liitä soveltuva monitori mukana tulevalla TV-kaapelilla
28
AV-liitäntään
16
.
Tallennusvälineiden käyttäminen
OHJEITA
► Koska kamerassa ei ole sisäänrakennettua muistia, se toimii
ainoastaan, kun microSDHC-muistikortti
34
on paikoillaan.
► Laite tukee kapasiteetiltaan korkeintaan 32 Gt:n microSDHC-
muistikortteja.
Page 62

FI
58
WK 5 A1
HUOMIO
► Suojaa muistikorttia kosteudelta, tärinältä, pölyltä, kuumuudelta
ja suoralta auringonsäteilyltä toimintahäiriöiden välttämiseksi.
► Kun työnnät muistikortin korttiaukkoon, huomaa ilmoitettu
sisääntyöntöasento. Älä koskaan työnnä muistikorttia korttiauk-
koon väkivalloin. Älä taita tai käännä muistikorttia sivuttain.
► Odota kuljetuksen jälkeen käyttöönottoa niin kauan, kunnes
muistikortti on lämmennyt ympäristön lämpötilaan. Jos läm-
pötila- tai kosteusolosuhteet vaihtelevat paljon, kondensaatio
saattaa aiheuttaa kosteuden muodostumista, mikä puolestaan
saattaa aiheuttaa oikosulun. Säilytä muistikortti säilytyslaatikos-
sa
32
.
♦ Poista microSDHC-muistikortti
34
laitteen muistikorttiaukosta 15
painamalla kevyesti muistikortin ulos työntyvää reunaa niin, että
sen lukitus vapautuu. Poista sitten kortti aukosta.
♦ Työnnä microSDHC-muistikortti laitteen muistikorttiaukkoon niin,
että se lukittuu paikoilleen. Tällöin muistikortin kontaktipintojen
on osoitettava kameran etuosan suuntaan.
Page 63

59
WK 5 A1
FI
Adapterikortin käyttäminen
MicroSDHC-muistikortti 34 toimitetaan käytännöllisen adapterikortin
(microSD-kortista SD-kortiksi) 33 kanssa, jotta microSDHC-muistikortin
käyttäminen kaikissa SD-korttipaikan omaavissa laitteissa ja sille
tallennettujen tietojen hyödyntäminen on mahdollista.
♦ Aseta microSD-muistikortti kuvassa esitetyllä tavalla adapterikorttiin.
OHJE
► Adapterikortissa on kirjoitussuojan takaava lukitus. Jos haluat
kirjoitussuojata microSDHC-muistikortin, työnnä sivuttainen
kirjoitussuojakytkin ”LOCK”-asemaan (ks. kuva).
► Kirjoitussuojakytkin suojaa microSDHC-muistikorttia vain silloin,
kun se on asetettu adapterikorttiin. Kun poistat microSDHCmuistikortin adapterikortista, kirjoitussuoja häviää.
Page 64

FI
60
WK 5 A1
Käyttö ja toiminta
Tässä luvussa annetaan tärkeitä ohjeita laitteen käytöstä ja toiminnasta.
Kytkeminen päälle ja pois päältä, asetusten
tekeminen
Kun laite on liitetty virtalähteeseen, siirrä käyttövalintakytkin 18 asentoon ”TEST”, jotta voit tehdä seuraavilla sivuilla kuvatut asetukset
käyttöpainikkeiden
14
avulla:
♦ Vaihda videotilasta valokuvatilaan painamalla -painiketta.
♦ Vaihda valokuvatilasta videotilaan painamalla
-painiketta.
♦ Käynnistä tallennus (valokuva tai video) manuaalisesti paina-
malla
-painiketta. Lopeta tallennus painamalla -painiketta
uudelleen.
♦ Avaa Asetukset-valikko painamalla
-painiketta.
Asetukset
Tila
Valokuvan tarkkuus
Sarjaotos
Videon tarkkuus
Videon pituus
Äänen nauhoitus
Takaisin
Valinta
Page 65

61
WK 5 A1
FI
♦
Valitse haluamasi valikkokohta painamalla
/
-painiketta ja
aktivoi valinta -painikkeella. Asetusten vaihtaminen on vahvistettava aina -painikkeella. -painikkeella voit siirtyä kulloinkin
yhden valikkotason taaksepäin.
Tila
Valitse, haluatko liikettä tunnistettaessa ottaa valokuvia vai tallentaa
videota. Tilassa ”Valokuva & Video” kamera ottaa ensiksi valokuvan
ja tallentaa sen jälkeen videota.
Valokuvan tarkkuus
Valitse valokuvan koko: 1MP, 3MP, 5MP (esiasetus), 8MP tai
12MP. Mitä suurempi tiedosto, sitä pienempiä yksityiskohtia siitä
voidaan tunnistaa. Otosten mahdollinen lukumäärä on kuitenkin suurella tiedostokoolla vähäinen, koska muistikortti täyttyy nopeammin.
Sarjaotos
Valitse Valokuva-tilassa peräkkäin otettavien valokuvien määrä.
Yksittäisotoksen (1 valokuva) lisäksi voit valita ”2 valokuvaa sarjassa”
tai ”3 valokuvaa sarjassa”.
Videon tarkkuus
Valitse kuvapisteiden lukumäärä: 1920×1080P, 1280×720P,
720×480P, 640×480P tai 320×240P.
Mitä suurempi tarkkuus, sitä nopeammin muistikortin kapasiteettiraja
täyttyy.
Page 66

FI
62
WK 5 A1
Videon pituus
Valitse painikkeilla
/ video-tilassa tallennettavan otoksen
pituudeksi joko 3–59 sekuntia tai 1–10 minuuttia. Mitä pidempi
tallennusaika valitaan, sitä lyhyempi on käyttöaika. Tallennuksen
oletuspituus on 5 sekuntia.
Äänen nauhoitus
Jos kameran halutaan tallentavan kuvan lisäksi myös ääntä, valitse
tässä ”Päällä”.
Nauhoitusväli
Valitse painikkeilla
/ se ajanjakso, jonka kamera vähintään
pitää taukoa, ennen kuin se reagoi pääanturin seuraaviin laukaisuihin
ensimmäisen tallennuksen jälkeen. Valitun aikavälin aikana kamera
ei ota valokuvia eikä tallenna videokuvaa. Näin estetään yhden ja
saman tapahtuman liian pitkä kuvausaika ja muistikortin täyttyminen.
Voit valita 5–59 sekuntin tai 1–60 minuutin välillä.
Sivuttainen liikeilmaisin
Voit kytkeä molemmat sivuille osoittavat liikkeentunnistimet
7
päälle
tai pois päältä. Jos esim. liikkuvat oksat häiritsevät sivuille osoittavia
liikkeentunnistimia, valitse ”Pois”, vahvista -painikkeella ja kytke
näin sivuille osoittavat liikkeentunnistimet pois päältä. Muuten liikkuvat
oksat saattavat laukaista otoksen. Esiasetuksena on ”Päällä”.
Page 67

63
WK 5 A1
FI
Liikeilmaisimen herkkyys
Säädä eteenpäin osoittavan liikkeentunnistimen herkkyys 6. Valitse
”korkea” sisätiloihin ja ympäristöihin, joissa tuulessa heiluvien oksien
kaltaisia häiriötekijöitä on vähän, ”normaali” ulkotiloihin ja ympäristöihin, joissa häiriötekijöiden määrä on normaali, ja ”alhainen”
ulkoalueille ja ympäristöihin, joissa häiriötekijöitä on runsaasti. Myös
lämpötila vaikuttaa herkkyyteen. Asetus ”korkea” soveltuu lämpimään
ympäristöön, kun taas kylmissä ympäristöissä on suositeltavaa valita
asetukseksi ”alhainen”.
OHJE
► Eteenpäin osoittavan liikkeentunnistimen
6
herkkyydeksi on
asetettu valmiiksi ”normaali”. Tämä esiasetus sopii useimpiin
käyttöihin.
► Huomaa, että kun asetuksena on ”korkea” vikalaukaisujen
todennäköisyys on normaalia suurempi. Kun asetuksena on
”alhainen”, pieniä eläimiä ei mahdollisesti tallenneta.
Kohteen nauhoitusaika
Valitse ”Päällä”, kun haluat kameran olevan aktiivinen vain tietyn
aikaa. Seuraavaksi näyttöön tulevassa näyttövalikossa voit asettaa
aktiivisen vaiheen aloitus- ja lopetusajan:
t: mint: min
Aseta kohteen
nauhoitusaika
Lopetus:
♦ Aseta aktiivisen vaiheen aloitusajan tunnit painikkeilla / .
Page 68

FI
64
WK 5 A1
♦
Siirry -painikkeella seuraavaan kenttään. Aseta aktiivisen
vaiheen aloitusajan minuutit painikkeilla
/
.
♦ Siirry
-painikkeella seuraavaan kenttään. Aseta aktiivisen
vaiheen lopetusajan tunnit painikkeilla / .
♦ Siirry
-painikkeella seuraavaan kenttään. Aseta aktiivisen
vaiheen lopetusajan minuutit painikkeilla
/ .
Tässä suoritetut asetukset ovat voimassa joka päivä. Aktiivisen vaiheen
ulkopuolella kamera ei tallenna mitään.
♦ Vahvista syötetty tieto
-painikkeella. Sulje alavalikko painamalla
sen jälkeen -painiketta.
Intervallikuvaus
Tällä toiminnolla kamera ottaa automaattisesti kuvia asetetuin väliajoin.
Tämä on avuksi, jos esimerkiksi haluat tarkkailla kasvien kukkaan
puhkeamista tai muuta vastaavaa tapahtumaa. Kun olet vahvistanut
asetuksen ”Päällä”
-painikkeella, voit sen jälkeen näyttöön tulevassa
näyttövalikossa syöttää halutun tallennusvälin:
Aseta nauhoitusväli
t
Huomio: Liiketunnistin on
kytketty pois päältä
s.
min
♦ Aseta halutun tallennusvälin tunnit painikkeilla / .
♦ Siirry
-painikkeella seuraavaan ”Min”-kenttään. Aseta halutun
tallennusvälin minuutit painikkeilla / .
Page 69

65
WK 5 A1
FI
♦
Siirry -painikkeella seuraavaan ”Sek”-kenttään. Aseta halutun
tallennusvälin sekunnit painikkeilla / .
♦ Vahvista syötetty tieto
-painikkeella. Sulje alavalikko painamalla
sen jälkeen -painiketta.
OHJE
►
Kun intervallikuvaus on aktivoitu, liikkeentunnistimet eivät ole
päällä.
Kieli
Tässä voit valita valikkokieleksi englannin, saksan, suomen, ruotsin,
tanskan, ranskan, italian, hollannin, espanjan tai portugalin.
Aika & päivämäärä
Tässä voit asettaa kellonajan ja päivämäärän, aikaformaatin (12/24 t)
sekä päivämääräformaatin (vvvv/kk/pp, pp/kk/vvvv tai kk/pp/vvvv).
♦ Vaihda painikkeilla / arvojen välillä ja muuta valittua arvoa
painikkeilla / .
♦ Vahvista asetus
-painikkeella.
Kuvaleima
Tässä voit valita, haluatko tallentaa valokuvat aikaleimalla vai ilman.
Voit valita, koostuuko leima ajasta ja päivämäärästä (esiasetus) vai
käytetäänkö pelkkää päivämäärää.
Page 70

FI
66
WK 5 A1
Salasanasuoja
Valitse ”Päällä”, jos haluat suojata kameraa asiattomalta käytöltä
salasanalla. Seuraavaksi näyttöön tulevassa näyttövalikossa voit
asettaa nelinumeroisen numeroyhdistelmän:
Luo salasana
♦ Paina painikkeita / valitaksesi ensimmäisen luvun väliltä 0–9.
♦ Siirry
-painikkeella seuraavaan kenttään.
♦ Toista edellä kuvatut vaiheet kaikkien neljän numeron asettami-
seksi.
♦ Vahvista syötetty numeroyhdistelmä
-painikkeella.
Sulje alavalikko painamalla sen jälkeen -painiketta.
Asetettua numeroyhdistelmää kysytään tästä eteenpäin jokaisella
TEST-tilassa tapahtuvalla käynnistyskerralla, ennen kuin kameraa
voidaan käyttää.
Jos olet unohtanut numeroyhdistelmän, avaa kameran lukitus palauttamalla kamera toimitustilaan seuraavasti:
♦ Voit ladata riistakameran ohjelmiston verkkosivuston
www.kompernass.com tuotetukiosiosta.
♦ Pura tiedosto ja kopioi tiedostot ”ISP_SD.bin” ja
”Rom_CodeWK5A1.bin” tyhjälle muistikortille.
Page 71

67
WK 5 A1
FI
♦
Työnnä muistikortti laitteeseen, kun käyttövalintakytkin 18 on
OFF-asennossa.
♦ Pidä
-painiketta painettuna samalla, kun työnnät käyttövalintakytkimen TEST-asemaan. Pidä -painiketta niin kauan painettuna, kunnes näytölle 10 tulee ilmoitus ”Firmware upgrading...
Keep Table”.
♦ Noin 25 sekunnin jälkeen kamera sammuu.
♦ Kytke kamera uudelleen päälle työntämällä käyttövalintakytkin
ensin OFF-asentoon ja sen jälkeen TEST-asentoon. Kameraa
voidaan nyt jälleen käyttää salasanaa syöttämättä.
OHJE
► Kaikki aikaisemmin tehdyt asetukset palautetaan tämän menet-
telyn kautta toimitustilaan.
Akustinen signaali
Voit valita, haluatko käyttää painikeääniä (esiasetus) vai et.
Alusta muistikortti
Kun microSDHC-muistikortti
34
alustetaan, kaikki sille tallennetut
tiedot poistetaan lopullisesti. Ennen kuin käytät kamerassa uutta tai
aikaisemmin jossakin muussa laitteessa käytettyä muistikorttia, sinun
on alustettava se.
♦ Valitse tässä tapauksessa asetus ”Kyllä”
-painikkeella.
Alustus alkaa. Alustuksen aikana näytössä näkyy ”Odota”.
Page 72

FI
68
WK 5 A1
HUOMIO
► Varmista, ettei muistikortilla ole mitään sellaisia tietoja, joita
vielä tarvitaan!
Palauta asetukset
Kun valitset tässä valikkokohdassa ”Kyllä” ja vahvistat sen
-painikkeella, kaikki suorittamasi kamera-asetukset sekä mahdollisesti asetettu
salasana poistetaan ja tehdasasetus palautetaan.
Versio
Tässä valikkokohdassa saat näkyviin kameraohjelmiston version.
Page 73

69
WK 5 A1
FI
Kiinnityshihnan asentaminen
Käytä mukana tulevaa kiinnityshihnaa 30 riistakameran kiinnittämiseen puuhun tai muuhun kohteeseen.
Seuraavissa kuvissa on esitetty, miten kiinnityshihna on vietävä kiinnityslaitteen
8
ja hihnan soljen 31 läpi.
♦ Ripusta nyt kamera haluamallasi tavalla ja paina hihnan soljen
läppää alas.
♦ Kiristä kiinnityshihnaa, kunnes kamera on tukevasti paikoillaan ja
irrota sitten ote läpästä.
♦ Irrota kamera painamalla hihnan soljen läppää alas ja vedä
kiinnityshihna ulos soljesta.
Seinäpidikkeen käyttäminen
Toimitukseen kuuluvalla seinäpidikkeellä voit asentaa kameran
kiinteästi seinään tai kattoon. Ennen kuin asennat seinäpidikkeen,
varmista, että kaikki ruuvit on kiristetty.
Page 74

FI
70
WK 5 A1
HUOMIO
► Varmista, ettei porattavan kohdan takana kulje sähkö- tai
vesijohtoja eikä lämpöputkia!
► Mukana tulevat vaarnatapit soveltuvat ainoastaan betoniin
tai kiveen kiinnitystä varten. Varmista ennen asennusta, että
vaarnatapit soveltuvat kyseiseen asennuspaikkaan. Asentamisessa on käytettävä kulloiseenkin asennuspaikkaan soveltuvia
asennustarvikkeita. Pyydä epävarmoissa tapauksissa ammattilaisten apua.
♦ Merkitse porausreiät
25
pitämällä seinäpidikkeen taustaa haluttua
asennuspaikkaa vasten ja piirtämällä porausreiät.
♦ Poraa porakoneella ja 6 mm:n poratyökalulla reiät ja työnnä
vaarnatapit
26
reikiin.
♦ Ruuvaa seinäpidike toimituksessa mukana tulevilla ruuveilla
27
seinään.
♦ Aseta kamera nyt statiiville asettamalla ruuvikierre
21
statiiviruuville
22
ja ruuvaamalla kameraa hieman (n. 3 kierrosta) kiinni.
♦ Pyöritä kamera haluttuun suuntaan ja lukitse se vastalaatalla
23
.
♦ Jotta voisit asemoida kameran lopulliseen asentoonsa, avaa
molempia siipiruuveja
24
hieman, suuntaa kamera ja lukitse
asema kiristämällä molemmat siipiruuvit.
Page 75

71
WK 5 A1
FI
Kameran suuntaaminen
Testitilassa voit määrittää liikkeentunnistinten 6, 7 ihanteellisen
toimintakulman ja tunnistusetäisyyden.
OHJE
► Kun suuntaat kameraa, mieti, onko sivuille osoittavien liikkeen-
tunnisten käyttö järkevää halutun tarkkailutuloksen saavuttamiseksi. Voit kytkeä sivuille osoittavat liikkeentunnistimet edellä
kuvatussa valikossa päälle tai pois päältä.
Suuntaa kamera seuraavasti:
Kiinnitä kamera 1–2 metrin korkeuteen puuhun tms. ja kohdista
kamera haluttuun suuntaan. Siirry nyt hitaasti kohdennetun alueen
yhdeltä puolelta toiselle puolelle. Tarkkaile tällöin liikenäyttöä
3
.
Jos se palaa sinisenä, toinen mahdollisesti päälle kytketyistä sivuille
osoittavista liikkeentunnistimista 7 on havainnut sinut. Jos se palaa
vihreänä, eteenpäin osoittava liikkeentunnistin 6 on havainnut sinut.
Näin voit selvittää parhaan asennon kameran suuntaamiseksi.
Vain kun käyttövalintakytkin 18 on TEST-asennossa, liikenäyttö syttyy
heti, kun yksi liikkeentunnistimista on havainnut liikettä. Normaalikäytössä LED-valo ei tällaisessa tapauksessa syty.
Jotta laite ei ottaisi tarpeettomia kuvia epäolennaisten liikkeiden
vuoksi, älä asenna kameraa aurinkoisiin paikkoihin äläkä tuulessa
mahdollisesti liikkuvien oksien alueelle. Antureiden tunnistuskulma on
n. 100° kulmasta kulmaan, valokuvien ja videon tallennusalue sen
sijaan n. 89°.
Page 76

FI
72
WK 5 A1
Live-tilan aktivointi
Laitteen normaali käyttö tapahtuu niin kutsutussa Live-tilassa.
Tässä tilassa liikkeentunnistimet 6, 7 laukaisevat otokset. Live-tila
asetetaan työntämällä käyttövalintakytkin
18
asentoon ”ON”.
Valmiusnäytön
2
punainen LED-valo sammuu 15 sekunnin kuluttua,
minkä jälkeen kamera aloittaa itsenäisen työskentelyn ja siirtyy
valmiustilaan. Heti kun riistaeläimet astuvat eteenpäin osoittavan
anturin välittömälle tunnistusalueelle, kamera aloittaa valokuvien ja/
tai videoiden kuvaamisen asetuksista riippuen.
Jos riistaeläimet tulevat sivulta sivuille osoittavien liikkeentunnistinten
7
tunnistusalueelle, nämä havaitsevat liikkeen ja aktivoivat kameran.
Kamera ottaa valokuvia ja/tai tallentaa videota niin kauan, kun
riistaeläimet liikkuvat eteenpäin osoittavan liikkeentunnistimen 6
tunnistusalueella. Kun riistaeläimet siirtyvät pois sivuille osoittavien
liikkeentunnistinten 7 tunnistusalueelta, kamera sammuu ja siirtyy
valmiustilaan.
Yöotokset
Yöotoksissa riistakameran etupuolella sijaitsevat infrapuna-LEDit 1
tuottavat tarvittavan valon kuvaamisen mahdollistamiseksi. LEDit
valaisevat suuren alueen. Tämä mahdollistaa yökuvauksen n. 3–20
m:n etäisyydellä kohdetta ylivalottamatta. Heijastavat esineet (esim.
liikennemerkit) voivat kuitenkin myös tämän toimintasäteen sisällä
aiheuttaa ylivalottumista. Huomaa, että yöotokset ovat mustavalkoisia.
Page 77

73
WK 5 A1
FI
Otosten näyttäminen kuvaruudulla
♦ Työnnä käyttövalintakytkin ”TEST”-asentoon. Näet nyt kameran
Live-kuvan.
♦ Jos haluat aktivoida toistotilan, paina
-painiketta. Valitusta tilasta
riippuen näytölle ilmestyy jompi kumpi seuraavista näytöistä:
A: Videotallennuksen näyttö
B: Videotarkkuuden näyttö
C: Näkyvissä olevan tiedoston kirjoitussuojauksen näyttö
D: Senhetkisen otoksen numero / Otosten kokonaislukumäärä
E: Paristotilan näyttö
F: Tallennuksen päivämäärä ja kellonaika
G: Toiston käynnistäminen -painikkeella
H: Videon pituuden näyttö
I: Valokuvaotoksen näyttö
J: Valokuvan tarkkuuden näyttö
K: Tallennuksen kellonaika ja näyttö
♦ Painikkeilla
/ voit selata ja tarkastella otoksia näytöllä 10.
AB C
D
EFG
H
IJ
K
Page 78

FI
74
WK 5 A1
♦
Painikkeella voit suurentaa kuvaa valokuvanäytössä.
♦ Kuvan pienentäminen on mahdollista painikkeella
.
♦ Painikkeilla
ja voit liikuttaa kuvan rajausta ylös- tai alaspäin.
♦ Kuvan rajauksen liikuttaminen sivusuunnassa on mahdollista
painikkeilla
ja . Jos kuva esitetään suurennettuna, kuvan
suurennuskerroin näytetään näytön
10
oikeassa yläkulmassa.
♦ Jos parhaillaan valittu otos on video, toista video painamalla
painiketta
.
♦ Painamalla
-painiketta uudelleen voit keskeyttää videon.
♦ Pysäytä video painamalla
-painiketta.
♦ Kun nyt painat
-painiketta, Asetukset-valikko aukeaa:
Asetukset
Takaisin Valinta
Poista valinta
Poista kaikki otokset
Aktivoi diashow
Kirjoitussuoja
♦ Valitse haluamasi valikkokohta painikkeilla / ja vahvista
valinta painikkeella . -painikkeella voit siirtyä kulloinkin
yhden valikkotason taaksepäin.
Page 79

75
WK 5 A1
FI
Poista valinta
Tämän toiminnon avulla voit poistaa yksittäisiä otoksia muistikortilta.
Kun olet valinnut tämän toiminnon, siirrä valintapalkki kohtaan ”Poista”
ja vahvista valitun otoksen poistaminen painamalla
-painiketta.
Poista kaikki otokset
Tämän toiminnon avulla voit poistaa kaikki otokset muistikortilta. Kun
olet valinnut tämän toiminnon, siirrä valintapalkki kohtaan ”Poista” ja
vahvista kaikkien otosten poistaminen painamalla
-painiketta.
Aktivoi diashow
Tämän toiminnon avulla voit näyttää muistikortille tallennetut valokuvat
automaattisessa diashow'ssa, jossa jokainen kuva näkyy näytöllä
n. 2 sekunnin ajan. Voit pysäyttää diashow'n tietyn valokuvan kohdalle
painamalla
-painiketta.
Kirjoitussuoja
Tämän toiminnon avulla voit suojata yksittäisiä tai kaikkia tallennettuja
otoksia tahattomalta poistamiselta.
Kirjoitussuojaa valinta
Kirjoitussuojaa kaikki
Poista kirjoitussuoja vali
Poista kirjoitussuoja kaik
♦ Valitse ”Kirjoitussuojaa valinta” suojataksesi valittu otos tahatto-
malta poistamiselta.
♦ Valitse ”Kirjoitussuojaa kaikki” suojataksesi kaikki jo tallennetut
otokset tahattomalta poistamiselta.
♦ Valitse ”Poista kirjoitussuoja vali” poistaaksesi kirjoitussuoja
parhaillaan valitusta otoksesta.
Page 80

FI
76
WK 5 A1
♦
Valitse ”Poista kirjoitussuoja kaik” poistaaksesi kirjoitussuoja
kaikista jo tallennetuista otoksista.
Jos valitset kirjoitussuojatun tiedoston, kirjoitussuojauksen symboli
ilmestyy näytön 10 yläosaan.
Tallenteiden näyttäminen ulkoisessa monitorissa
♦ Aseta käyttövalintakytkin 18 TEST-asemaan.
♦ Työnnä mukana toimitetun TV-kaapelin
28
minijakkipistoke
kameran Av-liitäntään 16 ja cinch-pistoke television tai vastaavan
laitteen audio- ja video-tuloon. Heti kun minijakkipistoke on
Av-liitännässä, laitteen näyttö 10 ei ole enää käytössä, vaan
kuva toistetaan Av-liitännän kautta.
Tallenteiden siirtäminen tietokoneelle
♦ Liitä mukana tulevan USB-johdon 29 mini-USB-liitin kameran mini-
USB-liitäntään 17.
♦ Työnnä USB-liitin päälle kytketyn tietokoneen vapaaseen
USB-2.0-liitäntään.
Tietokone tunnistaa laitteen nyt ”tiedonsiirtovälineenä” ja asentaa
automaattisesti tarvittavat ajurit. Sen jälkeen microSDHC-muistikortin
34
sisältö näkyy tietokoneessa uutena levyasemana. Sen jälkeen
voit suorittaa halutut tiedostotoiminnot.
Page 81

77
WK 5 A1
FI
Puhdistaminen
HUOMIO
Laitevauriot!
► Varmista, ettei laitteeseen pääse puhdistuksen aikana kosteutta,
sillä kosteus voi vaurioittaa laitteen korjauskelvottomaksi.
■ Puhdista laitteen pinnat pehmeällä, kuivalla liinalla. Jos lika on
pinttynyttä, käytä tavanomaista astianpesuainetta ja vettä.
Varmista, ettei laitteeseen pääse vettä.
■ Pidä kotelon molempien osien välissä oleva tiiviste aina puhtaana,
jottei laitteeseen pääse tunkeutumaan laitetta mahdollisesti vahingoittavaa kosteutta. Tiivisteen lika voi rajoittaa pöly- ja roiskevesisuojaa (IP54).
■ Pidä aina myös DC-liitäntää
20
suojaavassa pohjalevyssä oleva
tiiviste puhtaana.
■ Hoida tiivisteitä säännöllisesti vaseliinilla, jotta ne pysyvät pehmeinä.
Vain näin tiivisteet suojaavat laitteen sisäosia kosteudelta.
■ Jos haluat vaihtaa tiivisteet, ota yhteys huoltoon (katso luku Huolto).
Page 82

FI
78
WK 5 A1
Vian korjaus
Tässä luvussa annetaan tärkeitä ohjeita häiriöiden paikallistamiseen
ja poistamiseen. Huomioi ohjeet vaarojen ja vaurioiden välttämiseksi.
VAROITUS
Noudata seuraavia turvaohjeita vaarojen ja aineellisten vahinkojen välttämiseksi:
► Sähkölaitteiden korjauksia saavat suorittaa ainoastaan am-
mattilaiset, joilla on valmistajan antama koulutus. Virheelliset
korjaukset voivat aiheuttaa huomattavia vaaroja käyttäjälle ja
vaurioittaa laitetta.
Vikojen syyt ja korjaus
Seuraava taulukko auttaa pienempien häiriöiden paikallistamisessa
ja korjaamisessa:
Vika Mahdollinen syy Korjaus
Kamera ei toimi.
Paristoja ei ole asetettu
paikoilleen.
Aseta 41,5voltin paristoa
paristokoteloon
11
.
Paristot ovat lopussa. Vaihda paristot kameraan.
Mikäli et ole tyytyväinen
paristojen käyttöikään,
aseta vielä toiset
41,5voltin paristoa
paristokoteloon.
Page 83

79
WK 5 A1
FI
Vika Mahdollinen syy Korjaus
Kuvat ovat ylivalottuneita.
Kamera on suunnattu
heijastaviin esineisiin.
Muuta kameran
suuntausta.
Suora auringonsäteily
saattaa osua kameraan
mahdollisesti vain
tiettyinä kellonaikoina
(huomioi auringon
asema).
Muistikortilla ei
ole riistantarkkailun jälkeen yhtään
otosta, vaikka kameran asetukset
ovat oikein.
Kamera on asennettu
niin, etteivät riistaeläimet pääse astumaan
liikkeentunnistinten
tunnistusalueille.
Muuta kameran
asennuspaikkaa.
Kamera ottaa
liikaa turhia
otoksia.
Tuulessa heiluvat oksat
ovat saattaneet laukaista
kameran.
Muuta kameran asennuspaikkaa ja/tai kameran
suuntausta.
Liikkeentunnistinten
herkkyys saattaa olla
säädetty liian suureksi.
Vähennä liikkeentunnistinten herkkyyttä.
OHJE
► Jos et onnistu poistamaan ongelmaa edellä mainituilla ohjeilla,
ota yhteys asiakaspalveluun.
Page 84

FI
80
WK 5 A1
Varastointi/Hävittäminen
Varastointi
Jos laite on pidempään käyttämättä, poista paristot ja varastoi laite
puhtaassa, kuivassa paikassa suoralta auringonpaisteelta suojassa.
Laitteen hävittäminen
Älä missään nimessä heitä laitetta tavallisen
kotitalousjätteen seassa. Laite on eurooppalaisen sähkö- ja elektroniikkajätettä koskevan
direktiivin 2012/19/EU mukainen.
Anna laite valtuutetun jätehuoltoyrityksen tai kunnallisen jätehuoltolaitoksen hävitettäväksi. Noudata voimassa olevia määräyksiä. Ota
epäselvissä tapauksissa yhteyttä paikalliseen jätehuoltolaitokseen.
Paristojen/akkujen hävittäminen
Paristoja/akkuja ei saa hävittää talousjätteiden seassa. Paristot
saattavat sisältää myrkkyjä, jotka vahingoittavat ympäristöä. Hävitä
paristot/akut siksi ehdottomasti voimassa olevien lakisääteisten
määräysten mukaisesti.
Jokainen käyttäjä on lakimääräisesti velvoitettu luovuttamaan käytetyt
paristot/akut kuntansa/kaupunginosansa keräyspisteeseen tai kauppaan. Näin varmistetaan, että paristot/akut hävitetään ympäristöystävällisellä tavalla.
Palauta akut/paristot kierrätyspisteeseen aina tyhjinä.
Page 85
81
WK 5 A1
FI
Liite
Vaatimustenmukaisuusvakuutusta koskevia
ohjeita
Tämä laite vastaa eurooppalaisen sähkömagneettista
yhteensopivuutta koskevan direktiivin 2004/108/EC
sekä RoHS-direktiivin 2011/65/EU perustavanlaatuisia vaatimuksia ja muita asiaankuuluvia määräyksiä.
Täydellinen alkuperäinen vaatimustenmukaisuusvakuutus on saatavana maahantuojalta.
Tekniset tiedot
Riistakamera
Käyttöjännite ja virranotto
6V , kork. 1,5 A
4 tai 8 x 1,5V:n paristoa,
tyyppi AA/Mignon
microSDHC-korttipaikka Tukee 2–32Gt:n muistikortteja
Näyttö
2,4” TFT värillinen LC-näyttö
(Näytön koko (lävistäjä) n. 6,1 cm)
Valmiusaika
Jopa 6 kuukautta
(kun käytössä on 8 paristoa)
Valokuvien tarkkuudet
Tarkkuus 1: 12 MP (4000 x 3000 P)
Tarkkuus 2: 8 MP (3264 x 2448 P)
Tarkkuus 3: 5 MP (2592 x 1944 P)
Tarkkuus 4: 3 MP (2048 x 1536 P)
Tarkkuus 5: 1 MP (1280 x 960 P)
Tallennusformaatti JPEG
Page 86

FI
82
WK 5 A1
Videoiden tarkkuus
Tarkkuus 1: 1920 x 1080 pikseliä
Tarkkuus 2: 1280 x 720 pikseliä
Tarkkuus 3: 720 x 480 pikseliä
Tarkkuus 4: 640 x 480 pikseliä
Tarkkuus 5: 320 x 240 pikseliä
Videon tallennusformaatti
AVI
Videon kuvanopeus 30 fps
Toimintakulma n. 100° kulmasta kulmaan
Valokuvien ja videoiden
tallennusalue
n. 89°
Kotelointiluokka IP54
Käyttölämpötila –15 - +60°C
Varastointilämpötila –25 - +70°C
Kosteus
(ei kondensaatiota)
5 - 75 %
Mitat (L x S x K) n. 13,7 × 9,5 x 8,1 cm
Paino n. 360 g
Page 87

83
WK 5 A1
FI
Takuu
Laitteen takuu on 3 vuotta ostopäivästä.
Laite on valmistettu huolella ja tarkastettu perusteellisesti ennen
toimitusta.
Säilytä ostokuitti todisteeksi ostosta. Ota takuutapauksessa puhelimitse yhteyttä lähimpään huoltopisteeseen. Vain näin voimme taata,
että tuotteesi toimittaminen huoltoon on maksutonta.
OHJE
► Takuu koskee ainoastaan materiaali- ja valmistusvirheitä, ei
kuitenkaan kuljetusvaurioita, kuluvia osia tai herkästi vaurioituvien osien, esim. kytkinten tai akkujen vaurioita.
Tuote on tarkoitettu ainoastaan yksityiskäyttöön, sitä ei saa käyttää
kaupallisissa tarkoituksissa. Laitteen vääränlainen tai asiaton käsittely,
väkivallan käyttö ja muut kuin valtuutetun huoltopisteen suorittamat
korjaukset aiheuttavat takuun raukeamisen.
Tämä takuu ei rajoita kuluttajan lakisääteisiä oikeuksia. Takuukorjaus
ei pidennä takuuaikaa. Tämä koskee myös vaihdettuja ja korjattuja
osia.
Mahdollisesti jo ostettaessa olemassa olevista vaurioista ja puutteista
on ilmoitettava välittömästi pakkauksen avaamisen jälkeen, viimeistään kuitenkin kahden päivän sisällä ostopäiväyksestä.
Takuuajan päättymisen jälkeen suoritettavat korjaukset ovat maksullisia.
Page 88

FI
84
WK 5 A1
Huolto
Huolto Suomi
Tel.: 010309 3582
E-Mail: kompernass@lidl.fi
IAN 94376
Palvelupuhelin: Maanantaista perjantaihin klo 8:00–20:00 (CET)
Maahantuoja
KOMPERNASS HANDELS GMBH
BURGSTRASSE 21
44867 BOCHUM
GERMANY
www.kompernass.com
Page 89

85
WK 5 A1
SE
Innehållsförteckning
Inledning ...................................87
Information om den här bruksanvisningen ..................87
Upphovsrätt .........................................87
Föreskriven användning ................................87
Information om varumärken .............................88
Varningar ...........................................88
Säkerhet .................................... 89
Grundläggande säkerhetsanvisningar .....................89
Risk för personskador vid felaktig hantering av batterier .......91
Risk för personskador vid felaktig hantering av minneskort .....91
Möjliga brott mot tredje persons rättigheter .................92
Beskrivning av delar .......................... 94
Ta produkten i bruk ..........................96
Leveransens innehåll och transportinspektion ................96
Kassera förpackningen .................................97
Krav på uppställningsplatsen ............................97
Öppna och stänga kameran ............................98
Sätta in batterier/strömförsörjning ........................98
Videoanslutning ......................................99
Sätta in minneskort ....................................99
Använda adapterkort .................................100
Användning och bruk ........................101
Sätta på och stänga av, göra inställningar ................101
Montering med fästrem ...............................109
Använda vägghållaren ................................109
Rikta kameran .......................................111
Page 90

SE
86
WK 5 A1
Aktivera live-läget ....................................112
Mörkerbilder .......................................112
Visa bilder på bildskärmen .............................113
Visa bilder på en extern monitor ........................116
Föra över inspelningar till datorn ........................116
Rengöring .................................117
Åtgärda fel ................................118
Orsaker till fel och åtgärder ............................118
Förvaring/Kassering .........................120
Förvaring ..........................................120
Återvinning av produkten ..............................120
Återvinning av batterier ...............................120
Bilaga .....................................121
Översättning av försäkran om överensstämmelse ...........121
Tekniska data .......................................121
Garanti ............................................123
Service ............................................124
Importör ...........................................124
Page 91

87
WK 5 A1
SE
Inledning
Information om den här bruksanvisningen
Ett stort grattis till din nyinköpta produkt.
Du har valt en produkt med hög kvalitet. Bruksanvisningen ingår som
en del av leveransen. Den innehåller viktig information om säkerhet,
användning och återvinning. Läs noga igenom alla användar- och
säkerhetsanvisningar innan du börjar använda produkten. Använd
endast produkten enligt beskrivningarna och i de syften som anges
här. Om du överlåter eller säljer produkten ska du lämna över all
dokumentation inklusive bruksanvisningen till den nye ägaren.
Upphovsrätt
Det här dokumentet skyddas av upphovsrätt.
För all form av mångfaldigande eller eftertryck, även delvis, samt
återgivning av bilderna, även i förändrat skick, krävs tillverkarens
skriftliga tillstånd.
Föreskriven användning
Det här är en informationsteknisk produkt och den är endast avsedd
för att ta digitala foton och spela in videofilm, särskilt för att observera
vilda djur. All annan eller utökad form av användning strider mot
föreskrifterna. Produkten ska inte användas yrkesmässigt eller industriellt.
Det finns inga möjligheter att ställa krav på ersättning för skador som
är ett resultat av felaktig användning, felaktigt utförda reparationer,
otillåtna ändringar på produkten eller för att reservdelar som inte är
godkända använts. Allt ansvar vilar på användaren.
Page 92

SE
88
WK 5 A1
Information om varumärken
- USB är ett inregistrerat varumärke som tillhör USB Implementers
Forum, Inc.
Alla övriga namn och produkter kan vara varumärken eller registrerade
varumärken som tillhör respektive ägare.
Varningar
I den här bruksanvisningen används följande varningar:
FARA
En varning på den här nivån innebär en akut farlig
situation.
Om ingenting görs för att undvika situationen finns risk för
dödsolyckor och svåra personskador.
► Följ anvisningarna i varningstexten för att undvika dödsolyckor
och svåra personskador.
VARNING
En varning på den här nivån innebär att en farlig
situation kan uppstå.
Om ingenting görs för att åtgärda situationen kan resultatet bli
personskador.
► Följ anvisningarna i varningstexten för att undvika personskador.
Page 93

89
WK 5 A1
SE
AKTA
En varning på den här nivån innebär risk för
sakskador.
Om ingenting görs för att undvika situationen kan resultatet bli
sakskador.
► Följ anvisningarna i varningstexten för att undvika sakskador.
OBSERVERA
► Under Observera finns extra information som ska hjälpa dig att
handskas med produkten.
Säkerhet
Det här kapitlet innehåller viktig information för säker hantering av
produkten.
Den här produkten motsvarar gällande säkerhetsbestämmelser.
Om den används på fel sätt kan den orsaka person- och sakskador.
Grundläggande säkerhetsanvisningar
Observera följande anvisningar för säker hantering av produkten:
■ Kontrollera om produkten har några synliga skador innan du
använder den. Om produkten är skadad eller har fallit i golvet
får den inte användas.
■ Om kablarna eller anslutningarna är skadade ska du låta en
auktoriserad fackverkstad eller vår kundtjänst byta ut dem.
■ Personer som av fysiska, mentala eller motoriska skäl inte är
kapabla att hantera produkten på ett säkert sätt får endast använda den om någon ansvarig håller uppsikt eller visat och
talat om hur det går till.
Page 94

SE
90
WK 5 A1
■
Fäst inte produkten på fritt stående eller mycket höga träd, eftersom det då finns stor risk för att den träffas av blixten. Kameran
kan förstöras om blixten slår ned i trädet där den placerats.
■ Barn får bara använda produkten om någon vuxen håller uppsikt.
Barn förstår inte alltid vad som kan vara farligt.
■ Låt endast en auktoriserad fackverkstad eller vår kundtjänst
reparera produkten. Felaktigt utförda reparationer kan innebära
en risk för användaren. Dessutom upphör garantin att gälla.
Produkten får inte öppnas av användaren.
■ Endast en kundtjänst som auktoriserats av tillverkaren får utföra
reparationer på produkten under garantitiden, annars gäller inte
garantin för ev. senare skador.
■ Defekta delar får endast bytas ut mot reservdelar i original.
Det är endast originaldelarna som uppfyller säkerhetskraven.
■ Ställ inga föremål på produkten.
■ Använd inte produkten i närheten av öppna lågor (tex stearinljus).
■ Om det uppstår ovanliga ljud, rök eller liknande oförklarliga
fenomen ska du ta ut batterierna eller bryta strömtillförseln till en
eventuellt ansluten nätdel och kontakta kundservice (se kapitel
Service).
■
FARA! Förpackningsmaterial är inga leksaker.
Risk för kvävning!
Page 95

91
WK 5 A1
SE
Risk för personskador vid felaktig
hantering av batterier
■ Barn får inte handskas med batterier. De kan stoppa dem i munnen
och svälja dem. Om någon råkar svälja ett batteri måste man
omedelbart söka medicinsk vård.
■ Batterier får inte kastas i en eld. Batterier får inte utsättas för höga
temperaturer.
■ Explosionsrisk! Endast batterier som är märkta som uppladdnings-
bara får laddas upp igen.
■ Batterier får inte öppnas eller kortslutas.
■ Olika typer av uppladdningsbara och vanliga batterier får inte
kombineras i produkten. Helt urladdade batterier bör tas ut,
eftersom det finns en ökad risk för läckage. Batterierna bör även
tas ut ur kameran när den inte används.
■ Batterisyra som läcker från ett batteri kan irritera huden. Skölj i så
fall bort den från huden i rikligt med vatten. Om vätskan kommer in i
ögonen ska ögonen spolas med rikligt med vatten, inte gnuggas.
Uppsök därefter omedelbart en läkare.
■ Hur batterierna läggs in och tas ut ur produkten beskrivs i kapitel
Strömförsörjning.
Risk för personskador vid felaktig
hantering av minneskort
■ Se noga till så att barnen inte leker med minneskortet. Om någon
råkar svälja ett minneskort måste man genast söka medicinsk vård.
Page 96

SE
92
WK 5 A1
Möjliga brott mot tredje persons rättigheter
Tänk på följande när du använder viltkameran:
Upphovsrättsskydd
I princip innehar alla personer rätten till bilder av sig själva. Enligt
upphovsrättslagen får en bild bara publiceras utan godkännande
av de personer som förekommer på den om de endast ingår som en
detalj i landskapet eller någon annan omgivning. Omständigheterna
i det enskilda fallet avgör om en person ska anses vara en detalj på
bilden. Av rättssäkerhetsskäl måste allmänheten alltid informeras vid
alla tillfällen där det finns risk att personer som kan identifieras kommer med på bilderna från viltkameran (se kapitel Upplysningsplikt).
Skydd för privatlivet
Man får inte göra intrång i andras privata sfär med de bilder som
tas. Rikta inte kameran mot grannens trädgård eller dörr, även om de
är fullt synliga från ditt eget hus eller en allmän plats. Det ger dig inte
rätt att publicera bilder av det du ser.
Personlig integritet
Intrång i den personliga integriteten innebär att man kan fastställa
om en viss person befann sig på en viss plats vid en viss tidpunkt.
Identifieringen kan då även ske med personrelaterade kännetecken,
tex bilens registreringsnummer. Det är absolut nödvändigt att undvika intrång i den personliga integriteten.
Page 97

93
WK 5 A1
SE
Kameraövervakning på arbetsplatsen
Kameraövervakning på arbetsplatser regleras av stränga lagar i
Tyskeland. En arbetsgivare bör avstå helt från kameraövervakning
om det inte fullständigt går att utesluta risken för kränkningar.
Kameraövervakning i trafiken
Övervakningskameror som riktas mot trafiken ska helst placeras och
bilden konfigureras så att trafikanterna inte kan identifieras genom
sina bilnummer på bilderna. Även text och märken på fordonen kan
användas för att identifiera trafikanter.
Upplysningsplikt
Om det inte går att utesluta att personer identifieras måste en skylt
som hänvisar till övervakningskameran sättas upp väl synlig vid alla
tillfarter som leder till kamerans registreringsområde. Förbipasserande måste även informeras om att de godkänner att bilder tas när
de beträder kamerans registreringsområde och att de inte bör gå in
i området om de inte godkänner detta. Det bygger alltså på frivillighet. Om kameran sätts upp på en plats som måste passeras för att
komma fram till ett mål (tex ingången till en sevärdhet) är det inte
frivilligt och kameraövervakningen har inte godkänts av egen fri vilja.
Ta alltid hänsyn till möjliga överträdelser mot tredje persons rättigheter enligt lagar och bestämmelser i landet där kameran används.
Page 98

SE
94
WK 5 A1
Beskrivning av delar
(se bilder på de uppfällbara sidorna)
1
Infraröda LED-lampor
2
Driftberedskapsindikator, röd lampa
3
Rörelseindikator, grön och blå lampa
4
Kameraobjektiv
5
Låsögla
6
Främre rörelsesensor
7
Rörelsesensorer på sidan
8
Trädfäste
9
Låsskruv
10
Bildskärm
11
Batterifack
12
Låsklämmor
13
Högtalare
14
Kontrollfält
15
Minneskortplats (microSD)
16
AV-uttag
17
Mini USB-uttag
18
Driftväljare (OFF - TEST - ON)
19
Mikrofon
20
DC-uttag (för nätadapter; ingår inte i leveransen)
21
Stativgänga
22
Stativskruv
23
Kontringsplatta
24
Vingskruvar till led
Page 99

95
WK 5 A1
SE
25
Borrhål
26
Plugg
27
Skruvar
28
TV-kabel (miniplugg till cinch; audio/video)
29
Mini USB till USB 2.0 anslutningskabel
30
Fästrem
31
Remlås
32
Förvaringsbox
33
Adapterkort (microSD till SD)
34
microSDHC minneskort (4 GB)
35
8st.1,5V-batterier av typ AA/mignon/LR6
36
Bruksanvisning
Page 100

SE
96
WK 5 A1
Ta produkten i bruk
Leveransens innehåll och transportinspektion
Kontrollera att leveransen är komplett (se uppfällbara sidor).
Leveransen innehåller följande delar:
▯ Vilt/Övervakningskamera WK5A1
▯ Vägghållare
▯ 3 pluggar
26
▯ 3 skruvar
27
▯ TV-kabel (miniplugg till cinch; audio/video)
28
▯ Mini USB till USB 2.0 anslutningskabel
29
▯ Fästrem (2,5cm bred, ca 190cm lång)
30
▯ Förvaringsbox
32
▯ Adapterkort (microSD till SD)
33
▯ microSDHC minneskort (4 GB)
34
▯ 8st.1,5V batterier av typ AA/mignon/LR6
35
▯ Bruksanvisning
36
OBSERVERA
► Kontrollera att leveransen är komplett och inte har några
synliga skador.
► Om någonting fattas eller om leveransen skadats på grund av
bristfällig förpackning eller i transporten ska du vända dig till
vår Service Hotline (se kapitlet Service).
♦ Ta upp alla delar av produkten och bruksanvisningen ur förpack-
ningen.
♦ Ta bort allt förpackningsmaterial och all skyddsfolie från produkten.
 Loading...