

Page 1

CARGADOR DE BATERÍAS
CARICABAT TERIA
Antes de empezar a leer abra la página que contiene las imágenes y, en seguida, familiarícese con
todas las funciones del dispositivo.
Prima di leggere aprire la pagina con le immagini e prendere confidenza con le diverse funzioni
dell’apparecchio.
Before reading, unfold the page containing the illustrations and familiarise yourself with all functions
of the device.
Klappen Sie vor dem Lesen die Seite mit den Abbildungen aus und machen Sie sich anschließend mit
allen Funktionen des Gerätes vertraut.
Kompernaß GmbH
Burgstraße 21
D-44867 Bochum (Germany)
Estado de las informaciones · Versione delle informazioni
Last Information Update · Stand der Informationen:
09 / 2007 · Ident.-No.: T4X092007 - 5
T4X
CARGADOR DE BATERÍAS
Instrucciones de utilización y de seguridad
BAT TERY CHARGER
Operation and Safety Notes
CARICABAT TERIA
Indicazioni per l’uso e per la sicurezza
BAT TERIELADEGERÄT
Bedienungs- und Sicherheitshinweise
ES Instrucciones de utilización y de seguridad Página 5
IT / MT Indicazioni per l’uso e per la sicurezza Pagina 13
GB / MT Operation and Safety Notes Page 21
DE / AT Bedienungs- und Sicherheitshinweise Seite 29
Page 2

A
1 2 3 4
B
C
8
9 10
11
1415
57 6
11
12
13
Page 3

Introducción
Para su seguridad .........................................................................................................Página 6
Finalidad de uso ...........................................................................................................Página 6
Volumen de suministro ..................................................................................................Página 6
Descripción de piezas ..................................................................................................Página 6
Datos técnicos ...............................................................................................................Página 7
Seguridad
Indicaciones de seguridad ..........................................................................................Página 7
Propiedades del producto ...........................................................................................Página 9
Manejo
Puesta en funcionamiento ............................................................................................Página 9
Conexión .......................................................................................................................Página 9
Separar ..........................................................................................................................Página 10
Seleccionar el modo de carga ....................................................................................Página 10
Reset / borrar ajustes ....................................................................................................Página 10
Conmutaciones entre los modos 1, 2 y 3 ...................................................................Página 10
Modo 1 (14,4 V / 0,8 A) ........................................................................................Página 10
Modo 2 (14,4 V / 3,6 A) .......................................................................................Página 10
Modo 3 (14,7 V / 3,6 A) .........................................................................................Página 11
Regenerar / cargar baterías vacías (consumidas / sobrecargadas) ........................Página 11
Función de protección de aparato .............................................................................Página 11
Protección de sobrecalentamiento ..............................................................................Página 11
Índice
Mantenimiento y conservación .............................................................Página 12
Eliminación ..............................................................................................................Página 12
Información
Asistencia ......................................................................................................................Página 12
Declaración de conformidad / Fabricante .................................................................Página 12
5 ES
Page 4
6 ES
Introducción
En estas instrucciones de uso se utilizan los siguientes pictogramas / símbolos:
¡Lea las instrucciones de uso!
¡Siga las indicaciones de prevención y
seguridad!
¡Tenga cuidado con las descargas eléctricas!
Tensiones eléctricas peligrosas - Peligro de vida!
¡Peligro de explosión!
¡Peligro de incendio!
Cargador de baterías T4X
para acumuladores / baterías de 1,2 Ah
hasta 120 Ah
Q
Introducción
Q
Para su seguridad
Lea detenidamente las instrucciones de
uso, despliegue para ello la página con
las figuras. Antes de poner en funcionamiento el aparato, siga fielmente estas indicaciones.
Si necesita información más detallada como utilizarlo,
pongase en contacto con el servicio de asistencia
técnica de su país. Guarde bien estas instrucciones
de uso y en caso de transferir el aparato a terceros,
entreguele las instrucciones de uso.
Q
Finalidad de uso
W
V
Vatio (potencia efectiva)
Voltios (tensión alterna)
~
Así procederá de forma segura:
Mantenga a los niños y otras personas alejados
durante el manejo de herramientas eléctricas.
¡Evacue el embalaje y el aparato de forma
respetuosa con el medio ambiente!
Cualquier uso indebido o distinto al proyectacto
conllevará la pérdida de la garantía. El fabricante
no se responsabiliza de los daños derivados por
un uso no conforme al previsto. El aparato no está
destinado al uso industrial.
Q
Volumen de suministro
Controle inmediatamente después de desembalar
el volumen de suministro, tanto el aparato como
demás piezas por si presentan daños. No ponga
en servicio un aparato o piezas defectuosas. Pongase en tal caso en contacto con su servicio de
asistencia técnica para su sustitución.
1 Cargador TRONIC T4X
2 Bornes de conexión de contacto rápido
(1 rojo, 1 negro)
1 Instrucciones de uso
Documentaciones de garantía
El TRONIC T4X es un cargador conmutado (a efectos
de medición y regulación) de lado primario con carga
de mantenimiento por impulsos, apto para la carga
y el mantenimiento de la carga de acumuladores
(baterías) de plomo con solución electrolítica o de
gel. El cargador dispone de un circuito de protección
contra la formación de chispas y sobrecalentamiento.
Q
Descripción de piezas
1
STANDBY Indicación LED „STANDBY“
(disponibilidad)
2
Indicación LED „Modo 1“
3
Indicación LED „Modo 2“
4
Indicación LED „Modo 3“
Page 5
7 ES
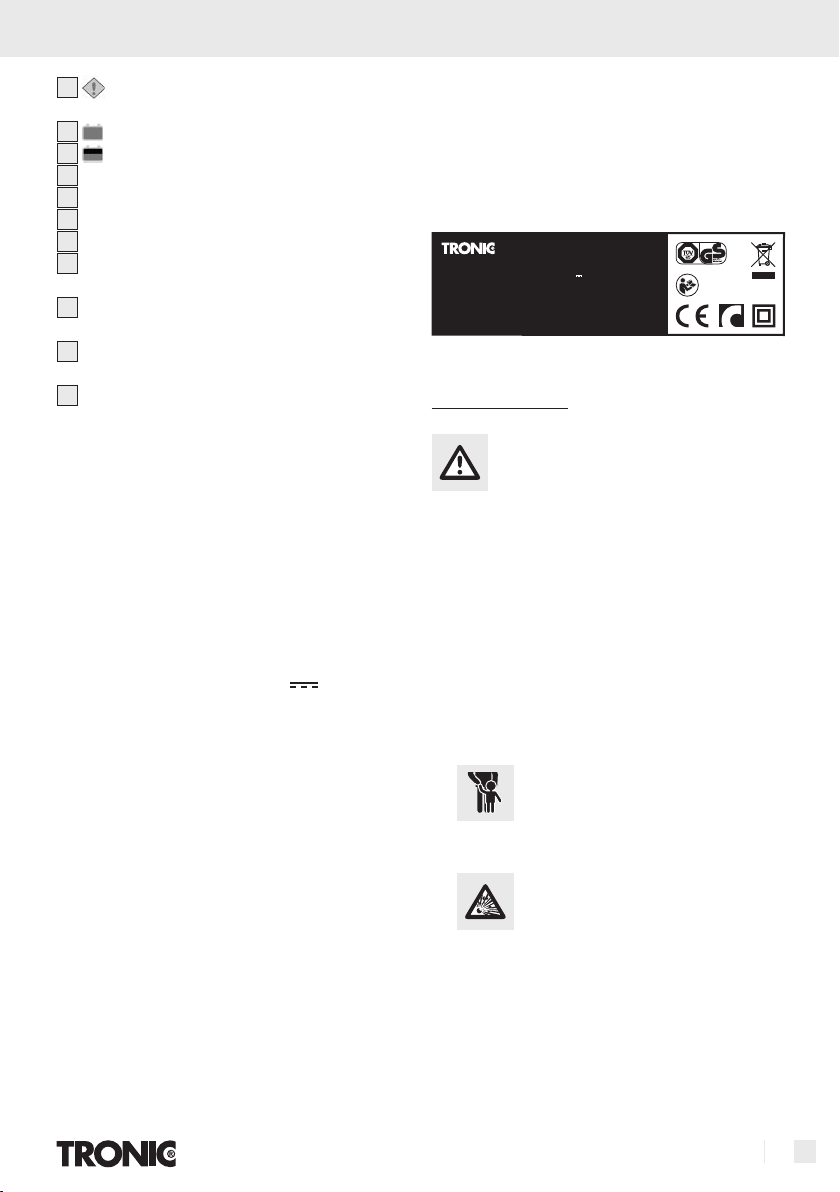
5
T4X KH 3157
220 V-240 V AC ~ 50 Hz / 60 Hz · 55 W
12 V DC
0,8 / 3,6 A · IP65
Polaridad: borne rojo (+), borne negro (-)
Fecha de fabricación: 02/2008
¡ATENCIÓN! Gases explosivos - Evite el
contacto con fuego abierto (como llamas y
chispas). Lea las instrucciones de empleo
antes del primer uso. Antes de insertar
o extraer las pilas separe el cargador de
la tensión de red. Asegúrese de que el
aparato esté bien ventilado.
Kompernaß GmbH · D- 44867 Bochum · Germany · www.kompernass.com
Indicación LED „Conexión polarización
incorrecta / Error“
6
Indicación LED „Cargado por completo“
7
Indicación LED „Proceso de carga activo“
Q
8
Tecla de selección „MODO“
9
Cargador
10
Clavija de red con conector de red
11
Orificios de fijación
12
Cable de conexión pol „+“ (rojo), incl. terminal
redondo
13
Cable de conexión pol „– (negro), incl. terminal
redondo
14
Contacto rápido pol „+“ borne de co-nexión
(rojo) incl. tornillo de fijación
15
Contacto rápido pol „–“ borne de co-nexión
(negro) incl. tornillo de fijación
Introducción / Seguridad
* = La corriente de retorno se define a la corriente
que consume el cargador de la batería
cuando no se encuentra conectado a la
corriente de red.
** = El valor de ruido describe los valores de per-
turbación de corriente y tensión.
Q
Seguridad
Q
Datos técnicos
Tensión de entrada: 220 - 240 V ~ 50 / 60 Hz
Corriente de conexión: < 25 A
Corriente de entrada: max. 0,6 A (valor efectivo)
Consumo de potencia: 55 W
Corriente de
realimentación*: < 5 mA (No dispone de
entrada de CA)
Tensión nominal: 12 V DC
Corriente nominal 0,8 / 3,6 A
Tensión de carga: 14,4 V ± 0,25 V o
14,7 V ± 0,25 V
Corriente de carga: 3,6 A (3,6 A ± 10 % o
bien 0,8 A ± 10 %)
Valor de ruido**: max. 150 mV
Clase: Batería de ácido plomo
12 V 1,2 Ah – 120 Ah
Clase de protección
de carcasa: IP 65 (hermético al polvo
y al agua)
Dimensiones: 180 x 62 x 40 mm
(A x A x F)
Peso: 0,5 kg aprox.
Nivel de ruido: < 50 dB (A)
(comprobado desde una
distancia de 50 cm)
Indicaciones de seguridad
m Peligro! Evite peligros de lesiones o incluso
muerte por un uso indebido!
J No haga funcionar el aparato con cable daña-
do, cable de red o clavija de red defectuosa.
m ¡CUIDADO! Un cable de red dañado signifi-
ca peligro de vida a causa de una descarga
eléctrica.
J Encomiende reparar el cable de red j en caso
de daño sólo por personal especialista con formación y autorizado! Pongase en contacto con
el cen-tro de asistencia técnica de su país en
caso de reparación!
J
No deje sólo sin vigilancia a los críos
pequeños ni a los niños con el aparato! Los niños no pueden apreciar
los posibles riesgos existentes al manipular los
aparatos eléctricos.
J
¡Peligro de explosión! Protejase
de la reacción de gas detonante
altamente explosivo! Durante el pro-
ceso de carga y de mantenimiento puede ema-
nar nitrógeno en forma de gas de la batería. El
gas detonante es una mezcla explosiva de hidrógeno en forma de gas y oxígeno. En contacto
con fuego abierto (llamas, brasas o chivas) se
produce la denominada reacción de gas detonante! Realice el proceso de carga y de carga
de mantenimiento en un recinto protegido contra
Page 6
8 ES
Seguridad
la intemperie y buena ventilación.
Asegurese de que durante el proceso de carga
y de carga de conservación no exista luz abierta
(llamas, brasas o bien chispas)!
J
explosivas o inflamables tale como p. ej. gaso-
m ¡Peligro de causticación! Proteja sus ojos
J
llaves fijas con mango aislado!
J Utilice el cargador exclusivamente para el pro-
J No utilice el cargador para el proceso de carga
J No utilice el cargador para el proceso de carga
J ¡Asegurese de que una batería montada fija, se
J Evite un cortocircuito eléctrico al conectar el
J ¡Asegurese antes de la conexión de la corriente
Riesgo de incendio y de ex-
plosión! Preste atención de que
no se puedan incendiar sustancias
lina o disolventes con el uso del cargador!
y la piel contra causticación por ácido (ácido
sulfúrico) al entrar en contacto con la batería!
No mire directamente sobre la batería conectada:
Llevar pues-ta gafas, ropa y guantes de protección resistente a ácidos! Si los ojos o la piel entran en contacto con ácido sulfúrico, lave la zona
del cuerpo afectada con abundante agua limpia
y acuda de inmediato a un médico!
Protejase contra las descargas
eléctricas! Utilice para la conexión
del cargador, destornilladores y
ceso de carga y de mantenimiento de baterías
de plomo de 12 V sin daños (con solución electrolítica o Gel)!
y de conservación de baterías no recargables.
y de conservación de una batería dañada o
congelada!
encuentre el vehículo fuera de servicio y en estado parado protegido! ¡Desconecte el contacto
de encendido y deje el vehículo en posi-ción de
aparcamiento con freno de mano puesto (p. ej.
vehículo), o con cuerda amarrada (p. ej. barco
eléctrico)!
cargador a la Batería. Conecte el cable de
conexión del polo negativo al polo negativo de
la batería o bien de la carrocería. Conecte el
cable de conexión del polo positivo exclusivamente al polo positivo de la batería!
de red, de que la corriente de red este conectada
a una tensión reglamentaria de 230 V ~ 50 Hz,
conductor neutro puesto a tierra, un interruptor
automático de 16 A y un interruptor automático
diferencia (interruptor de protección contra corriente de defecto)!
J ¡Toque el cable de red j con contacto a una
base de enchufe con toma de tierra, siempre
por la parte aislada de la clavija de red!
J Toque el cable de conexión de polos („–“ y „+“)
exclusivamente por la parte aislada!
J Realice la conexión a la batería y a la base de
enchufe con toma de tierra de la corriente de
red siempre protegido contra humedad!
J Realice el montaje, mantenimiento y cuidado
del cargador siempre libre de la corriente de red!
J ¡No coloque el cargador en las proximidades
del fuego, calor o influencias de temperatura
continua superior a 50° C! Con temperaturas
superiores disminuye automáticamente la potencia de salida del cargador.
J No dañe ninguna de las líneas o conductos para
combustible, electricidad, instalación de frenos,
sistema hidráulico, agua o de telecomunicación
durante la fijación del cargador con tornillos! En
caso contrario existe riesgo de vida y de lesiones!
J Asegurese de que el cable del polo positivo no
tenga ningún contacto con una tubería de combustible (p. ej tubería de gasolina)!
J Asegúrese de que la base de enchufe queda
accesible de modo que sea posible desenchufar
el aparato de la red en caso de emergencia.
J ¡Atención! Evite daños materiales debido a un
uso inadecuado!
J ¡utilice el cargador sólo con las piezas originales
suministradas!
J ¡no cubra el cargador con ningún objeto!
J coloque la batería durante el proceso de carga
sobre una superficie bien ventilada.
J ¡proteja las superficies de contacto de los elec-
trodos de las batería contra cortocircuito!
J Si utiliza el cargador en el exterior, deberá
conectarlo a una base de enchufe con toma de
tierra en un circuito con interruptor automático
diferencial.
J ¡No coloque el cargador sobre o directamente
encima la batería!
J Después de terminado el proceso de carga y
carga de compensación en una batería conec-
Page 7

9 ES
Seguridad / Manejo
tada permanentemente en el vehículo, separe
primero el cable de conexión del polo negativo
(negro) del cargador del polo negativo de la
batería.
J ¡Separe el cargador en caso de fallos y daños
de inmediato de la corriente de red!
J ¡Deje reparar el cargador sólo por personal
autorizado con formación! Pongase en contacto
con el centro de asistencia técnica de su país
en caso de reparación!
J Informese antes de conectar el cargador acerca
del mantenimiento de la batería conforme a lo
indicado en las instrucciones de uso!
J Informese antes de conectar el cargador a una
batería que esté conectada de forma permanente
al vehículo, acerca del cumplimiento de la seguridad eléctrica así como su mantenimiento
conforme a las instrucciones de uso del vehículo!
J ¡No someta el cargador a esfuerzos mecánicos!
J ¡En caso de no utilizarlo separe el cargador de
la corriente de red!
Q
Propiedades del producto
Este aparato ha sido diseñado para la carga de
una multitud de baterías SLA (Baterías de acido-plomo
selladas), estas son utilizadas en automóviles, motocicletas y otros vehículos. Estas pueden ser p.ej.,
baterías WET (con electrolito líquido),de GEL- (con
electrolito en forma de gel) o bien baterías AGM
(con esteras absorbentes de electrolito). Cuyas
capacidades van desde un rango de 12 V / 1,2 Ah
hasta 12 V / 120 Ah.
Una concepción especial del aparato (denominada
también „estrategia de carga 3 niveles“), posibilita
la recarga de las baterías de hasta casi el 100 %
de su capacidad. Además existe la opción de una
conexión de larga duración de la batería en caso
de que no sea utilizada mediante el cargador, de
esta forma se logra un estado óptimo de la batería
sin dañarla.
Q
Manejo
Q
Puesta en funcionamiento
m ¡Atención! Peligro de descarga eléc-
trica! ¡Instale, mantenga y conserve el aparato
separado de la red de corriente!
Así procederá de forma segura
j Seleccione para la puesta en servicio un puesto
de trabajo apropiado.
j Prepare la puesta en servicio con cuidado y
tomese suficiente tiempo. Coloquese todas las
piezas de repuesto y de más herramientas necesarias o materiales a mano de modo ordenada.
j Este siempre atento a los pasos operativos que
vaya a realizar. Proceda siempre de modo
razonable y no ponga el aparato en funcionamiento si se encuentra indispuesto o con falta
de concentración.
Q
Conexión
j Antes del proceso de carga y de mantenimiento
en una batería de conexión fija en un vehículo,
separe primero el cable de conexión negativo
(negro) del vehículo del polo negativo de la
batería. El polo negativo de la batería esta conectado por regla general con la carrocería
del vehículo.
j Separe a continuación el cable de conexión de
polo positivo (rojo) del vehículo del polo positivo
de la batería.
j Sujete a continuación la pinza de contacto
rápida del pol „+“ (rojo)
14
del cargador a la
polaridad derecha (Pol „+“) de la batería.
j Sujete la pinza de contacto rápida de pol
„–“-Pol (negro)
j Conecte el cable de red
15
sobre el Pol „–“ de la pila.
10
del cargador de
batería a la base de enchufe con toma de tierra
de la corriente de red.
Page 8

10 ES
Manejo
Q
Separar
j Separe el aparato de la corriente de red.
j Retire la pinza de contacto rápida de pol
„–“-Pol (negro)
15
del Pol „–“ de la batería.
j Retire la pinza de contacto rápida de pol
„+“-Pol rojo)
14
del Pol „+“ de la batería.
j Conecte el cable de conexión del polo positivo
de nuevo al polo positivo de la batería.
j Conecte el cable de conexión del polo negati-
vo de nuevo al polo negativo de la batería.
Q
Seleccionar el modo de carga
Para la carga puede partir para diferentes baterías
con temperaturas ambiente distintas, tres modo de
carga. Seleccione el modo que resulte más eficiente
y seguro para la carga de la batería.
En comparación con los cargadores de batería
convencionales, este aparato dispone de una función
especial para las baterías / acumuladores vacíos ya
usados. Puede volver a cargar por completo una
batería / acumulador totalmente descargado. La
protección integrada contra polarización inversa y
cortocircuito le garantiza un proceso de carga seguro. Por medio de la electrónica incorporada, el
cargador no se pone inmediatamente en función
después de conectar la batería, sino tras la selección
de un modo de carga.
De esta forma se evitan las chispas que se produce
en la mayoría de las veces durante el proceso de
conexión. Por otra parte el proceso es controlado
por una MCU Interna (unidad de microcomputadora),
que convierte el cargador en una unidad más rápida,
más potentes y fiable.
Q
Reset / borrar ajustes
Q
Conmutaciones entre los mo-
dos 1, 2 y 3
j Accione la tecla de selección MODE 8
correspondientemente una tras una, el aparato
conmuta el modo de carga en el orden siguiente:
Disponibilidad STANDBY, MODE1
MODE2
, MODE3 pone en marcha el
ciclo siguiente.
Si acciona la tecla de selección
8
conmuta al modo siguiente, ejecutando este. Sin
embargo si tras una carga completa no se desconecta la batería del cargador, esta per-manecerá
en modo de mantenimiento de carga aunque el
usuario conmute a un modo diferente. Tiene la ventaja de proteger una batería completamente cargada contra daños.
Q
Modo 1 (14,4 V / 0,8 A)
Este modo es apropiado para la carga de baterías
pequeñas con una capacidad inferior a 14 Ah.
j Pulse la tecla de selección MODE
leccionar el modo 1. Tras ejecutar este proceso
se ilumina la Indica-ción LED
diente. Si no inicia a continuación ningún otro
proceso, se activa la electrónica conjuntamente
con la indicación LED
7 e inicia el proceso
de carga con (una corriente de) 0,8 A ± 10 %.
Si transcurre el proceso sin problemas, la indi-
cación LED
7 permanece encendida durante
todo el proceso de carga hasta obtener la batería una carga de 14,4 V / ± 0,25 V. Cuando
se encuentre la batería completamente cargada
se ilumina la indicación LED
la indicación LED 7. Ahora la corriente de
compensación está disponible para la batería.
,
el modo de carga
8
, para se-
2
correspon-
6
y se apaga
Tras conectar al suministro de corriente, el aparato
se coloca automáticamente en su posición preferencial quedando en modo de espera STANDBY.
Q
Modo 2 (14,4 V / 3,6 A)
Este modo se aplica generalmente para la carga
de las baterías con gran capacidad superiores a
14 Ah bajo condiciones normales.
j Pulse la tecla de selección MODE
8
, para
Page 9
11 ES
Manejo
seleccionar el modo 2. Si no inicia a continuación
ningún otro proceso, se activa la electrónica
conjuntamente de modo automático con la indicación LED
con (una corriente de) 3,6 A ± 10 % (3,6 A max).
Si transcurre el proceso sin problemas, la indicación LED
todo el proceso de carga hasta obtener la batería una carga de 14,4 V / ± 0,25 V. Cuando
se encuentre la batería completamente cargada
se ilumina la indicación LED
la indicación LED
compensación está disponible para la batería.
Q
Modo 3 (14,7 V / 3,6 A)
Este modo se aplica para la carga de baterías con
una capacidad superior a 14 Ah bajo condiciones
frías o para la carga de baterías AGM propias superiores a 14 Ah.
j Pulse la tecla de selección MODE
leccionar el modo 3. Al mo-mento de seleccionar
el modo elegido, se ilumina la indicación LED
corres-pondiente
La electrónica se activa transcurrida la tempori-
zación de retraso para iniciar el proceso de
carga siempre que no realiza cualquier otra
manipulación. En este modo la corriente de
carga es la misma que en la del „modo 2“.
Si transcurre el proceso sin problemas, se ilumina
la indicación LED
cuentra activada y permanecerá en este estado
hasta que se cargue la batería a aprox.
14,7 V. Una vez alcanzado este valor, el cargador cambia al modo de conservación de
batería. A continuación se apaga la indicación
LED
7 y se ilumina la indicación LED
6
con el objeto de mostrar el estado actual.
3
e inicia el proceso de carga
7 permanece encendida durante
6 y se apaga
7. Ahora la corriente de
8
, para se-
4
de inmediato.
7, la electrónica se en-
Q
Regenerar / cargar baterías
vacías (consumidas /
sobrecargadas)
Si se conecta el cargador a una batería y se inicia
el proceso de carga, este detecta la tensión de la
batería automáticamente. Conmuta al modo de
carga por impulsos si la tensión queda comprendida
en un rango de 7,5 V ± 0,5 hasta 10,5 V ± 0,5 V.
Esta secuencia de carga por impulsos continua
hasta que aumente la tensión de la batería a 10,5
V ± 0,5 V. Una vez alcanzado el estado, el cargador
cambia de nuevo al modo de carga normal que
tenia previamente elegido.
Ahora se puede cargar la batería de forma rápida
y segura. Este procedimiento permite recargar de
nuevo la mayoría de las baterías vacías para volverlas a utilizar.
Q
Función de protección
de aparato
Al momento que se produce una situa-ción que se
desvía de lo normal tales como cortocircuito, tensión
de batería inferior a 7,5 V, circuito de corriente
abierto o conexión de polarización inversa en los
bornes de salida, el cargador desconecta el sistema
electrónico restableciendo el sistema a su posición
preferencial con el fin de evitar daños.
Mientras que no realice ningún otro ajus-te, el sistema
permanecerá en modo de espera STANDBY. En
caso de conexión inversa de los bornes de salida
se ilumina adicionalmente la indicación LED
„Conexión polarización incorrecta / Error
Q
Protección de
5“.
sobrecalentamiento
Si se calentase el aparato demasiado durante el proceso de carga, se disminuye automáticamente la potencia de salida. Esto protege el aparato contra daño.
Page 10
12 ES
Mantenimiento y conservación / Eliminación / Información
Q
Mantenimiento y conservación
m ¡Atención! Peligro de descarga eléc-
trica! ¡Instale, mantenga y conserve el aparato
separado de la red de corriente!
El aparato está libre de mantenimiento.
j Desconecte el aparato.
j Limpie las superficies de plástico del aparato y
la del mando a distancia mediante un paño seco.
En ningún caso deberá utilizar disolventes o
productos de limpieza agresivos.
Q
Eliminación
El embalaje se compone de materiales
reciclables que puede desechar en los
puntos locales de recogida selectiva.
¡No tire los aparatos eléctricos
en la basura doméstica!
Según la Directiva europea 2002 / 96 / CE sobre
residuos de aparatos eléctricos y electrónicos y en
cumplimiento con el derecho nacional, las herramientas eléctricas usadas se tienen que separar
y reciclar sin dañar el medioambiente. Para ello
devuelva el aparato en los puntos de recogida
indicados.
Para deshacerse de un aparato una vez que ya no
sirva pregunte a las autoridades locales o municipales.
Q
Información
Q
Asistencia
Consulte los puntos de atención al cliente de su
país en la documentación de la garantía.
J
Haga reparar los aparatos únicamente por per-
sonal técnico cualificado y con repuestos originales. Así se garantiza que el aparato
seguirá siendo seguro.
J
Si es necesario cambiar el enchufe o el cable de
alimentación, encargue este trabajo al fabricante
del aparato o a su servicio de atención al cliente.
Así se garantiza que el aparato seguirá siendo
seguro.
Q
Declaración de conformidad /
Fabricante
Nosotros, Kompernaß GmbH, Burgstr. 21,
D-44867 Bochum, Alemania, declaramos por
la presente que este producto cumple las
siguientes directrices europeas:
Directiva de baja tensión UE
(2006 / 95 / EG)
Compatibilidad electromagnética
( 8 9 / 3 3 6 / E E C )
Denominación del producto:
Tronic T4X Cargador de baterías
Bochum, 30.09.2007
Hans Kompernaß
- Gerente -
Queda reservado el derecho a realizar modificaciones técnicas
para el perfeccionamiento del dispositivo.
Page 11

13 IT/MT
Introduzione
Per la vostra sicurezza .................................................................................................Pagina 14
Utilizzo conforme alla destinazione d‘uso .................................................................Pagina 14
Fornitura ........................................................................................................................Pagina 14
Descrizione dei componenti ........................................................................................Pagina 14
Dati tecnici ....................................................................................................................Pagina 15
Sicurezza
Avvertenze di sicurezza ...............................................................................................Pagina 15
Caratteristiche del prodotto.........................................................................................Pagina 17
Utilizzo
Messa in esercizio ........................................................................................................Pagina 17
Collegamento ...............................................................................................................Pagina 17
Scollegamento ..............................................................................................................Pagina 17
Selezione della modalità di caricamento ...................................................................Pagina 18
Reset / Cancellazione delle impostazioni ...................................................................Pagina 18
Passaggio fra le modalità 1, 2 e 3..............................................................................Pagina 18
Modalità 1 (14,4 V / 0,8 A) ....................................................................................Pagina 18
Modalità 2 (14,4 V / 3,6 A) ..................................................................................Pagina 18
Modalità 3 (14,7 V / 3,6 A) ....................................................................................Pagina 19
Rigenerazione / caricamento delle batterie scariche (usate, sovraccaricate) ........Pagina 19
Funzione di protezione dell‘apparecchio ...................................................................Pagina 19
Protezione dal surriscaldamento .................................................................................Pagina 19
Indice
Cura e manutenzione .....................................................................................Pagina 20
Smaltimento ...........................................................................................................Pagina 20
Informazioni
Service ...........................................................................................................................Pagina 20
Dichiarazione di conformità / Produttore ...................................................................Pagina 20
Page 12

14 IT/MT
Introduzione
Nel presente manuale di istruzioni per l’uso vengono utilizzati i seguenti pittogrammi / simboli:
Leggere il manuale di istruzioni per l’uso!
Rispettare le avvertenze e le indicazioni per la
sicurezza!
Attenzione, rischio di scossa elettrica! Tensione
elettrica pericolosa – pericolo di morte!
Pericolo di esplosione!
Pericolo d’incendio!
Caricabatteria T4X
per accumulatori / batterie da 1,2 Ah a
120 Ah
Q
Introduzione
Q
Per la vostra sicurezza
Leggere attentamente le istruzioni per
l‘uso e aprire la pagina con le illustrazioni.
Osservare scrupolosamente le indicazioni
quando si mette in funzione l‘apparecchio. In caso
di domande riguardanti l‘uso, contattare il centro
assistenza della propria nazione. Conservare accuratamente le istruzioni per l‘uso e consegnarle insieme
all‘apparecchio in caso di cessione dello stesso a terzi.
Q
Utilizzo conforme alla
destinazione d‘uso
TRONIC T4X è un apparecchio di carica primaria
azionato lateralmente (funzionante in base alle tecniche di misurazione e regolazione) con carica di
mantenimento a impulsi, indicata per il caricamento
e il mantenimento di accumulatori al piombo da
12 V (batterie) con soluzione o gel elettrolitico. Il
W
V
caricabatterie possiede una funzione di protezione
dalla formazione di scintille e surriscaldamento.
L‘utilizzo non conforme alla destinazione d‘uso o
inappropriato annulla la garanzia. Il produttore non
si assume alcuna responsabilità per i danni derivanti
da un utilizzo non conforme.
L‘apparecchio non è destinato a un uso commerciale.
Q
Fornitura
Subito dopo l‘apertura dell‘imballaggio, controllare
la fornitura, l‘apparecchio e tutti i componenti alla
ricerca di eventuali danni. In presenza di danni visibili
all‘apparecchio o ai suoi componenti, non metterlo
in funzione. Per la sostituzione, mettersi in contatto
con il centro di assistenza competente.
1 Caricabatterie TRONIC T4X
2 Morsetti di collegamento rapido
1 Manuale di istruzioni per l‘uso
Documentazione di garanzia
Q
Descrizione dei componenti
1
Watt (potenza attiva)
Volt (tensione alternata)
~
In questo modo vi comportate
correttamente:
Tenere lontani i bambini e altre persone durante
l’uso dell’elettroutensile.
Smaltire l’imballaggio dell’apparecchio in modo
ecocompatibile
(1 rosso, 1 nero)
STANDBY Spia LED „STANDBY“
(pronto per l‘uso)
Page 13

15 IT/MT
2
T4X KH 3157
220 V-240 V AC ~ 50 Hz / 60 Hz · 55 W
12 V DC
0,8 / 3,6 A · IP65
Polarity: red clamp (+), black clamp (-)
Date of manufacture: 02/2008
Warning! Explosive gases-prevent
flames and sparks. Before changing,
study instruction sheet. Disconnecting
supply before making or braking
battery connections.
Provide for good ventilations.
Kompernaß GmbH · D- 44867 Bochum · Germany · www.kompernass.com
Spia LED „Modalità 1“
3
Spia LED „Modalità 2“
4
Spia LED „Modalità 3“
5
Spia LED „Connessione con polarità
inversa / errore“
6
Spia LED „Caricamento completato“
7
Spia LED „Procedimento di carica attivato“
Q
8
Tasto di selezione „MODE“
9
Caricabatterie
10
Cavo di rete con spina
11
Fori di fissaggio
12
Cavo di connessione con polo „+“ (rosso),
incl. capocorda a occhiello
13
Cavo di connessione con polo „–“ (nero), incl.
capocorda a occhiello
14
Morsetto di contatto rapido polo „+“ (rosso),
incl. vite di fissaggio rossa
15
Morsetto di contatto rapido polo „–“ (nero),
incl. vite di fissaggio nera
Q
Dati tecnici
Tensione di
alimentazione: 220 - 240 V ~ 50 / 60 Hz
Corrente di
inserzione: < 25 A
Corrente di ingresso: max. 0,6 A (valore effettivo)
Potenza assorbita: 55 W
Corrente inversa*: < 5 mA (nessun ingresso AC)
Tensione nominale: 12 V DC
Corrente Nominale: 0,8 / 3,6 A
Tensione di carica: 14,4 V ± 0,25 V o
14,7 V ± 0,25 V
Corrente di carica: 3,6 A
(3,6 A ± 10 % o 0,8 A ± 10 %)
Valore di rumore**: max. 150 mV
Tipo di batterie: batteria al piombo acido da
12 V 1,2 Ah – 120 Ah
Tipo di
alloggiamento: IP 65 (isolato dalla polvere,
isolato dall‘acqua)
Dimensioni: 180 x 62 x 40 mm
(l x p x a)
Peso: ca. 0,5 kg
Livello di rumore: < 50 dB (A)
(testato da 50 cm di distanza)
Introduzione / Sicurezza
* = La corrente inversa è quella che il caricabat-
terie consuma dalla batteria quando non è
collegato alla rete elettrica.
** = il valore di rumore descrive i valori di disturbo
di corrente e tensione.
Q
Sicurezza
Avvertenze di sicurezza
m Pericolo! Evitare l‘uso inidoneo, che può pro-
vocare il rischio di morte e di lesioni!
J Non operare l‘apparecchio in caso di danni al
cavo, al cavo di rete o alla presa di rete.
m ATTENZIONE! I cavi di rete danneggiati co-
stituiscono un pericolo di morte a causa di
scossa elettrica.
J In caso di danni al cavo di rete j, fare eseguire
le riparazioni unicamente da personale autorizzato e specializzato! In caso di necessità di
riparazioni, mettersi in contatto con il centro di
assistenza della propria nazione!
J
in grado di valutare i possibili pericoli collegati
J
Durante il procedimento di caricamento e di
Non lasciare il caricabatterie incu-
stodito in presenza di bambini e ragazzi! I bambini non sempre sono
all‘uso degli elettrodomestici.
Pericolo di esplosione! Proteg-
gersi da eventuali reazioni altamente
esplosive in presenza di gas tonante!
mantenimento della carica, dalla batteria può
fuoriuscire idrogeno allo stato gassoso. Il gas
tonante è una miscela esplosiva di idrogeno e
ossigeno allo stato gassoso. In caso di contatto
con fiamme libere (fuoco, brace o scintille) avviene la cosiddetta reazione del gas tonante!
Eseguire il procedimento di carica e mantenimento in un luogo al riparo dalle intemperie e
provvisto di buona aerazione.
Page 14

16 IT/MT
Sicurezza
Accertarsi che durante il processo di carica e
di mantenimento non siano presenti fiamme
libere (fuoco, brace o scintille)!
J
come benzina o solventi, durante l‘uso dell‘ap-
m Pericolo di corrosione! Proteggere gli occhi
J
per dadi con impugnatura isolata!
J Utilizzare il caricabatterie unicamente per il ca-
J Non utilizzare il caricabatterie per il procedi-
J Non utilizzare il caricabatterie per il procedi-
J In caso di batteria installata nel veicolo, assicu-
J Evitare il cortocircuito in caso di connessione
J Prima del collegamento alla rete elettrica, assi-
Pericolo di esplosione e di
incendio! Impedire l‘accensione
di sostanze esplosive o infiammabili,
parecchio!
e la cute dagli acidi corrosivi (acido solforico)
in caso di contatto con la batteria! Non rivolgere
lo sguardo direttamente sulla batteria collegata
e utilizzare occhiali, abbigliamento e guanti
protettivi resistenti agli acidi! In caso di contatto
dell‘acido solforico con gli occhi o con la cute,
sciacquare la parte del corpo interessata con
acqua corrente pulita e consultare immediatamente un medico!
Proteggersi dalle scosse elet-
triche! Nel collegare il caricabatterie,
utilizzare un cacciavite e una chiave
ricamento e il mantenimento in carica di batterie al
piombo da 12 V (con soluzione o gel elettrolitico)!
mento di carica e di mantenimento di batterie
non ricaricabili.
mento di carica e di mantenimento di batterie
danneggiate o congelate!
rarsi che il veicolo sia spento e fermo! Spegnere
il veicolo e parcheggiarlo con il freno di stazionamento azionato (ad es. per le autovetture) o
con il cavo ormeggiato (ad es. per il motoscafo)!
dell‘apparecchio alla batteria. Collegare il cavo
di connessione con il polo negativo esclusivamente al polo negativo della batteria o alla
carrozzeria. Collegare il cavo di connessione
con il polo positivo esclusivamente al polo positivo della batteria!
curarsi che la presa di corrente sia corrispondente a 230 V ~ 50 Hz, provvista di conduttore
neutro di messa a terra, fusibile da 16 A e cir-
cuito di sicurezza per correnti di guasto!
J In caso di contatto con la presa di corrente
con contatto di terra, afferrare il cavo di rete j
solo dalla presa isolata!
J Afferrare il cavo di connessione ai poli („–“ e
„+“) solo dalla zona isolata!
J Eseguire il collegamento alla batteria e alla
presa di corrente con contatto di terra impedendo qualsiasi contatto con l‘umidità!
J Eseguire il montaggio, la manutenzione e la
cura del caricabatterie solo in assenza di corrente elettrica!
J Non collocare il caricabatterie nelle vicinanze
di fuoco, calore e temperature superiori a 50° C!
In caso di alte temperature, la potenza di uscita
dell‘apparecchio si abbassa automaticamente.
J Non danneggiare con viti le condutture di car-
burante, i cavi elettrici, le condutture dei freni,
idrauliche, idriche o telefoniche nel fissaggio
dell‘apparecchio con le viti! Ciò espone al
rischio di morte e di lesioni personali!
J Assicurarsi che il cavo di collegamento al polo
positivo non venga in contatto con le condotte
del carburante (ad es. alimentazione di benzina)!
J Assicurarsi che la presa di rete sia liberamente
accessibile, per consentire di disconnettere rapidamente l‘apparecchio dalla rete di corrente
in caso di emergenza.
J Attenzione! Evitare i danni materiali dovuti a
un uso non conforme!
J Utilizzare il caricabatterie solo con i componenti
originali acclusi!
J Non coprire il caricabatterie con oggetti!
J Durante il caricamento collocare la batteria su
una superficie ben aerata.
J Proteggere le superfici dei contatti elettrici delle
batterie dai cortocircuiti!
J In caso di uso all‘aperto, collegare il carica-
batterie solo a una presa di corrente con contatto di terra, provvista di circuito di sicurezza
per correnti di guasto.
J Non collocare il caricabatterie direttamente
sopra o accanto alla batteria!
J Al termine del processo di carica e di manteni-
mento, in caso di batteria installata nel veicolo,
staccare prima il cavo di connessione al polo
Page 15

17 IT/MT
Sicurezza / Utilizzo
negativo (nero) del caricabatterie dal polo negativo della batteria.
J In caso di guasti e danneggiamenti, scollegare im-
mediatamente l‘apparecchio dalla rete elettrica!
J Fare eseguire le riparazioni unicamente da
personale autorizzato e specializzato! In caso
di necessità di riparazioni, mettersi in contatto
con il centro di assistenza della propria nazione!
J Prima di collegare l‘apparecchio, informarsi
sulla manutenzione della batteria consultando
il relativo manuale di istruzioni!
J Prima del collegamento del caricabatterie a
una batteria installata in un autoveicolo, informarsi sulle norme di sicurezza elettrica e sulla
manutenzione consultando il manuale di istruzioni dell‘autoveicolo!
J Non sottoporre l‘apparecchio a sollecitazioni
meccaniche!
J In caso di non utilizzo, scollegare l‘apparecchio
dalla rete elettrica!
Q
Caratteristiche del prodotto
Questo prodotto è stato progettato per caricare diversi tipi di batterie sigillate al piombo acido, utilizzate per lo più in autoveicoli, motociclette e alcuni
altri veicoli. Esse possono essere del tipo con elettrolito liquido (WET), elettrolito in gel, o AGM (con
tappetini imbevuti di elettrolito). La capacità è compresa fra 12 V / 1,2 Ah a 12 V / 120 Ah.
La speciale progettazione dell‘apparecchio (denominata anche „strategia di caricamento a tre livelli“)
permette il ricaricamento della batteria fino a quasi
il 100 % della sua capacità. Inoltre, una connessione
a lungo termine della batteria non utilizzata al caricabatterie può servire a mantenerla in condizioni
di carica ottimali senza danneggiarla.
Q
Utilizzo
ne dell‘apparecchio sempre in assenza di corrente elettrica!
In questo modo vi
comportate correttamente
j Per la messa in funzione, scegliere una posta-
zione di lavoro idonea.
j Dedicare tempo sufficiente all‘accurata prepa-
razione della messa in funzione. Posizionare
tutti i singoli componenti e gli altri utensili o materiale di probabile utilizzo in modo visibile e
facilmente accessibile.
j Prestare la massima attenzione e concentrarsi
sempre su ciò che si sta facendo. Procedere
sempre in modo ragionevole e non mettere in
funzione il caricabatterie se non si è concentrati
o non si è in perfette condizioni fisiche.
Q
Collegamento
j Prima del processo di carica e di mantenimen-
to sotto carica con batteria collegata stabilmente al veicolo, scollegare prima il cavo di
connessione al polo negativo (nero) del veicolo dal polo negativo della batteria. Il polo negativo della batteria di solito è collegato alla
carrozzeria del veicolo.
j Infine, scollegare il cavo di connessione al
polo positivo (rosso) del veicolo dal polo positivo della batteria.
j Solo a questo punto, collegare il morsetto di
collegamento rapido al polo „+“ (rosso)
14
del caricabatterie alla polarità a destra (polo
„+“) della batteria.
j Collegare quindi il morsetto di collegamento
rapido „–“ (nero)
j Collegare il cavo di rete
15
al polo „–“ della batteria.
10
del caricabatterie
alla presa di corrente con contatto di terra della rete elettrica.
Q
Messa in esercizio
m Attenzione! Pericolo di scossa elettrica!
Eseguire il montaggio, la cura e la manutenzio-
Q
Scollegamento
j Scollegare l‘apparecchio dalla rete elettrica.
j Prelevare il morsetto di collegamento rapido
Page 16

18 IT/MT
Utilizzo
„–“ (nero) 15 dal polo „–“ della batteria.
j Prelevare il morsetto di collegamento rapido
„+“ (rosso)
14
dal polo „+“ della batteria.
j Collegare nuovamente il cavo di connessione al
polo positivo del veicolo al polo positivo della
batteria.
j Collegare nuovamente il cavo di connessione
al polo negativo del veicolo al polo negativo
della batteria.
Q
Selezione della modalità
di caricamento
Per il caricamento di diverse batterie con diverse
temperature ambienti, è possibile selezionare tre
modalità di caricamento. Selezionare la modalità
più efficiente e più sicura per il caricamento della
batteria.
In confronto ai tradizionali caricabatterie, questo
apparecchio possiede una funzione speciale per il
riutilizzo di una batteria / accumulatore scarico. È
possibile ricaricare una batteria / accumulatore
completamente scarico. Il procedimento di caricamento sicuro è garantito da un dispositivo di protezione dai collegamenti errati e dai cortocircuiti. I
circuiti elettronici installati permettono la messa in
funzione dell‘apparecchio non subito dopo il collegamento della batteria, ma solo dopo la selezione
della modalità di caricamento.
In tal modo, si evita la formazione delle scintille solitamente prodotte durante il procedimento di connessione. Inoltre, tale dispositivo è controllato da
un‘unità MCU (unità microcomputer), che rende l‘apparecchio più sicuro, più efficiente e più affidabile.
Q
Reset / Cancellazione
delle impostazioni
Dopo il collegamento alla rete elettrica, l‘apparecchio si posiziona automaticamente nell‘impostazione
principale e resta in modalità STANDBY.
Q
Passaggio fra le modalità
1, 2 e 3
j Premendo il tasto di selezione MODE 8 in
successione rapida, l‘apparecchio mostra le
seguenti modalità di caricamento in sequenza:
pronto per l‘uso STANDBY, MODE1
MODE2
, MODE3
e avvia quindi il ciclo
successivo.
Premendo il tasto di selezione
8
, l‘apparecchio
passa alla modalità successiva di caricamento e la
esegue. Se però la batteria non viene scollegata dal
caricabatterie dopo la carica, essa resta in modalità
di mantenimento, anche se l‘utente passa a una
modalità diversa.
Ciò è utile per proteggere la batteria carica dai danni.
Q
Modalità 1 (14,4 V / 0,8 A)
Questa modalità è indicata per caricare batterie
piccole con capacità inferiore a 14 Ah.
j Premere il tasto di selezione MODE
lezionare la modalità 1. Al termine di questo
procedimento, si accende la relativa spia LED
2. Se non si desiderano eseguire altri procedimenti, l‘elettronica si regola automaticamente
in base alla spia LED
7 e avvia il procedi-
mento di carica (corrente di) 0,8 A ± 10 %.
Se il procedimento prosegue senza problemi, la
spia LED
7 resta accesa durante tutto il
procedimento, fino al caricamento della batteria da 14,4 V / ± 0,25 V. Se la batteria si è
caricata completamente, la spia LED
accende e la spia LED
7 si spegne. In tal
modo è disponibile una corrente di mantenimento per la batteria.
Q
Modalità 2 (14,4 V / 3,6 A)
Questa modalità viene utilizzata soprattutto per il
caricamento di batterie di grande capacità, superiore a 14 Ah, in condizioni normali.
,
8
, per se-
6 si
j Premere il tasto di selezione MODE
8
, per se-
Page 17

19 IT/MT
Utilizzo
lezionare la modalità 2. Se non si desiderano
eseguire altri procedimenti, l‘elettronica si regola
automaticamente in base alla spia LED
e avvia il procedimento di carica con (corrente di)
3,6 A ± 10 % (3,6 A).
Se il procedimento prosegue senza problemi,
la spia LED
procedimento, fino al caricamento della batteria
da 14,4 V / ± 0,25 V. Se la batteria si è caricata
completamente, la spia LED
e la spia LED
disponibile una corrente di mantenimento per
la batteria.
Q
Modalità 3 (14,7 V / 3,6 A)
Questa modalità è indicata per batterie di grande
capacità, superiore a 14 Ah, a basse temperature
o per caricare alcune batterie AGM di capacità
superiore a 14 Ah.
j Premere il tasto di selezione MODE
lezionare la modalità 3. Una volta selezionata
la modalità desiderata, si accende immediatamente la relativa spia LED
si attiva automaticamente all‘inizio del procedimento, dopo un tempo di attesa determinato,
qualora l‘utente non esegua altre azioni. In
questa modalità la corrente di carica è identica
a quella della „Modalità 2“.
Se il procedimento prosegue senza problemi,
la spia LED
attivata e resta in tale stato fino al caricamento
della batteria da 14,7 V. Non appena tale
carica è stata raggiunta, il caricabatterie passa
alla modalità di mantenimento di carica della
batteria. La spia LED
LED
corrente.
7 resta accesa durante tutto il
6 si accende
7 si spegne. In tal modo è
4. L‘elettronica
7 si accende, l‘elettronica è
7 si spegne e la spia
6
si accende, per indicare lo stato
8
, per se-
3
Q
Rigenerazione / caricamento
delle batterie scariche
(usate, sovraccaricate)
Il caricabatterie riconosce automaticamente la tensione della batteria, una volta collegato alla batteria
e dopo l‘avvio del procedimento di carica. Esso
passa alla modalità di caricamento a impulsi qualora la tensione sia compresa fra 7,5 V ± 0,5 e
10,5 V ± 0,5 V.
Questo caricamento a impulsi continua finché la
tensione della batteria arriva a 10,5 V ± 0,5 V.
Non appena tale situazione viene raggiunta, il
caricabatterie si riposiziona nella modalità di caricamento normale precedentemente selezionata.
Ora la batteria può essere caricata con rapidità e
sicurezza. In tal modo è possibile caricare la maggior
parte delle batterie scariche, che possono essere
così riutilizzate.
Q
Funzione di protezione
dell‘apparecchio
Non appena si manifesta una situazione differente
come cortocircuito, tensione della batteria inferiore
a 7,5 V, circuito di corrente aperto o collegamento
invertito dei morsetti di uscita, l‘apparecchio disattiva
l‘elettronica e riporta il sistema immediatamente
all‘impostazione principale, per evitare danni.
Se non vengono eseguite altre impostazioni, il sistema
resta in STANDBY.
In caso di connessione errata dei morsetti di uscita,
si accende inoltre la spia LED „Connessione con
polarità inversa / errore“
Q
Protezione dal surriscaldamento
Se l‘apparecchio si surriscalda durante la carica,
viene automaticamente ridotta la potenza in uscita,
per proteggere l‘apparecchio dai danni.
5.
Page 18

20 IT/MT
Cura e manutenzione / Smaltimento / Informazioni
Q
Cura e manutenzione
m Attenzione! Pericolo di scossa elettrica!
Eseguire il montaggio, la cura e la manutenzione
dell‘apparecchio sempre in assenza di corrente
elettrica!
L‘apparecchio non necessita di manutenzione.
j Spegnere l‘apparecchio.
j Ripulire le superfici in plastica dell‘apparecchio
e il telecomando con un panno asciutto. Non
utilizzare assolutamente solventi o altri detergenti aggressivi.
Q
Smaltimento
L’imballaggio è composto da materiali
ecologici, che possono essere smaltiti
presso i siti di riciclaggio locali.
Non gettate apparecchi elettri-
ci nella spazzatura della casa!
In base ala Direttiva Europea 2002 / 96 / EG relativa agli apparecchi elettrici ed elettronici usati e le
norme di armonizzazione di tale direttiva nel diritto
di ciascun Paese, i dispositivi elettrici usati debbono
essere smaltiti separatamente ed essere condotti
ad un loro riutilizzo non dannoso per l’ambiente.
modo si può essere sicuri di poter continuare ad
utilizzare l’apparecchio in condizioni di sicurezza.
J Fare eseguire la sostituzione dell’adattatore o del
cavo di alimentazione solamente dal produttore
o dal suo Servizio Clienti. Solo in questo modo si
può essere sicuri di poter continuare ad utilizzare
l’apparecchio in condizioni di sicurezza.
Q
Dichiarazione di conformità /
Produttore
Noi, la Kompernaß GmbH, Burgstr. 21,
44867 Bochum, Germania, dichiariamo la
conformità di questo prodotto con le seguenti
normative europee:
Normativa CE per la bassa tensione
(2006 / 95 / EG)
Compatibilità elettromagnetica
( 8 9 / 3 3 6 / E E C )
Descrizione del prodotto:
Tronic T4X Caricabatteria
Bochum, 30.09.2007
Le possibilitá di smaltimento dell’apparecchio
usurato potete reperire presso il vostro comune.
Q
Informazioni
Q
Service
Potete trovare l’assistenza clienti del vostro paese
nella documentazione della garanzia.
J Fare riparare l’apparecchio solamente da perso-
nale qualificato, utilizzando a tale scopo solamente pezzi di ricambio originali. Solo in questo
Hans Kompernaß
- Amministratore -
Modifiche tecniche nel senso dello sviluppo rimangono riservati.
Page 19

21 GB/MT
Table of Content
Introduction
For your safety ..............................................................................................................Page 22
Proper Use .....................................................................................................................Page 22
Delivery Contents .........................................................................................................Page 22
Component description ................................................................................................Page 22
Technical Data ..............................................................................................................Page 23
Safety
Safety information ........................................................................................................Page 23
Product features ............................................................................................................Page 25
Operation
Preparing for use ..........................................................................................................Page 25
Connection ....................................................................................................................Page 25
Disconnecting................................................................................................................Page 25
Select charging mode ..................................................................................................Page 25
Reset / deleting settings ................................................................................................Page 26
Switching over between modes 1, 2 and 3 ...............................................................Page 26
Mode 1 (14.4 V / 0.8 A) .........................................................................................Page 26
Mode 2 (14.4 V / 3.6 A) .......................................................................................Page 26
Mode 3 (14.7 V / 3.6 A) .........................................................................................Page 26
Regenerating / charging empty (used, overcharged) batteries ................................Page 27
Protective function of the device.......................................................................................Page 27
Overheating protection ................................................................................................Page 27
Maintenance and care ..................................................................................Page 27
Disposal ......................................................................................................................Page 27
Information
Servicing ........................................................................................................................Page 27
Declaration of conformity / Manufacturer ..................................................................Page 28
Page 20

22 GB/MT
Introduction
The following pictogrammes / symbols are used in these operating instructions:
Read the operating instructions!
Always heed warning labels and
safety instructions!
Caution - Danger of electric shock! Hazardous
voltage – danger to life!
Explosive material!
Risk of fire!
Battery charger T4X
for rechargeable batteries / batteries from
1.2 Ah to 120 Ah
Q
Introduction
Q
For your safety
Please carefully read these operating in-
structions and fold out the page with the
illustrations.Observe this information
exactly when putting the appliance into operation.
If you have any further
questions regarding use, please contact the service
department responsible for your country. Keep these
operating instructions in a safe place and hand them
over to anyone to whom you pass on the appliance.
W
V
Watts (effective power)
Volt (AC)
~
Proper procedure and handling.
Keep children and other unauthorised personnel
at a safe distance when using electrical tools.
Dispose packaging and appliance in an
environmentally-friendly way!
Operate the charging appliance in a warmed and
well ventilated room. Any incorrect or improper use
leads to loss of the warranty. The manufacturer
takes no responsibility for damage(s) arising out of
usage that is contrary to the instructions laid down.
The appliance is not meant for commercial use.
Q
Delivery Contents
Check the appliance and all accessories for damage immediately after unpacking. Do not put a defective appliance or parts into operation. Please
contact the resonsible service department for
a replacement.
1 Charger TRONIC T4X
2 Quick / contact clamps (1 red, 1 black)
1 Operating manual
Guarantee documents
Q
Proper Use
The TRONIC T4X is a primarily mains-connected
(working with measuring and control functions)
charging station with pulse trickle charge function,
suitable for charging and trickle charging 12 V lead
accumulators (batteries) with electrolyte solution or
gel. The charger has a circuit-breaker as protection
against sparking and overheating.
Q
Component description
1
STANDBY LED display :“STANDBY“ (standby)
2
LED display „Mode 1“
3
LED display „Mode 2“
4
LED display „Mode 3“
5
LED display „incorrect polarity/fault“
6
LED display „fully charged“
7
LED display „Charging process active“
Page 21

23 GB/MT
Introduction / Safety
T4X KH 3157
220 V-240 V AC ~ 50 Hz / 60 Hz · 55 W
12 V DC
0,8 / 3,6 A · IP65
Polarity: red clamp (+), black clamp (-)
Date of manufacture: 02/2008
WARNING! Explosive gases - prevent
flames and sparks. Before charging,
study instruction sheet. Disconnect
supply before making or breaking
battery connections. Provide for good
ventilation.
Kompernaß GmbH · D- 44867 Bochum · Germany · www.kompernass.com
Q
8
Selection button „MODE“
9
Charging station
10
Mains cable with power plug
11
Fixing holes
12
„+“-Pole connection cable (red), incl. ring shoe
13
„–“-Pole connection cable (black), incl. ring shoe
14
„+“-Pole quick-contact terminal (red), incl. red
fixing screw
15
„–“-Pole quick-contact terminal (black), incl.
black fixing screw
Q
Technical Data
Input voltage: 220 - 240 V ~ 50 / 60 Hz
Starting current: < 25 A
Input current: max. 0.6 A (Effective value)
Power
consumption: 55 W
Return current*: < 5 mA (no AC input)
Nominal voltage: 12 V DC
Nominal current: 0,8 / 3,6 A
Charging voltage: 14.4 V ± 0.25 V or
14.7 V ± 0.25 V
Charging current: max. 3.6 A (3.6 A ± 10 % or
0.8 A ± 10 %)
Noise value**: max. 150 mV
Battery type: 12 V lead acid battery
1.2 Ah - 120 Ah
Type of housing
protection: IP 65 (dustproof, waterproof)
Dimensions: 180 x 62 x 40 mm
(L x W x H)
Weight: 0.5 kg approx.
Noise level: < 50 dB (A) (tested from a
distance of 50 cm)
* = Return current is the current used by the
charging station battery, when no mains current is connected.
** = Noise value is the disturbance of current and
voltage.
Q
Safety
Safety information
m Danger! Avoid danger to life and limbs
caused by improper use!
J Do not operate the appliance with a damaged
cable, power cord or plug.
m CAUTION! A damaged power cord causes
danger to life by electric shock.
J If damaged, have the power cord j repaired by
authorised and trained technicians only! Please
contact the service department for your country!
J
the potential danger in the handling of electrical
J
can leak from the battery during the charging
J
vents can be ignited when using the charging
m Danger of chemical burns! Protect your
Do not allow toddlers or children
near the charging station without
super-vision! Children cannot assess
equipment.
Explosion hazard! Protect your-
self from a highly explosive oxyhydrogen gas reaction! Gaseous hydrogen
and discharging process. Oxyhydrogen gas is
an explosive mixture of gaseous hydrogen and
oxygen. The result is the so-called oxyhydrogen
reaction upon contact with open fire (flames,
embers or sparks)! Carry out the charging or
discharging procedure in a wellventilated room
protected from the weather. Make sure that there
are no sources of open fire (flames, embers or
sparks) in the vicinity when charging or discharging batteries!
Danger of explosion and fire!
Make sure that explosive and flammable substances e.g. petrol or sol-
station!
eyes and skin against chemical burns caused
by acid (sulphuric acid) upon contact with the
battery! Do not look directly at the connected
battery and use the following: acid-resistant
safety glasses, protective clothing and gloves!
If your eyes or skin come into contact with sulphuric acid, rinse the affected part of the body
with plenty of clear running water and seek
immediate medical assistance!
Page 22

24 GB/MT
Safety
J Protect yourself from an elec-
tric shock! When connecting the
charging station, use a screwdriver
and a spanner with an insulated handle!
J Only use the charging station for charging and
discharging undamaged 12 V lead batteries
(with electrolyte solution or gel)!
J Do not use the charging station for charging or
trickle-charging batteries without recharging
properties.
J Do not use the charging station for charging or
trickle-charging a damaged or frozen battery!
J In case of permanently installed batteries, make
sure that the vehicle is not in use and is in a secure, stationary position! Switch off the ignition
and select a parking position, apply the parking
brake (e.g. cars)or a retaining rope (e.g. boats)!
J When connecting the charging station to the
battery, avoid short-circuiting. Connect the minus
pole connecting cable only to the minus pole
of the battery or to the car body. Connect the
plus pole connecting cable only to the plus pole
of the battery!
J Before connecting to the mains, make sure that
the mains current is equipped with standard
230 V ~ 50 Hz, PEN conductor, a 16 A fuse
and a residual-current circuit-breaker!
J Only touch the power cord j in the insulated
area at the power plug upon contact with the
socket outlet with earthing contact!
J Only touch the pole connecting cables („–“
und „+“) in the insulated area!
J Only connect to the battery and the socket out-
let with earthing contact of the mains if it is fully
protected against moisture!
J Only carry out the assembly, maintenance and
servicing of the charging station when it is disconnected from the power supply!
J Do not position the charging station near a fire
or subject it to heat or to long-term temperatures
exceeding 50° C! The output capacity of your
charging station is automatically reduces at
high temperatures.
J Do not damage any leads or connections for
fuel, electricity, brake systems, hydraulics, water
or tele-communications when attaching the
charging station with bolts! Otherwise there
will be a danger to life and limbs!
J Make sure that the plus pole connecting cable
has no contact with the fuel line (e.g. petrol line)!
J Ensure that the mains power socket is at all times
freely accessible so that in a case of emergency
the appliance can be quickly separated from
the power source.
J Attention! Avoid damage caused by improper
use!
J Only use the charging station with the original
parts provided!
J Do not cover the charging station with objects!
J Place the battery in a well-ventilated location
during charging.
J Protect the electrical contacts of the battery
against short-circuiting!
J Only connect the charging station to a socket
outlet with earthing contact equipped with a residual-current circuit-breaker when using outdoors.
J Do not place the charging station driectly on or
next to the battery!
J After completing the charging and floating charge
operation on a battery permanently installed in
the vehicle, first disconnect the cable of the
negative (minus) pole (black) of the charger
from the negative (minus) pole of the battery.
J In case of malfunction or damage, immediately
disconnect the charging station from the mains!
J Have the charging station repaired by authorised
and trained specialists only! Please contact the
service department for your country!
J Before connecting the charging station, read
the information on battery maintenance in the
operating instructions of the battery!
J Before connecting the charging station to a
battery permanently installed in a vehicle, read
the information on electrical safety and maintenance in the operating instuctions of the vehicle!
J Do not subject the battery to mechanical
loads!
J When the charging station is not in use, discon-
nect it from the power supply!
Page 23

25 GB/MT
Safety / Operation
Q
Product features
This appliance has been designed for charging a
variety of SLA batteries (sealed lead acid batteries),
as mainly used in cars, motorbikes and several other
vehicles. They may be of types e.g. WET (with liquid
electrolyte), GEL (with mit gel-type electolyte) or AGM
(absorbed glass mat) batteries. Their capacity ranges
from 12 V / 1.2 Ah to 12 V / 120 Ah.
A special design of the appliance (also named
„three-phase-charging strategy“) enables the recharging of the batttery to almost 100 % of its original
capacity. Furthermore, a long-term connection of the
battery to the charging station can take place to
keep the battery in optimal condition when not in
use, without it being damaged in the process.
Q
Operation
Q
Preparing for use
m Caution! Danger of electric shock!
Only install, maintain and service the appliance
when it is disconnected form the mains!
Working safely
j When putting the appliance into operation,
select a suitable place to do so.
j Take your time when carefully preparing to put
the appliance into operation. Put all compoments
and any additionally required tools or materials
well arranged and within easy reach.
j Always be alert and pay attention to what you
are doing. Be sensible when working and do
not operate the charging station if you lack the
ability to concentrate or do not feel well.
Q
Connection
j Before starting the charging or discharging
procedure on a permanently installed battery
in a vehicle, first disconnect the minus pole con-
necting cable (black) of the vehicle from the
minus pole of the battery. The minus pole of the
battery is usually connected to the car body.
j Then disconect the plus pole connecting cable
(red) of the vehicle from the plus pole of the
battery.
j Then first connect the „+“ pole quick-contact
clamp (red)
14
of the charging station to the
plus pole („+“ pole) of the battery.
j Connect the „–“ pole quick-contact clamp (black)
15
to the „–“ pole of the battery.
j Connect the power cord
10
of the battery
charging station to the socket oulet with earthing
contact of the power supply.
Q
Disconnecting
j Disconnect the appliance from the power supply.
j Disconnect the „–“ pole quick-contact clamp
15
(black)
from the „–“ pole of the battery.
j Disconnect the „+“ pole quick-contact clamp
14
(red)
from the „+“ pole of the battery.
j Reconnect the plus pole connecting cable of
the vehicle to the plus pole of the battery.
j Reconnect the minus pole connecting cable of
the vehicle to the minus pole of the battery.
Q
Select charging mode
For charging various batteries at different ambient
temperatures you can choose between three different
charging modes. Select the most efficient and suitable charging mode for charging the battery.
In comparison with conventional battery charging
stations, this appliance has a special function for
reusing an empty battery or rechargeable battery.
You can recharge an empty battery / rechargeable
battery. Safe charging is ensured by means of a
protection function against incorrect connection and
short circuiting. Due to the installed electronics, the
charging station does not begin operation directly
after connecting the battery, but only starts after a
charging mode has been selected.
Page 24

26 GB/MT
Operation
This avoids sparking, which often occurs when connecting. Furthermore, this device is also controlled
by an internal MCU (Micro-Computer-Unit), which
makes it faster, more powerful and more reliable.
Q
Reset / deleting settings
After connection to the power supply, the appliance
automatically returns to its basic setting and remains
in STANDBY mode
Q
Switching over between
modes 1, 2 and 3
j Press the selection button MODE 8 repeatedly
to display the charging modes in the following
order: Ready STANDBY, MODE1
, MODE3
If you press the selector button
and start the next cycle.
8
automatically switches over to the next mode and
begins operation in that mode. However, if a battery
is not disconnected from the charging station after
a full charge, the appliance remains in trickle-charge
mode, even if the user switches over to another mode.
This protects the battery from being damaged.
Q
Mode 1 (14.4 V / 0.8 A)
This mode is suitable for charging small batteries
with a capacity below 14 Ah.
j Press the selection button MODE
mode 1. After doing so, the corresponding LED
display
2 lights up. If you do not activate
an-other process afterwards, the electronic system will automatically start the charging process
together with the LED display
current of) 0.8 A ± 10 %.
If the procedure runs without any problems, the
LED display
7 remains on during the entire
charging process, until the battery is fully charged
at 14.4 V / ± 0.25 V. When the battery is fully
charged, LED display
6 lights up and LED
, MODE2
,charging mode
8
, to select
7 at (with a
display 7 goes out. The floating current is now
available for the battery.
Q
Mode 2 (14.4 V / 3.6 A)
This mode is mainly used for charging batteries with
a large capacity exceeding 14 Ah under normal
conditions.
j Press the selection button MODE
8
, to activate
mode 2. If you do not activate another process
afterwards, the electronic system, together with
LED display
3 starts the charging process
at (with a current of) 3.6 A ± 10 % (3.6 A).
If the procedure runs without any problems, the
LED display
7 remains on during the entire
charging process, until the battery is fully charged
at 14.4 V / ± 0.25 V. When the battery is fully
charged, LED display
display
7 goes out. The floating current is
6 lights up and LED
now available for the battery.
Q
Mode 3 (14.7 V / 3.6 A)
This mode is used for charging batteries with a
greater capacity than 14 Ah in cold conditions or
for several AGM batteries with more than 14 Ah.
j Press the selection button MODE
8
, to activate
mode 3. As soon as you have selected the suitable charging mode, the corresponding LED
display
4 lights up immeditely. If you do not
take any further action, the electronic system
starts the charging process with a set delay. In
this mode the charging current is identical to
that of „Mode 2“.
If the procedure runs without any problems, the
LED display
7 lights up, the electronic stystem is active and remains in this condition until
the battery is charged to approx. 14.7 V. As
soon as this is reached, the charging station
switches over to trickle-charging function. Now
LED display
6
7 goes out and LED display
lights up to indicate the current status.
Page 25

27 GB/MT
Operation / Maintenance and care / Disposal / Information
Q
Regenerating / charging empty
(used, overcharged) batteries
If the charging station is connected to a battery
and the charging process starts it automatically recognises the battery voltage. It changes to pulse
charging mode if the voltage is in the range of
7.5 V ± 0.5 to 10.5 V ± 0.5 V.
This pulse charging process is continued until the
battery voltage has increased to 10.5 V ± 0.5 V. As
soon as this condition is reached, the charging station changes over to the previously selected normal
charging mode.
Now the battery can be charged quickly and safely.
Most empty batteries can be charged and used
again using this procedure.
Q
Protective function of the device
If a unexpected situation should occur, such as short
circuiting, battery voltage below 7.5 V, open circuit
or reversed connection of the output terminals, the
charging station deactivates the electronic system
and immediately switches back to basic position to
avoid damage.
If you do not activate any settings, the system will
remain in STANDBY mode. With the inverse connection of the output clamps the LED display „incorrect polarity / fault“
5
lights up additionally.
j Switch off the appliance.
j Clean the plastic surfaces of the appliance and
the remote control with a dry cloth. Do not under any circum-stances use solvents or other
aggressive cleaning agents.
Q
Disposal
The packaging is wholly composed of envi-
ronmentally-friendly materials that can be
disposed of at a local recycling centre.
Do not dispose of electrical
appliances in household waste.
In accordance with European Directive
2002 / 96 / EC on used electrical and electronic
appliances and its implementation in national law,
used power tools must be collected separately and
recycled in an ecologically compatible manner.
Please return the tool via the available collection
facilities.
Information on options for disposing of electrical
appliances after their useful life can be obtained
from your local or city council.
Q
Information
Q
Overheating protection
If the appliance becomes too hot during charging,
the power output is automatically reduced. This
protects the appliance from damage.
Q
Maintenance and care
m Caution! Danger of electric shock!
Only install, maintain and service the appliance when it is disconnected from the mains!
The appliance is maintenance-free.
Q
Servicing
The service centre for your country is shown in the
guarantee documentation.
J Have your device repaired only by qualified
specialist personnel using original manufacturer parts only. This will ensure that your device
remains safe to use.
J If the plug or mains lead needs to be replaced,
always have the replacement carried out by
the manufacturer or its service centre. This will
ensure that your device remains safe to use.
Page 26

28 GB/MT
Information
Q
Declaration of conformity /
Manufacturer
We, Kompernaß GmbH, Burgstr. 21,
D-44867 Bochum, Germany, hereby declare
that this product conforms to the following
EU Directives:
EC Low-Voltage Directive (2006 / 95 / EG)
Electromagnetic Compatibility
(89 / 336 / EEC)
Product designation:
Tronic TX4 Battery charger
Bochum, 30.09.2007
Hans Kompernaß
- Managing Director -
We reserve the right to make technical modifications in the course
of product development.
Page 27

Inhaltsverzeichnis
Einleitung
Zu Ihrer Sicherheit ........................................................................................................Seite 30
Bestimmungsgemäße Verwendung .............................................................................Seite 30
Lieferumfang .................................................................................................................Seite 30
Teilebeschreibung .........................................................................................................Seite 30
Technische Daten ..........................................................................................................Seite 31
Sicherheit
Sicherheitshinweise.......................................................................................................Seite 31
Produkteigenschaften ...................................................................................................Seite 33
Bedienung
Inbetriebnahme .............................................................................................................Seite 33
Anschließen ...................................................................................................................Seite 33
Trennen ..........................................................................................................................Seite 34
Lademodus auswählen .................................................................................................Seite 34
Reset / Einstellungen löschen .......................................................................................Seite 34
Hin- und Herschalten zwischen Modus 1, 2 und 3 ...................................................Seite 34
Modus 1
Modus 2
Modus 3
Leere (verbrauchte, überladene) Batterien regenerieren / aufladen .......................Seite 35
Geräteschutzfunktion ...................................................................................................Seite 35
Überhitzungsschutz ......................................................................................................Seite 35
(14,4 V / 0,8 A) ........................................................................................Seite 34
(14,4 V / 3,6 A) .....................................................................................Seite 34
(14,7 V / 3,6 A) ........................................................................................Seite 35
Wartung und Pflege ........................................................................................Seite 35
Entsorgung...............................................................................................................Seite 36
Informationen
Service ...........................................................................................................................Seite 36
Konformitätserklärung / Hersteller...............................................................................Seite 36
29 DE/AT
Page 28
30 DE/AT
Einleitung
In dieser Bedienungsanleitung werden folgende Piktogramme / Symbole verwendet:
Bedienungsanleitung lesen!
Warn- und Sicherheitshinweise beachten!
Vorsicht vor elektrischem Schlag! Gefährliche
elektrische Spannung – Lebensgefahr!
Explosionsgefahr!
Brandgefahr!
Batterieladegerät T4X
für Akkus / Batterien von 1,2 Ah bis 120 Ah
Q
Einleitung
Q
Zu Ihrer Sicherheit
Bitte lesen Sie die Bedienungsanleitung
aufmerksam durch und klappen Sie
dazu die Seite mit den Abbildungen
aus. Beachten Sie die Hinweise genau, wenn Sie das Gerät
in Betrieb nehmen. Sollten Sie darüber hinaus Fragen
zum Gebrauch haben, setzen Sie sich bitte mit der
Servicestelle Ihres Landes in Verbindung. Bewahren
Sie die Bedienungsanleitung gut auf und händigen
Sie diese bei der Weitergabe an Dritte bitte mit aus.
Q
Bestimmungsgemäße
Verwendung
W
V
gerät verfügt über eine Schutzschaltung gegen
Funkenbildung und Überhitzung. Betreiben Sie das
Ladegerät in einem leicht aufgewärmten und gut
belüfteten Raum.
Jeder nicht bestimmungsgemäße oder unsachgemäße
Gebrauch führt zum Garantieverlust. Für aus bestimmungswidriger Verwendung entstandene Schäden
übernimmt der Hersteller keine Haftung. Das Gerät
ist nicht für den gewerblichen Einsatz bestimmt.
Q
Lieferumfang
Kontrollieren Sie unmittelbar nach dem Auspacken
den Lieferumfang und das Gerät sowie alle Teile auf
Beschädigungen. Nehmen Sie ein defektes Gerät
oder Teile nicht in Betrieb. Setzen Sie sich für Ersatz
mit der zuständigen Servicestelle in Verbindung.
1 Ladegerät TRONIC T4X
2 Schnellkontakt-Anschlussklemmen
(1 rot, 1 schwarz)
1 Bedienungsanleitung
Garantieunterlagen
Watt (Wirkleistung)
Volt (Wechselspannung)
~
Tipp! So verhalten Sie sich richtig.
Halten Sie Kinder und andere Personen während
der Benutzung des Elektrowerkzeugs fern.
Entsorgen Sie Verpackung und Gerät
umweltgerecht!
Das TRONIC T4X ist ein primär seitig geschaltetes
(mess- und regeltechnisch wirkendes) Ladegerät mit
Pulserhaltungsladung, das zur Aufladung und Erhaltungsladung von 12 V-Blei-Akkus (Batterien) mit
Elektrolyt-Lösung oder -Gel geeignet ist. Das Lade-
Q
Teilebeschreibung
1
STANDBY LED-Anzeige „STANDBY“
(Bereitschaft)
Page 29

31 DE/AT
2
T4X KH 3157
220 V-240 V AC ~ 50 Hz / 60 Hz · 55 W
12 V DC
0,8 / 3,6 A · IP65
Polarität: rote Klemme (+),
schwarze Klemme (-)
Herstellungsdatum: 02/2008
WARNUNG! Explosive Gase - Vermeiden
Sie offenes Feuer (Flammen oder Funken).
Lesen Sie die Bedienungsanleitung vor
der ersten Verwendung. Trennen Sie das
Ladegerät von der Netzspannung, bevor
Sie die Batterie an- oder abklemmen.
Sorgen Sie für eine gute Belüftung.
Kompernaß GmbH · D- 44867 Bochum · Germany · www.kompernass.com
LED-Anzeige „Modus 1“
3
LED-Anzeige „Modus 2“
4
LED-Anzeige „Modus 3“
5
LED-Anzeige „verpolter Anschluss/Fehler“
6
LED-Anzeige „vollständig aufgeladen“
7
LED-Anzeige „Ladevorgang aktiv“
Q
8
Auswahltaste „MODE“
9
Ladegerät
10
Netzkabel mit Netzstecker
11
Befestigungslöcher
12
„+“-Pol-Anschlusskabel (rot), inkl. Ringschuh
13
„–“-Pol-Anschlusskabel (schwarz), inkl. Ringschuh
14
„+“-Pol-Schnellkontakt-Anschlussklemme (rot),
inkl. roter Befestigungsschraube
15
„–“-Pol-Schnellkontakt-Anschlussklemme
(schwarz), inkl. schwarzer Befestigungsschraube
Q
Technische Daten
Eingangsspannung: 220 - 240 V ~ 50 / 60 Hz
Einschaltstrom: < 25 A
Eingangsstrom: max. 0,6 A (Effektivwert)
Leistungsaufnahme: 55 W
Rückstrom*: < 5 mA (kein AC-Eingang)
Nennspannung: 12 V DC
Nennstrom: 0,8 / 3,6 A
Ladespannung: 14,4 V ± 0,25 V
oder 14,7 V ± 0,25 V
Ladestrom: 3,6 A
(3,6 A ± 10 %
oder 0,8 A ± 10 %)
Rauschwert**: max. 150 mV
Batterietyp: 12 V-Blei - Säure - Batterie
1,2 Ah - 120 Ah
Gehäuseschutzart: IP 65 (staubdicht, wasserdicht)
Abmessungen: 180 x 62 x 40 mm
(L x B x H)
Gewicht: ca. 0,5 kg
Geräuschpegel: < 50 dB (A)
(getestet aus 50 cm Entfernung)
* = Rückstrom bezeichnet den Strom, den das
Ladegerät aus der Batterie verbraucht, wenn
kein Netzstrom angeschlossen ist.
** = Rauschwert beschreibt die Störwerte von
Strom und Spannung.
Einleitung / Sicherheit
Q
Sicherheit
Sicherheitshinweise
m Gefahr! Vermeiden Sie Lebens- und Verletzungs-
gefahr durch unsachgemäßen Gebrauch!
J Betreiben Sie das Gerät nicht mit beschädigtem
Kabel, Netzkabel oder Netzstecker.
m Vorsicht! Beschädigte Netzkabel bedeuten
Lebensgefahr durch elektrischen Schlag.
J Lassen Sie das Netzkabel im Beschädigungsfall
nur von autorisiertem und geschultem Fachpersonal reparieren! Setzen Sie sich im Reparaturfall
mit der Servicestelle Ihres Landes in Verbindung!
J
Gefahren im Umgang mit Elektrogeräten noch
J Dieses Gerät ist nicht dafür bestimmt, durch Per-
J
kann beim Auflade- und Erhaltungsladevorgang
Lassen Sie Kleinkinder und Kinder
nicht unbeaufsichtigt mit dem Ladegerät! Kinder können mögliche
nicht einschätzen.
sonen (einschließlich Kinder) mit eingeschränkten
physischen, sensorischen oder geistigen Fähigkeiten oder mangels Erfahrung und / oder mangels Wissen benutzt zu werden, es sei denn, sie
werden durch eine für ihre Sicherheit zuständige
Person beaufsichtigt oder erhielten von ihr Anweisungen, wie das Gerät zu benutzen ist.
Explosionsgefahr! Schützen Sie
sich vor einer hochexplosiven Knallgasreaktion! Gasförmiger Wasserstoff
von der Batterie ausströmen. Knallgas ist eine
explosionsfähige Mischung von gasförmigem
Wasserstoff und Sauerstoff. Beim Kontakt mit offenem Feuer (Flammen, Glut oder Funken) erfolgt die so genannte Knallgasreaktion! Führen
Sie den Auflade- und Erhaltungsladevorgang in
einem witterungsgeschützten Raum mit guter
Belüftung durch. Stellen Sie sicher, dass beim
Page 30
32 DE/AT
Sicherheit
Auflade- und Erhaltungsladevorgang kein offenes
Licht (Flammen, Glut oder Funken) vorhanden ist!
J
Lösungsmittel beim Gebrauch des Ladegerätes
m Verätzungsgefahr! Schützen Sie Ihre Augen
J
bendreher und Schraubenschlüssel mit schutz-
J Verwenden Sie das Ladegerät ausschließlich
J Verwenden Sie das Ladegerät nicht zum Auflade-
J Verwenden Sie das Ladegerät nicht zum Auflade-
J Stellen Sie bei einer fest im Fahrzeug montierten
J Vermeiden Sie elektrischen Kurzschluss beim
J Stellen Sie vor dem Netzstromanschluss sicher,
Explosions- und Brandgefahr!
Stellen Sie sicher, dass explosive oder
brennbare Stoffe z.B. Benzin oder
nicht entzündet werden können!
und Haut vor Verätzung durch Säure (Schwefelsäure) beim Kontakt mit der Batterie! Wenden
Sie den Blick nicht direkt auf die angeschlossene
Batterie und verwenden Sie: säurefeste Schutzbrille, -bekleidung und -handschuhe! Wenn Augen
oder Haut mit der Schwefelsäure in Kontakt geraten sind, spülen Sie die betroffene Körperregion
mit viel fließendem, klarem Wasser ab und suchen
Sie umgehend einen Arzt auf!
Schützen Sie sich vor Strom-
schlag! Verwenden Sie beim
Anschluss des Ladegerätes Schrau-
isoliertem Griff!
zum Auflade- und Erhaltungsladevorgang von
unbeschädigten 12 V-Blei-Batterien (mit Elektrolyt-Lösung oder -Gel)!
und Erhaltungsvorgang von nicht wiederaufladbaren Batterien.
und Erhaltungsladevorgang einer beschädigten
oder eingefrorenen Batterie!
Batterie sicher, dass das Fahrzeug außer Betrieb
ist und sich im geschützten Stillstand befindet!
Schalten Sie die Zündung aus und bringen Sie
das Fahrzeug in Parkposition, mit angezogener
Feststellbremse (z.B. PKW) oder festgemachtem
Seil (z.B. Elektroboot)!
Anschluss des Ladegerätes an die Batterie.
Schließen Sie das Minus-Pol-Anschlusskabel
ausschließlich an den Minuspol der Batterie
bzw. an die Karosserie. Schließen Sie das PlusPol-Anschlusskabel ausschließlich an den Pluspol
der Batterie!
dass der Netzstrom vorschriftsmäßig mit
230 V~50 Hz, geerdetem Nullleiter, einer 16 A
Sicherung und einem FI-Schalter (Fehlerstromschutzschalter) ausgestattet ist!
J Fassen Sie das Netzkabel beim Kontakt mit der
Schutzkontaktsteckdose ausschließlich am isolierten Bereich des Netzsteckers an!
J Fassen Sie die Pol-Anschlusskabel („–“ und „+“)
ausschließlich am isolierten Bereich an!
J Führen Sie den Anschluss an die Batterie und
an die Schutzkontaktsteckdose des Netzstroms
vollkommen geschützt vor Feuchtigkeit durch!
J Führen Sie die Montage, die Wartung und die
Pflege des Ladegerätes nur frei vom Netzstrom
durch!
J Setzen Sie das Ladegerät nicht der Nähe von
Feuer, Hitze und lang andauernder Temperatureinwirkung über 50° C aus! Bei höheren
Temperaturen sinkt automatisch die Ausgangsleistung des Ladegerätes.
J Beschädigen Sie keine Leitungen für Treibstoff,
Elektrizität, Bremsanlagen, Hydraulik, Wasser,
oder Telekommunikation bei der Befestigung
des Ladegerätes mit Schrauben! Andernfalls
droht Lebens- und Verletzungsgefahr!
J Stellen Sie sicher, dass das Plus-Pol-Anschlusskabel
keinen Kontakt zu einer Treibstoffleitung (z.B.
Benzinleitung) hat!
J Stellen Sie sicher, dass die Netzsteckdose frei
zugänglich ist, damit man im Notfall das Gerät
schnell vom Stromnetz trennen kann.
J Vermeiden Sie Sachbeschädigung durch un-
sachgemäßen Gebrauch!
J Verwenden Sie das Ladegerät nur mit den
gelieferten Originalteilen!
J Decken Sie das Ladegerät nicht mit Gegenstän-
den ab!
J Stellen Sie die Batterie während des Ladevor-
gangs auf eine gut belüftete Fläche.
J Schützen Sie die Elektrokontaktflächen der Bat-
terie vor Kurzschluss!
J Schließen Sie das Ladegerät bei der Verwendung
im Freien nur an eine Schutzkontaktsteckdose,
ausgestattet mit einem FI-Schalter, an.
J Stellen Sie das Ladegerät nicht auf, oder direkt
an die Batterie!
J Trennen Sie nach der Beendigung des Auflade-
Page 31

33 DE/AT
Sicherheit / Bedienung
und Erhaltungsladevorgangs, bei einer ständig
im Fahrzeug angeschlossenen Batterie, zuerst
das Minus-Pol-Anschlusskabel (schwarz) des Ladegeräts vom Minus-Pol der Batterie.
J Trennen Sie das Ladegerät bei Betriebsstörungen
und Beschädigungen sofort vom Netzstrom!
J Lassen Sie das Ladegerät nur von autorisiertem
und geschultem Fachpersonal reparieren! Setzen
Sie sich im Reparaturfall mit der Servicestelle
Ihres Landes in Verbindung!
J Informieren Sie sich vor dem Anschluss des
Ladegerätes über die Wartung der Batterie
anhand deren Bedienungsanleitung!
J Informieren Sie sich vor dem Anschluss des
Ladegerätes an eine Batterie, die ständig in einem
Fahrzeug angeschlossen ist, über die Einhaltung
der elektrischen Sicherheit und Wartung anhand
der Bedienungsanleitung des Fahrzeugs!
J Belasten Sie das Ladegerät nicht mechanisch!
J Trennen Sie das Ladegerät bei Nichtgebrauch
vom Netzstrom!
Q
Produkteigenschaften
Dieses Gerät ist zum Laden einer Vielfalt von SLABatterien (versiegelter Bleisäure-Batterien) konzipiert,
welche weitestgehend in PKWs, Motorrädern und
einigen anderen Fahrzeugen verwendet werden.
Diese können z.B. WET- (mit flüssigem Elektrolyt),
GEL- (mit gelförmigem Elektrolyt) oder AGM-Batterien
(mit Elektrolyt absorbierenden Matten) sein. Deren
Kapazität reicht von 12 V / 1,2 Ah bis 12 V / 120 Ah.
Eine spezielle Konzeption des Gerätes (auch „DreiStufen-Lade-Strategie“ genannt) ermöglicht ein
Wiederaufladen der Batterie bis auf fast 100 % ihrer
Kapazität. Ferner kann ein Langzeitanschluss der
Batterie mit dem Ladegerät bei Nichtgebrauch
erfolgen, um diese möglichst immer in optimalem
Zustand zu halten, ohne sie zu beschädigen.
Q
Bedienung
Q
Inbetriebnahme
m Vorsicht! Stromschlaggefahr! Montieren,
warten und pflegen Sie das Gerät nur frei vom
Netzstrom!
So verhalten Sie sich richtig:
j Wählen Sie für die Inbetriebnahme einen
geeigneten Arbeitsplatz aus.
j Bereiten Sie die Inbetriebnahme sorgfältig vor
und nehmen Sie sich ausreichend Zeit. Legen
Sie alle Einzelteile und zusätzlich benötigtes
Werkzeug oder Material vorher übersichtlich
und griffbereit zurecht.
j Seien Sie stets aufmerksam und achten Sie immer
darauf was Sie tun. Gehen Sie stets mit Vernunft
vor und nehmen Sie das Ladegerät nicht in
Betrieb, wenn Sie unkonzentriert sind, oder sich
unwohl fühlen.
Q
Anschließen
j Trennen Sie vor dem Auflade- und Erhaltungsla-
devorgangs bei einer ständig im Fahrzeug
angeschlossenen Batterie, zuerst das Minus-PolAnschlusskabel (schwarz) des Fahrzeugs vom
Minus-Pol der Batterie. Der Minus-Pol der Batterie ist in der Regel mit der Karosserie des Fahrzeugs verbunden.
j Trennen Sie anschließend das Plus-Pol-An-
schlusskabel (rot) des Fahrzeugs vom Plus-Pol
der Batterie.
j Klemmen Sie erst dann die „+“-Pol-Schnellkon-
taktklemme (rot)
14
des Ladegeräts an die rech-
te Polarität („+“-Pol) der Batterie.
j Klemmen Sie die „–“-Pol-Schnellkontaktklemme
(schwarz)
j Schließen Sie das Netzkabel
15
an den „–“-Pol der Batterie.
10
des Batterieladegeräts an die Schutzkontaktsteckdose des
Netzstroms an.
Page 32

34 DE/AT
Bedienung
Q
Trennen
j Trennen Sie das Gerät vom Netzstrom.
j Nehmen Sie die „–“-Pol-Schnellkontaktklemme
(schwarz)
15
vom „–“-Pol der Batterie.
j Nehmen Sie die „+“-Pol-Schnellkontaktklemme
14
(rot)
vom „+“-Pol der Batterie.
j Schließen Sie das Plus-Pol-Anschlusskabel des
Fahrzeugs wieder an den Plus-Pol der Batterie an.
j Schließen Sie das Minus-Pol-Anschlusskabel
des Fahrzeugs wieder an den Minus-Pol der
Batterie.
Q
Lademodus auswählen
Sie können zum Laden verschiedener Batterien bei
unterschiedlicher Umgebungstemperatur aus drei
Lademodi auswählen. Wählen Sie dabei den für
Sie effizientesten und sichersten Modus für das Laden
der Batterie aus.
Im Vergleich zu herkömmlichen Batterieladegeräten,
verfügt dieses Gerät über eine spezielle Funktion
zum erneuten Verwenden einer leeren Batterie /
eines Akkus. Sie können eine vollständig entladene
Batterie / einen Akku wieder aufladen. Ein Schutz
gegen Fehlanschluss und Kurzschluss gewährleistet
den sicheren Ladevorgang. Durch die eingebaute
Elektronik setzt sich das Ladegerät nicht unmittelbar
nach Anschluss der Batterie in Betrieb, sondern
erst, nachdem ein Lademodus ausgewählt wurde.
Auf diese Weise werden Funken, die oftmals während
des Anschlussvorgangs auftreten, vermieden. Des
Weiteren wird diese Vorrichtung durch eine interne
MCU (Mikro-Computer-Einheit) gesteuert, die sie
schneller, leistungsfähiger und zuverlässiger macht.
Q
Reset / Einstellungen löschen
Q
Hin- und Herschalten zwischen
Modus 1, 2 und 3
j Drücken Sie die Auswahltaste MODE 8 ent-
sprechend nacheinander, das Gerät schaltet die
Lademodi in folgender Reihenfolge: Bereitschaft
STANDBY, MODE 1
MODE 3
und startet dann den nächsten
Zyklus.
Wenn Sie die Auswahltaste
der Lademodus zum nächsten Modus und führt
diesen aus. Wenn jedoch eine Batterie nach voller
Ladung nicht vom Ladegerät abgeklemmt wird, verbleibt sie im Erhaltungslademodus, sogar wenn der
Benutzer in einen anderen Modus schaltet. Dies ist
nützlich, um die voll geladene Batterie vor Schäden
zu schützen.
Q
Modus 1 (14,4 V / 0,8 A)
Dieser Modus eignet sich zum Laden von kleinen
Batterien mit einer Kapazität geringer als 14 Ah.
j Drücken Sie die Auswahltaste MODE
Modus 1 auszuwählen. Nach Durchführung
dieses Vorgangs leuchtet die entsprechende
LED-Anzeige
ßend keinen weiteren Vorgang vornehmen, stellt
sich die Elektronik automatisch zusammen mit
der LED-Anzeige
vorgang mit (einem Strom von) 0,8 A ± 10 %.
Verläuft der Vorgang ohne Probleme, bleibt die
LED-Anzeige
deverlaufs an, bis die Batterie auf 14,4 V / ±
0,25 V geladen ist. Wenn die Batterie vollständig
aufgeladen ist, leuchtet die LED-Anzeige
und die LED-Anzeige
Erhaltungsstrom für die Batterie verfügbar.
, MODE 2 ,
8
drücken, schaltet
8
, um
2 auf. Wenn Sie anschlie-
7 an und startet den Lade-
7 während des gesamten La-
6
7 erlischt. Nun ist ein
Nach Anschluss an die Stromversorgung bringt sich
das Gerät automatisch in die Grundstellung und
bleibt im STANDBY-Betrieb.
Q
Modus 2 (14,4 V / 3,6 A)
Dieser Modus wird hauptsächlich zum Laden von
Batterien mit großer Kapazität von mehr als 14 Ah
unter normalen Bedingungen angewendet.
Page 33

35 DE/AT
Bedienung / Wartung und Pflege
j Drücken Sie die Auswahltaste MODE 8, um
Modus 2 auszuwählen. Wenn Sie anschließend
keinen weiteren Vorgang vornehmen, stellt sich
die Elektronik zusammen mit der LED-Anzeige
3 an und startet den Ladevorgang mit
(einem Strom von) 3,6 A ± 10 % (3,6 A).
Verläuft der Vorgang ohne Probleme, bleibt die
LED-Anzeige
7 während des gesamten Ladeverlaufs an, bis die Batterie auf 14,4 V / ±
0,25 V geladen ist. Wenn die Batterie vollständig
aufgeladen ist, leuchtet die LED-Anzeige
und die LED-Anzeige
7 erlischt. Nun ist
6
ein Erhaltungsstrom für die Batterie verfügbar.
Q
Modus 3 (14,7 V / 3,6 A)
Dieser Modus wird zum Laden von Batterien mit
einer größeren Kapazität von mehr als 14 Ah unter
kalten Bedingungen oder zum Laden einiger AGMBatterien von mehr als 14 Ah angewendet.
j Drücken Sie die Auswahltaste MODE
8
, um
Modus 3 auszuwählen. Sobald Sie den gewünschten Modus ausgewählt haben, leuchtet die
entsprechende LED-Anzeige
4 unmittelbar
auf. Die Elektronik schaltet nach einer festgelegten Verzögerung zum Beginn des Ladevorgangs ein, wenn Sie keine weitere Handlung
vornehmen. In diesem Modus ist der Ladestrom
der gleiche, wie in „Modus 2“.
Verläuft der Vorgang ohne Probleme, leuchtet
die LED-Anzeige
7 auf, die Elektronik ist
eingeschaltet und bleibt in diesem Zustand bis
die Batterie auf ca. 14,7 V aufgeladen ist.
Sobald dies erreicht ist, wechselt das Ladegerät
in den Erhaltungsmodus der Batterie. Nun erlischt
die LED-Anzeige
6
leuchtet, um den derzeitigen Status an-
7 und die LED-Anzeige
zuzeigen.
Q
Leere (verbrauchte, überladene)
Batterien regenerieren /
aufladen
Wenn das Ladegerät an eine Batterie angeschlossen
wird und den Ladevorgang startet, erkennt es die
Batteriespannung automatisch. Es wechselt in den
Impulslademodus, wenn die Spannung im Bereich
von 7,5 V ± 0,5 bis 10,5 V ± 0,5 V liegt.
Dieser Impulsladelauf wird fortgesetzt, bis die Batteriespannung auf 10,5 V ± 0,5 V ansteigt. Sobald
dieser Zustand erreicht ist, wechselt das Ladegerät
in den normalen Lademodus, den Sie zuvor ausgewählt haben.
Nun kann die Batterie schnell und sicher aufgeladen
werden. Mit diesem Verfahren lassen sich die meisten
leeren Batterien wieder aufladen und können wieder
verwendet werden.
Q
Geräteschutzfunktion
Sobald eine abweichende Situation wie Kurzschluss,
Batteriespannung unter 7,5 V, offener Stromkreis
oder umgekehrter Anschluss der Ausgangsklemmen
auftritt, schaltet das Ladegerät die Elektronik aus und
stellt das System unmittelbar in die Grundstellung
zurück, um Schäden zu vermeiden.
Sofern Sie keine andere Einstellung vornehmen, bleibt
das System im STANDBY-Betrieb. Bei umgekehrtem
Anschluss der Ausgangsklemmen leuchtet zusätzlich
die LED-Anzeige „verpolter Anschluss / Fehler“
5
.
Q
Überhitzungsschutz
Sollte das Gerät während des Ladevorgangs zu heiß
werden, wird automatisch die Ausgangsleistung
verringert. Dies schützt das Gerät vor Beschädigung.
Q
Wartung und Pflege
m Vorsicht! Stromschlaggefahr! Montieren,
warten und pflegen Sie das Gerät nur frei vom
Netzstrom!
Page 34

Wartung und Pflege / Entsorgung / Informationen
Das Gerät ist wartungsfrei.
j Schalten Sie das Gerät aus.
j Reinigen Sie die Kunststoffoberflächen des
Gerätes und der Fernbedienung mit einem
trockenen Tuch. Verwenden Sie keinesfalls
Lösungsmittel oder andere aggressive
Reinigungsmittel.
Q
Entsorgung
Die Verpackung besteht aus umwelt-
freundlichen Materialien, die Sie über
die
örtlichen Recyclingstellen entsorgen
können.
Werfen Sie Elektrogeräte nicht
in den Hausmüll!
Gemäß Europäischer Richtlinie 2002 / 96 / EG
über Elektro- und Elektronik-Altgeräte und Umsetzung
in nationales Recht müssen verbrauchte Elektrogeräte
getrennt gesammelt und einer umweltgerechten
Wiederverwertung zugeführt werden.
Über Entsorgungsmöglichkeiten für ausgediente
Elektrogeräte informieren Sie sich bitte bei Ihrer
Gemeinde- oder Stadtverwaltung.
Sie als Endverbraucher sind gesetzlich (Batterieverordnung) zur Rückgabe aller gebrauchten Batterien
verpflichtet. Schadstoffhaltige Batterien sind mit
nebenstehenden Symbolen gekennzeichnet, die
auf das Verbot der Entsorgung über den Hausmüll
hinweisen. Die Bezeichnungen für das ausschlaggebende Schwermetall sind: Cd = Cadmium,
Hg = Quecksilber, Pb = Blei
Befördern Sie verbrauchte Batterien zu einer Entsorgungseinrichtung Ihrer Stadt oder Gemeinde, oder
zurück zum Händler.
Q
Informationen
Q
Service
Die zuständige Servicestelle Ihres Landes entnehmen
Sie bitte den Garantieunterlagen.
J Lassen Sie Ihre Geräte nur von qualifiziertem
Fachpersonal und nur mit Originalersatzteilen
reparieren. Damit wird sichergestellt, dass die
Sicherheit des Gerätes erhalten bleibt.
J Lassen Sie den Austausch des Steckers oder
der Anschlussleitung immer vom Hersteller des
Elektrowerkzeugs oder seinem Kundendienst
ausführen. Damit wird sichergestellt, dass die
Sicherheit des Gerätes erhalten bleibt.
Q
Konformitätserklärung /
Hersteller
Wir, Kompernaß GmbH, Burgstr. 21,
44867 Bochum, Deutschland, erklären hiermit für
dieses Produkt die Übereinstimmung mit folgenden
EG-Richtlinien:
Niederspannungsrichtlinie
(2006 / 95 / EG):
Elektromagnetische Verträglichkeit
(89 / 336 / EEC):
Typ / Gerätebezeichnung:
Tronic T4X Batterieladegerät
Bochum, 30.09.2007
Sie erfüllen damit die gesetzlichen Verpflichtungen
und leisten einen wichtigen Beitrag zum Umweltschutz.
36 DE/AT
Hans Kompernaß
- Geschäftsführer -
Technische Änderungen im Sinne der Weiterentwicklung
sind vorbehalten.
 Loading...