

Page 1
PAS 7,2 V
Operation and Safety Notes
Operation and Safety Notes ........................................................................................Page 5
Page 2
Q
I
W
E
R
E
A
O
B
{ P
T
T
Y
U
C
Kompernaß GmbH
D
Burgstraße 21 · D-44867 Bochum (Germany)
Last Information Update: 10 / 2006 · Ident.-No.: PAS 7,2 V - 102006-1 / UK / IE
Page 3
5 GB/IE
Before reading, unfold the page containing the illustrations
and familiarise yourself with all functions of the device.
The following icons / symbols are used in this instruction manual:
Read instruction manual!
Table of Content
Direct current
(Type of current and voltage)
Ah
V~
Observe caution and safety notes!
Caution – electric shock!
Dangerous electric current –
danger to life!
Amp-hours (Battery capacity) Proper procedure and handling.
Voltage
Nm
n
0
Newtonmeter (Torque)
Rated idle running speed
Protection category II
Introduction
For your safety ...................................................................................................... Page 6
Intended Use ......................................................................................................... Page 6
Equipment ............................................................................................................. Page 6
Scope of Supply .................................................................................................... Page 6
Technical Data ...................................................................................................... Page 6
Safety
Safety Information Specific to this Device ............................................................ Page 7
Initial Use
Charging the Battery Pack..................................................................................... Page 7
Inserting and Removing the Rechargeable Battery Pack from the Device .............. Page 8
Torque Pre-selection ............................................................................................ Page 8
Angular Position .................................................................................................... Page 8
Changing the Tool ................................................................................................ Page 8
Switching on / off ................................................................................................... Page 8
Setting the Speed.................................................................................................. Page 8
Reversing the Direction of Rotation ....................................................................... Page 9
Tips and Tricks ...................................................................................................... Page 9
Maintenance and Cleaning ............................................................................. Page 9
Disposal ................................................................................................................. Page 9
Information
Servicing ............................................................................................................... Page 9
Manufacturer’s declaration of conformity .............................................................. Page 10
Page 4

Introduction
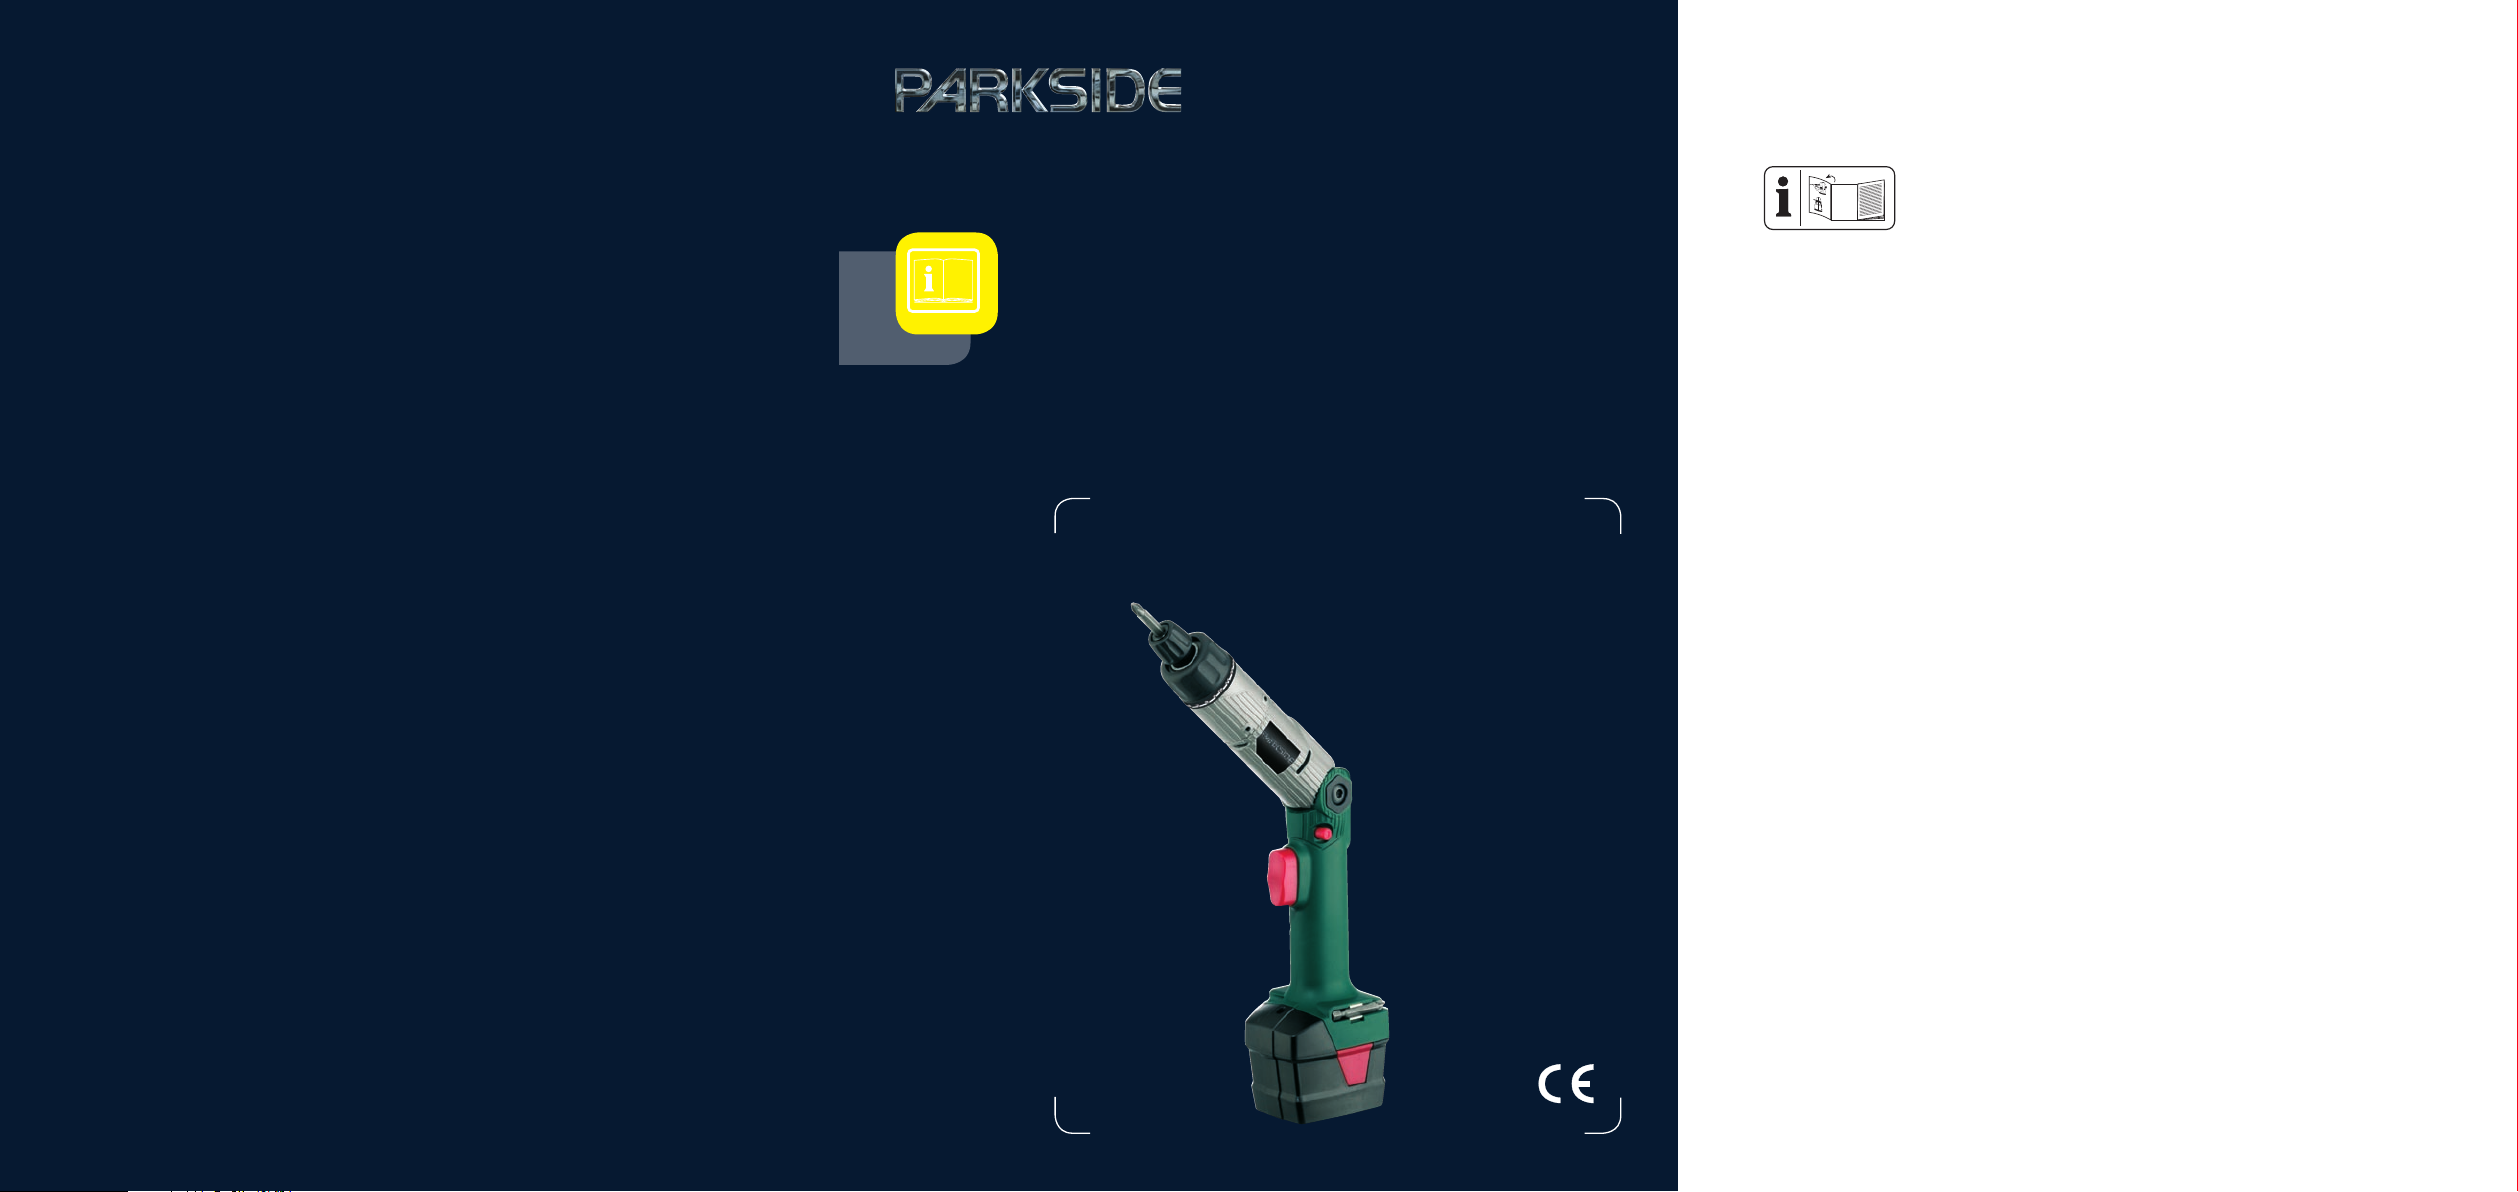
Rechargeable Cordless Screwdriver
PAS 7,2 V
L Introduction
L For your safety
Please make sure you familiarise yourself
fully with the way the device works before
you use it for the first time and that you
understand how to handle electrical power tools correctly. Further details can be found in the operating
instructions. In addition to the above, you must also
observe the general safety advice contained in the
accompanying booklet. Keep these instructions in a safe
place. If you pass the device on to anyone else, please
ensure that you also pass on all the documentation.
L
Intended Use
This device is intended to be used for screwing into
wood, plastic and metal. It should only be used as
described and for the stated fields of application.
Any other use or modification to this device is deemed
contrary to its intended use and harbours a considerable risk of accidents. The manufacturer accepts
no liability for damage caused through improper use
of this device.
Not intended for professional use.
L
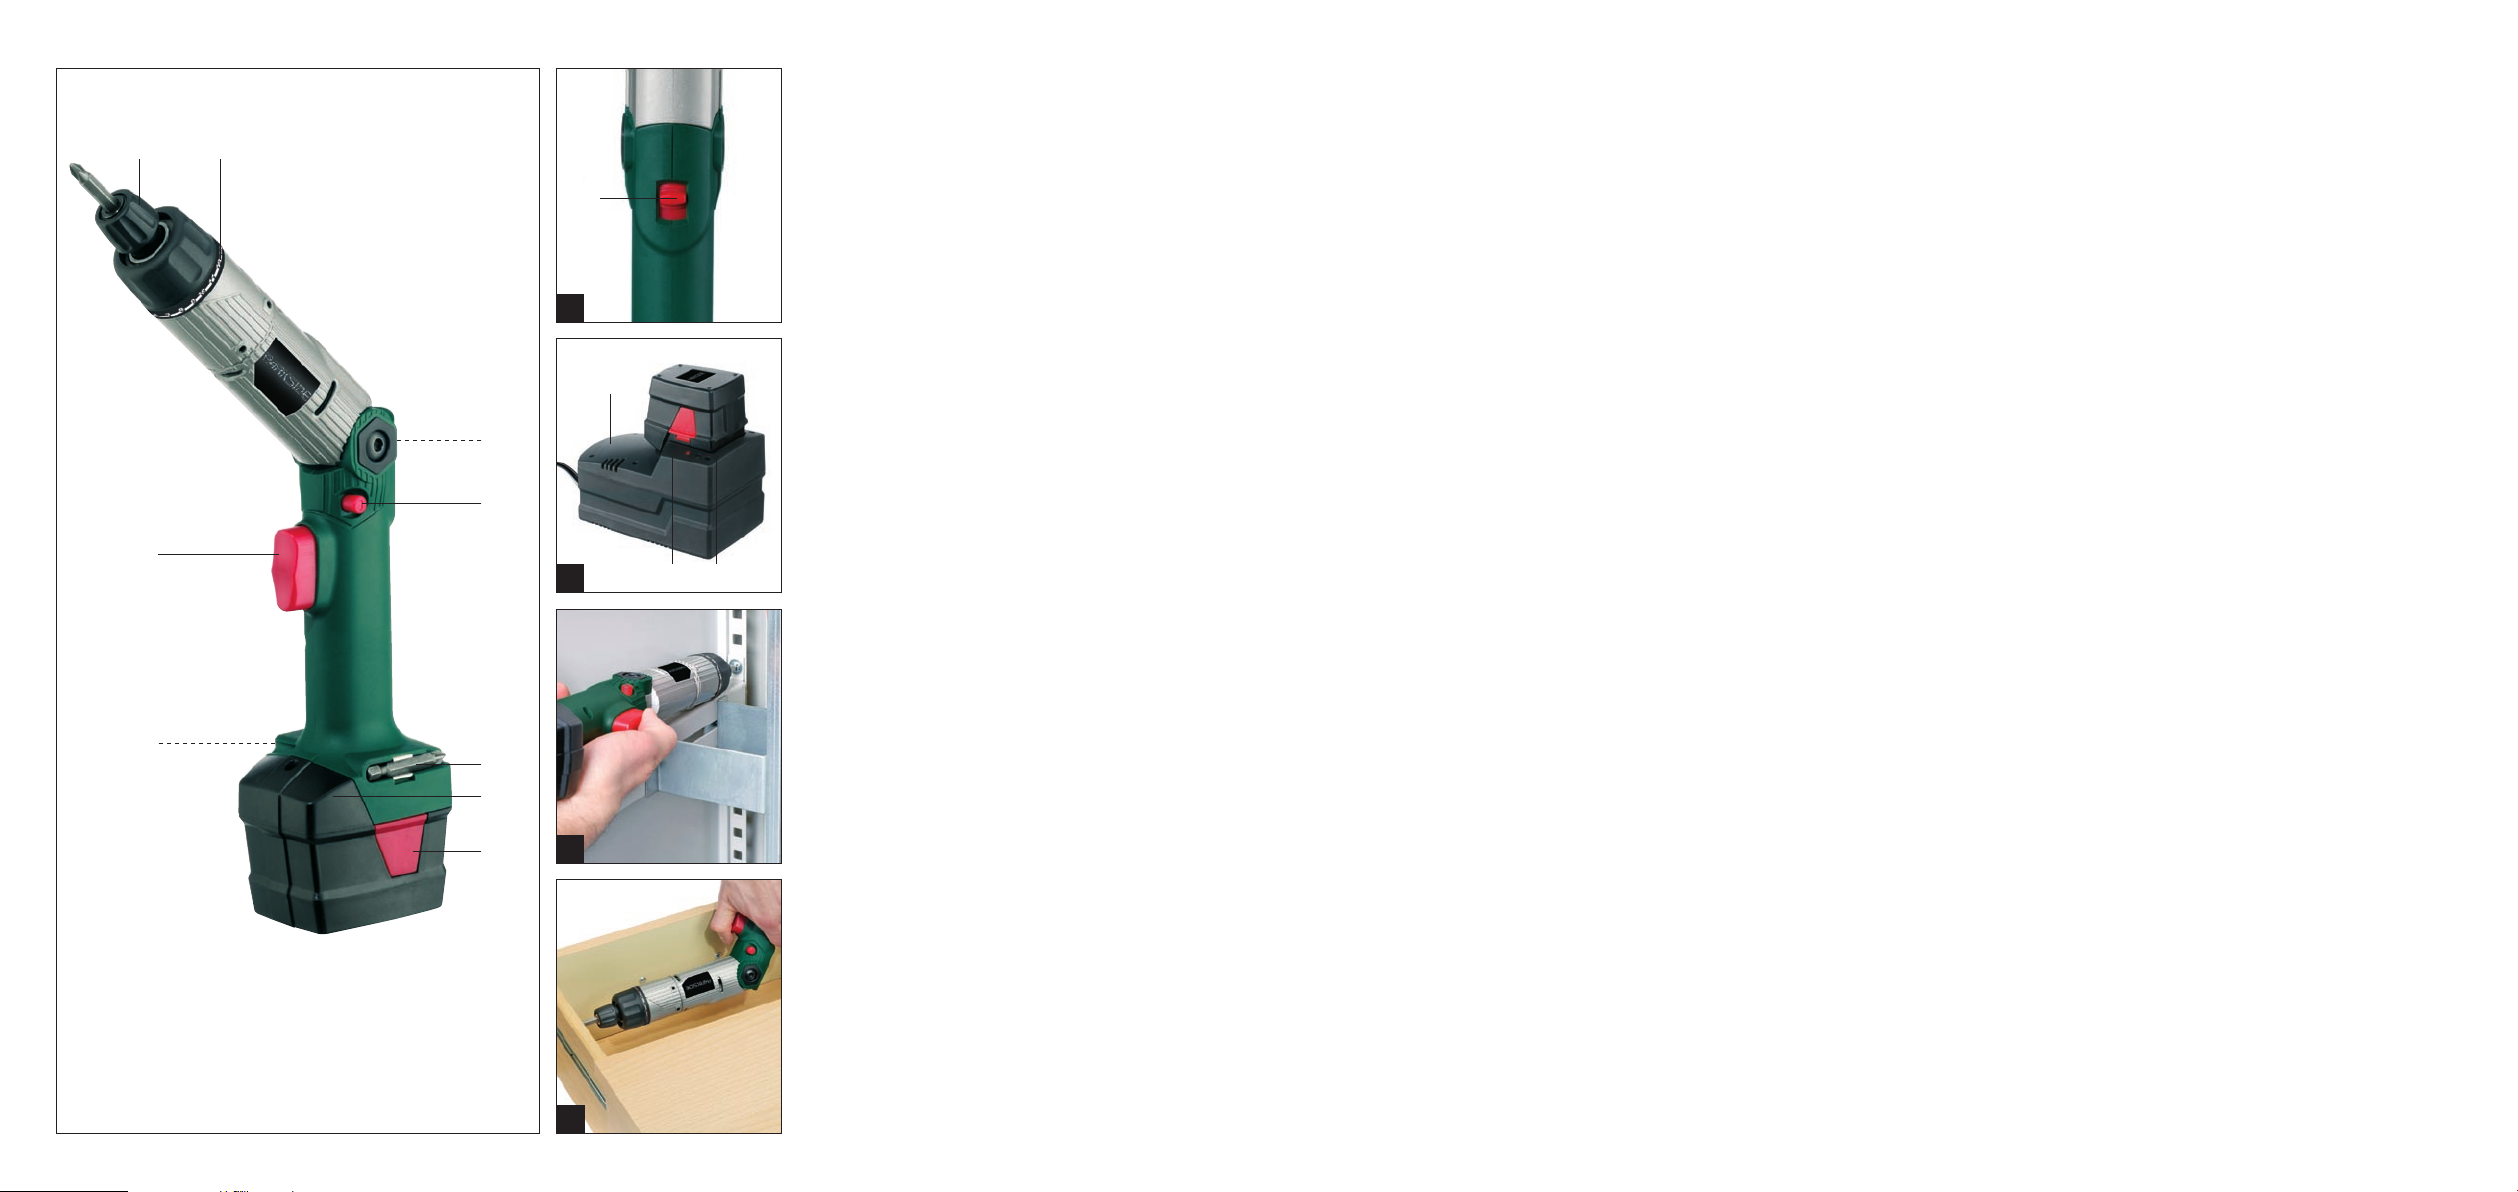
Equipment
Q
Tool holder (hexagonal / 6,35 mm)
W
Torque pre-selector
E
Switch for angular position
R
Direction of rotation switch / lock
T
Bit storage
Y
Rechargeable battery pack
U
Button for releasing the battery
I
ON / OFF switch / speed regulation
O
Fast charging device
P
Green charging control LED
{
Red charging control LED
Scope of Supply
L
1 rechargeable cordless screwdriver
with rechargeable battery pack
1 quick charging device
3 screw bits (hexagonal shaft / 6,35 mm)
1 carrying case
1 “rechargeable battery pack” ordering card
1 set of operating instructions
1 “General Safety Instructions” booklet
1 “Guarantee and Service” booklet
L
Technical Data
Rechargeable Screwdriver Parkside PAS 7,2 V:
Rated voltage: 7,2 V DC
Rated speed: n
0 - 500 min
0
-1
Tool holder: hexagonal / 6,35 mm
Torque levels: 16
Max. torque: 9 Nm
Sound pressure level: < 70 dB (A)
Noise level: 86 dB (A)
Vibration value: < 2.5 m / s
2
Rechargeable Battery Pack PAS 7,2 V - 1:
Rated voltage: 7,2 V DC
Nominal capacity: 1,3 Ah
Energy content: 9,4 Wh
Battery Fast Charging Device PAS 7,2 V - 2:
Primary:
Nominal voltage: 230 V ~ 50 Hz
Power consumption: 30 W
Secondary:
Nominal voltage: 7,2 V DC
Charging current: 2000 mA
Charging period: ca. 60 min.
Protection class: II /
6 GB/IE
Page 5
Safety / Initial Use
L Safety
Safety Information Specific
to this Device
J Please keep children away from this
device. The screwdriver should be
stored in a dry, closed room to which
children do not have access.
Avoid the Danger of Death
by Electric Shock!
Avoid the Danger of Injury and Fire and
Harmful Effects on Health!
J
check the condition of the screwdriver, the fast
charging device
rechargeable battery pack
J Any parts that are damaged must not be used. In
case of danger, disconnect the mains plug from
the socket immediately.
- The screwdriver should never be opened.
-
J Please protect the fast charging device
rechargeable battery pack
itself against moisture.
J Warning! Only the fast charging device
rechargeable battery pack
J Warning! The rechargeable battery pack
must not be short-circuited, otherwise overheating,
fire or bursting of the rechargeable battery pack
may result. For this reason:
- do NOT connect cables to the poles of the battery
- ensure that the rechargeable battery connectors
J Caution! The rechargeable battery pack
never be thrown into a fire or water. Danger of
Damaged devices, mains leads or
mains plugs may cause death by
electric shock. You should therefore
O
, mains lead, mains plug and
Y
at regular intervals.
All repairs or parts replacements may only be
carried
out by the service centre or a special-
ist electrician.
O
,
O
/
Y
pack
Y
and the screwdriver
Y
supplied may be used.
Y
.
cannot be short-circuited by other metal parts
(nails, screws etc.).
Y
must
Y
explosion! Handle the rechargeable battery pack
carefully and protect it against knocks and jolts!
J Warning! If you should come into contact with
acid from the rechargeable battery pack
acid must be washed off thoroughly with water
without delay. If acid should enter your eyes, rinse
it out immediately with water and seek medical
advice immediately.
J
Caution! Detection devices should be used to deter-
mine the position of supply lines so that you do not
damage any electrical wiring or gas or water pipes.
Stay Safe!
J Always disconnect the mains plug before cleaning
or maintaining the fast charging device
rechargeable battery pack
J Never charge the battery pack
Y
.
Y
O
if the surround-
ing temperature is below 10 °C or above 40 °C.
J The ventilation holes of the fast charging device
should never become blocked.
J Whenever the screwdriver is being adjusted,
transported or stored, please move the direction
of rotation switch
R
to the middle position (lock)
in order to prevent the screwdriver switching on
accidentally.
J High torques occur when hard surfaces are being
screwed into. You should therefore hold the
screwdriver very tight in order to avoid injury!
L Initial Use
L Charging the Battery Pack
(Illustration B)
Notice: A rechargeable battery pack Y that is new
or has not been used for a long time has to be
charged up before initial / renewed use.
P
lights up.
Y
reaches its full
The rechargeable battery pack
capacity after approx. 3-5 charging cycles.
1. Insert the mains plug into the socket. The green
charging control LED
Y
, the
or
Y
O
7 GB/IE
Page 6

Initial Use
2. Place the battery pack Y in the fast charging
3. The green charging control LED
4. Disconnect the mains plug of the fast charging
j A rechargeable battery pack
O
device
tinquishes and the red charging control LED
now glowing, indicates the start of the charging
process. The red charging control LED
guishes as soon as the battery pack
charged.
charging is complete and the rechargeable battery
pack
device
Remove the rechargeable battery pack
charged up a second time immediately after the
fast charging procedure. Otherwise there is a
danger that the rechargeable battery pack
be overcharged, thus reducing the lifetime of the
rechargeable battery pack
device
. The green charging control LED P ex-
Y
P
indicates that
Y
is ready for use.
O
from the socket.
Y
must never be
Y
O
.
and the fast charging
{
{
extin-
is fully
Y
.
Y
j The charging device should be switched off for
at least 15 minutes between charging.
Please remove the mains plug.
L
Inserting and Removing the
Rechargeable Battery Pack
from the Device
Inserting the Rechargeable Battery Pack:
j Please move the direction of rotation switch
to the “lock” position and allow the rechargeable
battery pack
Removing the Rechargeable Battery Pack:
j Press the side release buttons
and remove the rechargeable battery pack
Torque Pre-selection
L
Y
to lock into place in the handle.
U
simultaneously
R
Y
j Select a low level for small screws and soft ma-
terials.
,
j Select a high level for large screws, hard materials
and when loosening screws.
j If level 16 is selected, the clutch does not disconnect
the drive. The drive chain is locked in place. Select
this level if you require maximum rotary force.
L
Angular Position (Illustration A)
j Press and hold the angular position switch E
(see illustration A).
j Move the device into the angular position
(no intermediate setting).
j Release the angular position switch
Check whether the screwdriver has locked in
will
place in the angular position.
L
Changing the Tool
Inserting
j Insert the bit into the tool holder
Removing
j Remove the bit from the tool holder
Switching on / off
L
Notice: If the rotation direction switch R is located in
the central / neutral position, the ON / OFF switch
blocked. Therefore select a rotation direction before
switching on, in that the rotation direction switch
is pushed through completely
j To switch the screwdriver on, press the ON / OFF
I
.
switch
and keep it pressed.
j To switch the screwdriver off, release the ON / OFF
I
switch
.
E
.
Q
.
Q
.
I
is
R
The rotary force can be adjusted by means of the
torque pre-selector
approximately 9 Nm.
Once the rotary force that has been set (markings
1-15) is reached, the clutch disconnects the drive.
8 GB/IE
W
. The torque levels go up to
Setting the Speed
L
The ON / OFF switch I has a variable speed control.
Increasing the Speed
j Increase the pressure on the ON / OFF switch
I
.
Page 7

Initial Use / Maintenance and Cleaning / Disposal / Information
Reducing the Speed
j Reduce the pressure on the ON / OFF switch
Reversing the Direction of Rotation
L
Notice: If the rotation direction switch R is located
in the central / neutral position, the ON / OFF switch
is blocked. The rotation direction is only to be
switched when the appliance is at standstill.
I
.
I
j Reverse the direction of rotation by pressing the
direction of rotation switch
Tips and Tricks
L
By simply changing from the angled to the straight
position you can work effortlessly in any position
(see illustration C).
Particularly when assembling furniture you can
reach difficult-to-access places more easily with the
slender device (see illustration D).
When screwing into wood, metal and other
materials, please note the following:
R
to the right or left.
j Before operation, check that the scewdriver bit is
sitting properly, i.e. is correctly centred in the tool
holding fixture
Q
.
j Screw-bits are marked with their size and type. If
you are unsure, always test first to see if the bit
sits firmly and without free play in the tool holding fixture
Torque: Small screws and bits in particular may be
damaged if the selected torque and / or speed of the
device is too high.
Q
.
L Disposal
The packaging is made entirely of recyclable
materials, which you may dispose of at local
recycling facilities.
Do not dispose of electrical appliances
in household waste.
In accordance with European Directive 2002 / 96 / EC
on used electrical and electronic appliances and its
implementation in national law, used power tools
must be collected separately and recycled in an ecologically compatible manner.
Faulty or used rechargeable batteries must be
recycled in accordance with Directive 91 / 157 / EEC.
Please refer to the special safety advice in relation
to the charger
Return the appliance with integrated rechargeable
battery via the available collection facilities.
Information on options for disposing of electrical appliances after their useful life can be obtained from
your local or city council.
O
and battery pack Y.
L Information
L Servicing
The service centre for your country is shown in the
guarantee documentation.
L Maintenance and Cleaning
The rechargeable screwdriver is maintenance-free.
j The screwdriver should be cleaned regularly,
immediately upon completion of the work.
j A dry cloth should be used to clean the housing;
under no circumstances should petrol, solvent or
other cleaning agents be used.
9 GB/IE
Page 8

Information
L Manufacturer’s declaration
of conformity
We, Kompernaß GmbH, Burgstr. 21, D-44867 Bochum,
Germany, declare that this product complies with the
following EU directives:
EG Low Voltage Directive (73 / 23 / EEC)
Electromagnetic compatibility
(89 / 336 / EEC), (92 / 31 / EEC)
Applicable harmonised standards:
EN 60335-1:2002+A1+A11
EN 60335-2-29
EN 50366
EN 55014-1:2000+A1+A2
EN 55014-2:1997+A1
EN 61000-3-2
EN 61000-3-3:1995+A1
Description of the product:
Rechargeable Cordless Screwdriver PAS 7,2 V
Bochum, 31.10.2006
Hans Kompernaß
- Managing Director -
We reserve the right to make technical modifications in the course
of further development.
10 GB/IE
Page 9

11
Page 10

12
 Loading...