

Page 1
Outdoor Thermometer with Solar Lamp
Operating and Safety Instructions
Operating and safety instructions ........................................................................... Page 5
KH 4122
Page 2
P
O
Q
W
E
I
R
T
Y
Kompernaß GmbH
Burgstraße 21 · D-448 67 Bochum (Germany)
U
Validity Date of the Information: 02 / 2007
BA-Ident-No.: KH4122 - 022007 - UK
Page 3
5 GB
Before commencing to read, fold out the page with the illustrations and
subsequently make yourself familiar with all functions of the appliance.
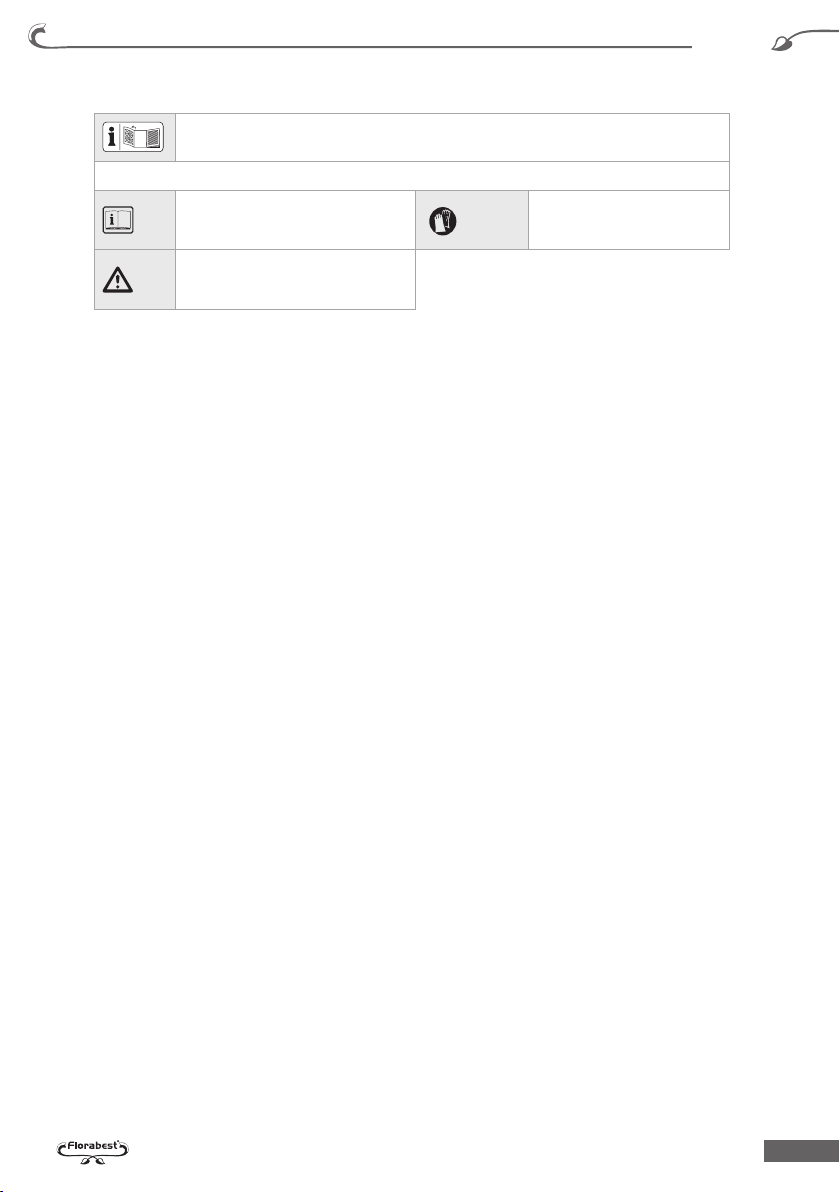
In these operating inst ructions the following Pictogram symbols are us ed:
Content
Read the operating instructions!
Important!
Pay attention to the warning and safety!
Wear protective gloves.
Introduction
Intended purpose .................................................................................................. Page 6
Equipment components ........................................................................................ Page 6
Items supplied ...................................................................................................... Page 6
Technical Data ..................................................................................................... Page 6
Safety
Safety Notices ....................................................................................................... Page 6
Product specific safety notices .............................................................................. Page 7
Commissioning
Assembly / Location selection ............................................................................... Page 7
Switching the illumination on and off ............................................................................ Page 7
Exchanging batteries ............................................................................................ Page 8
Cleaning and Maintenance ............................................................................. Page 8
Disposal ................................................................................................................. Page 8
Information
Service .................................................................................................................. Page 9
Conformity Declaration / Importer ........................................................................ Page 9
Page 4

6 GB
Introduction / Safety
Outdoor Thermometer
with Solar Lamp KH 4122
Introduction
Before commissioning it for the first
time make yourself familiar with all of
the functions of the Outdoor Thermometer.
To do this, read the following operating instructions
carefully. Retain these instructions for future reference. Also, pass them on to whoever might acquire
the appliance at a future date.
Intended purpose
The Outdoor Thermometer is intended as a measuring device for temperature display in garden areas
or terraces. All other usages, or modifications to
the appliance, are deemed to be improper applications and bring with them a high potential for serious
accidents. The manufacturer accepts no liability
for damage resulting from improper application.
The appliance is intended for domestic use only.
1 Solar housing
1 Thermometer tube
1 Support tube
1 Earth spike
2 Batteries 1,2 V / 700 mAh, Ni-MH / AA
1 Operating instructions
Technical Data
Power supply: 2 x Batteries 700
mAh / Ni-MH, AA
Solar panel: 60 x 60 mm
Lighting duration: 12 hours with fully
charged batteries
Light source: 1 x LED (Light Emit-
ting Diode)
Protection class: III
Protection type: IPX 3
LED Kl.1 / 0,07 W
Temperature display: -30 °C - + 50 °C
-20 °F - + 120 °F
Safety
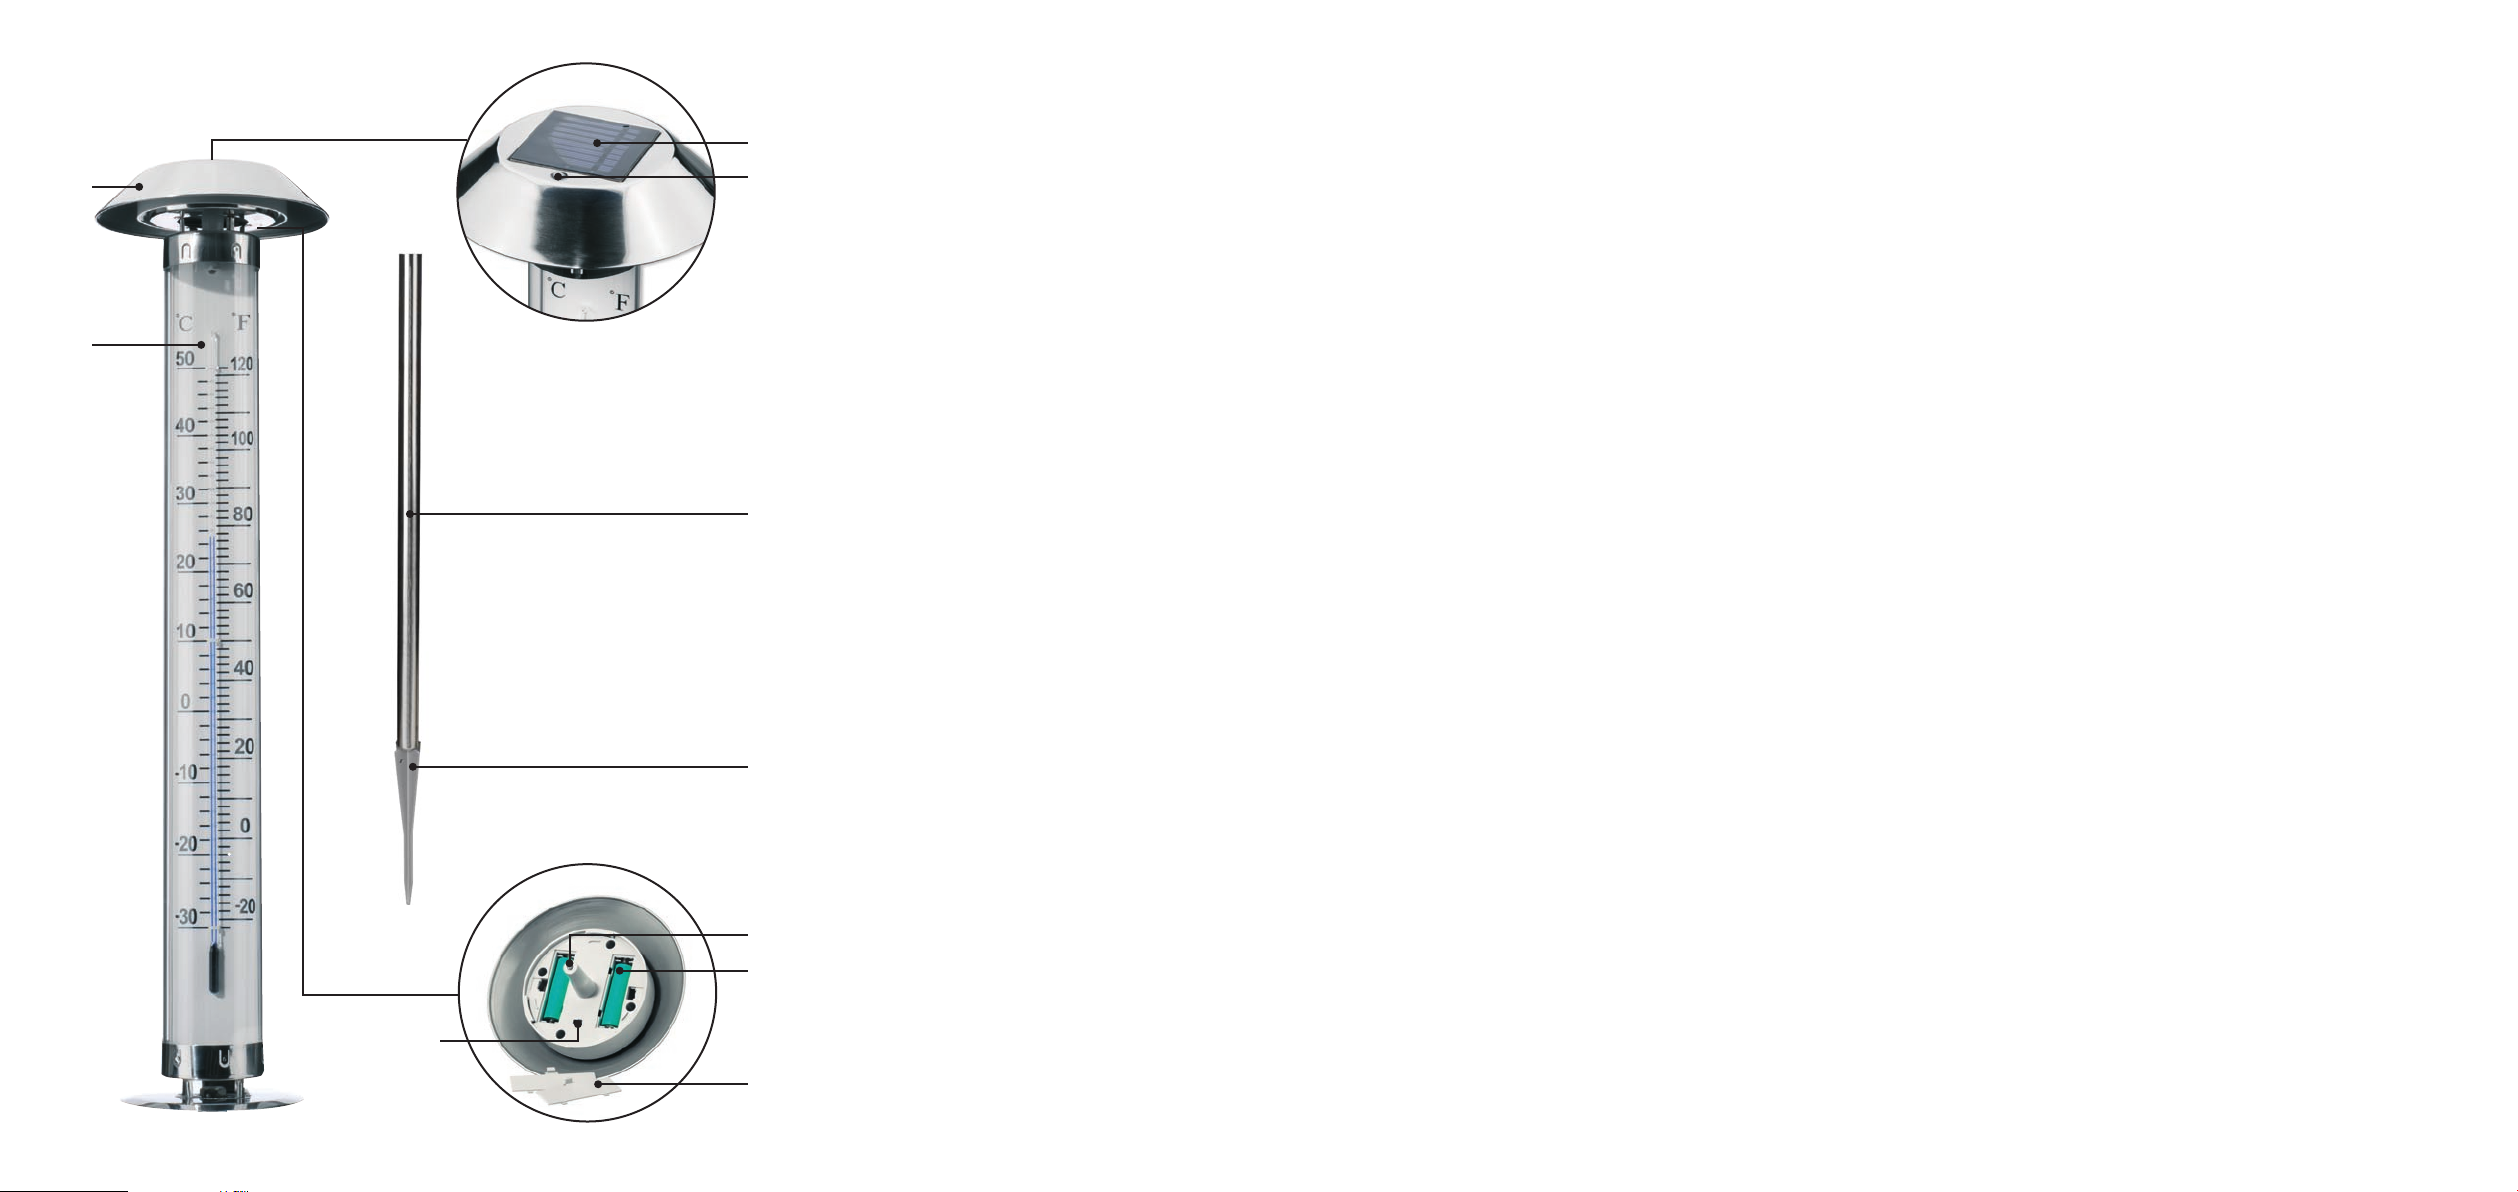
Equipment components
Q
Solar cell
W
Photo-sensor
E
Supporting tube
R
Earth spike
T
Light Emitting Diode (LED)
Y
Battery
U
Battery compartment lid
I
Auto- / OFF switch
O
Thermometer tube
P
Solar housing
Items supplied
Immediately after unpacking check to ensure that
all listed items are present and that all items are
free of visible damage.
Safety Notices
m Warning! Mortal danger! Batteries do not
belong in the hands of children. Do not leave
batteries lying around. There is a danger that
they could be swallowed by children or pets.
Should one be swallowed, immediately seek a
doctor / veterinarian.
Do not leave packaging material lying unat-
tended. Plastik sheets / bags etc. can be dangerous toys for children.
This product is not a toy, it does not belong in
the hands of children. Children often do not
comprehend the dangers inherent in electrical
products.
Page 5

7 GB
Safety / Commissioning
Product specific
safety notices
Do not subject the Outdoor Thermometer to
extreme temperatures (< -25 °C / > +50 °C),
heavy vibrations or strong mechanical stresses.
Ensure that the solar cell does not become
dirty and is not covered with snow or ice in the
winter. This reduces the performance capability
of the solar cell.
Cold temperatures have a negative influence
on the battery operating period. If you do not
need the Outdoor Thermometer for an extended
period, e.g. in the winter, it should be switched
off, cleaned and stored in a dry and warm area.
Remove the batteries to avoid damage to the
batteries themselves or to the solar housing.
mWarning! Never open the solar housing.
Arrange for repair or component exchange
work to be carried out only by the Service
Centre or qualified electricians .
m Warning! The batteries may not be short-
circuited. Overheating, fire risks or the exploding of the batteries could be the consequence.
mWarning! Risk of explosion! Never throw
batteries into water or a fire.
Chemical fluids may leak from batteries that are
very old or exhausted, and these fluids could
damage the appliance. You should therefore
remove the batteries if you do not require the
Outdoor Thermometer for an extended period.
Wear protective gloves:
Leaking or damaged batteries can cause
acid burns if they come into contact
with bare skin, thus in these cases you should
always wear suitable protective gloves.
Use only batterries of the correct size and of
the correct type.
Tip: Ensure that when the Outdoor Thermometer
is removed the support tube and the earth
spike are also removed, to avoid any possible
danger that they may cause (e.g. stumbling ).
Commissioning
Assembly / Location selection
To obtain the optimal results, place the Outdoor
Thermometer in a location at which the solar cell is
subject to the maximum amount of direct sunlight.
Do not place the Outdoor Thermometer under
bushes, trees, overhangs etc which could reduce
the total amount of sunlight received.
Ensure that the solar cell Q and the photo
W
sensor
cannot be covered or come into shade.
Ensure that the solar cell Q is not influenced
by other light sources, e.g. house or street illumination. If it is, the lamp will not switch on at
twilight.
During the assembly and the placing of the ap-
pliance do not use force, e.g. hammer blows these damage the product.
Screw the temperature tube O onto the sup-
port tube
E
.
Insert the earth spike R into the support tube E.
Put the earth spike R, on which the thermom-
eter tube
O
and the support tube E are now
placed, into the ground (lawn, flower-bed, etc).
Ensure it is standing securely.
Rotate the solar housing P carefully in a clock-
wise direction onto the thermometer tube
Remove the protective foil from the solar cell
O
.
Q
should one be placed over it.
Switching the illumination on and off
The solar housing P requires ca. 2-3 sunny days
to fully charge
thus leave the solar lamp switched off for 2-3 days
(Switch position "OFF").
Remove the solar housing P by carefully ro-
tating it anti-clockwise from the thermometer
tube
On the underside of the solar housing P place
the AUTO / OFF swich
AUTO: The solar lamp is switched on. As the
daylight reduces, the lamp switches on automatically.
Y
the batteries. Initially, you should
O
.
I
to:
Page 6

8 GB
Commissioning / Cleaning and Maintenance / Disposal
OFF: The solar lamp is switched off. The batteries
continue to be charged by the solar cell
Q
.
Rotate the solar housing P carefully in a clock-
wise direction onto the thermometer tube
O
.
Notice: The performance of solar light varies in
accord with the season. In sunny weather the performance is higher than in cloudy weather.
Exchanging batteries
m Attention! Risk of explosion! Use exclusively
batteries that are intended to be recharged and are
designed for recharging.
To obtain the optimal performance, exchange batteries every 12 months.
Remove the solar housing P by carefully ro-
tating it anti-clockwise from the thermometer
O
tube
.
Place the AUTO- / OFF switch I in the position
OFF.
Press the unlocking buttons of both battery
compartments
used batteries
Insert new batteries of the same type and the
same capacity (check the data on the original
batteries) into the battery compartment. Ensure that the batteries
correct polarity (pay heed to Plus and Minus).
Replace the battery compartment lids U.
Rotate the solar housing P carefully in a clock-
wise direction onto the thermometer tube
Notice: The solar housing
sunny days to completely charge the batteries
Leave the solar lamp switched off for this period
(Switch position "OFF").
U
, open them and remove the
Y
.
Y
are inserted with the
P
requires ca. 2-3
O
.
Y
Cleaning and Maintenance
The Outdoor Thermometer is, except for required
battery exchanges, maintenance-free. The LED is
not exchangable.
Clean the solar housing P with a moist cloth to
retain the optimal performance of the solar cell.
Do not use solvents for cleaning and do not
press too heavily on the solar housing
Disposal
The packaging comprises exclusively en-
vironmentally-friendly material which can
be disposed of in your local recycling containers.
Do not dispose of electrical appliances
with your domestic waste!
According to the European Directive 2002 / 96 / EG,
concerning used electrical and electronic appliances and its implementation in national law, superannuated electrical appliances must be collected and
disposed of via an environmentally suitable recycling facility.
Defective or worn out rechargeable batteries must
be recycled according to Directive 91 / 157 / EEC.
Dispose of batteries and appliances over the existing
collection facilities.
Your local communal or municipal authorities can
provide information on how to dispose of the worn
.
out appliance.
P
.
Page 7

9 GB
Information
Service
DES Ltd
Units 14-15
Bilston Industrial Estate
Oxford Street
Bilston
WV14 7EG
Tel.: 0870 / 787-6177
Fax: 0870 / 787-6168
e-mail: support.uk@kompernass.com
Conformity Declaration /
Importer
We, Kompernaß GmbH, Burgstr. 21, D-44867
Bochum, Germany, hereby declare that this
product complies with the requirements of
the following EU directives:
EN 60598-2-4:1997
EN 60825-1:2002
Information
Product designation:
Florabest Outdoor Thermometer with Solar Lamp
KH4122
Bochum, 28.02.2007
Hans Kompernaß
- Managing Director-
We reserve the right to make technical modifications in the
course of further development.
Page 8

10
Page 9

11
Page 10

12
 Loading...