

Page 1
3C
KOMPERNASS GMBH · BURGSTRASSE 21
D-44867 BOCHUM
www.kompernass.com
ID-Nr.: KH 4106 - 04/09-V1
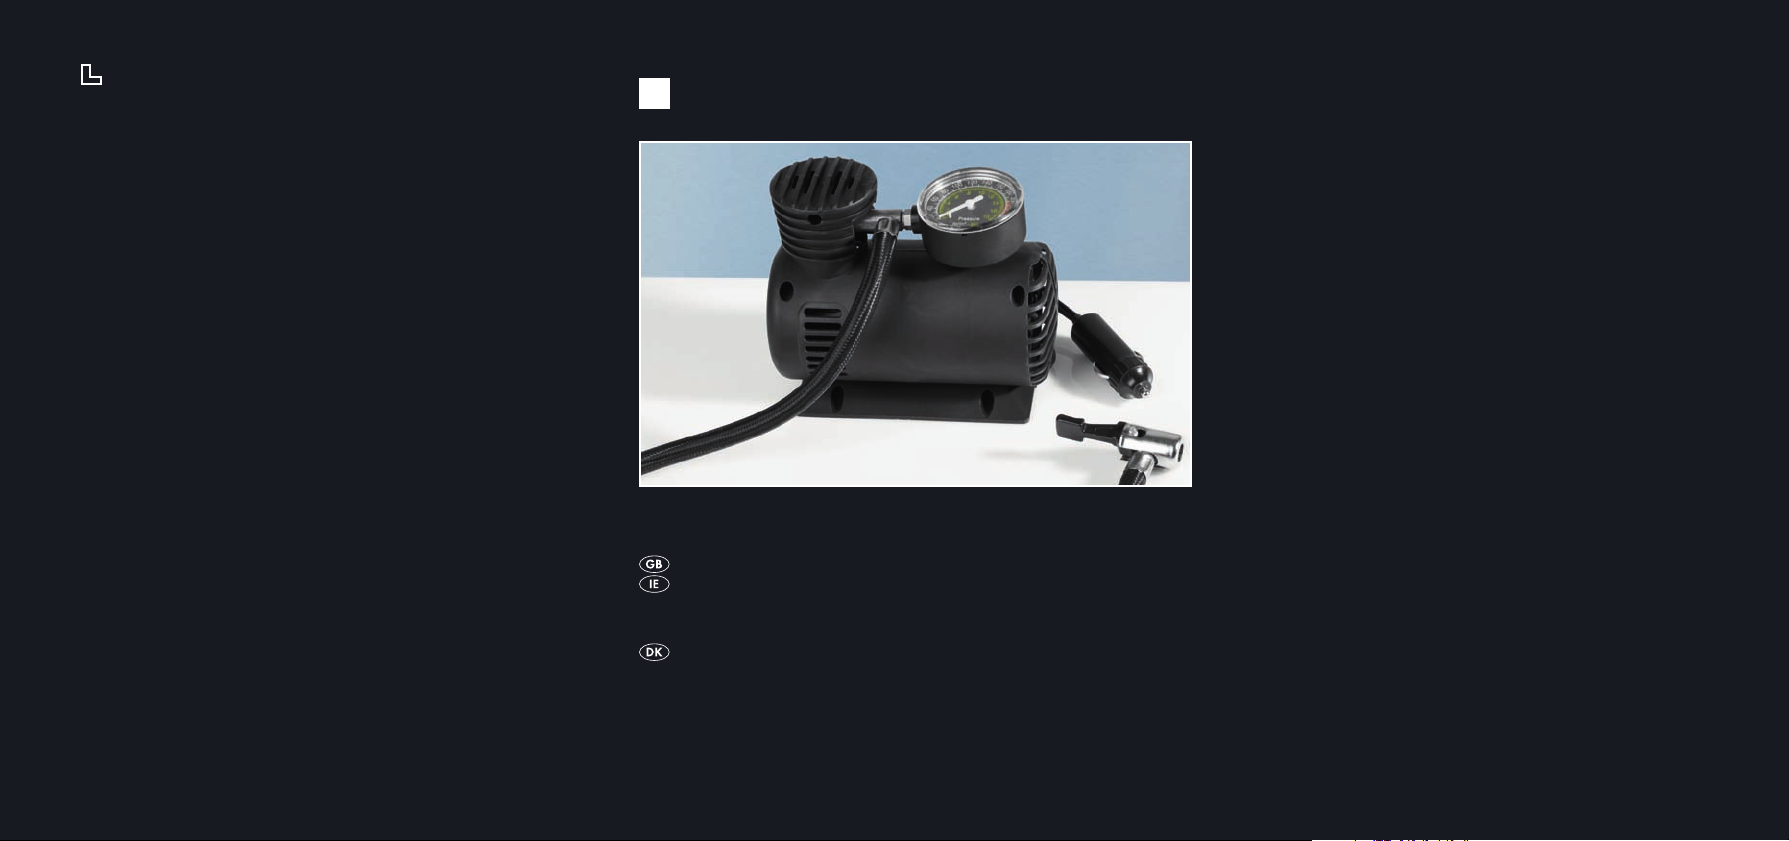
MINI COMPRESSOR
KH 4106
MINI COMPRESSOR
ating instructions
Oper
MINIKOMPRESSOR
Betjeningsvejledning
Page 2

Page 3

CONTENT PAGE
1. Safety instructions 2
2. Utilisation 5
3. Package contents 5
4. Technical data 6
5. Operating elements 6
6. Preparing the Mini Compressor for use 7
7. Using the Mini Compressor 7
8. Storing the Mini Compressor 10
9. Cleaning the Mini Compressor 11
10. Disposal 11
11. Warranty & Service 12
12. Importer 13
Read these operating instructions carefully before using the appliance
for the first time and preserve this maual for later reference. Pass this
manual on to whoever might acquire the appliance at a future date.
1
Page 4

MINI COMPRESSOR KH 4106
1. Safety instructions
Danger!
Should water or moisture penetrate into the Mini Compressor, …
• there is the danger of receiving an electric shock!
• it could be irreparably damaged!
Thus:
Do not use or store the Mini Compressor …
• in humid environments!
• in close proximity to water! Additionally, never subject the
Mini Compressor to spraywater or rain.
Also, do not place any water-filled receptacles onto the MiniCompressor!
Extreme heat effects can lead to the overheating of the Mini Compressor and to the meltdown of plastic parts. Through this the MiniCompressor could be irreparably damaged, and there is the additional
risk of fire!
2
Page 5

Thus:
• Do not place the Mini Compressor in close proximity to heat
sources.
• Do not place unprotected open flame sources – e.g. burning
candles – on the Mini Compressor!
• Do not leave the Mini Compressor in a vehicle if there are high
outdoor temperatures. Especially in summer the temperature inside
a vehicle can become extremely high.
• Do not cover the ventilation openings of the Mini Compressor!
Therefore, do not place the Mini Compressor on blankets or other
textiles etc.
• Take note that the Mini Compressor is not suitable for constant
operation. Thus do permit the Mini Compressor to be switched on
without a break for periods in excess of 10 minutes. Allow it to cool
down for at least 30 minutes before switching it back on.
• The Mini Compressor should not be used or stored in dusty environments. Dust could penetrate into the Mini Compressor. Should large
amounts of dust penetrate into the Mini Compressor it could
overheat and be irreparably damaged. There is also a danger of
fire!
Never attempt to repair the power cable yourself in the case of a
defect! There is the danger of an electric shock! Instead, approach
one of our service partners.
3
Page 6
Always check the maximum permitted air pressure for the object to be
inflated! For this, consult the operating instructions and safety information supplied with the object to be inflated. Additionally, when inflating
objects with the Mini Compressor always take note of the mamometer
on the Mini Compressor. Should the object be inflated beyond the maximum permitted air pressure it could burst. There is then the danger of
serious physical injury! Also, take precautions that the Mini Compressor
cannot be used by children without supervision!
Caution!
The Mini Compressor could be irreparably damaged if it falls or is
dropped! Therefore always place the Mini Compressor on a stable,
level and non-slip surface.
NOTE:
For damages resulting from …
• Opening the housing of the Mini Compressor
• attempted repairs made by non-qualified personnel
• improper utilisation of the Mini Compressor
no liability or warranty will be accepted!
The Mini Compressor becomes warm when it is switched on. This is not
a cause for concern and is not an indication of a technical problem.
4
Page 7

2. Utilisation
The Mini Compressor is suitable exclusively for…
• the inflation of objects with a valve (e. g. tyres, balls etc.).
• measuring the air pressure of inflated objects.
• for operation on the 12-V circuit of vehicles via the cigar lighter.
• for domestic, non-commercial use.
3. Package contents
• Mini Compressor
• 3 Adapter sets for various valve types
• Operating manual
NOTE:
The connector valve rof the Mini Compressor is suitable for the inflation of tyres with Schrader valves. For this you do not need to use an
additional valve adapter. For the inflation of bicycle tyres with valve
types …
• Sclaverand (also: French valves, Presta valves, inner-tube valves,
racing valves)
• Dunlop (also: Blitz valves, German valves)
you require the valve adapter for Schrader car valves. These are
available from specialist bicycle shops.
5
Page 8

4. Technical data
Operating voltage : 12 V DC
Current consumption: 6,5 A
Max. operating pressure: 17 bar /250 Psi
Continuous operating time: 10 Minutes
The CO Time (Continuous Operation Time) details how long an
appliance can be operated without the motor overheat-ing and
becoming damaged. After the appliance has run for this period it
must be switched off until the motor has cooled itself down.
5. Operating elements
Mini Compressor
q
Manometer display …
w
• bar resp. kg/cm2 (inner, yellow scale)
• psi (outer, white scale)
Airline
e
Connection valve with fastening lever
r
Power cable
t
Turn switch (Mini Compressor on/off)
y
Cigar lighter plug
u
Adaptor sets for various valve types.
i
6
Page 9

6. Preparing the Mini Compressor for use
Remove the Mini Compressor and the Adapter sets ifrom the
packaging. Unwind the power cable
The Mini Compressor is now ready for use.
to its full length.
t
7. Using the Mini Compressor
7.1 Using the Mini Compressor to inflate objects
1. Remove the cigar lighter from its holder in the vehicle.
NOTE:
Should the interior of the cigar lighter holder be soiled (e.g. with tobacco shreds or ash): Clean it with a non-con-ducting object before inserting the cigar lighter plug
the operation of the Mini Compressor. Ideal would be a small brush,
cotton buds or something similar. Under no circumstances use anything
metallic! Also, do not insert your fingers into the cigar lighter holder!
. Otherwise it could cause a malfunction in
u
7
Page 10

Danger!
Should you do so, you may receive an electrical shock!
2. Insert the cigar lighter plug
the vehicle.
3. Check to see if an adaptor is required for use on the object to be
inflated. Should this be the case: Press resp. screw the required
adaptor into the opening of the connection valve
4. Check to ensure that the fastening lever of the connection valve
is open. When open, the fastening lever is in a vertical position.
5. Press the opened connection valve
to be inflated. Press it down so that it is firmly seated. Should you be
using one of the adaptors
adaptor into the valve of the object to be inflated.
6. Close the connection valve r, in that the fastening lever is pressed
down. Continue to firmly hold the connection valve down. Ensure
that the connection valve cannot disconnect itself from the valve of
the object being inflated.
firmly into the cigar lighter holder in
u
.
r
onto the valve of the object
r
: Press the connection valve with the
i
r
8
Page 11

7. Switch on the vehicle ignition should this be necessary for the cigar
lighter to function. In case of query, consult the operating handbook
for the vehicle.
8. Firmly hold the object to be inflated. If necessary, obtain assistance
from a second person.
9. Twist the turn switch
it audibly engages. The Mini Compressor now starts to run. Check
the continually rising air pressure on the mamometer
Compressor.
10. As soon as the desired air pressure is displayed on the mamome-
ter
: Switch the Mini Compressor off. Twist the turn switch
w
this time in an anti-clockwise direction until it audibly engages.
11. Remove the cigar lighter plug
the vehicle. If necessary, switch off the vehicle ignition.
12. Open the fastening lever of the connection valve rin that it is
pushed into a vertical position. Pull the connection valve (complete
with the adaptor, if one has been used) from the valve of the
inflated object.
in a clockwise direction until
y
from the cigar lighter holder in
u
9
of the Mini
w
y
Page 12

Turn the connection valve back and forth to make it easier to remove.
When removing the connection valve air can escape from the valve of
the object that has been inflated. Therefore ensure that the connection
valve is removed as quickly as possible.
7.2 Using the Mini Compressor to measure inflation
pressure
NOTE:
For measuring the pressure of an inflated object the Mini Compressor
does not require electricity.
1. Follow steps 3 to 6 in chapter 7.1 „Using the Mini Compressor to
inflate objects“.
2. Read off the inflation pressure on the mamometer
Mini Compressor.
3. To conclude, follow step 12 in chapter 7.1 „Using the
Mini Compressor to inflate objects“.
w
of the
8. Storing the Mini Compressor
Always store the Mini Compressor at a clean and dry location.
To avoid damage, make sure that the air line
are not folded.
t
10
and the power cable
e
Page 13

9. Cleaning the Mini Compressor
Caution:
Ensure that moisture cannot penetrate into the Mini Compressor!
Danger of Electrocution!
• Clean the housing of the Mini Compressor with a lightly moist cloth.
10. Disposal
Do not dispose of the appliance in your normal domestic
waste. This product is subject to the European guideline
2002/96/EC.
Dispose of the appliance through an approved dis-posal centre or at
your community waste facility. Observe the currently applicable regulations. In case of doubt, please contact your waste disposal centre.
Dispose of all packaging materials in an environmentally
responsible manner.
11
Page 14

11. Warranty & Service
The warranty for this appliance is for 3 years from the date of purchase. The appliance has been manu-factured with care and meticulously
examined before delivery. Please retain your receipt as proof of purchase. In the case of a warranty claim, please make contact by telephone with our service department. Only in this way can a post-free
despatch for your goods be assured.
The warranty covers only claims for material and maufacturing defects,
not for wearing parts or for damage to fragile components. This product is for private use only and is not intended for commercial use.
The warranty is void in the case of abusive and improper handling, use
of force and internal tampering not carried out by our authorized service branch. Your statutory rights are not restricted in any way by this
warranty.
12
Page 15

DES Ltd
Units 14-15
Bilston Industrial Estate
Oxford Street
Bilston
WV14 7EG
Tel.: 0870/787-6177
Fax: 0870/787-6168
e-mail: support.uk@kompernass.com
Kompernass Service Ireland
Tel: 1850 930 412
Standard call rates apply. Mobile operators may vary.
e-mail: support.ie@kompernass.com
(0,082 EUR/Min.)
12. Importer
KOMPERNASS GMBH
BURGSTRASSE 21
44867 BOCHUM, GERMANY
www.kompernass.com
13
Page 16

14
Page 17

INDHOLDSFORTEGNELSE SIDE
1. Sikkerhedsanvisninger 16
2. Anvendelse 19
3. Leveringsomfang 19
4. Tekniske data 20
5. Betjeningselementer 20
6. Sådan gøres minikompressoren
klar til brug 21
7. Brug af minikompressoren 21
8. Opbevaring af minikompressoren 24
9. Rengøring af minikompressoren 25
10. Bortskaffelse 25
11. Garanti & Service 26
12. Importør 27
Læs betjeningsvejledningen igennem før første brug, og opbevar den
til senere brug. Lad vejledningen følge med, hvis apparatet gives
videre til andre."
15
Page 18

MINIKOMPRESSOR KH 4106
1. Sikkerhedsanvisninger
Fare!
Hvis der trænger fugt/vand ind i minikompressoren, …
• er der fare for elektriske stød!
• kan den beskadiges, så den ikke længere kan repareres!
Derfor:
Brug og opbevar ikke minikompressoren …
• i fugtige omgivelser!
• lige i nærheden af vand! Udsæt aldrig minikompressoren for stænkvand eller regn.
Stil ikke beholdere fyldt med vand på minikompressoren!
Kraftig indvirkning fra varme kan føre til overophedning af minikompressoren og til, at plastdele kan smelte. Derved kan minikompressoren
ødelægges, så den ikke længere kan repareres, og endvidere er der risiko for brand!
16
Page 19

Derfor:
• Stil ikke minikompressoren lige i nærheden af varmekilder.
• Stil ikke åbne varmekilder – f.eks. brændende lys – på minikompressoren!
• Efterlad ikke minikompressoren i bilen, hvis temperaturen udenfor er
høj. Især om sommeren kan bilen blive meget varm indeni.
• Tildæk aldrig minikompressorens ventilationsåbninger! Stil ikke minikompressoren på tæpper eller andre teks-tilmaterialer etc..
• Bemærk, at minikompressoren ikke er egnet til vedvarende brug.
Lad derfor ikke minikompressoren være tændt uafbrudt i mere end
10 minutter. Lad den afkøle mindst 30 minutter, før den tændes
igen.
• Brug og opbevar ikke minikompressoren i støvede omgivelser. Der
kan trænge støv ind i minikompressoren. Hvis der trænger større
mængder støv ind i minikompressoren, kan det føre til overophedning og skader, som ikke kan repareres.
Der er fare for brand!
Forsøg aldrig selv at reparere strømkablet, hvis det er defekt! Der er
fare for elektrisk stød! Henvend dig i stedet til en af vores
servicepartnere.
17
Page 20

Kontrollér det maksimalt tilladte lufttryk for genstanden, der skal pumpes op, før påfyldning! Brug betjeningsvejledningen og følg sikkerhedsanvisningerne til genstanden, der skal pumpes op. Hold endvidere hele
tiden øje med lufttrykdisplayet på minikompressoren ved påfyldning
med minikompressoren. Hvis genstanden, der skal pumpes op, fyldes
ud over det maksimalt tilladte lufttryk, kan den eksplodere. Der er dermed fare for alvorlige kvæstelser! Sørg derfor for, at minikompressoren
ikke bruges af børn uden opsyn!
Forsigtig!
Minikompressoren kan beskadiges, så den ikke længere kan repareres,
hvis den falder ned eller tabes på gulvet! Stil derfor altid minikompressoren på en fast, plan, skridsikker overflade.
Bemærk:
Ved skader på grund af …
• åbning af minikompressorens hus
• forsøg på at reparere minikompressoren af andre end kvalificeret
specialpersonale
• ikke-bestemmelsesmæssig anvendelse af minikompressoren
gives der ikke garanti/mangelansvar!
Minikompressoren bliver varm, når den tændes. Det er ikke grund til
bekymring og ikke tegn på et teknisk problem.
18
Page 21

2. Anvendelse
Minikompressoren er udelukkende egnet …
• til oppumpning af genstande med ventil, som er fyldt med luft (f.eks.
dæk, bolde etc.).
• til måling af lufttrykket for genstande, som er fyldt med luft.
• til brug ved hjælp af køretøjets elektriske 12-V-system med cigarettænderen.
• til privat, ikke-kommercielt brug.
3. Leveringsomfang
• Minikompressor
• 3 adapter-indsatser til forskellige ventiltyper
• Betjeningsvejledning
Bemærk:
Tilslutningsventilen rtil minikompressoren er egnet til oppumpning af
dæk med schrader-/autoventil. Hertil skal der bruges ekstra adapterindsatser. Til oppumpning af cykeldæk med ventiler af typerne …
• Sclaverand (også: fransk ventil, Presta-ventil, slangedækventil, racerventil)
• Dunlop (også: blitzventil, tysk ventil)
skal du bruge ventil-adaptere til Schrader-/autoventiler. Disse kan købes hos cykelhandleren.
19
Page 22

4. Tekniske data
Driftsspænding: 12 V DC
Strømforbrug: 6,5 A
Driftstryk maks.: 17 bar /250 Psi
KD-tiden: 10 minutter
KD-tiden (kort drift) angiver, hvor længe man kan bruge apparatet,
uden at motoren bliver for varm og tager skade. Efter den angivne
KD-tid skal der slukkes for apparatet, indtil motoren er kølet af.
5. Betjeningselementer
Minikompressor
q
Lufttrykdisplay i …
w
• bar eller kg/cm2 (inderste, gule skala)
• psi (yderste, hvide skala)
Luftslange
e
Tilslutningsventil med lukkearm
r
Strømkabel
t
Drejekontakt (minikompressor on/off)
y
Cigarettænder-stik
u
Adapter-indsatser til forskellige ventiltyper
i
20
Page 23

6. Sådan gøres minikompressoren klar
til brug
Tag minikompressoren og adapter-indsatserne iud af emballagen.
Vikl strømkablet
Nu er minikompressoren klar til brug.
ud til den fulde længde.
t
7. Brug af minikompressoren
7.1 Brug af minikompressoren til oppumpning af
genstande
1. Tag køretøjets cigarettænder ud af holderen.
Bemærk:
Hvis cigarettænderens holder er meget snavset indeni (f.eks. med
tobaksrester, aske): Rengør den med en ikkeledende genstand, før
cigarettænder-stikket
ved brug af minikompressoren. Det er bedst at bruge en pensel,
vatpind eller lignende til dette. Brug aldrig metalliske genstande! Stik
aldrig fingrene ind i holderen til cigarettænderen!
sættes i. Ellers kan der opstå fejlfunktioner
u
21
Page 24

Fare!
Fare for elektrisk stød!
2. Sæt stikket til cigarettænderen
cigarettænder.
3. Se efter, om der skal bruges en adapter-indsats til genstanden, der
skal pumpes op. Hvis det er tilfældet: Tryk eller skru adapterindsatsen ind i tilslutningsventilens åbning
4. Kontrollér, at tilslutningsventilens lukning
åben, skal lukkearmen pege opad.
5. Sæt den åbne tilslutningsventil rpå ventilen til genstanden, der
skal pumpes op. Tryk den kraftigt ned, så den sidder fast. Hvis du
bruger en af adapter-indsatserne
adapter-indsatsen ind i ventilen på genstanden, der skal pumpes op.
6. Luk tilslutningsventilen rved at trykke lukkearmen nedad. Hold
samtidigt tilslutningsventilen trykket nede. Kontrollér, at tilslutningsventilen ikke kan løsne sig fra ventilen til genstanden, der skal
pumpes op.
ind i holderen til køretøjets
u
.
r
er åben. Når den er
r
: Tryk tilslutningsventilen med
i
22
Page 25

7. Tænd for køretøjets tænding, hvis det er nødvendigt, for at cigarettænderen fungerer. Læs i driftsvejledningen til køretøjet, hvis du er i
tvivl.
8. Hold godt fast i genstanden, der skal pumpes op. Få eventuelt
hjælp fra endnu en person.
9. Drej drejekontakten
det kan høres. Nu kører minikompressoren. Kontrollér det stigende
lufttryk på lufttrykdisplayet
10. Så snart den ønskede lufttrykværdi vises på lufttrykdisplayet
Sluk for minikompressoren. Drej drejekontakten
igen, indtil den går i indgreb, så det kan høres.
11. Tag cigarettænder-stikket uud af holderen til køretøjets
cigarettænder. Sluk derefter eventuelt for køretøjets tænding.
12. Åbn tilslutningsventilens lukkearm rved at trykke den op. Tag
tilslutningsventilen (med adapter-indsatsen, hvis den anvendes) af
ventilen til genstanden, der skal pumpes op.
Drej tilslutningsventilen frem og tilbage, så den lettere løsner sig. Når
tilslutningsventilen løsner sig, kan der slippe luft ud af ventilen til
genstanden, der skal pumpes op. Sørg for at tage tilslutningsventilen
af ventilen så hurtigt som muligt.
i urets retning, indtil den går i indgreb, så
y
på minikompressoren.
w
i urets retning
y
23
w
:
Page 26

7.2 Brug af minikompressoren til måling af lufttryk
Bemærk:
Til måling af lufttrykket på en genstand, der er fyldt med luft, behøver
minikompressoren ingen strømforsyning.
1. Følg trin 3 til 6 i kapitel 7.1 „Brug af minikompressoren til
oppumpning af genstande“.
2. Aflæs lufttrykket på lufttryk-displayet
3. Følg derefter trin 12 i kapitel 7.1 „Brug af minikompressoren til
oppumpning af genstande“.
på minikompressoren.
w
8. Opbevaring af minikompressoren
Opbevar altid minikompressoren på et tørt, rent sted.
Sørg for, at luftslangen
forebygges.
og strømkablet tikke knækker, så skader
e
24
Page 27

9. Rengøring af minikompressoren
OBS:
Pas på, at der ikke kommer fugt ind i minikompressoren! Fare på grund
af elektrisk stød!
• Få Rengør minikompressorens kabinet med en let fugtet klud.
10. Bortskaffelse
Kom under ingen omstændigheder afspilleren i det
normale husholdningsaffald. Dette produkt overholder
Europa-Parlamentets og Rådets direktiv 2002/96/EC.
Bortskaf afspilleren hos et godkendt affaldsfirma eller på dit
kommunale affaldsanlæg. Følg de aktuelt gældende regler.
Kontakt affaldsordningen, hvis du er i tvivl.
Aflever alle emballagematerialer på et affaldsdepot, så
miljøet skånes.
25
Page 28

11. Garanti & Service
På denne afspiller får du 3 års garanti fra købsdatoen. Apparatet er
produceret omhyggeligt og er inden levering afprøvet samvittighedsfuldt. Opbevar kassebonen som bevis for købet. I garantitilfælde bedes
du kontakte dit servicested telefonisk. Kun på den måde kan der garanteres gratis indsendelse af din vare.
Garantien gælder kun for materiale- eller fabrikationsfejl, men ikke ved
sliddele eller beskadigelser ved skrøbelige dele, f.eks. kontakten eller
akkumulatorer. Produktet er kun beregnet til privat og ikke til erhvervsmæssigt brug.
Ved misbrug og uhensigtsmæssig behandling, anvendelse af vold og
ved indgreb, som ikke er foretaget af vores autoriserede service-afdeling, ophører garantien. Dine juridiske rettigheder indskrænkes ikke ved
denne garanti.
Kompernass Service Danmark
Hornbækvej 473
DK-3080 Tikøb
Tel.: +45 4975 8454
Fax: +45 4975 8453
e-mail: support.dk@kompernass.com
26
Page 29

12. Importør
KOMPERNASS GMBH
BURGSTRASSE 21
44867 BOCHUM, GERMANY
www.kompernass.com
27
 Loading...