

Page 1
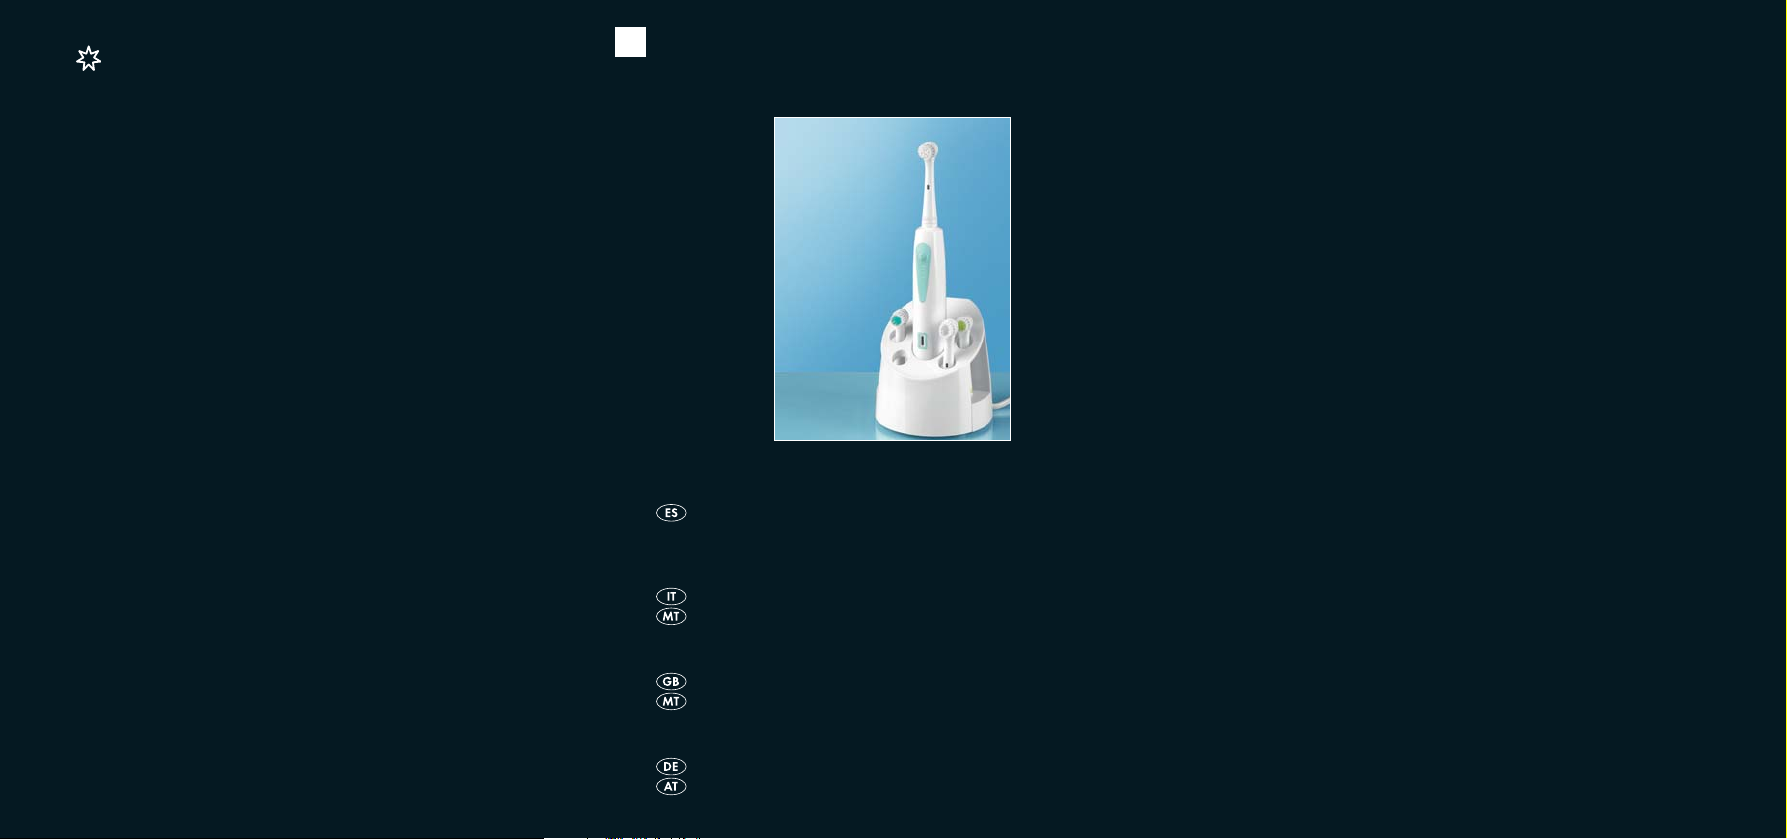
CEPILLO DENTAL ELÉCTRICO RECARGABLE
SPAZZOLINO DA DENTI ELETTRICO
KH 107
CEPILLO DENTAL ELÉCTRICO RECARGABLE
Instrucciones de uso
SPAZZOLINO DA DENTI ELETTRICO
Istruzioni per l'uso
KOMPERNASS GMBH · BURGSTRASSE 21 · D-44867 BOCHUM
www.kompernass.com
ID-Nr.: KH107-01/09-V2
RECHARGEABLE ELECTRIC TOOTHBRUSH
Operating instructions
AKKU-ZAHNBÜRSTE
Bedienungsanleitung
Page 2
햷
햲
햸
햳
햴
햵
햶
Page 3

ÍNDICE PÁGINA
Indicaciones de seguridad 4
Finalidad de uso 5
Características técnicas 5
Volumen de suministro 5
Descripción del aparato 6
Emplazamiento 6
Montar/desmontar el cabezal del cepillo 7
Primer uso 7
Limpiar los dientes 8
Limpieza y mantenimiento 9
Evacuación 10
Garantía & servicio posventa 11
Importador 11
Lea atentamente este manual de instrucciones antes del primer uso
y consérvelo para posteriores utilizaciones. Entréguelo en caso de
traspasar el aparato a terceros.
- 3 -
Page 4

CEPILLO DENTAL ELÉCTRICO
RECARGABLE KH 107
Indicaciones de seguridad
Para evitar peligro de muerte por descarga eléctrica:
• Preste atención a que el cable de red no se pueda mojar o pueda
entrar en contacto con humedad durante el servicio. Extienda el cable
de modo que no se pueda aplastar o dañar de alguna forma.
• El cable de conexión de red del presente aparato no se puede sustituir.
En caso de daños en el cable el aparato se se ha de evacuar.
• Nunca toque el cargador si se ha caído al agua. ¡Retire siempre
primero la clavija de red!
• Este aparato no es adecuado para que lo manejen personas (incluidos
niños) con capacidad física, sensorial o mental reducida o que carezcan
de la experiencia y/o el conocimiento necesario para ello, a no ser
que sean supervisados por una persona responsable de su seguridad o
hayan recibido de ella las indicaciones oportunas para utilizar el
aparato.
Vigile a los niños para asegurarse de que no juegan con el aparato.
• El cepillo eléctrico sólo podrá cargarse con la estación de carga
suministrada.
• ¡Bajo ninguna circunstancia debe sumergir en agua u otros líquidos el
dispositivo de mano o la estación de carga!
- 4 -
Page 5
Finalidad de uso
Este aparato está destinado al cuidado dental personal en el ámbito doméstico. No está previsto para su uso comercial, industrial ni en áreas
médicas o veterinarias.
Características técnicas
Suministro de energía: 220-240 V ~50 Hz
Consumo de potencia: 1 W
Tiempo de carga: aprox. 12 horas
Tipo de protección (cargador): IP X7
Clase de protección: II
Volumen de suministro
Cepillo de dientes eléctrico
4 Cabezales del cepillo
Caja de almacenamiento con soporte para dos cabezales.
2 tornillos y 2 tacos
Instrucciones de uso
Tarjeta de pedido
- 5 -
Page 6
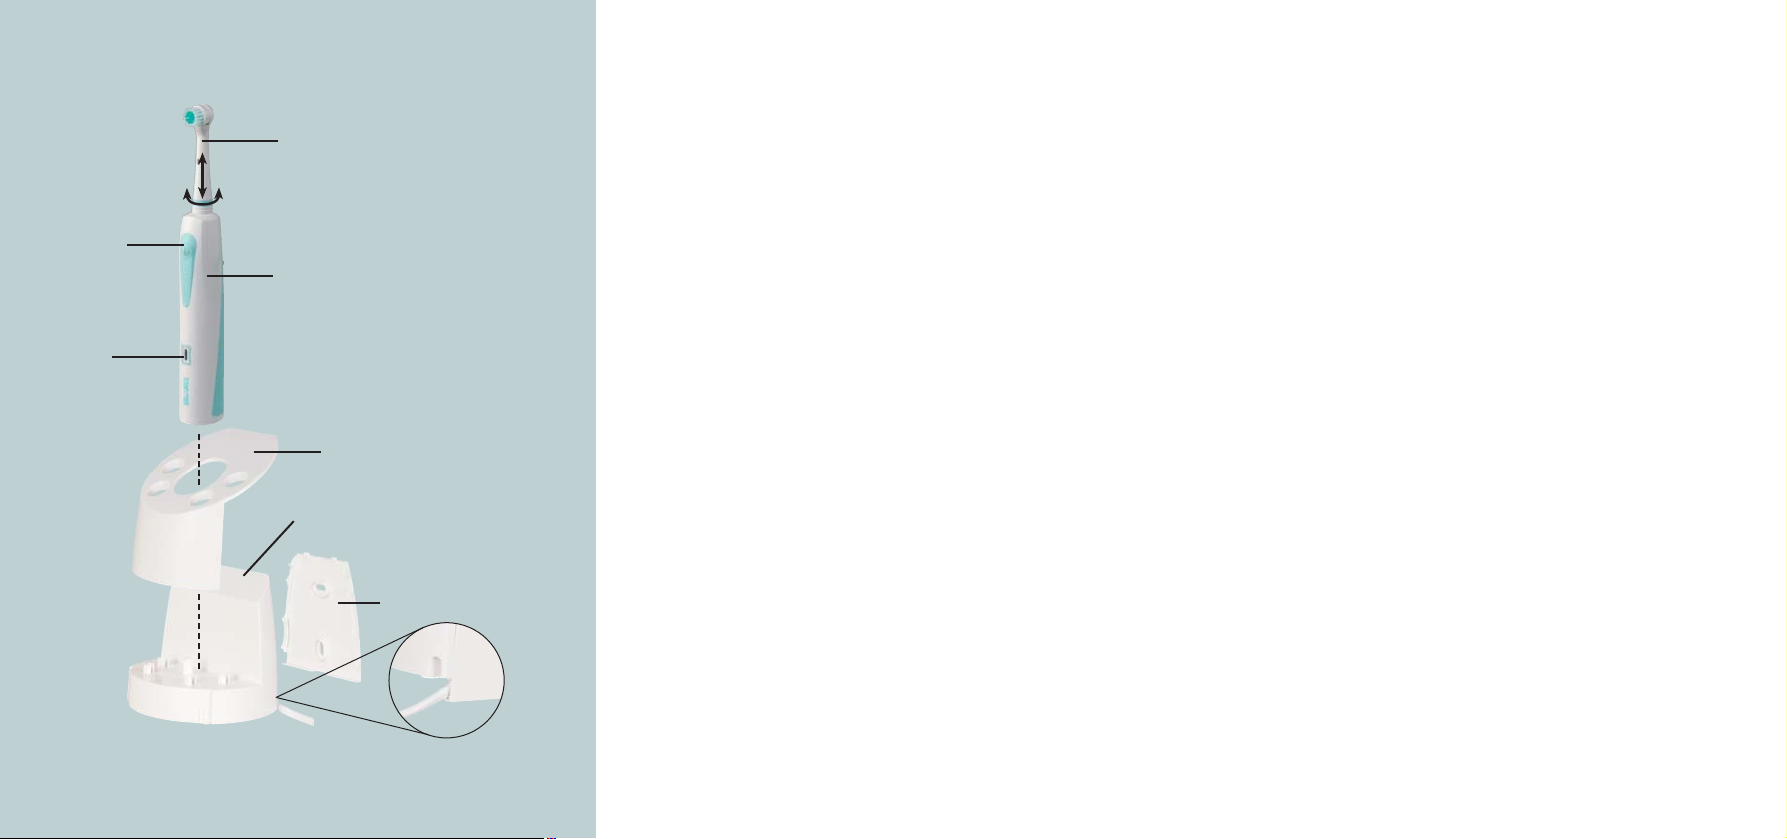
Descripción del aparato
Cabezal del cepillo
Mango
Soporte para los cepillos
Cargador
Soporte para la pared
Indicador luminoso
Interruptor de encendido/apagado
Emplazamiento
El cargador sólo debe ser utilizado sin sujeción en espacios secos.
En espacios húmedos, especialmente cerca del agua (en el Baño), el cargador
deberá estar firmemente montado, para que esté protegido ante
una caída accidental en el agua:
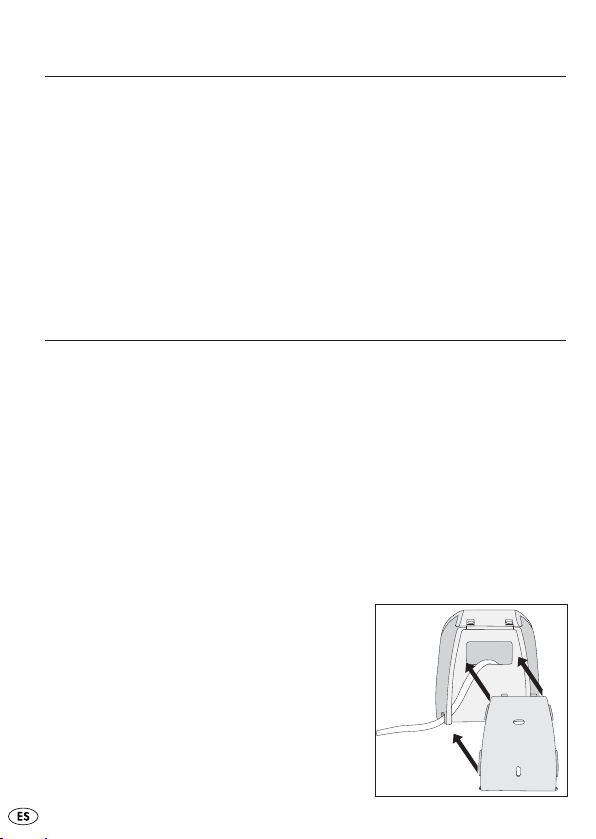
• Tirando hacia abajo del soporte para la pared , sepárelo del cargador
.
• Asegúrese de colocar el soporte para la pared cerca de una base
de enchufe. Utilice los tornillos y tacos suministrados.
• Finalmente vuelva a montar el soporte para la pared , el cargador
y el soporte para los cepillos . Asegúrese de que el cable de red
pase por los huecos laterales del soporte
para la pared y el cargador . ¡No
debe aplastarse!
- 6 -
Page 7
Montar/desmontar
el cabezal del cepillo
Gire el cabezal del cepillo en sentido horario y tire de él hacia arriba.
Para colocar el cabezal del cepillo proceda en orden inverso.
El cabezal del cepillo debe enclavarse al colocarlo. A fin de evitar daños
en el aparato, utilice únicamente un cabezal del cepillo original.
(Véanse los cabezales de repuesto en la tarjeta de pedido)
Primer uso
Antes de poner el aparato en funcionamiento, cerciórese de que se encuentra
en perfecto estado. En caso contrario, no deberá utilizarse.
• Introduzca la clavija de red en la base de enchufe.
• Antes del primer uso, limpie el nuevo cabezal del cepillo con agua
limpia.
• Coloque el mango en el cargador de manera que se deslice
suavemente por la guía de la base.
• Deje cargar el mango aprox. 24 horas antes de utilizarlo por primera
vez. Tras el primer uso, la batería necesitará sólo aprox. 12 horas para
cargarse completamente. El indicador luminoso de la parte delantera del mango se iluminará con el color rojo durante el proceso de
carga.
Nota: Si se encuentra cargado el aparato manual , extraíga la clavija de
red de la estación de carga de la base de enchufe. De este modo aportará
su ayuda en la conservación del acumulador cuando coloque en la estación
de carga y no utilice el aparato manual . Inserte la clavija de red de
nuevo en la base de enchufe cuando aprecie que disminuyen los movimientos
en el cepillo de dientes, volviendo a recargar el aparato de mano .
- 7 -
Page 8

Limpiar los dientes
Advertencia: Al principio pueden sangrar un poco las encías debido a
una irritación extraña, esto es normal. Si esto se prolongase durante más
de dos semanas, deberá consultar a su odontólogo.
• Aplique un poco de pasta para los dientes sobre el cepillo húmedo.
• Para evitar salpicaduras, no encienda el cepillo hasta que lo tenga dentro
de la boca.
• Pulse el interruptor de encendido/apagado .
• En primer lugar cepille la parte exterior de los dientes. Coloque el cabezal
del cepillo sobre las encías y desplace el cepillo por toda la superficie
de los dientes desde arriba hacia abajo.
• Empiece a limpiar cada diente desde las encías.
• Para cepillar la parte interior de los dientes proceda del mismo modo.
• Para limpiar la superficie de masticación pase el cepillo giratorio por
todos los dientes ejerciendo una ligera presión.
• A continuación, cepille con cuidado la parte posterior de las muelas
posteriores.
• Para apagar el aparato vuelva a pulsar el interruptor de encendido/
apagado .
Este aparato tiene un temporizador de 2 minutos. Tras aprox. 2 minutos, el
aparato reduce la velocidad para indicarle que ha sido alcanzado el tiempo
de cepillado recomendado por los odontólogos.
- 8 -
Page 9

Limpieza y mantenimiento
• Extraiga primero la clavija de red de la base de enchufe, antes de proceder
a limpiar el cargador .
• ¡Nunca abra la carcasa del cargador o del cepillo! No podría volver
a cerrarlas herméticamente.
• Limpie el cargador sólo con un paño suave ligeramente humedecido. No utilice productos de limpieza o disolventes. Estos podrían
dañar las superficies de plástico.
• Limpie el cabezal del cepillo después de cada uso a fondo con agua
corriente. Le recomendamos que limpie cada 4-8 semanas los cabezales
del cepillo con líquido de limpieza de uso comercial para prótesis.
• Puede limpiar el soporte para los cepillos tranquilamente con agua
y un poco de jabón líquido. Para ello puede tirar sencillamente del soporte para los cabezales del cepillo hacia arriba. Deje que todas las
piezas se sequen completamente antes de volver a colocarlas en el
cargador .
• Para mantener la batería, cargue completamente el aparato sólo cuando
la batería esté agotada, al menos cada seis meses.
- 9 -
Page 10
Evacuación
En ningún caso deberá tirar el aparato a la basura
doméstica. Este producto está sometido a la directiva
europea 2002/96/EC.
Elimine el aparato a través de una empresa de evacuación de basuras
autorizada o por medio del centro de evacuación de basuras municipal.
Tenga en cuenta las normativas actuales en vigor. En caso de duda
póngase en contacto con el centro de evacuación de basuras.
¡Evacuación de las pilas!
Las pilas no deben evacuarse en la basura doméstica. Cada usuario está
obligado por ley de evacuar o entregar las/os pilas/acumuladores
en un centro de recogida de su ayuntamiento/barrio o en el comercio.
Esta obligación tiene el objetivo de que las pilas puedan eliminarse de forma ecológica. Devuelva las pilas/acumula-dores sólo en estado sin carga.
El material de embalaje debe desecharse de forma respetuosa
con el medio ambiente.
- 10 -
Page 11
Garantía & servicio posventa
Este aparato tiene 3 años de garantía desde la fecha de compra. El aparato
ha sido producido con mucho esmero y comprobado a conciencia antes de
la entrega. Guarde el ticket de caja como justificante de compra. Si necesitase hacer uso de la garantía, por favor póngase en contacto telefónicamente con su servicio técnico. Sólo así se puede garantizar el envío sin
cargos de su artículo.
La garantía cubre los defectos de fabricación o del material, pero no las
piezas sujetas a desgaste y los daños sufridos por las piezas frágiles, p.ej.
el interruptor o las baterías. El producto ha sido diseñado únicamente para
el uso privado y no para el uso comercial. En caso de un tratamiento inadecuado e indebido, uso de la fuerza bruta e intervenciones por asistencia
técnica distinta a la autorizada por nosotros, se extinguirá la garantía. Esta
garantía no reduce en forma alguna sus derechos legales.
Kompernass Service España
Tel.: 902/884663
e-mail: support.es@kompernass.com
Importador
KOMPERNASS GMBH
BURGSTRASSE 21
44867 BOCHUM, GERMANY
www.kompernass.com
- 11 -
Page 12

- 12 -
Page 13

INDICE PAGINA
Avvertenze di sicurezza 14
Destinazione d'uso 15
Dati tecnici 15
Fornitura 15
Descrizione dell'apparecchio 16
Montaggio 16
Applicare/Rimuovere la testa dello spazzolino 17
Primo impiego 17
Pulizia dei denti 18
Pulizia e cura 19
Smaltimento 20
Garanzia & assistenza 21
Importatore 21
Leggere attentamente le istruzioni per l'uso prima del primo impiego,
e conservarle per il successivo utilizzo. In caso di cessione
dell'apparecchio a terzi, consegnare anche le istruzioni.
- 13 -
Page 14

SPAZZOLINO DA DENTI ELETTRICO
KH 107
Avvertenze di sicurezza
Per evitare il pericolo di morte dovuto a scossa elettrica:
• impedire che il cavo di rete diventi bagnato o umido durante l'uso.
Posizionare il cavo di rete in modo tale che non si impigli o venga
danneggiato in altro modo.
• Il cavo di connessione alla rete di questo apparecchio non può essere sostituito. In caso di danni al cavo è necessario rottamare l'apparecchio.
• Non toccare la stazione di carica, qualora essa fosse caduta in acqua.
Staccare sempre prima la spina di rete!
• Questo apparecchio non è destinato a essere utilizzato da persone
(inclusi i bambini) con capacità fisiche, sensoriali o psichiche limitate, ovvero prive dell'esperienza e/o delle conoscenze necessarie a utilizzarlo, a meno che non vengano seguite o istruite in relazione all'uso
dell'apparecchio da una persona responsabile per la loro sicurezza.
Sorvegliare i bambini per assicurarsi che non giochino con l'apparecchio.
• Lo spazzolino elettrico può venire caricato solo con la stazione di carica
fornita in dotazione.
• Non immergere per alcun motivo l’apparecchio manuale o la stazione di
carica in acqua o altri liquidi!
- 14 -
Page 15

Destinazione d'uso
Questo apparecchio è previsto per la cura personale dei denti in
ambiente domestico privato. Non è destinato all'uso in settori commerciali,
industriali o medici e alla cura degli animali.
Dati tecnici
Alimentazione di tensione: 220-240 V ~50 Hz
Assorbimento di potenza: 1 W
Tempo di caricamento: ca. 12 ore
Grado di protezione (stazione di carica): IP X7
Classe di protezione: II
Fornitura
Spazzolino elettrico
4 testine
Custodia con supporto per due testine
2 viti e 2 tasselli
Istruzioni per l'uso
Cedola di ordinazione
- 15 -
Page 16

Descrizione dell'apparecchio
Testina
Impugnatura
Supporto per spazzolini
Stazione di carica
Supporto a parete
Spia luminosa
Interruttore On/Off
Montaggio
La stazione di carica può essere azionata solo in ambiente asciutto e
senza venire in contatto con altri oggetti.
In ambienti umidi, soprattutto nelle vicinanze dell'acqua (bagno), la stazione
di carica dev'essere montata saldamente, per essere protetta da
involontarie cadute in acqua:
• Estrarre il supporto a parete verso il basso dalla stazione di carica .
• Provvedere a un montaggio professionale del supporto a parete nelle
vicinanze di una presa di corrente. Utilizzare a tal fine le viti e i tasselli
acclusi.
• Ricomporre infine il supporto a parete , la stazione di carica e il
supporto per gli spazzolini . Fare
scorrere il cavo di rete lateralmente attraverso gli intagli del supporto a parete e
della stazione di carica . Impedire lo
schiacciamento del cavo!
- 16 -
Page 17

Applicare/Rimuovere la testa dello
spazzolino
Ruotare la testina in senso orario e tirarla quindi verso l'alto.
Per montare la testina procedere nella sequenza opposta.
La testina deve bloccarsi una volta inserita. Utilizzare solo testine originali,
per evitare danni all'apparecchio. (Per le testine di ricambio, v. la
cedola di ordinazione)
Primo impiego
Prima di mettere in funzione l'apparecchio, accertarsi che sia in condizioni
perfette. In caso contrario, non utilizzarlo.
• Inserire la spina di rete nella presa.
• Prima del primo impiego, pulire le nuove testine con acqua
corrente.
• Collocare l'impugnatura nella stazione di carica in modo da
farla scivolare facilmente nella guida dello zoccolo.
• Fare caricare l'impugnatura per circa 24 ore, prima del primo impiego.
Dopo il primo impiego, l'accumulatore necessita di solo 12 ore circa
per caricarsi completamente. La spia luminosa davanti all'impugnatura si accende (rosso) durante la carica.
Avviso: se l'impugnatura è carica, staccare la spina della stazione di
carica dalla presa. Se si posiziona l'impugnatura nella stazione di
carica dopo ogni impiego, si contribuisce in tal modo alla buona manutenzione dell'accumulatore. Reinserire la spina nella presa di corrente
solo quando i movimenti dello spazzolino risultano sensibilmente indeboliti, e ricaricare l'impugnatura .
- 17 -
Page 18

Pulizia dei denti
Attenzione: inizialmente, a causa dell'inusuale stimolazione, si può verificare
un leggero sanguinamento delle gengive, che è da ritenersi normale. Se
tale eventualità persistesse per oltre due settimane, consultare il proprio dentista.
• Collocare un po' di dentifricio sullo spazzolino umido.
• Accendere l'apparecchio solo dopo averlo introdotto nella bocca,
al fine di evitare spruzzi.
• Premere a tale scopo l'interruttore On/Off .
• Spazzolare dapprima il lato esterno dei denti. Collocare la testina sulle
gengive e guidare lo spazzola partendo dalle gengive verso i denti.
• Ripetere l'operazione per ogni singolo dente, sempre partendo dalla
gengiva.
• Pulire il lato interno dei denti con la stessa tecnica.
• Per pulire le superfici di masticazione far passare lo spazzolino
rotondo lungo le superfici di masticazione esercitando una leggera
pressione.
• Dopo di ciò pulire a fondo il lato posteriore dei denti molari.
• Per spegnere, premere nuovamente l'interruttore On/Off .
Questo apparecchio ha un timer regolato su 2 minuti. Dopo ca. 2 minuti,
l'apparecchio rallenta e mostra che si è eseguito il lavaggio dei denti pari
ai due minuti consigliati dal dentista.
- 18 -
Page 19

Pulizia e cura
• Staccare la spina dalla presa prima di effettuare la pulizia della
stazione di carica .
• Non aprire mai l'alloggiamento dell'apparecchio di carica o dello
spazzolino, in quanto non è più possibile richiuderlo a tenuta stagna.
• Pulire la stazione di carica solo con un panno morbido e leggermente
inumidito. Non utilizzare detergenti o solventi, che potrebbero danneggiare
le superfici in plastica.
• Dopo l'uso, pulire accuratamente le testine sotto acqua corrente. Consigliamo di eseguire la pulizia delle testine nel liquido di pulizia per protesi,
reperibile in commercio, ogni 4 - 8 settimane.
• Il supporto per gli spazzolini può essere pulito semplicemente con
acqua e un po' di sapone liquido. In tal caso è sufficiente semplicemente
tirare il supporto verso l'alto. Fare asciugare completamente tutti i
pezzi, prima di reinserirli sulla stazione di carica .
• Per la manutenzione dell'accumulatore, caricare completamente
l'apparecchio non appena l'accumulatore mostra segni di
esaurimento, e comunque almeno due volte all'anno.
- 19 -
Page 20

Smaltimento
Non gettare per alcun motivo l’apparecchio insieme ai
normali rifiuti domestici. Questo prodotto sottostà alla
direttiva europea 2002/96/EC.
Smaltire l’apparecchio presso un’azienda autorizzata o presso l’ente
comunale di smaltimento.
Rispettare le norme attualmente in vigore. In caso di dubbi, contattare
l’azienda di smaltimento competente.
Pile
Non gettare assolutamente le pile insieme ai normali rifiuti domestici.
Le pile possono contenere sostanze tossiche dannose per l'ambiente.
Smaltire pertanto le pile unicamente in conformità alle leggi vigenti.
Smaltire tutti i materiali d’imballo in conformità alle norme per il
rispetto dell’ambiente.
- 20 -
Page 21

Garanzia & assistenza
Questo apparecchio è coperto da 3 anni di garanzia, a partire dalla data
d'acquisto. L'apparecchio è stato prodotto con precisione e sottoposto
ad accurati controlli prima della consegna. Conservare lo scontrino
come prova d'acquisto. In caso di interventi in garanzia, contattare
telefonicamente il proprio centro di assistenza. Solo in tal modo è
possibile garantire un invio gratuito della merce.
La garanzia vale solo per i difetti di materiale e di fabbricazione, ma non per
le parti sottoposte a usura o per danni a elementi fragili come interruttori o
accumulatori. Il prodotto è destinato esclusivamente all'uso privato e
non commerciale. La garanzia decade in caso di impiego improprio o
manomissione, uso della forza e interventi non eseguiti dalla nostra filiale di assistenza autorizzata. I diritti di legge dei consumatori non vengono
limitati dalla presente garanzia.
Kompernass Service Italia
Tel.: 199 400 441 (0,12 EUR/Min.)
e-mail: support.it@kompernass.com
Importatore
KOMPERNASS GMBH
BURGSTRASSE 21
44867 BOCHUM, GERMANY
www.kompernass.com
- 21 -
Page 22

- 22 -
Page 23

CONTENT PAGE
Safety instructions 24
Intended Use 25
Technical data 25
Included in delivery 25
Description of the appliance 26
Placement 26
Installing / removing brush heads 27
First use 27
Brushing one's teeth 28
Cleaning and Care 29
Disposal 30
Warranty and Service 31
Importer 32
Read the operating instructions carefully before using the appliance for the
first time and preserve this booklet for later reference. Hand over the
manual to whomsoever you might pass the appliance on to.
- 23 -
Page 24

RECHARGEABLE ELECTRIC
TOOTHBRUSH KH 107
Safety instructions
To avoid potentially fatal electric shocks:
• Ensure that the power cable can never become wet or damp during
operation. Place the power cable such that it cannot become trapped
or damaged in any way.
• The power cable on this appliance cannot be repaired. In the event of
damage to the cable the appliance must be scrapped.
• Never touch the charging station if it has fallen into water. First of all
remove the plug from the wall socket!
• Do not allow individuals (including children) to use the appliance
whose physical, sensorial or mental abilities or lack of experience and
knowledge hinder their safe usage of it if they have not previously been
supervised or instructed in its correct usage.
Tell children about the appliance and its potential dangers so that they
do not play with it.
• The electric toothbrush may only be recharged with the supplied
charging station.
• You must under no cirumstances immerse the hand appliance or the
charging station in water or other liquids!
- 24 -
Page 25

Intended Use
This appliance is intended for personal dental care in domestic situations.
The appliance is not intended for use in commercial, industrial or medical
environments. It is not suitable for animal care.
Technical data
Mains current: 220-240 V / 50 Hz
Power consumption : 1 W
Charging time: app. 12 hours
Protection rating
(Charging station): IP X7
Protection class: II
Included in delivery
Electric Toothbrush
4 Brush heads
Storage box with fixture for two brush heads
2 Screws and 2 Dowels
Operating instructions
Order form
- 25 -
Page 26

Description of the appliance
Brush head
Hand appliance
Brush holder
Charging station
Wall fixture
Display light
On/Off switch
Placement
The charging station may only be operated free-standing in dry rooms.
In moist rooms, especially in the vicinity of water (bath), the charging station must be firmly fixed to the wall, to protect it from falling into water:
• Pull the wall fixture downwards from underneath the charging
station .
• Provide for the correct assembly of the wall fixture close to a power
socket. For this, use the dowels and screws supplied for this purpose.
• Subsequently, place the wall fixture , charging station and brush
holder back together. Ensure that the power cable runs laterally
through the recesses of the wall fixture and the charging station .
It may not become jammed!
- 26 -
Page 27

Installing / removing brush heads
Turn the brush head clockwise and remove it upwards.
To install the brush head , apply the opposite procedure.
The brush head must click in on installation. Only use original brush
heads, to avoid damage to the appliance. (For replacement brush heads,
see the order form)
First use
Before operating the appliance, ensure that it is in working condition. If
not, it may not be used.
• Insert the power cord into the wall socket.
• Before the first use, clean the new brush heads with clear water.
• Place the hand appliance into the charging station such that it
easily slides into the guides in the plinth.
• Allow the hand appliance to charge up for ca. 24 hours before
using it for the first time. After the first use, the battery requires only
approximately 12 hours to completely recharge. The display light
on the front of the hand appliance glows red during the charging
process.
Notice: If the hand appliance is fully charged, remove the plug of the
charging station from the mains power socket. This contributes to the
care of the batteries if you place the hand appliance back into the
charging station after every use. Insert the plug into the mains power
socket to recharge the hand appliance first when the movements of the
toothbrush have noticeably weakened.
- 27 -
Page 28

Brushing one's teeth
Warning: Due to the unaccustomed operation, some gum bleeding may
initially occur, this is normal. Should this continue for more than two weeks,
consult your dentist.
• Apply some toothpaste to the moistened brush.
• Switch the appliance on when it is in your mouth, to avoid splashing.
• To do this, press the On/Off switch .
• First of all brush the outer surfaces of your teeth. Place the brush head
on the gums and direct the brush upwards or downwards over the
tooth.
• Start again on the gums for each individual tooth.
• Clean the inner surfaces of your teeth with the same technique.
• To clean the chewing surfaces, direct the rotating brush head with light
pressure over the chewing surfaces.
• Finally, thoroughly clean the back parts of the rear molar teeth.
• To switch off, press the On/Off switch again .
This appliance has a two minute timer. After two minutes the appliance
becomes slower, indicating to you that the dental profession
recommendation of two minutes has been complied with.
- 28 -
Page 29

Cleaning and Care
• First remove the plug from the wall socket before cleaning the charging
station .
• Never open the housing of the charging station or the tooth brush!
These cannot be resealed in a water-tight manner.
• Only clean the charging station with a soft, lightly moistened cloth.
Never use detergents or solvents. These could damage the plastic
surfaces.
• Clean the brush heads thoroughly under running water after use. We
recommend cleaning the brush heads in a typical cleaning fluid for
prosthetics every 4 - 8 weeks.
• The brush holder can be cleaned without problem with water and
some liquid soap. For this, the brush holder can be simply removed
by pulling upwards. However, allow all parts to dry completely
before replacing them in the charging station .
• To maintain the batteries in the appliance, they should be completely
charged up only when they become noticably weaker - or at least
every half-year.
- 29 -
Page 30

Disposal
Do not dispose of the appliance in your normal domestic
waste. This product is subject to the European guideline
2002/96/EC.
Dispose of the appliance through an approved dis-posal centre or at your
community waste facility.
Observe the currently applicable regulations.
In case of doubt, please contact your waste disposal centre.
Battery disposal!
Batteries may not be disposed of with normal domestic waste. All consumers are statutorily obliged to dispose of batteries at the collection point in
their community/district or with the original supplier.
The purpose of this obligation is to ensure that batteries can be disposed
of in an environmentally friendly manner. Only dispose of batteries when
they are fully discharged.
Dispose of all packaging materials in an environmentally
responsible manner.
- 30 -
Page 31

Warranty and Service
The warranty for this appliance is for 3 years from the date of purchase.
The appliance has been manufactured with care and meticulously examined
before delivery. Please retain your receipt as proof of purchase. In the case
of a warranty claim, please make contact by telephone with our service
department. Only in this way can a post-free despatch for your goods be
assured.
The warranty covers only claims for material and maufacturing defects, not
for wearing parts or for damage to fragile components, e.g. buttons or batteries. The appliance is intended solely for private domestic use, not for
commercial applications.
The warranty is void in the case of abusive and improper handling, use of
force and internal tampering not carried out by our authorized service
branch. Your statutory rights are not restricted in any way by this warranty.
DES Ltd
Units 14-15
Bilston Industrial Estate
Oxford Street
Bilston
WV14 7EG
Tel.: 0870/787-6177
Fax: 0870/787-6168
e-mail: support.uk@kompernass.com
Kompernass Service Ireland
Tel: 1850 930 412
Standard call rates apply. Mobile operators may vary.
e-mail: support.ie@kompernass.com
(0,082 EUR/Min.)
- 31 -
Page 32

Importer
KOMPERNASS GMBH
BURGSTRASSE 21
44867 BOCHUM, GERMANY
www.kompernass.com
- 32 -
Page 33

INHALTSVERZEICHNIS SEITE
Sicherheitshinweise 34
Verwendungszweck 35
Technische Daten 35
Lieferumfang 35
Gerätebeschreibung 36
Aufstellen 36
Bürstenkopf aufsetzen / abnehmen 37
Erste Verwendung 37
Zähne putzen 38
Reinigung und Pflege 39
Entsorgung 40
Garantie & Service 41
Importeur 42
Lesen Sie die Bedienungsanleitung vor der ersten Verwendung
aufmerksam durch und heben Sie diese für den späteren Gebrauch auf.
Händigen Sie bei Weitergabe des Gerätes an Dritte auch die Anleitung
aus.
- 33 -
Page 34

AKKU-ZAHNBÜRSTE KH 107
Sicherheitshinweise
Um Lebensgefahr durch elektrischen Schlag zu vermeiden:
• Achten Sie darauf, dass im Betrieb das Netzkabel niemals nass oder
feucht werden kann. Führen Sie das Netzkabel so, dass es nicht
eingeklemmt oder anderweitig beschädigt werden kann.
• Die Netzanschlussleitung dieses Gerätes kann nicht ersetzt werden. Bei
Beschädigung der Leitung ist das Gerät zu verschrotten.
• Berühren Sie niemals die Ladestation, wenn diese in das Wasser
gefallen ist. Ziehen Sie unbedingt erst den Netzstecker!
• Dieses Gerät ist nicht dafür bestimmt, durch Personen (einschließlich
Kinder) mit eingeschränkten physischen, sensorischen oder geistigen
Fähigkeiten oder mangels Erfahrung und/oder mangels Wissen benutzt
zu werden, es sei denn, sie werden durch eine für ihre Sicherheit zuständige Person beaufsichtigt oder erhielten von ihr Anweisungen, wie
das Gerät zu benutzen ist.
Kinder sollten beaufsichtigt werden, um sicherzustellen, dass sie nicht
mit dem Gerät spielen.
• Die elektrische Zahnbürste darf nur mit der gelieferten Ladestation
geladen werden.
• Tauchen Sie das Handgerät oder die Ladestation nicht in Wasser oder
andere Flüssigkeiten.
- 34 -
Page 35

Verwendungszweck
Dieses Gerät ist vorgesehen zur persönlichen Zahnpflege im häuslichen
Bereich. Es ist nicht vorgesehen zur Verwendung in gewerblichen, industriellen oder medizinischen Bereichen und nicht in der Tierpflege.
Technische Daten
Spannungsversorgung: 220-240 V ~50 Hz
Leistungsaufnahme: 1 W
Ladezeit: ca. 12 Stunden
Schutzart (Ladestation): IP X7
Schutzklasse: II
Lieferumfang
Elektrische Zahnbürste
4 Bürstenköpfe
Aufbewahrungsbox mit Halterung für zwei Bürstenköpfe
2 Schrauben und 2 Dübel
Bedienungsanleitung
Bestellschein
- 35 -
Page 36

Gerätebeschreibung
Bürstenkopf
Handgerät
Bürstenhalter
Ladestation
Wandhalter
Leuchtanzeige
Ein-/Ausschalter
Aufstellen
Die Ladestation darf nur in trockenen Räumen frei stehend betrieben
werden.
In feuchten Räumen, insbesondere in der Nähe von Wasser (Bad), muss
die Ladestation fest montiert sein, um vor versehentlichem Hineinfallen
in das Wasser geschützt zu sein:
• Ziehen Sie den Wandhalter nach unten aus der Ladestation
heraus.
• Sorgen Sie für eine fachgerechte Anbringung des Wandhalters in
der Nähe einer Steckdose. Benutzen Sie hierfür die mitgelieferten
Schrauben und Dübel.
• Stecken Sie anschließend wieder Wandhalter , Ladestation und Bürstenhalter
zusammen. Achten Sie darauf, dass das
Netzkabel seitlich durch die Aussparungen
des Wandhalters und der Ladestation
läuft. Es darf nicht eingeklemmt werden!
- 36 -
Page 37

Bürstenkopf aufsetzen / abnehmen
Zum Abnehmen des Bürsenkopfes , drehen Sie ihn im Uhrzeigersinn und
ziehen Sie ihn dann nach oben ab.
Zum Aufsetzen des Bürstenkopfs verfahren Sie in umgekehrter Reihenfolge.
Der Bürstenkopf muss beim Aufsetzen einrasten. Verwenden Sie nur
Original-Bürstenköpfe, um Schäden am Gerät zu vermeiden.
(Ersatzbürstenköpfe siehe Bestellschein)
Erste Verwendung
Bevor Sie das Gerät in Betrieb nehmen, überzeugen Sie sich davon, dass
es in einwandfreiem Zustand ist. Andernfalls darf es nicht verwendet
werden.
• Stecken Sie den Netzstecker in die Steckdose.
• Reinigen Sie vor der ersten Verwendung den neuen Bürstenkopf mit
klarem Wasser.
• Stellen Sie das Handgerät so in die Ladestation , dass es leicht in
die Führung am Sockel gleitet.
• Lassen Sie das Handgerät ca. 24 Stunden aufladen, bevor Sie es
erstmals verwenden. Nach dem ersten Gebrauch benötigt der Akku nur
noch ca. 12 Stunden zum vollständigen aufladen. Die Leuchtanzeige
vorne am Handgerät leuchtet rot während des Aufladens.
Hinweis: Ist das Handgerät aufgeladen, ziehen Sie den Netzstecker
der Ladestation aus der Steckdose. So tragen Sie zur Pflege der Akkus
bei, wenn Sie das Handgerät nach jeder Benutzung in die Ladestation
stellen. Stecken Sie den Netzstecker erst wieder in die Steckdose, wenn die
Bewegungen der Zahnbürste spürbar schwächer werden und laden Sie das
Handgerät wieder auf.
- 37 -
Page 38

Zähne putzen
Warnung: Anfänglich kann es durch die ungewohnte Reizung zu etwas
Zahnfleischbluten kommen, das ist normal. Hält dies länger als zwei
Wochen an, sollten Sie Ihren Zahnarzt befragen.
• Tragen Sie etwas Zahnpasta auf die feuchte Bürste auf.
• Schalten Sie das Gerät aber erst im Mund ein, um Spritzer zu
vermeiden.
• Drücken Sie hierzu den Ein-/Ausschalter .
• Bürsten Sie zuerst die Außenseite Ihrer Zähne. Setzen Sie den Bürstenkopf auf das Zahnfleisch auf und führen Sie die Bürste vom Zahnfleisch
ausgehend über den Zahn.
• Setzen Sie für jeden Zahn neu auf dem Zahnfleisch an.
• Reinigen Sie die Innenseite Ihrer Zähne mit der gleichen Technik.
• Um die Kauflächen zu reinigen, führen Sie die rotierende Bürste mit
leichtem Druck über die Kauflächen.
• Reinigen Sie anschließend gründlich die Rückseite der hinteren
Backenzähne.
• Zum Ausschalten drücken Sie erneut den Ein-/Ausschalter .
Dieses Gerät hat einen 2-Minuten-Timer. Nach ca. 2 Minuten wird das
Gerät langsamer und zeigt Ihnen dadurch an, dass Sie der zahnärztlichen
Empfehlung von 2 Minuten gerecht geworden sind.
- 38 -
Page 39

Reinigung und Pflege
Warnung: Ziehen Sie erst den Netzstecker aus der Steckdose, bevor
Sie die Ladestation reinigen. Es besteht die Gefahr eines elektrischen
Schlages!
• Öffnen Sie niemals das Gehäuse des Ladegerätes oder der Zahnbürste! Diese können nicht wieder wasserdicht verschlossen werden.
• Reinigen Sie die Ladestation nur mit einem weichen, leicht angefeuchteten Tuch. Verwenden Sie keine Reinigungs- oder Lösemittel.
Diese können die Kunststoff-Oberflächen beschädigen.
• Säubern Sie die Bürstenköpfe nach Gebrauch gründlich unter laufendem Wasser. Wir empfehlen eine Reinigung der Bürstenköpfe in handelsüblicher Reinigungsflüssigkeit für Prothesen etwa alle 4 - 8 Wochen.
• Den Bürstenhalter können Sie problemlos mit Wasser und etwas Sei-
fenflüssigkeit reinigen. Hierzu können Sie den Bürstenhalter einfach
nach oben abziehen. Lassen Sie aber alle Teile erst vollständig
trocknen, bevor Sie diese erneut auf die Ladestation aufsetzen.
• Laden Sie zur Pflege der Akkus das Gerät erst bei schwächer
werdenden Akkus, mindestens aber jedes halbe Jahr, komplett auf.
- 39 -
Page 40

Entsorgung
Werfen Sie das Gerät keinesfalls in den normalen
Hausmüll. Dieses Produkt unterliegt der europäischen
Richtlinie 2002/96/EC.
Entsorgen Sie das Gerät über einen zugelassenen Entsorgungsbetrieb
oder über Ihre kommunale Entsorgungseinrichtung.
Beachten Sie die aktuell geltenden Vorschriften.
Setzen Sie sich im Zweifelsfall mit Ihrer Entsorgungseinrichtung in
Verbindung.
Batterien/Akkus entsorgen
Batterien/Akkus dürfen nicht im Hausmüll entsorgt werden. Jeder Verbraucher ist gesetzlich verpflichtet, Batterien/Akkus bei einer Sammelstelle
seiner Gemeinde / seines Stadtteils oder im Handel abzugeben.
Diese Verpflichtung dient dazu, dass Batterien/Akkus einer umweltschonenden Entsorgung zugeführt werden können. Geben Sie Batterien/Akkus
nur im entladenen Zustand zurück.
Führen Sie alle Verpackungsmaterialien einer umweltgerechten
Entsorgung zu.
- 40 -
Page 41

Garantie & Service
Sie erhalten auf dieses Gerät 3 Jahre Garantie ab Kaufdatum. Das Gerät
wurde sorgfältig produziert und vor Anlieferung gewissenhaft geprüft.
Bitte bewahren Sie den Kassenbon als Nachweis für den Kauf auf. Bitte
setzen Sie sich im Garantiefall mit Ihrer Servicestelle telefonisch in
Verbindung. Nur so kann eine kostenlose Einsendung Ihrer Ware gewährleistet werden.
Die Garantieleistung gilt nur für Material- oder Fabrikationsfehler, nicht
aber für Verschleißteile oder für Beschädigungen an zerbrechlichen
Teilen, z. B. Schalter oder Akkus. Das Produkt ist lediglich für den privaten
und nicht für den gewerblichen Gebrauch bestimmt. Bei missbräuchlicher
und unsachgemäßer Behandlung, Gewaltanwendung und bei Eingriffen,
die nicht von unserer autorisierten Service-Niederlassung vorgenommen
wurden, erlischt die Garantie. Ihre gesetzlichen Rechte werden durch
diese Garantie nicht eingeschränkt.
Schraven
Service- und Dienstleistungs GmbH
Gewerbering 14
47623 Kevelaer, Germany
Tel.: +49 (0) 180 5 008107
(14 Ct/Min. aus dem dt. Festnetz ggf. abweichende Preise aus den Mobilfunknetzen)
Fax: +49 (0) 2832 3532
e-mail: support.de@kompernass.com
Kompernaß Service Österreich
Tel.: +43 (0) 820 899 913 (
Fax: +43 (0) 7612 626056
e-mail: support.at@kompernass.com
0,20 EUR/min.)
- 41 -
Page 42

Kompernaß Service Switzerland
Tel.: +41 (0) 848 000 525
(
max. 0,0807 CHF/min.)
e-mail: support.ch@kompernass.com
Importeur
KOMPERNASS GMBH
BURGSTRASSE 21
44867 BOCHUM, GERMANY
www.kompernass.com
- 42 -
 Loading...