

Page 1
IAN 270290
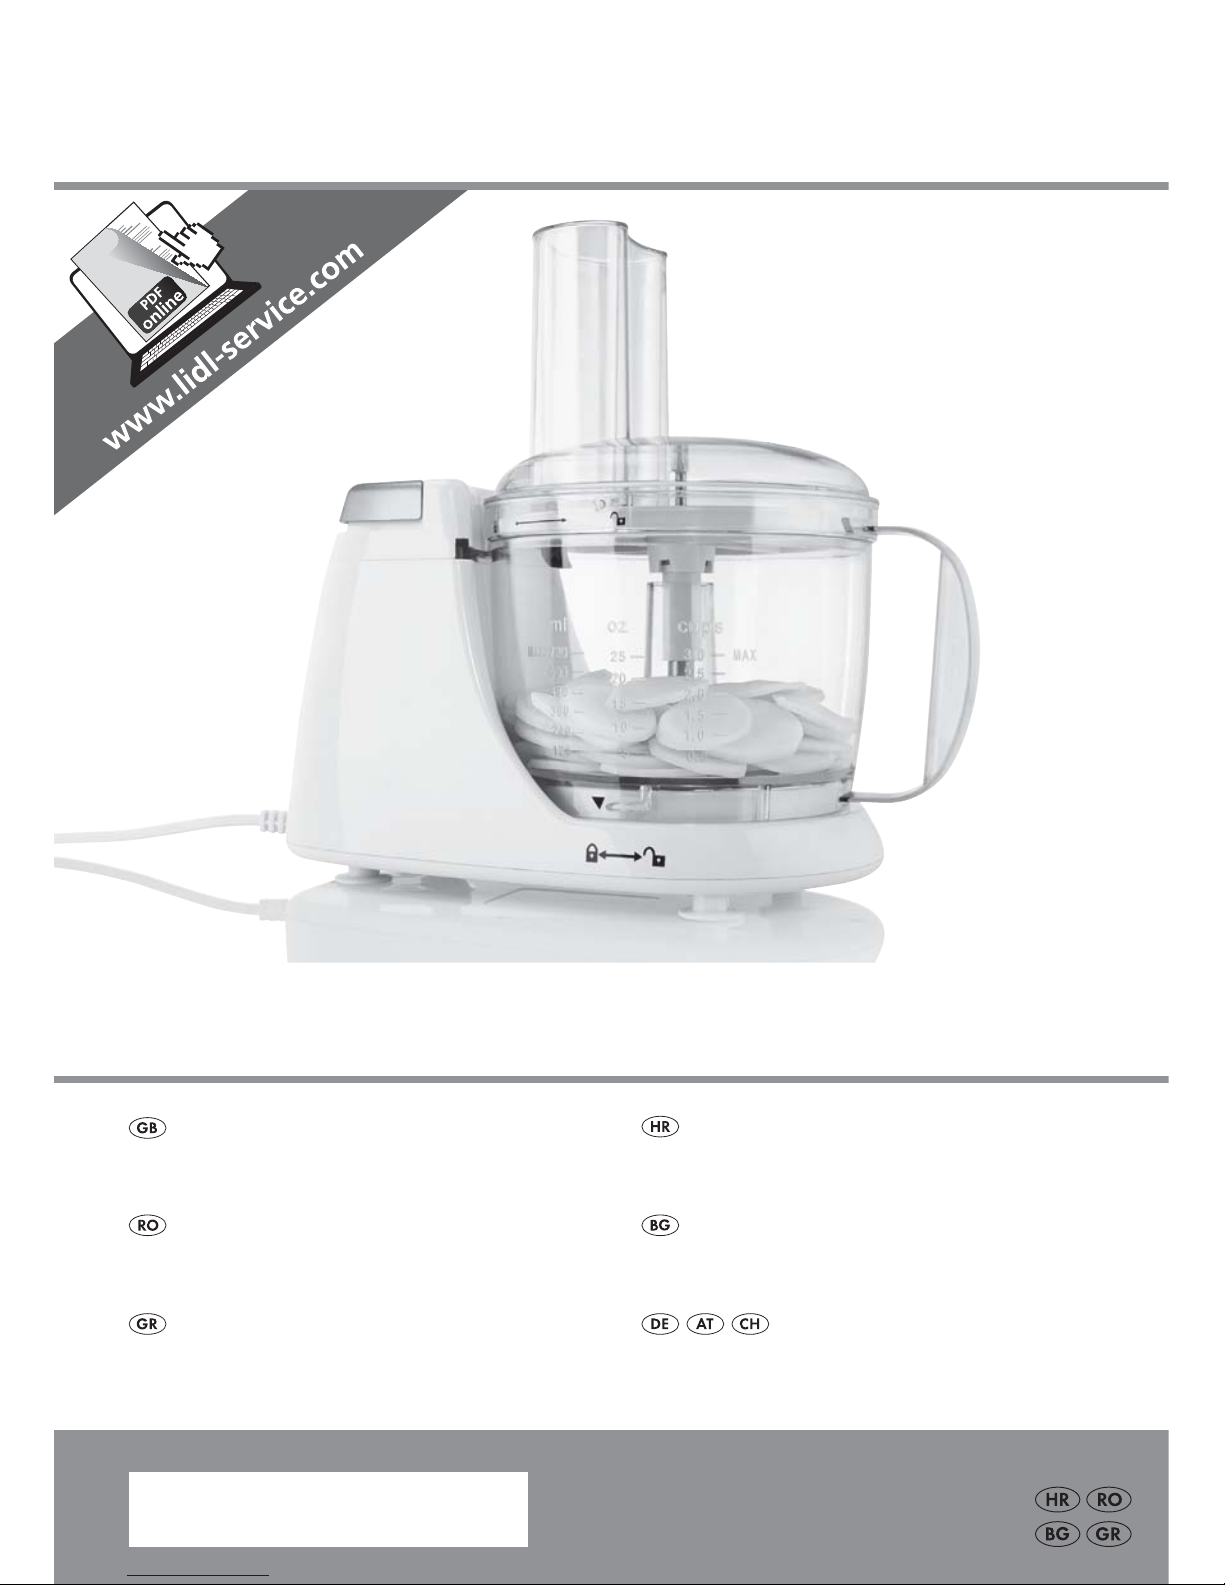
FOOD PROCESSOR KM 250 A1
FOOD PROCESSOR
Operating instructions
КУХНЕНСКИ РОБОТ
Ръководство за експлоатация
ΗΛΕΚΤΡΙΚΟΣ ΤΡΙΦΤΗΣ
Οδηүίες χρήσης
KÜCHENMASCHINE
Bedienungsanleitung
ROBOT DE BUCĂTĂRIE
Instrucţiuni de utilizare
KUHINJSKI UREĐAJ
Upute za upotrebu
Page 2
GB Operating instructions Page 1
HR Upute za upotrebu Stranica 11
RO Instrucţiuni de utilizare Pagina 21
BG Ръководство за експлоатация Cтраница 31
GR Οδηүίες χρήσης Σελίδα 41
DE / AT / CH Bedienungsanleitung Seite 51
Before reading, unfold the page containing the illustrations and familiarise yourself with all functions of
the device.
Prije nego što pročitate tekst, otvorite stranicu sa slikama i upoznajte se na osnovu toga sa svim funkcijama
uređaja.
Înainte de a citi instrucţiunile, priviţi imaginile şi familiarizaţi-vă cu toate funcţiile aparatului.
Преди да прочетете отворете страницата с фигурите и след това се запознайте с всички функции
на уреда.
Πριν ξεκινήσετε την ανάγνωση, ανοίξτε τη σελίδα με τις εικόνες και εξοικειωθείτε με όλες τις λειτουργίες
της συσκευής.
Klappen Sie vor dem Lesen die Seite mit den Abbildungen aus und machen Sie sich anschließend mit allen
Funktionen des Gerätes vertraut.
Page 3

Page 4

1
KM 250 A1
GB
Table of Contents
Introduction ............................................................2
Proper use .............................................................2
Package contents .......................................................2
Appliance description ....................................................2
Technical details ........................................................2
Safety instructions ......................................................3
Before first use .........................................................5
Assembling the appliance ................................................5
Cutting blades ...................................................................... 5
Food processing attachments .......................................................... 6
Operation .............................................................6
Using the cutting blades .............................................................. 6
Working with the food processor .......................................................7
Cleaning and care .......................................................8
Storage ...............................................................8
Disposal ...............................................................9
Service ................................................................9
Importer ..............................................................9
Troubleshooting .......................................................10
Page 5

2
KM 250 A1
GB
Introduction
Congratulations on the purchase of your new
appliance.
You have selected a high-quality product.
The operating instructions are part of this product.
They contain important information on safety, use
and disposal. Before using the product, familiarise
yourself with all operating and safety instructions.
Use this product only as described and only for
the specified areas of application. Please also
pass these operating instructions on to any future
owner(s).
Proper use
This appliance is intended exclusively for chopping
and processing food. This appliance is intended
exclusively for use in domestic households.
Not to be used for commercial purposes.
Package contents
Food processor
(lid, pusher, bowl, motor unit)
Cutting blades
Disc adapter
Grater attachment
Slicer attachment
Operating instructions
Check the delivery contents for completeness immediately after unpacking.
Appliance description
Pusher
Feed tube
Lid
Cutting blades
Bowl
Drive shaft
Motor unit
ON button
OFF/PULSE button
Disc adapter
- Grater attachment
3 Slicer attachment
Technical details
Rated voltage: 220–240 V ~, 50 Hz
Nominal power: 250 W
Protection class: II
CO time: 1 minute
CO time
The CO time (continuous operation time) is the
amount of time an appliance can be operated
without the motor overheating and becoming
damaged. When the specified CO time has been
reached, the appliance must be switched off until
the motor has cooled down to room temperature.
Page 6

3
KM 250 A1
GB
Safety instructions
DANGER – ELECTRIC SHOCK!
►
The appliance must only be connected to correctly installed and earthed
mains power sockets. Ensure that the rating of the local power supply
corresponds with the details on the rating plate of the appliance.
► Ensure that the power cord does not become wet or moist during use.
Route the cable in such a way that it cannot be crushed or damaged.
► Keep the power cord away from hot surfaces.
► Do not perform any repairs on the appliance. All repairs must be per-
formed by our Customer Services or by qualified personnel.
► Remove the plug from the mains power socket when the appliance is being
cleaned or in the event of a fault. Switching the appliance off is insufficient,
since the appliance receives power for as long as the plug is connected to
the mains power socket.
► To avoid risks, arrange for defective plugs and/or power cables to be
replaced at once by qualified technicians or our Customer Service
Department.
► The appliance and its connecting cable must be kept away from children.
Never submerge the appliance in water or other liquids.
Page 7

4
KM 250 A1
GB
WARNING! RISK OF INJURY!
► Always disconnect the appliance from the mains power supply when fitting
or removing accessory parts. This will prevent unintentional activation of the
appliance.
► The appliance should always be disconnected from the mains when not
supervised and before assembly, disassembly or cleaning.
► Only use the original accessory parts for this appliance. Accessory parts
from other manufacturers may not be suitable, and this may lead to risks!
► This appliance may not be used by children.
► Appliances can be used by persons with reduced physical, sensory or
mental capabilities or lack of experience and knowledge if they are supervised or have been given instruction concerning use of the appliance in
a safe way and if they understand the hazards involved.
► Children must not play with the appliance.
► Caution: the cutting blades, the slicer attachment and the grater attachment
are very sharp! For this reason, take care when cleaning.
► Caution: the cutting blades, the slicer attachment and the grater attachment
are very sharp! For this reason, take care when emptying the bowl.
► When the appliance is operating, do not put anything other than the ingre-
dients to be processed into the bowl.
► Never use the appliance for purposes other than those described in these
instructions. Otherwise you run a risk of serious injury!
Page 8

5
KM 250 A1
GB
Before first use
■ Remove all packaging materials from the appli-
ance.
■ Clean the appliance as described in the section
"Cleaning and care".
■ Ensure that all parts are completely dry before
operating the appliance.
Assembling the appliance
NOTE
► The appliance will not start until the bowl
and the lid are correctly attached.
1) Place the motor unit on a flat surface so
that the sucker feet can attach firmly and the
appliance stands firmly in place.
2) Place the bowl onto the motor unit
so that the arrow on the bowl points
towards the open lock symbol
on the
motor unit . Then turn the bowl until the
arrow
points to the closed lock symbol
and the bowl clicks into place.
If you want to work with the cutting blades ,
assemble the appliance as described in the section
"Cutting blades".
If you want to work with the food processing attachments, assemble the appliance as described
in the section "Food processing attachments".
Cutting blades
1) Place the cutting blades onto the drive
shaft . The flattened side of the drive shaft
must correctly fit into the take up of the cutting
blades . Otherwise the cutting blades
cannot be properly attached.
2) Place the lid onto the bowl so that the
arrow on the lid coincides with the
arrow
and the opened lock symbol
on the bowl .
3) Turn the lid until the arrow
on the lid
points to the arrow
and the closed lock
symbol
on the bowl .
4) Place the pusher into the feed tube .
5) Insert the plug into a mains power socket.
WARNING! RISK OF INJURY!
► To avoid personal injury and damage to the appliance, never insert or
place your hands or any foreign objects into the feed tube.
► Do not change accessories unless the drive is stationary and the mixer is
unplugged from the power supply! The appliance will run on for a short
time after being switched off!
► Never leave the appliance unattended!
► Before changing accessories or additional parts that are in motion during
operation, the appliance must be switched off and disconnected from
mains power.
Page 9
6
KM 250 A1
GB
Food processing attachments
1) Select the desired attachment:
– the slicer attachment 3
– or the grater attachment -.
2) If another attachment is still installed: press the
long metal tab of the attachment inwards and
slide the attachment out of the disc adapter
using the metal tab as an aid. You can now lift
the catch at the other end of the attachment
out of the disc adapter .
3) Insert the new attachment with the catch first
into the disc adapter .
4) Then carefully push the side with the large
metal tab into the disc adapter . The best
way to do this is to press with both thumbs on
the outer edges of the attachment until it clicks
completely into place in the disc adapter .
5) Place the disc adapter with the attachment
fitted onto the drive shaft . The flattened side
of the drive shaft must correctly fit into the
take up of the disc adapter . Otherwise the
disc adapter cannot be properly attached.
6) Place the lid onto the bowl so that the
arrow
on the lid coincides with the
arrow
and the opened lock symbol
on the bowl .
7) Turn the lid until the arrow
on the lid
points to the arrow
and the closed lock
symbol
on the bowl .
8) Place the pusher into the feed tube .
9) Insert the plug into a mains power socket.
Operation
Using the cutting blades
The cutting blades can be used to chop foods
such as onions or meat.
NOTE
► Do not attempt to mix liquids with the cutting
blades . These will overflow or spray out.
1) Fit the cutting blades as described in the
chapter "Assembling the appliance".
2) Cut the ingredients into pieces of approximately 2–3 cm.
3) Pour the ingredients in. Do not exceed the
quantities specified in the following table.
INGREDIENT
MAX.
AMOUNT
SPEED
Bread max. 80 g ON
Cheese max. 150 g ON
Meat max. 300 g ON
Herbs max. 30 g ON
Garlic 80–200 g PULSE
Onions max. 300 g PULSE
Ice cubes max. 140 g PULSE
NOTE
► The speeds given in the table are intended as
reference values. These can vary depending
on the quality and quantity of the ingredients!
4) Close the lid .
Page 10

7
KM 250 A1
GB
5) Start chopping by pressing the ON button .
Press OFF/PULSE button once when all the
ingredients have been chopped and you want
to stop the appliance.
If you would like to continue to process the
ingredients using the PULSE function, press
the OFF/PULSE button several times in
succession until the ingredients are sufficiently
chopped.
If ingredients stick to the sides of the bowl or the
blades:
– Switch the appliance off.
– Remove the lid .
– Remove the ingredients from the cutting
blades and the inside using a dough
scraper or a spoon.
– Close the lid .
– Restart the appliance.
NOTE
► Only process meat that is boneless!
► Do not allow the appliance to operate for
long periods when chopping (hard) cheese.
Otherwise the cheese will become too hot,
start to melt and clump.
► If you wish to add ingredients during the cut-
ting process, add them via the feed tube !
The appliance stops if the lid is opened!
Do not exceed the maximum quantities specified in the table when adding ingredients!
Working with the food processor
You can grate or slice food using the processor’s
attachments -/3.
1) Select the required attachment and assemble
everything as described in the chapter "Assembling the appliance".
2) Remove the pusher from the feed tube .
3) Cut the food into pieces that will easily fit into
the feed tube .
4) Start grating/slicing by pressing the ON
button .
5) Then gradually add the food. Push the food in
using the pusher without applying pressure.
Do not exceed the quantities specified in the following table.
INGREDIENT SLICER ATTACHMENT
Apples/carrots max. 350 g
Cucumber max. 1.5
Potatoes max. 350 g
Onions max. 200 g
INGREDIENT GRATER ATTACHMENT
Apples/carrots max. 350 g
Parmesan max. 150 g
Potatoes max. 350 g
Hard cheese (e.g.
mature Gouda)
max. 200 g
Page 11
8
KM 250 A1
GB
NOTE
► Do not prepare large quantities all at once,
but in several portions. Empty the bowl
after each use.
► Do not allow the appliance to operate for
long periods when chopping (hard) cheese
or chocolate. Otherwise the ingredients will
become too hot, start to melt and clump.
Cleaning and care
WARNING
RISK OF ELECTRIC SHOCK!
► Always remove the plug from the mains
power socket before cleaning the appliance.
Under no circumstances must the motor
unit be submerged in liquid! This could
result in a potentially fatal electric shock
and the appliance could be damaged.
► Never open the appliance housing! Other-
wise there is a risk of a fatal electric shock.
WARNING RISK OF INJURY!
► Take extreme care when cleaning the cutting
blades , the slicer attachment 3 and the
grater attachment -.
► These parts are extremely sharp!
CAUTION – PROPERTY DAMAGE!
► Do not use solvents or abrasive cleaners. These
will damage the surface of the appliance!
► Do not use abrasive, aggressive or chemical
cleaning agents! They could irreparably damage the surface!
NOTE
► Always clean all parts immediately after use.
This makes food residue easier to remove.
► Processing strongly staining foods, such as
carrots, can lead to staining of the plastic
parts on the appliance. This is not a defect in
the appliance and will not adversely affect
operation.
You can rub off discolourations using a little
cooking oil.
■ Clean the motor unit and the power cable
with a damp cloth. Dry everything properly
before re-using it.
■ Clean the bowl , the lid , the pusher ,
the cutting blades , the disc adapter , the
slicer attachment 3 and the grater attachment -
in warm washing up water. Afterwards, rinse all
parts with clean water so that no detergent residue remain on the parts.
Dry all parts thoroughly, before re-using the
appliance.
Storage
■ Store the cleaned appliance in a clean, dust-free
and dry location.
Page 12
9
KM 250 A1
GB
Disposal
Never dispose of the ap-
pliance in normal domestic
waste. This product is subject
to the provisions of European
Directive 2012/19/EU.
Dispose of the appliance via an approved disposal
company or your municipal waste facility. Please
observe the currently applicable regulations.
Please contact your waste disposal centre if you
are in any doubt.
The packaging is made from environ-
mentally friendly material and can be
disposed of at your local recycling plant.
Service
Service Great Britain
Tel.: 0871 5000 720 (£ 0.10/Min.)
E-Mail: kompernass@lidl.co.uk
IAN 270290
CY
Service Cyprus
Tel.: 8009 4409
E-Mail: kompernass@lidl.com.cy
IAN 270290
Hotline availability: Monday to Friday 08:00 20:00 (CET)
Importer
KOMPERNASS HANDELS GMBH
BURGSTRASSE 21
44867 BOCHUM
GERMANY
www.kompernass.com
Page 13

10
KM 250 A1
GB
Troubleshooting
PROBLEM POSSIBLE CAUSE POSSIBLE SOLUTIONS
The appliance is not
working.
The appliance is not connected with a mains power socket.
Connect the appliance to
a mains power socket.
The appliance is damaged. Contact Customer Services.
The appliance will not start.
The bowl is not correctly
clicked into place on the motor
unit .
Check the placement of
the bowl and correct it
if necessary.
The lid is not/not correctly
in place and closed.
Close the lid correctly.
If the malfunction cannot be corrected with the above suggestions, or if you have determined that
the malfunction may have other causes, please contact our Customer Service.
Page 14

11
KM 250 A1
HR
Sadržaj
Uvod ................................................................12
Namjenska uporaba ...................................................12
Opseg isporuke .......................................................12
Opis uređaja ..........................................................12
Tehnički podaci ........................................................12
Sigurnosne napomene ..................................................13
Prije prve uporabe .....................................................15
Sastavljanje uređaja ...................................................15
Nož za rezanje ....................................................................15
Protočni usitnjivač .................................................................. 16
Rukovanje ............................................................16
Rad s nožem za rezanje .............................................................16
Rad s protočnim usitnjivačem ..........................................................17
Čišćenje i održavanje ...................................................18
Skladištenje. . . . . . . . . . . . . . . . . . . . . . . . . . . . . . . . . . . . . . . . . . . . . . . . . . . . . . . . . . .18
Zbrinjavanje ..........................................................19
Servis ................................................................19
Uvoznik ..............................................................19
Otklanjanje smetnji ....................................................20
Page 15

12
KM 250 A1
HR
Uvod
Srdačno čestitamo na kupnji Vašeg novog uređaja.
Time ste se odlučili za visokovrijedan proizvod.
Upute za rukovanje predstavljaju sastavni dio ovog
proizvoda. One sadrže važne napomene za
sigurnost, rukovanje i zbrinjavanje. Prije uporabe
uređaja upoznajte se sa svim pripadajućim uputama
za uporabu i svim sigurnosnim napomenama.
Proizvod koristite isključivo na opisani način i u
navedenim područjima uporabe. U slučaju predaje
proizvoda trećim osobama priložite i predajte i svu
dokumentaciju.
Namjenska uporaba
Ovaj uređaj služi isključivo za usitnjavanje
namirnica. Ovaj je uređaj namijenjen isključivo za
uporabu u privatnim domaćinstvima. Ne koristite
ga u gospodarske svrhe.
Opseg isporuke
Kuhinjski stroj
(Poklopac, čep, zdjela, blok motora)
Nož za rezanje
Adapter ploče
Ploča za struganje
Ploča za rezanje
Upute za uporabu
Neposredno nakon raspakiranja provjerite cjelovitost opsega isporuke.
Opis uređaja
Čep
Otvor za umetanje
Poklopac
Nož za rezanje
Zdjela
Pogonska osovina
Blok motora
Tipka ON
Tipka OFF/PULSE
Adapter ploče
- Ploča za struganje
3 Ploča za rezanje
Tehnički podaci
Nazivni napon: 220 - 240 V ~, 50 Hz
Nominalna snaga: 250 W
Razred zaštite: II
KP vrijeme: 1 minuta
Izjava o sukladnosti za ovaj proizvod dostupna je
na internet stranici www.lidl.hr.
KP vrijeme
KP vrijeme (vrijeme kratkotrajnog pogona) označava, koliko dugo uređaj može biti u pogonu bez
da se motor pregrije i pretrpi oštećenje. Nakon
navedenog KP vremena uređaj mora biti isključen
toliko dugo, dok se motor ne ohladi i dostigne
sobnu temperaturu.
Page 16

13
KM 250 A1
HR
Sigurnosne napomene
OPASNOST OD STRUJNOG UDARA!
►
Uređaj priključite isključivo na propisno instaliranu i uzemljenu mrežnu utičnicu. Mrežni napon mora odgovarati navodima napisanim na tipskoj ploči
uređaja.
► Obratite pažnju na to, da za vrijeme rada mrežni kabel ne bude mokar ili
vlažan. Kabel postavite tako da se ne može ukliještiti ili oštetiti.
► Mrežni kabel držite podalje od vrućih površina.
► Ne vršite radove popravljanja uređaja. Sve vrste popravaka moraju biti
izvršene od strane servisa za kupce ili od strane kvalificiranog stručnog
osoblja.
► Izvucite utikač iz mrežne utičnice prije čišćenja uređaja ili u slučaju smetnji
u radu. Samo isključivanje nije dovoljno jer je uređaj još uvijek pod naponom, dok god je utikač utaknut u utičnicu.
► Oštećene mrežne utikače i kabele obavezno mora zamijeniti ovlašteno
stručno osoblje ili servis za kupce, kako biste izbjegli nastanak opasnosti.
► Uređaj i priključni kabel treba držati podalje od djece.
Uređaj nikako ne smijete uranjati u vodu ili druge tekućine.
Page 17

14
KM 250 A1
HR
UPOZORENJE! OPASNOST OD OZLJEDA!
► Uređaj načelno odvojite od strujne mreže, kada želite skidati ili postavljati
dijelove opreme. Na taj ćete način izbjeći nehotično uključivanje uređaja.
► Ako uređaj nije pod nadzorom, te prije sastavljanja i rastavljanja ili čišćenja
uređaja, uvijek treba izvući utikač iz mrežne utičnice.
► S ovim uređajem koristite isključivo originalne dijelove opreme. Dijelovi
opreme drugih proizvođača eventualno nisu prikladni i mogu dovesti do
nastanka opasnosti!
► Ovaj uređaj ne smije biti korišten od strane djece.
► Ovaj uređaj mogu koristiti osobe sa smanjenim fizičkim, senzornim ili
mentalnim osobina sposobnostima ili osobe s pomanjkanjem iskustva i/
ili znanja, ukoliko ih se prilikom uporabe nadzire ili ukoliko su upućene u
sigurno rukovanje uređajem, te ukoliko su shvatile opasnosti koje iz tog
rukovanja proizlaze.
► Djeca se ne smiju igrati uređajem.
► Oprez: nož za rezanje, ploča za rezanje i ploča za struganje su vrlo oštri!
Stoga pažljivo postupajte prilikom čišćenja.
► Oprez: nož za rezanje, ploča za rezanje i ploča za struganje su vrlo oštri!
Stoga postupite oprezno prilikom pražnjenja posude!
► Za vrijeme rada uređaja u zdjelu umetnite samo sastojke koji trebaju biti
prerađeni.
► Ne koristite uređaj za druge svrhe od onih koje su opisane u ovim uputama.
U protivnom postoji opasnost od ozljeda!
Page 18

15
KM 250 A1
HR
Prije prve uporabe
■ Odstranite svu ambalažu s uređaja.
■ Očistite uređaj na način opisan u poglavlju
"Čišćenje i održavanje".
■ Provjerite, jesu li svi dijelovi potpuno osušeni
prije nego što uređaj pustite u rad.
Sastavljanje uređaja
NAPOMENA
► Uređaj možete pokrenuti samo kada su zdje-
la i poklopac postavljeni na ispravan
način.
1) Postavite blok motora na ravnu površinu,
tako da nogice s vakumskim priljepcima prionu
i uređaj čvrsto i sigurno stoji.
2) Postavite zdjelu tako na blok motora , da
strelica
na zdjeli pokazuje na otvorenu
bravu
na bloku motora . Okrenite zdjelu
toliko, da strelica pokazuje na zapornu
bravu i zdjela ulegne.
Ako želite raditi s nožem za rezanje , nastavite
sklapanje na način opisan u poglavlju "Nož za
rezanje".
Ako želite raditi s protočnim usitnjivačem, nastavite
sklapanje na način opisan u poglavlju "Protočni
usitnjivač".
Nož za rezanje
1) Postavite nož za rezanje na pogonsku
osovinu . Ravna strana pogonske osovine
pritom mora ispravno zahvatiti u prihvat noža
za rezanje . U protivnom nož za rezanje
ne može biti postavljen.
2) Postavite poklopac na zdjelu , tako da
strelica na poklopcu pokazuje na strelicu i otvorenu bravu na zdjeli .
3) Okrenite poklopac toliko, da strelica
na
poklopcu pokazuje na strelicu i zatvorenu
bravu
na zdjeli .
4) Umetnite čep u otvor za umetanje .
5) Mrežni utikač utaknite u utičnicu.
UPOZORENJE! OPASNOST OD OZLJEDA!
► Nikada ruke ili strane predmete ne umetati u otvor za umetanje, kako biste
izbjegli ozljede i oštećenje uređaja.
► Opremu mijenjajte samo kada pogon uređaja miruje i kada je iskopčan
utikač za napajanje! Uređaj će nakon isključivanja još kratko vrijeme biti u
pokretu!
► Uređaj nikada ne ostavljajte da radi bez nadzora.
► Prije zamjene opreme ili dodatnih dijelova koji se prilikom rada uređaja
kreću, uređaj treba isključiti i odvojiti od mreže napajanja.
Page 19

16
KM 250 A1
HR
Protočni usitnjivač
1) Izaberite željenu ploču:
– ploču za rezanje 3
– ili ploču za struganje -.
2) Ako je instalirana još jedna druga ploča:
Pritisnite dugi metalni ispust ploče prema unutra
i istovremeno guranjem uz pomoć metalnog
ispusta izvadite iz adaptera ploče . Sada
blokadu na drugom kraju ploče možete podizanjem iz adaptera za ploče izvaditi.
3) Utaknite novu ploču s blokadom prvo u adapter
ploče . Zatim pažljivo pritisnite stranu s velikim
metalnim ispustom u adapter ploče .
4) Pritom najbolje palčevima gurnite vanjske
bridove ploče, sve dok ploča ne dospije kompletno u adapter za ploču i tamo ulegne.
5) Postavite adapter ploče sa umetnutom
pločom na pogonsku osovinu .
Ravna strana pogonske osovine pritom
mora ispravno zahvatiti u prihvat adaptera
ploče . U protivnom adapter ploče ne
može biti postavljen.
6) Postavite poklopac na zdjelu , tako da
strelica
na poklopcu pokazuje na streli-
cu i otvorenu bravu na zdjeli .
7) Okrenite poklopac toliko, da strelica na
poklopcu pokazuje na strelicu i zatvorenu
bravu na zdjeli .
8) Umetnite čep u otvor za umetanje .
9) Mrežni utikač utaknite u utičnicu.
Rukovanje
Rad s nožem za rezanje
Nožem za rezanje možete usitniti namirnice,
kao na primjer luk ili meso.
NAPOMENA
► Ne pokušajte tekućine s nožem za rezanje
miješati. One bi se prelijevale ili prskale van.
1) Umetnite nož za rezanje , na način opisan
u poglavlju "Sastavljanje uređaja".
2) Izrežite sastojke na komade debljine ca. 2 –
3 cm.
3) Umetnite sastojke. Pritom ne prekoračite količine navedene u sljedećoj tablici:
SASTOJAK
MAKSI-
MALNA
KOLIČINA
BRZINA
Kruh maks. 80 g ON
Sir maks. 150 g ON
Meso maks. 300 g ON
Začinsko bilje maks. 30 g ON
Češnjak 80 - 200 g PULSE
Luk maks. 300 g PULSE
Kocke leda maks. 140 g PULSE
NAPOMENA
► Brzine navedene u tablici predstavljaju orijen-
tacijske vrijednosti. One mogu varirati ovisno
o svojstvima i količine sastojaka!
4) Zatvorite poklopac .
Page 20

17
KM 250 A1
HR
5) Pritiskanjem tipke ON pokrenite usitnjavanje. Pritisnite tipku OFF/PULSE jednom,
kada su svi sastojci usitnjeni i kada želite
zaustaviti uređaj.
Kada sastojke uz pomoć PULSE-funkcije želite
preraditi, pritisnite tipku OFF/PULSE nekoliko
puta za redom, sve dok svi sastojci ne budu
usitnjeni.
Ako su se sastojci zalijepili na stjenci zdjele ili
na nožu:
– Isključite uređaj.
– Skinite poklopac .
– Odstranite sastojke s noža za rezanje i
sa unutrašnje stjenke pomoću strugalice za
tijesto ili žlice.
– Zatvorite poklopac .
– Ponovo pokrenite uređaj.
NAPOMENA
► Prerađujte samo meso bez kostiju!
► Ne ostavite uređaj da predugo radi, kada
vršite usitnjavanje (tvrdog) sira. On će u protivnom postati previše vruć, početi će se topiti
i nastaju grudve.
► Ako za vrijeme postupka rezanja želite
dodati još sastojaka, iste umetnite kroz otvor
za umetanje ! Ako poklopac otvorite,
uređaj se zaustavlja!
Pazite međutim na to, da maksimalne količine
navedene u tablici prilikom naknadnog dodavanja sastojaka ne prekoračite!
Rad s protočnim usitnjivačem
S pločama -/3 protočnog usitnjivača možete
strugati ili rezati.
1) Izaberite željenu ploču i sve zajedno sastavite
na način opisan u poglavlju "Sastavljanje
uređaja".
2) Izvadite čep iz otvora za umetanje .
3) Režite namirnice u komade takve veličine,
da oni bez problema mogu stati u otvor za
umetanje .
4) Pritiskanjem tipke ON pokrenite struganje/
usitnjavanje.
5) Zatim redom umetnite namirnice. Pritom namirnice gurnite unutra pomoću čepa , bez da
vršite pritisak.
Pritom ne prekoračite količine navedene u sljedećoj
tablici:
SASTOJAK PLOČA ZA REZANJE
Jabuke/mrkve maks. 350 g
Krastavac maks. 1,5 komada
Krumpir maks. 350 g
Luk maks. 200 g
SASTOJAK PLOČA ZA STRUGANJE
Jabuke/mrkve maks. 350 g
Parmezan maks. 150 g
Krumpir maks. 350 g
Tvrdi sir (npr.
stara Gouda)
maks. 200 g
Page 21

18
KM 250 A1
HR
NAPOMENA
► Ne preradite veće količine odjednom, nego
u nekoliko porcija jednim za drugima.
S vremena na vrijeme praznite zdjelu .
► Ne ostavite uređaj da predugo radi, kada
vršite usitnjavanje (tvrdog) sira ili čokolade.
Sastojci će u protivnom postati previše vrući,
početi će se topiti i nastaju grude.
Čišćenje i održavanje
UPOZORENJE!
OPASNOST OD STRUJNOG UDARA!
► Prije čišćenja uređaja uvijek izvucite mrežni
utikač iz utičnice.
Ni u kom slučaju ne smijete blok motora
uroniti u tekućine! Uslijed toga može doći
do opasnosti po život uslijed strujnog
udara, te do oštećenja uređaja.
► Nikada ne otvarajte kućište uređaja!
U protivnom postoji opasnost po život uslijed
strujnog udara.
UPOZORENJE!
OPASNOST OD OZLJEDA!
► Budite oprezni prilikom čišćenja noža za
rezanje , ploče za rezanje 3 i ploče za
struganje -. Ovi dijelovi su vrlo oštri!
OPREZ - OŠTEĆENJE PROIZVODA!
► Ne koristite otapala ili abrazivna sredstva.
Takva sredstva oštećuju površinu uređaja!
► Ne koristite agresivna, kemijska ili abrazivna
sredstva za čišćenje! Takva sredstva mogu
nepopravljivo oštetiti površinu uređaja!
NAPOMENA
► Sve dijelove uvijek očistite neposredno nakon
uporabe. Na taj način ostatke namirnica
možete lakše odstraniti.
► Kada prerađujete namirnice koje ispuštaju
boju, na primjer mrkve, može se dogoditi da
određeni plastični dijelovi uređaja promijene
boju. To ne predstavlja nedostatak uređaja i
ne ometa njegovu funkcionalnost.
Dijelove koji su promijenili boju možete oribati s malom količinom jestivog ulja.
■ Očistite blok motora i mrežni kabel blago
navlaženom krpom za pranje posuđa. Sve zajedno dobro osušite, prije ponovnog korištenja.
■ Očistite zdjelu , poklopac , čep , nož za
rezanje , adapter ploče , ploču za rezanje
3 i ploču za struganje - u toploj vodi za
pranje suđa. Nakon toga sve dijelove isperite
čistom vodom, tako da na dijelovima nema
ostataka sredstva za pranje posuđa.
Sve dijelove dobro osušite prije nego što nastavite koristiti uređaj.
Skladištenje
■ Uređaj čuvajte na suhom mjestu, na kojem nema
prašine.
Page 22

19
KM 250 A1
HR
Zbrinjavanje
Uređaj nikako ne smijete ba-
cati u obični kućni otpad. Ovaj
proizvod podliježe europskoj
direktivi 2012/19/EU.
Uređaj zbrinite preko autoriziranog poduzeća za
zbrinjavanje ili preko Vaše komunalne ustanove
za zbrinjavanje otpada. Poštujte aktualno važeće
propise. U slučaju dvojbe obratite se mjesnom
poduzeću za zbrinjavanje otpada.
Ambalaža se sastoji od materijala neš-
kodljivih za okoliš, koje možete zbrinuti
preko mjesnih ispostava za recikliranje.
Servis
Servis Hrvatska
Tel.: 0800 777 999
E-Mail: kompernass@lidl.hr
IAN 270290
Dostupnost dežurne telefonske linije:
Ponedjeljak do petak od 8:00 - 20:00 sati (SEV)
Uvoznik
Lidl Hrvatska d.o.o. k.d.,
p.p. 61
10020 Novi Zagreb
Proizvođač:
KOMPERNASS HANDELS GMBH
BURGSTRASSE 21
44867 BOCHUM
GERMANY
www.kompernass.com
Page 23

20
KM 250 A1
HR
Otklanjanje smetnji
PROBLEM MOGUĆI UZROK
MOGUĆE
RJEŠENJE
Uređaj ne radi.
Uređaj nije spojen na mrežnu
utičnicu.
Uređaj priključite na mrežnu utičnicu.
Uređaj je oštećen. Obratite se servisu.
Uređaj ne može biti
pokrenut.
Zdjela nije ispravno ulegla
u blok motora .
Kontrolirajte stanje zdjele
i po potrebi izvršite
korekciju.
Poklopac nije/nije ispravno
postavljen i blokiran.
Ispravno zatvorite poklopac .
Ukoliko smetnje ne možete otkloniti gore navedenim mjerama, ili ako ustanovite druge vrste smetnji,
molimo da se obratite našem servisu.
Page 24

21
KM 250 A1
RO
Cuprins
Introducere ...........................................................22
Utilizarea conform destinaţiei ............................................22
Furnitura .............................................................22
Descrierea aparatului ..................................................22
Datele tehnice .........................................................22
Indicaţii de siguranţă ...................................................23
Înainte de prima utilizare ...............................................25
Asamblarea aparatului .................................................25
Cuţit de tăiere .....................................................................25
Sistem de tăiere continuă .............................................................26
Operarea .............................................................26
Lucrul cu cuţitul de tăiere .............................................................26
Lucrul cu sistemul de tăiere continuă ....................................................27
Curăţare şi îngrijire .....................................................28
Depozitare ...........................................................28
Eliminare .............................................................29
Service-ul .............................................................29
Importator ............................................................29
Remedierea defecţiunilor. . . . . . . . . . . . . . . . . . . . . . . . . . . . . . . . . . . . . . . . . . . . . . . . 30
Page 25

22
KM 250 A1
RO
Introducere
Felicitări pentru cumpărarea noului dvs. aparat.
Prin aceasta v-aţi decis pentru un produs de
calitate superioară. Instrucţiunile de utilizare fac
parte integrantă din acest produs. Acestea cuprind
informaţii importante pentru siguranţă, utilizare
şi eliminare. Înainte de utilizarea produsului,
familiarizaţi-vă cu toate indicaţiile privind operarea
şi siguranţa. Utilizaţi acest produs numai în modul
descris şi numai în scopurile menţionate. În cazul
transmiterii aparatului unei alte persoane, predaţi-i,
de asemenea, documentele aferente acestuia.
Utilizarea conform destinaţiei
Acest aparat este destinat exclusiv mărunţirii alimentelor. Acest aparat este destinat exclusiv uzului
casnic. Nu îl utilizaţi în scopuri profesionale.
Furnitura
Robot de bucătărie
(capac, accesoriu de împingere, castron, bloc
motor)
Cuţit de tăiere
Adaptor discuri
Disc de răzuire
Disc de feliere
Instrucţiuni de utilizare
Imediat după livrare verificaţi dacă furnitura este
completă.
Descrierea aparatului
Accesoriu de împingere
Tub de umplere
Capac
Cuţit de tăiere
Castron
Arbore de antrenare
Bloc motor
Tasta ON
Tasta OFF/PULSE
Adaptor discuri
- Disc de răzuire
3 Disc de feliere
Datele tehnice
Tensiune nominală: 220 - 240 V ~, 50 Hz
Putere nominală: 250 W
Clasa de protecţie: II
Timp de operare continuă: 1 minut
Timp de operare continuă
Timpul de operare continuă indică timpul cât un
aparat poate fi operat fără ca motorul să se supraîncălzească şi să se deterioreze. La încheierea
timpului de operare continuă specificat, aparatul
trebuie oprit până când motorul se răcește la
temperatura ambientală.
Page 26

23
KM 250 A1
RO
Indicaţii de siguranţă
PERICOL DE ELECTROCUTARE!
► Conectaţi aparatul numai la o priză instalată regulamentar şi împământată.
Tensiunea reţelei trebuie să corespundă indicaţiilor de pe plăcuţa de fabricaţie a aparatului.
► Evitaţi contactul cablului de reţea cu lichide sau umezirea acestuia în timpul
funcţionării aparatului. Ghidaţi cablul astfel încât să nu poată fi deteriorat
sau blocat de alte obiecte din jur.
► Ţineţi cablul de reţea departe de suprafeţele fierbinţi.
► Nu efectuaţi niciun fel de reparaţii la acest aparat. Orice fel de reparaţii
trebuie efectuate de către serviciul tehnic sau de către specialişti calificaţi.
► Pentru curăţarea aparatului sau în caz de defecţiune, scoateţi întotdeauna
ștecărul din priză. Simpla oprire nu este suficientă, deoarece în aparat mai
există încă tensiune, atât timp cât ștecărul este în priză.
► Pentru a evita pericolele, solicitaţi imediat înlocuirea de către personalul de
specialitate autorizat sau de către serviciul tehnic a ștecărelor sau a cablurilor de alimentare deteriorate.
► A nu se lăsa aparatul şi cablul de conexiune la îndemâna copiilor.
Nu este permisă introducerea aparatului în apă sau în alte lichide.
Page 27

24
KM 250 A1
RO
AVERTIZARE! PERICOL DE ACCIDENTARE!
► Deconectaţi întotdeauna aparatul de la sursa de curent când montaţi sau
demontaţi accesoriile. Astfel se evită pornirea neintenţionată a aparatului.
► Atunci când nu este posibilă supravegherea şi înaintea asamblării, deza-
samblării sau curăţării, aparatul trebuie scos întotdeauna din priză.
► Utilizaţi numai accesoriile originale ale acestui aparat. Este posibil ca
piesele provenite de la alţi producători să nu fie adecvate şi să provoace
periclitări!
► Nu este permisă utilizarea de către copii a acestui aparat.
► Acest aparat poate fi utilizat de persoane cu abilităţi fizice, senzoriale sau
mintale reduse sau fără experienţă şi/sau fără cunoştinţe necesare, dacă
sunt supravegheate sau dacă au fost instruite cu privire la utilizarea sigură
a acestui aparat şi au înţeles pericolele legate de acesta.
► Copiilor le este interzis să se joace cu aparatul.
► Atenţie: cuţitul de tăiere, discul de feliere și discul de răzuire sunt foarte
ascuţite! De aceea aveţi grijă atunci când le curăţaţi.
► Atenţie: cuţitul de tăiere, discul de feliere și discul de răzuire sunt foarte
ascuţite! De aceea procedaţi cu atenţie la golirea vasului.
► În timpul funcţionării aparatului puneţi în castron doar ingredientele care
trebuie prelucrate.
► Nu utilizaţi aparatul în alte scopuri decât cele descrise în aceste instrucţiuni.
Altfel există pericol de rănire!
Page 28

25
KM 250 A1
RO
Înainte de prima utilizare
■ Îndepărtaţi toate materialele de ambalare de la
aparat.
■ Curăţaţi aparatul în modul descris în capitolul
„Curăţare şi îngrijire”.
■ Asiguraţi-vă ca toate componentele sunt complet
uscate înaintea utilizării aparatului.
Asamblarea aparatului
INDICAŢIE
► Aparatul poate fi pornit doar atunci când cas-
tronul și capacul sunt așezate corect.
1) Așezaţi blocul motor pe o suprafaţă plană,
astfel încât piciorușele cu ventuză să se fixeze
bine și aparatul să stea sigur.
2) Așezaţi castronul pe blocul motor astfel
încât săgeata de pe castron să indice
spre lacătul deschis
de pe blocul motor .
Rotiţi castronul până când săgeata indică
spre lacătul închis
și castronul este blocat.
Dacă doriţi să lucraţi cu cuţitul de tăiere ,
continuaţi cu asamblarea după cum este descris în
capitolul „Cuţit de tăiere“.
Dacă doriţi să lucraţi cu sistemul de tăiere continuă,
continuaţi cu asamblarea după cum este descris în
capitolul „Sistem de tăiere continuă“.
Cuţit de tăiere
1) Așezaţi cuţitul de tăiere pe arborele de
antrenare . Latura plată a arborelui de antrenare trebuie să intre corect în sistemul de
prindere a cuţitului de tăiere . În caz contrar
cuţitul de tăiere nu poate fi montat.
2) Așezaţi capacul pe castron , astfel încât
săgeata
de pe capac să indice spre
săgeata
și lacătul deschis de pe
castron .
3) Rotiţi capacul astfel încât săgeata
de pe capac să indice spre săgeata
și lacătul închis de pe castron .
4) Introduceţi accesoriul de împingere în tubul
de umplere .
5) Introduceţi ștecărul în priză.
AVERTIZARE! PERICOL DE ACCIDENTARE!
► Nu introduceţi niciodată mâinile sau obiecte în tubul de umplere sau în
mixer, pentru a evita rănirile şi defectarea aparatului.
► Înlocuiţi accesoriile numai cu motorul oprit şi ștecărul scos din priză! După
oprire aparatul mai funcţionează scurt timp!
► Nu lăsaţi niciodată aparatul să funcţioneze nesupravegheat.
► Înainte de înlocuirea accesoriilor sau componentelor care se mişcă în tim-
pul funcţionării, aparatul trebuie să fie oprit şi scos din priză.
Page 29

26
KM 250 A1
RO
Sistem de tăiere continuă
1) Alegeţi-vă discul dorit:
– discul de feliere 3
– sau discul de răzuire -.
2) Dacă este montat un alt disc: Apăsaţi eclisa
metalică lungă a discului spre interior și împingeţi simultan discul cu ajutorul eclisei metalice
din adaptorul de discuri . Acum puteţi ridica
piedica de la celălalt capăt al discului din
adaptorul discului .
3) Introduceţi noul disc mai întâi cu piedica în
adaptorul de discuri .
4) Apăsaţi apoi cu grijă latura cu eclisa metalică
mare în adaptorul de discuri . Când faceţi
acest lucru apăsaţi cu ambii policari pe muchiile exterioare ale discului până când discul se
fixează bine în adaptorul de discuri .
5) Așezaţi adaptorul de discuri cu discul fixat
pe arborele de antrenare . Latura plată
a arborelui de antrenare trebuie să intre
corect în sistemul de prindere a adaptorului
de discuri . În caz contrar adaptorul de
discuri nu poate fi montat.
6) Așezaţi capacul pe castron , astfel încât
săgeata
de pe capac să indice spre
săgeata
și lacătul deschis de pe
castron .
7) Rotiţi capacul astfel încât săgeata
de pe capac să indice spre săgeata
și
lacătul închis
de pe castron .
8) Introduceţi accesoriul de împingere în tubul
de umplere .
9) Introduceţi ștecărul în priză.
Operarea
Lucrul cu cuţitul de tăiere
Cu cuţitul de tăiere puteţi toca alimenta cum ar
fi ceapă sau carne.
INDICAŢIE
► Nu încercaţi să amestecaţi lichide cu cuţitul
de tăiere . Aceste se revarsă pe dinafară
sau stropesc.
1) Așezaţi cuţitul de tăiere după cum este
descris în capitolul „Asamblarea aparatului“.
2) Tăiaţi ingredientele în bucăţi de cca 2 – 3 cm
grosime.
3) Introduceţi ingredientele. Nu depășiţi cantităţile
indicate în tabelul următor:
INGREDIENT
CANTITATE
MAX.
VITEZĂ
Pâine max. 80 g ON
Brânză max. 150 g ON
Carne max. 300 g ON
Ierburi aroma-
tice
max. 30 g ON
Usturoi 80 - 200 g PULSE
Ceapă max. 300 g PULSE
Cub de
gheata
max. 140 g PULSE
INDICAŢIE
► Vitezele indicate în tabel sunt valori orientative.
Acestea pot varia în funcţie de consistenţa și
cantitatea ingredientelor!
4) Închideţi capacul .
Page 30

27
KM 250 A1
RO
5) Porniţi mărunţirea prin apăsarea tastei ON .
Apăsaţi o dată tasta OFF/PULSE , atunci
când toate ingredientele sunt mărunţite și doriţi
să opriţi aparatul.
Dacă doriţi să prelucraţi ingredientele cu ajutorul funcţiei PULSE, apăsaţi tasta OFF/PULSE
de mai multe ori consecutiv, până când toate
ingredientele sunt mărunţite.
Dacă ingredientele se prind de peretele castronului sau se lipesc de cuţit:
– opriţi aparatul.
– Scoateţi capacul .
– Îndepărtaţi ingredientele de pe cuţitul de
tăiere , precum şi de pe peretele interior
cu ajutorul unei spatule sau al unei linguri.
– Închideţi capacul .
– Porniţi din nou aparatul.
INDICAŢIE
► Prelucraţi doar carne fără oase!
► Nu lăsaţi aparatul să funcţioneze prea mult
timp atunci când mărunţiţi brânză (tare). În
caz contrar aceasta se încălzește prea tare,
începe să se topească și se face cocoloașe.
► În cazul în care doriţi să adăugaţi ingrediente
pe parcursul procesului de tăiere, introduceţile prin tubul de umplere ! În cazul în care
deschideţi capacul , aparatul se opreşte!
Aveţi totuşi în vedere să nu depăşiţi cantităţile
maxime indicate în tabel pe parcursul procesului de completare a ingredientelor!
Lucrul cu sistemul de tăiere continuă
Cu discurile -/3 ale sistemului de tăiere continuă puteţi răzui sau felia.
1) Alegeţi discul dorit și asamblaţi-l conform descrierii din capitolul „Asamblarea aparatului“.
2) Îndepărtaţi accesoriul de împingere din
tubul de umplere .
3) Tăiaţi alimentele în bucăţi potrivite astfel încât
să intre fără probleme în tubul de umplere .
4) Porniţi răzuirea/felierea prin apăsarea tastei
ON .
5) Introduceţi apoi pe rând alimentele.
Împingeţi alimentele cu ajutorul accesoriului
de împingere , fără a exercita presiune.
Nu depășiţi cantităţile indicate în tabelul următor:
INGREDIENT DISC DE FELIERE
Mere/morcovi max. 350 g
Castravete Fabio max. 1,5 bucăţi
Cartofi max. 350 g
Ceapă max. 200 g
INGREDIENT DISC DE RĂZUIRE
Mere/morcovi max. 350 g
Parmezan max. 150 g
Cartofi max. 350 g
Brânză tare
(de ex. Gouda
maturată)
max. 200 g
Page 31

28
KM 250 A1
RO
INDICAŢIE
► Nu prelucraţi cantităţile mai mari dintr-o dată,
ci consecutiv în mai multe porţii. Goliţi între
timp regulat castronul .
► Nu lăsaţi aparatul să funcţioneze prea mult
timp atunci când mărunţiţi brânză (tare) sau
ciocolată. În caz contrar ingredientele se
încălzesc prea tare, încep să se topească și
se fac cocoloașe.
Curăţare şi îngrijire
AVERTIZARE
PERICOL DE ELECTROCUTARE!
► Înainte de a curăţa aparatul, scoateţi întot-
deauna ştecherul din priză.
Blocul motor nu trebuie introdus în
niciun caz în lichide! Pericol de moarte prin
electrocutare şi deteriorarea aparatului.
► Nu deschideţi niciodată carcasa aparatului.
În caz contrar, există pericol de moarte prin
electrocutare.
AVERTIZARE
PERICOL DE RĂNIRE!
► Aveţi grijă atunci când curăţaţi cuţitul de
tăiere , discul de feliere3 și discul de
răzuire -.
► Aceste piese sunt foarte ascuţite!
ATENŢIE - PAGUBE MATERIALE!
► Nu utilizaţi substanţe abrazive sau corozive.
Acestea atacă suprafeţele aparatului!
► Nu utilizaţi substanţe de curăţare agresive,
chimice sau abrazive! Aceste substanţe pot
deteriora ireparabil suprafaţa!
INDICAŢIE
► Curăţaţi întotdeauna toate piesele imediat
după utilizare. Astfel resturile de alimente pot
fi îndepărtate mai uşor.
► Componentele de plastic ale aparatului
se pot colora din cauza alimentelor foarte
pigmentate, de exemplu morcovi. Aceasta
nu reprezintă un defect al aparatului și nu îi
deteriorează funcţionarea.
Aceste colorări pot fi îndepărtate prin frecare
cu puţin ulei alimentar.
■ Curăţaţi blocul motor şi cablul de alimentare
cu o lavetă uşor umedă. Înainte de o nouă utilizare aparatul trebuie să fie complet uscat.
■ Curăţaţi castronul , capacul , accesoriul de
împingere , cuţitul de tăiere , adaptorul de
discuri , discul de feliere 3 și discul de ră-
zuire - cu apă caldă și detergent. Clătiţi apoi
toate piesele cu apă curată pentru a îndepărta
toate resturile de detergent de pe piese.
Înainte de a reutiliza aparatul, uscaţi bine toate
componentele.
Depozitare
■ Păstraţi aparatul curăţat într-un loc ferit de praf
şi uscat.
Page 32

29
KM 250 A1
RO
Eliminare
Nu aruncaţi aparatul în
niciun caz în gunoiul menajer
obişnuit. Acest produs face
obiectul Directivei europene
2012/19/EU.
Eliminaţi aparatul prin intermediul unei firme autorizate sau prin intermediul centrului local de colectare
a deşeurilor. Respectaţi reglementările actuale în
vigoare. Dacă aveţi nelămuriri, contactaţi serviciul
local de eliminare a deşeurilor.
Ambalajul este format din materiale
ecologice pe care le puteţi elimina la
centrele locale de colectare a deşeurilor.
Service-ul
R
Service România
Tel.: 0800896637
E-Mail: kompernass@lidl.ro
IAN 270290
Acces linie telefonică directă: De luni până vineri,
între orele 8:00 - 20:00 (CET)
Importator
KOMPERNASS HANDELS GMBH
BURGSTRASSE 21
44867 BOCHUM
GERMANY
www.kompernass.com
Page 33

30
KM 250 A1
RO
Remedierea defecţiunilor
PROBLEMA CAUZA POSIBILĂ SOLUŢII POSIBILE
Aparatul nu funcţionează.
Aparatul nu este conectat la
o priză.
Conectaţi aparatul la o priză.
Aparatul este deteriorat.
Adresaţi-vă centrului de
service.
Aparatul nu porneşte.
Castronul nu este fixat
corect în blocul motor .
Verificaţi poziţia castronului
şi corectaţi-o dacă este cazul.
Capacul nu este ataşat şi
blocat sau nu este ataşat şi
blocat corect.
Închideţi capacul în mod
corect.
Dacă defecţiunile nu pot fi remediate prin măsurile specificate mai sus sau dacă constataţi alte tipuri
de defecţiuni, adresaţi-vă centrului nostru de service.
Page 34

31
KM 250 A1
BG
Съдържание
Въведение ...........................................................32
Употреба по предназначение ...........................................32
Окомплектовка на доставката ..........................................32
Описание на уреда ....................................................32
Технически характеристики ............................................32
Указания за безопасност ...............................................33
Преди първата употреба ...............................................35
Монтаж на уреда .....................................................35
Режещ нож .......................................................................35
Устройство за непрекъснато рязане ..................................................36
Обслужване ..........................................................36
Работа с режещия нож ............................................................. 36
Работа с устройството за непрекъснато рязане .........................................37
Почистване и поддръжка ..............................................38
Съхранение ..........................................................38
Предаване на отпадъци. . . . . . . . . . . . . . . . . . . . . . . . . . . . . . . . . . . . . . . . . . . . . . . . 39
Сервиз ...............................................................39
Вносител .............................................................39
Отстраняване на неизправности .........................................40
Page 35

32
KM 250 A1
BG
Въведение
Поздравяваме Ви за покупката на вашия нов
уред.
Избрали сте висококачествен продукт. Ръководството за потребителя е неразделна част от този
продукт. То съдържа важни указания относно
безопасността, употребата и предаването на
отпадъци. Преди да използвате продукта се
запознайте с всички указания за обслужване и
безопасност. Използвайте продукта единствено
според описанието и за указаните области на
приложение. Предавайте продукта на трети
лица заедно с цялата документация.
Употреба по предназначение
Този уред служи единствено за раздробяване
на хранителни продукти. Този уред е предназначен единствено за битова употреба. Не го
използвайте за професионални цели.
Окомплектовка на доставката
Кухненски робот
(капак, избутвач, купа, блок на мотора)
Режещ нож
Адаптер за приставки
Приставка за стъргане
Приставка за рязане
Ръководство за потребителя
Непосредствено след разопаковане проверете
пълнотата на окомплектовката на доставката.
Описание на уреда
Избутвач
Отвор за пълнене
Капак
Режещ нож
Купа
Задвижващ вал
Блок на двигателя
Бутон ON
Бутон OFF/PULSE
Адаптер за приставки
- Приставка за стъргане
3 Приставка за рязане
Технически характеристики
Номинално
напрежение: 220 – 240 V ~, 50 Hz
Номинална мощност: 250 W
Клас на защита: II
Време на
кратковременен
режим: 1 минута
Време на кратковременен режим
Времето на кратковременния режим показва
колко време може да се използва уредът без да
прегрее и да се повреди двигателят. След като
изтече посоченото за кратковременния режим
време, уредът трябва да се изключи, докато
двигателят се охлади на стайна температура.
Page 36

33
KM 250 A1
BG
Указания за безопасност
ОПАСНОСТ - ЕЛЕКТРИЧЕСКИ УДАР!
► Включвайте уреда само към инсталиран съгласно разпоредбите и за-
земен контакт. Мрежовото напрежение трябва да съвпада с данните
от фабричната табелка на уреда.
► По време на работа внимавайте кабелът да не се мокри или навлаж-
нява. Прокарвайте го така, че да не може да се притисне или повреди.
► Дръжте кабела далече от горещи повърхности.
► Не извършвайте ремонти по уреда. Всички ремонти трябва да се
извършват от сервиза или квалифициран специалист.
► Изключвайте щепсела от контакта, когато уредът се почиства или в
случай на грешка. Не е достатъчно да изключите уреда само от бутона,
тъй като докато щепселът е включен в мрежовия контакт, в уреда има
все още мрежово напрежение.
► Повредени щепсели или кабели трябва незабавно да се сменят от
оторизирани специалисти или сервиз, за да се избегнат опасности.
► Уредът и захранващият кабел трябва да се държат далеч от деца.
В никакъв случай не потапяйте уреда във вода или други течности.
Page 37

34
KM 250 A1
BG
ПРЕДУПРЕЖДЕНИЕ! ОПАСНОСТ ОТ НАРАНЯВАНЕ!
► По принцип изключвайте уреда от електрическата мрежа, когато
поставяте или сваляте принадлежности. Така се избягва неволно
включване на уреда.
► При липса на наблюдение и преди сглобяване, разглобяване или
почистване, уредът винаги трябва да се изключва от мрежата.
► Използвайте само оригиналните принадлежности към този уред.
Възможно е принадлежности от други производители да не са
подходящи и да доведат до опасности!
► Този уред не трябва да се използва от деца.
► Този уред може да се използва от лица с ограничени физически, сен-
зорни или умствени способности или с липса на опит и/или знания,
ако са под наблюдение или са били инструктирани по отношение
на безопасната употреба и са разбрали възможните опасности.
► Не допускайте деца да играят с уреда.
► Внимание: режещият нож, приставката за рязане и приставката за
стъргане са много остри! Затова действайте внимателно при почистването.
► Внимание: режещият нож, приставката за рязане и приставката за
стъргане са много остри! Затова действайте внимателно при изпразване на купата.
► Докато уредът работи поставяйте съставките за преработка единст-
вено в купата.
► Никога не използвайте уреда за други цели, освен за описаните в
настоящото ръководство. В противен случай съществува опасност
от нараняване!
Page 38

35
KM 250 A1
BG
Преди първата употреба
■ Отстранете всички опаковъчни материали
от уреда.
■ Почистете уреда според указанията в глава
„Почистване и поддръжка“.
■ Уверете се, че всички части са напълно сухи,
преди да използвате уреда.
Монтаж на уреда
УКАЗАНИЕ
► Уредът може да се стартира, само когато
купата и капакът са поставени
правилно.
1) Поставете блока на мотора върху равна
повърхност, така че вакуумните крачета
да се фиксират стабилно и уредът да стои
надеждно.
2) Поставете купата върху блока на мото-
ра така, че стрелката
върху купата
да сочи към отворения катинар върху
блока на мотора . Завъртете купата
дотолкова, че стрелката да сочи към
затворения катинар
и купата да
щракне.
Ако искате да работите с режещия нож ,
продължете със сглобяването както е описано в
глава "Режещ нож".
Ако искате да работите с устройството за
непрекъснато рязане, продължете със сглобяването, както е описано в глава "Устройство
за непрекъснато рязане".
Режещ нож
1) Поставете режещия нож върху задвижващия вал . При това плоската страна
на задвижващия вал трябва правилно
да влезе в държача на режещия нож .
В противен случай режещият нож не
може да се постави.
2) Поставете капака върху купата , така
че стрелката
върху капака да сочи
към стрелката
и отворения катинар
върху купата .
3) Завъртете капака дотолкова, че стрел-
ката
върху купата да сочи към стрел-
ката
и затворения катинар върху
купата .
4) Поставете избутвача в отвора за пълне-
не .
5) Включете щепсела в контакт.
ПРЕДУПРЕЖДЕНИЕ! ОПАСНОСТ ОТ НАРАНЯВАНЕ!
► Никога не поставяйте ръцете си или външни предмети в отвора за
пълнене, за да избегнете наранявания и повреди на уреда.
► Сменяйте принадлежностите само при спрян задвижващ механизъм
и при изключен мрежови щепсел! След изключването уредът продължава да работи още известно време по инерция!
► Никога не оставяйте уреда без наблюдение.
► Преди смяната на принадлежности или резервни части, които се
движат по време на работа, уредът трябва да се изключи от мрежата
и от контакта.
Page 39

36
KM 250 A1
BG
Устройство за непрекъснато рязане
1) Изберете желаната приставка:
– приставката за рязане 3
– или приставката за стъргане -.
2) Ако има инсталирана друга приставка:
Натиснете дългото метално ухо на приставката навътре и същевременно извадете
приставката с помощта на металното ухо
от адаптера за приставки . Сега можете
да повдигнете заключващия механизъм в
другия край на приставката от адаптера за
приставки .
3) Вкарайте новата приставка със заключващия механизъм напред в адаптера за
приставки .
4) След това внимателно натиснете страната
с голямото метално ухо в адаптера за приставки . При това най-добре натискайте
с двата палеца върху външните ръбове на
приставката, докато приставката не легне
изцяло в адаптера за приставки и не
щракне.
5) Поставете адаптера за приставки с
поставената приставка върху задвижващия
вал . При това плоската страна на задвижващия вал трябва да влезе правилно
в държача на адаптера за приставки . В
противен случай адаптерът за приставки
не може да се постави.
6) Поставете капака върху купата , така
че стрелката
върху капака да сочи
към стрелката
и отворения катинар
върху купата .
7) Завъртете капака дотолкова, че стрел-
ката
върху купата да сочи към стрел-
ката
и затворения катинар върху
купата .
8) Поставете избутвача в отвора за пълне-
не .
9) Включете щепсела в контакт.
Обслужване
Работа с режещия нож
С режещия нож Вие можете да раздробявате хранителни продукти, като например лук
или месо.
УКАЗАНИЕ
► Не се опитвайте да разбърквате течности
с режещия нож . Те ще прелеят или ще
се разпръскат навън.
1) Поставете режещия нож , както е описано
в глава "Монтаж на уреда".
2) Нарежете съставките на парчета с размери
около 2 - 3 см.
3) Напълнете съставките. При това не надвишавайте посочените в следващата таблица
количества:
СЪСТАВКА
МАКС.
КОЛИЧЕСТВО
СКОРОСТ
Хляб макс. 80 гр. ON
Сирене макс. 150 гр. ON
Месо макс. 300 гр. ON
Подправки макс. 30 гр. ON
Чесън 80 - 200 гр. PULSE
Лук макс. 300 гр. PULSE
Кубчета лед макс. 140 гр. PULSE
УКАЗАНИЕ
► Посочените в таблицата скорости са
ориентировъчни стойности. Те могат да
варират в зависимост от консистенцията
и количеството на съставките!
4) Затворете капака .
Page 40

37
KM 250 A1
BG
5) Стартирайте раздробяването чрез натискане на бутона ON . Натиснете бутона
OFF/PULSE веднъж, когато всички
съставки са раздробени и искате да спрете
уреда.
Ако искате да преработите съставките с
помощта на функцията PULSE, натискайте
бутона OFF/PULSE много пъти последователно, докато всички съставки бъдат
раздробени.
Ако съставките се съберат по стената на купата или залепнат върху ножа:
– Изключете уреда.
– Свалете капака .
– Отстранете съставките от режещия нож ,
както и от вътрешната стена с помощта
на стъргалка за тесто или лъжица.
– Затворете капака .
– Включете отново уреда.
УКАЗАНИЕ
► Преработвайте само месо без кости!
► Не оставяйте уреда никога да работи
прекалено дълго, когато раздробявате
(твърдо) сирене. В противен случай то се
загрява прекомерно, започва да се топи и
в резултат на това става на бучки.
► Когато по време на процеса на рязане
искате да допълните съставки, добавете
тези съставки през отвора за пълнене !
Когато отворите капака , уредът спира!
При допълване на съставки внимавайте
за това, да не превишите посочените в
таблицата максимални количества.
Работа с устройството за непрекъснато рязане
С приставките -/3 на устройството за
непрекъснато рязане можете да стържете или
режете.
1) Изберете желаната приставка и сглобете
всичко, както е описано в глава "Монтаж
на уреда".
2) Отстранете избутвача от отвора за
пълнене .
3) Нарежете хранителните продукти на
толкова големи парчета, че да се побират
безпроблемно в отвора за пълнене .
4) Стартирайте стъргането/рязането чрез
натискане на бутона ON .
5) След това допълвайте хранителните продукти. При това избутвайте хранителните
продукти с помощта на избутвача , без
да упражнявате натиск.
При това не надвишавайте посочените в следващата таблица количества:
СЪСТАВКА
ПРИСТАВКА ЗА
РЯЗАНЕ
Ябълки/моркови макс. 350 гр.
Дълги краставици
макс. 1,5 броя
Картофи макс. 350 гр.
Лук макс. 200 гр.
СЪСТАВКА
ПРИСТАВКА ЗА
СТЪРГАНЕ
Ябълки/моркови макс. 350 гр.
Пармезан макс. 150 гр.
Картофи макс. 350 гр.
Твърдо сирене
(например стара
Гауда)
макс. 200 гр.
Page 41

38
KM 250 A1
BG
УКАЗАНИЕ
► Не преработвайте големи количества
наведнъж, а на няколко порции една след
друга. Междувременно винаги изпразвайте купата .
► Не оставяйте уреда никога да работи
прекалено дълго, когато раздробявате
(твърдо) сирене или шоколад. В противен
случай съставките се загряват прекомерно, започват да се топят и в резултат на
това стават на бучки.
Почистване и поддръжка
ПРЕДУПРЕЖДЕНИЕ
ОПАСНОСТ ОТ ТОКОВ УДАР!
► Винаги изключвайте щепсела от контакта,
преди да започнете да почиствате уреда.
Блокът на мотора в никакъв случай
не трябва да се потапя в течности! Това
може да причини опасност за живота
от токов удар и повреждане на уреда.
► Никога не отваряйте корпуса на уреда. В
противен случай съществува опасност за
живота поради токов удар.
ПРЕДУПРЕЖДЕНИЕ
ОПАСНОСТ ОТ НАРАНЯВАНЕ!
► Бъдете предпазливи при почистването на
режещия нож , на приставката за рязане 3 и на приставката за стъргане -.
► Тези части са много остри!
ВНИМАНИЕ – ОПАСНОСТ ОТ
МАТЕРИАЛНИ ЩЕТИ!
► Не използвайте разтворители или абра-
зивни препарати. Те разяждат повърхностите на уреда!
► Не използвайте агресивни, химически
или абразивни препарати за почистване!
Те могат да повредят непоправимо повърхността!
УКАЗАНИЕ
► Винаги почиствайте всички части непо-
средствено след употреба. По този начин
остатъците от хранителни продукти се
отстраняват по-лесно.
► Ако преработвате силно оцветяващи
хранителни продукти, като например
моркови, може да се получи оцветяване
на пластмасовите части на уреда. Това
не представлява повреда на уреда и не
влошава неговата функция.
Вие можете да отстраните тези оцветявания с малко олио.
■ Почистете блока на мотора и мрежовия
кабел с леко навлажнена кърпа за миене.
Подсушете добре всичко, преди да го
използвате отново.
■ Почистете купата , капака , избутвача ,
режещия нож , адаптера за приставки ,
приставката за рязане 3 и приставката за
стъргане - с топла вода. След това изплакнете всички части с чиста вода, за де не
остават следи от препарата по частите.
Подсушете добре всички части, преди да
използвате уреда отново.
Съхранение
■ Съхранявайте почистения уред на чисто и
сухо място.
Page 42

39
KM 250 A1
BG
Предаване на отпадъци
В никакъв случай не изхвър-
ляйте уреда с обикновените
битови отпадъци. Този продукт подлежи на европейската директива
2012/19/EU.
Предайте уреда в специализирано предприятие за извозване на отпадъци или местния
пункт за събиране на отпадъци. Спазвайте
действащите в момента разпоредби. В случай
на съмнение се обърнете към местния пункт за
събиране на отпадъци.
Опаковката е произведена от еко-
логични материали, които могат да
се предават в местните пунктове за
рециклиране.
Сервиз
Сервизно обслужване България
Тел.: 00800 111 4920
Е-мейл: kompernass@lidl.bg
IAN 270290
Работно време на горещата линия:
понеделник до петък от 8:00 ч. – 20:00 ч. (централноевропейско време)
Вносител
KOMPERNASS HANDELS GMBH
BURGSTRASSE 21
44867 BOCHUM
GERMANY
www.kompernass.com
Page 43

40
KM 250 A1
BG
Отстраняване на неизправности
ПРОБЛЕМ ВЪЗМОЖНА ПРИЧИНА
ВЪЗМОЖНИ
НАЧИНИ НА
ОТСТРАНЯВАНЕ
Уредът не функционира.
Уредът не е включен към
контакт.
Включете уреда към
контакт.
Уредът е повреден. Обърнете се към сервиза.
Уредът не стартира.
Купата не е щракнала
правилно в блока на мотора .
Проверете нивото на
напълване на купата
и го коригирайте при
необходимост.
Капакът не е поставен/
не е поставен и блокиран
правилно.
Затворете правилно
капака .
Ако неизправностите не могат да се отстранят по посочените по-горе начини или установите
други видове неизправности, се обърнете към нашия сервиз.
Page 44

41
KM 250 A1
GR
Περιεχόμενα
Εισαγωγή .............................................................42
Προβλεπόμενη χρήση ..................................................42
Παραδοτέος εξοπλισμός ................................................42
Περιγραφή συσκευής ...................................................42
Τεχνικά χαρακτηριστικά .................................................42
Υποδείξεις ασφαλείας ...................................................43
Πριν την πρώτη χρήση ..................................................45
Συναρμολόγηση της συσκευής ...........................................45
Λεπίδα κοπής .....................................................................45
Εξάρτημα τοποθέτησης ..............................................................46
Χειρισμός .............................................................46
Εργασία με τη λεπίδα κοπής ..........................................................46
Εργασία με το εξάρτημα τοποθέτησης ..................................................47
Καθαρισμός και φροντίδα ...............................................48
Αποθήκευση ..........................................................48
Απόρριψη ............................................................49
Σέρβις. . . . . . . . . . . . . . . . . . . . . . . . . . . . . . . . . . . . . . . . . . . . . . . . . . . . . . . . . . . . . . . . 49
Εισαγωγέας ...........................................................49
Διόρθωση σφαλμάτων ..................................................50
Page 45

42
KM 250 A1
GR
Εισαγωγή
Συγχαρητήρια για την αγορά της νέας σας
συσκευής.
Αποφασίσατε έτσι για την απόκτηση ενός προϊόντος υψηλής ποιότητας. Οι οδηγίες χρήσης είναι
τμήμα αυτού του προϊόντος. Περιέχουν σημαντικές
υποδείξεις για την ασφάλεια, τη χρήση και την
απόρριψη. Πριν από τη χρήση του προϊόντος,
εξοικειωθείτε με όλες τις υποδείξεις χειρισμού και
ασφάλειας. Χρησιμοποιείτε το προϊόν μόνο όπως
περιγράφεται και για τους αναφερόμενους τομείς
χρήσης. Παραδώστε όλα τα έγγραφα σε περίπτωση παράδοσης του προϊόντος σε τρίτους.
Προβλεπόμενη χρήση
Αυτή η συσκευή προορίζεται αποκλειστικά για το
κομμάτιασμα τροφίμων. Αυτή η συσκευή προορίζεται αποκλειστικά για χρήση σε νοικοκυριά. Μην τη
χρησιμοποιείτε για επαγγελματικό σκοπό.
Παραδοτέος εξοπλισμός
Ηλεκτρικός τρίφτης
(Καπάκι, εξάρτημα ώθησης, μπολ, μοτέρ)
Λεπίδα κοπής
Αντάπτορας δίσκων
Δίσκος τριψίματος
Δίσκος κοπής
Οδηγίες χρήσης
Αμέσως μετά την αποσυσκευασία ελέγξτε την
πληρότητα του παραδοτέου εξοπλισμού.
Περιγραφή συσκευής
Εξάρτημα ώθησης
Χωνί πλήρωσης
Καπάκι
Λεπίδα κοπής
Μπολ
Άξονας κίνησης
Μοτέρ
Πλήκτρο ΟN
Πλήκτρο OFF/PULSE
Αντάπτορας δίσκων
- Δίσκος τριψίματος
3 Δίσκος κοπής
Τεχνικά χαρακτηριστικά
Ονομαστική τάση: 220 - 240 V ~, 50 Hz
Ονομαστική ισχύς: 250 W
Κατηγορία προστασίας: II
Χρόνος σύντομης
λειτουργίας: 1 λεπτό
Χρόνος σύντομης λειτουργίας (ΣΛ)
Ο χρόνος ΣΛ (χρόνος σύντομης λειτουργίας) δείχνει για πόσο χρόνο μπορεί κανείς να λειτουργεί
μια συσκευή χωρίς να υπερθερμανθεί το μοτέρ και
χωρίς να πάθει βλάβες. Μετά τον δοθέντα χρόνο
ΣΛ η συσκευή πρέπει να απενεργοποιηθεί έως
ότου το μοτέρ αγγίξει τη θερμοκρασία δωματίου.
Page 46

43
KM 250 A1
GR
Υποδείξεις ασφαλείας
ΚΙΝΔΥΝΟΣ ΗΛΕΚΤΡΟΠΛΗΞΙΑΣ!
► Συνδέετε τη συσκευή μόνο σε μια σύμφωνα με τις προδιαγραφές εγκατεστη-
μένη και γειωμένη πρίζα. Η τάση δικτύου πρέπει να συμφωνεί με τα στοιχεία
στην πινακίδα τύπου της συσκευής.
► Προσέχετε ώστε κατά τη λειτουργία το καλώδιο να μη βρέχεται ή υγραίνε-
ται. Περνάτε το κατά τέτοιο τρόπο, ώστε να μην πιάνεται ή φθείρεται.
► Κρατάτε το καλώδιο μακριά από καυτές επιφάνειες.
► Μη διεξάγετε εργασίες επισκευών στη συσκευή. Οποιεσδήποτε επισκευές
πρέπει να διεξάγονται μέσω του τμήματος εξυπηρέτησης πελατών ή από
ειδικό προσωπικό.
► Τραβάτε το βύσμα από την πρίζα, όταν καθαρίζετε τη συσκευή ή σε περί-
πτωση βλάβης. Η απενεργοποίηση από μόνη της δεν αρκεί, διότι υπάρχει
ακόμα τάση στη συσκευή, όσο το βύσμα βρίσκεται στην πρίζα.
► Τα βύσματα ή τα καλώδια που έχουν υποστεί βλάβη πρέπει να αντικαθί-
στανται αμέσως από εξουσιοδοτημένο εξειδικευμένο προσωπικό ή από το
τμήμα εξυπηρέτησης πελατών, ώστε να αποφεύγονται κίνδυνοι.
► Η συσκευή και το καλώδιο σύνδεσής της πρέπει να φυλάσσονται μακριά
από παιδιά.
Δεν επιτρέπεται σε καμία περίπτωση να βυθίσετε τη συσκευή σε νερό ή
άλλα υγρά.
Page 47

44
KM 250 A1
GR
ΠΡΟΕΙΔΟΠΟΙΗΣΗ! ΚΙΝΔΥΝΟΣ ΤΡΑΥΜΑΤΙΣΜΟΥ!
► Αποσυνδέετε τη συσκευή από την παροχή ρεύματος όταν τοποθετείτε ή
απομακρύνετε εξαρτήματα. Έτσι αποφεύγεται μια μη ηθελημένη ενεργοποίηση της συσκευής.
► Η συσκευή πρέπει να αποσυνδέεται πάντα από το δίκτυο όταν δεν επιτη-
ρείται και πριν από τη συναρμολόγηση, την αποσυναρμολόγηση ή τον
καθαρισμό.
► Χρησιμοποιείτε μόνο τα γνήσια αξεσουάρ για αυτή τη συσκευή. Αξεσουάρ
άλλων κατασκευαστών πιθανώς να μην ενδείκνυνται και μπορεί να οδηγήσουν σε κινδύνους!
► Η παρούσα συσκευή δεν επιτρέπεται να χρησιμοποιείται από παιδιά.
► Μπορεί να γίνεται χρήση αυτής της συσκευής από άτομα με μειωμένες
φυσικές, αισθητηριακές ή νοητικές ικανότητες ή με έλλειψη εμπειρίας και/ή
γνώσεων, εφόσον επιτηρούνται ή έχουν εκπαιδευτεί αναφορικά με την
ασφαλή χρήση της συσκευής και έχουν κατανοήσει τους επακόλουθους
κινδύνους.
► Τα παιδιά δεν επιτρέπεται να παίζουν με τη συσκευή.
► Προσοχή: η λεπίδα κοπής, ο δίσκος κοπής και ο δίσκος τριψίματος είναι
πολύ αιχμηρά! Γι' αυτό να είστε προσεκτικοί κατά τον καθαρισμό.
► Προσοχή: η λεπίδα κοπής, ο δίσκος κοπής και ο δίσκος τριψίματος είναι
πολύ αιχμηρά! Γι' αυτό να είστε προσεκτικοί κατά το άδειασμα του μπολ.
► Όσο λειτουργεί η συσκευή προσθέτετε αποκλειστικά τα συστατικά που
απαιτούνται για την επεξεργασία.
► Μη χρησιμοποιείτε τη συσκευή για άλλους σκοπούς από τους περιγραφό-
μενους στις παρούσες οδηγίες. Αλλιώς υπάρχει κίνδυνος τραυματισμού!
Page 48

45
KM 250 A1
GR
Πριν την πρώτη χρήση
■ Απομακρύνετε όλα τα υλικά συσκευασίας από
τη συσκευή.
■ Καθαρίζετε τη συσκευή όπως περιγράφεται στο
Κεφάλαιο "Καθαρισμός και φροντίδα".
■ Βεβαιώνεστε ότι όλα τα εξαρτήματα είναι
πλήρως στεγνά, προτού χρησιμοποιήσετε τη
συσκευή.
Συναρμολόγηση της συσκευής
ΥΠΟΔΕΙΞΗ
► Η συσκευή μπορεί να εκκινηθεί μόνο όταν το
μπολ και το καπάκι έχουν τοποθετηθεί
σωστά.
1) Τοποθετήστε το μοτέρ σε μια επίπεδη
επιφάνεια έτσι ώστε τα πόδια - βεντούζες να
ακουμπάνε καλά και η συσκευή να στέκεται με
ασφάλεια.
2) Τοποθετήστε το μπολ κατά τέτοιο τρόπο
στο μοτέρ , ώστε το βέλος
στο μπολ
να δείχνει στην ανοιχτή κλειδαριά στο
μοτέρ . Γυρίστε το μπολ τόσο, ώστε το
βέλος
να δείχνει στην κλειστή κλειδαριά
και το μπολ να κουμπώνει.
Εάν θέλετε να εργαστείτε με τη λεπίδα κοπής ,
συνεχίστε με τη συναρμολόγηση όπως περιγράφεται στο κεφάλαιο "Λεπίδα κοπής".
Εάν θέλετε να εργαστείτε με το εξάρτημα τοποθέτησης, συνεχίστε με τη συναρμολόγηση όπως περιγράφεται στο κεφάλαιο "Εξάρτημα τοποθέτησης".
Λεπίδα κοπής
1) Τοποθετήστε τη λεπίδα κοπής επάνω στον
άξονα κίνησης . Η επίπεδη πλευρά του
άξονα κίνησης πρέπει να μαγκώνει σωστά
στην υποδοχή της λεπίδας κοπής . Αλλιώς
η λεπίδα κοπής δεν μπορεί να τοποθετηθεί.
2) Τοποθετήστε το καπάκι επάνω στο μπολ ,
έτσι ώστε το βέλος
να δείχνει στο καπάκι
στο βέλος
και η ανοιχτή κλειδαριά στο
μπολ .
3) Γυρίστε το καπάκι τόσο ώστε το βέλος
να δείχνει στο καπάκι στο βέλος
και η
κλειστή κλειδαριά
στο μπολ .
4) Τοποθετήστε το εξάρτημα ώθησης στο χωνί
πλήρωσης .
5) Βάλτε το βύσμα σε μια πρίζα.
ΠΡΟΕΙΔΟΠΟΙΗΣΗ! ΚΙΝΔΥΝΟΣ ΤΡΑΥΜΑΤΙΣΜΟΥ!
► Ποτέ μη βάζετε τα χέρια ή ξένα αντικείμενα στο χωνί πλήρωσης, ώστε να
αποφεύγετε τραυματισμούς και φθορές στη συσκευή.
► Αλλάζετε τα αξεσουάρ μόνο όταν ο άξονας κίνησης είναι ακινητοποιημένος
και εφόσον έχει τραβηχτεί η πρίζα! Η συσκευή συνεχίζει να λειτουργεί για
λίγο μετά την απενεργοποίηση!
► Ποτέ μην αφήνετε τη συσκευή χωρίς επιτήρηση.
► Πριν από την αντικατάσταση αξεσουάρ ή επιπρόσθετων εξαρτημάτων, τα
οποία κινούνται κατά τη λειτουργία, πρέπει να απενεργοποιηθεί η συσκευή
και να αποσυνδεθεί από το δίκτυο.
Page 49

46
KM 250 A1
GR
Εξάρτημα τοποθέτησης
1) Επιλέξτε τον επιθυμητό δίσκο:
– το δίσκο κοπής 3
– ή το δίσκο τριψίματος -.
2) Στην περίπτωση που έχει εγκατασταθεί άλλος
ένας δίσκος: Πιέστε τη μακριά μεταλλική προεξοχή του δίσκου προς τα μέσα και ταυτόχρονα
ωθήστε το δίσκο με τη βοήθεια της μεταλλικής
προεξοχής έξω από τον αντάπτορα δίσκων .
Τώρα μπορείτε να σηκώσετε την ασφάλιση στο
άλλο άκρο του δίσκου έξω από τον αντάπτορα
δίσκων .
3) Εισάγετε το νέο δίσκο με την ασφάλιση πρώτα
στον αντάπτορα δίσκων .
4) Πιέστε στη συνέχεια προσεκτικά την πλευρά με
τη μεγάλη μεταλλική προεξοχή στον αντάπτορα
δίσκων . Πιέστε τότε με τους δύο αντίχειρες
στις εξωτερικές ακμές του δίσκου, έως ότου ο
δίσκος εδράζεται και κουμπώνει πλήρως στον
αντάπτορα δίσκων .
5) Τοποθετήστε τον αντάπτορα δίσκων με
τοποθετημένο δίσκο στον άξονα κίνησης .
Η επίπεδη πλευρά του άξονα κίνησης
πρέπει τότε να μαγκώνει σωστά στην υποδοχή
του αντάπτορα δίσκων . Αλλιώς δεν μπορεί
να τοποθετηθεί ο αντάπτορας δίσκων .
6) Τοποθετήστε το καπάκι επάνω στο μπολ ,
έτσι ώστε το βέλος
να δείχνει στο καπάκι
στο βέλος
και η ανοιχτή κλειδαριά στο
μπολ .
7) Γυρίστε το καπάκι τόσο, ώστε το βέλος
να δείχνει στο καπάκι στο βέλος και η
κλειστή κλειδαριά
στο μπολ .
8) Τοποθετήστε το εξάρτημα ώθησης στο χωνί
πλήρωσης .
9) Βάλτε το βύσμα σε μια πρίζα.
Χειρισμός
Εργασία με τη λεπίδα κοπής
Με τη λεπίδα κοπής μπορείτε να ψιλοκόψετε
τρόφιμα όπως για παράδειγμα κρεμμύδια ή κρέας.
ΥΠΟΔΕΙΞΗ
► Μην προσπαθήσετε να αναμίξετε υγρά με
τη λεπίδα κοπής . Αυτά ξεχειλίζουν ή
εκτοξεύονται.
1) Τοποθετήστε τη λεπίδα κοπής , όπως
περιγράφεται στο κεφάλαιο "Συναρμολόγηση
συσκευής".
2) Κόψτε τα υλικά σε τεμάχια μεγέθους περ. 2 -
3 εκ.
3) Γεμίστε με τα υλικά. Μην υπερβαίνετε τις αναφερόμενες στον ακόλουθο πίνακα ποσότητες:
ΥΛΙΚΟ
ΜΕΓ.
ΠΟΣΟΤΗΤΑ
ΤΑΧΥΤΗΤΑ
Ψωμί μέγ. 80 γρ. ON
Τυρί μέγ. 150 γρ. ON
Κρέας μέγ. 300 γρ. ON
Βότανα μέγ. 30 γρ. ON
Σκόρδο 80 - 200 γρ. PULSE
Κρεμμύδια μέγ. 300 γρ. PULSE
Παγάκια μέγ. 140 γρ. PULSE
ΥΠΟΔΕΙΞΗ
► Οι αναφερόμενες στον πίνακα ταχύτητες
είναι τιμές αναφοράς. Αυτές μπορεί να
ποικίλουν ανάλογα με τη σύνθεση και την
ποσότητα των υλικών!
4) Κλείστε το καπάκι .
Page 50

47
KM 250 A1
GR
5) Μέσω πίεσης του πλήκτρου ON , εκκινήστε την κοπή σε μικρά κομμάτια. Πατήστε το
πλήκτρο OFF/PULSE μια φορά όταν έχουν
κοπεί σε μικρά κομμάτια όλα τα υλικά και
θέλετε να σταματήσετε τη συσκευή.
Εάν θέλετε να επεξεργαστείτε υλικά με τη βοήθεια της λειτουργίας PULSE, πατήστε το πλήκτρο OFF/PULSE πολλές φορές διαδοχικά,
έως ότου κομματιαστούν όλα τα υλικά.
Εάν έχουν εναποτεθεί υλικά στα τοιχώματα του
μπολ ή έχουν κολλήσει στη λεπίδα:
– Απενεργοποιείστε τη συσκευή.
– Απομακρύνετε το καπάκι .
– Απομακρύνετε τα υλικά από τη λεπίδα
κοπής καθώς και από τα εσωτερικά
τοιχώματα με τη βοήθεια ενός ξέστρου ή
ενός κουταλιού.
– Κλείστε το καπάκι .
– Εκκινήστε εκ νέου τη συσκευή.
ΥΠΟΔΕΙΞΗ
► Επεξεργάζεστε μόνο κρέας χωρίς κόκαλα!
► Μην αφήνετε τη συσκευή να λειτουργεί για
πολύ χρόνο, όταν ψιλοκόβετε (σκληρό) τυρί.
Αλλιώς αυτό θα ζεσταθεί πολύ, θα αρχίσει
να λιώνει και έτσι θα κολλήσει.
► Εάν κατά τη διάρκεια της διαδικασίας κοπής
θέλετε να προσθέσετε και άλλα υλικά, προσθέστε τα μέσα από το χωνί πλήρωσης !
Όταν ανοίγετε το καπάκι η συσκευή
σταματάει!
Ωστόσο προσέξτε ότι δεν θα πρέπει να υπερβαίνετε τις αναφερόμενες στον πίνακα μέγιστες ποσότητες κατά την πλήρωση υλικών!
Εργασία με το εξάρτημα τοποθέτησης
Με τους δίσκους -/3 του εξαρτήματος τοποθέτησης μπορείτε να διεξάγετε τρίψιμο ή κοπή.
1) Επιλέξτε τον επιθυμητό δίσκο και τοποθετήστε
όλα τα εξαρτήματα, όπως περιγράφεται στο
κεφάλαιο "Συναρμολόγηση συσκευής".
2) Απομακρύνετε το εξάρτημα ώθησης από
το χωνί πλήρωσης .
3) Κόψτε τα τρόφιμα σε τόσο μεγάλα κομμάτια,
ώστε να χωράνε άνετα στο χωνί πλήρωσης .
4) Μέσω πίεσης του πλήκτρου ON , εκκινήστε
το τρίψιμο/ την κοπή.
5) Στη συνέχεια προσθέστε το ένα μετά το άλλο
τα τρόφιμα. Ωθήστε τα τρόφιμα με τη βοήθεια
του εξαρτήματος ώθησης χωρίς να ασκείτε
πίεση.
Μην υπερβαίνετε τις αναφερόμενες στον ακόλουθο
πίνακα ποσότητες:
ΥΛΙΚΟ ΔΙΣΚΟΣ ΚΟΠΗΣ
Μήλα/Καρότα μέγ. 350 γρ.
Αγγούρι μέγ. 1,5 τεμάχιο
Πατάτες μέγ. 350 γρ.
Κρεμμύδια μέγ. 200 γρ.
ΥΛΙΚΟ ΔΙΣΚΟΣ ΤΡΙΨΙΜΑΤΟΣ
Μήλα/Καρότα μέγ. 350 γρ.
Παρμεζάνα μέγ. 150 γρ.
Πατάτες μέγ. 350 γρ.
Σκληρό τυρί (π.
χ. παλαιωμένο
γκούντα)
μέγ. 200 γρ.
Page 51

48
KM 250 A1
GR
ΥΠΟΔΕΙΞΗ
► Μην επεξεργάζεστε μονομιάς μεγαλύτερες
ποσότητες, αλλά ανά μερίδες διαδοχικά.
Ενδιάμεσα αδειάζετε πάντα το μπολ .
► Μην αφήνετε τη συσκευή να λειτουργεί για
πολύ χρόνο, όταν ψιλοκόβετε (σκληρό) τυρί
ή σοκολάτα. Αλλιώς αυτά τα υλικά ζεσταίνονται πολύ, αρχίζουν να λιώνουν και έτσι
κολλάνε.
Καθαρισμός και φροντίδα
ΠΡΟΕΙΔΟΠΟΙΗΣΗ
ΚΙΝΔΥΝΟΣ ΗΛΕΚΤΡΟΠΛΗΞΙΑΣ!
► Πριν από τον καθαρισμό της συσκευής τρα-
βάτε πάντα το βύσμα από την πρίζα.
Σε καμία περίπτωση δεν επιτρέπεται το
μοτέρ να βυθίζεται σε υγρά! Μπορεί να
προκύψει κίνδυνος ζωής από ηλεκτροπληξία και η συσκευή να υποστεί φθορά.
► Ποτέ μην ανοίγετε το περίβλημα της συσκευ-
ής. Αλλιώς υπάρχει κίνδυνος θανάτου λόγω
ηλεκτροπληξίας.
ΠΡΟΕΙΔΟΠΟΙΗΣΗ
ΚΙΝΔΥΝΟΣ ΤΡΑΥΜΑΤΙΣΜΟΥ!
► Να είστε προσεκτικοί κατά τον καθαρισμό
της λεπίδας κοπής , του δίσκου κοπής 3
και του δίσκου τριψίματος -.
► Αυτά τα εξαρτήματα είναι πολύ αιχμηρά!
ΠΡΟΣΟΧΗ - ΥΛΙΚΕΣ ΖΗΜΙΕΣ!
► Μη χρησιμοποιείτε διαλυτικά ή τριβικά μέσα
καθαρισμού. Αυτά διαβρώνουν τις επιφάνειες
της συσκευής!
► Μη χρησιμοποιείτε επιθετικά, χημικά ή
τριβικά μέσα καθαρισμού. Αυτά μπορεί να
προσβάλλουν ανεπανόρθωτα την επιφάνεια!
ΥΠΟΔΕΙΞΗ
► Καθαρίζετε πάντα όλα τα εξαρτήματα
απευθείας μετά τη χρήση. Έτσι, υπολείμματα
τροφίμων απομακρύνονται ευκολότερα.
► Όταν επεξεργάζεστε τρόφιμα που χρωματί-
ζουν πολύ, όπως για παράδειγμα καρότα,
ενδέχεται να χρωματιστούν και τα πλαστικά
τμήματα της συσκευής. Αυτό δεν αποτελεί
πρόβλημα της συσκευής και δεν επηρεάζει
τη λειτουργία.
Μπορείτε να αφαιρέσετε τους αποχρωματισμούς τρίβοντας με λίγο λάδι μαγειρικής.
■ Καθαρίστε το μοτέρ και το καλώδιο με ένα
ελαφρώς βρεγμένο πανί καθαρισμού. Στεγνώστε
τα όλα καλά προτού τα χρησιμοποιήσετε εκ νέου.
■ Καθαρίζετε το μπολ , το καπάκι , το
εξάρτημα ώθησης , τη λεπίδα κοπής , τον
αντάπτορα δίσκων ,το δίσκο κοπής 3 και
το δίσκο τριψίματος - σε ζεστό νερό πλύσης.
Στη συνέχεια ξεπλένετε όλα τα εξαρτήματα με
καθαρό νερό έτσι ώστε να μην απομείνουν
υπολείμματα απορρυπαντικού.
Στεγνώστε όλα τα εξαρτήματα πριν χρησιμοποιήσετε εκ νέου τη συσκευή.
Αποθήκευση
■ Φυλάτε την καθαρή συσκευή σε ένα στεγνό
χώρο χωρίς σκόνη.
Page 52

49
KM 250 A1
GR
Απόρριψη
Σε καμία περίπτωση μην
απορρίπτετε τη συσκευή στα
οικιακά απορρίμματα. Αυτό
το προϊόν υπόκειται στην
Ευρωπαϊκή Οδηγία
2012/19/ΕU.
Απορρίπτετε τη συσκευή μέσω μιας εγκεκριμένης
επιχείρησης απόρριψης ή μέσω της κοινοτικής
επιχείρησης απόρριψης. Τηρείτε τους ισχύοντες
κανονισμούς. Σε περίπτωση αμφιβολιών επικοινωνείτε με την αρμόδια επιχείρηση απόρριψης.
Η συσκευασία αποτελείται από φιλικά
προς το περιβάλλον υλικά, τα οποία
μπορείτε να απορρίψετε μέσω των τοπικών σημείων ανακύκλωσης.
Σέρβις
Σέρβις Ελλάδα
Tel.: 801 5000 019 (0,03 EUR/Min.)
E-Mail: kompernass@lidl.gr
IAN 270290
Τηλεφωνικό κέντρο (Hotline): Δευτέρα έως Παρασκευή, 8:00 – 20:00 (CET)
Εισαγωγέας
KOMPERNASS HANDELS GMBH
BURGSTRASSE 21
44867 BOCHUM
GERMANY
www.kompernass.com
Page 53

50
KM 250 A1
GR
Διόρθωση σφαλμάτων
ΠΡΟΒΛΗΜΑ ΠΙΘΑΝΗ ΑΙΤΙΑ ΠΙΘΑΝΕΣ ΛΥΣΕΙΣ
Η συσκευή δε λειτουργεί.
Η συσκευή δεν είναι συνδεδεμένη σε πρίζα.
Συνδέστε τη συσκευή σε μια
πρίζα.
Η συσκευή έχει υποστεί ζημιά.
Απευθυνθείτε στο τμήμα
σέρβις.
Η συσκευή δεν εκκινείται.
Το μπολ δεν έχει κουμπώσει
σωστά στο μοτέρ .
Ελέγξτε την έδραση του
μπολ και διορθώστε
την εφόσον απαιτείται.
Το καπάκι δεν έχει τοποθετηθεί και ασφαλιστεί/έχει
τοποθετηθεί λάθος.
Κλείστε το καπάκι
σωστά.
Εάν οι βλάβες δεν διορθώνονται με τις ανωτέρω αναφερόμενες προτάσεις αντιμετώπισης σφαλμάτων,
ή εάν εξακριβώσετε άλλα είδη βλαβών, απευθυνθείτε στο τμήμα σέρβις μας.
Page 54

51
KM 250 A1
DE
AT
CH
Inhaltsverzeichnis
Einleitung .............................................................52
Bestimmungsgemäßer Gebrauch .........................................52
Lieferumfang ..........................................................52
Gerätebeschreibung. . . . . . . . . . . . . . . . . . . . . . . . . . . . . . . . . . . . . . . . . . . . . . . . . . . . 52
Technische Daten ......................................................52
Sicherheitshinweise ....................................................53
Vor dem ersten Gebrauch ...............................................55
Gerät zusammenbauen .................................................55
Schneidmesser .....................................................................55
Durchlaufschnitzler. . . . . . . . . . . . . . . . . . . . . . . . . . . . . . . . . . . . . . . . . . . . . . . . . . . . . . . . . . . . . . . . . . 56
Bedienen .............................................................56
Arbeiten mit dem Schneidmesser .......................................................56
Arbeiten mit dem Durchlaufschnitzler ...................................................57
Reinigung und Pflege ...................................................58
Lagerung .............................................................58
Entsorgung ...........................................................59
Service ...............................................................59
Importeur ............................................................59
Fehlerbehebung .......................................................60
Page 55

52
KM 250 A1
DE
AT
CH
Einleitung
Herzlichen Glückwunsch zum Kauf Ihres neuen
Gerätes.
Sie haben sich damit für ein hochwertiges Produkt
entschieden. Die Bedienungsanleitung ist Bestandteil dieses Produkts. Sie enthält wichtige Hinweise
für Sicherheit, Gebrauch und Entsorgung. Machen
Sie sich vor der Benutzung des Produkts mit allen
Bedien- und Sicherheitshinweisen vertraut. Benutzen Sie das Produkt nur wie beschrieben und für
die angegebenen Einsatzbereiche. Händigen Sie
alle Unterlagen bei Weitergabe des Produkts an
Dritte mit aus.
Bestimmungsgemäßer
Gebrauch
Dieses Gerät dient ausschließlich dem Zerkleinern
von Lebensmitteln. Dieses Gerät ist ausschließlich
für die Benutzung in privaten Haushalten bestimmt.
Benutzen Sie es nicht gewerblich.
Lieferumfang
Küchenmaschine
(Deckel, Stopfer, Schüssel, Motorblock)
Schneidmesser
Scheibenadapter
Raspelscheibe
Schneidscheibe
Bedienungsanleitung
Kontrollieren Sie direkt nach dem Auspacken den
Lieferumfang auf Vollständigkeit.
Gerätebeschreibung
Stopfer
Einfüllschacht
Deckel
Schneidmesser
Schüssel
Antriebswelle
Motorblock
Taste ON
Taste OFF/PULSE
Scheibenadapter
- Raspelscheibe
3 Schneidscheibe
Technische Daten
Nennspannung: 220 - 240 V ~, 50 Hz
Nennleistung: 250 W
Schutzklasse: II
KB-Zeit: 1 Minute
KB-Zeit
Die KB-Zeit (Kurzbetriebszeit) gibt an, wie lange
man ein Gerät betreiben kann, ohne dass der
Motor überhitzt und Schaden nimmt. Nach der
angegebenen KB-Zeit muss das Gerät solange
ausgeschaltet werden, bis sich der Motor auf
Raumtemperatur abgekühlt hat.
Page 56

53
KM 250 A1
DE
AT
CH
Sicherheitshinweise
GEFAHR - ELEKTRISCHER SCHLAG!
► Schließen Sie das Gerät nur an eine vorschriftsmäßig installierte und
geerdete Netzsteckdose an. Die Netzspannung muss mit den Angaben auf
dem Typenschild des Gerätes übereinstimmen.
► Achten Sie darauf, dass im Betrieb das Netzkabel nicht nass oder feucht
wird. Führen Sie es so, dass es nicht eingeklemmt oder beschädigt werden
kann.
► Halten Sie das Netzkabel von heißen Oberflächen fern.
► Führen Sie keine Reparaturarbeiten am Gerät durch. Jegliche Reparaturen
müssen durch den Kundendienst oder von qualifiziertem Fachpersonal
durchgeführt werden.
► Ziehen Sie den Netzstecker aus der Netzsteckdose, wenn das Gerät ge-
reinigt wird oder im Fehlerfall. Ausschalten alleine genügt nicht, weil noch
immer Netzspannung im Gerät anliegt, solange der Netzstecker in der
Netzsteckdose steckt.
► Lassen Sie beschädigte Netzstecker oder Netzkabel sofort von autorisier-
tem Fachpersonal oder dem Kundenservice austauschen, um Gefährdungen zu vermeiden.
► Das Gerät und seine Anschlussleitung sind von Kindern fernzuhalten.
Sie dürfen das Gerät keinesfalls in Wasser oder andere Flüssigkeiten
tauchen.
Page 57

54
KM 250 A1
DE
AT
CH
WARNUNG! VERLETZUNGSGEFAHR!
► Trennen Sie das Gerät grundsätzlich vom Stromnetz, wenn Sie Zubehörteile
abnehmen oder anbringen. Ein unbeabsichtigtes Einschalten des Gerätes
wird so vermieden.
► Das Gerät ist bei nicht vorhandener Aufsicht und vor dem Zusammenbau,
dem Auseinandernehmen oder Reinigen stets vom Netz zu trennen.
► Verwenden Sie nur die Original-Zubehörteile zu diesem Gerät. Zubehörtei-
le anderer Hersteller sind dafür möglicherweise nicht geeignet und führen
zu Gefährdungen!
► Dieses Gerät darf nicht von Kindern benutzt werden.
► Dieses Gerät kann von Personen mit reduzierten physischen, sensorischen
oder mentalen Fähigkeiten oder Mangel an Erfahrung und/oder Wissen
benutzt werden, wenn sie beaufsichtigt oder bezüglich des sicheren Gebrauchs des Gerätes unterwiesen wurden und die daraus resultierenden
Gefahren verstanden haben.
► Kinder dürfen nicht mit dem Gerät spielen.
► Vorsicht: das Schneidmesser, die Schneidscheibe und die Raspelscheibe
sind sehr scharf! Gehen Sie daher vorsichtig bei der Reinigung vor.
► Vorsicht: das Schneidmesser, die Schneidscheibe und die Raspelscheibe
sind sehr scharf! Gehen Sie daher vorsichtig beim Leeren der Schüssel vor.
► Geben Sie, während das Gerät läuft, ausschließlich die zu verarbeitenden
Zutaten in die Schüssel.
► Missbrauchen Sie das Gerät nicht für andere Zwecke, als in dieser Anlei-
tung beschrieben. Ansosnten besteht Verletzungsgefahr!
Page 58

55
KM 250 A1
DE
AT
CH
Vor dem ersten Gebrauch
■ Entfernen Sie alle Verpackungsmaterialien vom
Gerät.
■ Reinigen Sie das Gerät, wie im Kapitel „Reini-
gung und Pflege“ beschrieben.
■ Vergewissern Sie sich, dass alle Teile vollständig
trocken sind, bevor Sie das Gerät verwenden.
Gerät zusammenbauen
HINWEIS
► Das Gerät lässt sich nur starten, wenn die
Schüssel und der Deckel korrekt aufgesetzt sind.
1) Stellen Sie den Motorblock auf eine ebene
Fläche, so dass die Saugnapffüße sich fest
saugen und das Gerät sicher steht.
2) Setzen Sie die Schüssel so auf den Motorblock , dass der Pfeil
auf der Schüssel
auf das geöffnete Schloss am Motorblock
weist. Drehen Sie die Schüssel so weit,
dass der Pfeil auf das geschlossene Schloss
weist und die Schüssel einrastet.
Wenn Sie mit dem Schneidmesser arbeiten
wollen, fahren Sie mit dem Zusammenbau wie im
Kapitel „Schneidmesser“ beschrieben fort.
Wenn Sie mit dem Durchlaufschnitzler arbeiten
wollen, fahren Sie mit dem Zusammenbau wie im
Kapitel „Durchlaufschnitzler“ beschrieben fort.
Schneidmesser
1) Setzen Sie das Schneidmesser auf die
Antriebswelle . Die abgeflachte Seite der
Antriebswelle muss dabei korrekt in die
Aufnahme des Schneidmessers greifen.
Ansonsten kann das Schneidmesser nicht
aufgesetzt werden.
2) Setzen Sie den Deckel auf die Schüssel ,
so dass der Pfeil am Deckel auf den
Pfeil
und das geöffnete Schloss
an der
Schüssel zeigt.
3) Drehen Sie den Deckel soweit, dass der
Pfeil
am Deckel auf den Pfeil und
das geschlossene Schloss
auf der Schüssel
zeigt.
4) Setzen Sie den Stopfer in den Einfüllschacht
.
5) Stecken Sie den Netzstecker in eine Netzsteckdose.
WARNUNG! VERLETZUNGSGEFAHR!
► Stecken Sie niemals Hände oder Fremdgegenstände in den Einfüllschacht,
um Verletzungen und Beschädigungen des Gerätes zu vermeiden.
► Wechseln Sie das Zubehör nur bei Stillstand des Antriebs und bei gezoge-
nem Netzstecker! Das Gerät läuft nach dem Ausschalten noch kurze Zeit
nach!
► Lassen Sie das Gerät niemals unbeaufsichtigt.
► Vor dem Auswechseln von Zubehör oder Zusatzteilen, die im Betrieb
bewegt werden, muss das Gerät ausgeschaltet und vom Netz getrennt
werden.
Page 59

56
KM 250 A1
DE
AT
CH
Durchlaufschnitzler
1) Wählen Sie die gewünschte Scheibe:
– die Schneidscheibe 3
– oder die Raspelscheibe -.
2) Falls noch eine andere Scheibe installiert ist:
Drücken Sie die lange Metalllasche der Scheibe nach innen und schieben Sie die Scheibe
gleichzeitig mit Hilfe der Metalllasche aus dem
Scheibenadapter heraus. Sie können nun
die Arretierung am anderen Ende der Scheibe
aus dem Scheibenadapter heben.
3) Stecken Sie die neue Scheibe mit der Arretierung zuerst in den Scheibenadapter .
4) Drücken Sie dann vorsichtig die Seite mit der
großen Metalllasche in den Scheibenadapter
. Drücken Sie dabei am besten mit den
beiden Daumen an den äußeren Kanten der
Scheibe, bis die Scheibe komplett im Scheibenadapter sitzt und einrastet.
5) Setzen Sie den Scheibenadapter mit eingesetzter Scheibe auf die Antriebswelle . Die
abgeflachte Seite der Antriebswelle muss
dabei korrekt in die Aufnahme des Scheibenadapters greifen. Ansonsten kann der
Scheibenadapter nicht aufgesetzt werden.
6) Setzen Sie den Deckel auf die Schüssel ,
so dass der Pfeil
am Deckel auf den
Pfeil
und das geöffnete Schloss
an der
Schüssel zeigt.
7) Drehen Sie den Deckel soweit, dass der
Pfeil
am Deckel auf den Pfeil und
das geschlossene Schloss
auf der Schüssel
zeigt.
8) Setzen Sie den Stopfer in den Einfüllschacht
.
9) Stecken Sie den Netzstecker in eine Netzsteckdose.
Bedienen
Arbeiten mit dem Schneidmesser
Mit dem Schneidmesser können Sie Lebens-
mittel, wie zum Beispiel Zwiebeln oder Fleisch,
zerhacken.
HINWEIS
► Versuchen Sie nicht, Flüssigkeiten mit dem
Schneidmesser zu mischen. Diese laufen
über oder spritzen heraus.
1) Setzen Sie das Schneidmesser , wie im Kapi-
tel „Gerät zusammenbauen“ beschrieben, ein.
2) Schneiden Sie die Zutaten in ca. 2 - 3 cm
große Stücke.
3) Füllen Sie die Zutaten ein. Überschreiten Sie
dabei nicht die in der nachfolgenden Tabelle
angegebenen Mengen:
ZUTAT
MAX.
MENGE
GESCHWINDIG-
KEIT
Brot max. 80 g ON
Käse max. 150 g ON
Fleisch max. 300 g ON
Kräuter max. 30 g ON
Knoblauch 80 - 200 g PULSE
Zwiebeln max. 300 g PULSE
Eiswürfel max. 140 g PULSE
HINWEIS
► Die in der Tabelle angegebenen Geschwin-
digkeiten sind Richtwerte. Diese können je
nach Beschaffenheit und Menge der Zutaten
variieren!
4) Schließen Sie den Deckel .
Page 60

57
KM 250 A1
DE
AT
CH
5) Starten Sie, durch Drücken der Taste ON ,
das Zerkleinern. Drücken Sie die Taste OFF/
PULSE einmal, wenn alle Zutaten zerkleinert
sind und Sie das Gerät stoppen wollen.
Wenn Sie die Zutaten mit Hilfe der PULSE-Funktion verarbeiten wollen, Drücken Sie die Taste
OFF/PULSE mehrere Male hintereinander,
bis alle Zutaten zerkleinert sind.
Falls Zutaten sich an der Wand der Schüssel
absetzen oder am Messer kleben:
– Schalten Sie das Gerät aus.
– Nehmen Sie den Deckel ab.
– Entfernen Sie die Zutaten vom Schneidmes-
ser sowie von der Innenwand mit Hilfe
einses Teigschabers oder eines Löffels.
– Schließen Sie den Deckel .
– Starten Sie das Gerät erneut.
HINWEIS
► Verarbeiten Sie nur knochenfreies Fleisch!
► Lassen Sie das Gerät nicht zu lange laufen,
wenn Sie (Hart-)Käse zerkleinern. Dieser
wird sonst zu heiß, beginnt zu schmelzen und
verklumpt dadurch.
► Wenn Sie während des Schneidvorganges
noch Zutaten nachfüllen wollen, geben Sie
diese durch den Einfüllschacht hinzu!
Wenn Sie den Deckel öffnen, stoppt das
Gerät!
Achten Sie jedoch darauf, dass Sie die in der
Tabelle angegebenen Höchstmengen beim
Nachfüllen von Zutaten nicht überschreiten!
Arbeiten mit dem Durchlaufschnitzler
Mit den Scheiben -/3 des Durchlaufschnitzlers
können Sie raspeln oder schneiden.
1) Wählen Sie die gewünschte Scheibe aus und
setzen Sie alles zusammen, wie im Kapitel
„Gerät zusammenbauen“ beschrieben.
2) Entfernen Sie den Stopfer aus dem Einfüllschacht .
3) Schneiden Sie die Lebensmittel in so große
Stücke, dass diese ohne Probleme in den
Einfüllschacht passen.
4) Starten Sie, durch Drücken der Taste ON ,
das Raspeln/Schneiden.
5) Füllen Sie dann nach und nach die Lebensmittel ein. Schieben Sie dabei die Lebensmittel
mit Hilfe des Stopfers nach, ohne Druck
auszuüben.
Überschreiten Sie dabei nicht die in der nachfolgenden Tabelle angegebenen Mengen:
ZUTAT SCHNEIDSCHEIBE
Äpfel/Möhren max. 350 g
Schlangengurke max. 1,5 Stück
Kartoffeln max. 350 g
Zwiebeln max. 200 g
ZUTAT RASPELSCHEIBE
Äpfel/Möhren max. 350 g
Parmesan max. 150 g
Kartoffeln max. 350 g
Hartkäse (z.B.
alter Gouda)
max. 200 g
Page 61

58
KM 250 A1
DE
AT
CH
HINWEIS
► Verarbeiten Sie größere Mengen nicht auf
einmal, sondern in mehreren Portionen hintereinander. Leeren Sie zwichendurch immer die
Schüssel .
► Lassen Sie das Gerät nicht zu lange laufen,
wenn Sie (Hart-)Käse oder Schokolade
zerkleinern. Die Zutaten werden sonst zu
heiß, beginnen zu schmelzen und verklumpen
dadurch.
Reinigung und Pflege
WARNUNG
STROMSCHLAGGEFAHR!
► Bevor Sie das Gerät reinigen, ziehen Sie im-
mer den Netzstecker aus der Netzsteckdose.
Auf keinen Fall darf der Motorblock in
Flüssigkeiten getaucht werden! Hierdurch
kann Lebensgefahr durch elektrischen
Schlag entstehen und das Gerät beschädigt werden.
► Öffnen Sie niemals das Gehäuse des Gerä-
tes. Andernfalls besteht Lebensgefahr durch
elektrischen Schlag.
WARNUNG
VERLETZUNGSGEFAHR!
► Seien Sie vorsichtig beim Reinigen des
Schneidmessers , der Schneidscheibe 3
und der Raspelscheibe -. Diese Teile sind
sehr scharf!
ACHTUNG - SACHSCHADEN!
► Verwenden Sie keine Lösungs- oder Scheu-
ermittel. Diese greifen die Oberflächen des
Gerätes an!
► Benutzen Sie keine aggressiven, chemischen
oder scheuernden Reinigungsmittel! Diese
können die Oberfläche irreparabel angreifen!
HINWEIS
► Reinigen Sie alle Teile immer direkt nach dem
Gebrauch. So lassen sich Lebensmittelreste
leichter entfernen.
► Wenn Sie stark färbende Lebensmittel
verarbeiten, wie zum Beispiel Möhren, kann
es sein, dass sich die Plastikteile des Gerätes
verfärben. Dies stellt keinen Mangel am Gerät dar und beeinträchtigt nicht die Funktion.
Sie können Verfärbungen mit ein wenig
Speiseöl abreiben.
■ Reinigen Sie den Motorblock und das Netz-
kabel mit einem leicht angefeuchteten Spültuch.
Trocknen Sie alles gut ab, bevor Sie es erneut
verwenden.
■ Reinigen Sie die Schüssel , den Deckel ,
den Stopfer , das Schneidmesser , den
Scheibenadapter , die Schneidscheibe 3
und die Raspelscheibe - in warmem Spülwasser. Spülen Sie danach alle Teile mit klarem
Wasser ab, so dass keine Spülmittelreste an den
Teilen haften.
Trocknen Sie alle Teile gut ab, bevor Sie das
Gerät erneut verwenden.
Lagerung
■ Bewahren Sie das gereinigte Gerät an einem
staubfreien und trockenen Ort auf.
Page 62

59
KM 250 A1
DE
AT
CH
Entsorgung
Werfen Sie das Gerät kei-
nesfalls in den normalen
Hausmüll. Dieses Produkt
unterliegt der europäischen
Richtlinie 2012/19/EU.
Entsorgen Sie das Gerät über einen zugelassenen
Entsorgungsbetrieb oder über Ihre kommunale
Entsorgungseinrichtung. Beachten Sie die aktuell
geltenden Vorschriften. Setzen Sie sich im Zweifelsfall mit Ihrer Entsorgungseinrichtung in Verbindung.
Die Verpackung besteht aus umwelt-
freundlichen Materialien, die Sie über
die örtlichen Recyclingstellen entsorgen
können.
Service
Service Deutschland
Tel.: 0800 5435 111 (Kostenfrei aus dem
dt. Festnetz/Mobilfunknetz)
E-Mail: kompernass@lidl.de
IAN 270290
Service Österreich
Tel.: 0820 201 222 (0,15 EUR/Min.)
E-Mail: kompernass@lidl.at
IAN 270290
Service Schweiz
Tel.: 0842 665566 (0,08 CHF/Min.,
Mobilfunk max. 0,40 CHF/Min.)
E-Mail: kompernass@lidl.ch
IAN 270290
Erreichbarkeit Hotline: Montag bis Freitag von
8:00 Uhr – 20:00 Uhr (MEZ)
Importeur
KOMPERNASS HANDELS GMBH
BURGSTRASSE 21
44867 BOCHUM
GERMANY
www.kompernass.com
Page 63

60
KM 250 A1
DE
AT
CH
Fehlerbehebung
PROBLEM MÖGLICHE URSACHE
MÖGLICHE
LÖSUNGEN
Das Gerät funktioniert
nicht.
Das Gerät ist nicht mit einer
Netzsteckdose verbunden.
Schließen Sie das Gerät an
eine Netzsteckdose an.
Das Gerät ist beschädigt.
Wenden Sie sich an den
Service.
Das Gerät startet nicht.
Die Schüssel ist nicht
korrekt in den Motorblock
eingerastet.
Kontrollieren Sie den
Stand der Schüssel und
korrigieren Sie ihn gegebenenfalls.
Der Deckel ist nicht/
nicht korrekt aufgesetzt und
verriegelt.
Schließen Sie den Deckel
korrekt.
Sollten sich die Störungen nicht mit oben stehenden Fehlerbehebungen beheben lassen, oder wenn
Sie andere Arten von Störungen feststellen, wenden Sie sich bitte an unseren Service.
Page 64

IAN 270290
KOMPERNASS HANDELS GMBH
BURGSTRASSE 21
44867 BOCHUM
DEUTSCHLAND / GERMANY
www.kompernass.com
Last Information Update · Stanje informacija · Versiunea informaţiilor
Актуалност на информацията · Έκδοση των πληροφοριών
Stand der Informationen: 06 / 2015 · Ident.-No.: KM250A1-062015-1
 Loading...