

Kompact KC572MF User Manual

KOMPACT
KC572MF
USER
MANUAL
www.kompactuk.co.uk
CUSTOMER CARE
0844 800 1128
BUILT-UNDER ELECTRIC DOUBLE OVEN

2
IMPORTANT INFORMATION
KC572MF
CONTENTS
Important Information
Before you start 2
Safety information 3
Environment information 4
Technical and legal information 4
Voltage and frequency of power supply 4
Your oven
Control panel 5
Electronic programmer 5
Your Oven 5
First use/Setting up your oven
Setting the clock 6
Cleaning the oven 6
Product functions 7
Daily operation of your oven
3-key timer procedure cooking mode 8
Cooling ventilation 9
Oven modes 9
Care and Maintenance
How to keep your oven in good condition 12
How to remove the oven doors 13
Replacing the oven lamp 14
Installation 15
Trouble shooting 18
Guarantee 19
Customer service contact details 20
BEFORE YOU START
To avoid the risks that are always present when you use
an electrical appliance it is important that this appliance is
installed correctly and that you read the safety instructions
carefully to avoid misuse and hazards. Please keep this
instruction booklet for future reference and pass it on to
any future owners. After unpacking the appliance please
check that it is not damaged. If in doubt, do not use the
appliance but contact Kompact on 0844 800 1128.
Decide on the appropriate location for your product.
Check the package and make sure you have all of the
parts below.
Your product contains glass please take care when tting
or handling to prevent personal injury or damage to the
product.
The specications plate displays all the necessary
identication information for ordering replacement parts.
If you sell the appliance, give it away, or leave it behind
when you move house, make sure you also pass on this
manual so that the new owner can become familiar with
the appliance and its safety warnings.
KC572MF Oven x1
Grill pan handle x1
Grill pan/drip tray x1
Oven shelf x2
Support rails #2 x2
Ø4mm x 25mm screws x12 Ø4mm x 10mm screws x8 Plastic washers x4

3
IMPORTANT INFORMATION
KC572MF
SAFETY INFORMATION
These instructions are for your safety. Please read through
them thoroughly prior to installation and retain them for
future reference.
All installation work must be carried out by a competent
person or qualied electrician.
This appliance must be installed correctly by a suitably
qualied person, strictly following the manufacturer’s
instructions.
This appliance complies with all current European safety
legislation, however, the Manufacturer must emphasise
that this compliance does not prevent the surfaces of the
appliance from heating up during use and remaining hot
during its operation.
Do not allow the electric cables to touch the hot parts of
the appliance.
Make sure that the power cord is not caught under or in
the appliance and avoid damage to the power cable.
Do not remove the plug in the presence of ammable gas.
Do not install the appliance outdoors in a damp place or in
an area which may be prone to water leaks such as under
or near a sink unit. In the event of a water leak allow the
machine to dry naturally.
Please dispose of the packing material carefully.
Do not use ammable sprays in close vicinity to the
appliance.
This appliance can be used by children aged from 8 years
and above and persons with reduced physical, sensory or
mental capabilities or lack of experience and knowledge if
they have been given supervision or instruction concerning
use of the appliance in a safe way and understand the
hazards involved. Children shall not play with the appliance.
Cleaning and user maintenance shall not be made by
children without supervision.
Regularly check the power plug and power cord for
damage. If the supply cord is damaged, it must be replaced
by the manufacturer, its service agent or similarly qualied
persons in order to avoid a danger or injury.
A steam cleaner is not to be used.
The appliance is not intended to be operated by means of
external timer or separated remote-control system.
The appliance is for domestic use only.
The Manufacturer declines all liability for personal or
material damage as a result of misuse or incorrect
installation of this appliance.
Danger of burns! During use the appliance becomes hot.
Care should be taken to avoid touching heating elements
inside the oven.
Warning! Accessible parts may become hot during use.
Children should be kept away.
Warning! If the door or door seals are damaged, the
oven must not be operated until it has been repaired by a
competent person.
Do not lean on the door or place any objects on the door
of the appliance. This can damage the door hinges.
The oven should be cleaned regularly and any food
deposits removed.
Warning! Ensure that the appliance is switched off before
replacing the lamp to avoid the possibility of electric shock.
The oven must be installed in accordance with installation
instructions and all dimensions must be followed.
Before connecting the appliance to the power supply,
check that the power supply voltage and current rating
corresponds with the power supply details shown on the
appliance rating label.
Never use a damaged appliance! Disconnect the appliance
from the electrical outlet and contact your retailer if it is
damaged.
Danger of electric shock! Do not attempt to repair the
appliance yourself. In case of malfunction, repairs are to
be conducted by qualied personnel only.
To avoid damaging the cord, do not squeeze, bend or
chafe it on sharp edges. Keep it away from hot surfaces
and open ames as well.
Lay out the cord in such a way that no unintentional
pulling or tripping over it is possible.
Keep the appliance and its cord out of reach of children.
Do not operate the appliance with wet hands or while
standing on a wet oor. Do not touch the power plug with
wet hands.
Connect the power plug to an easily reachable electrical
outlet so that in case of an emergency the appliance can
be unplugged immediately. Pull the power plug out of the
electrical outlet to completely switch off the appliance. Use
the power plug as the disconnection device.
Disconnect the power plug from the electrical outlet when
not in use and before cleaning.
Always turn the appliance off before disconnecting the
power plug.
This appliance is classied as protection class I and must
be connected to a protective ground (Earth).
Means for full disconnection must be incorporated in
the xed wiring in accordance with the wiring rules. To
4
IMPORTANT INFORMATION
KC572MF
achieve this install an appropriate circuit breaker (CB) and
residual current device (RCD). It should be installed in an
easily reachable place so that in case of emergency the
appliance can be disconnected from power immediately.
The xed wiring must be protected against heat surfaces.
Do not hang an objects to the handle of the oven door.
Do not cover the bottom of the oven with aluminium foil or
other objects. Caution: Risk of re!
Do not allow aluminium foil, plastic, paper or fabric contact
with heating elements.
Never leave the appliance unattended during use,
especially when cooking with ammable substances (e.g.
hot oil, fat, etc.).
Do not store or never use harsh chemicals, sprays,
ammable or non-food in or near the oven. Oven is
designed specically for heating or cooking food. The use
of corrosive chemicals in heating or cleaning will damage
the unit and may cause injury.
Should any food inside the oven catch re, keep the
door closed. Switch the oven off and disconnect the power
supply.
Always exercise caution when opening the door. Move
to side, open the door slowly to vent the hot air and/or
steam. Make sure your face is away from the opening and
make sure there are no children or pets near the oven.
Only use utensils that are suitable for use in this type
of oven.
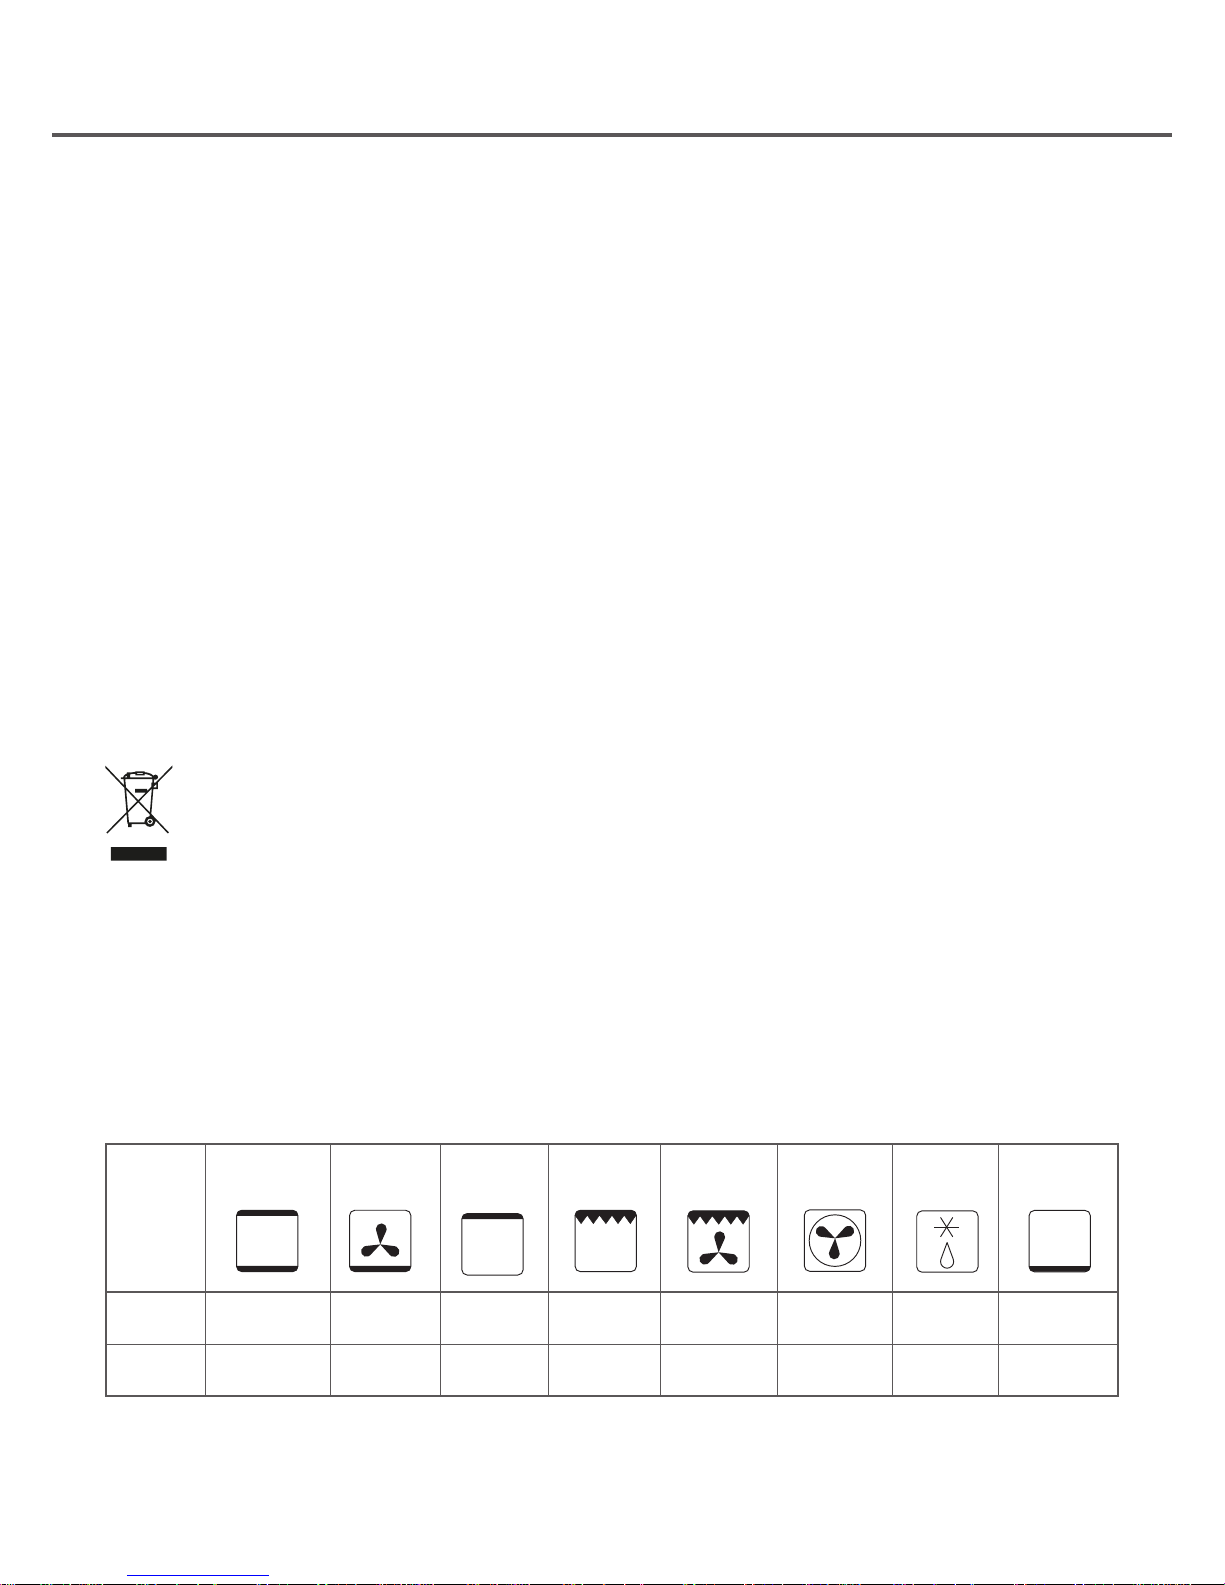
ENVIRONMENTAL INFORMATION
Waste electrical products should not be disposed of
with household waste. Please recycle where facilities
exist. Check with your Local Authority or retailer for
recycling advice.
This symbol on the product or its packaging
indicates that this product cannot be treated
as normal household waste. This product must
be handed over to an electric and electronic
equipment collection point for recycling.
On ensuring that this product is disposed of correctly, you
will help to avoid possible negative consequences for the
environment and public health, which could occur if this
product is not handled correctly. To receive more detailed
information about recycling this product, contact your
local government, domestic waste disposal services or the
outlet where the product was bought.
TECHNICAL AND LEGAL INFORMATION
TECHNICAL INFORMATION:
Power supply: 220-240V~, 50/60Hz
Power consumption: max. 5.1kW
Power supply cable: H05RR-F 3 x 2.5mm²
Bulb Type: E14
Wattage & Voltage: 25W/220-240V
Measurements:
Oven capacity (net): Top 32.5L/Bottom 45L
External dimensions (WxHxD): 594x718x560mm
Net weight: 48kg
LEGAL INFORMATION
The Manufacturer declines all liability for damage caused
to persons and objects due to incorrect or improper
installation of the appliance.
Conventional
oven
Lower heat
with fan
Top heat
element
Full grill Fan assisted
grill
True fan
mode
Defrost
mode
Lower heat
element
Top Oven
32.5L
1950-2300W
2090-
2520W
1000-
1200W
Bottom
Oven 45L
2100-2550W
460-
1120W
940-
1110W
2090-
2520W
2100-
2550W
1660-
2020W
45-55W
VOLTAGE AND FREQUENCY OF POWER SUPPLY:

5
YOUR OVEN
KC572MF
A. Cooking mode selection dial - Top and bottom ovens
B. Cooking temperature selection dial
C. Electronic programmer - allows you to programme the
desired cooking by selecting the cooking time and the
end cooking time. It can also be used as a timer (only
available on certain models)
D. Oven indication light. When lit, it indicates the ovens is
heating up to the temperature set
YOUR CONTROL PANEL
AB B
C
D
D
YOUR ELECTRONIC PROGRAMMER
1. Timer
2. Cooking time
3. End cooking time
4. Clock
5. Display
6. – button
7. Mode change
8. + button
1
2 3
4
5
6
8
7
a. Control panel
b. Shelf guides
c. Oven shelf
d. Grill pan set
YOUR OVEN
a
b
b
d
A
c

6
FIRST USE/SETTING UP YOUR OVEN
KC572MF
We recommend that you read the instructions in this owner’s manual carefully before use for the best performance and to
extend the life of your appliance, as it will provide you with all the instructions you require to ensure its safe installation,
use and maintenance. Always keep this owner’s manual close to hand since you may need to refer to it in the future.
Thank you.
SETTING THE CLOCK
Once it is connected to the electrical supply, the display
will show “ 12:00 ” within the square above “ ” symbol.
Press the “ + ” or “ – ” button to increase or decrease the
number until it reaches the right time; after 5 seconds
it will start automatically or you can press the function
button to make it work.
CLEANING THE OVEN FOR THE FIRST TIME
Before using the oven for the rst time we recommend
that both ovens be switched on and set to there highest
temperature. Keep the oven doors closed and leave the
appliance on for 30 minutes with nothing in it. Ensure
adequate ventilation during this process by opening any
doors and windows in the room. Any odours created
during this operation will be due to the evaporation of
substances used to protect the appliance during storage
prior to installation.
7
FIRST USE/SETTING UP YOUR OVEN
KC572MF
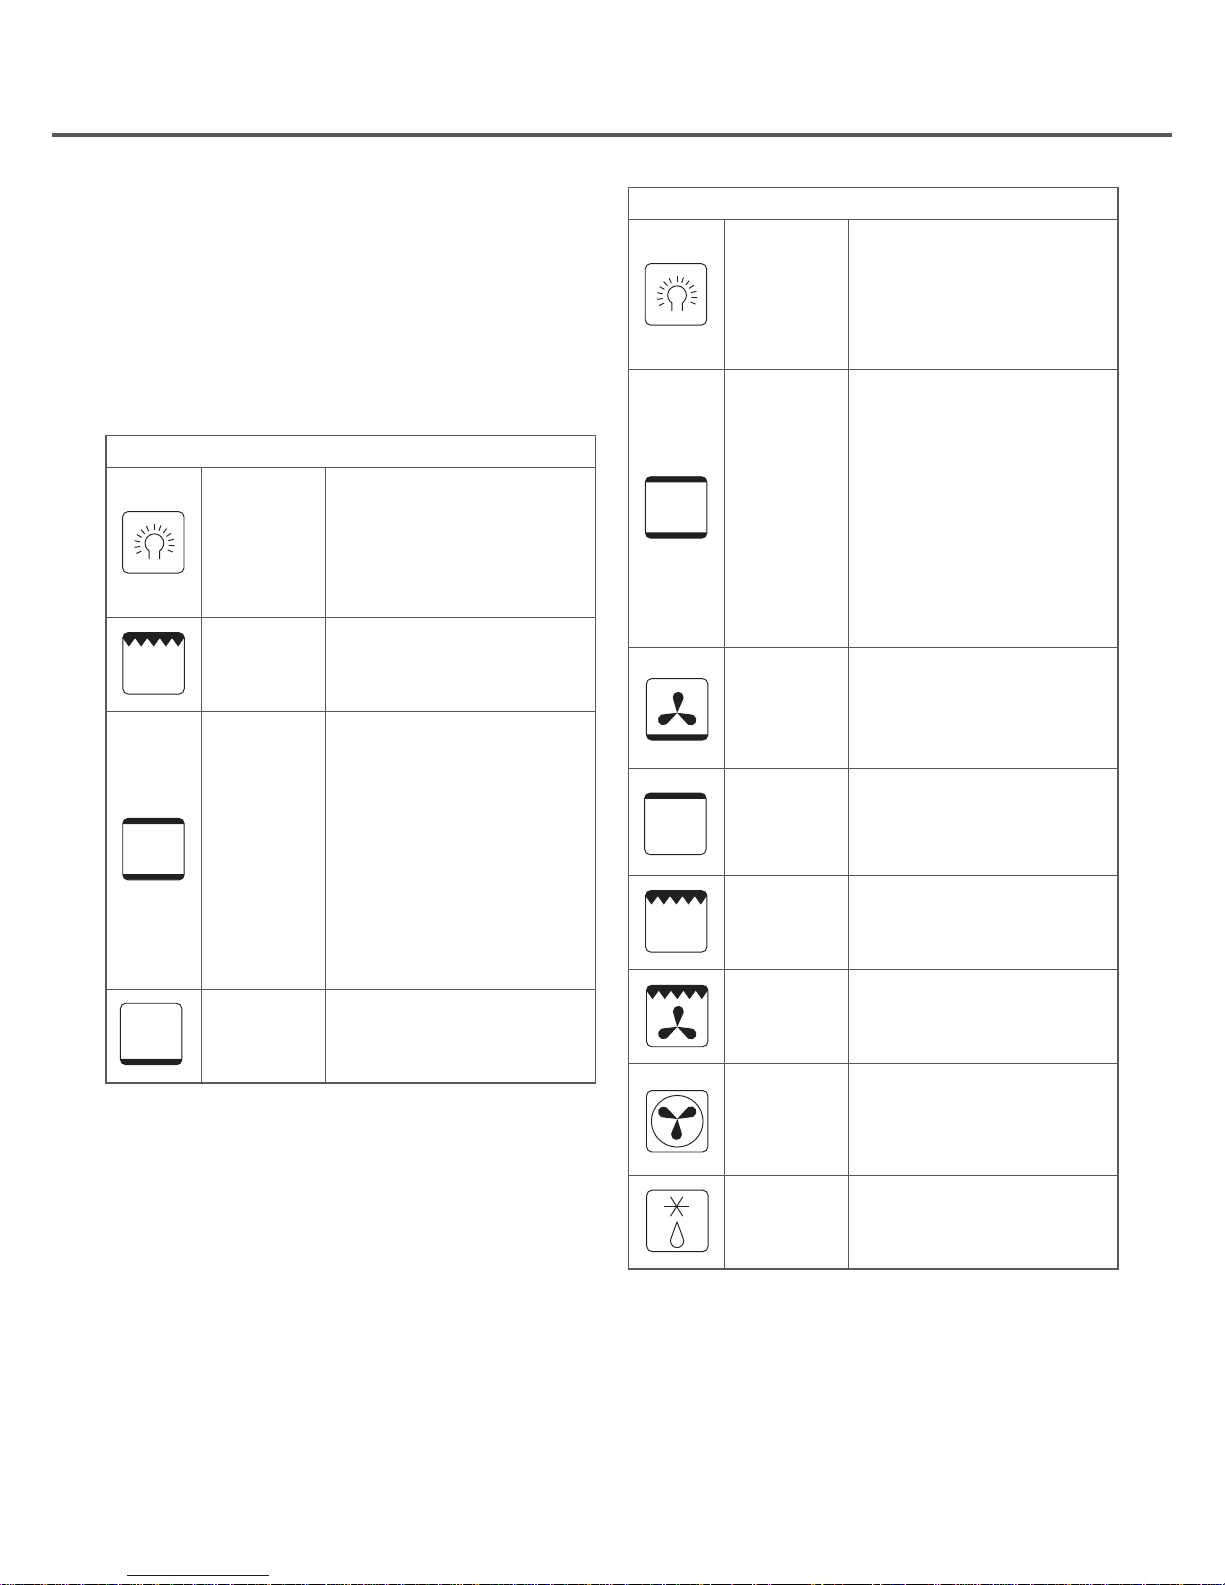
MAIN OVEN
Oven Light
Turning cooking mode
selection dial to this setting,
the oven light will illuminate
in the oven cavity, and will
operate on all selected
functions.
Conventional
Upper and lower heating
element come on. Heat
is distributed by natural
convection and this means
the top half of the oven is
warmer than the bottom half,
food should be placed on a
higher shelf if the food is to
be crisped. It is recommended
that the oven is pre-heated
for 10-15 minutes before
commencing cooking
Lower heat
with fan
mode
Lower element comes on,
heat radiates by force con‑
vection. e oven does not
require pre‑heating
Top heat
Top element comes on, heat
radiates by natural convection
from the top of the oven.
Grill
Grill element comes on and is
dispersed by radiant heat
Fan Assisted
Grill
Grill element comes on and
is dispersed by the rear fan.
Even distribution of heat is
attained in the cavity.
True Fan
The circular rear element and
fan come on together and
the heat is dispersed by force
convection. The oven does not
require pre-heating.
Defrost
Only the fan comes on
and the food is thawed by
ventilation without heat.
Read the information of the food packaging for the
cooking temperatures and times. Once familiar with the
performance of the appliance, the temperatures and times
may be varied to adapt them to your personal tastes.
Check that frozen food is completely thawed before
cooking, unless indicated otherwise.
PRODUCT FUNCTIONS
The oven is controlled by a thermostat between 50°C
and 250°C, depending on the temperature required.
The thermostat light turns on and off to indicate the
temperature control during use.
The required cooking mode is selected using the cooking
mode selection dial (A). The functions that may be
selected are:
TOP OVEN
Oven Light
Turning cooking mode
selection dial to this setting,
the oven light will illuminate
in the oven cavity, and will
operate on all selected
functions.
Grill
Grill element comes on and is
dispersed by radiant heat
Conventional
Upper and lower heating
element come on. Heat
is distributed by natural
convection and this means
the top half of the oven is
warmer than the bottom half,
food should be placed on a
higher shelf if the food is to
be crisped. It is recommended
that the oven is pre-heated
for 10-15 minutes before
commencing cooking
Lower heat
Lower element comes on,
heat radiates by natural
convection from the base of
the oven.
8
DAILY OPERATION OF YOUR OVEN
KC572MF
This multi-function double oven combines the advantages
of traditional convection ovens with those of the more
modern fan assisted models in a single appliance. It is an
extremely versatile appliance that allows you to choose
easily and safely between different cooking modes.
3-KEY TIMER PROCEDURE COOKING MODE
AUTOMATIC SETTING (set the time with full
automatic starting and ending)
Press the mode button repeatedly until the square symbol
above the “ ” ashes, and press + or - button to set
the required cooking time.
Press the mode button repeatedly until the square symbol
above the “ ” ashes, and press + or - button to set
the time to switch off.
Adjusting the cooking temperature selection dial and
cooking mode dial to set temperature and baking method.
After these setting, the symbols above the “ ” and
“ ” will ash. This indicates that oven is now set to
complete the set cooking programme.
EXAMPLE:
If the food is required to bake for 45 minutes, and it is
supposed to stop at 14:00 then …
… press the mode button repeatedly until the square
symbol above “ ” ashes, and set the time of baking to
45 minutes.
Press the mode button repeatedly until the square symbol
above “ ” ashes, and set the end time of baking at
14:00.
After these setting, the proper clock (hour, minute) and
the square symbol will show on the display, it indicates
the setting of baking procedure has been remembered
automatically.
When the clock shows 13:15 (between 14 - 15min), the
oven will switch on automatically.
During the baking time frame, the square symbol will keep
ashing.
When the clock shows 14:00, baking will switch off
automatically. The alarm will ring, the square symbol will
ash. To stop the ringing press any button.
SEMI-AUTOMATIC SETTING (set the time of
automatic starting and ending)
A. Setting the required time frame for baking (10 hours
maximum)
Press the mode button repeatedly until the square symbol
above “ ”, and set the required time using the + and buttons.
Switch on the oven immediately, the square symbol above
“ ” begins to ash.
When the baking is done the square symbol above
“ ” will ash, and the alarm will sound. To cancel the
alarm press any button.
B. Setting the end time of baking (23 hours 59 minutes
maximum)
Press the mode button repeatedly until the square symbol
above “ ” ashes, and set the end time of baking using
the + and - buttons.
Switch on the oven immediately, the square symbol above
“ ” begins to ash.
When it reaches the time set, baking procedure will switch
off automatically. The square symbol above “ ” ashes,
and the alarm will sound. To cancel the alarm press any
button.
The set baking procedure could be seen by pressing the
mode button repeatedly at any time, only if the time frame
of baking is at “ 0” position. By adjusting the end time of
baking to the current time, the set baking procedure can
be cancelled.
TIMER
The longest time frame can be set is 23 hours and
59 minutes. For setting time, press the mode button
repeatedly until the square symbol above “ ” ashes,
and press “+ or - button until the desired time shows on
the display. After setting, the required time (hours and
minutes) the square symbol above the “ ” begins to
ash. In addition, the time countdown begins to work.
When it reaches the set time, the square symbol above
the “ ” ashes, and the alarm sounds. To cancel the
alarm press any button.
NOTE!
Once a function has been selected, setting the time
needs to be started within 5 seconds. If the power fails
unexpectedly all programmes and the set time will be
cancelled.
Once power has been restored “12:00” and the square
symbol above “ ” will show on the display. You will
need to reset the time and any programmes required.
 Loading...