

Kolpin 20033 User Manual
Rev. 1
NO.
Description
QTY.
1
Base Plate
1
2
Swivel Plate
1
3
U-Bracket
1
4
Vertical Plate
1 5 Rubber Coated Ring
1
6
KXP Plunger
2
7
¼” – 20 x 1.00” Truss Head Bolt
3 8 ¼” – 20 Nylon Nut
3
9
1/4” Washer
6
10
½” – 13 Nylon Nut
1
11
½” Flat Washer
2
12
5/16” Lock Pin
1
13
3/8” – 16 x 1.00” Hex Bolts
2
14
3/8” Nylock Nut
3
15
3/8” Flat Washer
5
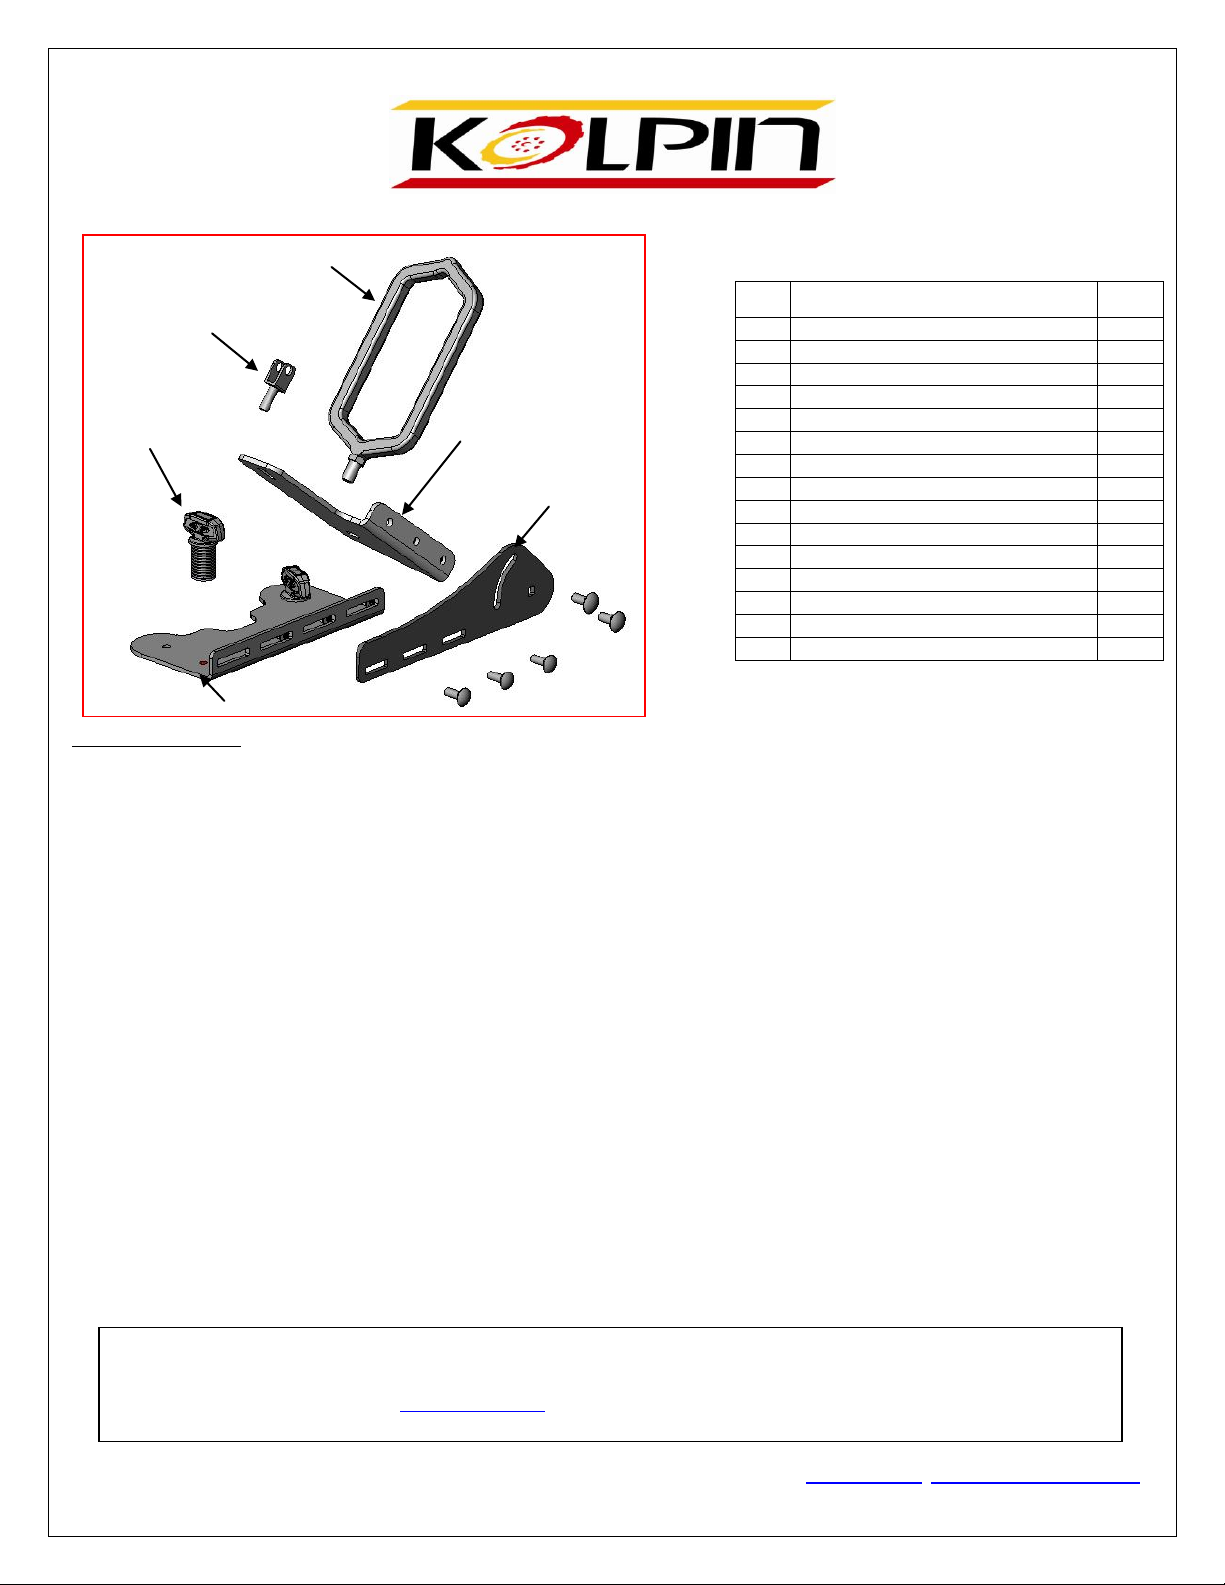
Base Plate
Swivel Plate
Rubber Coated Ring
U-Bracket
KXP Plunger
Vertical Plate
Kolpin now offers many accessory options for Polaris ATV and UTV models. For a complete listing of these KXP
accessories and Kolpin’s KXP Plungers that are compatible with Polaris® Lock & Ride® System, be sure to check
out www.kolpin.com, as new items will be coming soon.
20033 - KXP Gun Boot 4 and Gun Boot 6 Loop Bracket
20033 Assembly:
1. Attach the Vertical Plate to the Base Plate using the (3) ¼" Truss Head bolts, 3 flat washers and (3) – ¼” Nylon nuts.
Tighten loosely until final positioning is completed when the bracket is on the machine.
2. Attach the Swivel Plate to the Vertical Plate using the (2) 3/8” Hex Head Bolts, (4) 3/8” Washers and (2) 3/8” Nylon
Nuts.
3. Attach the Rubber Coated Ring to the Rotating Plate using the 2 – ½” Washers (one on top and one underneath).
Secure with ½” Nylon Nut.
4. Attach the 20033 Universal Gun Boot 4 and Gun Boot 6 Mounting Bracket to the rack of your ATV Using (2) –
KXP PLUNGERS. Simply place the threads of the plunger through the holes on the Base Plate and thread on the
KXP Handle. The picture shown at the top is how the KXP Plungers will be if you are mounting this to the right
side of the ATV. This bracket is designed to work on either the left or right side of the vehicle. NOTE: the bracket
will need to be reassembled to work on the left hand side.
5. Align the bracket on the ATV rack so the both plungers line up with the existing mount locations. Make sure the
bracket is flat on the rack and tighten each KXP plunger securely.
6. Attach the U-Bracket to the Rotating Plate using the 3/8” flat washer and the 3/8” Nylock Nut. Tighten loosely
until Gun Boot is placed in the bracket.
7. Insert “barrel end” of the Gun Boot through the Rubber Coated Ring and insert the Locking Pin through the U-
Bracket through the slot in the Gun Boot. Adjust the bracket for angle and tighten. Tighten the Rubber coated
ring and then adjust the U-bracket in slot, making sure the pin is at the front of the Slot in the Gun Boot.
CAUTION: Always make sure gun is unloaded before placing it in your Gun Boot!
Kolpin Outdoors, Inc., 205 N. Depot Street, Fox Lake, WI Phone #: (877) 9KOLPIN or (920) 928-3118 www.kolpin.com customerservice@kolpin.com
 Loading...