

Page 1
GT MULTIPLE X ING INSTALLATION INSTRUCTIONS
{ Use a suitable lifting means and be careful of sharp edge
s.
SECTION I
STACKING NEW CLASSIC UNITS ABOVE NEW CLASSIC UNITS
GT330/GT340 /GT350 Series Models
NOTE: Please refer to Section II of these instructions for installing a New Classic
GT330/340/350 unit above an Old Classi c GT7/GT300 unit, or Section III for installing an
Old Classic GT7/GT8/GT300/400/500/600 unit above a New Classic GT330/340/350 unit.
CAUTION:
{ RISK OF PERSONAL INJURY, PROPERTY DAMAGE,
EQUIPMENT FAILURE OR FIRE.
{ Refer all maintenance to qualified personnel .
{ Never operate this equipment with covers, panels or other parts
removed or not properly secured.
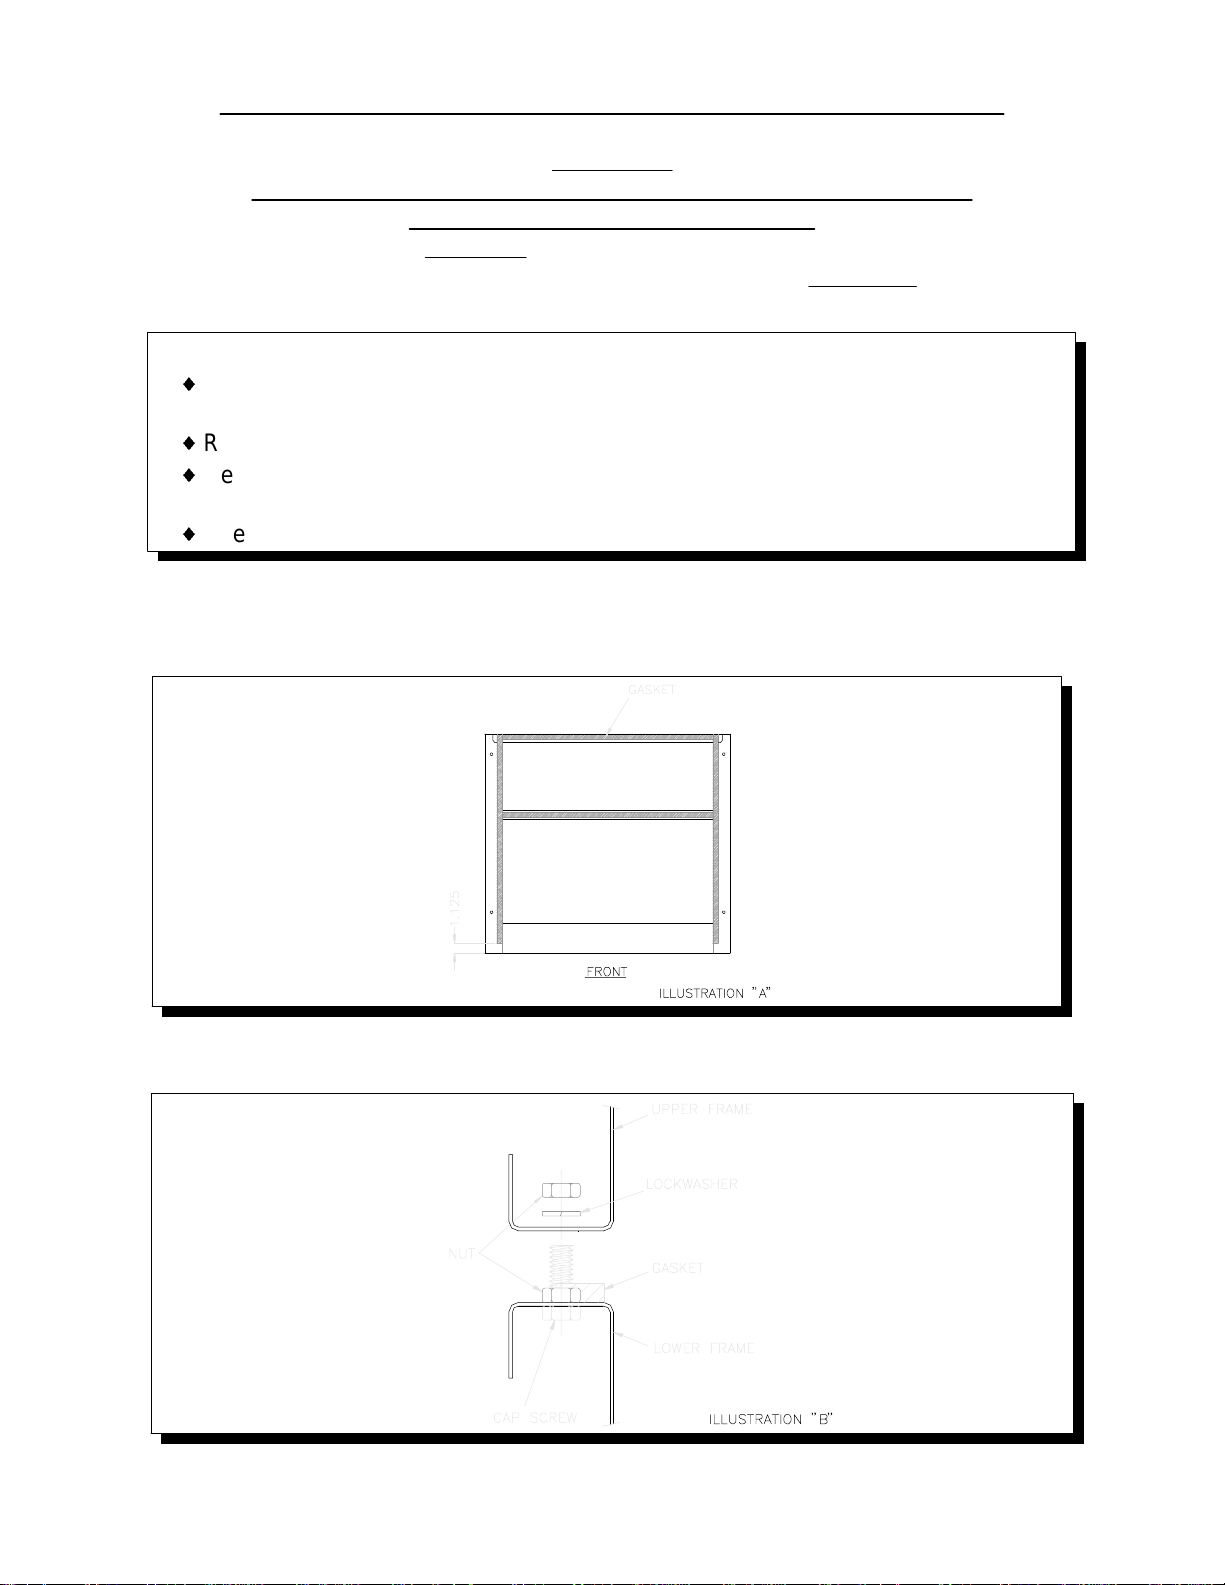
1. Remove cabinet panels from upper and lower ice makers
2. Apply gasket supplied with stacki ng kit to l ower ice maker frame and cut to fit. (See
Illustration "A")
3. Install 4 - 1/4-20 cap screws up through mounting holes of lower ice maker and
fasten with 4 nuts. (See Illustration "B")
508101601 8-25-00
--
Page 2
GT MULTIPLE X ING INSTALLATION INSTRUCTIONS
4. Position upper ice maker over lower unit and lower in place. Install lock washers
and secure with 4 nuts. (See Illustration "B") CAUTION: Support upper unit until all
fasteners are secured.
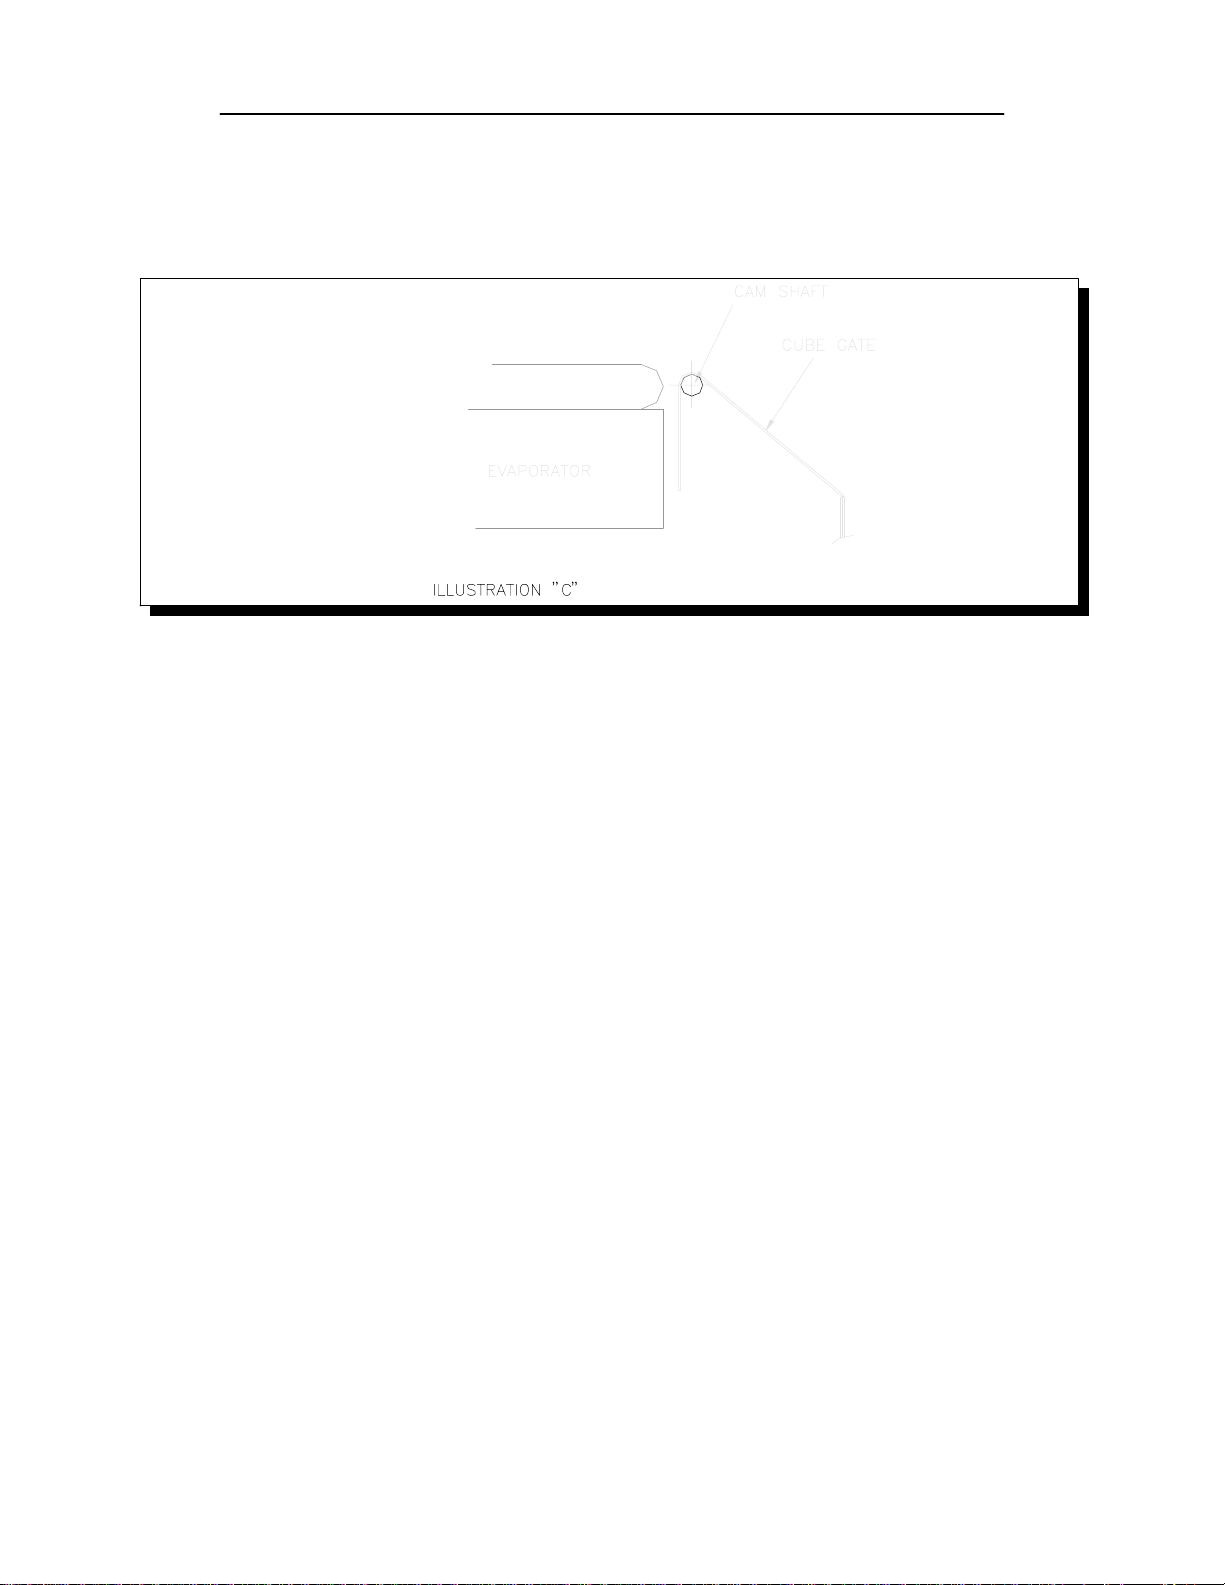
5. Hang Cube Gate on lower ice maker cam shaft. (See Illustration "C")
6. Remove the standard Drain Pan/Chute from the upper ice maker and replace with
the Multiplex model. (Supplied with kit) Connect the drain hose to the drain pan
nipple, and route it down so that it spills on the lower ice maker drain pan. Secure
the hose with a clamp.
7. Route the upper ice maker bin thermostat capillary tube through the grommetted
hole in the right si de wall, down to the lower ice maker chute opening for
positioning. Keep capillary tube toward front of side wall, out of the path of falling
ice. Stacking a third ice maker will require a bin thermostat with a longer capillary
tube. Consult factory for more information.
508101601 8-25-00
-2-
Page 3
GT MULTIPLE X ING INSTALLATION INSTRUCTIONS
SECTION II
STACKING NEW (GT330/GT3 40/GT350) CLASSIC UNITS ABOVE
OLD (GT7/GT300) CLASSIC UNITS
1. Remove cabinet panels from upper and lower ice makers.
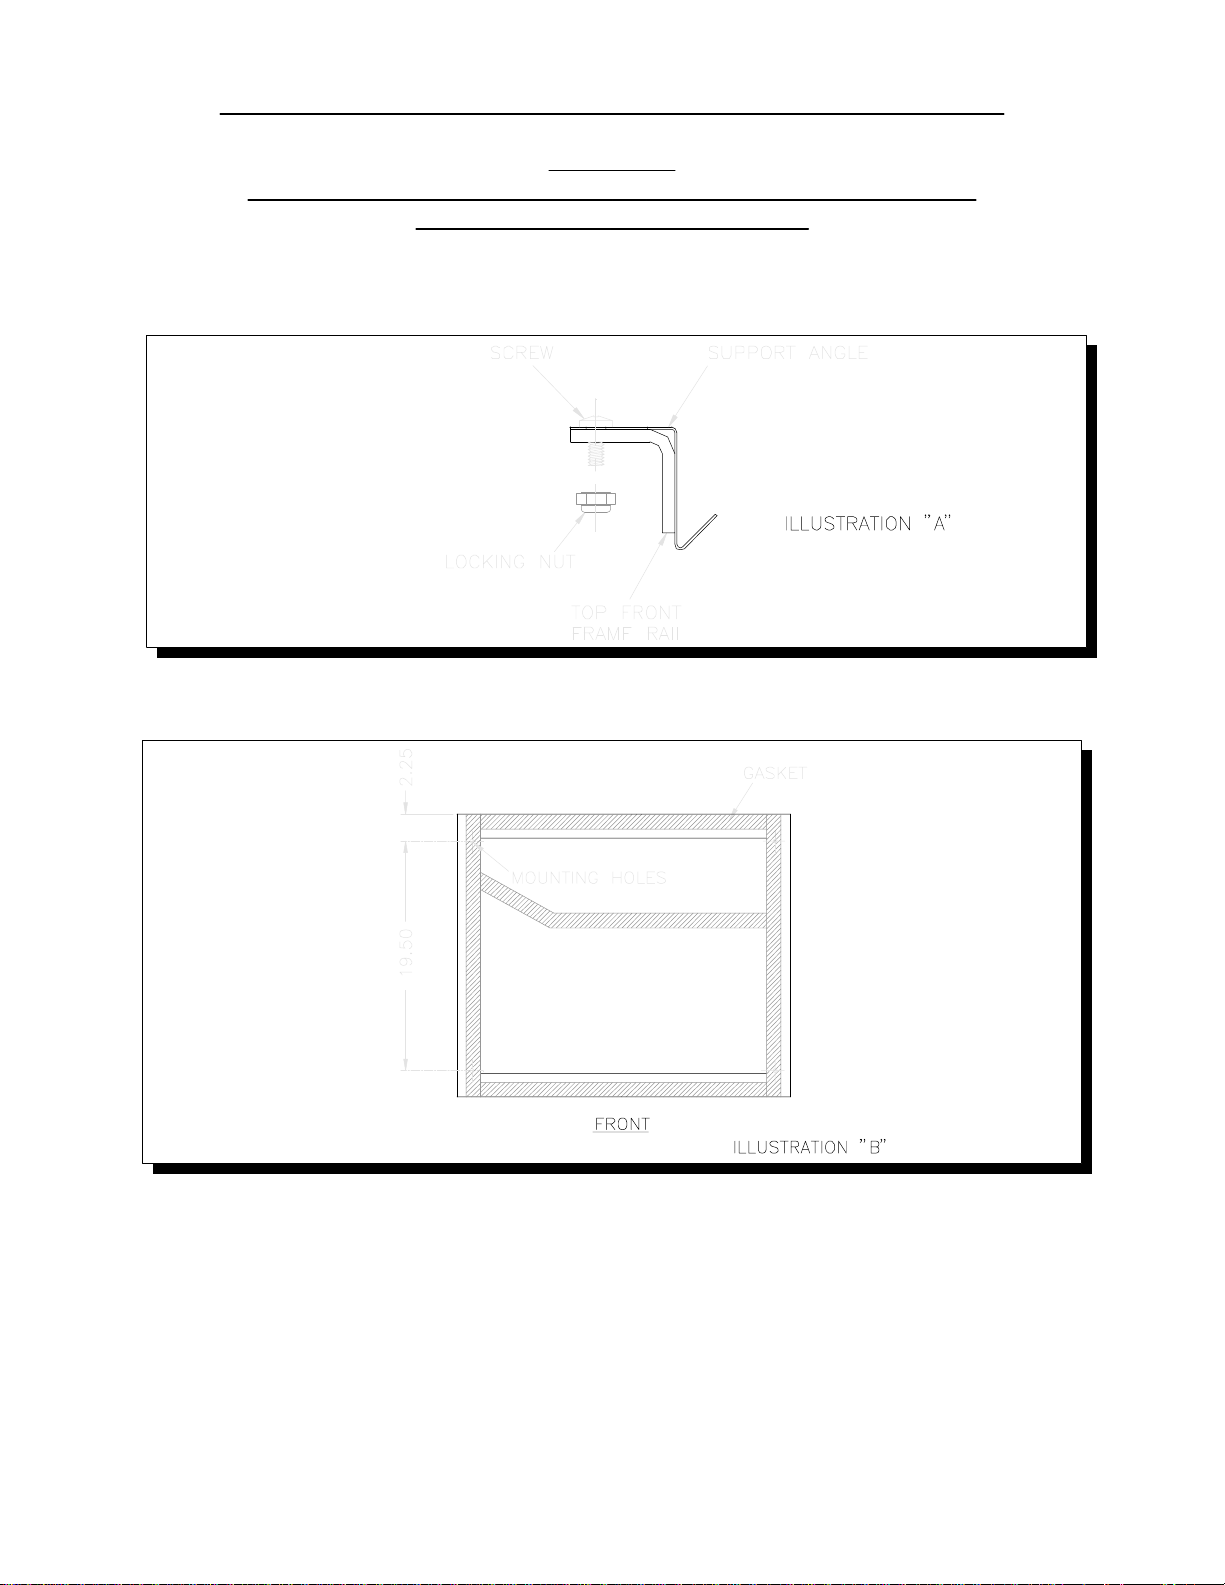
2. Mount inspection panel support angle to top front frame rail of lower (Old Classic)
unit with #8-32 screws and nuts provided. (See Illustration "A")
3. Apply gasket supplied with stacking ki t to lower ice maker frame and cut to fit.
Pierce gasket where it covers the 4-mounting holes. (See Illustration "B")
4. The new classic unit drain pan support angle must be modified for use with old
classic units. Remove the standard Drain Pan/Chute from the new classic unit.
Locate the notched section of the support angle, clip the tabs and break out of unit.
(See Illustration "C").
508101601 8-25-00
-3-
Page 4

GT MULTIPLE X ING INSTALLATION INSTRUCTIONS
5. Install 4 - 1/4-20 cap screws up through mounting holes of lower ice maker and
fasten with 4 nuts.
6. Position upper ice maker over lower unit and lower in place. Install lockwashers
and secure with 4 nuts. (See Illustration "D") CAUTION: Support upper cuber until
all fasteners are secured.
7. Hang Cube Gate on lower ice maker cam shaft. (See Illustration "E")
8. Modify the multiplex chute. (Supplied with kit) Carefully separate the chute from the
drain pan with a utility knife and discard chute section (See Illustration "F")
508101601 8-25-00
-4-
Page 5

GT MULTIPLE X ING INSTALLATION INSTRUCTIONS
9. Install drain pan section in upper ice maker and move to left side. Install chute
(Supplied with kit) and position to the right side of the drain pan, under the drain
pan lip. (See Illustration "G")
10.Route upper ice maker bin thermostat capillary tube through grommetted hole in
the partition wall, down to the lower ice maker chute opening for positioning. Keep
capillary tube toward front of partition wall, out of the path of falling ice. Stacking a
third ice maker will require a bin thermostat with a longer capillary tube. Consult
factory for more information.
Install the side cabinet panels and follow start-up instructions included with ice maker to
complete installation.
508101601 8-25-00
-5-
Page 6

GT MULTIPLE X ING INSTALLATION INSTRUCTIONS
SECTION III
STACKING OLD CLASSIC (GT7/GT8/GT300/GT400/GT 500/GT600) UNITS
ABOVE GT330/GT340/GT350 NEW CLASSIC UNITS
NOTE: Kit No. 102 1207 04 is required for this installation.
1. Remove cabinet panels from upper and lower ice makers.
2. Apply gasket supplied with stacking kit to lower ice maker frame and cut to fit. (See
Illustration "A")
3. Install 4 - 1/4-20 cap screws up through mounting holes of lower ice maker and
fasten with 4 nuts. (See Illustration "B")
4. To allow for proper mounting, it is necessary to enlarge a 3/16" dia. hole in the
bottom of the Old Classic frame to 5/16" dia. (See Illustration "C")
508101601 8-25-00
-6-
Page 7

GT MULTIPLE X ING INSTALLATION INSTRUCTIONS
5. Position upper ice maker over lower unit and lower in place. Install lock washers
and secure with 4 nuts. (See Illustration "B") CAUTION: Support upper unit until all
fasteners are secured.
6. Hang Cube Gate on lower ice maker cam shaft. (See Illustration "D")
7. Remove the standard Drain Pan and Chute from the upper ice maker and replace
with the plastic Drain Pan and the Multiplex Chute supplied with the kit. Connect
the drain hose to the drain pan nipple, and route it down so that it spills on the
lower ice maker drain pan. Secure the hose with a clamp.
8. Route the upper ice maker bin probe wire down to the lower ice maker chute
opening for positioning. Keep capillary tube toward front of side wall, out of the
path of falling ice.
508101601 8-25-00
-7-
Page 8

SECTION III, GT MULTIPLEXING INSTALLATION INSTRUCTIONS
{ Use a suitable lifting means and be careful of sharp edges.
STACKING OLD CLASSIC (GT400, 500, 600) UNITS ABOVE
GT330/GT340/GT350 NEW CLASSIC UNITS
CAUTION:
{ RISK OF PERSONAL INJ URY, PROPERTY DAMAGE, EQUIPMENT FAILURE
OR FIRE.
{ Refer all maintenance to qualified personnel .
{ Never operate this equipment with covers, panels or other parts removed or not
properly secured.
1. Remove cabinet panels from upper and lower ice makers.
2. Apply gasket supplied with stacking ki t to lower ice maker frame and cut to fit.
(See Illustration "A")
3. Install 4 - 1/4-20 cap screws up through mounting holes of lower ice maker and
fasten with 4 nuts. (See Illustration "B")
508101701
Page 9

4. To allow for proper mounting, it is necessary to enlarge a 3/16" dia. hole in the
bottom of the Old Classic frame to 5/16" dia. (See Illustration "C")
5. Position upper ice maker over lower unit and lower in place. Install lock washers
and secure with 4 nuts. (See Illustration "B") CAUTION: Support upper unit until
all fasteners are secured.
6. Hang Cube Gate on lower ice maker cam shaft. (See Illustration "D")
7. Remove the standard Drain Pan and Chute from the upper ice maker and
replace with the plastic Drain Pan and the Multiplex Chute supplied with the kit.
Connect the drain hose to the drain pan nipple, and route it down so that it spills
on the lower ice maker drain pan. Secure the hose with a clamp.
8. Route the upper ice maker bin probe wire down to the lower ice maker chute
opening for positioning. Keep capillary tube toward front of side wall, out of the
path of falling ice.
508101701
 Loading...