

Kohler Margaux Series, 16231-4ND, 16230-4, 16231-4 Installation Instructions Manual
INSTALLATION INSTRUCTIONS
Single Lever / Single Control
16230-4 SINGLE HOLE LAV FAUCET
16231-4/4ND SINGLE HOLE TALL LAV FAUCET
BEFORE YOU BEGIN
All information is based on the latest product information available at the time of publication. Kohler Co.
reserves the right to make changes in product characteristics, packaging, or availability at any time without
notice.
Please leave these instructions for the consumer. They contain important information.
NOTES:
1. Flush the water supply pipes thoroughly to remove debris.
2. Inspect the supply tubing for damage. Replace as necessary.
3. Observe local plumbing codes.
4. If possible, install this faucet before installing the lavatory.
HANDLE OPERATION
Operation for open and close, hot and cold water as shown below.
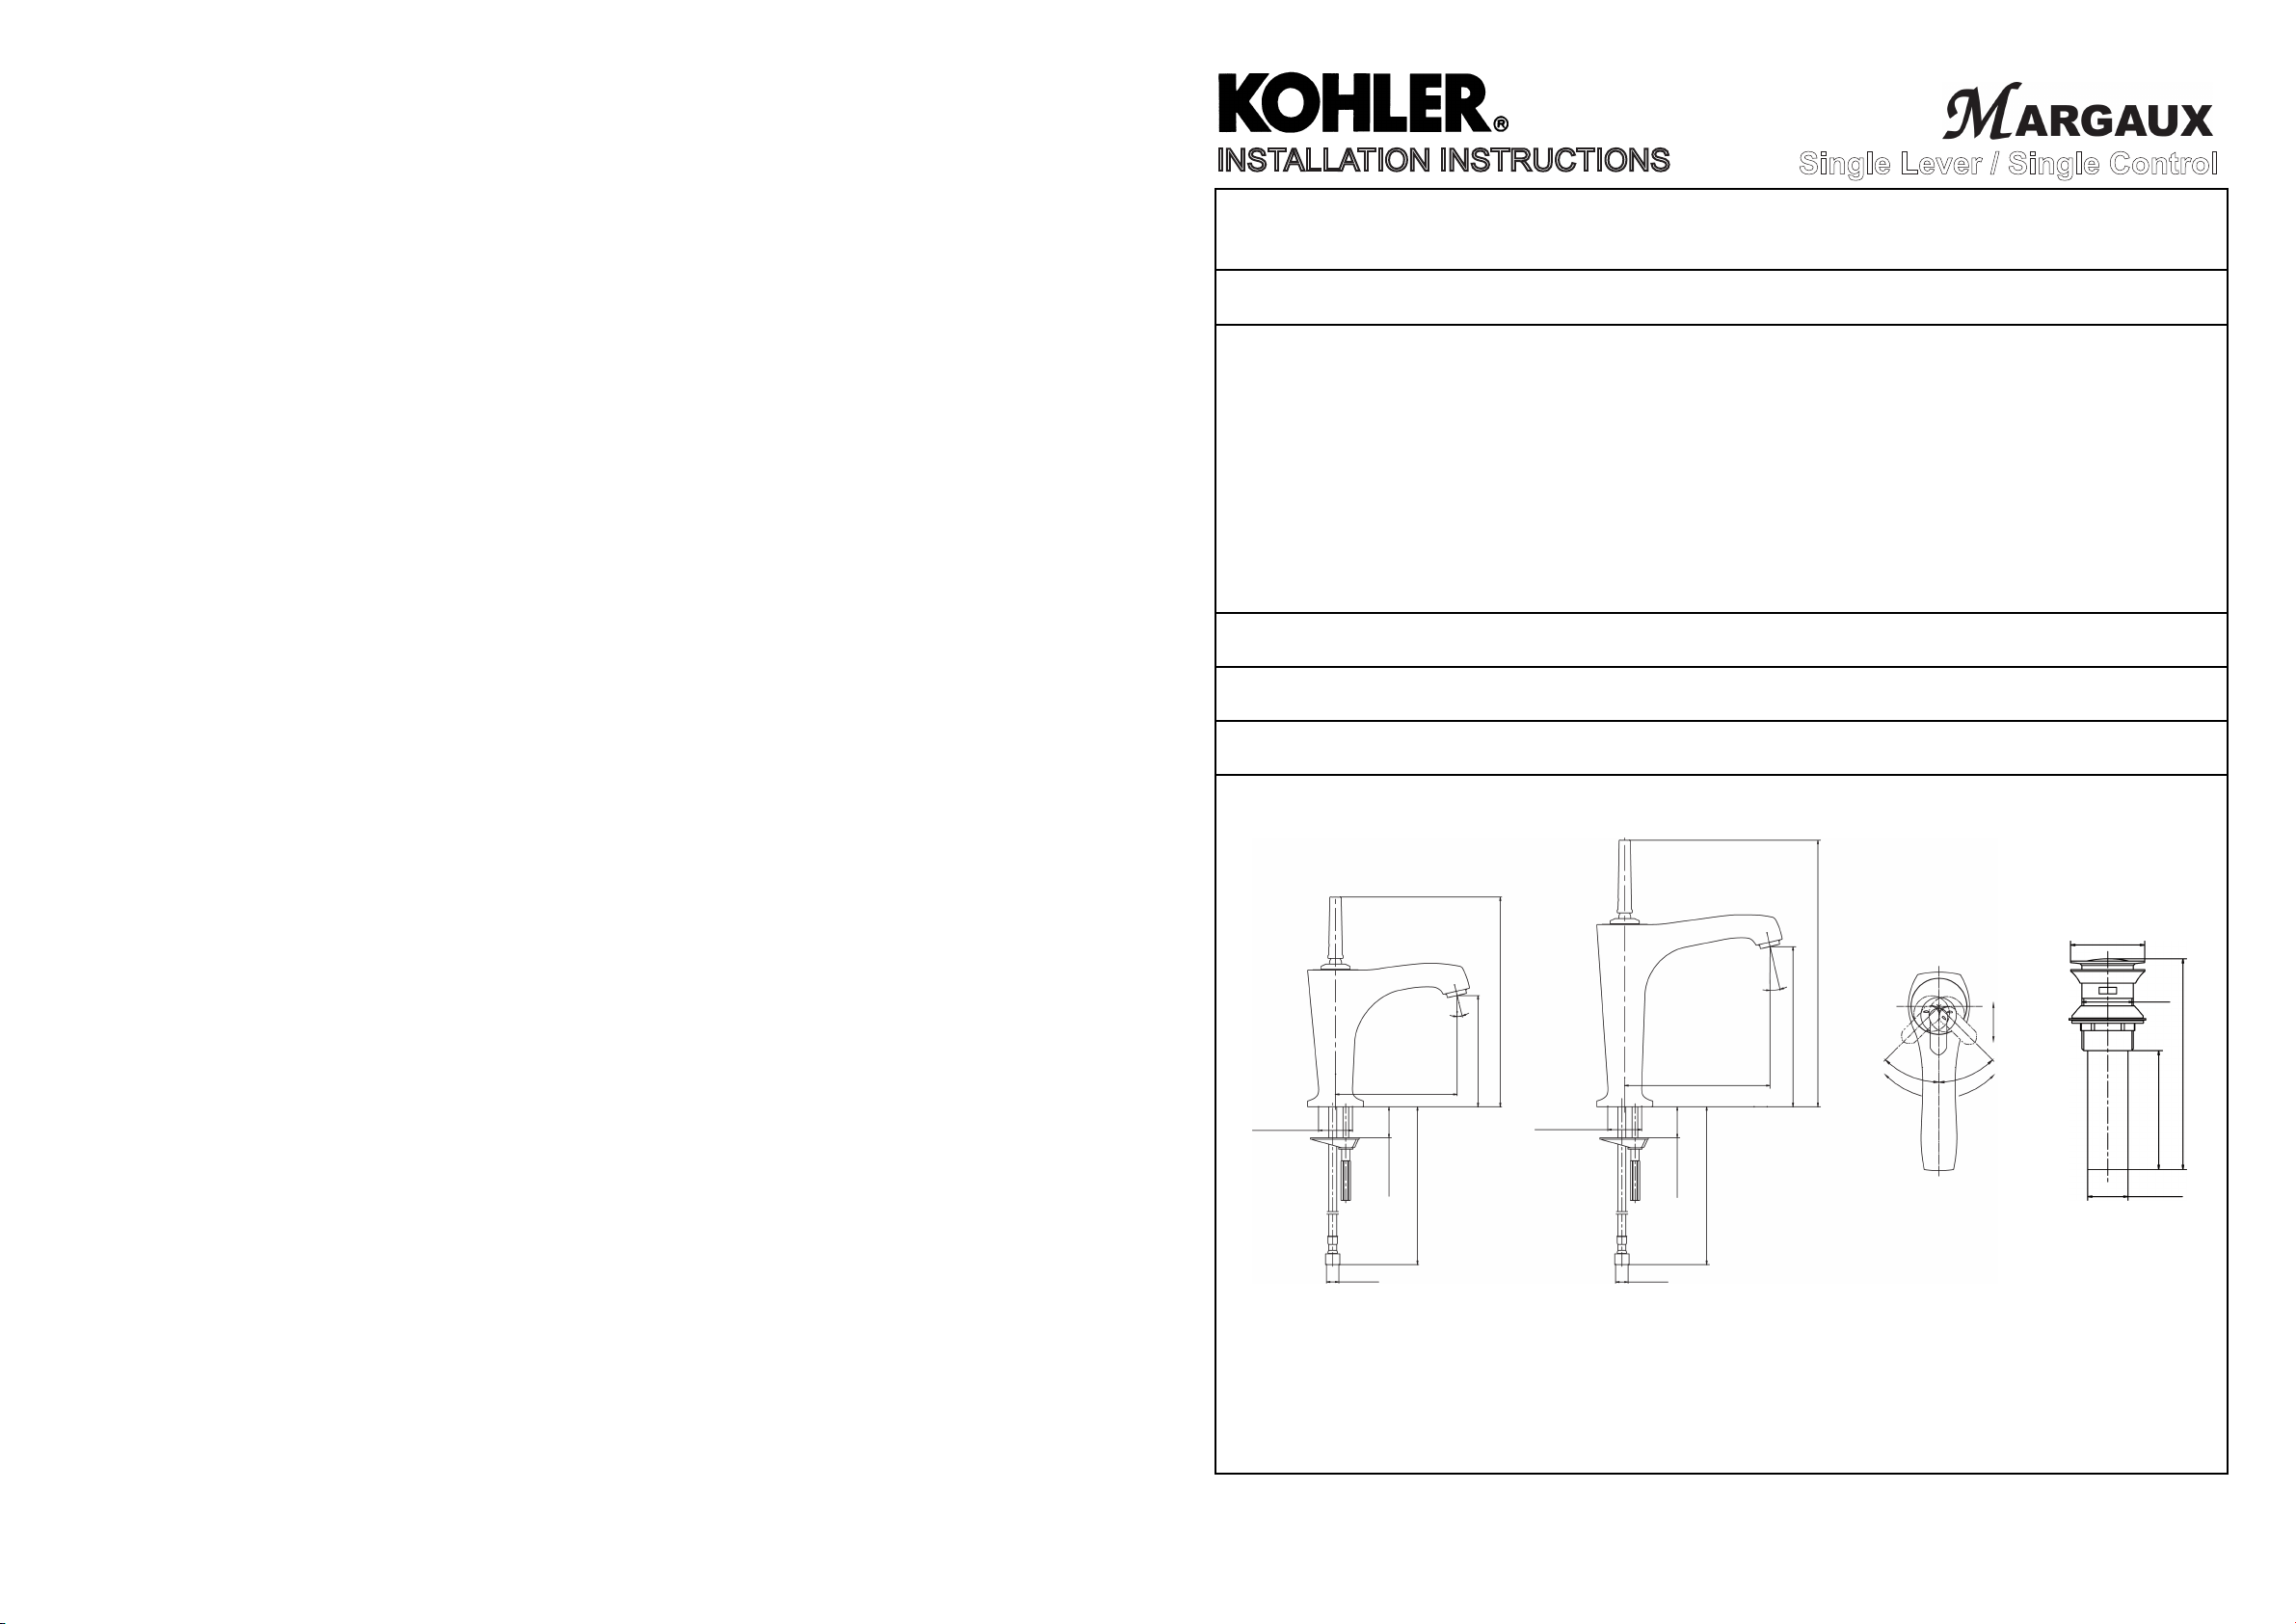
ROUGH-IN DIMENSIONS
13º
135
Ø37~Ø42
50MAX
520
G1/2″
234
124
Ø37~Ø42
G1/2″
162
50MAX
470
13º
178
297
Hot
45º
45º
Close
Open
Cold
Ø56
Ø42
173~185
101
Ø31.75
16231-4/4ND16230-4
1070378-2A-A 1
INSTALLATION
How To Install The Faucet
Screw the stud(1) to the thread hole on the bottom of faucet. Put the
washer(2) into the bottom of body(4) through the flexible hoses(3) and
the stud. Insert hoses(3) and stud into the hole of lavatory. Position
the faucet. From underside of the lavatory, fit the bracket(5) and
washer(6) on the stud. Secure the faucet by tightening nut(7).
Attach the hoses to water supplies.
Note: The hose with red mark is connected to hot water.
How To Install The Drain(Not For 16231-4ND)
Remove the locknut(13), plastic washer(12), rubber gasket(11) and
tailpiece(10) from the drain body. Supply enough tape or sealant to
tailpiece thread. Reinstall the tailpiece. Insert the drain body into the
lavatory. Put the rubber gasket (tapered side up), plastic washer and
locknut back to the drain body in turn. Tighten the locknut.
NOTE: If needed, apply a ring of plumbers putty or other sealants
around the underside of the drain flange(8), instead of using rubber
washer(9).
Do not reposition the drain after the locknut is tightened, or you may
break the putty or sealant seal.
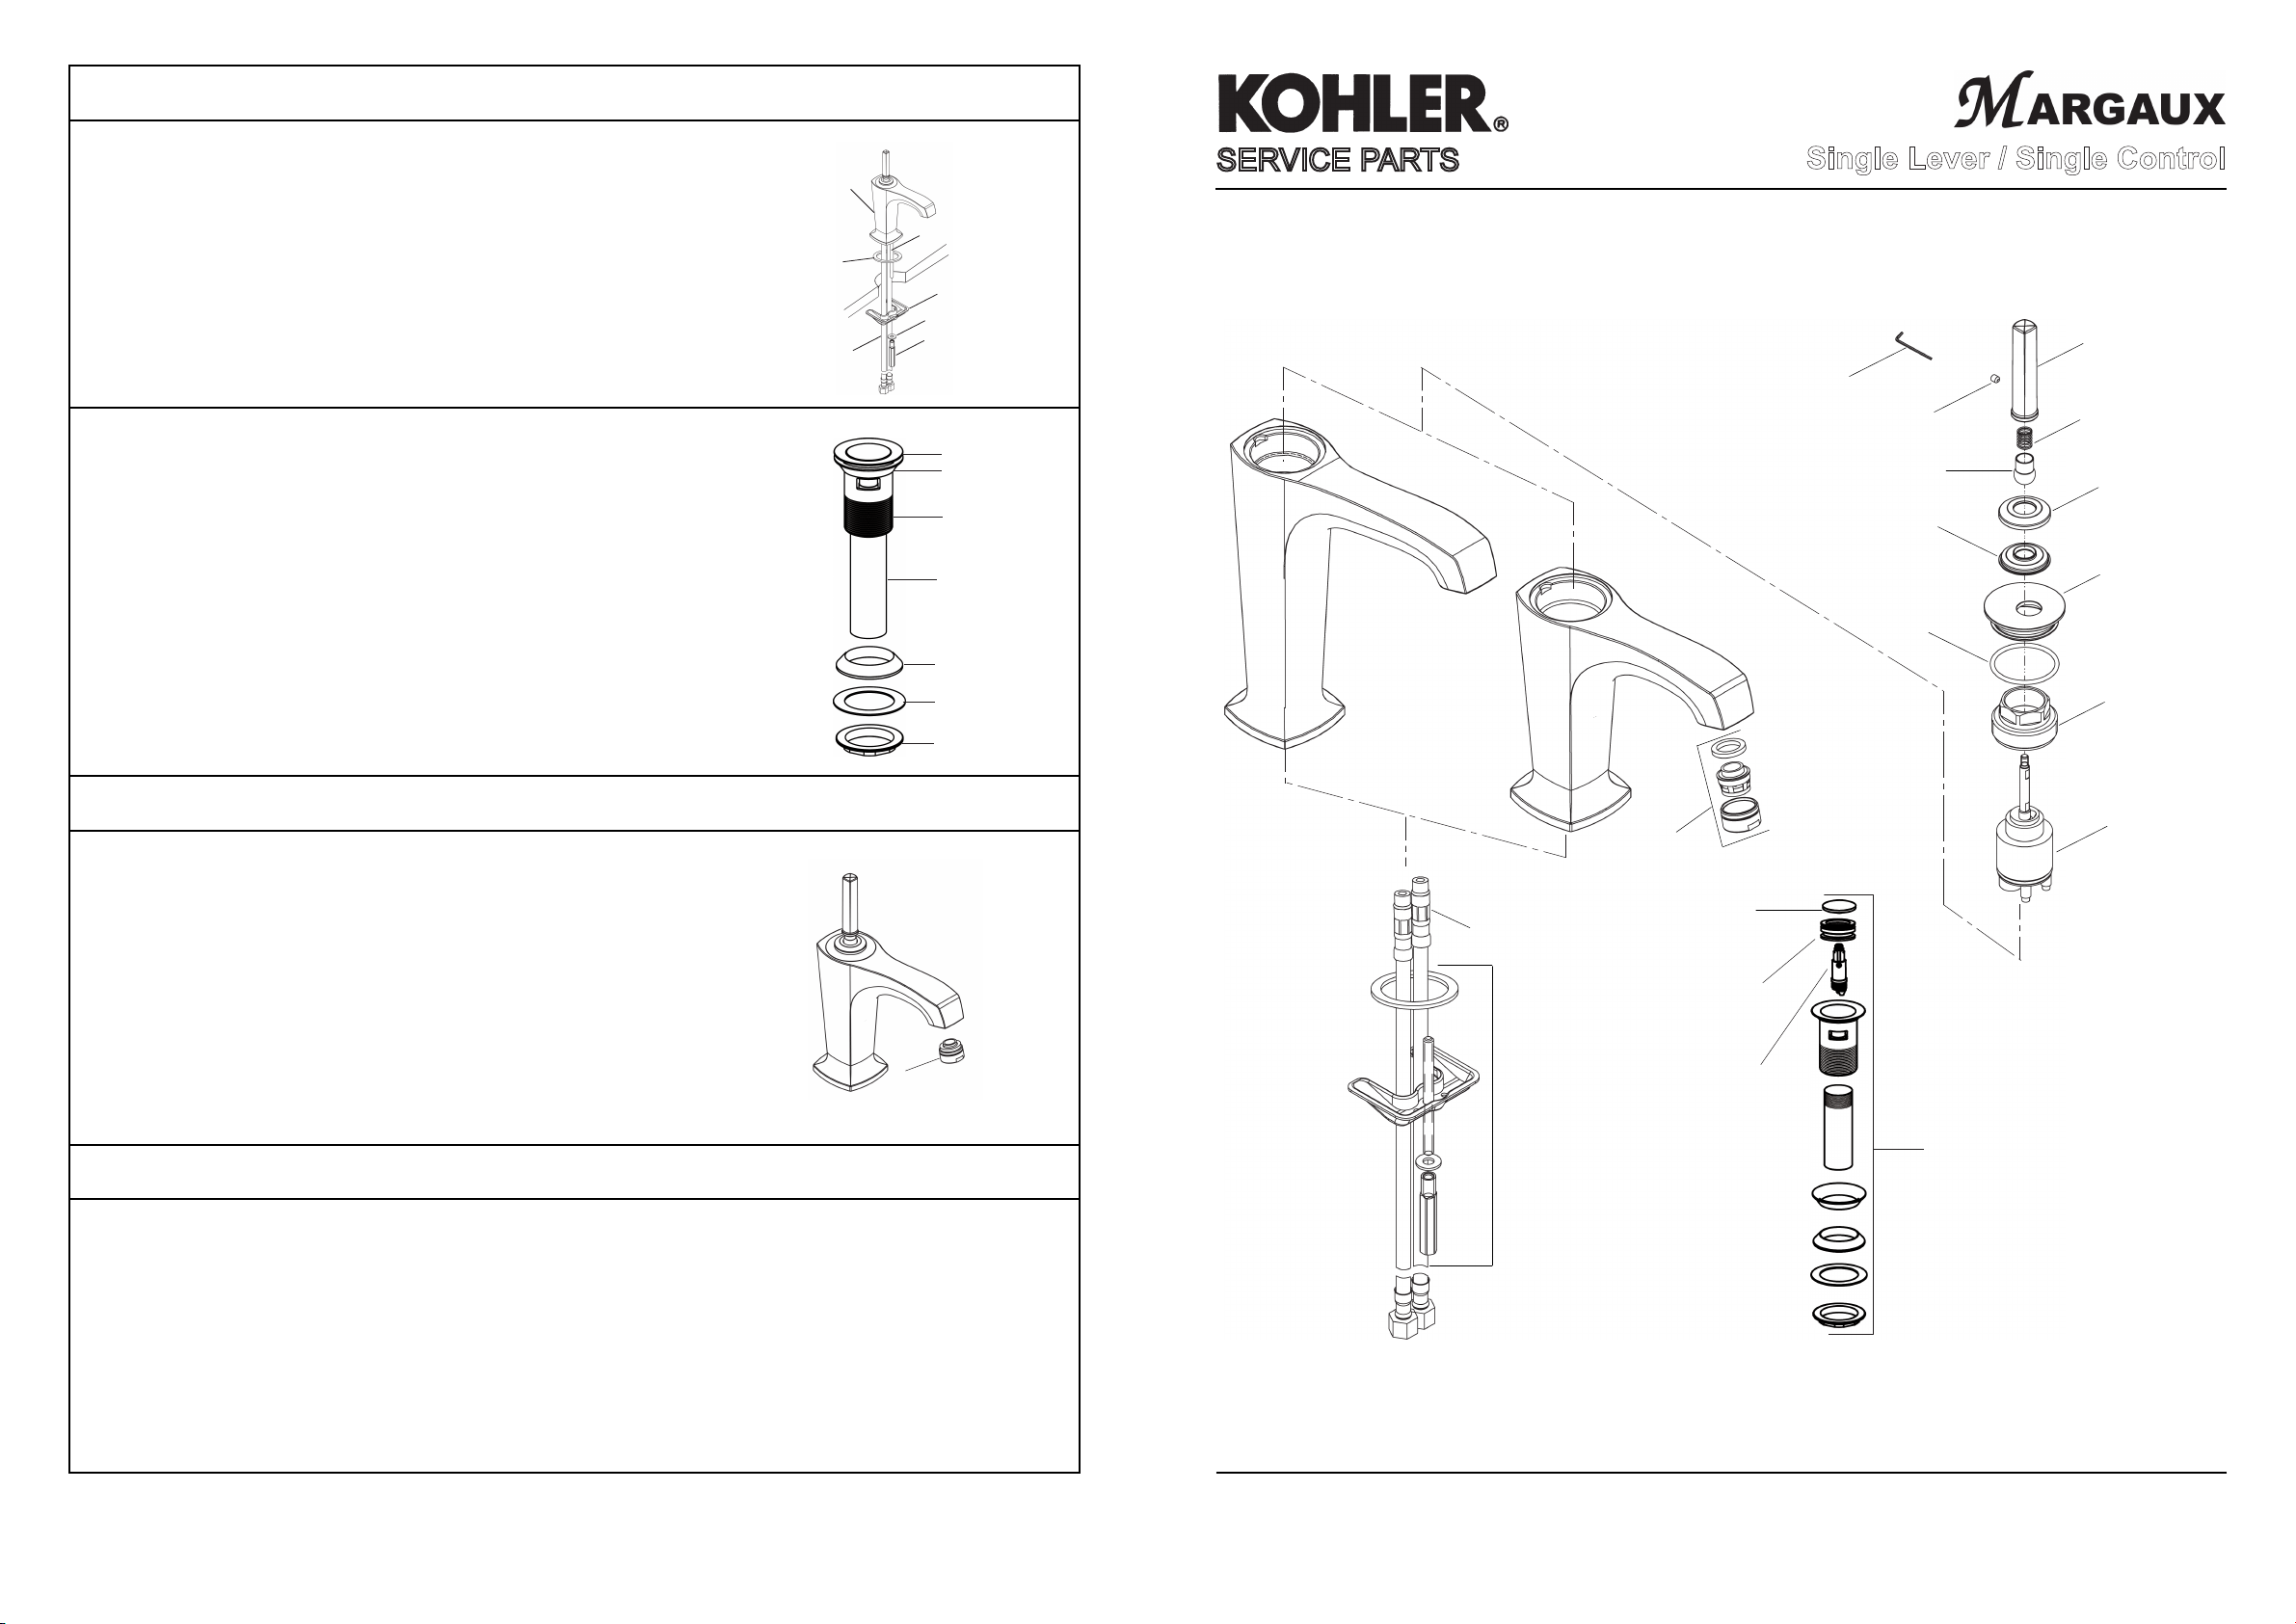
SERVICE PARTS
4
1
2
5
6
3
7
8
9
Drain body
10
11
12
13
16231-4/4ND SINGLE HOLE TALL LAV FAUCET
16230-4 SINGLE HOLE LAV FAUCET
Single Lever / Single Control
1070773**
(Only for 16230-4)
Handle
1046290
Hex Wrench
1041023
Screw
1054197**
Ball connector
1054202
Bearing
1010167
O-Ring
1070774**
(Only for 16231-4)
1054201
Spring
1054199**
Sliding Disk
1054198**
Cap
1019863**
Nut
INSTALLATION CHECKOUT
Ensure all coupling nuts are tightened.
Ensure that handle is in the off position.
Turn on the darin and main water supply. Check for leaks. Repair as
required.
Remove aerator assembly(14). Turn faucet handle on. Run hot and
cold water through spout for about one minute to remove any debris.
Check for leaks at this time. Remove any debris from aerator
14
assembly. Shut the faucet off and reinstall aerator assembly.
CLEANING INSTRUCTIONS
All Finishes: Clean the finish with mild soap and warm water. Wipe entire surface completely dry with clean
soft cloth. Many cleaners may contain chemicals, such as ammonia, chlorine, toilet cleaner etc. which could
adversely affect the finish and are not recommended for cleaning.
Do not use abrasive cleaners or solvents on Kohler faucets and fittings.
880096
Hose
1081483
Mounting Hardware
1195036**
Aerator Assy
1191840**
(Only for Thailand)
1102888**
Stopper
1102889
Washer
1102892
Piston Kit
1054200
Valve
1095926**
Click Drain
(Not for 16231-4ND)
1070378-2A-A 2
**Color code must be specified when ordering
1070378-2A-A 3
 Loading...