

Page 1

Installation Guide
Replacement Filter Cartridge
Français, page ″Français-1”
Español, página ″Español-1”
1414186-2-A
Page 2

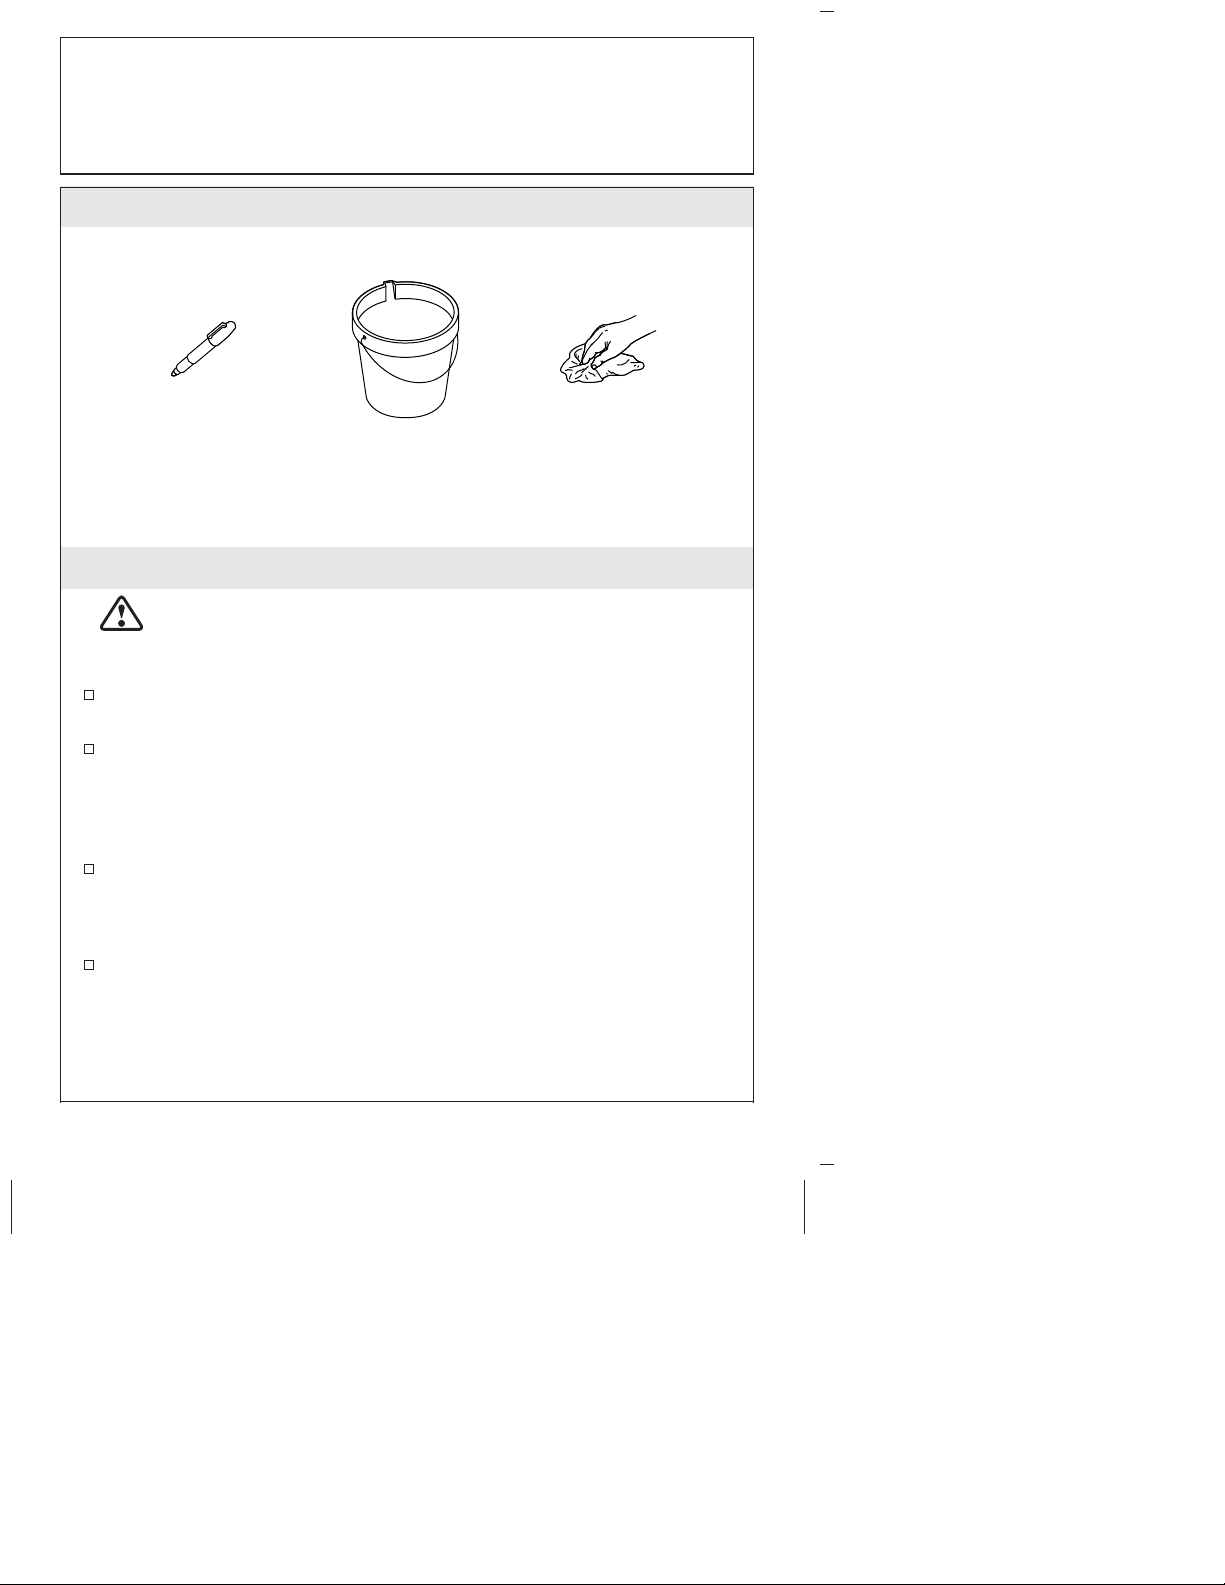
Tools and Materials
Permanent
Marker
RagsBucket
Before You Begin
WARNING: Risk of personal injury. Do not use with water
that is microbiologically unsafe or of unknown quality
without adequate disinfection before or after the system.
Observe all state and local plumbing and building codes.
Contaminants or other substances removed or reduced by this
filtration system may not be present in your water. Refer to the
Performance Data Sheet (available at us.kohler.com) for
contaminants and reduction performance.
System is not intended to convert wastewater or raw sewage into
drinking water.
NOTE: The overall filter height is 16″ (406 mm).
Replace the filter cartridges every 6 months and the membrane
cartridge every 12 months, when the capacity has been exceeded,
or when a noticeable decrease in water flow is observed.
Flush the filter system thoroughly after prolonged periods of
nonuse. Allow the water to flow for 5 or 6 minutes before use.
If the filter cartridges are not maintained and operated as
specified in the Performance Data Sheet, there is a risk of
exposure to contaminants.
Record your model number and installation date below. Also
mark the installation date on the filter head and filter cartridges.
Model number: ____________ Replacement date: _____________
Keep this manual for future reference.
1414186-2-A 2 Kohler Co.
Page 3
Before You Begin (cont.)
To learn more about other KOHLER water filtration systems,
replacement cartridges, subscription services, and recycling program
visit kohler.com.
Kohler Co. 3 1414186-2-A
Page 4

1. Remove Existing Filter Cartridge
NOTE: Used filter cartridges can be recycled in the U.S. only.
Follow the instructions on the recycling card provided. Drain as
much water as possible from the used filter cartridge before
shipping.
Position a bucket, pan, or rag under the filtration system to catch
residual water.
Turn the filter cartridge 90° clockwise, and pull-down gently to
remove.
Discard or recycle the used filter cartridge.
1414186-2-A 4 Kohler Co.
Page 5

Cap
Filter
Head
BlueBlack Red Yellow
O-Rings
Filter Cartridge
Key
Write the date
on the label.
2. Install New Filter Cartridge
IMPORTANT! Replace all of the cartridges at the same time to
maintain proper performance.
NOTE: See the ″Condition New Cartridges″ section for cartridge
orientation and conditioning instructions.
Write the installation date on the new filter cartridge labels.
Remove and discard the cap from the filter cartridges.
Inspect the filter cartridges for damage.
Verify that both sets of O-rings are present and are positioned
correctly in the grooves.
NOTE: The filter cartridge will only engage into the filter head one
way. Do not force the components.
Align the filter cartridge so the label is to the left, and press
upward so the filter cartridge key engages into the filter head.
Use your hand to rotate the filter cartridge counterclockwise 90°
until it stops and is securely engaged into the filter head.
Kohler Co. 5 1414186-2-A
Page 6
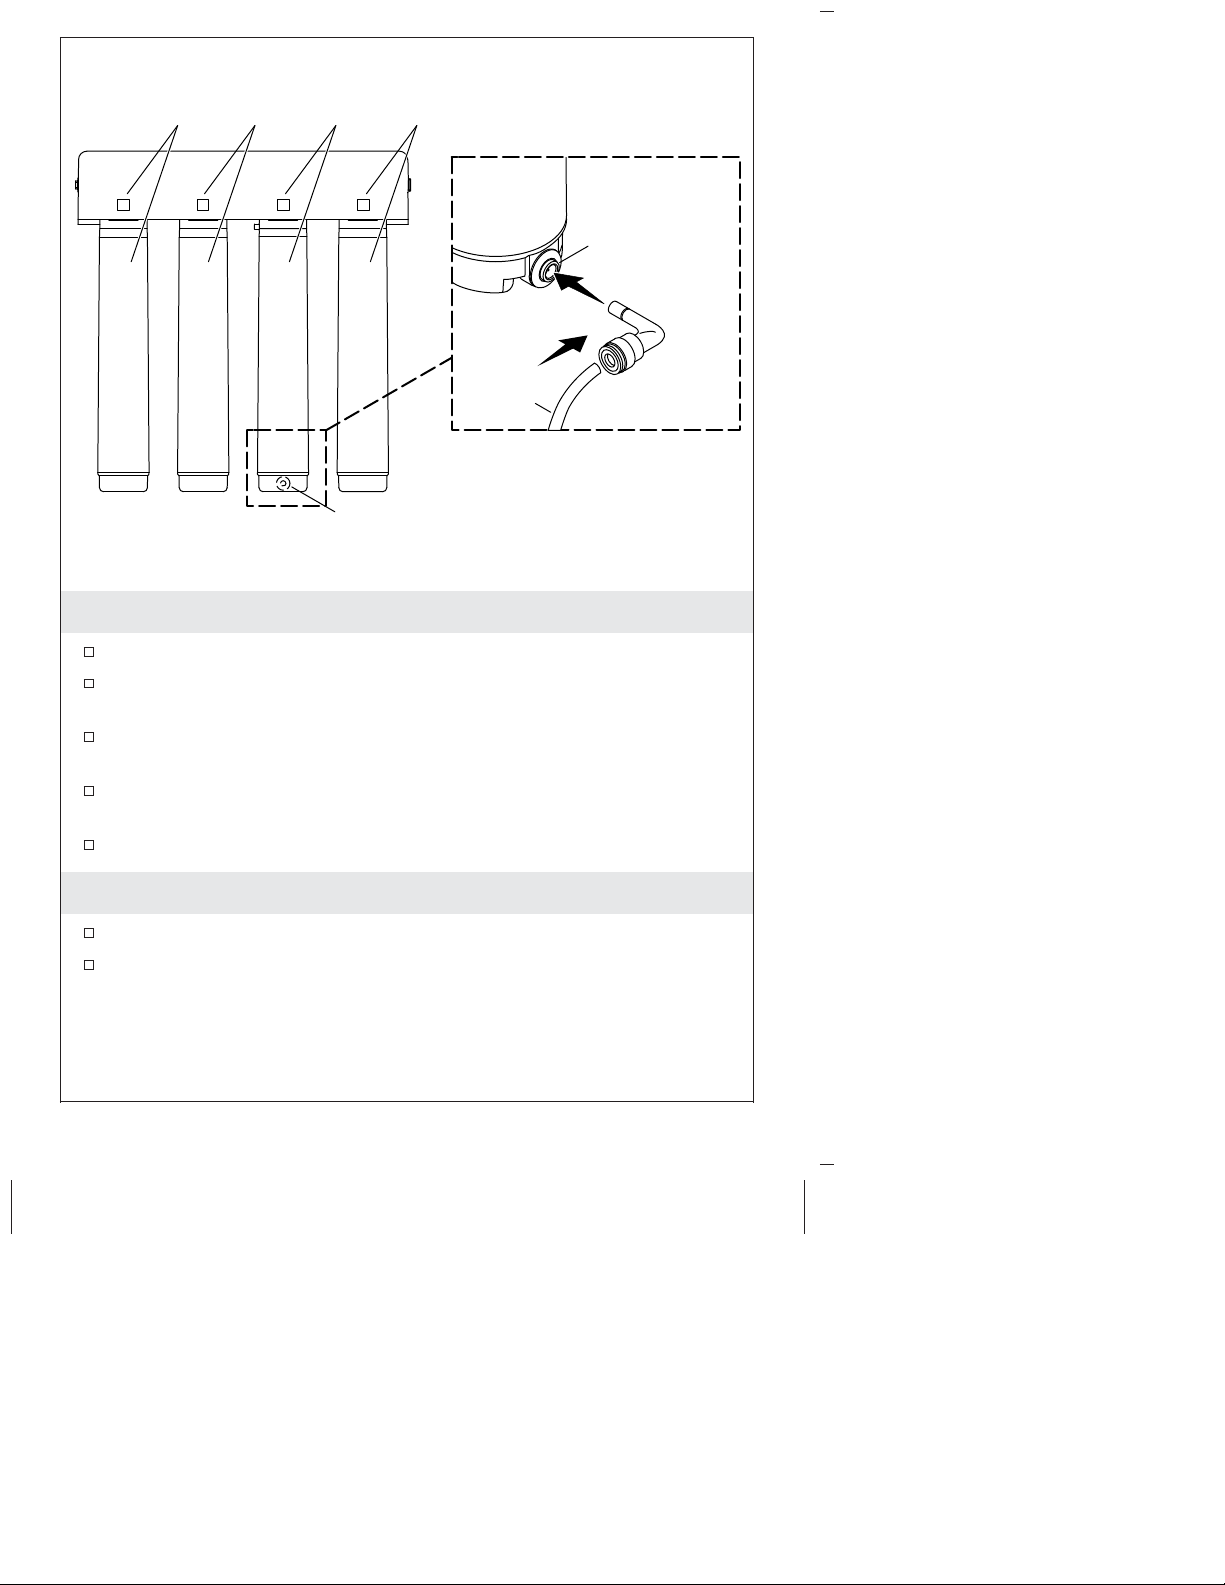
BlueBlack Red Yellow
Drain Port
1/4" Red
Tube
Drain Port
(On Back)
3. Condition New Cartridges
Insert the elbow into the cartridge drain port.
Insert the 1/4″ red tube with the flow restrictor into the elbow.
Verify that the connection is secure.
Turn on the cold water supply and check all connections for
leaks.
Run water through the faucet for 10 minutes to remove any air
and carbon particles from the system.
Turn off the water.
4. Installation Checkout
Check the filter cartridge connections for leaks. Repair as needed.
Run water through the faucet for at least 5 minutes to remove
any air and carbon particles in the system.
1414186-2-A 6 Kohler Co.
Page 7

Troubleshooting
This troubleshooting guide is for general aid only. For warranty
service, contact your dealer or wholesale distributor.
For service parts and replacement filter cartridges, visit your product
page at kohler.com.
Symptoms Probable Causes Recommended Action
1. Water leaks
between the
filter head and
the filter
cartridge.
2. Water leaks at
a tubing
connection.
A. An O-ring is
damaged, dirty, or
out of place.
A. Tubing is not cut
square, or is
damaged or
crimped.
A. Turn off the water
supply, and relieve
water pressure.
Remove the filter
cartridge and inspect
the O-rings for
damage or debris,
and ensure that the
O-rings are in place.
Replace or reinstall
the filter cartridge,
turn on the water
supply, and check for
water leakage.
A. Turn off the water
supply, and relieve
water pressure. Press
in the collar around
the fitting at the leak,
and pull the tubing
to remove. Use a
sharp utility knife to
cut 1/2″ (13 mm) off
the end of the
tubing. Reinsert the
tubing into the
fitting. Turn on the
water supply and
check for leakage.
Kohler Co. 7 1414186-2-A
Page 8
Troubleshooting (cont.)
Symptoms Probable Causes Recommended Action
3. Water leaks at
a threaded
connection.
A. The connection is
damaged or dirty.
A. Turn off the water
supply, and relieve
water pressure.
Disconnect the
fitting, and inspect
the seal for damage
or debris. Remove
any debris or replace
the damaged fitting.
Securely reconnect
the fitting, but do not
overtighten. Turn on
the water supply and
check for leakage.
1414186-2-A 8 Kohler Co.
Page 9
Guide d’installation
Cartouche de filtre de rechange
Outils et matériel
Marqueur
permanent
ChiffonsSeau
Avant de commencer
AVERTISSEMENT: Risque de blessures. Ne pas utiliser
avec de l’eau qui n’est pas sûre au point de vue
microbiologique ou d’une qualité non connue sans
désinfection adéquate avant ou après le système.
Respecter tous les codes de plomberie et de bâtiment de l’État et
locaux.
Les contaminants ou d’autres substances éliminés ou réduits par
ce système de filtration pourraient ne pas être présents dans votre
eau. Consulter la fiche de renseignements sur la performance
(disponible sur le site us.kohler.com) en ce qui concerne les
contaminants et la performance en termes de réduction.
Ce système n’est pas destiné à convertir les eaux usées ou les
eaux d’égout brutes en eau potable.
REMARQUE: La hauteur globale du filtre est de 16 po (406 mm).
Remplacer les cartouches de filtre tous les 6 mois et la membrane
de la cartouche tous les 12 mois, lorsque la capacité a été
dépassée, ou lorsque l’on observe une réduction perceptible dans
le débit d’eau.
Kohler Co. Français-1 1414186-2-A
Page 10

Avant de commencer (cont.)
Purger le système du filtre au complet après des périodes
prolongées de non utilisation. Laisser l’eau s’écouler pendant 5 ou
6 minutes avant utilisation.
Si les cartouches de filtre ne sont pas entretenues et utilisées tel
que spécifié dans la fiche de renseignements sur la performance,
un risque d’exposition à des contaminants est présent.
Noter le numéro de modèle et la date d’installation ci-dessous.
Marquer également la date d’installation sur la tête du filtre et les
cartouches du filtre. Numéro du modèle : ____________ Date de
remplacement : _____________
Conserver ce manuel pour référence future.
Pour en apprendre davantage sur les autres systèmes de filtration
d’eau, les cartouches de rechange, les services d’abonnement, et le
programme de recyclage KOHLER, visiter le site kohler.com.
1414186-2-A Français-2 Kohler Co.
Page 11

1. Retirer la cartouche de filtre existante
REMARQUE: Les cartouches de filtre usées peuvent être recyclées
aux É.-U. seulement. Suivre les instructions indiquées sur la carte de
recyclage fournie. Vider autant d’eau que possible de la cartouche
de filtre usée avant de l’expédier.
Placer un seau, un bac, ou un chiffon sous le système de filtration
pour récupérer l’eau résiduelle.
Tourner la cartouche du filtre de 90° dans le sens horaire et tirer
doucement vers le bas pour la retirer.
Jeter ou recycler la cartouche de filtre usée.
Kohler Co. Français-3 1414186-2-A
Page 12

Tête de
filtre
Capuchon
Joints
toriques
Clavette de
cartouche
de filtre
Inscrire la date
sur l'étiquette.
2. Installer la cartouche de filtre neuve
IMPORTANT! Remplacer toutes les cartouches en même temps afin
de maintenir un rendement adéquat.
REMARQUE: Se reporter à la section « Conditionner les nouvelles
cartouches » pour les instructions d’orientation et de
conditionnement des cartouches.
Inscrire la date d’installation sur les étiquettes des nouvelles
cartouches de filtre.
Retirer et jeter le capuchon des cartouches de filtre.
Inspecter les cartouches de filtre pour y déceler des dommages.
Vérifier que les deux ensembles de joints toriques sont présents et
qu’ils sont positionnés correctement dans les rainures.
BleuNoir Rouge Jaune
REMARQUE: La cartouche du filtre s’engage seulement dans la tête
du filtre dans un sens. Ne pas forcer les composants.
Aligner la cartouche du filtre de manière à ce que l’étiquette se
trouve sur la gauche et appuyer vers le haut de manière à ce que
la clavette de la cartouche du filtre s’engage dans la tête du filtre.
1414186-2-A Français-4 Kohler Co.
Page 13

Installer la cartouche de filtre neuve (cont.)
Utiliser la main pour tourner la cartouche du filtre de 90° dans le
sens antihoraire, jusqu’à ce qu’elle s’arrête et soit engagée en
toute sécurité dans la tête du filtre.
Kohler Co. Français-5 1414186-2-A
Page 14

BleuNoir Rouge Jaune
Port de drain
Tube
rouge de
1/4 po
Port de drain
(à l'arrière)
3. Conditionner les nouvelle cartouches
Insérer le coude dans le port d’évacuation de la cartouche.
Insérer le tube rouge de 1/4 po avec le limiteur de débit dans le
coude. Vérifier que le raccord est solide.
Ouvrir l’alimentation en eau froide et vérifier tous les raccords
pour y rechercher des fuites éventuelles.
Faire couler l’eau par le robinet pendant 10 minutes pour éliminer
tout l’air et toutes les particules de charbon du système.
Couper l’eau.
4. Vérification de l’installation
Inspecter les connexions de la cartouche du filtre pour y
rechercher des fuites. Effectuer les réparations au besoin.
Faire couler l’eau par le robinet pendant 5 minutes au moins pour
éliminer tout l’air et toutes les particules de charbon dans le
système.
1414186-2-A Français-6 Kohler Co.
Page 15

Dépannage
Ce guide de dépannage est seulement destiné à fournir une aide
d’ordre général. Pour une réparation sous garantie, s’adresser au
concessionnaire ou au distributeur en gros.
Pour tout renseignement sur les pièces de rechange et les cartouches de
filtres de rechange, visiter la page du produit sur le site kohler.com.
Symptômes Causes probables Action recommandée
1. Fuites d’eau
entre la tête du
filtre et la
cartouche du
filtre.
2. Fuites d’eau au
niveau du
raccord de la
tubulure.
A. Un joint torique est
endommagé,
encrassé ou délogé.
A. La tubulure n’est
pas coupée
d’équerre ou elle
est endommagée
ou pincée.
A. Couper
l’alimentation en eau
et libérer la pression
d’eau. Retirer la
cartouche du filtre et
inspecter les joints
toriques pour y
rechercher des
dommages ou des
débris éventuels et
assurer que les joints
toriques sont en
place. Remplacer ou
réinstaller la
cartouche du filtre,
ouvrir l’alimentation
en eau et vérifier
qu’il n’y a pas de
fuites d’eau.
A. Couper
l’alimentation en eau
et libérer la pression
d’eau. Enfoncer le
collier autour du
raccord au niveau de
la fuite et tirer sur la
tubulure pour la
retirer. Utiliser un
couteau tout usage
tranchant pour
couper 1/2 po (13
mm) de l’extrémité
de la tubulure.
Réinsérer la tubulure
dans le raccord.
Ouvrir l’alimentation
en eau et rechercher
des fuites
éventuelles.
Kohler Co. Français-7 1414186-2-A
Page 16

Dépannage (cont.)
Symptômes Causes probables Action recommandée
3. Fuites d’eau au
niveau de la
connexion
filetée.
A. La connexion est
endommagée ou
encrassée.
A. Couper
l’alimentation en eau
et libérer la pression
d’eau. Déconnecter le
raccord et inspecter
le joint d’étanchéité
pour y rechercher
des dommages ou
des débris. Retirer
tous les débris ou
remplacer le raccord
endommagé.
Reconnecter le
raccord en toute
sécurité, mais ne pas
serrer excessivement.
Ouvrir l’alimentation
en eau et rechercher
des fuites
éventuelles.
1414186-2-A Français-8 Kohler Co.
Page 17

Guía de instalación
Cartucho de filtro de repuesto
Herramientas y materiales
Marcador
permanente
TraposCubeta
Antes de comenzar
ADVERTENCIA: Riesgo de lesiones personales. No use con
agua microbiológicamente insegura o de calidad desconocida,
sin haberla desinfectado adecuadamente antes o después del
sistema.
Cumpla todos los códigos locales y estatales de plomería y de
construcción.
Es posible que su agua no contenga los contaminantes u otras
sustancias que este sistema de filtración elimina o reduce.
Consulte contaminantes y reducción de rendimiento en la hoja de
datos de rendimiento (disponible en us.kohler.com).
El sistema no tiene el propósito de convertir en agua potable el
agua de desecho o el agua residual sin tratar.
NOTA: La altura general del filtro es 16″ (406 mm).
Cambie los cartuchos de filtro cada 6 meses, y el cartucho de
membrana cada 12 meses, cuando se haya excedido la capacidad,
o cuando se observe una disminución notable en el flujo de agua.
Deje correr agua para enjuagar bien el sistema de filtro después
de periodos prolongados de no usarlo. Antes de usarlo, deje que
fluya agua durante5o6minutos.
Kohler Co. Español-1 1414186-2-A
Page 18

Antes de comenzar (cont.)
Si a estos cartuchos no se le da el mantenimiento o el uso
especificados en la hoja de datos de rendimiento, existe el riesgo
de que se ocasione exposición a contaminantes.
Registre abajo su número de modelo y la fecha de instalación.
También marque la fecha de instalación en la cabeza del filtro y
en los cartuchos de filtro. Número de modelo: ____________
Fecha de cambio: _____________
Guarde este manual para referencia futura.
Para obtener más información acerca de otros sistemas de filtración de
agua de KOHLER, de cartuchos de repuesto, de servicios de
suscripción, y de programas de reciclado, visite kohler.com.
1414186-2-A Español-2 Kohler Co.
Page 19

1. Retire el cartucho de filtro actual
NOTA: Los cartuchos de filtro usados pueden ser reciclados solo en
Estados Unidos. Siga las instrucciones en la tarjeta de reciclado que
incluimos. Drene toda el agua que sea posible de los cartuchos de
filtro antes de enviarlos.
Coloque una cubeta, una bandeja, o un trapo bajo el sistema de
filtración para recoger el agua que escurra.
Gire el cartucho de filtro 90° hacia la derecha, y tire de él hacia
abajo con cuidado para retirarlo.
Deseche o recicle el cartucho de filtro usado.
Kohler Co. Español-3 1414186-2-A
Page 20

Arosellos
Cabeza
de filtro
Tapa
Chaveta de
cartucho
de filtro
Negro
Rojo
Amarillo
Escriba la fecha
en la etiqueta.
2. Instale el nuevo cartucho de filtro
¡IMPORTANTE! Cambie todos los cartuchos al mismo tiempo para
mantener el rendimiento apropiado.
NOTA: En la sección ″Acondicionamiento de nuevos cartuchos″
consulte las instrucciones de orientación y acondicionamiento.
Anote la fecha de instalación en las etiquetas de los nuevos
cartuchos de filtro.
Retire y deseche las tapas de los cartuchos de filtro.
Revise si los cartuchos de filtro están dañados.
Verifique que ambos conjuntos de arosellos estén bien colocados
en las ranuras.
Azul
NOTA: Los cartuchos de filtro encajan en la cabeza del filtro solo de
una forma. No fuerce los componentes.
Alinee el cartucho de filtro de forma que la etiqueta quede hacia
la izquierda, y oprima hacia arriba de manera que la chaveta del
cartucho de filtro encaje en la cabeza del filtro.
1414186-2-A Español-4 Kohler Co.
Page 21

Instale el nuevo cartucho de filtro (cont.)
Gire con la mano el cartucho de filtro hacia la izquierda 90° hasta
que se detenga y quede bien fijo en la cabeza del filtro.
Kohler Co. Español-5 1414186-2-A
Page 22

AzulNegro Rojo Amarillo
Puerto
de drenado
Tubo
rojo de
1/4 pulg.
Puerto de drenado
(en el lado posterior)
3. Acondicionamiento de nuevos cartuchos
Introduzca el codo en el puerto de drenado del cartucho.
Introduzca en el codo el tubo rojo de 1/4 pulg. con el limitador
de flujo. Verifique que la conexión esté bien fija.
Abra el suministro de agua fría y verifique que no haya fugas en
ninguna conexión.
Deje correr agua por la grifería durante 10 minutos para eliminar
el aire y las partículas de carbón del sistema.
Cierre el agua.
4. Verificación de la instalación
Verifique que no haya fugas en las conexiones del cartucho de
filtro. Haga las reparaciones necesarias.
Deje correr agua por la grifería durante por lo menos 5 minutos
para eliminar el aire y las partículas de carbón del sistema.
1414186-2-A Español-6 Kohler Co.
Page 23

Resolución de problemas
Esta guía de resolución de problemas está diseñada únicamente como
ayuda general. Para obtener servicio de garantía, comuníquese con el
vendedor o con el distribuidor mayorista.
Para consultar información sobre piezas de repuesto y cartuchos de
filtro de repuesto, visite la página de su producto en kohler.com.
Síntomas Causas probables Acción recomendada
1. Se fuga agua
entre la cabeza
del filtro y el
cartucho de
filtro.
2. Se fuga agua
en una
conexión de
manguera.
A. Hay algún arosello
dañado, sucio, o
fuera de su lugar.
A. La manguera no
está bien cortada, o
está dañada o
aplastada.
A. Cierre el suministro
de agua y libere la
presión de agua.
Retire el cartucho de
filtro y revise los
arosellos para ver si
están dañados o si
tienen desperdicios,
y asegúrese de que
los arosellos estén en
su lugar. Cambie o
vuelva a instalar el
cartucho de filtro,
abra el suministro de
agua, y revise que no
haya fugas de agua.
A. Cierre el suministro
de agua y libere la
presión de agua.
Oprima el collarín
alrededor del
conector que tiene la
fuga, y tire de la
manguera para
retirarla. Con una
navaja con buen filo
recorte 1/2″ (13 mm)
del extremo de la
manguera. Vuelva a
introducir la
manguera en el
conector. Abra el
suministro de agua y
verifique que no
haya fugas.
Kohler Co. Español-7 1414186-2-A
Page 24

Resolución de problemas (cont.)
Síntomas Causas probables Acción recomendada
3. Se fuga agua
en una
conexión
roscada.
A. La conexión está
sucia o dañada.
A. Cierre el suministro
de agua y libere la
presión de agua.
Desconecte el
conector, y revise que
el sello no esté
dañado ni tenga
desperdicios. Retire
los desperdicios o
cambie el conector
dañado. Vuelva a
conectar con firmeza
el conector, pero no
apriete demasiado.
Abra el suministro
de agua y verifique
que no haya fugas.
1414186-2-A Español-8 Kohler Co.
Page 25

1414186-2-A
Page 26

1414186-2-A
Page 27

1414186-2-A
Page 28

USA/Canada: 1-800-4KOHLER
México: 001-800-456-4537
kohler.com
©2019 Kohler Co.
1414186-2-A
 Loading...