

Page 1

32" QHD IPS FRAMELESS
MONITOR
2560 x 1440, 75Hz
KAMN32QF7LA
Page 2

Page 3

SAFETY & WARNINGS
Ensure to read all instructions and warnings in this user guide prior to first use. Retain this
user guide for future reference.
• Do not position the monitor on unstable surfaces. If the monitor falls, it may lead to
damage and injuries to people around its vicinity.
• Do not place the monitor near heat sources (for example, heaters, stoves, fireplaces).
• Do not use the monitor in areas lacking adequate ventilation.
• Do not open the back panel of the monitor as it contains a high-voltage current even
when unplugged.
• Do not place heavy objects on the monitor, its power cord, or any other connected
cable.
• The back of this monitor is designed with ventilation holes. Do not cover or block them
as this may cause overheating and damage.
• Do not insert or spray anything into the vents of this monitor.
• Unplug the monitor if it will not be used for an extended period.
• Ensure the monitor is unplugged before cleaning.
• Do not use cleaning alcohol, ammonia-based liquids, or other harsh cleaners when
cleaning the monitor.
The terms HDMI and HDMI High-Definition Multimedia Interface,
and the HDMI Logo are trademarks or registered trademarks of
HDMI Licensing Administrator, Inc. in the United States, and other
countries.
Page 4

A Monitor (x1)
B Stand stem (x1)
C Stand base (x1)
D Base cover (x1)
E 12mm M4 screw (x2)
F 23mm M4 screw (x4)
G VESA connector (x4)
H DisplayPort cable (x1)
I Power cable (x1)
J Power adapter (x1)
K User guide (x1)
COMPONENTS
Page 5

1
Menu/enter button
2
Up button
3
Down button
4
Exit button
5
Power button
6
Power port
7
DisplayPort port
8
HDMI port
9
Audio output port
10
LED indicator
OVERVIEW
1 2 3
4 5 6 7 8 9 10
Ports
Front view
Page 6

E C A
F B B
1. Ensure all components are present before disposing of any packaging.
Open the packaging and remove the stand stem (B) and stand base (C). Using a
Phillips screwdriver (not supplied), secure the stand base (C) to the stand stem (B)
with the 12mm M4 screws (E). The optional base cover (D) can be installed onto the
stand base (C) at this point.
2. Remove the monitor (A) and place it on a flat surface. Using a Phillips screwdriver,
attach the stand stem (B) to the monitor (A) with the 23mm M4 screws (F).
both hands to lift the monitor (A) upright.
3. Use
Page 7

VESA MOUNT
G
A
Notes:
Mount
1. Open the packaging, and with the foam attached, take out the monitor (A) and place
it on a flat surface. Remove the upper foam and film covering the monitor, then place
the monitor on the lower piece of foam.
2. Remove the VESA connectors (G) from the accessory bag. Using a flathead
screwdriver (not supplied), secure the VESA connectors (G) onto the back of the
monitor (A).
3. Mount the monitor (A) as desired with the steps provided with your VESA mount.
(not supplied)
• The mounting hole distance for this monitor is 75 x 75mm.
• VESA mount and mounting accessories are not included.
Page 8
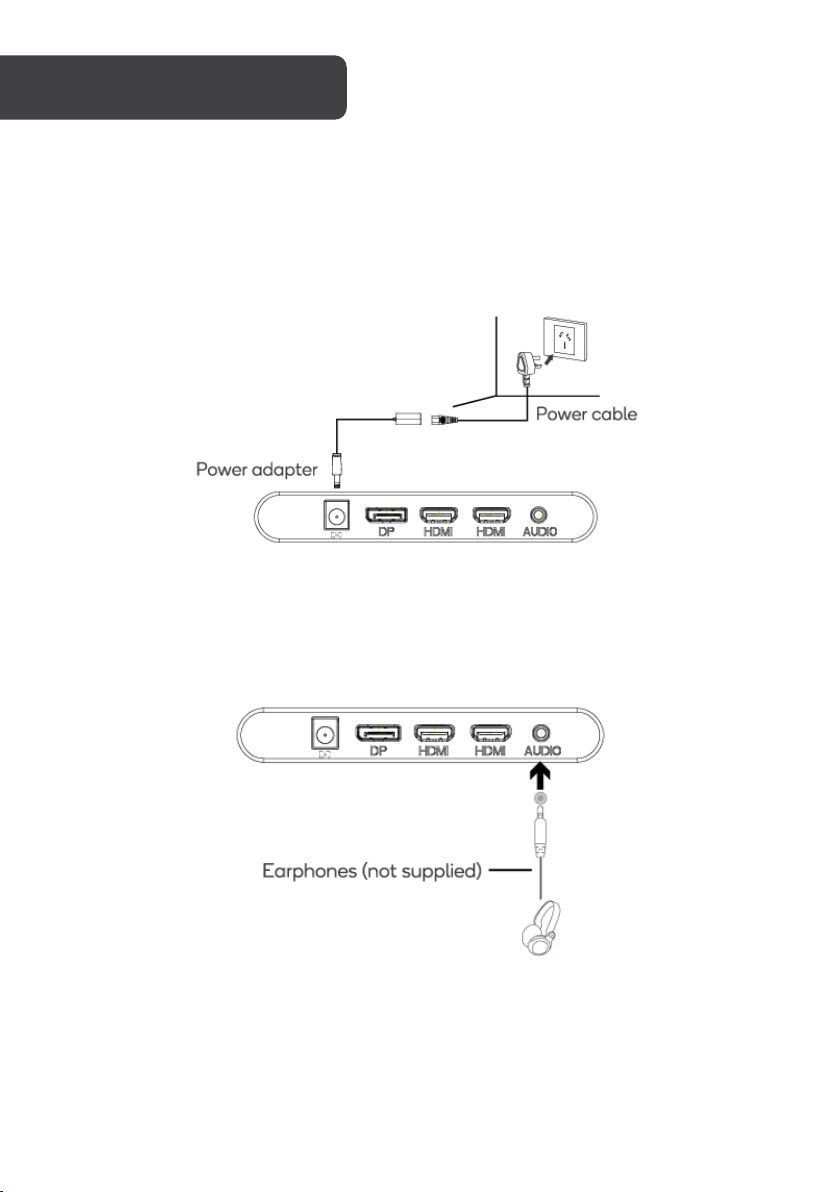
CONNECTIVITY
Power adapter
Connect one end of the power adapter into the power port on the monitor. Connect the
other end into one end of the power cable.
Connect the other end of the power cable into a power socket.
Earphones
Plug in earphones (not supplied) into the 3.5mm headphone jack on the monitor.
Note: If audio devices are plugged into the monitor and computer, there will be no sound.
Page 9

HDMI
To allow the monitor to receive HDMI signals from the computer, plug one end of an HDMI
cable (not supplied) into the monitor. Plug the other end of the cable into the HDMI output
port on your computer.
DisplayPort
To allow the monitor to receive DisplayPort signals from your computer, plug in one end of
the provided DisplayPort cable into the DisplayPort port on the monitor. Plug the other end
of the cable into the DisplayPort output on the computer.
Page 10

OPERATION
Note:
Note:
OSD menu
LED effect menu
GamePlus menu
Exit menu
Power menu
1. Connect the monitor to your computer via HDMI/DisplayPort.
2. Connect one end of the power adapter into the power port on the monitor. Connect
the other end into one end of the power cable. Connect the other end of the power
cable into a power socket. Switch the power socket on.
It is recommended to use a surge protector with adequate voltage if the power cable is
not directly connected to a wall socket.
3. Press the power button on the monitor to turn it on. The LED indicator will
illuminate white.
If the LED indicator turns off while the monitor is on, there is no video, horizontal, or
vertical signal detected. Ensure the HDMI/DisplayPort cable has been properly
connected.
Navigation window
Whilst turned on, press any button located underneath the monitor to bring up the
navigation window. These include options to go to the on-screen display menu, as well as
shortcuts to sub-menus and options.
• Press the menu/enter button to access the OSD menu.
• Press the up button to access the LED effect menu.
• Press the down button to access the GamePlus menu.
• Press the exit button to exit the OSD menu.
• Press the power button to access the power menu.
Page 11

On-screen display menu
The On-Screen Display (OSD) menu can be used to adjust the monitor’s settings. When the
monitor is used for the first time, optimal settings will be set as default.
1. Press any one of the buttons located underneath the monitor to activate the
navigation window.
2. Press the menu/enter button to access the OSD menu.
3. Press the up and down buttons to browse through the categories of settings.
4. Press the menu/enter button to enter the sub-menu of the desired category.
5. Press the up and down buttons to browse through the sub-menu, then press the
menu/enter button on the desired setting you would like to change.
6. Press the up and down buttons to adjust the settings to your liking. Press the
menu/enter button to confirm the change and exit back into the sub-menu.
Press the exit button to exit the OSD menu.
Page 12

OSD menu options
Below is list of the options available that can be adjusted through the OSD menu.
Category Sub-Menu Options Description
Brightness 0–100
Contrast 0–100 Adjusts the display contrast
Standard,
PICTURE
IMAGE Aspect Wide, Auto, 4:3 Sets the aspect ratio
COLOUR TEMP.
OSD SETTINGS
ECO
DCR On, Off
Colour temp.
Red 0–100
Green 0–100
Blue 0–100
Language
OSD H. POS. 0–100
OSD V.POS. 0–100
OSD Timer 5–60
RTS,
Game,
FPS, Movie, Text
Warm, User,
Cool
English, Español,
Русский,
Français, 한한,
Português,
Deutsch, Türkçe,
简体中文,
日本語, Polski,
Italiano,
Nederlands
Transparency 0–100
Adjusts the display
brightness
Sets the display’s colour
balance to pre-set levels to
suit different uses
Turns the DCR function
on/off
Includes pre-set (Warm,
Cool) and custom (User)
colour temperatures
Allows for manual
adjustment of the RGB
colour balance
Sets the OSD language
Adjusts the horizontal
position of the OSD menu
Adjusts the vertical position
of the OSD menu
Sets how long the OSD
menu will remain on-screen
without input (in seconds)
Sets the level of
transparency of the OSD
menu
Page 13

RESET Reset N/A
Resets the monitor to
factory default settings
Signal source
Volume 0–100 Adjusts the audio volume
Low blue ray 0–100
MISC.
ECO modes
There are various pre-set colour modes suited for various use cases available on this monitor.
These can be accessed using the ECO modes menu. The modes include the following:
• Standard (suitable for most activities)
• Game (best suited general gaming)
• RTS (best suited when playing real-time strategy games)
• FPS (best suited when playing first-person shooter games)
• Movie (best suited when watching movies)
• Text (best suited when reading text)
GamePlus
The GamePlus menu allows you to change the appearance of crosshairs that appear when
gaming.
Adaptive-Sync On, Off
Over Driver
LED effect
HDMI1, HDMI2,
DP
Off, Low, Middle,
High
Normal, Off,
Flicker
Selects the input signal
source
Sets the level of blue light
filtering
Turns the Adaptive-Sync
function on/off
Setting these at higher
levels will decrease the
monitor’s response time
speed.
Changes the mode of the
LED
Page 14
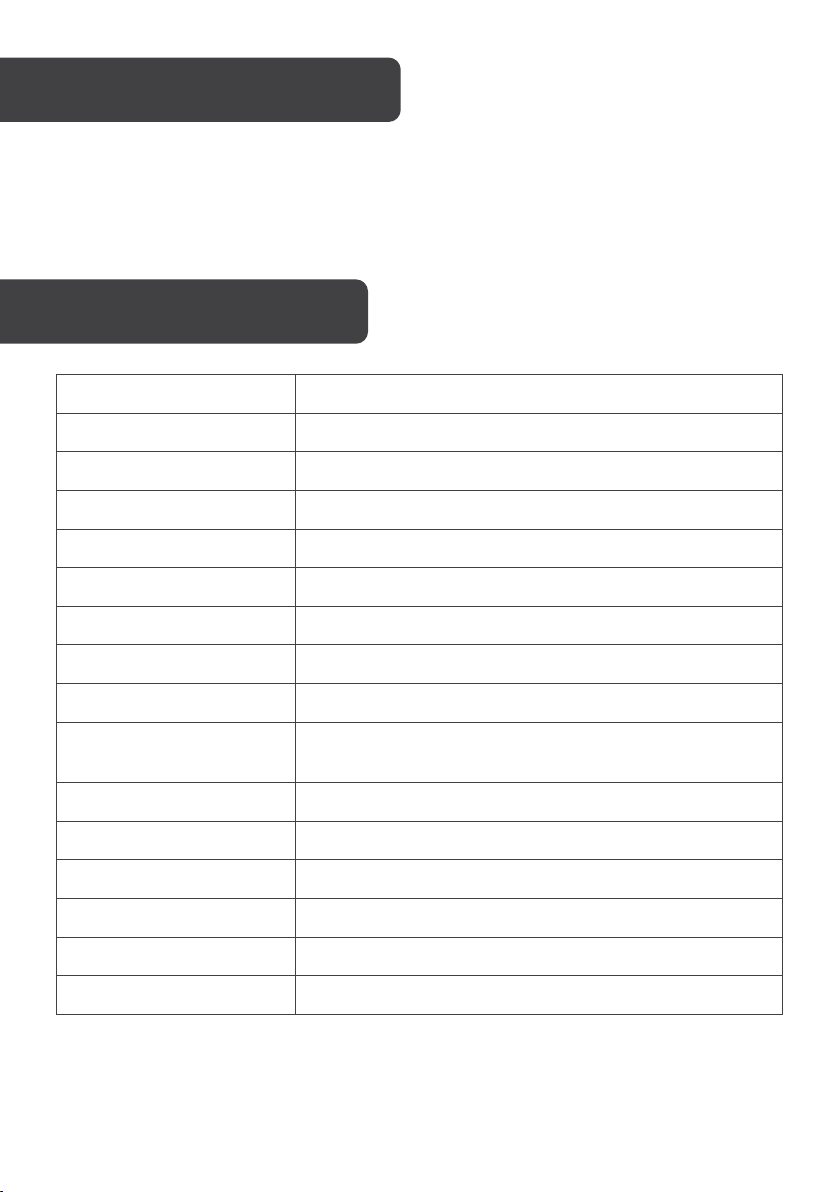
Model
KAMN32QF7LA
Screen size
32"
Aspect ratio
16:9
Backlight
E–LED
Brightness
350cd/m
2
Panel
IPS
Resolution
2560 x 1440
Refresh rate
75Hz
Response time
4ms
178° (H)
Contrast ratio
1200:1
VESA mounting
75 x 75mm
Colours
16.7M
Adaptive Sync
Yes
Signal input
x1 DisplayPort, x2 HDMI 1.4
Power
DC 19V, 3.42A
CLEANING & CARE
• Ensure the monitor is turned off, unplugged, and cooled before cleaning.
• Clean the screen by wiping it with a dry microfibre cloth.
• Clean the monitor body with a slightly damp cloth with water.
SPECIFICATIONS
Viewing angle
178° (V) (typical)
Page 15

Audio
Audio out
Yes
Speakers
No
Accessories
Power cable
Yes
Power adapter
Yes
DisplayPort cable
Yes
Additional functions
Low blue light
Yes
Flicker free
Yes
Physical dimensions
Dimensions (with stand)
718.59 x 519.17 x 236.05mm
Dimensions (without stand)
718.59 x 422.07 x 47.4 0mm
Net weight
6.87kg
Gross weight
7.7 7 kg
Page 16

Need more information?
We hope that this user guide has given you
the assistance needed for a simple set-up.
For the most up-to-date guide for your product,
as well as any additional assistance you may require,
head online to help.kogan.com
 Loading...