

Page 1
KOGAN ALEXA BUILT-IN
SMART WATCH BAND
(KALXBNDBLKA, KALXBNDBLUA, KALXBNDGRYA,
KALXBNDGRNA, KALXBNDPNKA, KALXBNDREDA)
Page 2

Safety & Warnings 3
Overview 4
Operation 5
Pairing with VeryFit app 7
Functions
Using with Amazon Alexa 14
Cleaning & Care 17
Specifications 17
Notes 18
8
2
Page 3

SAFETY & WARNINGS
• To prevent device failure, fire and explosion, never place the smart band or its
accessories in any extremely high temperature or extremely low temperature areas.
• To prevent device damage, accessory damage and device failure, always protect the
device against strong impact or shock.
• Do not disassemble or modify the device or its accessories without authorization. Any
device failure should be referred to our after-sales service personnel.
3
Page 4
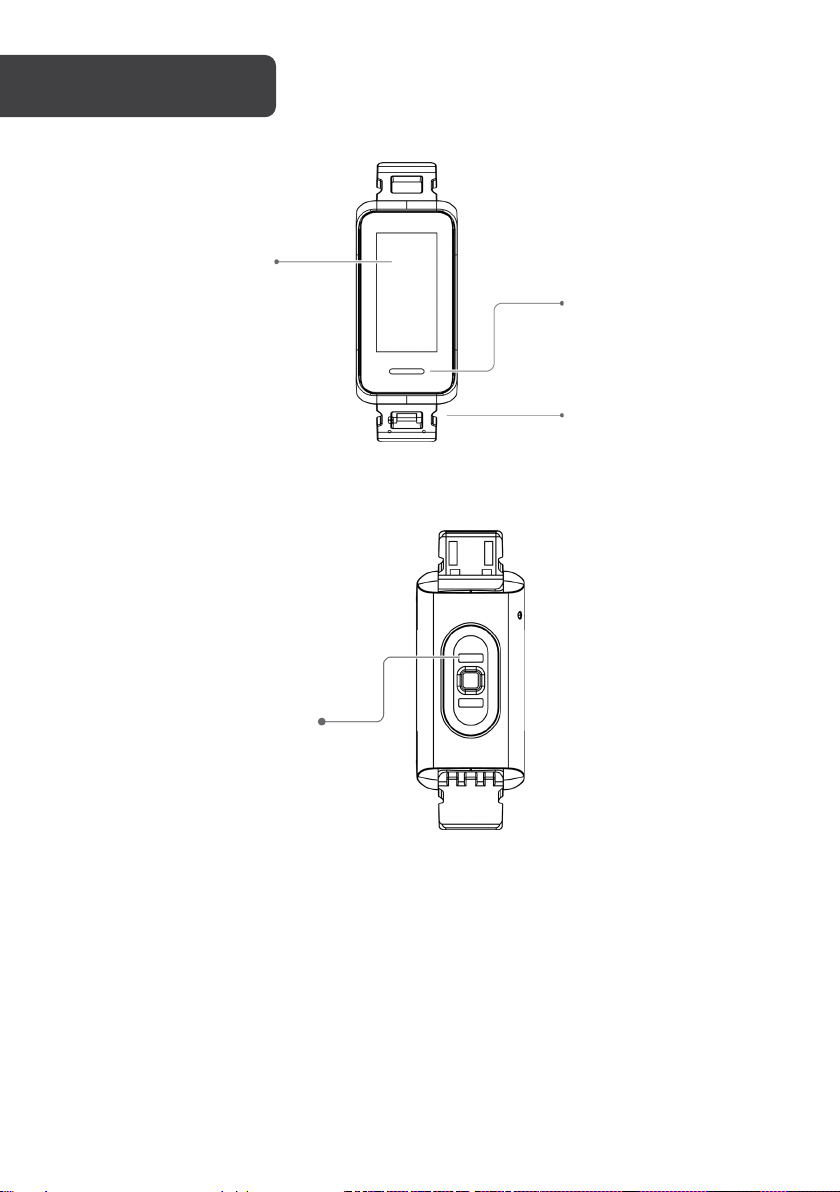
Touch key
USB terminal
Heart rate LED
Touch screen
OVERVIEW
4
Functions of the Touch key
Click the Touch key to:
1. Return (back)
2. Turn on the screen
Page 5
Note:
OPERATION
• Ensure the smart band is charged fully before first use.
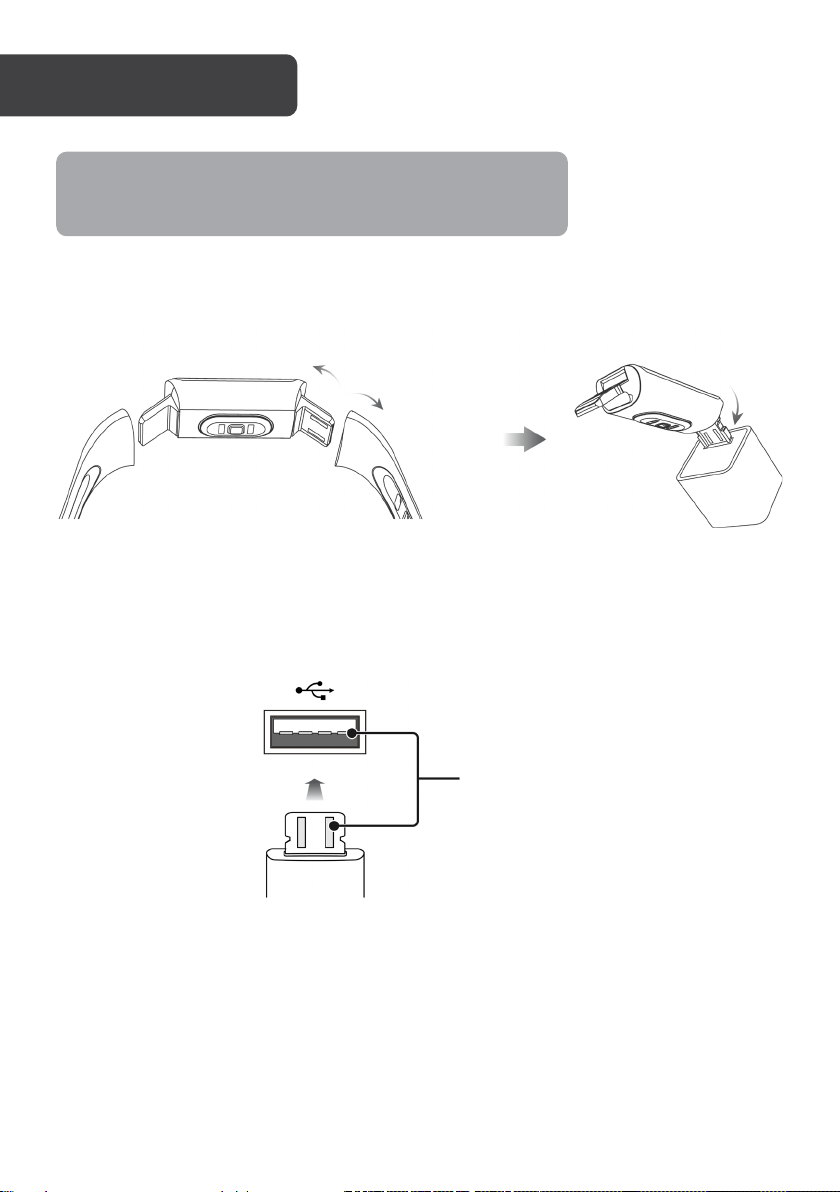
Charging the Smart Band
1. Pull the wrist band from the main body of the smart band to remove.
2. Insert the USB charging terminal of the main body into a charging adapter’s USB
port to charge the smart band.
Metal prongs
• Ensure the smart band is inserted the right way up, so polarity is not reversed. The
metal prongs on the smart band should make contact with the metal prongs
within the USB port.
• Ensure the adapter meets the specified voltage and current (5V/500mA).
5
Page 6
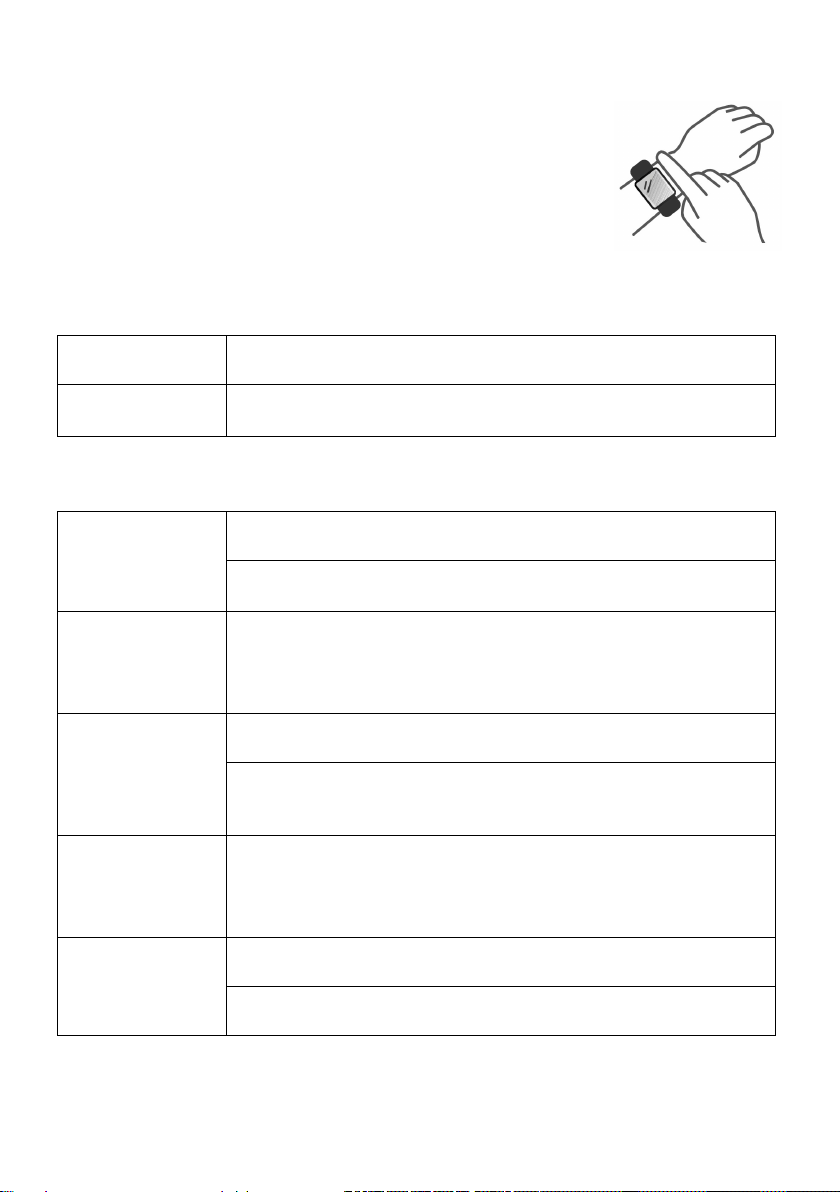
Wearing
1. Wear it correctly: make sure that the bottom sensor is
properly attached to the skin and the strap shall be one
finger away from the wrist.
2. Touch operation: the smart band supports full-screen
touch operations.
3. Touch key: the smart band has a touch key. Short press:
return or close a notification.
Getting started
Powering on To power on, connect the band to a powered USB charging port
Powering off To power off, open Setup menu and select “Power Off”
Navigating and operation basics
Swipe the screen
up/down
Swipe the screen
left/right
Click the screen
Click and hold
the screen
Click and hold
the touch key
6
To scroll through pages
To view long text or details
To view quick access pages next to homescreen
To go to the sub-page
To complete the corresponding action, depending on which
on-screen button is clicked
To change the watch face wallpaper
To end an activity monitoring session
Hold for 2 seconds to activate Alexa
Page 7
PAIRING WITH VERYFIT APP
For Android users, open Google Play Store on your smartphone.
For iOS users, open App Store on your iPhone.
Search for “Veryfit” and download the app.
Alternatively, scan this QR code on your device to open the appropriate
store for your device and go straight to the app download page.
Once downloaded, open the app, fill in your info, then go to the “Home” page and select
“Bind Device.”
Make sure Bluetooth on your smartphone is turned on. You will see a list of devices. Select
the smart band and continue with the binding process.
Light up the smart band screen and bring it close to your phone.
Confirm the binding request on the smart band. Fill in your information and set your step
goal on the app to complete the binding. Make sure location/GPS permissions are granted
to the app for full functionality.
7
Page 8
FUNCTIONS
Apps
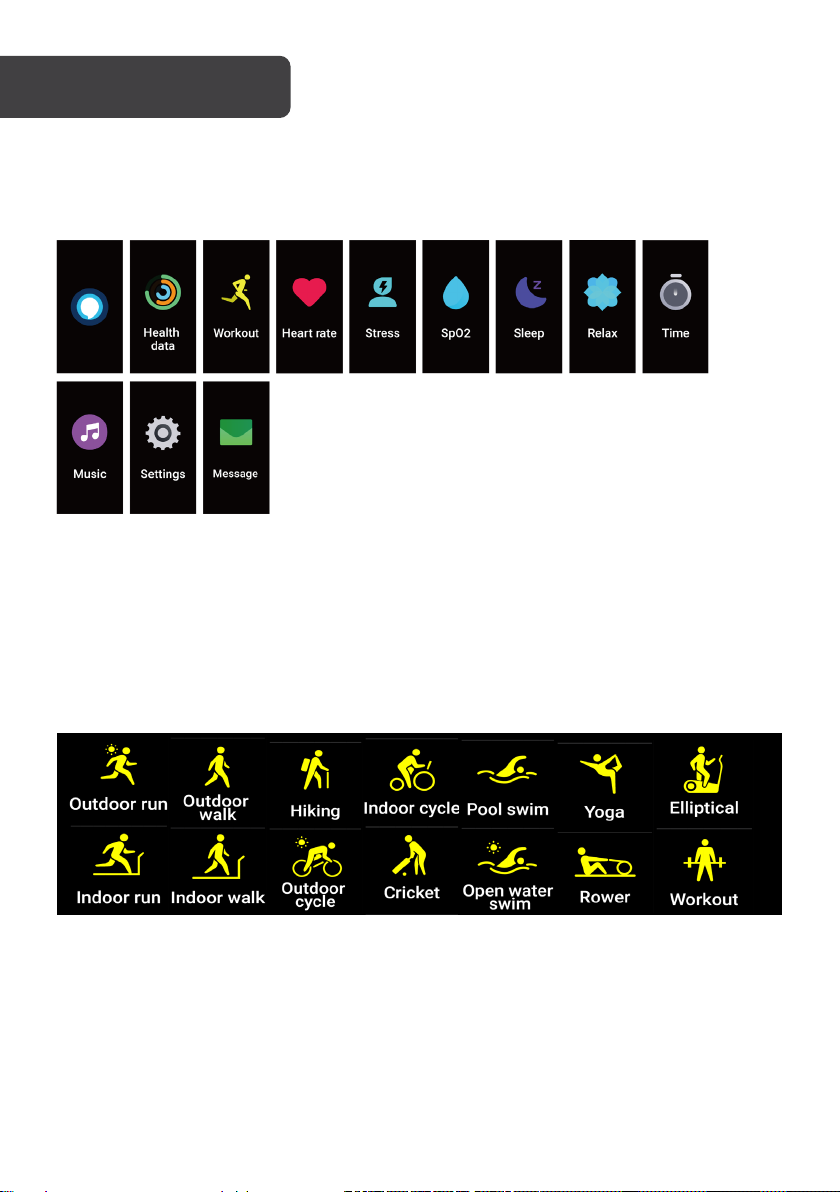
Swipe up or down to select an icon. The icons include: Message, Health Data, Workout,
Heart Rate, Stress, SpO2, Sleep, Relax, Music, Time and Settings.
Dial
You can switch between different dials in the “Dial Settings”. And you can download and
install more dials in the “Dial Market”.
Sports
14 Sports modes are provided:
You can choose to show or hide any sports mode in “veryfit”.
To start an exercise, start the Sports app, click the icon of sports type, set the goal, then
start to exercise.
To end an exercise, press and hold the touch key and follow the prompt on the screen.
8
Page 9
Intelligent detection
The smart band has the Intelligent Sports Detection function and can detect if the user is
running or walking; this function can be enabled or disabled in the app.
The Sports Summary of the smart band contains a variety of sports data and the details
can be viewed in the VeryFit app.
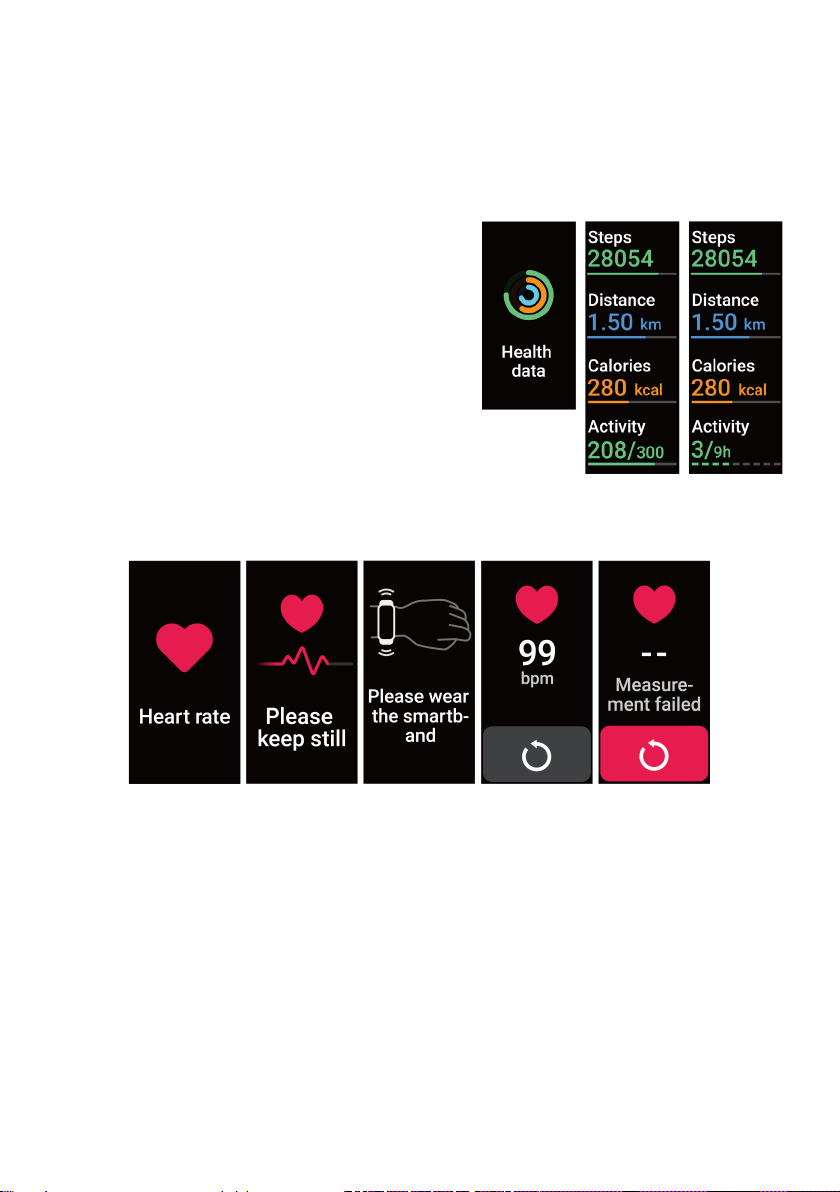
Health Data
It supports viewing the daily accomplishment of the
following info: Steps, Calories, Distance and
Activity.
Heart Rate
This device supports measuring your heart rate any time or viewing the daily monitoring
data. Also, you can set the measurement frequency in the app settings.
After you start the heart rate measurement app, you should keep your arms and wrists still
during the measurement.
9
Page 10
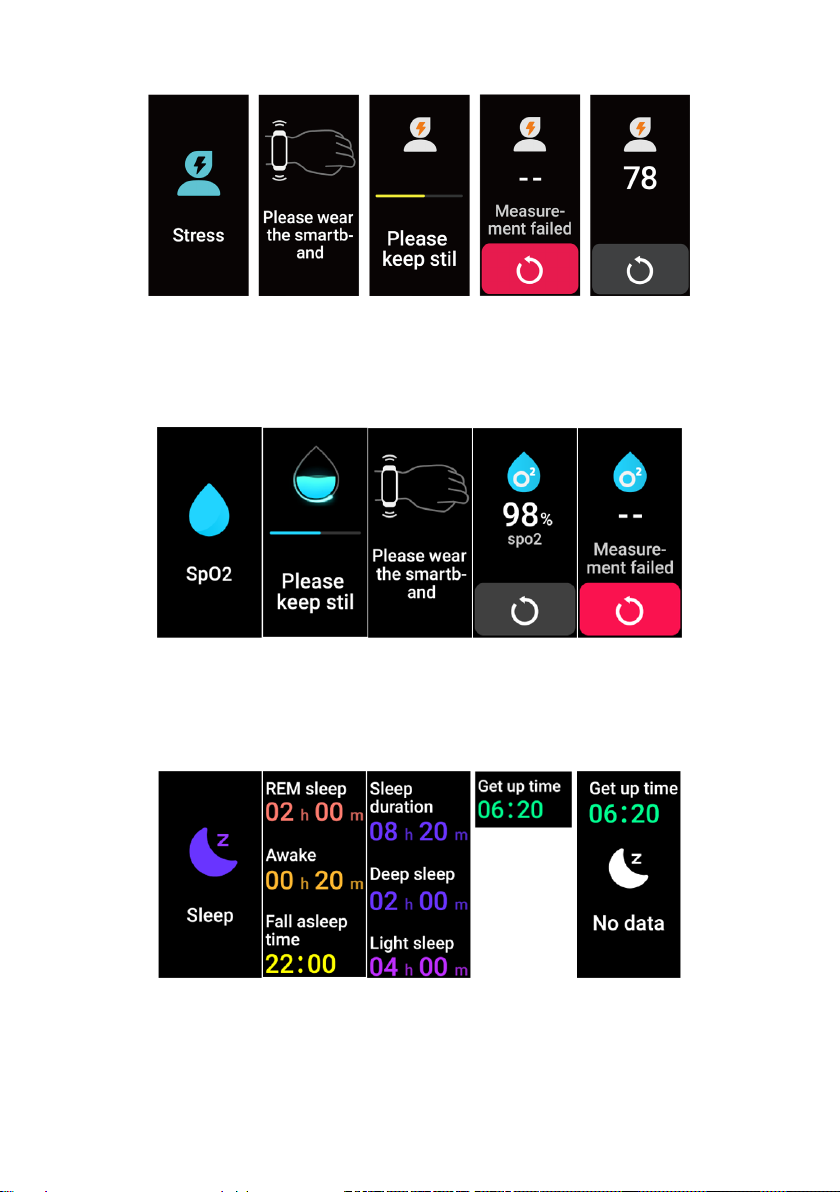
Stress
After you start the stress measurement app, you should keep your arms and wrists still
during the measurement.
SpO2
After you start the SpO2 measurement app, you should keep your arms and wrists still
during the measurement.
Sleep
You can view the most recent sleep record and sleep status at each stage.
10
Page 11
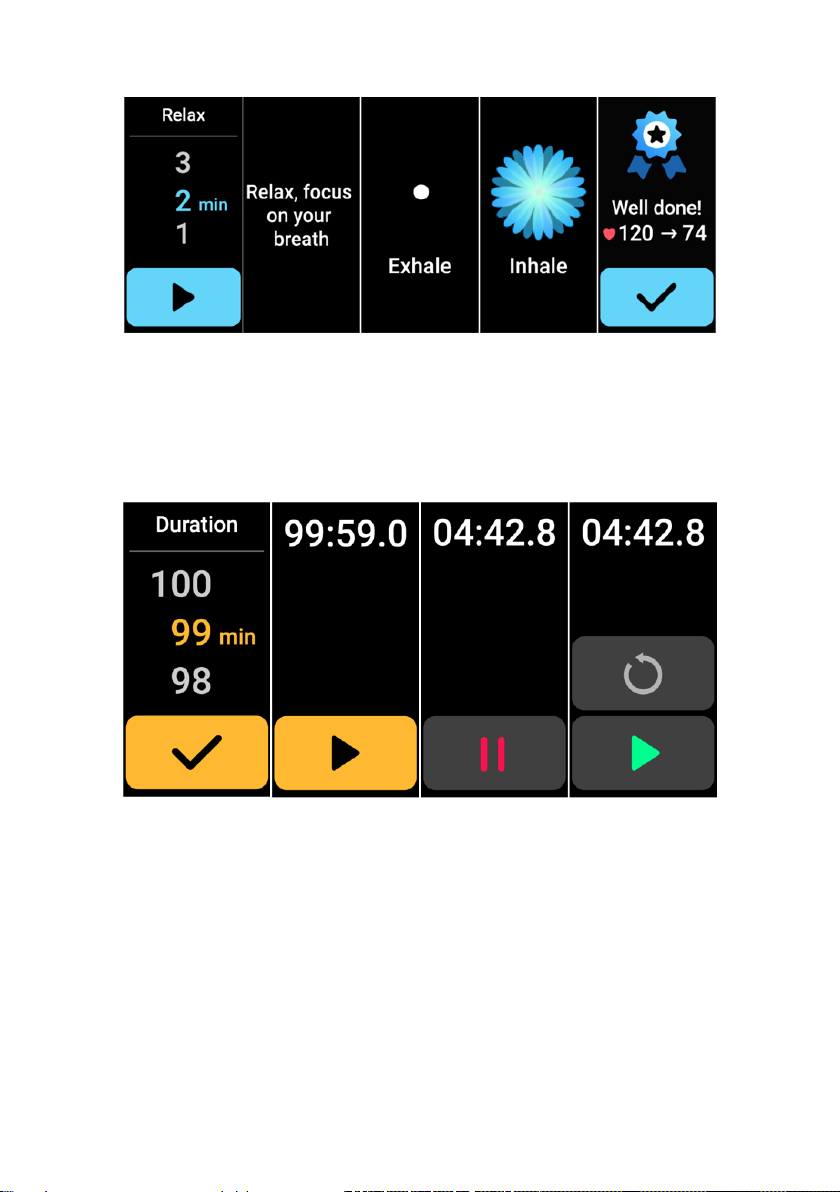
Relax
Enter the Relax app and choose the duration.
Click to start, then follow the vibration frequency and animation instructions to adjust your
breathing and it will help you relax.
Time > Stopwatch
You can set the stopwatch on the Smart Band, it supports recording multiple times.
11
Page 12
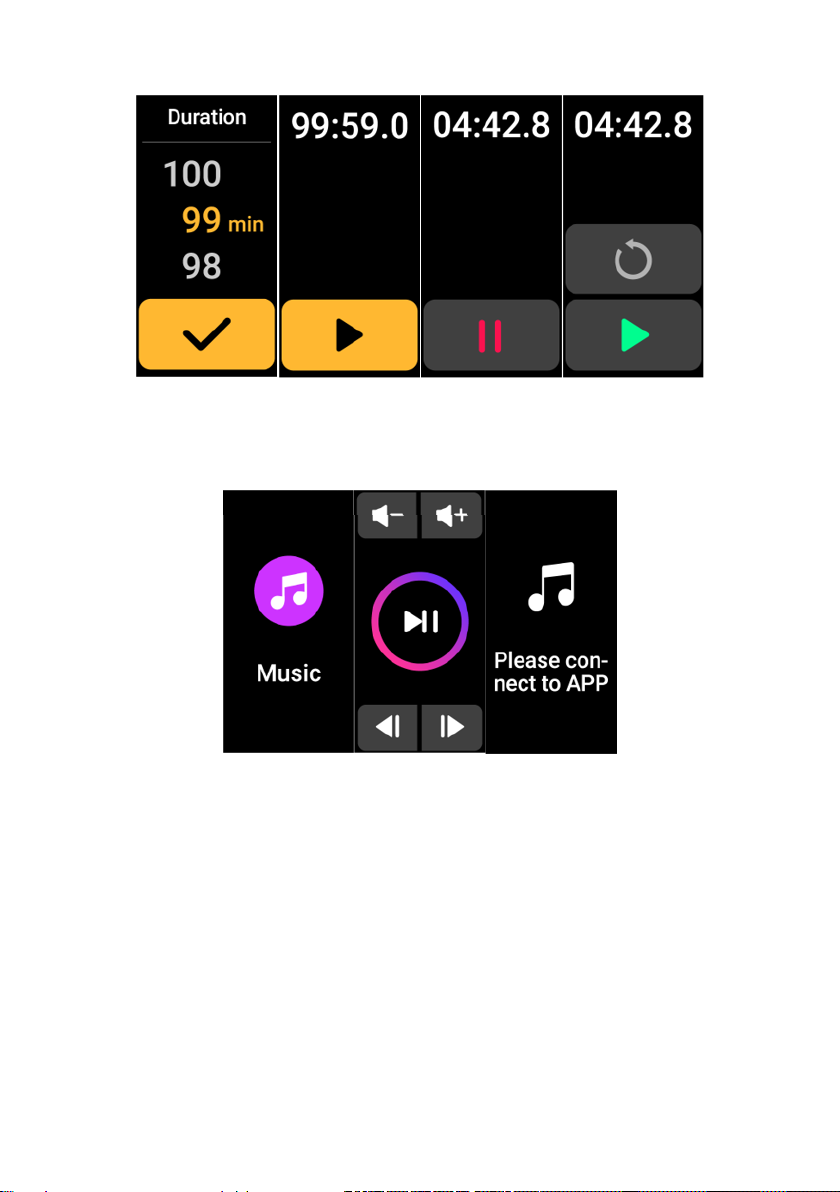
Time > Timer
You can set the duration of timer on the smart band and it will remind you when time is up.
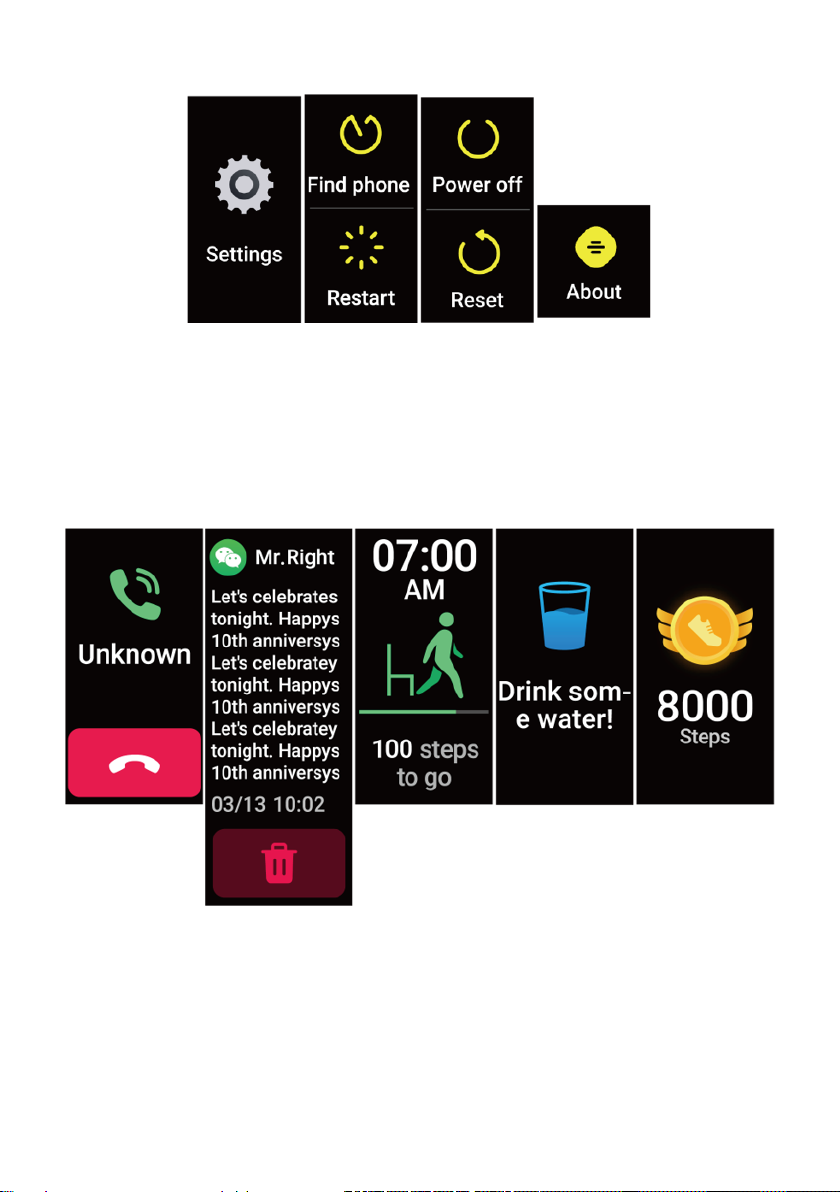
Music
When the bracelet is connected to the App, you can control the music player on your
phone. Common operations like Next/Previous, Play/Pause and Volume +/- are supported.
This function can be displayed\hide in the app settings.
12
Page 13
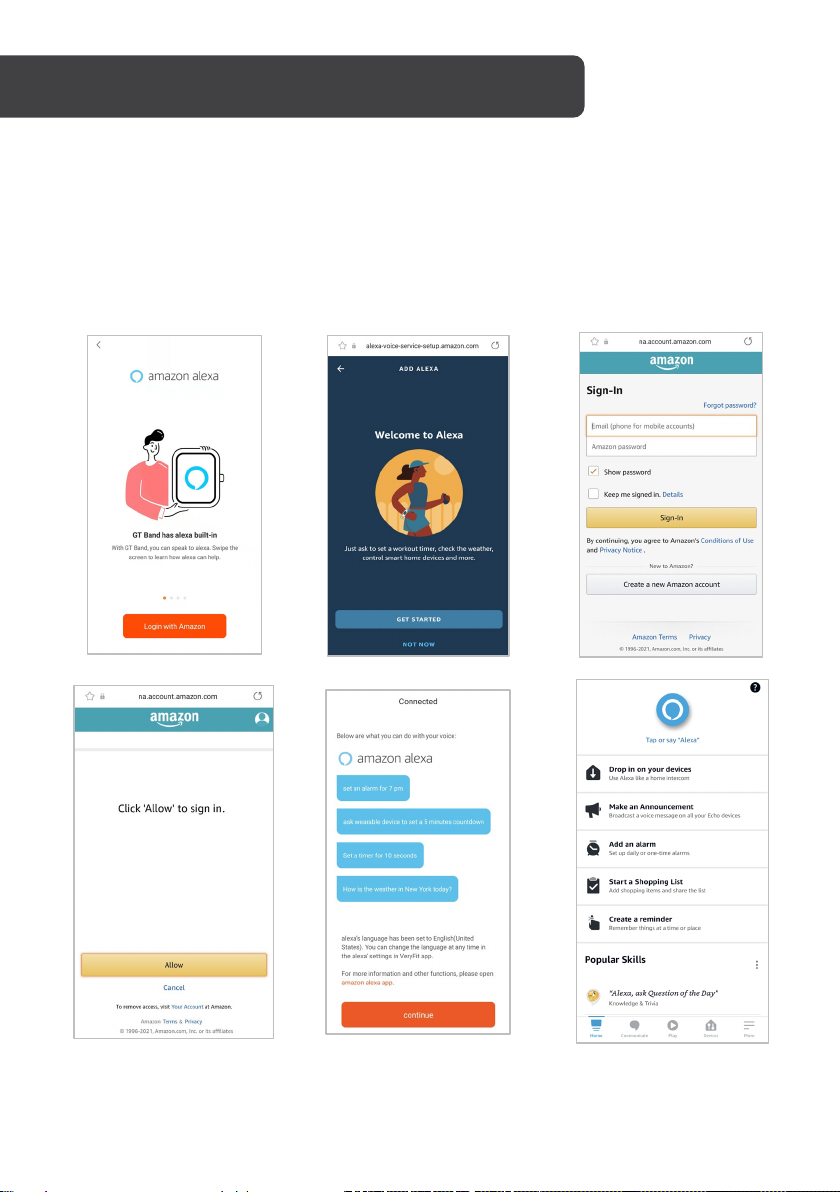
Settings
Under Settings, functions like Find Phone, Restart, Power off, reset (reset the smart band, all
data in the smart band will be cleared and it will be unbound from the phone) and About
are provided.
Message
It supports different notifications, including message, incoming call, exercise reminder,
“Drink Some Water!” tip, daily exercise goal reminder, etc.
13
Page 14
USING WITH AMAZON ALEXA
Syncing with Alexa
Ensure you have the Amazon Alexa app downloaded and have your Alexa account set up
first. To pair the Smart Band with Alexa, open the VeryFit app, go to the Device page, click
on your device, then find the Amazon Alexa function among the settings.
Follow the prompts on the screen, log in with your Amazon account, authorise your smart
band by clicking Allow, and finish the pairing process. Finally, you can choose your preferred
language setting for Alexa.
14
Page 15
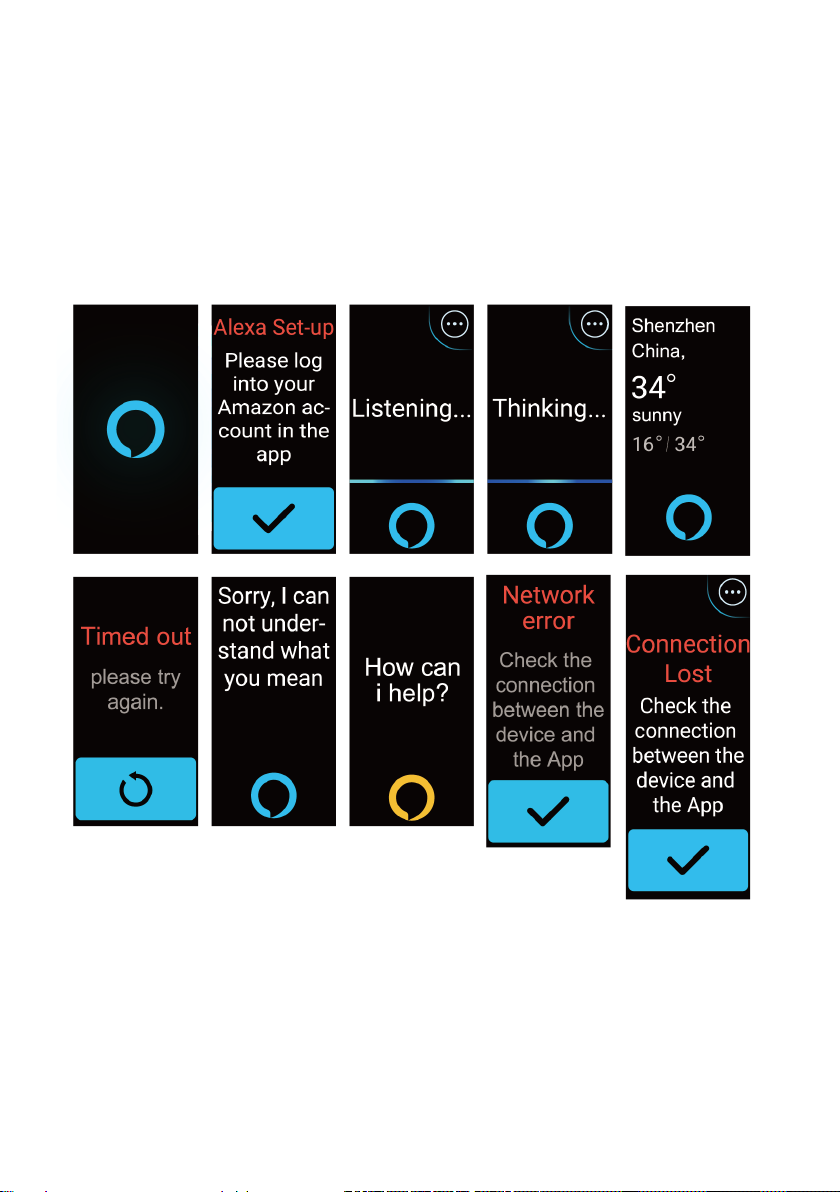
The band supports Alexa Voice Services. After inputting a voice command in the listening
interface, it will enter the thinking interface and return the result.
Timed out? When the request times out, the voice cannot be recognized, the account is not
logged in, the network connection is unstable, or the Bluetooth is not connected, a
corresponding prompt will be displayed.
Please note: The band has to stay connected with the phone in order to use Alexa.
15
Page 16
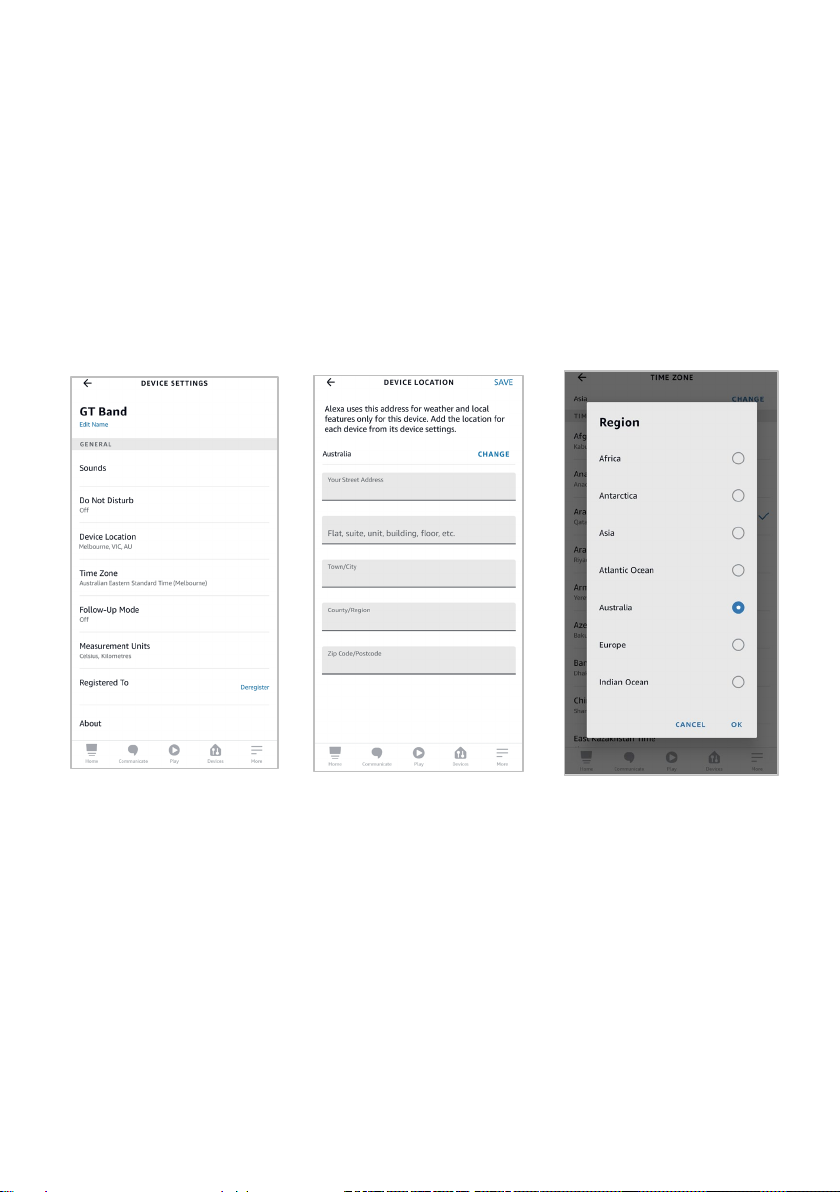
Time and Location Settings of Alexa
Please note that Alexa doesn't know the location and time zone of your smart band until
you have the location and time zone updated in the Alexa app. Without doing this, Alexa
cannot check your local weather or set the correct alarm.
To update your default location and time zone settings, first open your Alexa app, then go
to the Devices page, click on All Devices, select your smart band. Then click on Device
Location, fill in your default location, then click on Save. Finally, under Time Zone settings,
change the region by clicking on “Change” on the top right corner, select Australia, then
specify which Australian time zone.
16
Page 17
CLEANING & CARE
Below are three recommendations on wearing and maintenance:
• Keep the device clean
• Keep the device dry
• Do not wear the device too tight
For cleaning:
• Do not use household cleaners to clean the device. Use soap-free cleaners instead.
• For stains that are difficult to remove, it is recommended to scrub with alcohol.
Waterproof performance: the device is not suitable for diving, swimming in the sea or sauna,
it is suitable for swimming pool, shower (cold water) and swimming in shallows.
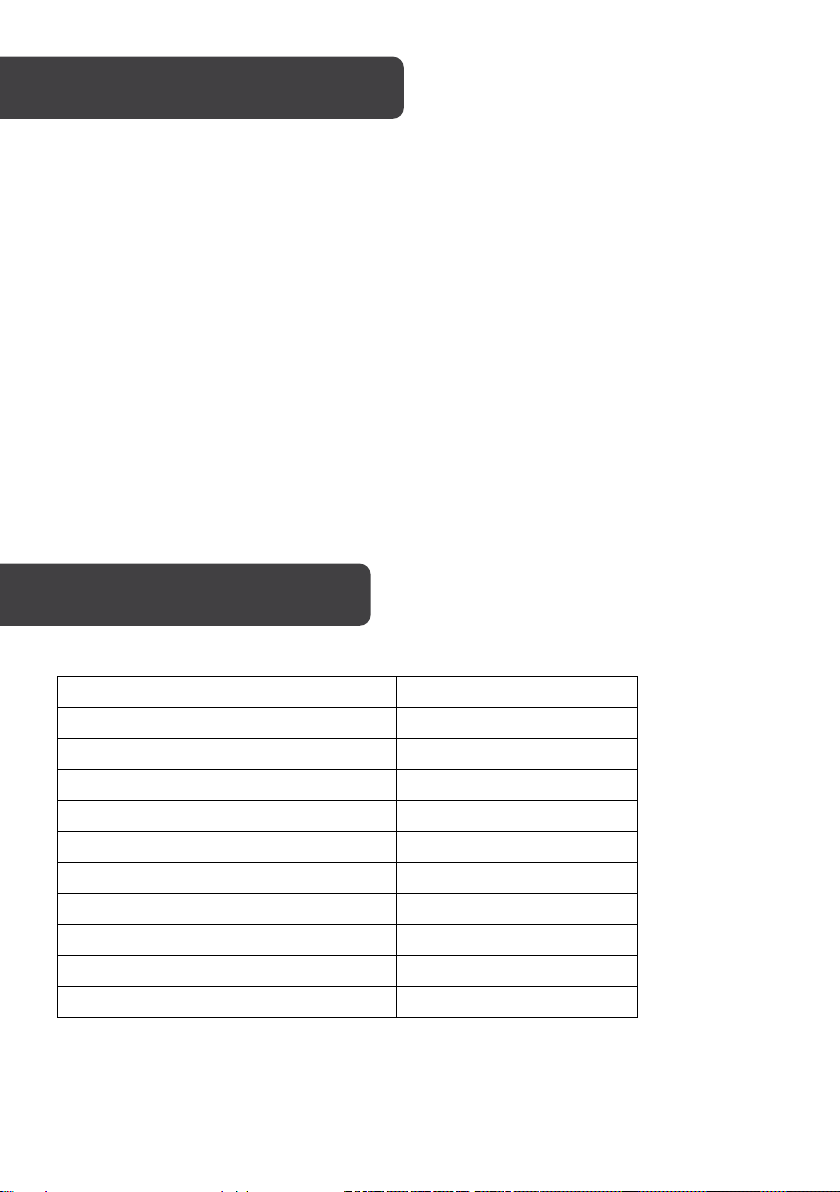
SPECIFICATIONS
Battery capacity 110mAh
Charging time About 2 hours
Waterproof level 5ATM
Operating temperature 0°C-60°C
Product frequency 2402-2480MHZ
Screen type 1.05" -inch colour screen
Charging voltage 5V±0.2V
Battery life 7 days, average use
Weight 26g
Bluetooth version BLE5
Max. Transmission power consumption 4dBm
17
Page 18
18
Page 19
19
Page 20

Need more information?
We hope that this user guide has given you
the assistance needed for a simple set-up.
For the most up-to-date guide for your product,
as well as any additional assistance you may require,
head online to help.kogan.com
20
 Loading...