

Page 1
QUICK START GUIDE
40” FULL HD LED TV
SERIES 7 GF7400
(KALED40GF7400GA)
Page 2
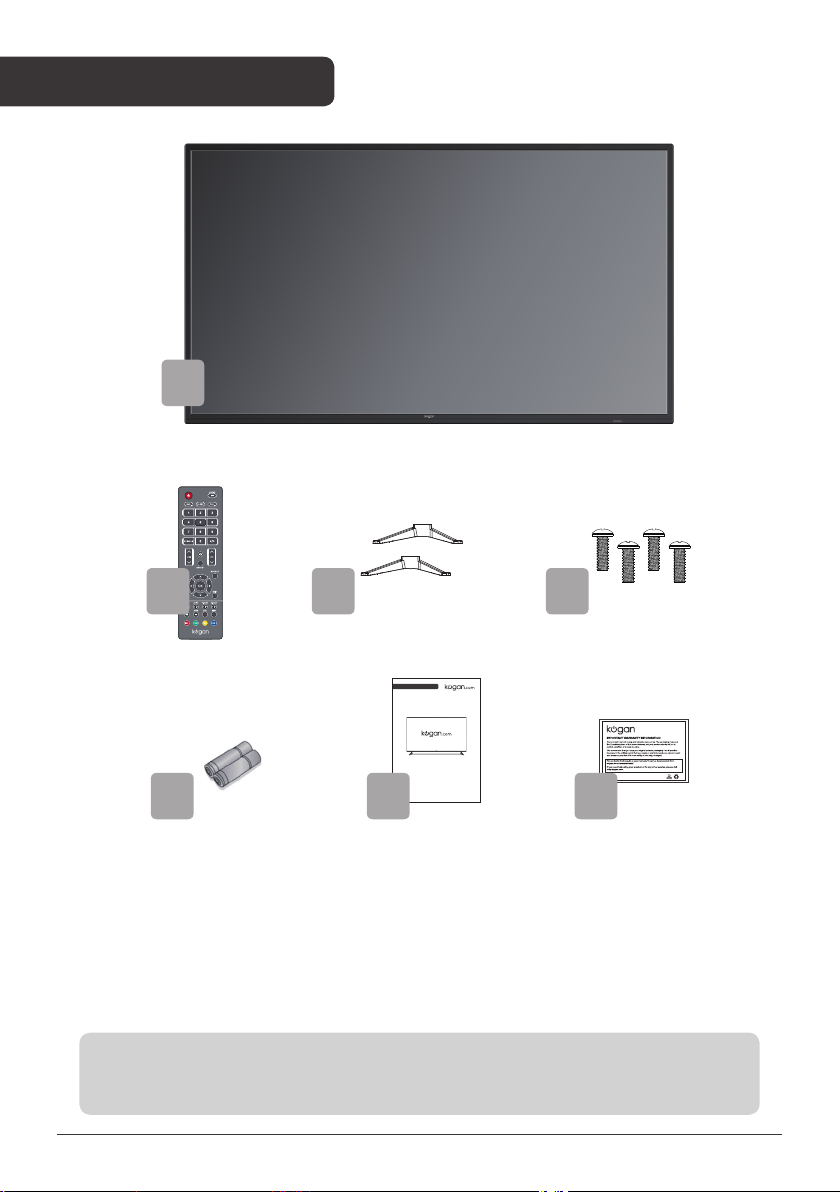
COMPONENTS
A
B
E
A Kogan 40” FULL
HD LED TV
B Remote control
C Stand (x2)
C D
QUICK START GUIDE
40” FULL HD LED TV
SERIES 7 GF7400
(KALED40GF7400GA)
F
D M4 x 15mm screw (x4)
E AAA battery (x2)
F Quick-start guide
G Warranty card
G
NOT INCLUDED
Phillips head screwdriver, antenna cable, broadband internet connection.
3
Page 3
REMOTE CONTROL OVERVIEW
1
1
3
4
4
6
5
7
7
9
8
10
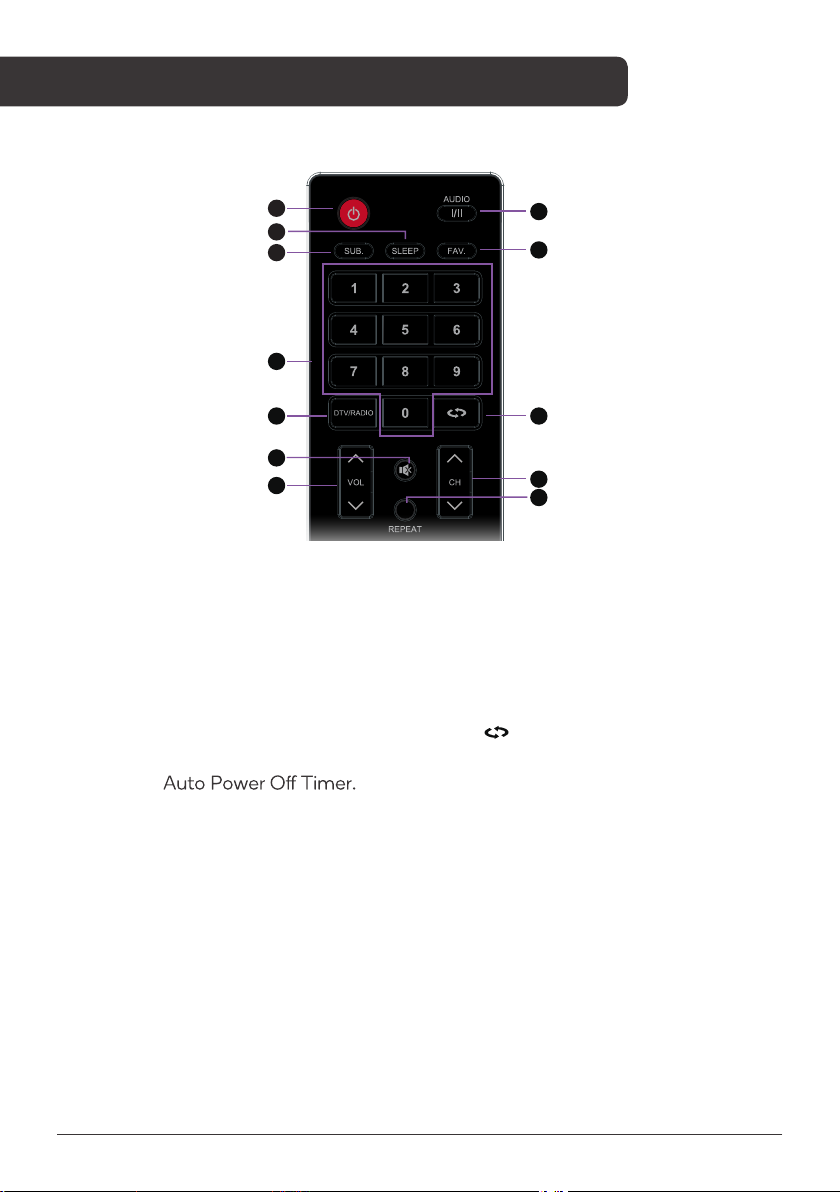
1. POWER: Turn on the TV/Standby.
2.
AUDIO: Switch the audio channel
when DVD or multimedia playing.
:In the TV condition, press this
I/II
button to select the stereo mode.
3. SLEEP:
4. SUB:
Select subtitle of media video
file.(needs the support of disk or file
5. FAV: Show the list of favourite
channels.
6. NUMBER KEYS:
Change the
channel directly.
2
5
8
11
12
7. DTV/RADIO:
In DTV mode, press
DTV/RADIO button to enter DTV
or RADIO mode.
8.
: Return to the previous
channel tuned.
9. MUTE:
10. VOL:
Mute or restore the sound.
Increase and decrease volume.
11. CH: Next and Previous channel.
12. REPEAT:
Repeat mode.
4
Page 4
5
8
12
7
12
8
11
7
10
9
13
15
14
15
16
14
17
18
19
22
23
26
27
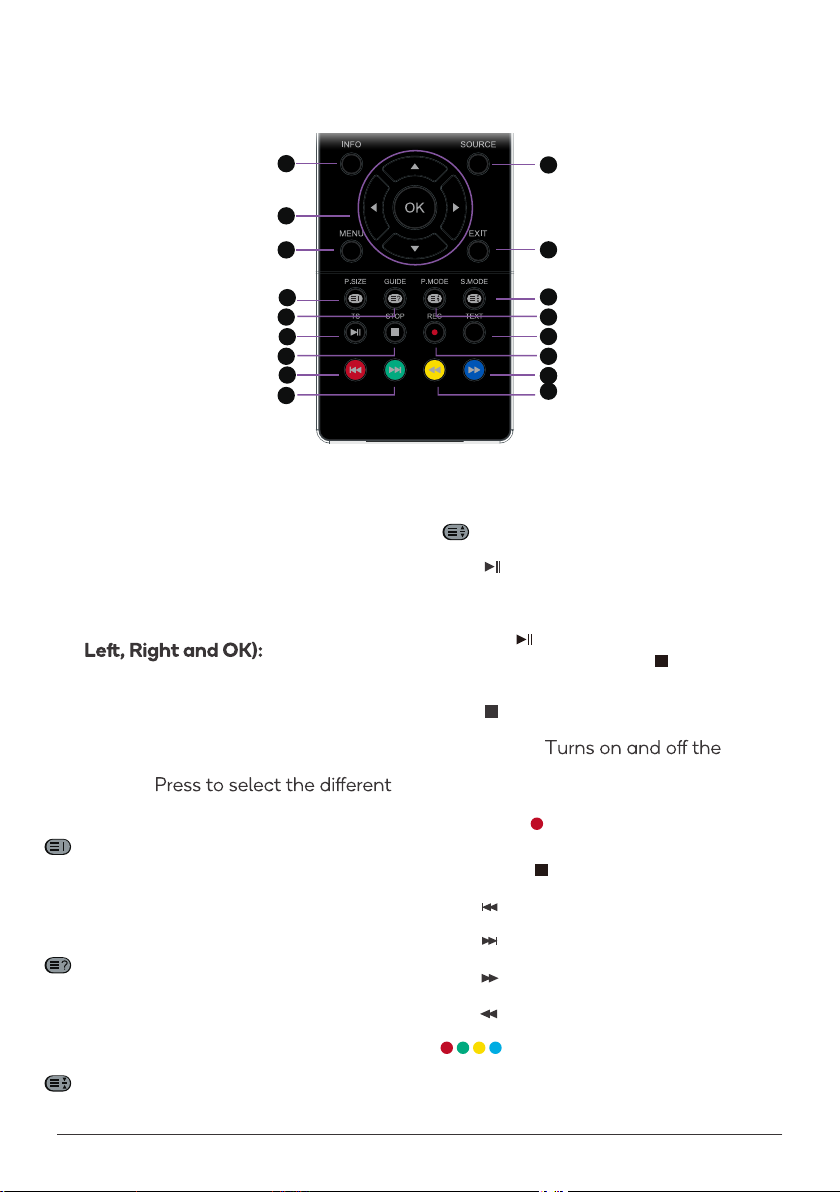
13. INFO:
Show information about
the current program.
14. SOURCE:
Press to change
signal source.
15. NAVIGATION KEYS (Up, Down,
To move in the
menus and confirm settings.
16. MENU: Display menu page.
17. EXIT:
Exit the Menu.
18. P.SIZE:
picture size.
: Displays the main index in
Teletext mode.
20
21
24
25
28
28
29
21. P.MODE:
:
Displays the top, buttom or all of page.
Output image mode selection.
: Play/Pause.22.
TS: In DTV mode, press TS button
to start the delay function, press
the button to start playing delay
program, press the button to
terminate the delay functions.
23.
: Stop playback.
24. TEXT:
Teletext function.
25. REC/ : In DTV mode , press
REC button to start recording,
press button to stop recording.
GUIDE: Show the Electronic
19.
Program Guide.
: Reveals hidden information such as
the answers to a quiz in TELETEXT
mode.
20. S.MODE: Setting audio options.
:
Freeze a multi-page changing on
Teletext mode.
: Previous file or chapter.26.
: Next file or chapter.27.
28.
: Fast forward playback.
29.
: Fast rewind playback.
Press the appropriate colour to
direct access functions in
TELETEXT or EPG OSD mode.
5
Page 5

ASSEMBLY AND INSTALLATION
BEFORE YOU GET STARTED
Spread cushioning flat to lay the TV on. This will help to prevent damage.
1. Stand assembly
a. Attach stand to base of TV.
b. Insert two 15mm screws and use Phillips head screwdriver
(not supplied) to tighten.
c. Repeat these steps for second stand.
1c
1a
1b
2. Remote control assembly
a. Open the battery compartment cover on the back side.
b. Insert two 1.5V AAA size batteries, making sure to match the polarity
markings (+ / -) of the batteries with the diagram inside
the compartment.
c. Replace battery compartment cover.
2a 2b 2c
6
Page 6

3. Connect to antenna
ANT
USB 2.0
(5V / 500mA)
AUDIO OUT
DIGITAL
AUDIO OUT
R -AUDIO- L VIDEO
AV
a. Connect an antenna cable (not supplied) via the ‘ANT’ input port at
the back of the TV.
b. Ensure the antenna cable is also connected to a working antenna,
either via an antenna wall socket in your home, or directly.
Antenna
wall socket
3b
3a
Antenna cable
(not supplied)
4. Turning TV on
Plug the power cord into a suitable power outlet, then press the
POWER (
) button on the remote control, making sure to aim it at the
sensor at the front of the TV. Alternatively, you can press the power
button on the lower side of the back panel on the TV.
TURNING TV OFF
Press the
To power down the TV completely, unplug the power cord from the power
outlet.
Do not leave your set in standby mode for long periods of time. If you will
not use the TV for a long time, it is recommended to unplug the set from
both the power outlet and aerial.
POWER ( ) button on the remote control to enter standby mode.
7
Page 7

SETTINGS
When turning the TV on for the first time, the Setup Wizard screen will
appear. Use the ▲, ▼ and OK buttons to navigate the following options.
Select Language
Press / button to select the language to be used for menus
and message.
Select Country
Press ▼ / ▲ button to highlight country menu.
Press / button to select the country you want to.
Select Energy Mode
Press / button to select the Energy mode.
Auto Tuning
Select Input Source
Press SOURCE button to display the
input source list, Press ▼ / ▲ or
SOURCE button to select the input
source you want to, Press OK button
to enter the input source, Press EXIT
button to quit.
8
Page 8

BASIC TROUBLESHOOTING
Poor picture and sound quality
Try a di
Adjust the antenna
Check all connections
No picture or sound in TV status
Try another channel
Press the TV/AV button
Make sure TV is plugged in
Check the antenna connection
No sound or sound is too low at
maximum volume
Check the volume settings on any
external speakers connected to your
television
Adjust the TV volume accordingly
Check another channel or input
Check that MUTE hasn’t been
turned on
No colour, wrong colour or tints
Make sure the program itself is
broadcast in colour
Select the picture menu, then adjust
the colour and tint submenus
erent channel
Remote control malfunc
Replace remote control batteries
Check battery terminals
Remote is out of range, move closer
to TV
Remove any obstructions between
remote and IR sensor of TV
Make sure the power cord to your TV
is plugged in and turned on
Image is not centred on the screen
Adjust the horizontal and vertical
position
“No Signal” on HDMI source
Test the device with a di
cable
Plug the device into an
port
Try a di
the same cable and port
Perform a factory reset on your TV
For our full TV troubleshooting guide
and extended User Manual for this
TV, head online to help.kogan.com
erent device connected to
tions
erent HDMI
other HDMI
Picture rolls vertically
Check all connections
Blurred or snowy picture, distorted
sound
Check direction, location and
connections to your antenna
Issues may be caused by the use of
an indoor antenna (poor signal)
91011
Page 9

Page 10

Page 11

Need more information?
This is a Quick Start Guide, and while we hope that this
has given you the assistance needed for a simple set-up,
a full user guide outlining all of this product’s instructions
and features can be found online at help.kogan.com
 Loading...