

Page 1

TABLE OF CONTENTS
12.1” Digital Photo Frame
DPF12MB
Safety Information……………………………………………3
General Information…………………………………………4
Remote Control Features……………………………………5
Basic Operations
Main Menu………………………………………………..6
Memory options………………………………………….7
Displaying Photos………………………………………..8
Playing Music Files…………………………….………10
Displaying Photos with Music…………………………11
Playing Video Files……………………….……………12
E-Book…………………………………….…………….13
Editing………………………………………..………….14
Managing Files…………………………………………15
Setup
Language Setup………………………….……….……16
Setting up Slideshow……………………….……….…17
Clock Setup………………………………….………….18
Alarm Setup…………………………………………….19
Startup ………………………………………….……….19
Video………………………………………………….....20
Default………………………………………….……..…20
Calendar………………………………………...………21
Page | 2
Page 2
Safety Information:
z Do not store in damp or dusty environment.
z Never store in areas of extreme temperatures.
z Never try to open the case yourself, always seek technical
support.
z Connect the AC adaptor to both the DC IN jack and to the power
outlet.
z Only use attachments or accessories approved by the
manufacturer.
z When left unused for a long period of time, the unit should be
unplugged from the household AC outlet
Warning: To reduce the risk of fire or electric shock, do not expose
photo frame any form of moisture.
General Information about your Photo Frame
1.1 Interface
1
1. Po wer Connector: This is for connecting the power adapter.
2. Au dio Out: This can be connected to earphones or Audio In of TV.
3. Vi deo Out: This can be connected to video in of TV.
4. 5 in1 Card Socket: Accepts SD/MMC/MS/XD Memory cards.
5. CF Card Socket: Accepts CFI/CFII/ Microdrive.
6. USB Host: This can be connected to USB flash disk.
7. USB : This can be connected to the USB port of PC.
2 3 5 6 7
4
1.2 Package Contents
Remote Control
Power adapter
AV Cable
USB Cable
Mini USB (to PC)
Page | 3
Page | 4
Page 3
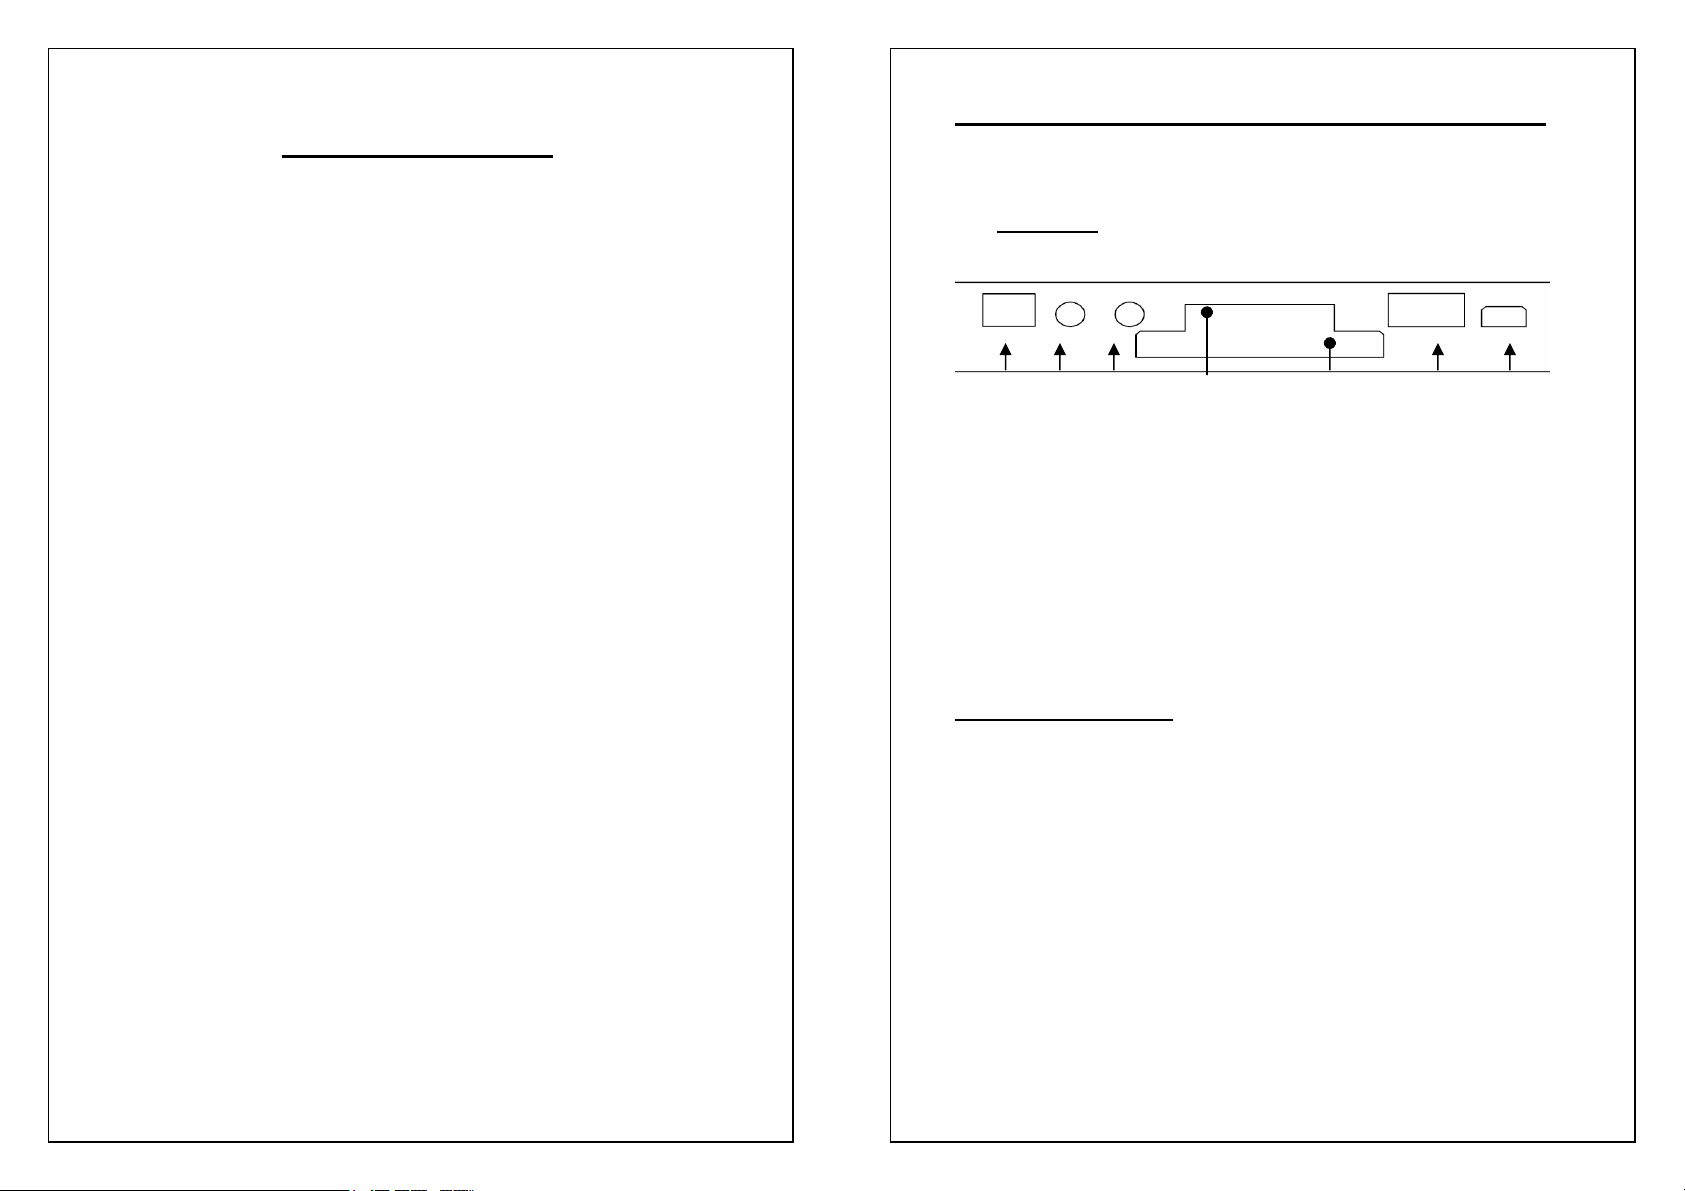
Features of the Remote Control
Basic Operations
2.1 Remote Control
Switch between Photo
Frame and TV
Adjust LCD brightness
Play Music and Photo
Play Music
Exit and Return
Adjust Volume
Pause/Play
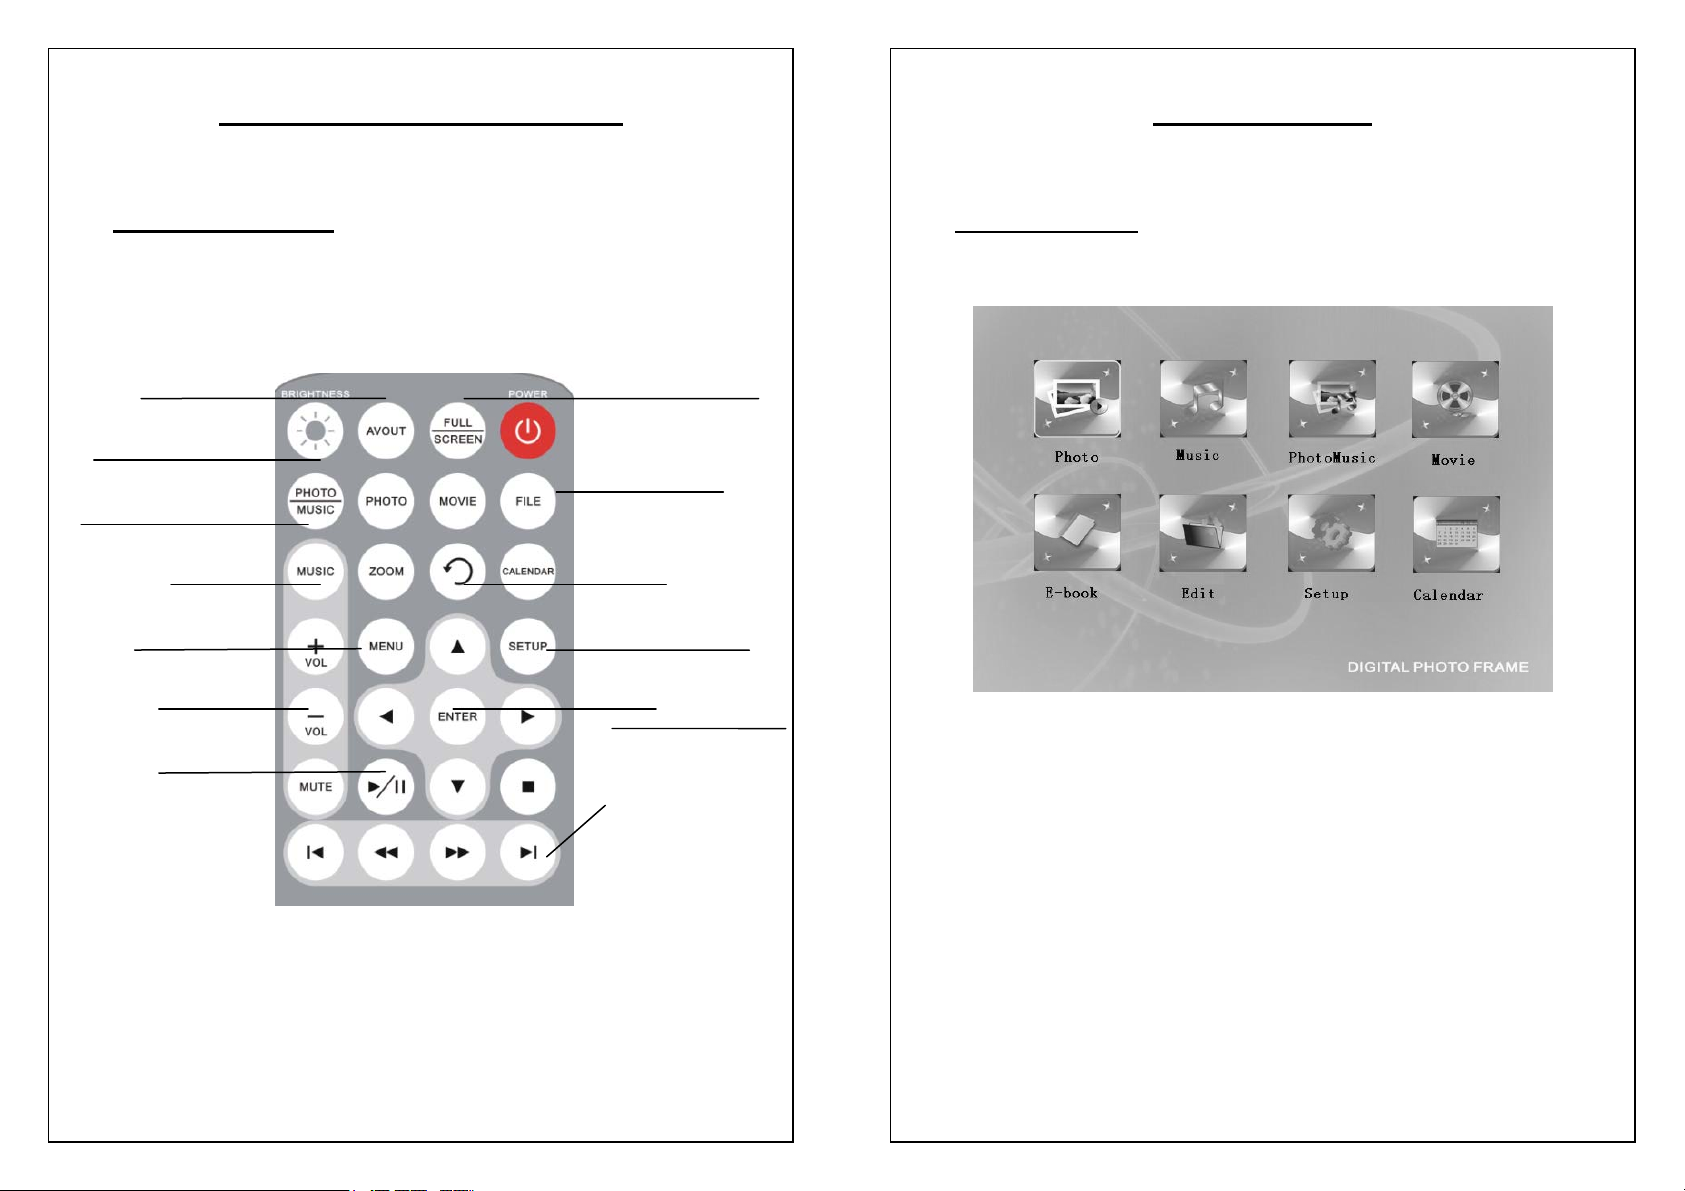
3.1 Main Menu
Full Screen Mode
Open File List
Rotate
Open Setup menu
OK
Next
Function:
Main Menu interface is the entrance of all menus.
Operation:
Press the “/ /▲ /▼” key to choose the menu, press
“ENTER/MODE” key to go into the item.
Page | 5
Page | 6
Page 4
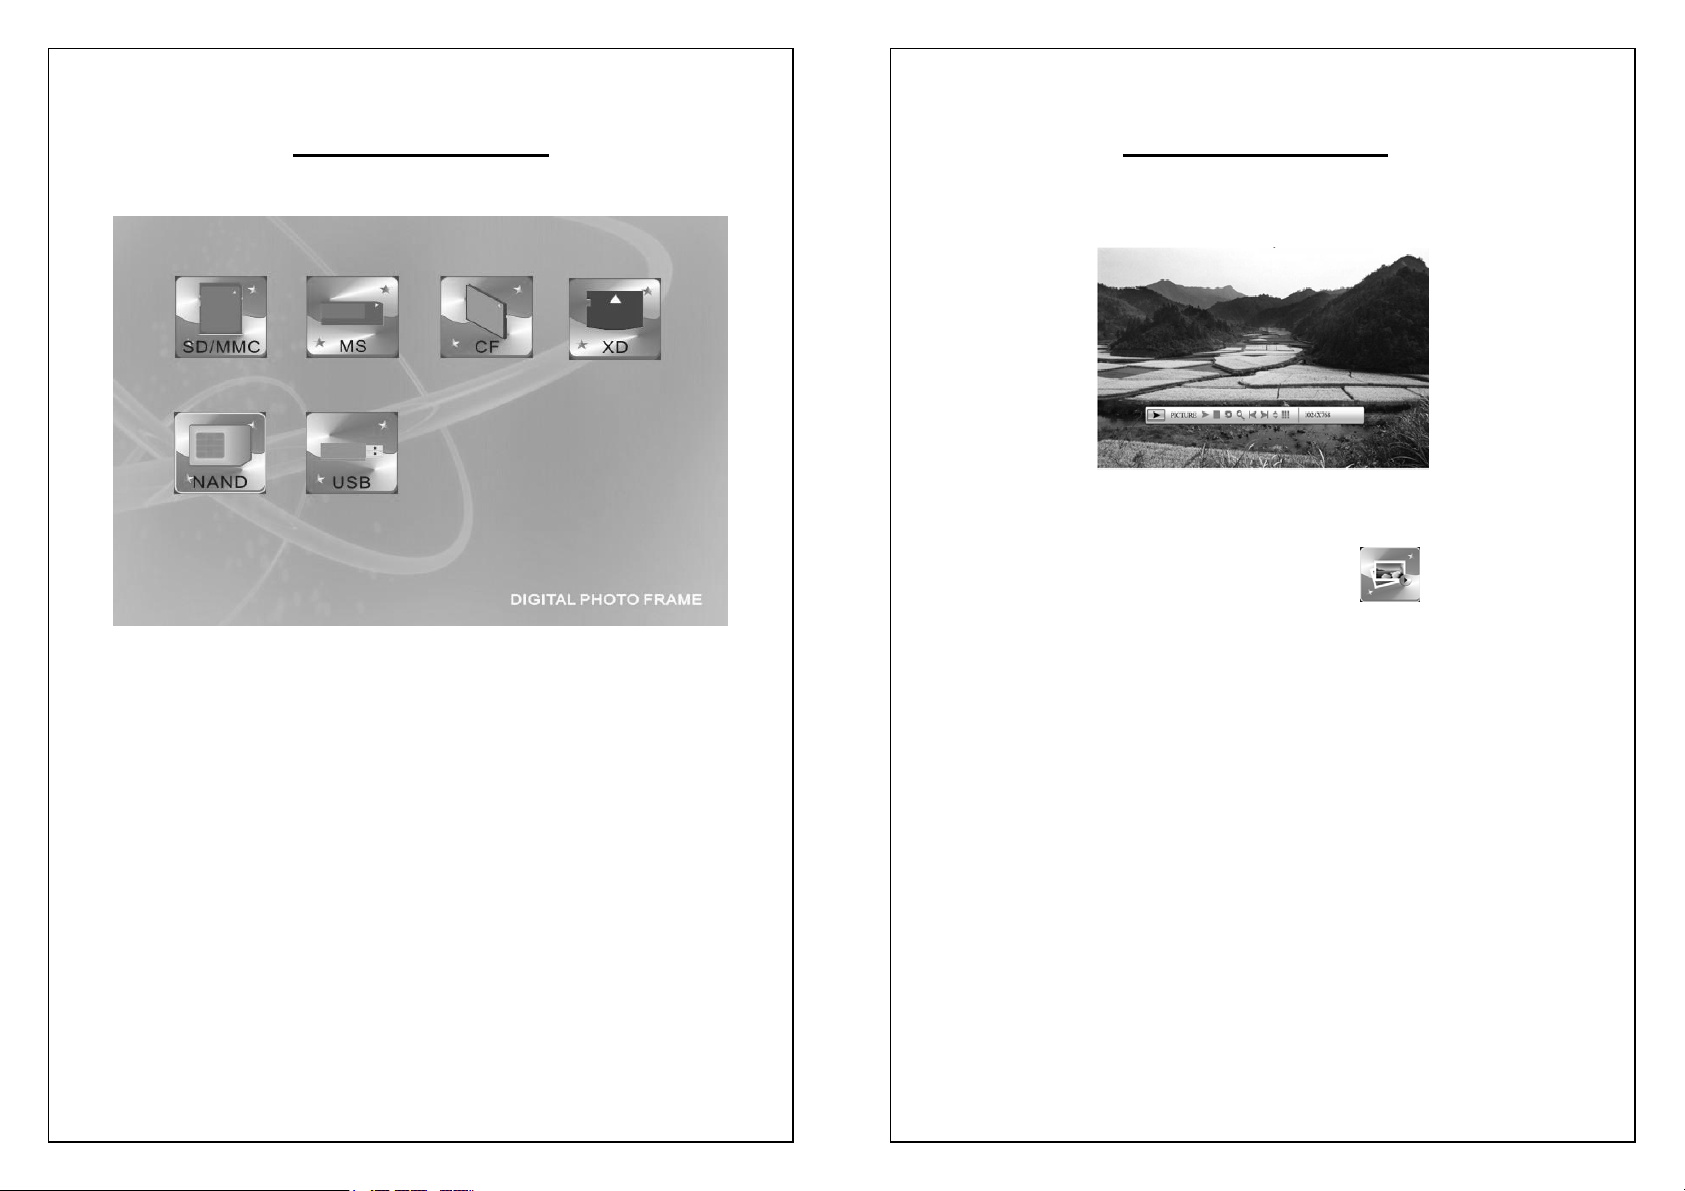
3.2 Memory Options
Function:
You can choose the Memory medium you would like to load from in this
interface.
Operation:
Press “/ /▲ /▼” key to choose the memory, press
“ ENTER/MODE ” key to into the memory medium.
3.3 Displaying Photos
Operation:
¾ Press “/ /▲ /▼” key to choose “ ” in Main menu.
¾ Press “ENTER/MODE” key to into the memory menu and
choose the photo you would like to display.
¾ When the photo is displayed, press the “ENTER” key to enter
“Info Bar”, and then press “
options, and then press “ENTER” to operate.
¾ NOTE: The “Info Bar” will disappear if no input activities are
detected for 5 seconds.
¾ “Info Bar” functions are as follows from left to right:
z Status bar
z Play/Pause
z Stop
z Rotate Picture
z Zoom In
z Previous picture
/” key to choose one of the
Page | 7
Page | 8
Page 5

z Next picture
z Show picture info
z Thumbnail Display
z Resolution
¾ When the play stops, you can browse the pictures in any disk.
¾ The picture can be rotated 90 degrees clockwise each time.
¾ In thumbnail display mode, you can view nine pictures at one
time.
3.4 Playing Music Files
Operation:
¾ Press “/ /▲ /▼” key in the Main menu, then press the
“ENTER/MODE” key in the memory interface and choose the
music file you would like to play.
¾ When the music is playing, press “
of the options in the Info bar.
¾ The following are the “Info Bar” functions from left to right:
z Status show
z Play time of the single music
z Play/pause
z Stop
z Previous music
z Fast backward
z Fast forward
z Next music
z Music file info
z Music info
z Play mode (Standard, Repeat one, Dir repeat)
/” key to choose one
Page | 9
Page | 10
Page 6

3.5 Displaying Photos and Music Together
3.6 Playing Video Files
Operation:
¾ Press “/ /▲ /▼ ” key to choose “ ” in Main menu,
then press “ENTER/MODE” key in the memory interface and
choose a photo to display.
¾ Press “VOL+/VOL-” key to regulate the volume.
¾ Press “Mute” key to mute volume.
¾ When playing, press “ENTER” key to open the “Info Bar”.
¾ You can see its function and operation shown in 3.4. NOTE:
The “Info Bar” will disappear if no input activities are detected
for 5 seconds.
¾ If you would like to display a photo, please use the quick key
on the remote.
Operation:
¾ Press “/ /▲ /▼ ” key to choose “ ” in Main menu,
press “ENTER/MODE” key to into the memory choice
interface and choose the file to play.
¾ Press “VOL+/VOL-” key to regulate the volume.
¾ Press “Mute” key to mute.
¾ When the movie is playing , press “ENTER” key to enter “Info
Bar” as the picture 3.6,and then press “
one of the item.
¾ “Info Bar” show the functions from left to right:
z Status Show
z Single play time
z Play/pause
z Stop
z Previous Video
z Fast backward
z Fast forward
/ ” key to choose
Page | 11
Page | 12
Page 7

z Next video
z Video file info
z Zoom in
z Subtitle switch, Audio display and Play mode (Standard,
Repeat one, Dir repeat)
Note: If play wide screen (16:9) movie, please press FULL/SCREEN
key on the remote to switch display mode.
3.8 Editing
When a memory card is inserted into your digital photo frame, it will be
displayed in a new window. Then the user can then upload files from it.
3.8.1 Folder Operation
3.7 E-Book Function
Operation:
¾ Press “//▲/▼” key to choose “ ” in Main menu,
press “ENTER” key to into the memory choice interface and
choose the TXT file to play.
¾ Press “
¾ Press “/ ” key to page up.
▲/▼ ” key to line up.
Operation:
¾ Press “//▲/▼” key to choose “ ” in Main menu,
press “ENTER” key to into the memory interface and then
choose the file to operation.
¾ Press “
¾ Press “
¾ Press “MENU” key to return.
▲/▼” key to choose the folder, press “ENTER/” key
to affirm, press “
▲/▼” key to choose the file, press “ENTER” key to
play the file.
” key to return.
Page | 13
Page | 14
Page 8

3.8.2 Managing Files
3.9 Setup
Operation:
¾ Press “▲/▼” key to choose the file. When you press “” key,
a symbol “
3.8.2.1.
¾ Press “
¾ Press “Menu” key to choose file function operation items
¾ Press “
¾ Press “ENTER” key to return the file list.
¾ To copy files, Press “
¾ If an error occurs, an Error” window will pop up.
¾ Press “ENTER” to return.
/” key to choose the folder.
(cancel/paste/delete), see picture below.
▲/▼” to choose the function that you want, and
press “ENTER” key to operate.
the destination.
” will appear at the left, as the picture
” key to choose the file and paste it to
Operation:
¾ Press “//▲/▼” key to choose “ ” in Main menu,
press “ENTER” key to into the memory interface and choose
the file to open.
Refer to above picture.
¾ Press “
“ENTER/
¾ Press the “
¾ Press the “ENTER/
▲/▼” key to choose the option and then press
” key to enter the folder.
▲/▼” key to choose an option.
” key to open the corresponding menu.
Page | 15
Page | 16
Page 9

3.9.1 Language Setup
3.9.2 Setting up a Slideshow
Function:
Change the language of your Photo Frame. The following languages are
available:
Chinese, English, Deutsch, French, Spanish.
Operation:
¾ Press “
¾ Press “ENTER” to affirm.
¾ Press “
▲/▼” to choose the language
” to exit.
Function:
Set slideshow mode: fast, middle, slow
Operation:
¾ Press “
¾ Press “ENTER/” key and then press “ ▲/▼” key to choose
¾ Press “ENTER” to confirm.
¾ Press “
▲/▼” to choose “slideshow mode”
“fast” or “middle” or “slow” as playing speed.
” to exit.
Page | 17
Page | 18
Page 10

3.9.3 Clock Setup
Function:
Set the system date and time.
Operation:
¾ Press “/” key to choose the set content as follow: year,
month, day, hour, minute, 12H/24H )
¾ Press “
¾ Press “ENTER” key to exit
Function:
1 Set the Date, time and ringtone of the alarm.
2 You can save three MP3 rings in FLASH named “Ring1.mp3”,
3 If not, the default ring will be used.
4 There are three
Operation:
¾ Press “/” key to choose the: year, month, day, hour, minute,
ring and mode.
¾ Press “
¾ Press “ENTER” key to exit
▲/▼” key to set the value
3.9.4 Alarm Setup
“Ring2.mp3”, “Ring3.mp3”. Choose one of them to be the
alarm ringtone.
▲/▼” key to set the value.
3.9.5 Startup Setup
Function:
At the Setup Menu, you can choose from the following options:
Mode, Calendar, Picture, Music, Movie, Edit.
Operation:
¾ Press “
¾ Press “ENTER” key to affirm. Then the choice will be the
¾ Press “
Function:
Adjust the Brightness, Contrast and the Color.
Operation:
¾ Press “
¾ Press / key to adjust these parameters.
¾ Press “ENTER” key to exit
▲/▼” key to choose the option
startup interface when you restart.
” key to exit
3.9.6 Video Setup
▲/▼” key to select Brightness/Contrast/Color
Page | 19
Page | 20
Page 11

3.9.7 Default Set
Function:
Recover default settings.
Operation:
¾ Press “
¾ Press ”ENTER/” key to affirm
¾ Press “
▲/▼” key to choose “Default Set”
” key to exit
3.10 Calendar
Function:
1. Show the calendar month to month
2. Clock(12H/24H )
3. Alarm
Operation:
//▲/▼” key to choose “ CALENDAR” in Main menu, then
Press “
press “ENTER” key.
Questions or Queries?
Feel free to email our support team at support@kogan.com.au and
they will happily a
product.
nswer your questions regarding your Kogan
Page | 21
Page | 22
 Loading...