

Page 1
.
Agora Netbook
User Manual
Agora
Agora Pro
Edition
Page 2

About this User’s Manual
Congratulations on your purchase of the Kogan Agora Netbook.
This user manual provides information regarding the various components in the Netbook
and how to use them.
Table of Contents:
Chapter 1: Introducing the Agora Netbook:
Notes for this Manual……………………………………………....
Safety Precautions
The AC adapter………………………………………………
Battery Pack………………………………………………….
General ………………………………………………………
Where to Place your Netbook……………………………………...
Ergonomic Considerations…………………………………………
Power Systems……………………………………………………..
Turning your Netbook On/Off……………………………………..
Chapter 2: Knowing the Parts:
Opening/Closing Netbook…………………………………………
Front Side………………………………………………………….
Left Side…………………………………………………………...
Right Side………………………………………………………….
Bottom Side………………………………………………………..
Status LEDs………………………………………………………..
Chapter 3: Getting Started:
Connecting the AC adapter and Charging the Battery…………….
Removing the Battery………………………………………………
Using the Touchpad….…………………………………………….
Using the Keyboard
Special Function keys……………………………………….
Initial Start-up Guide…………………………………………….....
p 1
p 2-3
p 4
p 5
p 6
p 7
p 8
p 9
p 10
p 10-11
p 12
p 13
p 14
p 15
p 16-17
p 18
p 19
p 20
p 21-22
Page 3

Chapter 4: Using your Netbook
Adjusting Display Resolution……………………………………..
Switching Users……………………………………………...........
Different Log-Out States
Restart………………………………………...................................
Shutdown………………………………………..............................
Stand-by………………………………………................................
Log-Out……………………………………….................................
Switch User………………………………………...........................
Hibernate………………………………………...............................
Suspend……………………………………….................................
Using the Web Camera…………………………………………….
Using Peripherals………………………………………………….
Connecting USB Storage Devices…………………………………
Connecting Audio Devices…………………………………...........
Using the Bluetooth Dongle……………………………………….
Connecting to a Wi-Fi Network…………………………………...
Connecting an External Monitor………………………………......
Using Open Office………………………………………………....
Returning to Default Factory Settings…………………………......
Appendix
Installing Windows XP…………………………………………….. p 38
Support Information……………………………………………….. p 38
p 23
p 24
p 25
p 25
p 25
p 25
p 25
p 25
p 25
p 25
p 26
p 27-29
p 30
p 31
p 32
p 33
p 34
p 35
p 36-37
Page 4
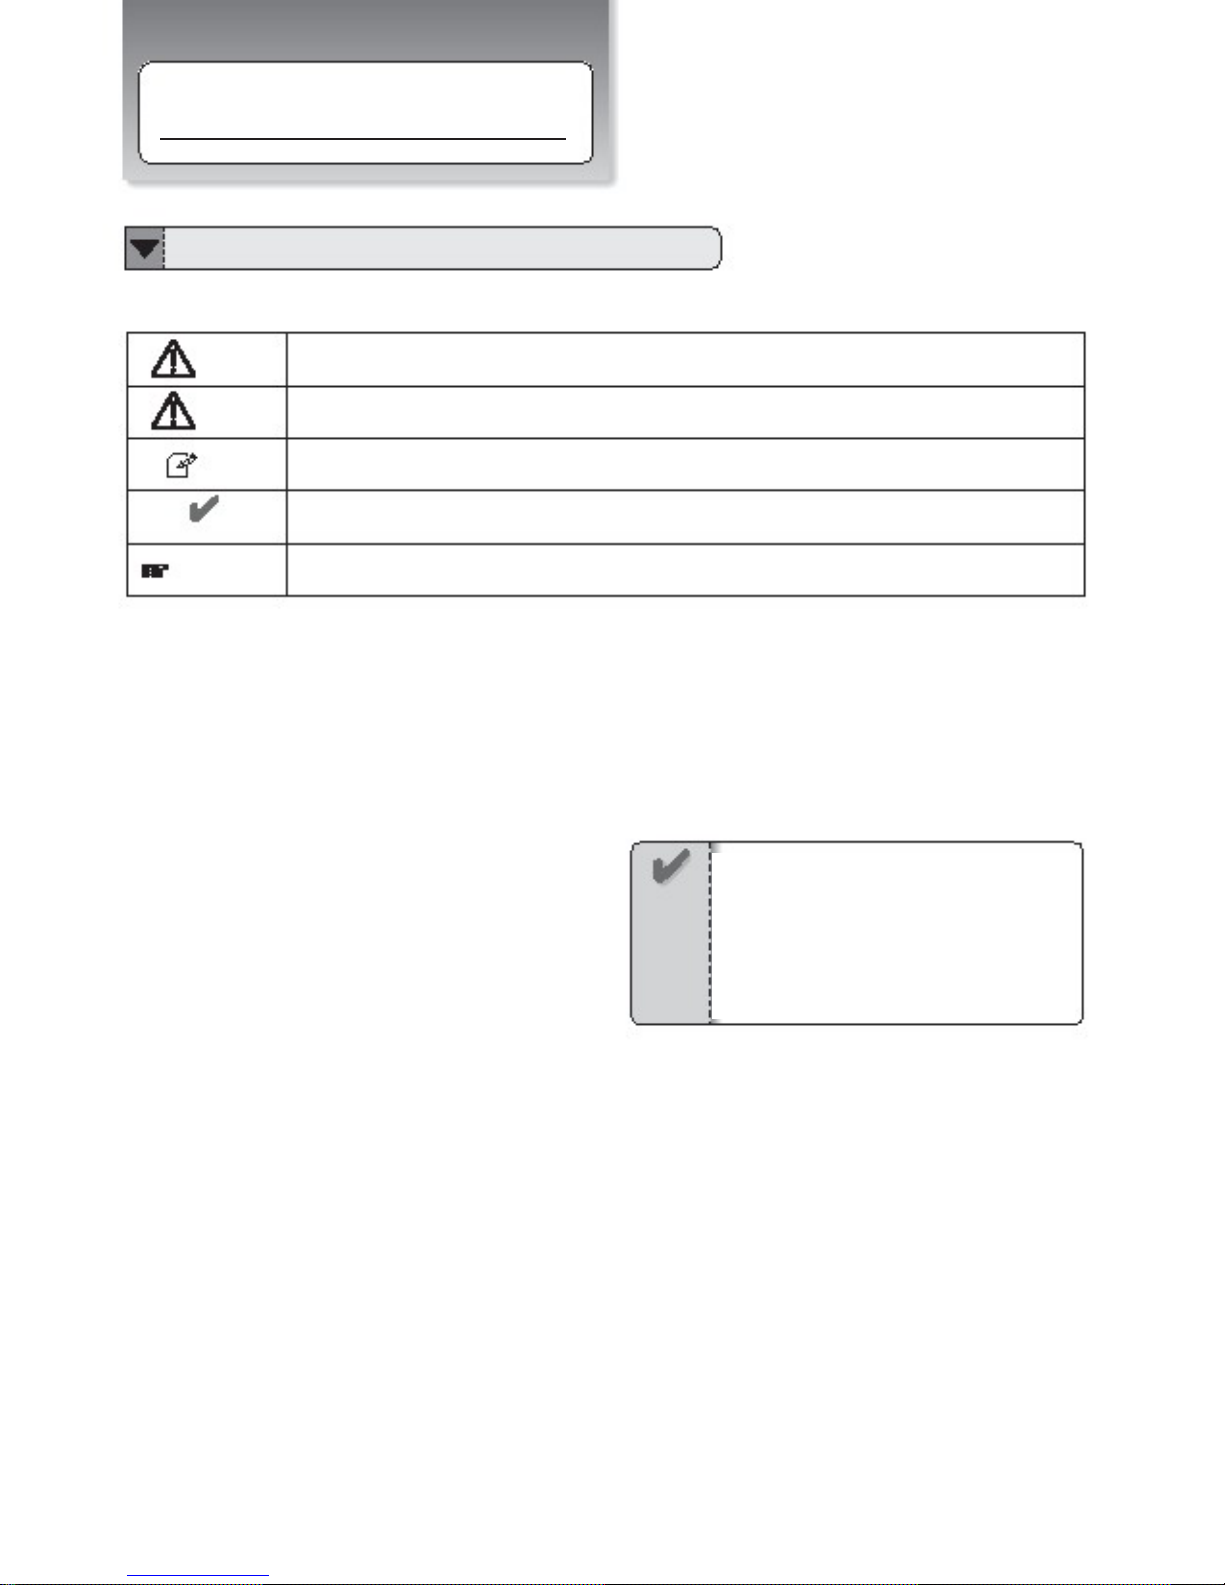
Notes for this Manual
You will come across the following symbols in this manual.
Warning
Page X
Notice
Tip
Attention
The detail information is mentioned in the specific page
Points out possible damage to property, personal injury or death
To help you note and avoid possible damage to your Netbook’s hardware or software.
Helpful points and tricks for operating your Netbook
Important notice for non-operational actions or the points you must know for your operation
Pleasenote:Theremaybe
differencesbetweenyourNetbook
andthepicturesinthismanual.
Informationinthismanualissubject
tochangewithoutnotice.
Page 1
Page 5
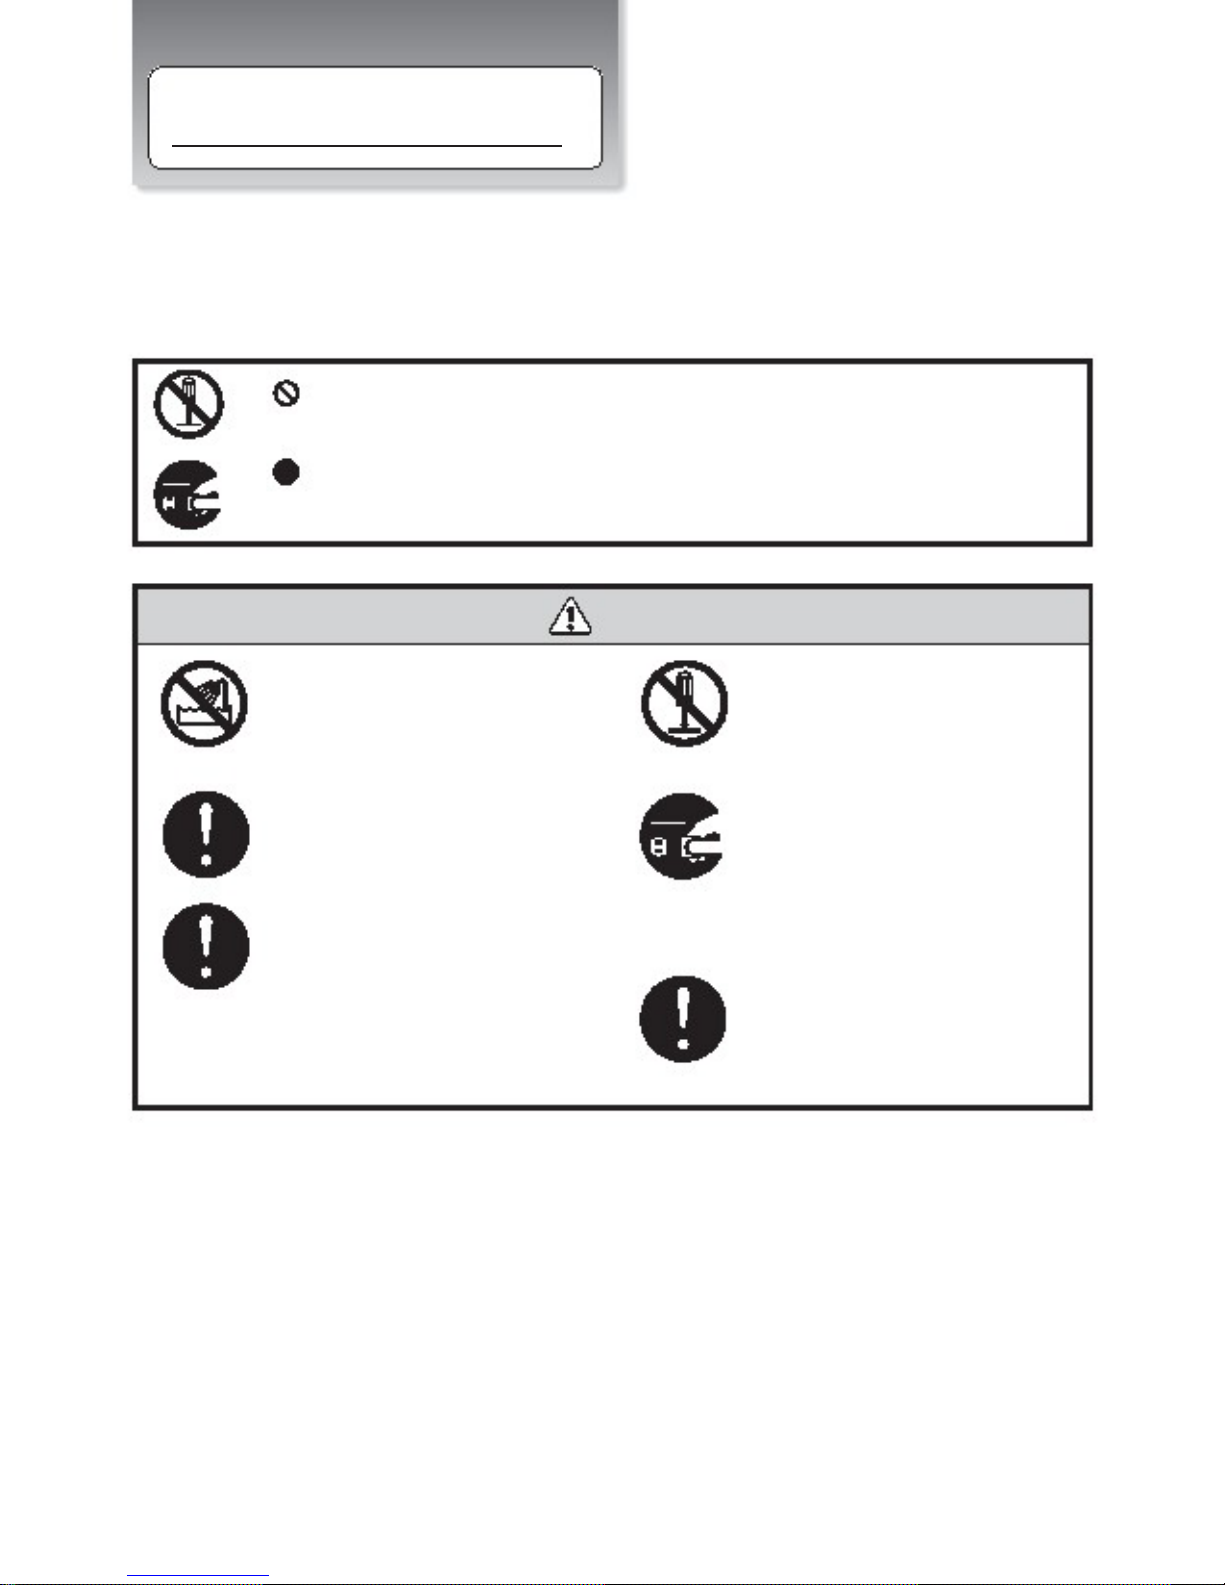
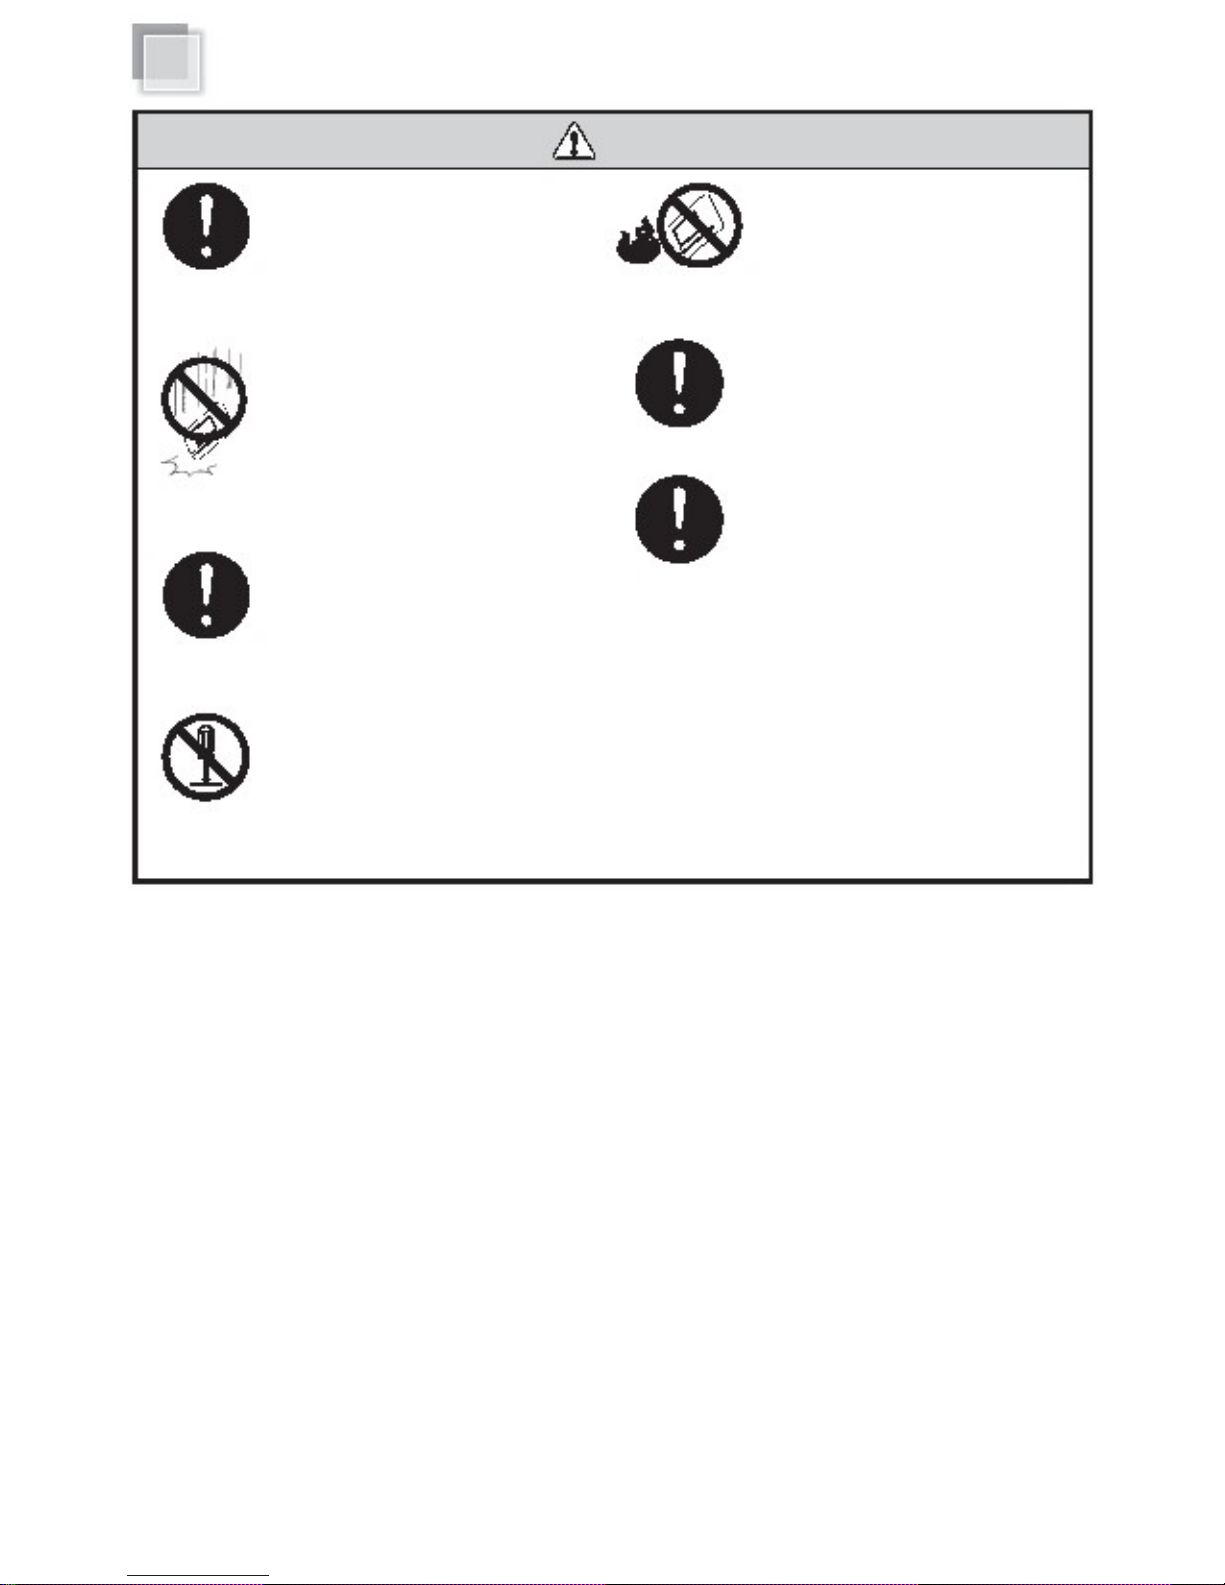
Safety Precautions
The following safety precautions will increase the life of the Netbook. Follow all precautions and instructions.
Except as described in this manual, refer all servicing to qualified personnel. Do not use damaged power cords,
accessories or other peripherals. Do not use strong solvents such as thinners, benzene, or other chemicals on
or near the surface of your Netbook.
The sign shows the behavior prohibited
The sign shows the regulative behavior or the indication
Warning (The AC adapter)
DO NOT expose to or use near water,
rain, or moisture. DO NOT use the LAN
during an electrical storm.
DO NOT attempt to service this product
by yourself. By opening covers, you will
be exposing your Netbook to electrical
dangers.
DO NOT use an AC adapter not
included in the package. Use of
another type of adapter may risk
fire or explosion.
Before you connect the Netbook
to a power source, ensure the
voltage rating of the AC adapter
matches the available power
source.
When you feel the surface of the AC
adapter is very hot or giving off bad
odour please pull out the power
plug immediately. Continuing to use
the AC adapter may risk fire or
electrical shock.
DO NOT leave the Netbook on your
lap or any part of the body to prevent
discomfort or injury from heat
exposure.
Page 2
Page 6
Safety Precautions
Attention (AC adapter)
Please be sure not to pull out the
power plug from the cord only.
Unplug this Netbook from the wall
outlet when you stop using this
Netbook.
DO NOT place this Netbook on an
unstable cart, stand, or table. DO OT
place heavy object on this Netbook.
It may be broken to cause some serious
damage.
SAFE TEMP: This Netbook should not
be used in environments with extreme
temperatures.
Please verify there is no foreign
object on the keyboard when you close
the Netbook lid as it could damage the
display panel.
DO NOT press or touch the display
panel. DO NOT place together with
small items that may scratch or enter
the notebook.
If you operate the touchpad with
unreasonable force or posture, it
may hurt you finger or wrist.
When you carry the Netbook please close
the display lid to avoid damage to the panel.
A
void using the Netbook during an
electrical storm. Disconnect all plugs
and cables to avoid the possible
damage.
If an extension cord is used with this Netbook,
make sure that the total ampere rating of the
equipment plugged into the extension cord
does not exceed the extension cord ampere
rating.
DO NOT allow anything to rest on the
power cord. DO NOT position this Netbook
where people will step on the cord.
Page 3
Page 7
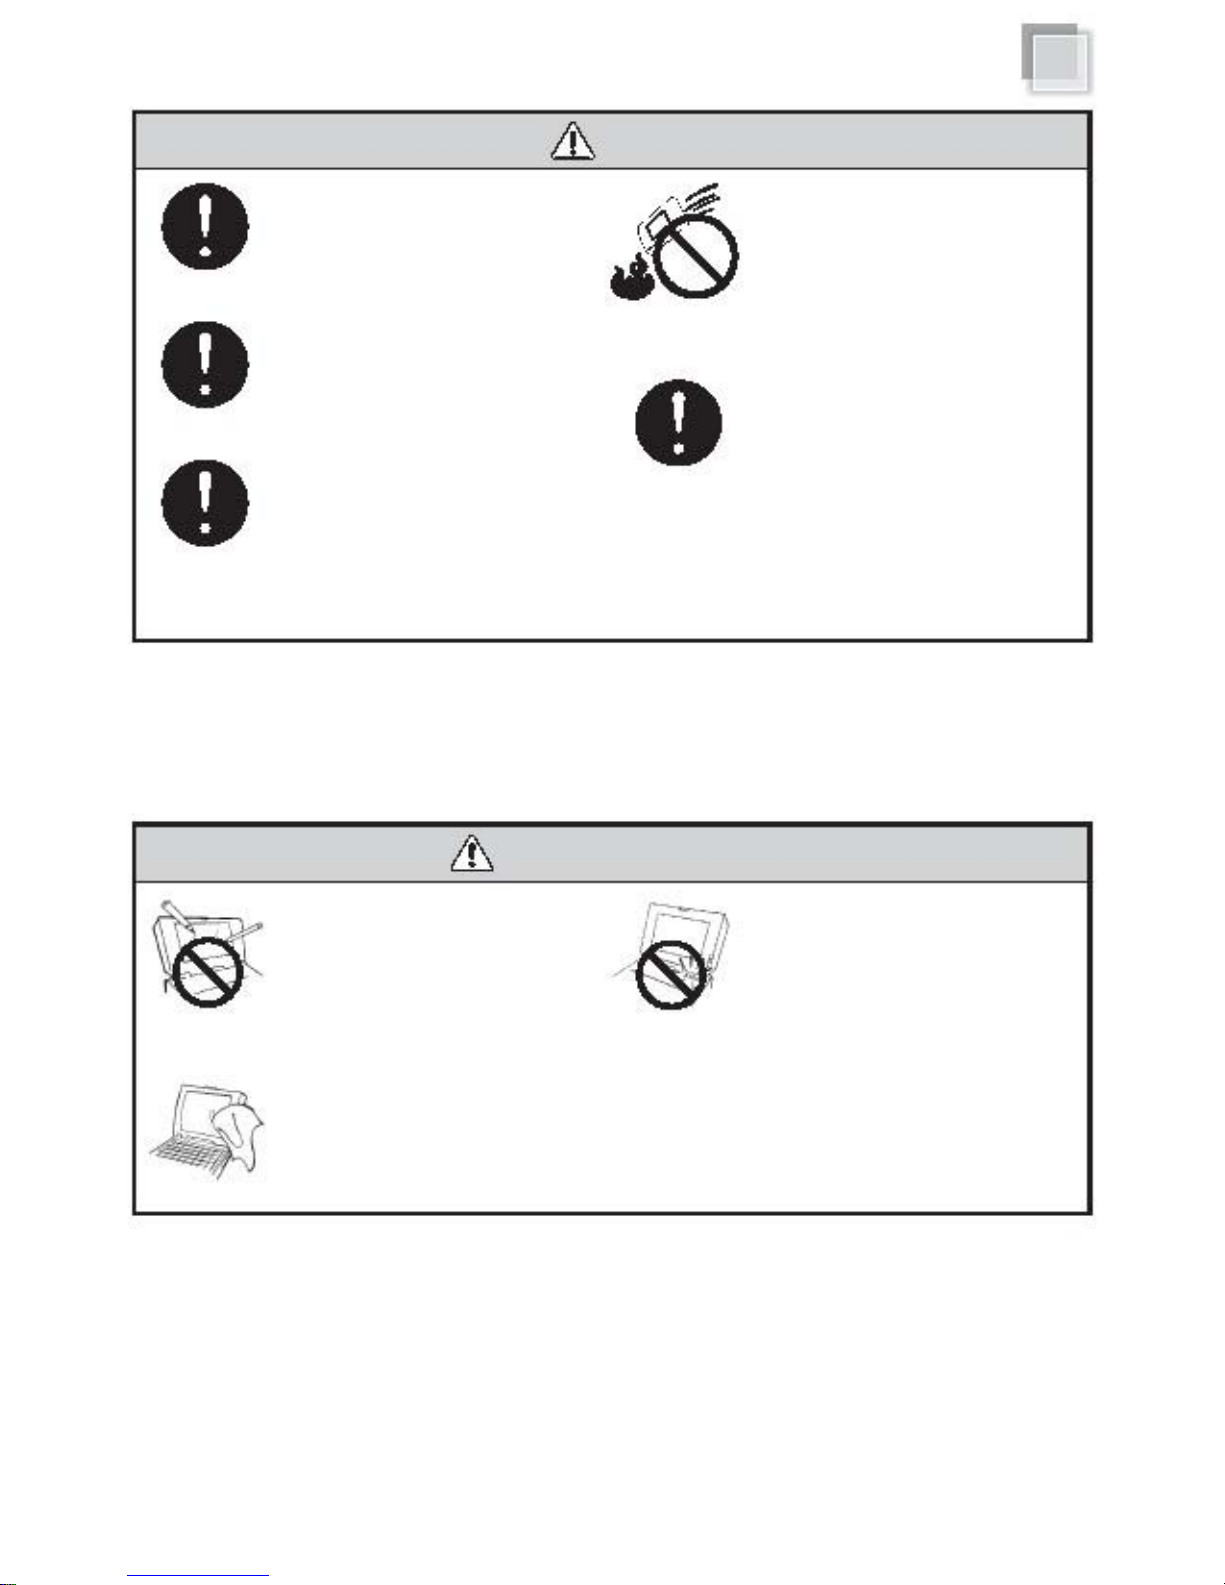
Warning (Battery Pack)
Danger: Explosion may occur if battery
is incorrectly replaced. Replace only with
the same or equivalent type battery
recommended by the manufacturer.
DO NOT dispose batteries in a fire.
They may explode. Check with local
authorities for disposal instructions.
Do NOT drop or step on the
battery
If the battery pack leaks and the fluid get
in your eyes, rinse your eyes under
wate
r
and seek medical attention to avoid
eye injury.
If the battery pack leaks, gives off a bad
odor, generates heat, discolors
or is deformed, or in any way appears
abnormal during use, immediately remove
it from the Netbook.
If you exceed the specified charge time and
the charge does not complete, please stop
the battery charge. It may risk fire or
explosion if you continue to charge the
battery.
Do not crush, disassemble, puncture, or
incinerate the short external contacts of
the battery pack.
Page 4
Page 8
Safety Precautions
Attention (Battery Pack)
If liquid solution from the battery comes
out and contacts the skin or clothes,
flush out with clean water.
Do not connect the positive (+) and
negative (-) terminals with a metal object
such as wire. Short-circuiting may occur
leading the battery pack to leak acid,
overheat, emits smoke, or ignite.
DO NOT throw the battery in fire.
Do NOT immerse the battery pack in water
or allow it to get wet. Its protective features
can be damaged. Abnormal chemical
reactions may occur, possibly leading it to
leak acid, overheat, emit smoke, burst and
or ignite.
If you find a bad odour, overheating,
discolor, deformation, and or other irregularities
when using the battery, return it to your supplier
Keep the battery away from children.
General Warnings
DO NOT touch the panel with sharp objects
DO NOT
knock or scratch
the machine
while operating
DO NOT remove your Netbook while
the hard disk is in operating status. It
may damage the hard disk.
Clean your Netbook with a soft cloth
dampened with water. Do not use liquid
or aerosol cleaners, which may contain
flammable substances.
Periodically backup your data in the
hard disk.
Page 5
Page 9

Where to Place Your Netbook
Make sure that your Netbook is placed in a well-ventilated area.
Please reserve at least 15cm distance around the Netbook.
Please reserve suitable space in front of keyboard and touchpad
for operating the Netbook comfortably.
A
void placing the Netbook on a bed, sofa, rug, or similar surface
to avoid blocking ventilations.
15cm
Where Not to Place Your Netbook
This Netbook should never be placed near or
over a radiator or a heat register, or under direct
sunlight.
DO NOT operate this Netbook near water, for
example near a sink, bathtub or laundry tub.
DO NOT place this Netbook on uneven or
unstable work surfaces.
Page 6
Page 10
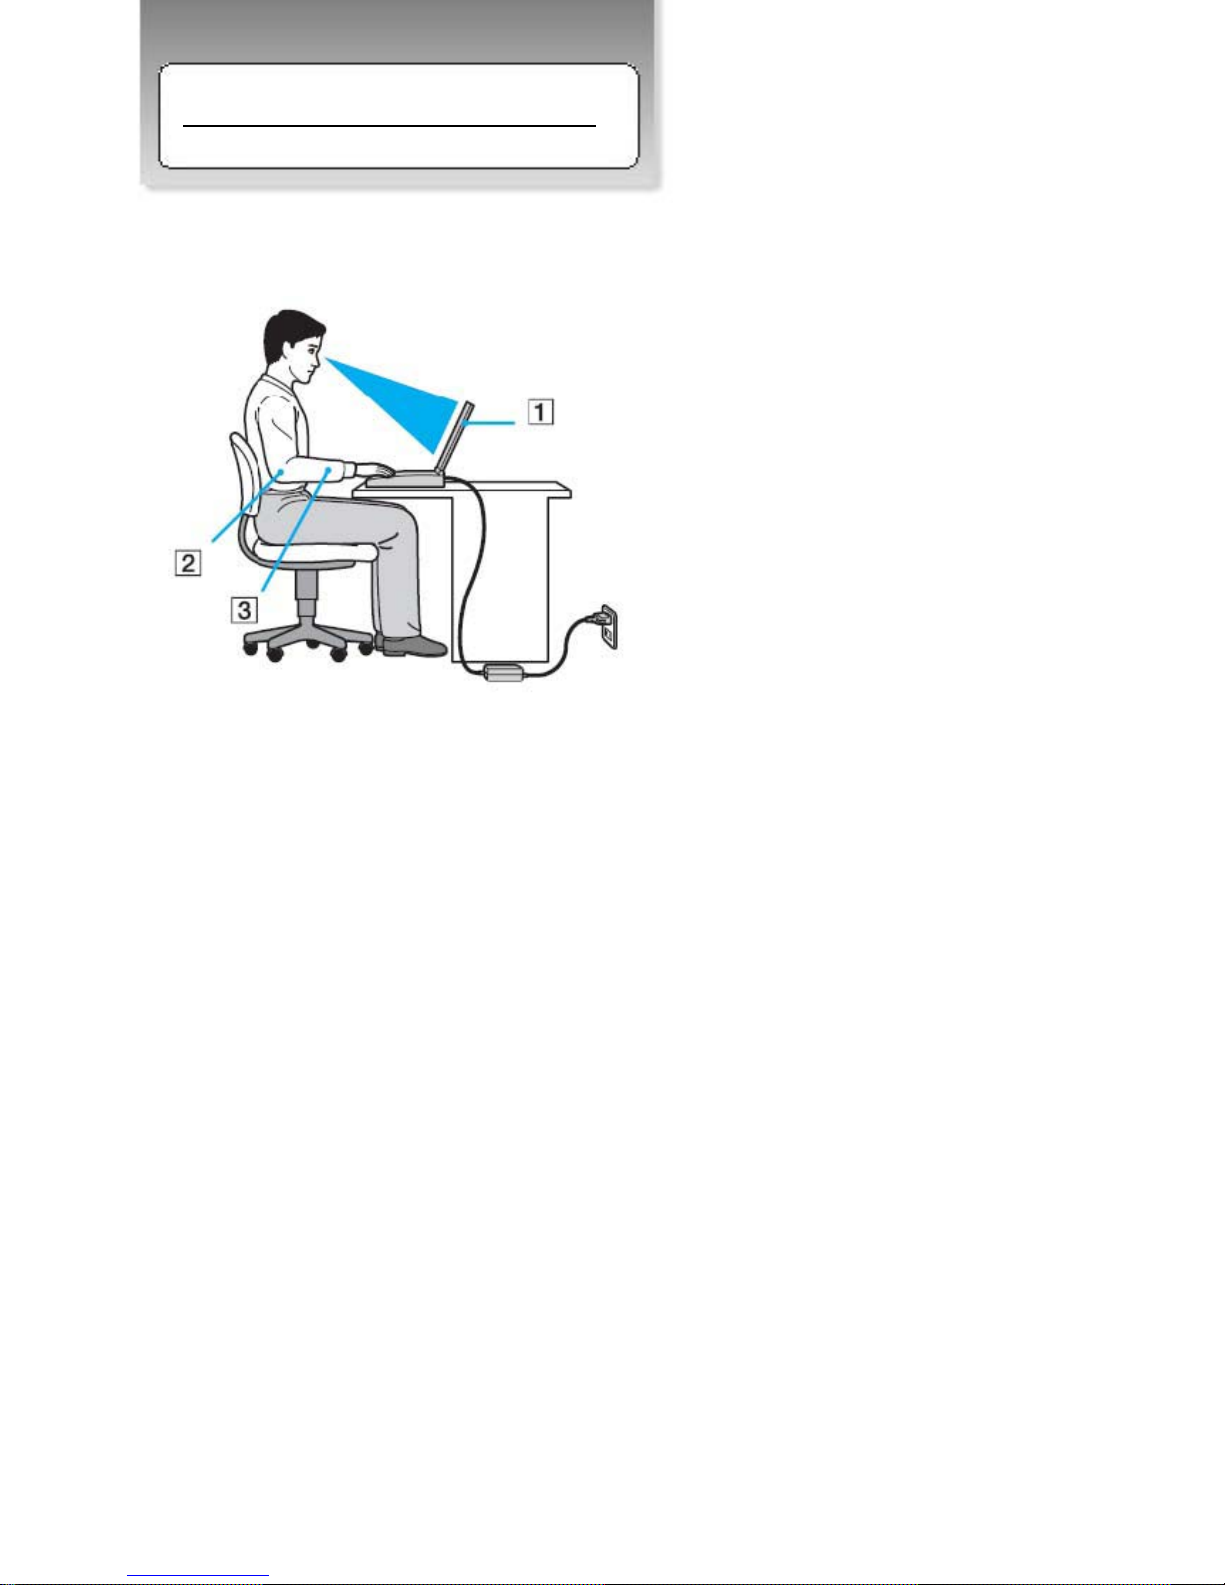
Ergonomic Considerations
Your Netbook is a portable device that may be used in various environments. Whenever
possible, consider the following ergonomic factors:
Position of your computer – Placing the computer directly in front of you:
1. Keep your forearms horizontal.
2. Position your wrists in a neutral, comfortable position while using the keyboard, touch
pad, or external mouse.
3. Let your upper arms hang naturally at your sides.
4. Take frequent breaks while using your computer.
Excessive use of the computer may cause strain to your eyes, muscles, or tendons.
Furniture and posture - Sit in a chair with good back support.
Adjust the level of the chair so your feet are flat on the floor. A footrest may make you
more comfortable. Sit in a relaxed upright posture and avoid slouching forward or leaning
far backwards.
Viewing angle of the computer's display - Use the display's tilting feature to find the best
position.
You can reduce eye strain and muscle fatigue by adjusting the tilt of the display to the
proper position Adjust the brightness level of the display as well.
Lighting – Choose a location where windows and lights do not cause glare and reflection
on the display.
Use indirect lighting to avoid bright spots on the display. Proper lighting adds to your
comfort and work efficiency.
Page 7
Page 11
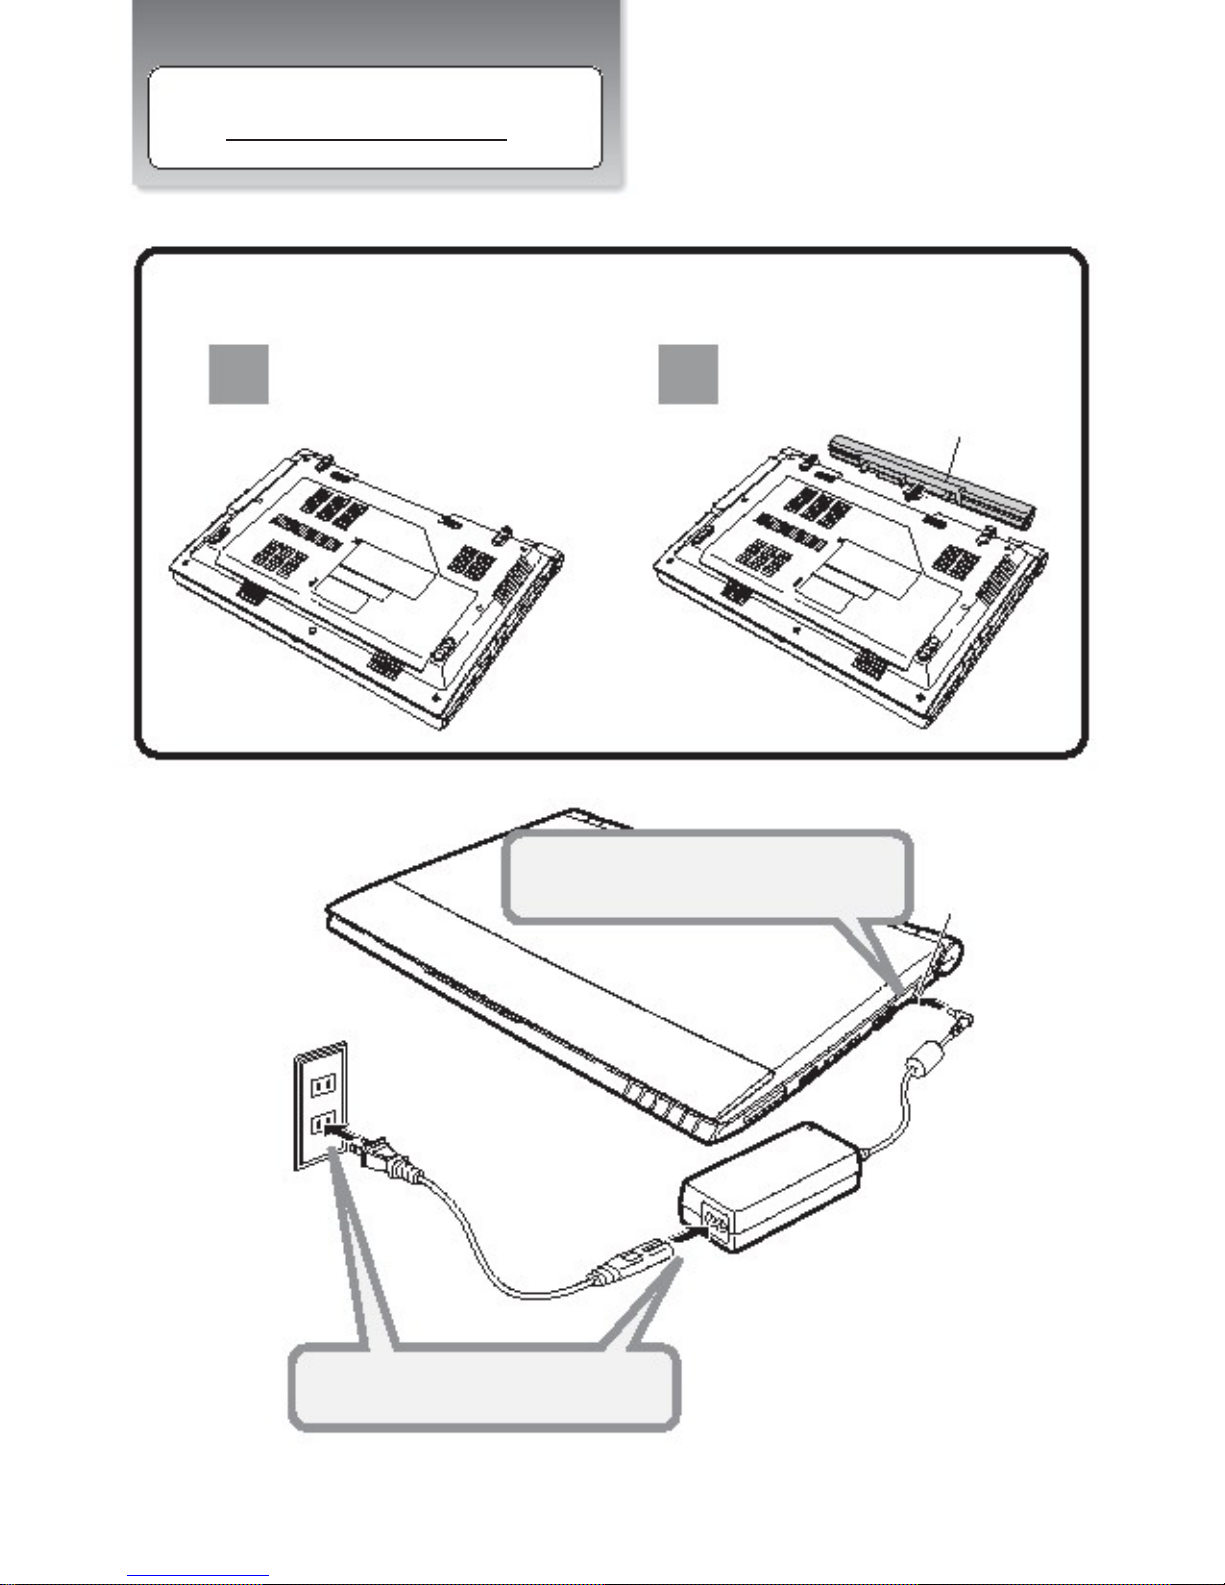
Power System
To install the battery pack
Close the Netbook lid and
turn it over gently.
Slide the battery pack into the
slot.
Battery Pack
1
Connect the DC plug to DC-IN pack
DC-IN pack
Connect the AC power cord to the AC outlet
Page 8
Page 12
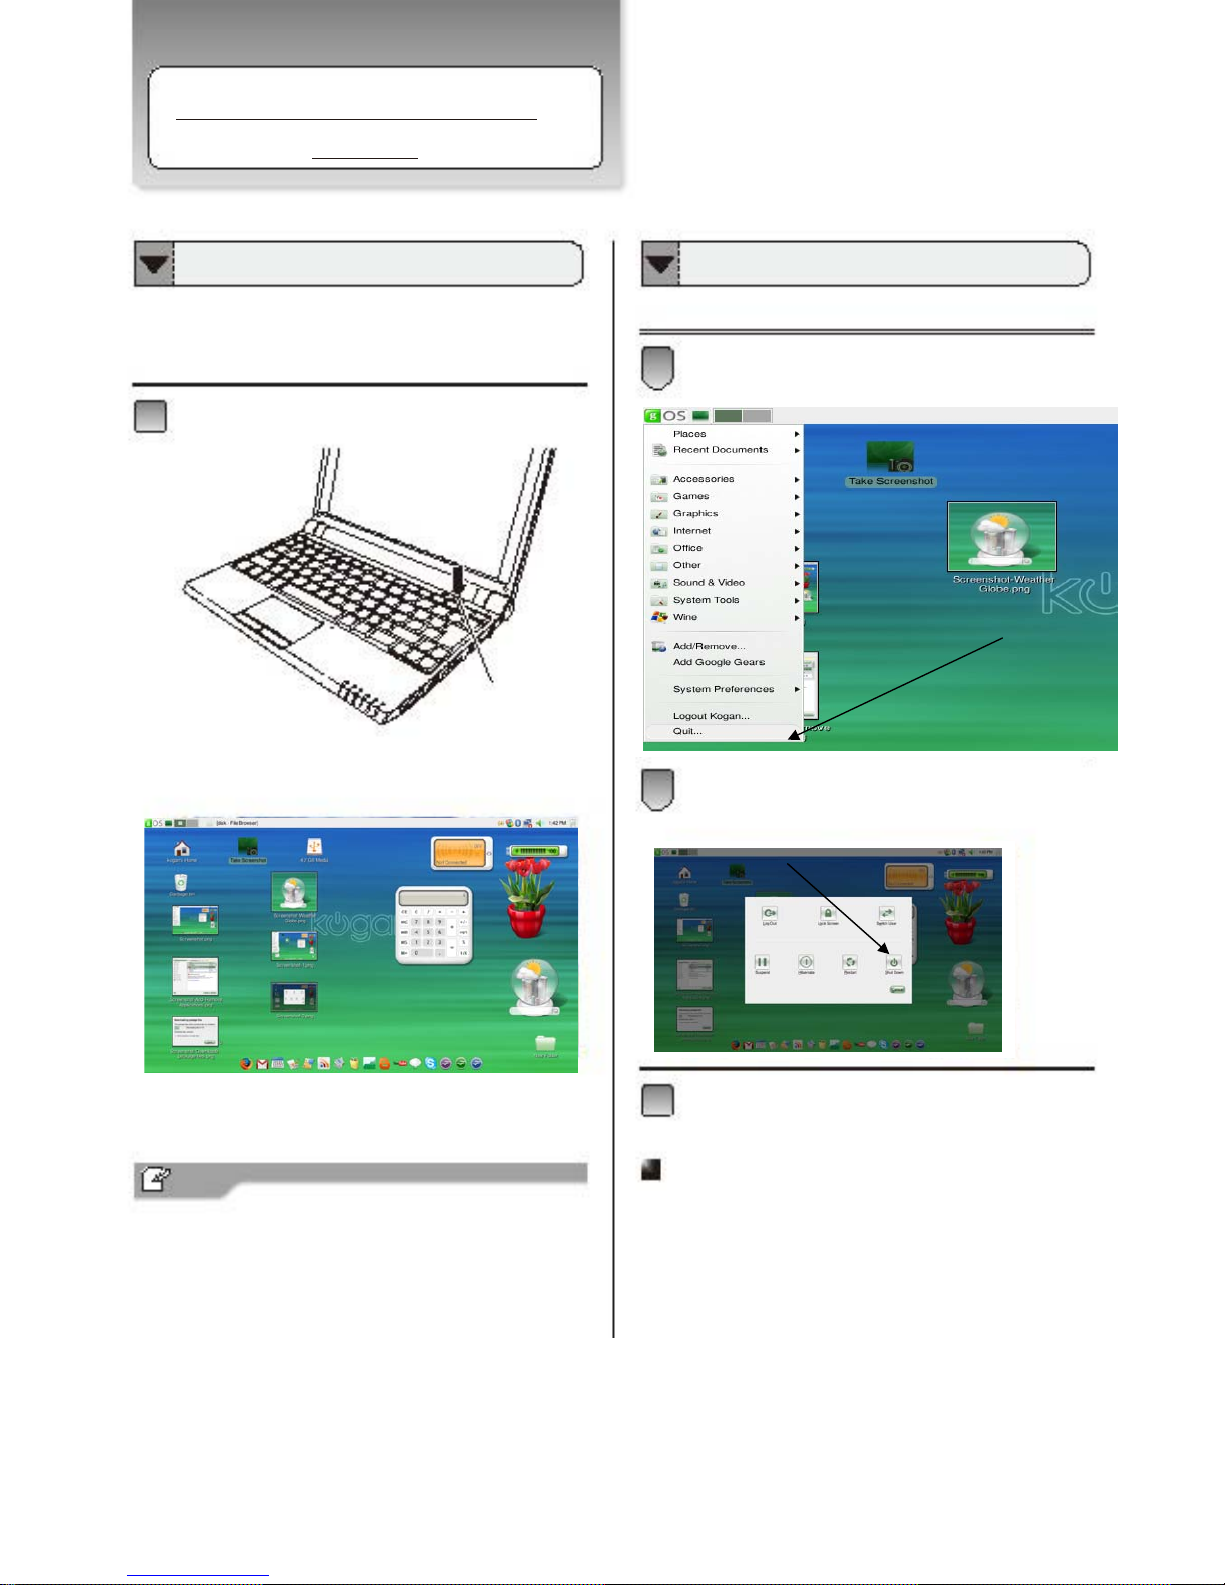
Turning Your Netbook
On/Off
Turning your
Netbook On
Turning your
Netbook Off
After setting up the Netbook, press the power button to
turn on it. The gOS desktop screen will appear.
Operates from the “start” menu to power off your Netbook
Click [gOS] → [Quit], and the
“Turn off computer” dialog box will appear.
Press the power button to turn on your Netbook
A
ttention
power button
DO NOT turn off the Netbook by pressing the power
button directly. It may damage the gOS operating
system
gOS desktop screen will appear after
the power button is pressed.
Click [Shutdown].
The Netbook will be powered off later.
Depending on your Netbook setup and
software, your desktop may have different
or additional shortcuts.
Turn off the power of peripherals connected if
necessary.
Restart
We suggest you restart gOS when a new device
driver is installed or if gOS is unstable. Click
[gOS] → [Quit] → [Restart].
Page 9
Page 13
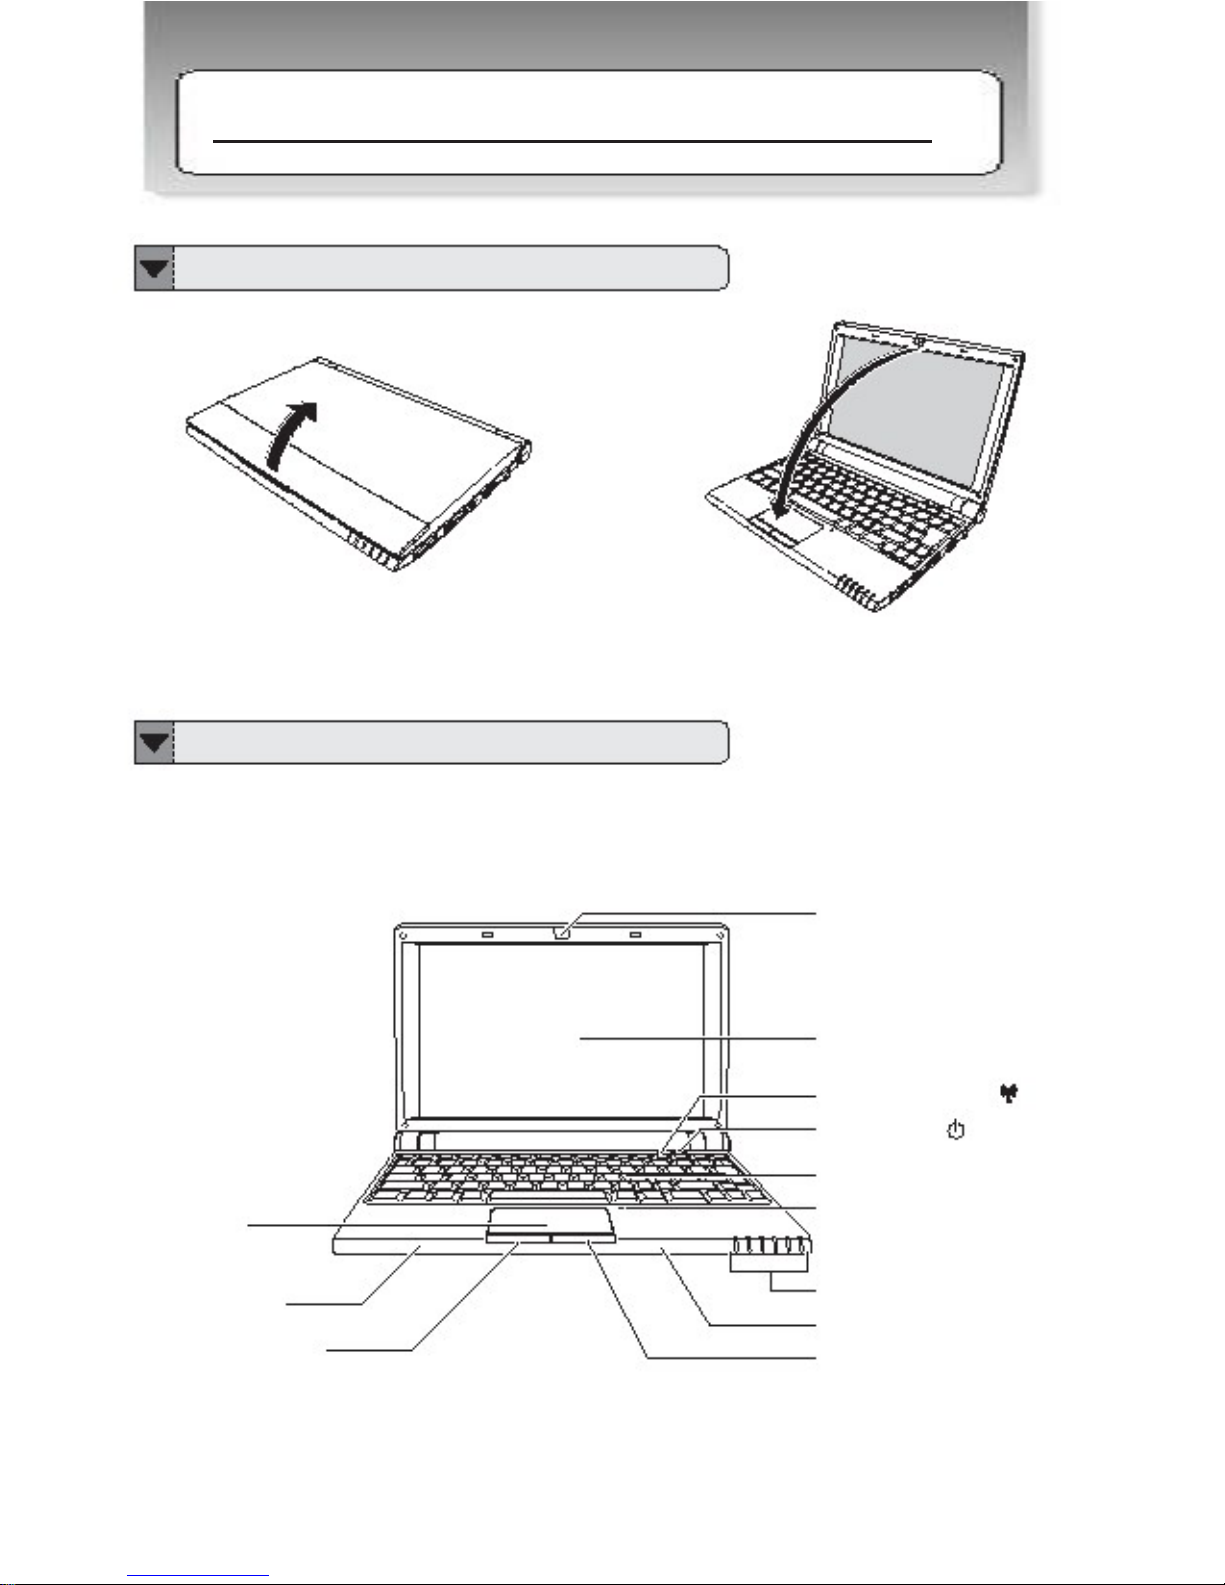
To Open/Close the Netbook
Open the panel cover and adjust to an appropriate
angle.
Close the panel cover to make sure the Netbook is
closed.
Front Side
Web Camera
Display Screen
Wireless LAN Switch
Power Button
Keyboard
Touchpad
Internal Microphone
Stereo Speaker
Status LEDs
Stereo Speaker
Touchpad (left button)
Touchpad (right button)
Chapter 2 – Knowing the Parts
Page 10
Page 14

Web Camera
The built in camera allows picture taking or video
Recording
Display Screen
It functions as the same as a desktop monitor.
Use a soft cloth without any chemical fluids to clean the display screen.
Wireless LAN Switch
Press this button to enable the built-in Wireless LAN
Power Button
The button allows you to turn your Netbook ON and OFF.
The blue indicator LED lights when the Netbook is turned on
Touchpad: right and left buttons
The touchpad and its buttons comprises a pointing device
that provides the same functions as a desktop mouse
Touchpad
This is the pointing device of the Netbook.
Keyboard
The keyboard provides with comfortable travel depth for both hands
Internal microphone
It can be used for video conferencing, voice narration,
audio recording, and multimedia applications.
Status LEDs
Indicates the system status of the Netbook
Stereo Speaker
The built in speaker allows you to hear audio without
any additional attachment
Page 11
Page 15

Right Side
DC Input
VGA Port
LAN Port
USB Port
Memory Card Slot
DC Input
To connect the AC adapter
Memory Card Slot
The following cards listed below can be used on this Netbook.
Attention
To prevent damage to the Netbook and battery
pack, always use the supplied power adapter.
It may become warm when in use. Be sure
not to cover the adapter and keep it away from
your body.
Memory Stick
Memory Stick Pro
SD
MMC
Memory cards have different insert directions,
Please insert the memory card in the correct manner
MiniSD cards cannot be inserted into the memory
card slot. Please verify the card type before
you insert it.
VGA Port
To connect an external monitor
N
otice
LAN port
Ethernet connector is used to connect
a LAN cable for network connection.
This uses a standard Ethernet Cable. Do not use
any other type of cable as it may cause damage
Attention
USB Port
Refer to the next page.
Page 12
Page 16

Left Side
Kensington Lock Port
Ventilation Slot
USB Port
Microphone Jack
Headphone Output Jack
Kensington Lock Port
Allows the notebook to be secured using Kensington
Lock.
Ventilation Slot
The slot is designed to cool the system. DO NOT
block the ventilation for air circulation.
USB Port
The US port is compatible with USB 1.0 or 1.1 devices.
It allows many devices to run simultaneously on a single
computer, with some peripherals acting as additional
plug-in sites or hubs. The USB Port also supports
hot-swapping function.
Page 3
Microphone Jack
It is designed to connect the microphone used for
Skype, voice narrations, or simple voice recordings.
Page 3
Headphone Output Jack
It connects the notebook s audio out signal to amplified
speakers or headphones. Using this jack automatically
Page 3
disables the built-in speakers.
Kensington® Lock Port
The Kensington® lock port allows the Netbook to be secured using Kensington® compatible
security products. These security products usually include a metal cable lock that prevent the
Netbook to be removed from a fixed object.
LAN Port
The eight-pin RJ-45 LAN port (10/100M bit) supports a standard Ethernet cable for connection to a
local network. The built-in connector allows convenient use without additional adapters.
Ventilation Slot
This slot is designed to cool the Netbook and should not be covered.
USB Port (2.0/1.1)
The USB (Universal Serial Bus) port is compatible with USB 2.0 or USB 1.1 devices such as
keyboards, cameras, and storage devices connected in a series up to 12Mbits/sec (USB 1.1) and
480Mbits/sec (USB 2.0). This allows USB devices to run simultaneously
on a single computer, with some peripherals acting as additional plug-in or hubs. It also supports
hot-swapping function
Microphone Output Jack
The Microphone jack is designed to connect the microphone used for Skype, voice narrations or
audio recordings.
Page 13
Page 17

Bottom Side
Battery Release Hatch
Battery Pack
Memory Module Cover
Battery Lock Switch
Battery Release Hatch
The latch keeps the battery pack secure. When the battery pack is inserted
it will automatically lock. When removing the battery pack, this latch must be
retained in the unlocked position.
Battery Pack
Your Netbook will be powered by the battery pack when the AC adapter is
disconnected.
Battery Lock Switch
The switch is used to keep the battery pack secured. Move the lock to the
locked position to insert or remove the battery pack.
Memory Module Cover
The memory module, hard disk drive, and wireless LAN module are located under
the cover. Please take the cover off when adding removing the module.
Page 14
Page 18

About Status LEDs
①
Num K ED
② Caps Lock ED
③ HDD ED
④ Battery ED
⑤ Power ED
⑥ Wireless A
1. Numlock.
The LED lights when you press the Numlock key on the keyboard.
2. Capslock.
Pressing the Capslock key will light up the LED.
3. HDD LED
This LED blinks when data is being written to or read from the Hard drive.
4. Battery
Lights up when Netbook is running on battery power.
5. Power LED
Lights up when the Netbook is turned ON and blinks slowly when the netbook in
the Suspend mode. This LED is off when the Netbook is turned off.
6. Wireless LED
When the built in WLAN is enabled the LED lights turn on.
Page 15
Page 19

For First Time Use
The battery included in the package is not fully
charged. When you use the Netbook for the
first time, please connect the AC adapter after
slide the battery pack.
ONLY use the AC adapter included in
the package. Use of another type of adapter
may risk fire or explosion.
DO NOT allow anything to rest on the AC
adapter. It may overheat the AC adapter
and risk fire or explosion.
Connect the AC power cord to the AC outlet
LED lighted indicates
Charging.
The Netbook comes with a universal AC-DC adapter for
connecting to any 100 - 240 outlet.
You can use the Netbook while charging the battery.
Connect the DC plug to DC-IN jack.
Chapter 3 – Getting Started
Connecting AC adapter and Charging battery
Page 16
Page 20

Power and Battery Status LEDs
Power LED
Battery LED
Power LED
Status
Blue Light
Blue Blinking
Orange Blinking
Red Blinking
Battery LED
Content
The Netbook is powered on
The Netbook is in suspend mode
Battery charge is between 10-50% charged
Battery charge is less than 10% charged
Status
ON
OFF
Battery is charging
Battery is fully charged
Content
A
ttention
Battery pack cannot be exchanged during
battery charging. When the battery level
is low you can possibly lose your data
if you continue to operate your Netbook.
When the battery is empty, your Netbook will
turn off so ensure that you have saved your
documents when your battery level is low.
Page 17
Page 21

DO NOT use another type of adapter or may
risk fire or explosion.
Do not connect the positive and negative
terminals with a metal object such as wire.
Short circuiting may occur leading the battery
pack to leak acid, overheat, emit smoke, burst
and or ignite.
DO NOT throw the battery in fire.
Please refer to the safety precautions in
this manual.
Removing and Installing the Battery
Ensure the Netbook is powered off before removing
The battery LED is off.
the battery. Please ensure
Slide the battery into the slot. Press it into place
gently but firmly until the latch locks it into place.
A
ttention
Tip
Ensure the battery lock switch is unlocked then insert the
battery firmly.
Before removing the battery, ensure the Netbook
is powered off.
Move the battery lock switch to the right unlock
position .
Battery lock Switch
Slide the battery lock to switch back to the locked
position.
Battery lock Switch
①Slide and hold the battery release latch
②Remove the battery
Battery Release hatch
①
②
Page 18
Page 22

Using the Touchpad
Introducing the Touchpad
Left Button
The left button has the same function as mouse left button.
Making selections, dragging objects, or double clicking.
Touchpad
Move the pointer over the icon you wish to execute, press the
left button or tap the pad twice in rapid succession, and the system
launches the corresponding program. If the interval between the
clicks or taps too long, the operation will not be executed.
Right Button
The right button has the same function as mouse right button.
When clicking the right button, the shortcut menu is indicated.
Scroll Operation
Using the fingertip to slide up or
down on the grey area of the
touchpad to scroll a window up
or down.
A
ttention
DO NOT use a pointed object on the touchpad as it
may damage it.
DO NOT operate the touchpad with a wet finger.
Page 19
Page 23

Using the Keyboard
The Function Key
The following defines the hot keys on the keyboard. The commands can only be accessed
by first pressing and holding the Fn key while pressing a key with an icon.
Power Saving Function Fn + F1
Places the Netbook in suspend mode
Press the power button to return from suspend mode
Wireless LAN Function Fn + F2
Toggles the internal wireless LAN ON/OFF
Adjusting LCD Brightness Function Fn + F4/F5
Decrease/Increase display brightness
LCD External Display Function Fn + F3
Toggles between the Netbook’s LCD
display and an external monitor.
- Netbook LCD only
- External Monitor only
- External Monitor + Netbook LCD
Speaker Mute Function Fn + F6
Mutes the speaker
Speaker Volume Function Fn + F7/F8
Adjust the speaker Volume
LCD Display ON/OFF Function Fn + F9
Turns off the display backlight
Page 20
Camera Function Fn + F10
Turns on and off the Built-in Camera
Page 24

Initial Start-up Guide
Begin by turning the Netbook Power ON
The Kogan Logo Screen with loading Bar will be displayed.
After gOS finishes loading, a SYTEM CONFIGURATION window will be displayed.
Step 1:
Select your preferred Language in the left panel and click forward.
Step 2:
In the next window you will have to choose your city and time zone. You can select your
city in the world map by clicking the dots or from the pull-down menu, and then click
forward.
Please Note: the cities are grouped by continent, and you will have to scroll down to find
Australia.
Step 3:
The Keyboard layout is selected in the next window. The default (strongly recommended)
option will be USA, or you can select your own keyboard layout.
You may test the new keyboard layout in the textbox provided, and then click forward.
Page 21
Page 25

Step 4
You will now need to choose a username and password.
Enter the Netbook owner name in the first box.
Enter the Username (this will be the administrator username) for the Netbook in the
second text box (If more user accounts needed to be added, this can be done after the
installation).
The third and fourth textbox is to enter the password and verify the password for the
username
Once this is done click forward
After a few minutes the Netbook will load the LOGIN screen. Type in your username
and then press enter. Then type your password and press enter.
gOS will now load and the desktop will appear. Your Netbook is ready to use!
IMPORTANT:
Please DO NOT run any gOS software updates before contacting Kogan Support.
Please DO NOT run Synaptic Package Manager updates.
Page 22
Page 26

1. Press [gOS] and select [System Preferences]
Adjusting Display Resolution
2. Select [Preferences] and then select [Screen
Resolution]
3. Select your Preferred Resolution
Chapter 4 – Using your Netbook
Page 23
Page 27

Logging out of Account
Click [gOS] on the desktop and then
click [Log Out (Current User)]
Switching Users without Logging Out.
1. Click [gOS] on the desktop and then click [Quit]
Switching User Accounts
2. A Display tab will now open showing several
options.
Press [Switch User]
You will be returned to the login screen
where the new user will be required to enter
their Username and Password.
Note: Username and Password are Casesensitive
Page 24
Page 28

The Different Log Out
Options
Log Out
The User logs out of their account and returns to the first display screen asking for a username and
password to log in.
Lock Screen
If you are temporarily leaving the Netbook, you can opt to lock the Screen to ensure that no one else
can use the Netbook when you are away. You can unlock by entering your username and password
which will return you back to the desktop.
Switch User
Allows the current user to log off and another to log on without any information being lost.
Suspend
While on Suspend mode, the Netbook switches to a low power state where devices, such as the
monitor and hard disks are turned off and the Netbook uses less power.
Hibernate
The Hibernate feature saves everything in memory on disk, turns off your monitor and hard and then
turns off the Netbook. When you restart the Netbook, your desktop is restored exactly as you left it.
Restart
Turns off the Netbook and instantly turns it back on. This may be required during software
installation
The gOS platform allows users to select to place their computers into different states when
they are finished using their Netbook.
Page 25
Page 29

.
.
Using The Web Camera
gOS does not have any native application to view web camera. It needs to use third party
applications like cheese or chat applications like Skype or yahoo messenger for using the
web camera.
Steps to download Cheese:
1. Click gOS -> Add/Remove.
2. Add/ Remove applications window will open. Search for cheese. Make sure the
Netbook is connected to internet.
3. When the search finds cheese application select the application (double click).
Installation window will appear – click the Install all or install button.
4. gOS will download the application and install it.
5. For opening the cheese application,
Click gOS ->Graphics->cheese (cheese can be used to snap a picture or record video
using web camera).
Page 26
Page 30

Using Peripherals
Right Side
USB Port
Card Reader Writer USB Mouse CCD Camera USB Device
Memory Card Slot
Memory Card
VGA Port
External Display
Memory Stick
Memory Stick PRO
SD Card MMC
Page 27
Page 31

Left Side
USB Port
USB 2.0 Compatible
peripherals
Microphone Jack
Microphone
Headphone Jack
Headphone
Page 28
Page 32

Before Installing Peripherals
Turn Off the Netbook
Turn off the notebook and unplug the AC power cord
from AC outlet before the installation. Otherwise, it
may damage the notebook and the peripheral.
Installation Notice
Please remove the Static Electricity of Your body
because the parts such as memory and circuit board is extrem
e
weak to the static electricity. It is possible to damage the parts
when your hands touch them. Please touch the metal object
such as knob of the door to remove the static electricity which
has been electrified in the body before the peripheral
installation.
Tip
While the Netbook is powered on, the following devices
are able to be removed from the Netbook.
USB Compatible Devices
Memory Stick
Memory Stick Pro
SD Card
MMC
Turn off the Netbook.
Disconnect the DC plug of the adapter from your
netbook.
or installation, we suggest you to wear gloves.
If you install or remove the peripherals in a wrong way, it is
possible to damage the peripheral. Please read this manual
well before installation.
Attention
Please read the Manual of the Peripheral Device
The manual and driver CD always come with the peripheral.
Please read through the manual before the driver installation.
Manual
Driver
Page 29
Page 33

When USB mass storage device is connected to one of the USB port:
1. If gOS recognize the device, an icon will appear on the desktop. You can also check in
Computer-file browser.
2. Click gOS ->Places->Computer.
3. You should be able to find the mounted USB storage devices.
If no icon appears on the desktop or in Computer-file browser. gOS may not able to
recognize the USB device. You must install correct drivers available from the device
manufacturer to make the device work.
Connecting USB storage devices
Page 30
Page 34

Connecting Audio Equipments
Connecting a Microphone
Connect the microphone plug to the microphone jack
on the netbook. This will make the netbook record
voice and sound.
Connecting a
Headphone
Connect the headphone plug to the headphone jack on
the netbook. The voice or sound will output from the
headphone instead of speaker.
Headphone jack
Microphone jack
Tip
Ensure the Netbook is not before you use
microphone.
If the microphone is close to the speaker,
sometimes it will produce resonance causing
a howling sound. In this case, move the
microphone away from the speaker.
Page 31
Page 35

1. Plug in the USB dongle came with the netbook in the USB port. Make sure Bluetooth
icon appear on the top right corner of the taskbar.
2. Right Click on the Bluetooth icon, Select Preferences. Bluetooth Preferences window
will pop up.
User can set the Mode of operation, adapter name, and connected devices (bonded).
4. Select General tab, File transfer options can be set under this tab.
Connecting the USB Bluetooth Dongle
Page 32
Page 36

Once the desktop is loaded, check to see if your Wi-Fi light is on.
The Wi-Fi light is located on the bottom right of the Netbook. It is the first light on the
right.
If the light is blue then left-click on the network icon in the toolbar and
select your network and provide the authentication credentials to log on.
If the light is not on, press the Wi-Fi button.
This is located near the power button in the top right corner of the keyboard.
The Netbook will show the following display (When Wireless is disabled)
Once the Wireless is on, wait
for about one minute while the
Netbook scans the available
networks in the area.
Then left-click on the network icon in
the task panel. Select your network
and provide the Authentication
credentials to log on
(Including Wireless Security)
If you connected successfully it will
show a screen as below.
Connecting to a Wi-Fi Network
Page 33
Page 37

Connecting an External Monitor
1. Connect your external display to the VGA Monitor on the right side of the Netbook
2. In order for gOS to recognize the monitor you will need to log off and on again.
3. The Resolution of the external display can be displayed in its native resolution.
To change the resolution select Main menu (gOS logo in top left) -> system
preference -> preference -> Screen resolution.
4. The monitor resolution settings window will appear.
Select the desired display mode (you can choose from several settings)
Using the external display under the Extended mode will cause the Netbook’s display
to show a portion of what is being displayed on the external monitor.
To bring back the original desktop on the Netbook display you will need to log off,
disconnect the external monitor and logon on.
Page 34
Page 38

Using Open Office Software
Open Office is the leading open-source office software suite for word processing,
spreadsheets, presentations, graphics, databases and more. It is available in many
languages and works on all common computers. It stores all your data in an
international open standard format and can also read and write files from other common
office software packages.
Saving Files in Open Office (Writer, Spreadsheets, and Presentations):
To save files in the above Open Office programs you first need to change the
default saving path. This is a one-time activity.
1) Click Open Office Writer in the dock.
2) Click Tools -> Options.
Under Open Office.org Option, select paths.
3) On the right-hand side window select My-Documents and click edit
4) Click Create Folder to make a new folder for storing your documents.
Type the desired folder name and click OK twice.
You can now save all documents in Open Office
Page 35
Page 39

Step 1: Create a Bootable Flash Drive:
Note: Any data on the hard drive and USB drive used for installing gOS will be
erased. Users are advised to make a backup of the data before starting the
following process.
1. Please use a PC with Windows operating system.
2. Make sure the USB drive used is formatted for FAT32 file system.
3. Download gOSConvert3.exe from the following link and run gOSConvert3.exe,
and extract to your PC, a gOS folder is created in the extracted path.
http://www.pendrivelinux.com/downloads/gOSConvert3.exe
4. Download the Kogan gOS.iso image file from the following link and place the ISO
file in the gOS folder:
http://www.sendspace.com/pro/dl/s2eg5d
5. From your gOS folder, click fixgOS2.bat. A console window will be open and then
enter the Drive letter of the USB pen drive and press enter.
6. This program will extract the files from Kogan gOS image and copy it to the USB
drive.
7. If using windows XP, just press any key to make USB drive bootable. If using Vista,
you may see a "failure to update the MBR" error at the top of the next screen. In
this case, just ignore the error message and press enter.
8. Go to my computer, open the USB drive. Look for file makeboot.bat. Right click on
it and select run as administrator. A console window will open press enter twice.
Now the USB drive is ready for installing gOS.
Restorin
g
the Netbook to Factory Default Settings
Page 36
Page 40

Step 2 – Installing gOS
1. Go to my computer, open the USB drive. Look for file makeboot.bat.
Right click on it and select run as administrator.
A console window will open and press enter twice.
Now the USB drive is ready for installing gOS.
2. Plug in the gOS USB drive to the netbook USB port.
As soon as Netbook is powered on press the F2 key. The Netbook BIOS screen will appear.
Use right arrow key to select the BOOT tab.
Under Boot priority order select the USB device which you copied the gOS files.
HOLD shift and “+” keys and move the USB device to the first position.
Press F10 key and press enter.
3. The Netbook will restart and the gOS menu will come up.
Select the first option and press enter.
4. After few minutes the gOS desktop will be loaded. The image loaded is a live image from the
USB. The changes made and files saved in this mode will be erased in the next reboot. To
install gOS to your hard drive, double click on the install icon on the desktop.
5. The install window will popup. Select the language and click forward.
6. In the next window you have to choose your city and time zone. You can select your city in
the world map by clicking the dots or from the pull-down menu, and then click forward.
(grouped by continent).
7. The keyboard layout can be selected in the next window. The default (strongly recommend)
option will be USA, or you can select your own keyboard layout. You may test the new
keyboard layout in the textbox provided, and then click forward.
8. In the next window, select the first option “Guided –use entire disk” then select your hard
drive and click forward.
9. You will now need to choose a username and password.
Enter the Netbook owner name in the first text box.
Enter the username (This will be the root/administrator user name) for the Netbook in the
second text box. (If more user accounts need to be added, this can be done after installation).
The third and fourth text box is to enter the password and verify the password for the
username.
Once this is done click forward.
10. Click install in the next window.
11. gOS will now start installing on the Hard Drive
.
Page 37
Page 41

Appendix
Installing Windows XP
Please refer to the following link if you choose to install Windows XP on
the Agora Netbook.
http://www.ezbsystems.com/cgi-bin/ikonboard.cgi?act=ST;f=2;t=2440
If you have any questions regarding XP installation, feel free to contact the
Kogan Support Team on support@kogan.com.au
.
Warranty
Your Agora Netbook comes with a 1 year warranty. Please refer to the
following link for further information regarding your Warranty terms and
conditions.
http://www.kogan.com.au/support/
Support
If you would like to contact our Support Team, the best way is through
email, support@kogan.com.au
.
Full Contact details are listed on the Kogan Technologies website.
http://www.kogan.com.au/contact/
Page 38
 Loading...