

Page 1
Folded Size - A6
4
5
Shaver
KSH 4220 WD
DE
Gebrauchsanweisung
EN
User manual
ES
Manual de instrucciones
FR
Mode d’emploi
GR
6
2
1
1
Οδηγίες χρήσης
HU
Használati leírás
IT
Manuale dell'utente
NL
Gebruiksaanwijzing
PL
Instrukcja obsługi
PT
Manual de utilização
SE
Användarhandbok
TR
Kullanım Kılavuzu
Deutsch 3 - 8
English 9 - 14
Español 15 - 20
Français 21 - 26
Ελληνικά 27 - 32
Magyar 33 - 38
Italiano 39 - 44
Nederlands 45 - 50
Polski 51 - 56
Português 57 - 62
Svenska 63 - 68
Türkçe 69 - 74
7
Imtron GmbH
Wankelstraße 5
85046 Ingolstadt
Germany
I II III IV V
IM_KSH4220WD_180803_V07_HR.indb 1 3/8/18 5:12 pm
www.imtron.eu
www.koenic-online.com
IM_KSH 4220 WD_180803_V07
Page 2

Folded Size - A6
A
B
C
G
H
1
2
D
I
E
J
F
3
K
L
IM_KSH4220WD_180803_V07_HR.indb 2 3/8/18 5:12 pm
Page 3
Deutsch
Sicherheitshinweise
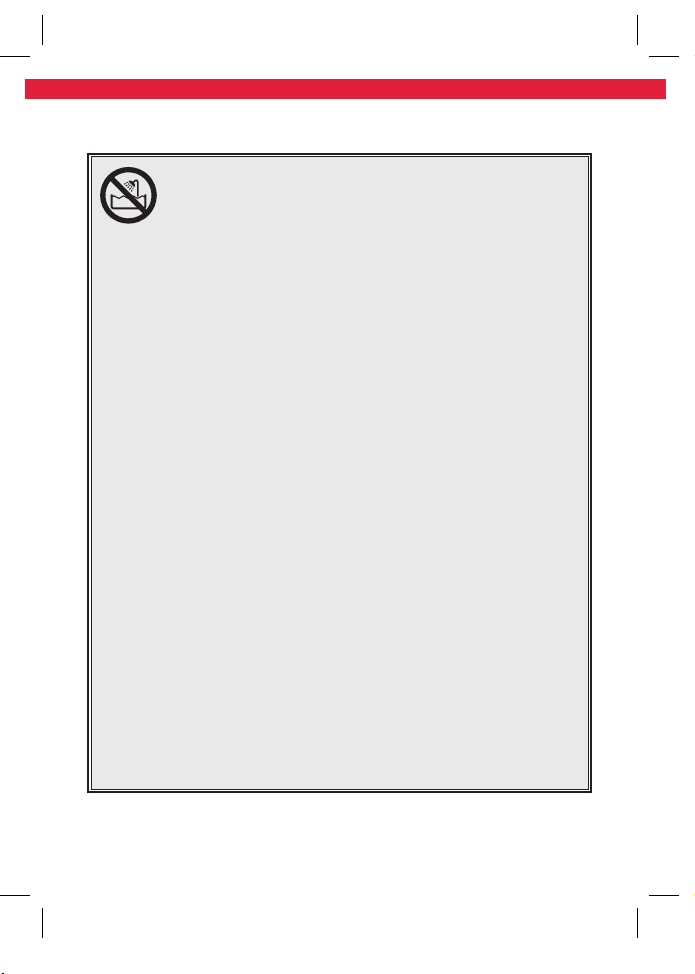
Warnung! Benutzen Sie dieses
Produkt nicht in der Nähe von
Wasser oder starker Feuchtigkeit,
z.B. in einem feuchten Keller oder neben
einem Schwimmbecken oder der
Badewanne.
•Dieses Produkt kann von Kindern
ab 8 Jahren sowie von Personen mit
reduzierten physischen, sensorischen
oder mentalen Fähigkeiten oder Mangel
an Erfahrung und/oder Wissen benutzt
werden, wenn sie beaufsichtigt werden
oder bezüglich des sicheren Gebrauchs
des Produktes unterwiesen wurden
und die daraus resultierenden Gefahren
verstanden haben.
•Kinder dürfen nicht mit dem Produkt spielen.
•Reinigung und Benutzerwartung dürfen
nicht durch Kinder durchgeführt werden,
es sei denn sie sind beaufsichtigt.
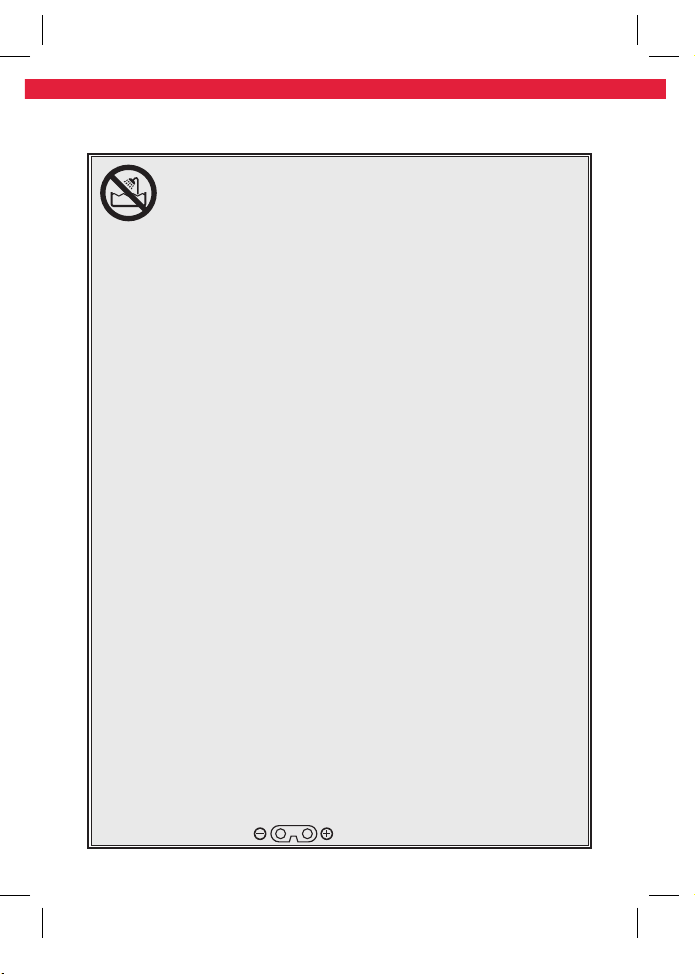
•Achtung! Das Produkt trocken halten.
3
Page 4
Deutsch
Size - A6
Sicherheitshinweise
•Laden Sie das Produkt nur mit dem
mitgelieferten Ladeadapter auf. Die
Polarität des Netzteils muss mit der des
Produktes übereinstimmen .
1. Lesen Sie diese Bedienungsanleitung
vor dem ersten Gebrauch gründlich
durch und geben Sie sie zusammen
mit dem Produkt weiter. Beachten Sie
Warnungen auf dem Produkt und in dieser
Bedienungsanleitung. Sie enthält wichtige
Sicherheitshinweise sowie Gebrauchs- und
Wartungsanleitungen für das Produkt.
2. Verwenden Sie das Produkt nur
zweckbestimmt und mit den empfohlenen
Zubehörteilen und Komponenten. Eine
unsachgemäße oder falsche Nutzung ist
gefährlich.
3. Lassen Sie das Produkt nie unbeaufsichtigt,
solange es eingeschaltet ist.
4. Tauchen Sie elektrische Teile des Produktes
während des Reinigens oder des Betriebs
nie in Wasser oder andere Flüssigkeiten.
Halten Sie das Produkt nie unter fließendes
Wasser. Beachten Sie unbedingt das Kapitel
Reinigung und Pflege.
5. Reparieren Sie das Produkt auf keinen Fall
selbst (z.B. wenn das Netzkabel beschädigt
ist oder das Produkt fallengelassen
wurde, etc.). Lassen Sie Wartungen und
Reparaturen nur von einem autorisierten
Kundendienst durchführen.
6. Verwenden Sie das Produkt nur in
trockenen Innenräumen, niemals im Freien.
7. Schützen Sie das Produkt vor:
- direkter Sonneneinstrahlung und Staub;
- Feuer (Kamin, Grill, Kerzen), Wasser
(Wasserspritzer, Vasen, Badewanne) oder
hoher Luftfeuchtigkeit.
8. Dieses Produkt ist nicht für kommerziellen
Gebrauch geeignet. Es ist nur für die
Nutzung im Haushalt konzipiert.
9. Reinigen Sie das Produkt und die übrigen
Zubehörteile nach jedem Gebrauch.
10. Beachten Sie das Kapitel Reinigung und
Pflege.
4
11.
12. Warnung! Das handgehaltene Teil ist von
Batteriehinweise
1. Entfernen Sie die Batterien bevor Sie das
2. Setzen Sie Akkus niemals übermäßiger
3. Der Akku ist im Produkt fest eingebaut und
4. Wenden Sie sich vor der Entsorgung
5. Die Kontakte/Anschlüsse des Akkus
6. Den Akku des Produkts niemals
Das Symbol am Produkt weist
darauf hin, dass manche Teile
des Produktes unter fließendem
Wasser gereinigt werden können.
der Anschlussleitung zu trennen, bevor es
mit Wasser gereinigt wird.
Produkt entsorgen.
Hitze (z.B. pralle Sonne, Feuer) aus und
werfen Sie sie niemals in Feuer. Die Akkus
könnten explodieren.
kann nicht ausgetauscht werden.
des Produktes an einen elektrischen
Fachmann oder Ihren Händler, um die
Akkus auszubauen und umweltgerecht zu
entsorgen.
niemals kurzschließen. Den Akku bzw. das
Produkt nicht ins Feuer werfen. Es besteht
Explosions- und Brandgefahr!
unbeaufsichtigt laden.
Page 5
Deutsch
Herzlichen Glückwunsch!
Vielen Dank, dass Sie sich für ein KOENIC
Produkt entschieden haben. Bitte lesen Sie die
Bedienungsanleitung aufmerksam durch und
bewahren Sie sie für späteres Nachschlagen auf.
Bestimmungsgemäße Benutzung
Dieses Produkt ist nur zum Rasieren trockener
oder nasser Barthaare, mit oder ohne
Rasierschaum, sowie zum Trimmen von Bart und
Koteletten geeignet. Dieses Produkt ist nur für
die Nutzung im Haushalt konzipiert. Es ist nicht
für den kommerziellen Gebrauch geeignet.
Die Imtron GmbH übernimmt keine Haftung
für Schäden am Produkt, Sachschaden, oder
Verletzung von Personen aufgrund von
unachtsamer, unsachgemäßer, falscher oder
nicht dem vom Hersteller angegebenen Zweck
entsprechender Verwendung des Produkts.
Vor dem ersten Gebrauch
Entfernen Sie das Produkt und Zubehör vorsichtig
aus der Originalverpackung. Überprüfen Sie
den Verpackungsinhalt auf Vollständigkeit und
Beschädigungen. Sollte der Verpackungsinhalt
unvollständig oder sollten Beschädigungen
feststellbar sein, kontaktieren Sie umgehend Ihre
Verkaufsstelle.
Hinweis
• Laden Sie den Akku vor der ersten
Benutzung mindestens 2 Stunden auf. Die
allgemeine Ladezeit betragt ca. 90 Minuten
und hängt auch vom Zustand des Akkus ab.
• Wenn der Akku vollständig aufgeladen ist,
kann das Produkt ca. 60 Minuten verwendet
werden. Die Nutzungsdauer kann variieren (je
nach Zustand des Akkus).
Entsorgung
Das Produkt nicht im Hausmüll entsorgen.
Das Produkt ist an den ausgewiesenen
Sammelstellen für elektrische und
elektronische Produkte zu entsorgen. Für
weitere Informationen wenden Sie sich bitte an
Ihren Händler oder die zuständige Behörde am Ort.
Bitte entsorgen Sie die Batterien
umweltgerecht. Werfen Sie Batterien nicht
in den Hausmüll. Benutzen Sie bitte die
Rückgabe und Sammelsysteme in Ihrer Gemeinde
oder wenden Sie sich an den Händler, bei dem das
Produkt gekauft wurde.
: 5 V
50/60 Hz
500 mAh
, 800 mA
, 800 mA
Lieferumfang
1 x Rasierer
1 x Netzteilladegerät
1 x Reinigungspinsel
1 x Auewahrungsbeutel
1 x Ersatzscherkopf und 2 Klingenblöcke
1 x Bedienungsanleitung
Bedienelemente und Komponenten
A
Schutzkappe
B
Scherkopf
C
Scherkopfentriegelung, beidseitig
D
Ein-/Aus-Schalter
E
Display
F
Ladebuchse
G
Haartrimmer
H
Netzteilladegerät mit DC-Kabel und -Stecker
I
Reinigungspinsel
J
Auewahrungsbeutel
Ersatzteile
K
Scherkopf mit Scherfolien
L
Klingenblock (2x)
Technische Daten
Rasierer
Nennspannung : 3,7 V
Nenneingangsspannung/strom
Schutzart : IPX5
Ladenetzteil (HX-SV0500800)
Nenneingangsleistung : 100 - 240 V~,
Nennausgangsleistung : 5 V
Schutzart : IP44
Schutzklasse : II
Batterien
Akku : Li-Ion, 3,7 V
5
Page 6
Deutsch
Size - A6
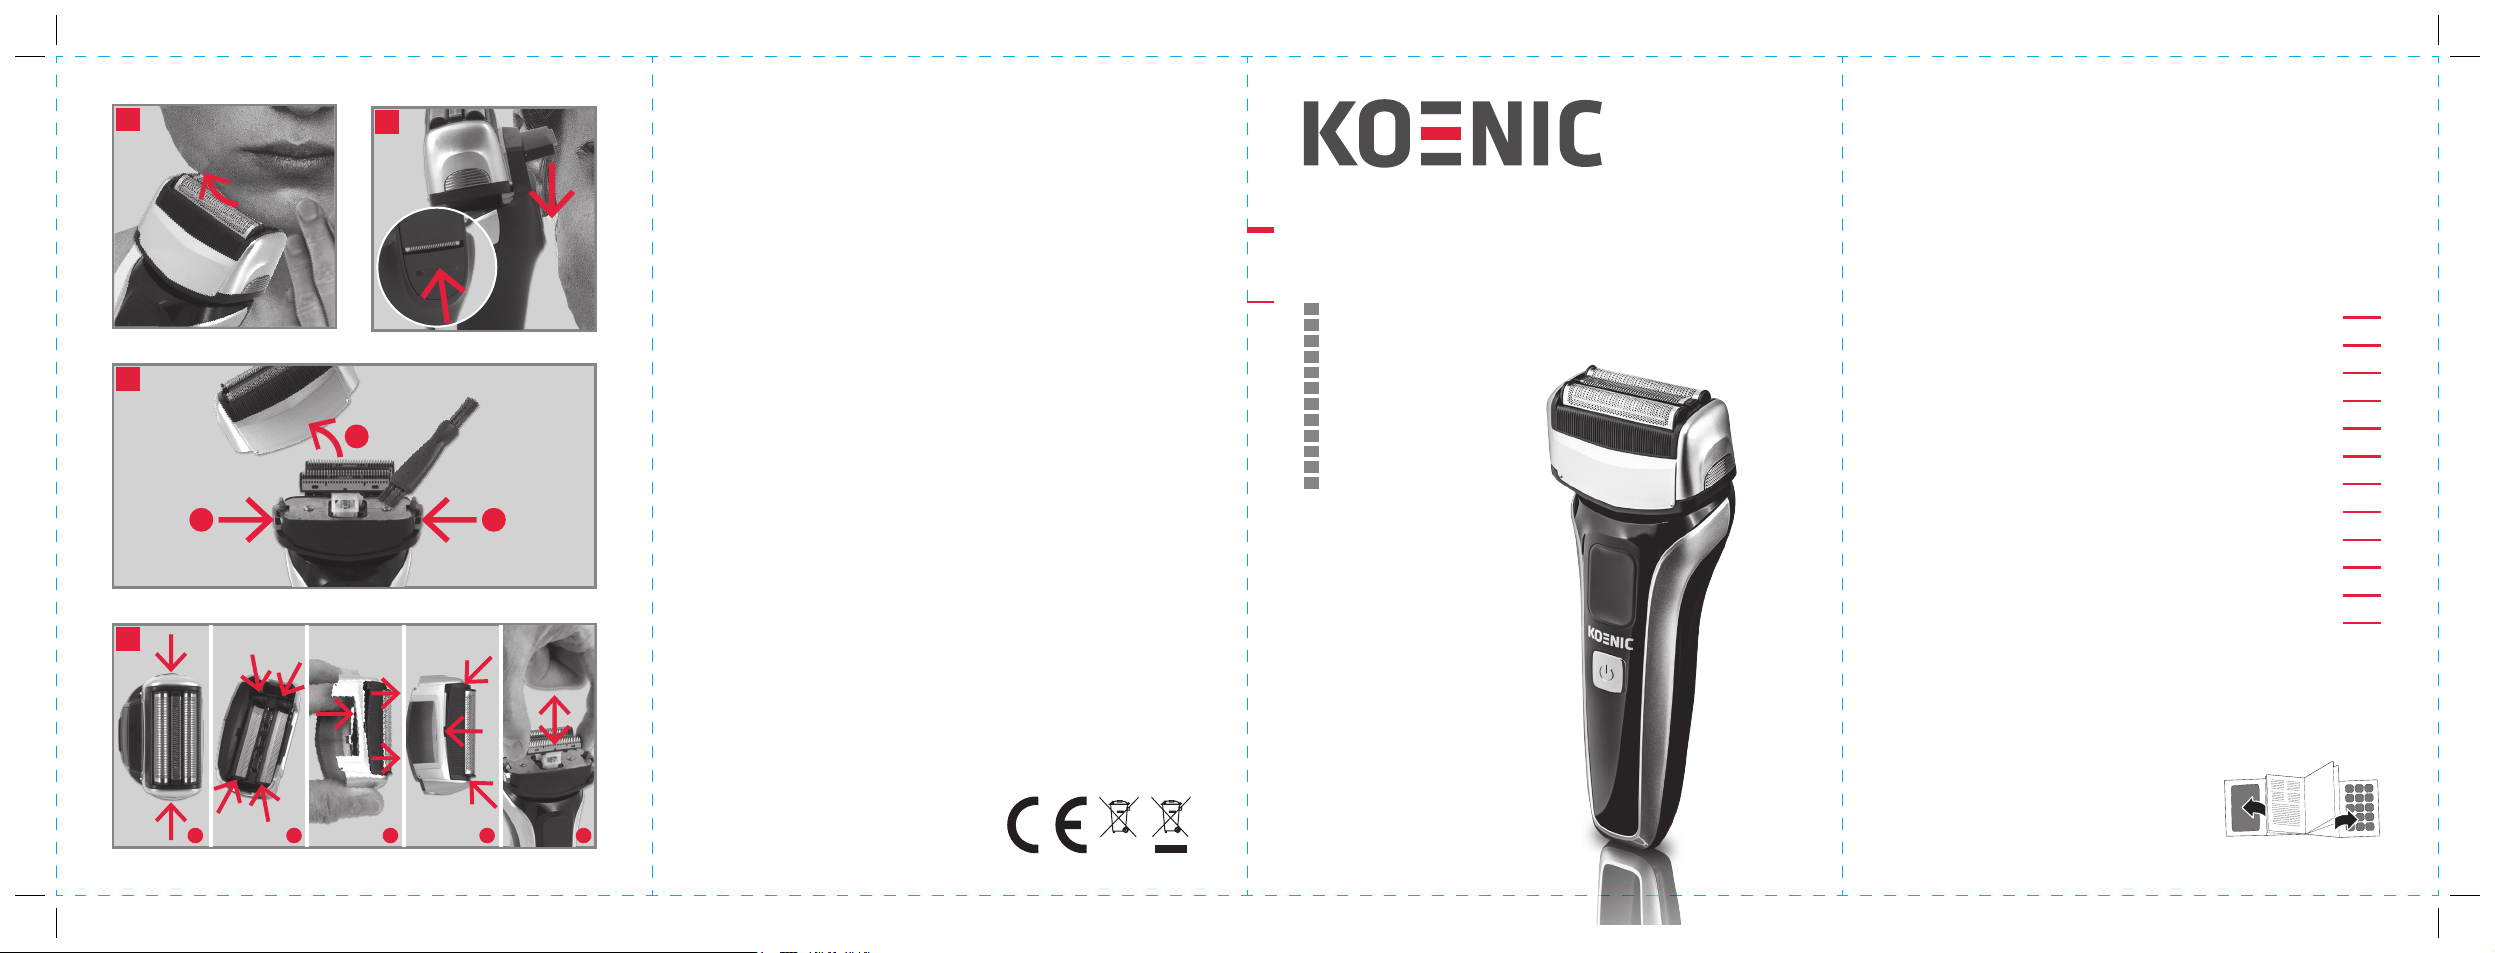
Vorbereitung
Stecken Sie den DC-Stecker des
1
Netzteilladegerätes richtig herum in
die Ladebuchse und stecken Sie das
Netzteilladegerät in eine geeignete
Steckdose.
Im Display leuchtet das Symbol
2
zeigt an, dass der Akku geladen wird. Das
Batteriesymbol leuchtet grün, wenn der
Akku voll aufgeladen ist.
Laden Sie den Akku vor der ersten Benutzung
mindestens 120 Minuten lang. Bei
Standardladevorgängen ist der leere Akku nach
einer maximalen Ladezeit von 90 Minuten
vollständig geladen was durch das grüne
Batteriesymbol im Display angezeigt wird.
Entfernen Sie nach Beendigung des
Ladevorganges den Ladestecker und ziehen Sie
das Netzteil aus der Steckdose.
Hinweis
Das Produkt muss vor dem Aufladen
ausgeschaltet sein.
Betriebsanzeige
LED-Farbe Zustand
Steckersymbol,
rot
Batteriesymbol,
grün
Steckersymbol,
rot, blinkend
Bedienung
Produkt einschalten
3
• Schalten Sie das Produkt durch Drücken
• Um das Produkt auszuschalten, drücken Sie
Aufladevorgang oder
Netzbetrieb
Ladevorgang beendet oder
während der kabellosen
Benutzung. Akku ist voll
aufgeladen.
Während des Gebrauchs, wenn
der Akkuzustand weniger als
20% ist.
des Ein-/Ausschalters ein.
- In der Anzeige erscheint ein grünes
Batteriesymbol.
- Bei Anwendung im Netzbetrieb blinken
grünes Batteriesymbol und rotes
Steckersymbol abwechselnd.
erneut den Ein-/Ausschalter.
- Das Batteriesymbol erlischt.
rot und
Trockenrasur
4
Hinweis
Das Produkt nicht verwenden bei:
- Hautwunden
- Entzündeter Haut
- Sonenbrand
- Pickeln und Blasen
Eingewöhnung
Nach ersten Anwendung des Folienrasierers
kann es zu einer vorübergehenden Rötung
oder Reizung der Haut kommen. Das ist eine
normale Erscheinung, denn die Haut muss
sich erst an diese Art der Rasur gewöhnen.
Wenden Sie sich an Ihren Arzt, falls die
Rötung/Reizung längere Zeit anhält.
• Entfernen Sie die Schutzkappe.
• Schalten Sie das Produkt mit dem Ein-/
Aus-Schalter ein.
• Halten Sie das Produkt beim Rasieren
möglichst im rechten Winkel zur
Hautoberfläche.
• Straen Sie mit der freien Hand die Haut
an problematischen Stellen, z. B. an den
Wangen, um ein besseres Ergebnis zu
erzielen.
• Rasieren Sie auch gegen die
Bartwuchsrichtung um Bartstoppeln
bestmöglich zu entfernen.
• Kontrollieren Sie den Rasurfortschritt
indem Sie mit der freien Hand über die
Haut fahren. Sind Bartstoppeln vorhanden
wiederholen Sie den Vorgang solange bis
die Haut glatt und frei von Bartstoppeln
ist.
• Schalten Sie das Produkt nach dem
Gebrauch mit dem Ein-/Aus-Schalter aus.
Hinweis
Beachten Sie, dass die Barthaare nicht
länger als wenige Millimeter sein sollten (z.B.
3-Tage Bart). Längere Barthaare können das
Ergebnis der Rasur negativ beeinflussen
und sollten deshalb zuerst mit dem
Haartrimmer gekürzt werden.
6
Page 7
Deutsch
Nassrasieren
• Befeuchten Sie Ihr Gesicht und tragen
Sie eine dünne Schicht Rasierschaum auf
die Stellen Ihres Gesichtes auf, die rasiert
werden sollen.
• Befolgen Sie die oben im Kapitel Rasieren
beschriebenen Schritte.
Hinweis
Beachten Sie, dass sie das Produkt nur
mit reinem Rasierschaum und nicht mit
Rasiergel verwenden sollte. Rasiergel
verklebt den Scherkopf und verhindert so
eine einwandfreie Rasur.
Benutzung der Einschaltsperre
• Drücken und halten Sie den Ein-/Aus-Schalter
länger als 3 Sekunden, um die Einschaltsperre
zu aktivieren. Das Batterie- und Steckersymbol
blinken dreimal und zeigen an, dass die
Einschaltsperre aktiviert wurde.
• Um den Ein-/Aus-Schalter zu entriegeln,
drücken und halten Sie ihn erneut für
mehr als 3 Sekunden. Der Rasierer wird
automatisch eingeschaltet. Drücken Sie den
Ein-/Aus-Schalter erneut, um den Rasierer
auszuschalten. Wenn Sie den Rasierer wie
in Kapitel Vorbereitung beschrieben an
die Stromversorgung anschließen, wird die
Einschaltsperre ebenfalls deaktiviert.
Reinigung und Pflege
Warnung
Verwenden Sie zur Reinigung keinesfalls
Lösungs- und Scheuermittel, harte Bürsten,
metallische oder scharfe Gegenstände.
Lösungsmittel sind gesundheitsschädlich und
greifen die Plastikteile an; scheuernde Reiniger
und Hilfsmittel zerkratzen die Oberfläche.
• Verwenden Sie nach jedem Gebrauch
6
den Reinigungspinsel, um Haare auf den
Klingen, dem Zubehör und dem Produkt
sorgfältig zu entfernen.
• Drücken Sie die Scherkopfentriegelung
auf beiden Seiten und nehmen Sie den
Scherkopf ab.
• Klopfen Sie den Scherkopf vorsichtig
aus oder blasen Sie ihn aus. Reinigen
Sie mit dem Reinigungspinsel die beiden
Klingenblöcke und das Gehäuse darunter.
• Der Scherkopf kann auch unter fließendem
Wasser abgespült werden. Trocknen Sie ihn
danach jedoch gut ab.
• Setzen Sie den Scherkopf so auf den
Rasierer auf, dass die Verriegelung
beidseitig einrastet.
• Reinigen Sie die Außenfläche des
Produktes mit einem leicht angefeuchteten
Tuch und trocknen Sie sie anschließend
gut ab.
• Achten Sie darauf, dass kein Wasser
(z.B. am Schalter) ins Produktinnere
gelangt. Das Produkt an einem trockenen,
kühlen, vor Feuchtigkeit und direkter
Sonneneinstrahlung geschützten Ort
auewahren. Bewahren Sie das Produkt
an einem für Kinder unzugänglichen Ort
auf.
7
Page 8
Deutsch
Size - A6
Scherfolien und Klingenblöcke austauschen
Entfernen des Akkus
Achtung
Die Klingenblöcke sind scharf. Vermeiden Sie
Verletzungen durch ein ungewolltes Berühren.
Angenommen der Rasierer wird täglich
7
einmal benutzt, empfehlen wir die
Scherfolien und Klingenblöcke jährlich
auszutauschen.
1. Nehmen Sie den Scherkopf wie im Kapitel
Reinigung und Pflege beschrieben ab (I).
2. Drücken Sie eine der Nasen an den kurzen
Seiten der Scherfolienhalterung nach
innen (II). Drücken Sie die Scherfolien mit
ihrer Halterung nun nach und nach aus
dem Scherkopfgehäuse heraus (III). Setzen
Sie nun die neuen Scherfolien mit ihrer
Halterung in das Scherkopfgehäuse (IV).
3. Ziehen Sie die Klingenblöcke nach oben ab
und stecken Sie die neuen Klingeblöcke auf
die Halterungen (V).
4. Setzen Sie den Scherkopf wie im Kapitel
Reinigung und Pflege beschrieben
wieder auf den Rasierer.
Fehlerbehebung
Sollte es während des Betriebs zu Störungen kommen, beachten Sie nachfolgende Tabelle. Sollten die
Probleme wie unter Behebung angegeben nicht abgestellt werden können, wenden Sie sich an Ihren
Händler.
Problem Mögliche Ursache Behebung
Produkt funktioniert nicht • Keine Stromversorgung
Die LED leuchtet während des
Aufladens nicht
• Akku leer
• Keine Stromversorgung
• Ladekabel nicht richtig mit
Produkt
Warnung
• Stellen Sie sicher, dass das Produkt vom
Netzkabel getrennt wurde, bevor Sie die
Batterie entnehmen.
• Explosionsgefahr! Batterie niemals
ersetzen.
Ihr Produkt enthält Batterien, die der
europäischen Richtlinie unterliegen und nicht mit
dem normalen Haushaltsmüll entsorgt werden
dürfen.
1. Entfernen Sie die Schrauben und nehmen Sie
das Gehäuse ab.
2. Durchschneiden Sie die Kabel und entnehmen
Sie die Batterie.
• Überprüfen der
Stromversorgung
• Akku nachladen
• Stromversorgung überprüfen
• Überprüfen des Ladekabels
8
Page 9
English
Safety instructions
Warning! Do not use this product in
the vicinity of water or high levels of
humidity, for example in a damp cellar or
close to a swimming pool or bathtub.
•This product can be used by children
aged from 8 years and above and
persons with reduced physical,
sensory or mental capabilities or lack
of experience and knowledge if they
are being supervised or have been
instructed concerning use of the product
in a safe way and understand the
hazards involved.
•Children shall not play with the product.
•Cleaning and user maintenance shall not
be carried out by children unless they are
supervised.
•Warning! Keep the product dry.
•Only use the charging adapter provided
to charge the product. The polarity of
the adaptor must match the polarity of
the product
.
9
Page 10
English
Size - A6
Safety instructions
1. Read this user manual thoroughly before
first use and pass it on with the product.
Pay attention to the warnings on the
product and in this user manual. It contains
important information for your safety as
well as for the use and maintenance of the
equipment.
2. Use the product only for its intended
purpose and with recommended
accessories and components. Improper use
or wrong operation may lead to hazards.
3. Never leave the product unsupervised while
it is switched on.
4. Never immerse electrical parts of the
product in water during cleaning or
operation. Never hold the product under
running water.
5. Do not under any circumstances attempt
(e.g. damage in power cord, product has
been dropped, etc.) to repair the product
yourself. For servicing and repairs, please
consult an authorised service agent.
6. Use this product in dry indoor areas only
and never outdoors.
7. Never use, expose or put the product
near to:
- direct sunlight and dust;
- fire (fireplace, grill, candles), water (water
splashes, vases, ponds, bath tube) or
heavy moisture.
8. This product is not intended for commercial
use. It is designed for household use only.
9. Clean the product and all other accessories
after each use.
10. Follow the instructions in the chapter
Cleaning and care.
11.
12. Attention! The handheld part must be
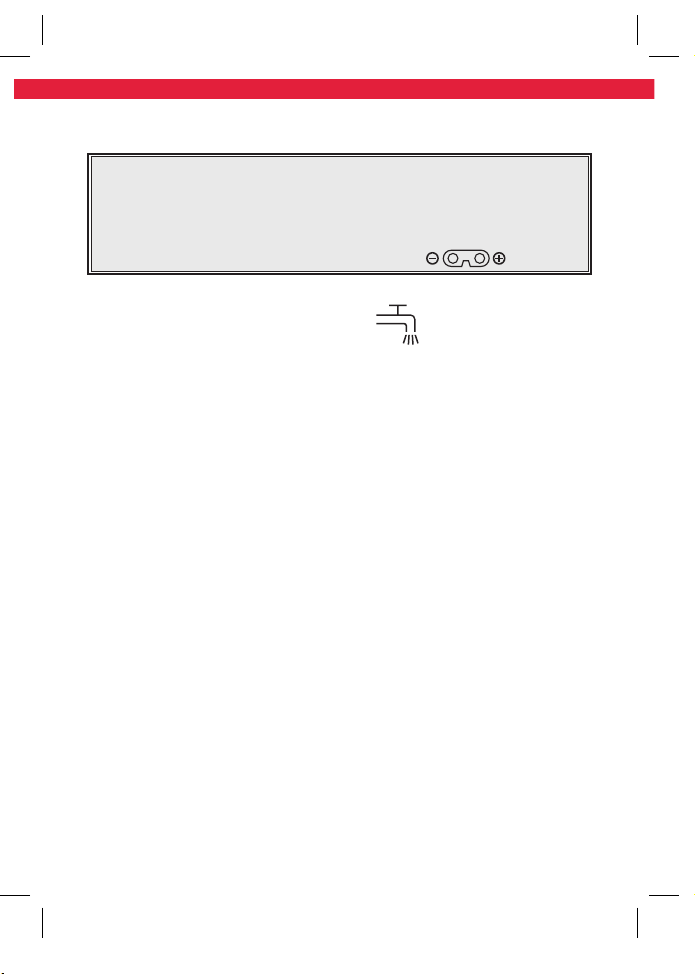
The shaver is suitable for being
cleaned under running water.
disconnected from the connection line
before being cleaned with water.
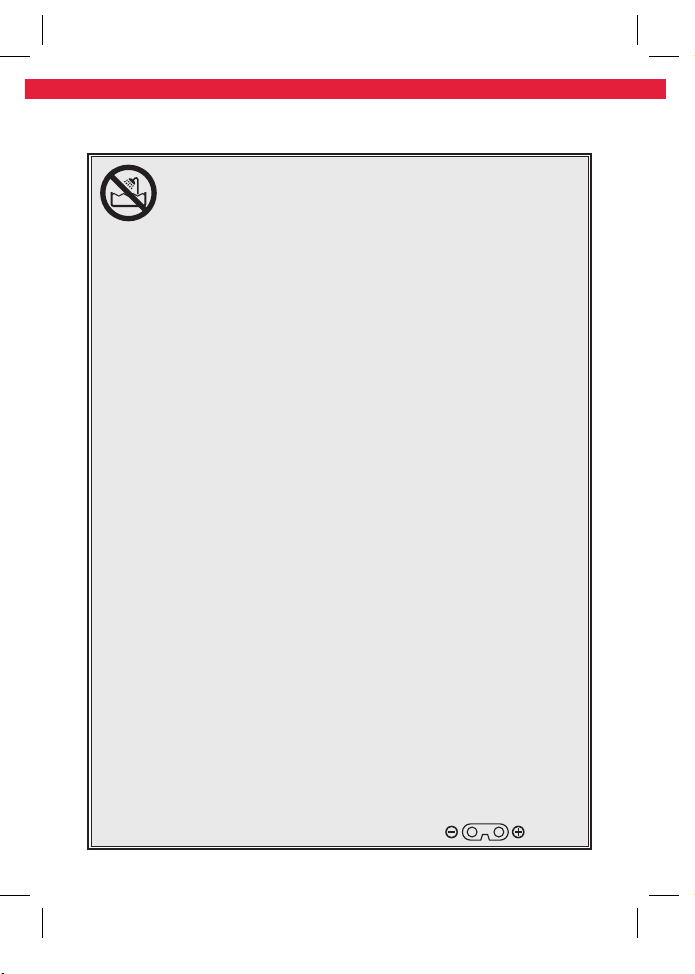
Battery
1. Remove the batteries from the product
before disposal.
2. Never expose rechargeable batteries
to excessive heat (e.g. bright sun, fire),
and never throw them into fire. The
rechargeable batteries could explode.
3. The rechargeable battery is permanently
built into the product and cannot be
replaced.
4. When disposing the product, please consult
an electrician or your retailer to remove
and dispose the built in batteries in an
environmentally friendly manner.
5. Never short-circuit the contacts of the
rechargeable battery. Do not throw the
rechargeable battery or the product into
fire. There is a danger of fire and explosion!
6. Never charge the rechargeable battery of
the product unattended.
10
Page 11

English
Congratulations!
Thank you for your purchase of KOENIC product
Please read this manual carefully and keep it for
future reference.
Intended use
This product is only suitable for shaving dry or
wet beards, with or without shaving cream, as
well as for trimming beards and sideburns.
Any other use may result in damage to product
or injuries. This product is not intended for
commercial use. It is designed for household
use only.
The Imtron GmbH assumes no liability for damage
to the product, for property damage or for
personal injury due to careless or improper usage
of the product, or usage of the product which
does not meet the manufacturer’s specified
purpose.
Before first time use
Remove the product and accessories carefully
from the original packaging. Inspect the delivery
contents for completeness and damages. Should
the delivery contents be incomplete or damaged,
contact your sales outlet immediately.
Note
• For first time use, charge the product for at
least 2 hours. The general charging time is
about 90 minutes which also depends on the
condition of the battery.
• When the battery is fully charged, the
product can be used for 60 minutes. The
time may vary (depending on the battery
condition).
Disposal
Do not dispose of this product as municipal
waste. Return it to a designated collection
point for the recycling of electrical and
electronic equipment. Contact your retailer
or local authorities for more information.
Please dispose of batteries in an
environmentally friendly manner Do not
put batteries into the household waste.
Please use the return and collection systems in
your community or contact the dealer where you
purchased the product.
, 800 mA
, 800 mA
Content
1 x Shaver
1 x Charging power supply
1 x Cleaning brush
1 x Storage bag
1 x Replacement shaving head and 2 blade blocks
1 x User manual
Controls and Components
A
Protective cap
B
Shaving head
C
Shaving head release button, both sides
D
On/ o button
E
Display
F
Charging socket
G
Hair trimmer
H
Charging power supply with DC cable and plug
I
Cleaning brush
J
Storage bag
Spare parts
K
Shaving head with shear foil
L
Blade block (2x)
Technical Data
Shaver
Battery operated : 3.7 V
Rated input
voltage/current
IP code : IPX5
Charging adaptor (HX-SV0500800)
Rated input : 100 - 240 V~, 50/60 Hz
Rated output : 5 V
IP code : IP44
Protection class : II
Battery
Re-chargeable
battery
: 5 V
: Li-Ion, 3.7 V
500 mAh
11
Page 12
English
Size - A6
Preparation
Insert the DC plug of the charging power
1
supply into the charging socket and plug the
charging power supply in a suitable power
outlet.
The symbol
2
and indicates that the battery is being
charged. The battery symbol shines
green when the battery is fully charged.
Charge the battery for at least 120 minutes
before first use. For standard charging,
the empty battery is fully charged after a
maximum charging time of 90 minutes, as
indicated by the green battery icon on the
display.
After completing the charging process,
remove the charging plug and unplug the
charging power supply from the socket.
Note
Ensure that the product is switched o before
charging.
LED indicator
LED-Color Condition
Plug symbol,
red
Battery
symbol, green
Plug symbol,
red, flashing
Operation
Switch on the device
3
• Switch on the device by pressing the on/
o button.
- The display shows a green battery
symbol.
- When used in mains mode, the green
battery symbol and the red plug symbol
flash alternately.
• To switch o the device press the on/ o
button again.
- The battery symbol turns o.
lights up red in the display
During charging or mains
operated.
Charging completed or when
used cordless. Fully charged.
During operation, when the
battery level is less than 20%.
Foil shave
4
Note
Do not use the product if you have:
- skin lesions
- inflamed skin
- sunburn
- spots and blisters
Familiarisation:
After using the product you may have red
or irritated skin for a while. This is a normal
reaction because the skin has to first get
used to this kind of shave. Consult a doctor
if the redness or irritation continues for
longer than this period.
• Remove the protective cap.
• Switch on the device with the on/ o
button.
• When shaving, keep the device as
perpendicular as possible to the surface
of the skin.
• Tighten the skin with your free hand in
problematic areas, eg. on the cheeks, to
achieve a better result.
• Also shave against the beard growth
direction to remove stubble as best as
possible.
• Control shaving progress by touching your
skin with your free hand. If beard stubbles
are present repeat the process again and
again until the skin is smooth and free of
beard stubbles.
• Switch o the device with the on/ o
button after use.
Note
The beard should not be longer than a
few millimetres as longer hair will impair
the shaving. If the beard is too long, use
the hair trimmer to cut it before using the
actual razor.
12
Page 13

English
Wet shaving
• Wetting your face and apply thin layer
shaving foam to the parts of your face
which shall be shaved.
• Follow steps as given above in chapter
Shaving.
Note
Only proper shaving foam may be used with
the razor, as shaving gel will gum up the
shaving head and impair the result.
Hair trimmer
5
The hair trimmer on the back of the device
allows the cutting of sideburns for example.
• Slide the hair trimmer on the back of the
unit all the way up until it clicks into place.
• Switch on the device with the on/ o
button.
• Carefully guide the hair trimmer to the
ends of the hair to be trimmed and cut the
desired shape.
• After use, switch o the device with the
on/ o button and push the hair trimmer
back down until it clicks into place.
Using the switch lock
• Push and hold the on/o switch for more
than 3 seconds to lock the on/o switch. The
battery and plug symbols will flash three times
and indicate the switch lock is activated.
• To unlock the on/o switch push and hold it
for more than 3 seconds again. The shaver will
switch on automatically. Push the on/o switch
again to switch o the shaver. Connecting the
shaver to the power supply as given in chapter
Preparation will also deactivate the on/o
switch lock.
Cleaning and care
Warning
When cleaning, never use solvents or abrasive
materials, hard brushes, metallic or sharp
objects. Solvents are harmful to human health
and can attack plastic parts, while abrasive
cleaning mechanisms and tools may scratch
the surface(s).
• After every use, please use the cleaning
6
brush to thoroughly brush and blow out hair.
• Press the shaving head release on both
sides and remove the shaving head.
• The shaving head can also be rinsed under
running water. But then you have to dry
it well.
• Gently tap or blow out the shaving head.
Use the cleaning brush to clean the two
blade blocks and the housing underneath.
• Place the shaving head on the shaver so
that it clicks in place on both sides.
• Clean the product’s exterior surfaces with
a slightly damp cloth and then dry them
thoroughly.
• Make sure that no water enters the
product interior (for example, through the
on/o button). Keep the product in a dry,
cool location which is protected against
moisture and direct sunlight. Keep this
product out of the reach of children.
13
Page 14
English
Size - A6
Replacing shear foils and blade blocks
Remove the integrated battery
Attention
The blade blocks are sharp. Avoid injuries by
accidentally touching them.
Assuming the razor is used once a day, we
7
recommend replacing the shear foils and
blade blocks after 1 year.
1. Remove the shaving head as described in
chapter on Cleaning and care (I).
2. Press in one of the lugs on the short sides
of the shear foil holder (II) and push the
shear foil with its holder gradually out of
the shaving head housing (III). Now place
the new shear foil with its holder in the
shaving head housing (IV).
3. Pull the blade blocks upwards and clip the
new blade blocks onto the brackets (V).
4. Attach the shaving head back to the
shaver as described in chapter Cleaning
and care.
Troubleshooting
If there are any problems during operation, please refer to the following table. If problems cannot be
solved as indicated under Solution, please contact your manufacturer.
Problem Possible causes Solution
Product does not work • Interrupted power supply
LED indicator does not light on
during charging batteries
• Batteries empty
• No power supply
• Charging cord is not connected
to product
Warning
• Make sure the product is disconnected from
the adaptor before removing the battery.
• Risk of Explosion! Never Replace the
battery.
According to European Battery Directive, the
battery inside the product cannot be disposed
with normal household waste.
1. Remove the screws and take o the enclosure.
2. Cut the battery wires and remove the battery.
• Check the power supply
• Re-charge batteries
• Check the power supply
• Check the charging cord
connection
14
Page 15
Español
Instrucciones de seguridad
¡Advertencia! No utilice este
producto cerca de agua o con altos
niveles de humedad, por ejemplo, en un
sótano húmedo o cerca de una piscina o
bañera.
•Este producto puede ser usado por niños
de más de 8 años de edad y personas
con capacidades físicas, sensoriales o
mentales reducidas, o falta de experiencia
y conocimientos, si reciben supervisión o
instrucciones sobre el uso del producto de
forma segura y comprenden los riesgos
que implica.
•Los niños no deben jugar con el aparato.
•La limpieza y el mantenimiento no
deberán ser realizadas por niños, a
menos que estén supervisados.
•Atención! Mantenga seco el producto
•Use exclusivamente el adaptador de
carga incluido para cargar el producto. La
polaridad del adaptador debe coincidir
con la polaridad del producto
.
15
Page 16
Español
Size - A6
Instrucciones de seguridad
1. Lea por completo este manual del usuario
antes del primer uso y entréguelo con el
producto. Preste atención a las advertencias
del producto y el manual del usuario.
Contiene información importante para su
seguridad y el uso y mantenimiento del
equipo.
2. Use el producto exclusivamente para
su finalidad y con los accesorios y
componentes recomendados. Un uso
inadecuado o incorrecto puede provocar
riesgos.
3. Nunca deje el producto sin supervisión
mientras esté encendido.
4. Nunca sumerja las partes eléctricas del
producto en agua durante la limpieza ni el
manejo. Nunca mantenga el producto bajo
agua corriente.
5. No intente bajo ninguna circunstancia
reparar usted mismo el producto (p.ej.,
cable de alimentación dañado, si ha caído
el producto, etc.). Para cualquier asistencia
y reparación, consulte con un agente de
servicio autorizado.
6. Utilice este producto sólo en zonas
interiores secas y nunca fuera.
7. No use nunca, exponga ni ponga el
producto cerca de:
- luz del sol directa y polvo;
- fuego (chimenea, parrilla, velas), agua
(salpicaduras, jarrones, estanques,
bañeras) ni humedad intensa.
8. Este producto no es adecuado para uso
comercial. Está diseñado solamente para
uso doméstico.
9. Limpie el producto y los demás accesorios
después de cada uso.
10. Siga las instrucciones del capítulo Limpieza
y cuidados.
11.
12. ¡Atención! Desenchufe la empuñadura de
La afeitadora se puede lavar con
agua corriente.
la corriente antes de limpiarla con agua.
Pilas
1. Retire las baterías del producto antes de su
eliminación.
2. Nunca exponga unas baterías recargables
a excesivo calor (p. ej., sol, fuego), y nunca
las tire al fuego. Las baterías recargables
podrían explotar.
3. La batería recargable está integrad de
manera permanente en el producto y no se
puede sustituir.
4. Al desechar el producto, consulte a un
electricista o a su distribuidor para eliminar
y desechar las baterías incluidas de forma
respetuosa con el medio ambiente.
5. Nunca cortocircuite los contactos de
la batería recargable. No tire la batería
recargable o el producto al fuego. ¡Existe
peligro de incendio y explosión!
6. Nunca cargue sin supervisión la batería
recargable del producto.
16
Page 17
Español
Felicidades!
Gracias por adquirir un producto KOENIC. Lea
atentamente este manual y consérvelo como
referencia en el futuro.
Uso pretendido
Este aparato solo es adecuado para el afeitado en
seco y húmedo, con o sin crema de afeitar, y para
perfilar barbas y patillas.
Cualquier otro uso puede provocar daños en el
producto o lesiones personales. Este producto
está diseñado solo para uso doméstico y no está
pensado para uso comercial.
Imtron GmbH no asume ninguna responsabilidad
por daños producidos al producto, a la propiedad
o por lesiones personales debidas al uso
inadecuado del producto o por su utilización para
una finalidad distinta a la especificada por el
fabricante.
Antes del primer uso
Saque el producto y sus accesorios
cuidadosamente del embalaje original. Compruebe
que el contenido entregado esté completo y sin
daños. Si el contenido está incompleto o dañado,
contacte de inmediato con su lugar de adquisición.
Nota
• Cuando lo utilice por primera vez, cargue el
aparato durante al menos 2 horas. El tiempo
de carga habitual es de unas 90 minutos,
aunque también depende del estado de la
batería.
• Cuando la batería esté completamente
cargada, el aparato podrá utilizarse durante
60 minutos. El tiempo puede variar
(dependiendo del estado de la batería).
Eliminación
No deseche este aparato en la basura
doméstica. Llévelo a un punto de recogida
selectiva para el reciclaje de los componentes
eléctricos y electrónicos. Póngase en
contacto con su vendedor o autoridades locales para
obtener más información al respecto.
Deshágase de las pilas de forma
respetuosa con el medioambiente. No tire
las pilas junto con los residuos domésticos
del hogar. Utilice los sistemas de devolución y
recogida de su comunidad o póngase en contacto
con el vendedor al que compró el producto.
: 5 V
500 mAh
, 800 mA
, 800 mA
Contenido
1 afeitadora
1 suministro de corriente de carga
1 cepillo limpiador
1 bolsa de almacenamiento
1 cabezal de afeitado y 2 bloques de cuchillas
de repuesto
1 manual de usuario
Control y componentes
A
Tapa protectora
B
Cabezal de afeitado
C
Botón de desbloqueo del cabezal de afeitado,
ambos lados
D
Botón de encendido/apagado
E
Pantalla
F
Toma de carga
G
Cortapelos
H
Suministro de corriente de carga con cable de
CC y enchufe
I
Cepillo de limpieza
J
Bolsa de almacenamiento
Recambios
K
Cabezal de afeitado con hoja de afeitar
L
Bloque de cuchillas (x 2)
Datos técnicos
Afeitadora
Funciona con batería : 3,7 V
Entrada nominal
Electricidad
Tipo de protección : IPX5
Adaptador de carga (HX-SV0500800)
Entrada nominal : 100 - 240 V~, 50/60 Hz
Salida nominal : 5 V
Tipo de protección : IP44
Clase de protección : II
Batería
Batería recargable : Li-Ion, 3,7 V
17
Page 18
Size - A6
Español
Preparación
Inserte el enchufe de CC de la fuente de
1
alimentación de carga en la toma de carga
y enchufe la fuente de alimentación a una
toma de corriente adecuada.
El símbolo
2
e indica que la batería se está cargando. El
símbolo de la batería se ilumina en verde
cuando está completamente cargada.
Cargue la batería durante, al menos, 120
minutos antes del primer uso. Para una
carga normal, cuando la batería está
completamente vacía, tardará unos 90
minutos como máximo en cargarse. En la
pantalla se indicará con el símbolo de la
batería iluminado en verde.
Una vez cargada la batería, desenchufe la
fuente de alimentación de la toma y retire el
enchufe de carga.
Nota
Asegúrese de que el producto esté apagado
antes de cargarlo.
Indicador LED
Color LED Estado del color LED
Símbolo del enchufe
iluminado en rojo
Símbolo de la batería
iluminado en verde
Símbolo del enchufe
parpadeando en rojo
Funcionamiento
Encendido del dispositivo
3
• Encienda el aparato pulsando el botón
encender/apagar.
• Para apagar el aparato, pulse de nuevo el
botón de encender/apagar.
se ilumina en rojo en la pantalla
Durante la carga o cuando
está enchufado a la red.
Durante la carga o cuando
está enchufado a la red.
Totalmente cargado.
Mientras está en
funcionamiento, cuando
el nivel de la batería es
menor al 20 %.
- La pantalla muestra el símbolo de la
batería en verde.
- Cuando se usa enchufado a la red, el
símbolo de la batería iluminado en verde y
el símbolo del enchufe iluminado en rojo
parpadean alternativamente.
- El símbolo de la batería se apagará.
Afeitado en seco
4
Nota
No utilice el producto si observa:
- Heridas en la piel
- Inflamación de la piel
- Quemaduras solares
- Granos o ampollas
Adaptación:
Después de usar el aparato, la piel puede
ponerse roja o irritarse durante un tiempo.
Esta es una reacción normal porque la piel
debe acostumbrarse a este tipo de afeitado.
Consulte a un médico si el enrojecimiento o
la irritación continúa durante más tiempo.
• Retire la tapa protectora.
• Encienda el aparato con el botón de
encendido/apagado.
• Al afeitarse, mantenga el aparato lo más
perpendicular posible a la superficie de
la piel.
• Estire la piel de las zonas problemáticas
con la mano que tenga libre, por ejemplo,
en las mejillas, para lograr mejores
resultados.
• Afeite en dirección contraria al crecimiento
de la barba para eliminar los restos lo mejor
posible.
• Compruebe el resultado del afeitado
tocando la piel con la mano que tenga libre.
Si hay restos de barba, repita el proceso
una y otra vez hasta que la piel quede
completamente lisa.
• Apague el aparato con el botón de
encendido/apagado después de usar.
Nota
El largo de la barba no debe medir más de
unos milímetros, ya que si el pelo es más
largo, afectará al resultado del afeitado. Si
la barba es demasiado larga, córtela con el
cortapelos antes de usar la afeitadora.
18
Page 19
Español
Afeitado en húmedo
• Humedézcase la cara y extienda una fina
capa de espuma de afeitar por las partes
que va a afeitar.
• Siga los pasos que se indican arriba en el
apartado Afeitado en seco.
Nota
Solo se puede usar una espuma de afeitar
adecuada con la afeitadora, ya que el gel
de afeitar dejará el pelo pegajoso y no
conseguirá un buen resultado.
Cortapelos
5
El cortapelos de la parte posterior del aparato
permite recortar las patillas, por ejemplo.
• Deslice el cortapelos de la parte posterior
de la unidad hasta que encaje en su lugar.
• Encienda el aparato con el botón de
encendido/apagado.
• Pase el cortapelos con cuidado por la parte
que desee cortar y corte con la forma
deseada.
• Después de usar, apague el dispositivo con
el botón de encender/apagar y empuje el
cortapelos hacia abajo hasta que encaje
en su lugar.
Uso del bloqueo
• Mantenga pulsado el interruptor de encendido/
apagado durante más de tres segundos para
bloquear el interruptor. Los símbolos de batería
y enchufe parpadearán tres veces e indicarán
que el bloqueo del interruptor está activado.
• Para desbloquear el interruptor de encendido/
apagado, manténgalo pulsado de nuevo
durante más de tres segundos. La afeitadora se
encenderá automáticamente. Pulse de nuevo
el interruptor de encendido/apagado para
apagar la afeitadora. Al enchufar la afeitadora
a la fuente de alimentación como se indica en
el capítulo Preparación también desactivará el
bloqueo del interruptor de encendido/apagado.
Limpieza y mantenimiento
Atención
Al limpiar, no use nunca disolventes ni
materiales abrasivos, cepillos rígidos, objetos
metálicos o afilados. Los disolventes son
dañinos para la salud humana y pueden
afectar a las piezas de plástico, mientras que
los mecanismos y herramientas de limpieza
abrasivos pueden rayar las superficies.
• Después de cada uso, utilice el cepillo de
6
limpieza para limpiar a fondo y sacar el pelo
de las hojas.
• Pulse el botón de desbloqueo del cabezal de
afeitado de ambos lados y quite el cabezal
de afeitado.
• El cabezal de afeitado también se puede
enjuagar con agua corriente, pero luego
debe secarlo bien.
• Golpee o sople, con cuidado, el cabezal de
afeitado. Limpie los dos bloques de cuchillas
y por debajo de la carcasa con el cepillo
limpiador.
• Coloque el cabezal de afeitado en la
afeitadora de modo que encaje con un clic
en su lugar en ambos lados.
• Limpie las superficies exteriores del
dispositivo con un paño húmedo y después
séquelas completamente.
• Asegúrese de que no entre agua en el
producto (por ejemplo, por el interruptor).
Guarde el producto en un lugar seco y
fresco, protegido de la humedad y la luz del
sol directa. Mantenga este producto fuera
del alcance de los niños.
19
Page 20

Size - A6
Español
Sustitución de la hoja de afeitar y los
bloques de cuchillas
Atención
Los bloques de cuchillas están afilados. Para
evitar lesiones no los toque.
Suponiendo que la afeitadora se use una vez
7
al día, le recomendamos que cambie las hojas
de afeitar y los bloques de cuchillas después
de un año.
1. Retire el cabezal de afeitado como se
explica en el apartado Limpieza y
cuidado (I).
2. Pulse una de las lengüetas de los lados
cortos del soporte de la hoja de afeitar (II)
y extraiga la hoja de afeitar con su soporte
fuera de la carcasa del cabezal de afeitado
(III). Ahora coloque la hoja de afeitar nueva
con su soporte en la carcasa del cabezal de
afeitado (IV).
3. Tire de los bloques de cuchilla hacia arriba
y sujete los bloques de cuchilla nuevos en
los soportes (V).
4. Vuelva a colocar el cabezal de afeitar en la
afeitadora como se indica en el apartado
Limpieza y mantenimiento.
Resolución de problemas
Si aparecen problemas de funcionamiento, consulte la siguiente tabla. Si los problemas no se pueden
resolver como se indica en Solución, contacte con el fabricante.
Problema Posible Causas
El producto no funciona • Suministro de corriente
El indicador LED no se ilumina
durante la carga de la batería
interrumpido
• Baterías descargadas
• No hay suministro de corriente
• El cable de carga no está
conectado al aparato
Extracción de la batería
Advertencia
• Asegúrese de que el aparato esté
desconectado del adaptador antes de
extraer la batería.
• ¡Riesgo de explosión! Nunca sustituya
la batería.
De acuerdo con la Directiva Europea relativa a las
pilas y acumuladores, la batería no se puede tirar
con los residuos domésticos.
1. Quite los tornillos y saque la carcasa.
2. Corte los cables de la batería y extráigala.
• Compruebe el suministro de
corriente
• Recargue las baterías
• Compruebe el suministro de
corriente
• Compruebe el cable de carga
20
Page 21
Français
Consignes de sécurité
Avertissement! N’utilisez pas ce
produit à proximité de l’eau ou de
grande humidité, p. ex. dans une cave
humide ou à côté d’une piscine ou
baignoire.
•Ce produit peut être utilisé par des
enfants âgés de plus de 8 ans et par
des personnes à capacités physiques,
sensorielles ou mentales réduites, ou
inexpérimentées et sans connaissances,
s’ils sont surveillées ou s’ils ont reçu
des instructions concernant l’utilisation
en toute sécurité du produit et s’ils
comprennent les risques qui en découlent.
•Les enfants ne doivent pas jouer avec
l'appareil.
•Le nettoyage et l'entretien du fer ne
doivent pas être eectués par des
enfants, à moins qu'ils soient surveillés.
•Avertissement! Gardez l’appareil au sec.
21
Page 22
Français
Size - A6
Consignes de sécurité
•N’utilisez que l’adaptateur de rechargement
fourni pour recharger l’appareil. La polarité
de l’adaptateur doit correspondre à la
polarité du produit .
1. Lisez intégralement ce mode d’emploi
avant la première utilisation. Si vous cédez
ce produit à quelqu’un, donnez-lui mode
d’emploi. Soyez attentif aux mises en garde
sur le produit et dans ce mode d’emploi. In
contient des informations importantes pour
votre sécurité, l’utilisation et l’entretien de
l’équipement.
2. N’utilisez le produit que pour son
usage prévu et avec les accessoires et
composants recommandés. Une mauvaise
utilisation peut entraîner des risques.
3. Ne laissez jamais l’appareil sans surveillance
lorsqu’il est sous tension.
4. N’immergez jamais les pièces électriques de
l’appareil dans l’eau au cours du nettoyage
ou de l’utilisation. Ne passez jamais
l’appareil sous l’eau courante.
5. N’essayez sous aucun prétexte (ex.: cordon
d’alimentation endommagé, produit tombé,
etc.) de réparer le produit vous -même.
Pour l’entretien et les réparations, veuillez
consulter un réparateur agréé.
6. Utilisez cet appareil dans un lieu en intérieur
non humide et jamais à l’extérieur.
7. Ne jamais utiliser, exposer ou placer le
produit :
- au soleil et dans un endroit poussiéreux ;
- près d’un feu (cheminée, gril, bougies),
près de l’eau (éclaboussures, vases,
bassin, baignoire) ou dans un endroit
très humide.
8. Ce produit n’est pas adapté à une utilisation
commerciale. Il est conçu uniquement pour
une utilisation domestique.
9. Nettoyez l’appareil et tous les autres
accessoires après chaque utilisation.
10. Suivez les instructions de la section
Nettoyage et entretien.
11.
22
Le rasoir peut être lavé sous le
robinet.
12. Attention ! La section sans fil de l’appareil
doit être débranchée de l’alimentation
électrique avant de la laver sous l’eau.
Piles
1. Retirer les piles du produit avant de le
mettre au rebut.
2. Ne jamais exposer des batteries
rechargeables à des chaleurs excessives (ex.
plein soleil, incendie), et ne jamais les jeter
dans un feu. Les batteries rechargeables
pourraient exploser.
3. La batterie rechargeable fait partie de
l’appareil et ne peut pas être remplacée.
4. Lorsque vous eliminez le produit, veuillez
consulter un électricien ou votre détaillant
pour faire retirer les accumulateurs
intégrés dans le cadre dans le respect de
l’environnement.
5. Ne jamais court-circuiter les contacts de
la batterie rechargeable. Ne pas jeter la
batterie rechargeable ou l’appareil dans un
feu. Danger de feu ou d’explosion!
6. Ne jamais recharger la batterie rechargeable
de l’appareil sans supervision.
Page 23
Français
Félicitations!
Merci d’avoir acheté un produit KOENIC. Veuillez
lire soigneusement ce manuel et le conserver
pour une consultation future.
Usage prévu
Ce produit est seulement prévu pour raser les
barbes sèches ou mouillées, avec ou sans crème
de rasage, ainsi que pour tailler les barbes et
pattes.
Toute autre utilisation peut endommager
l’appareil ou entraîner des blessures. Cet appareil
n’est destiné qu’à l’utilisation domestique et non
pas à l’utilisation commerciale.
Imtron GmbH n’assume aucune responsabilité
quant à des dommages au produit, à des
dommages matériels ou à des blessures
corporelles dus à une négligence ou un usage
inapproprié du produit, ou à un usage du produit
non indiqué par le fabricant.
Avant de l’utiliser pour la Premiere fois
Retirez soigneusement le produit et les
accessoires de leur emballage d’origine. Vérifiez
que le contenu est complet et qu’il n’est pas
endommagé. Si le contenu livré est incomplet ou
endommagé, contactez immédiatement votre
revendeur.
Remarque
• Avant la première utilisation, chargez la
batterie pendant au moins 2 heures. La
charge prend généralement 90 minutes, ce
qui dépend également de l’état de la batterie.
• Lorsque la batterie est entièrement chargée,
l’appareil peut être utilisé pendant 60
minutes. La durée peut varier (selon l’état de
la batterie).
Mise au rebut
Ne jetez pas cet appareil aux ordures
ménagères. Rapportez-le dans un centre
de collecte adapté au recyclage des
équipements électriques et électroniques.
Pour plus d’informations, contactez votre
détaillant ou les autorités locales.
Jetez les piles en respectant
l’environnement. Ne jetez pas les piles dans
les ordures ménagères. Rapportezles dans
un centre de collecte local ou contactez le
revendeur où vous avez acheté ce produit.
: 5 V
500 mAh
, 800 mA
, 800 mA
Contenu
1 x Rasoir
1 x Chargeur secteur
1 x Brosse de nettoyage
1 x Sacoche de rangement
1 x Tête de rasage de remplacement et 2 blocs
de lames
1 x Mode d’emploi
Contrôle et composants
A
Capuchon de protection
B
Tête de rasage
C
Bouton de libération de la tête de rasage, de
chaque côté
D
Bouton Marche/Arrêt
E
Écran
F
Port de charge
G
Tondeuse à cheveux
H
Chargeur secteur avec câble d’alimentation
secteur et prise
I
Brosse de nettoyage
J
Sacoche de rangement
Pièces détachées
K
Tête de rasage avec rasoir-grille
L
Bloc de lame (2 x)
Données techniques
Rasoir
Sur batterie : 3,7 V
Entrée nominale
Voltage / courant
IP code : IPX5
Chargeur secteur (HX-SV0500800)
Entrée nominale : 100 - 240 V~, 50/60 Hz
Sortie nominale : 5 V
IP code : IP44
Classe de protection : II
Batterie
Rechargeable batterie: Li-Ion, 3,7 V
23
Page 24

Size - A6
Français
Préparation
Insérez la prise du câble du chargeur
1
secteur dans le port de charge et branchez
le chargeur secteur dans une prise murale
adaptée.
Le symbole
2
pour indiquer que la batterie est en cours de
charge. L’icône de batterie devient verte
lorsque la batterie est entièrement chargée.
Rechargez la batterie pendant 120
minutes avant la première utilisation.
Lors des recharges suivantes, la batterie
complètement vide peut se charger en un
temps maximum de 90 minutes, comme
indiqué par l’icône verte sur l’écran.
Après avoir terminé le processus de charge,
débranchez la prise de charge et débranchez
le chargeur secteur de la prise murale.
Remarque
Veillez à ce que l’appareil soit éteint avant le
chargement.
Voyant LED
Couleur de
LED
Symbole de
prise, rouge
Symbole de
batterie, vert
Symbole de
prise, rouge,
clignotant
Utilisation
Allumer l’appareil
3
• Allumez l’appareil avec le bouton marche/
arrêt.
- L’écran ache un symbole de batterie
vert
- Si vous utilisez le mode alimentation
secteur, alors le symbole de batterie vert
et le symbole de prise rouge clignotent
en alternance.
• Pour éteindre l’appareil, appuyez sur le
bouton Marche/Arrêt de nouveau.
- Le symbole de batterie s’éteint.
s’illumine en rouge sur l’écran
Signification de la couleur
de LED
Charge en cours, ou branché sur
une prise murale.
Charge terminée, ou utilisation
sans fil Entièrement rechargé.
En marche, quand le niveau de
batterie est inférieur à 20%
Rasoir-grille
4
Remarque
Ne pas utiliser le produit dans les cas
suivants :
- En cas de lésion cutanée
- En cas d’inflammation cutanée
- En cas de coup de soleil
- En cas de boutons ou de cloques
Familiarisation :
Après utilisation du produit, vous pourriez
présenter des rougeurs ou des irritations
pendant une courte période. Ceci est une
réaction normale, car la peau doit d’abord
s’habituer à ce type de rasoir. Consultez un
docteur si les rougeurs ou l’irritation persiste
après une courte période.
• Retirez le capuchon de protection.
• Allumez l’appareil avec le bouton Marche/
Arrêt.
• Lorsque vous rasez, tenez l’appareil aussi
perpendiculairement que possible sur la
surface cutanée.
• Tendez la peau de votre main libre dans les
zones diciles, par exemple sur les joues,
pour améliorer le résultat.
• Rasez également dans le sens contraire
de la pousse des poils, pour retirer la barbe
courte aussi ecacement que possible.
• Contrôler la progression du rasage en
touchant la peau de votre main libre. Si de
courts poils sont toujours présents, répétez
le processus autant de fois que nécessaire,
jusqu’à ce que votre peau soit douce et
libre de poils.
• Éteignez l’appareil avec le bouton Marche/
Arrêt.
Remarque
La barbe ne doit pas être plus longue que
quelques millimètres, pour éviter de gêner le
rasage. Si la barbe est trop longue, utilisez
d’abord la fonction de tondeuse à cheveux,
avant d’utiliser le rasoir.
24
Page 25

Français
Rasage humide
• Mouillez-vous le visage et appliquez une
fine couche de mousse de rasage avant de
raser les parties du visage désirées.
• Suivez les étapes décrites dans le chapitre
Rasage-grille.
Remarque
Utilisez seulement de la mousse de rasage
classique, car le gel de rasage obstruera
la tête de rasage et donnera un résultat
insatisfaisant.
Tondeuse à cheveux
5
La tondeuse à cheveux située sur l’arrière
de l’appareil permet de couper les pattes,
par exemple.
• Faites glisser la tondeuse à cheveux sur
l’arrière de l’appareil au maximum vers le
haut, jusqu’à ce qu’elle s’enclenche.
• Allumez l’appareil avec le bouton Marche/
Arrêt.
• Guidez avec précautions la tondeuse à
cheveux sur l’extrémité des cheveux à
couper et rasez-les selon la forme désirée.
• Après utilisation, éteignez l’appareil avec
le bouton Marche/Arrêt, et poussez la
tondeuse à cheveux vers le bas jusqu’à ce
qu’elle s’enclenche.
Utilisation du verrou de bouton
• Maintenez appuyé le bouton Marche/Arrêt
pendant plus de 3 secondes pour verrouiller le
bouton Marche/Arrêt. Les symboles de batterie
et de prise clignoteront 3 fois pour indiquer que
le verrou de bouton est activé.
• Pour déverrouiller le bouton Marche/Arrêt,
maintenez le bouton Marche/Arrêt pendant
3 secondes de nouveau. Le rasoir s’allumera
automatiquement. Appuyez sur l’interrupteur
MARCHE/ARRÊT de nouveau pour éteindre
l’appareil. Brancher le rasoir sur le chargeur
secteur comme décrit dans le chapitre
Préparation désactivera également le verrou de
bouton Marche/Arrêt.
Nettoyage et entretien
Avertissement
Lors du nettoyage, ne jamais utiliser de
solvants ou des matériaux abrasifs, des brosses
dures, des objets métalliques ou pointus. Les
solvants sont dangereux pour la santé humaine
et peuvent ronger les éléments en plastique,
alors que des mécanismes et des outils de
nettoyage agressifs peuvent rayer les surfaces.
• Après chaque utilisation, utilisez la brosse
6
de nettoyage pour nettoyer soigneusement
et souer sur les cheveux sur les lames.
• Appuyez sur les boutons de libération situés
de chaque côté de la tête de rasage pour
la retirer.
• La tête de rasage peut également être
lavée sous l’eau du robinet. Mais il faudra
alors veiller à le sécher avec soin.
• Tapotez doucement ou souez sur la tête
de rasage. Utilisez la brosse de nettoyage
pour nettoyer les deux blocs de lames et le
boîtier en-dessous.
• Installez la tête de rasage sur le rasoir
jusqu’à ce qu’il s’enclenche de chaque côté.
• Nettoyez les surfaces extérieures de
l’appareil avec un chion humide et puis
essuyez-les soigneusement.
• Assurez-vous qu’aucun liquide ne pénètre
à l’intérieur de l’appareil (par exemple,
par le bouton). Ranger le produit dans un
endroit sec et frais, à l’abri de l’humidité et
du soleil. Ranger l’appareil hors de portée
des enfants.
25
Page 26

Size - A6
Français
Remplacer la grille ou les blocs de lames
Retirer la batterie intégrée
Attention
Les blocs de lames sont coupants Évitez de
vous blesser en les touchant.
En comptant que le rasoir est utilisé une
7
fois par jour, nous vous recommandons de
remplacer la grille ou les blocs de lames après
une année.
1. Retirez les têtes de rasage comme décrit
dans le chapitre Nettoyage et entretien
(I).
2. Appuyez l’un des ergots situés sur les
côtés courts du support de la grille de
rasage (II), et poussez la grille de rasage
dans son support graduellement hors du
boîtier de la tête de rasage (III). Placez
maintenant la nouvelle grille de rasage
dans son support dans le boîtier de la tête
de rasage (IV).
3. Tirez sur les blocs de lames vers le haut, et
enclenchez les nouveaux blocs de lames
sur les encoches (V).
4. Ré-attachez la tête de rasage sur le rasoir,
comme décrit dans la section Nettoyage
et entretien.
Dépannage
En cas de problèmes pendant le fonctionnement, veuillez consulter le tableau suivant. Si les problèmes
ne peuvent pas être résolus tels indiqués dans Solutions, veuillez contacter votre fabricant.
Problème Causes possibles Solutions
L’appareil ne fonctionne pas • Alimentation électrique
Voyant LED ne s’allume pas
pendant le chargement de
batterie
interrompue
• Batterie vide
• Pas d’alimentation électrique
• Câble de recharge non branché
à l’appareil
Avertissement
• Veillez à ce que le produit soit déconnecté du
secteur avant d’en retirer la batterie.
• Risque d’explosion ! Ne jamais remplacer
la batterie
Selon les directives Européennes sur les batteries,
la batterie contenue dans cet appareil ne peut pas
être jetée avec les déchets ménagers classiques.
1. Retirez les vis pour retirer le boîtier.
2. Coupez les fils de la batterie, puis retirez-la.
• Vérifiez l’alimentation
électrique
• Rechargement de batterie
• Vérifiez la source
d’alimentation
• Vérifiez le branchement du
câble de recharge
26
Page 27

Ελληνικά
Οδηγίες ασφαλείας
Προειδοποίηση! Μη
χρησιμοποιείτε αυτό το προϊόν
κοντά σε νερό ή εκεί όπου υπάρχουν
υψηλά επίπεδα υγρασίας, για παράδειγμα
σε μια αποθήκη με υγρασία ή κοντά σε
πισίνα ή μπανιέρα.
•Το προϊόν αυτό μπορεί να
χρησιμοποιηθεί από παιδιά ηλικίας
από 8 ετών και άνω και από άτομα με
μειωμένες σωματικές, αισθητήριες
ή διανοητικές ικανότητες ή έλλειψη
εμπειρίας και γνώσεις εφόσον τους
έχουν δοθεί καθοδήγηση ή οδηγίες που
αφορούν τη χρήση του προϊόντος κατά
ένα ασφαλή τρόπο και κατανοούν τους
εμπλεκόμενους κινδύνους.
•Τα παιδιά δεν πρέπει να παίζουν με το
προϊόν αυτό.
•Ο καθαρισμός και η συντήρηση χρήστη
δεν πρέπει να διεξάγονται από παιδιά,
εκτός εάν αυτά επιτηρούνται.
•Προσοχή! Έχετε πάντα το προϊόν
στεγνό.
27
Page 28

Ελληνικά
Size - A6
Οδηγίες ασφαλείας
•Χρησιμοποιήστε μόνο τον παρεχόμενο
αντάπτορα φόρτισης για να φορτίσετε
το προϊόν. Η πολικότητα του
προσαρμογέα πρέπει να ταιριάζει με την
πολικότητα του προϊόντος .
1. Διαβάστε διεξοδικά αυτό το εγχειρίδιο
χρήστη πριν από τη χρήση και κρατήστε το
μαζί με το προϊόν. Δώστε ιδιαίτερη προσοχή
στις προειδοποιήσεις πάνω στο προϊόν και
σε αυτό το εγχειρίδιο χρήστη. Αυτό περιέχει
σημαντικές πληροφορίες για την ασφάλειά
σας καθώς και για τη χρήση και συντήρηση
του εξοπλισμού.
2. Χρησιμοποιέιτε το προϊόν μόνο για τον
ενδεδειγμένο σκοπό και με τα συνιστώμενα
εξαρτήματα και συνιστώντα μέρη. Η
ακατάλληλη χρήση και η εσφαλμένη
λειτουργία μπορεί να οδηγήσει σε κινδύνους.
3. Μην αφήνετε ποτέ το προϊόν δίχως
επίβλεψη ενώ είναι ενεργοποιημένο.
4. Μη βυθίζετε ποτέ τα ηλεκτρικά μέρη του
προϊόντος στο νερό κατά τον καθαρισμό ή
τη λειτουργία. Μην κρατάτε ποτέ το προϊόν
κάτω από τρεχούμενο νερό.
5. Μην προσπαθήσετε σε καμία περίπτωση (π.χ.
βλάβη του καλωδίου τροφοδοσίας, το προϊόν
έχει πέσει κάτω, κλπ.) να επιδιορθώσετε
μόνοι σας το προϊόν. Για σέρβις και επισκευές,
παρακαλείστε να συμβουλευτείτε έναν εξουσιοδοτημένο αντιπρόσωπο του σέρβις.
6. Χρησιμοποιήστε το προϊόν μόνο σε
στεγνούς εσωτερικούς χώρους και ποτέ σε
εξωτερικούς χώρους.
7. Ποτέ μη χρησιμοποιείτε, εκθέτετε ή
τοποθετείτε το προϊόν κοντά:
- κοντά στο άμεσο ηλιακό φώς και σε σκόνη·
- φωτιά (τζάκι, σχάρα, κεριά), νερό
(πιτσιλίσματα , βάζα, δεξαμενές,
σωληνώσεις μπάνιου) ή σε βαριά υγρασία.
8. Το προϊόν αυτό δεν είναι κατάλληλο για
εμπορική χρήση. Είναι σχεδιασμένο μόνο για
οικιακή χρήση.
9. Καθαρίστε τη συσκευή και όλα της τα
εξαρτήματα μετά από κάθε χρήση.
10. Ακολουθήστε τις οδηγίες της παραγράφου
Καθαρισμός και φροντίδα.
11.
12. Προσοχή! Το τμήμα χειρός πρέπει να
Μπαταρίες
1. Απομακρύνετε τις μπαταρίες από το προϊόν
2. Μην εκθέτετε ποτέ επαναφορτιζόμενες
3. Η επαναφορτιζόμενη μπαταρία είναι μόνιμα
4. Κατά την απόρριψη αυτού του προϊόντος
5. Μη βραχυκυκλώνετε ποτέ τις επαφές της
6. Μη φορτίζετε την επαναφορτιζόμενη
Η ξυριστική μηχανή είναι
κατάλληλη για καθάρισμα κάτω
από τρεχούμενο νερό.
αποσυνδεθεί από τη γραμμή σύνδεσης πριν
από το καθάρισμα με νερό.
πριν το απορρίψετε.
μπαταρίες σε υπερβολική θερμότητα (π.χ.
λαμπερός ήλιος, φωτιά), και μην τις ρίχνετε
ποτέ στην φωτιά. Οι επαναφορτιζόμενες
μπαταρίες θα μπορούσαν να εκραγούν.
εγκατεστημένη μέσα στο προϊόν και δεν
μπορεί να αντικατασταθεί.
να συμβουλεύεστε έναν ηλεκτρολόγο
ή το κατάστημα λιανικής σχετικά με
την απομάκρυνση και διάθεση των
ενσωματωμένων μπαταριών με φιλικό
τρόπο προς το περιβάλλον.
επαναφορτιζόμενης μπαταρίας. Μη ρίχνετε
την επαναφορτιζόμενη μπαταρία ή το προϊόν
στη φωτιά. Υπάρχει κίνδυνος πυρκαγιάς και
έκρηξης!
μπαταρία του προϊόντος όταν αυτό δεν
βρίσκεται υπό επίβλεψη.
28
Page 29

Ελληνικά
Συγχαρητήρια!
Σας ευχαριστούμε για την αγορά ενός προϊόντος
KOENIC. Παρακαλούμε διαβάστε προσεκτικά το
παρόν εγχειρίδιο και φυλάξτε το για μελλοντική
αναφορά.
Προτιθέμενη χρήση
Αυτό το προϊόν είναι κατάλληλο μόνο για στεγνό
ξύρισμα ή ξύρισμα υγρών γενιών, με ή χωρίς
κρέμα ξυρίσματος, καθώς και για το τριμάρισμα
γενιών και φαβορίτων.
Οποιαδήποτε άλλη χρήση μπορεί να έχει
σαν αποτέλεσμα την πρόκληση ζημιάς στο
προϊόν ή τραυματισμούς. Το προϊόν είναι ειδικά
σχεδιασμένο για οικιακή χρήση μόνο και δεν
προορίζεται για εμπορική χρήση.
Η Imtron GmbH δεν φέρει καμία ευθύνη για βλάβη
στο προϊόν, για καταστροφή περιουσίας ή για
προσωπικό τραυματισμό εξαιτίας απρόσεκτης ή
ακατάλληλης χρήσης του προϊόντος ή χρήση που
δεν είναι σύμφωνη με τον συγκεκριμένο σκοπό
χρήσης όπως ορίζεται από τον κατασκευαστή.
Πριν την πρωτη χρηση
Καθαρίζετε αυτό το προϊόν όπως περιγράφεται
στο απόσπασμα Καθαρισμός και φροντίδα πριν
από την πρώτη χρήση και μετά από περιόδους
κατά τις οποίες δεν έχει χρησιμοποιηθεί για
μεγάλο χρονικό διάστημα.
Σημείωση
• Την πρώτη φορά, φορτώστε τη συσκευή
για τουλάχιστον 2 ώρες. Ο χρόνος φόρτισης
ανέρχεται γενικά σε 90 λεπτά περίπου, εξαρτάται όμως από την κατάσταση της μπαταρίας.
• Όταν η μπαταρία έχει φορτιστεί πλήρως,
η συσκευή μπορεί να χρησιμοποιηθεί για
60 λεπτά. Ο χρόνος μπορεί να ποικίλλει
(ανάλογα με την κατάσταση της μπαταρίας).
Απορριψη
Μην απορρίπτετε τη συσκευή σαν αστικό
απόβλητο. Επιστρέψτε το σε κατάλληλο σημείο
ανακύκλωσης ηλεκτρικού και ηλεκτρονικού
εξοπλισμού. Επικοινωνήστε με τον έμπορο σας
ή τις τοπικές αρχές για περισσότερες πληροφορίες.
Παρακαλούμε απορρίπτετε τις μπαταρίες
με έναν φιλικό για το περιβάλλον τρόπο.
Μην τις ρίχνετε στα οικιακά απορρίμματα.
Παρακαλούμε χρησιμοποιείτε τα σημεία
επιστροφής και συγκέντρωσης στην κοινότητα
σας ή επικοινωνείτε με τον αντιπρόσωπο, στον
οποίο αγοράσατε το προϊόν.
Περιεχόμενο
1 x Ξυριστική μηχανή
1 x Τροφοδοτικό φόρτισης
1 x Βουρτσάκι καθαρίσματος
1 x Σακουλάκι φύλαξης
1 x Κεφαλή ξυρίσματος αντικατάστασης και
2 μπλοκ λεπίδων
1 x Εγχειρίδιο χρήστη
Χειριστηρια και εξαρτηματα
A
Προστατευτικό κάλυμμα
B
Κεφαλή ξυρίσματος
C
Κουμπί αποδέσμευσης κεφαλής ξυρίσματος,
και στις δύο πλευρές
D
Κουμπί ενεργοποίησης/απενεργοποίησης
E
Οθόνη
F
Υποδοχή φόρτισης
G
Εξάρτημα τριμαρίσματος τριχών
H
Τροφοδοτικό φόρτισης με καλώδιο DC και φις
I
Βουρτσάκι καθαρίσματος
J
Σακουλάκι φύλαξης
Ανταλλακτικά
K
Κεφαλή ξυρίσματος με μεμβράνες κοπής
L
Μπλοκ λεπίδων (2x)
Τεχνικά Δεδομένα
Ξυριστική μηχανή
Λειτουργία με μπαταρία : 3,7 V
Ονομαστική τάση/
ρεύμα εισόδου
Κωδικός IP : IPX5
Προσαρμογέας φόρτισης (HX-SV0500800)
Ονομαστική είσοδος : 100 - 240 V~, 50/60 Hz
Ονομαστική έξοδος : 5 V
Κωδικός IP : IP44
Κατηγορία προστασίας : II
Μπαταρία
Επαναφορτιζόμενη
μπαταρία
, 800 mA
: 5 V
, 800 mA
: Ιόντων λιθίου, 3,7 V
500 mAh
29
Page 30

Size - A6
Ελληνικά
Προετοιμασία
Εισάγετε το φις DC του τροφοδοτικού
1
φόρτισης στην υποδοχή φόρτισης και
συνδέστε το τροφοδοτικό φόρτισης σε μια
κατάλληλη πρίζα.
Το σύμβολο
2
και υποδεικνύει ότι η μπαταρία φορτίζεται.
Το σύμβολο της μπαταρίας ανάβει
πράσινο, όταν η μπαταρία είναι πλήρως
φορτισμένη.
Φορτίστε την μπαταρία για τουλάχιστον
120 λεπτά πριν από την πρώτη χρήση. Για
τυπική φόρτιση, η άδεια μπαταρία φορτίζεται
πλήρως μετά από μέγιστο χρόνο φόρτισης
90 λεπτών, όπως υποδεικνύεται με το
πράσινο εικονίδιο μπαταρίας στην οθόνη.
Αφού ολοκληρωθεί η διαδικασία φόρτισης,
αφαιρέστε το φις φόρτισης και αποσυνδέστε
το τροφοδοτικό φόρτισης από την υποδοχή.
Σημείωση
Βεβαιωθείτε ότι το προϊόν είναι
απενεργοποιημένο πριν από τη φόρτιση.
Ενδεικτική λυχνία LED
Χρώμα LED Χρώμα LED Κατάσταση
Σύμβολο φις,
κόκκινο
Σύμβολο
μπαταρίας,
πράσινο
Σύμβολο
φις, κόκκινο,
αναβοσβήνει
Λειτουργία
Ενεργοποίηση της συσκευής
3
• Ενεργοποιήστε τη συσκευή πιέζοντας το
κουμπί ενεργοποίησης/απενεργοποίησης
- Στην οθόνη εμφανίζεται ένα πράσινο
σύμβολο μπαταρίας.
- Όταν χρησιμοποιείται με ρεύμα, το
πράσινο σύμβολο μπαταρίας και το
κόκκινο σύμβολο φις αναβοσβήνουν
εναλλάξ.
• Για να απενεργοποιήσετε τη συσκευή,
πατήστε ξανά το κουμπί ενεργοποίησης/
απενεργοποίησης.
- Το σύμβολο μπαταρίας σβήνει.
ανάβει κόκκινο στην οθόνη
Κατά τη φόρτιση ή σε λειτουργία
με ρεύμα.
Ολοκλήρωση φόρτισης ή όταν
χρησιμοποιείται χωρίς καλώδιο.
Πλήρως φορτισμένη.
Κατά τη διάρκεια της λειτουργίας,
όταν το επίπεδο φόρτισης της
μπαταρίας είναι κάτω από 20%.
Ξύρισμα με μεμβράνες
4
Σημείωση
Μην χρησιμοποιείτε το προϊόν εάν έχετε:
- δερματικές αλλοιώσεις
- δέρμα με φλεγμονή
- ηλιακό έγκαυμα
- κηλίδες και στίγματα
Εξοικείωση:
Μετά τη χρήση του προϊόντος ενδέχεται να
έχετε κόκκινο ή ερεθισμένο δέρμα για λίγο.
Πρόκειται για φυσιολογική αντίδραση διότι
το δέρμα πρέπει πρώτα να συνηθίσει σε
αυτό το είδος ξυρίσματος. Συμβουλευτείτε
έναν γιατρό εάν η ερυθρότητα ή ο
ερεθισμός συνεχιστεί για περισσότερο από
αυτό το χρονικό διάστημα.
• Αφαιρέστε το προστατευτικό κάλυμμα.
• Ενεργοποιήστε τη συσκευή με το κουμπί
ενεργοποίησης/απενεργοποίησης.
• Κατά το ξύρισμα, κρατήστε τη συσκευή όσο
το δυνατό πιο κάθετα στην επιφάνεια του
δέρματος.
• Τεντώστε το δέρμα με το ελεύθερο
χέρι σας στις προβληματικές περιοχές
προκειμένου να πετύχετε καλύτερο
αποτέλεσμα.
• Επίσης, ξυρίζεστε σε αντίθετη φορά προς
αυτή που μεγαλώνουν τα γένια για να
αφαιρέσετε όσο το δυνατό καλύτερα τα
κοντά γένια.
• Ελέγχετε την πρόοδο του ξυρίσματος
αγγίζοντας το δέρμα σας με το ελεύθερο
χέρι σας. Εάν υπάρχουν κοντά αξύριστα
γένια, επαναλάβετε τη διαδικασία ξανά και
ξανά μέχρι το δέρμα να είναι λείο και χωρίς
κοντά αξύριστα γένια.
• Μετά τη χρήση, απενεργοποιήστε τη
συσκευή με το κουμπί ενεργοποίησης/
απενεργοποίησης.
Σημείωση
Τα γένια δεν πρέπει να είναι μακρύτερα από
μερικά χιλιοστά, διότι το μακρύτερα γένια θα
αλλοιώσουν το ξύρισμα. Εάν τα γένια είναι
πολύ μακριά, χρησιμοποιήστε το εξάρτημα
τριμαρίσματος τριχών για να τα κόψετε
προτού χρησιμοποιήσετε το καθαυτού
ξυράφι.
30
Page 31

Ελληνικά
Υγρό ξύρισμα
• Βρέξτε το πρόσωπό σας και απλώστε μια
λεπτή στρώση αφρού ξυρίσματος στα μέρη
του προσώπου σας τα οποία θα ξυρίσετε.
• Ακολουθήστε τα βήματα που δίνονται παραπάνω στο κεφάλαιο Ξύρισμα με μεμβράνες.
Σημείωση
Με την ξυριστική μηχανή μπορείτε να
χρησιμοποιείτε μόνο τον κατάλληλο αφρό
ξυρίσματος, διότι το τζελ ξυρίσματος θα
μπλοκάρει την κεφαλή ξυρίσματος και θα
αλλοιώσει το αποτέλεσμα.
Εξάρτημα τριμαρίσματος τριχών
5
Το εξάρτημα τριμαρίσματος τριχών στο πίσω
μέρος της συσκευής επιτρέπει το κόψιμο των
φαβορίτων, για παράδειγμα.
• Ολισθήστε το εξάρτημα τριμαρίσματος
τριχών στο πίσω μέρος της μονάδα
τελείως προς τα επάνω μέχρι να σφαλίσει
στη θέση του με ένα κλικ.
• Ενεργοποιήστε τη συσκευή με το κουμπί
ενεργοποίησης/απενεργοποίησης.
• Καθοδηγήστε προσεκτικά το εξάρτημα
τριμαρίσματος τριχών στα άκρα των
τριχών που θα τριμαριστούν και κόψτε στο
σχήμα που θέλετε.
• Μετά τη χρήση, απενεργοποιήστε τη
συσκευή με το κουμπί ενεργοποίησης/
απενεργοποίησης και ωθήστε το εξάρτημα
τριμαρίσματος τριχών προς τα κάτω μέχρι
να ασφαλίσει στη θέση του με ένα κλικ
Χρήση της κλειδώματος διακόπτη
• Πιέστε και κρατήστε πατημένο τον διακόπτη
ενεργοποίησης/απενεργοποίησης για πάνω
από 3 δευτερόλεπτα για να κλειδώσετε τον
διακόπτη ενεργοποίησης/απενεργοποίησης. Τα
σύμβολα μπαταρίας και φις θα αναβοσβήσουν
τρεις φορές και υποδεικνύουν ότι το κλείδωμα
διακόπτη ενεργοποιήθηκε.
• Για να ξεκλειδώσετε τον διακόπτη ενεργοποίησης/απενεργοποίησης, κρατήστε τον για
πάνω από 3 δευτερόλεπτα και πάλι. Η ξυριστική
μηχανή θα ενεργοποιηθεί αυτόματα. Ωθήστε
τον διακόπτη ενεργοποίησης/απενεργοποίησης
ξανά για να απενεργοποιήσετε την ξυριστική
μηχανή. Η σύνδεση της ξυριστικής μηχανής στο
τροφοδοτικό όπως περιγράφεται στο κεφάλαιο
Προετοιμασία θα απενεργοποιήσει επίσης τον
διακόπτη ενεργοποίησης/απενεργοποίησης.
Καθαρισμος και φροντιδα
Προειδοποίηση
Όταν καθαρίζετε, μη χρησιμοποιείτε ποτέ
διαλύτες ή διαβρωτικά υλικά, σκληρές
βούρτσες, μεταλλικά ή αιχμηρά αντικείμενα. Οι
διαλύτες είναι επιβλαβείς για την ανθρώπινη
υγεία και μπορούν να προσβάλλουν τα
πλαστικά μέρη, ενώ οι μηχανισμοί διαβρωτικού
καθαρισμού και τα εργαλεία μπορεί να
χαράξουν την(τις) επιφάνεια(-ες).
• Μετά από κάθε χρήση, παρακαλείστε
6
να χρησιμοποιήσετε το βουρτσάκι
καθαρίσματος για να βουρτσίσετε επιμελώς
και να φυσήξετε τις τρίχες.
• Πιέστε το κουμπί αποδέσμευσης της
κεφαλής ξυρίσματος και στις δύο πλευρές
και αφαιρέστε την κεφαλή ξυρίσματος.
• Μπορείτε επίσης να ξεπλύνετε την κεφαλή
ξυρίσματος κάτω από τρεχούμενο νερό.
Αλλά τότε πρέπει να τη στεγνώσετε πολύ
καλά.
• Χτυπήστε ελαφρά ή φυσήξτε την κεφαλή
ξυρίσματος. Χρησιμοποιήστε το βουρτσάκι
καθαρίσματος για να καθαρίσετε τα δύο
μπλοκ λεπίδων και το περίβλημα από κάτω.
• Τοποθετήστε την κεφαλή ξυρίσματος στην
ξυριστική μηχανή έτσι ώστε να ασφαλίσει
στη θέση της με ένα κλικ και στις δύο
πλευρές.
• Καθαρίστε τις εξωτερικές επιφάνειες της
συσκευής με υγρό πανί και στη συνέχεια
στεγνώστε σχολαστικά.
• Βεβαιωθείτε ότι δεν μπαίνει νερό μέσα
στο εσωτερικό (για παράδειγμα, μέσω
τπυ διακόπτη) του προϊόντος. Φυλάξτε το
προϊόν σε ένα στεγνό, ψυχρό μέρος που να
είναι προστατευμένο έναντι της υγρασίας
και του άμεσου ηλιακού φωτός. Φυλάξτε το
προϊόν αυτό μακριά από παιδιά.
31
Page 32

Size - A6
Ελληνικά
Αντικατάσταση των μεμβρανών κοπής και
των μπλοκ λεπίδων
Προσοχή
Τα μπλοκ λεπίδων είναι κοφτερά. Αποφύγετε
τους τραυματισμούς μην αγγίζοντάς τα κατά
λάθος.
Εάν υποθέσουμε ότι χρησιμοποιείτε
7
την ξυριστική μηχανή μία φορά τη μέρα,
συνιστούμε την αντικατάσταση των
μεμβρανών κοπής και των μπλοκ λεπίδων
μετά από 1 χρόνο.
1. Αφαιρέστε την κεφαλή ξυρίσματος όπως
περιγράφεται στο κεφάλαιο Καθαρισμός
και φροντίδα (I).
2. Πιέστε σε μία από τις προεξοχές στις
μικρές πλευρές της βάσης συγκράτησης
της μεμβράνης κοπής (II) και ωθήστε
την μεμβράνη κοπής μαζί με τη βάση
συγκράτησής της σταδιακά έξω από το
περίβλημα της κεφαλής ξυρίσματος
(III). Τώρα τοποθετήστε την καινούρια
μεμβράνη κοπής μαζί με τη βάση
συγκράτησής της στο περίβλημα της
κεφαλής ξυρίσματος (IV).
3. Τραβήξτε τα μπλοκ λεπίδων προς τα
επάνω και κουμπώστε τα καινούρια μπλοκ
λεπίδων στους βραχίονές τους (V).
4. Τοποθετήστε την κεφαλή ξυρίσματος πίσω
στην ξυριστική μηχανή όπως περιγράφεται
στο κεφάλαιο Καθαρισμός και φροντίδα.
Αφαίρεση της ενσωματωμένης μπαταρίας
Προειδοποίηση
• Βεβαιωθείτε ότι το προϊόν έχει αποσυνδεθεί
από τον προσαρμογέα πριν να αφαιρέσετε
την μπαταρία.
• Κίνδυνος έκρηξης! Μην αντικαθιστάτε ποτέ
την μπαταρία.
Σύμφωνα με την Ευρωπαϊκή Οδηγία σχετικά με
τις μπαταρίες, η μπαταρία στο εσωτερικό του
προϊόντος δεν πρέπει να απορρίπτεται μαζί με τα
συνήθη οικιακά απορρίμματα.
1. Αφαιρέστε τις βίδες και αφαιρέστε το
περίβλημα.
2. Κόψτε τα καλώδια της μπαταρίας και
αφαιρέστε την μπαταρία.
Αντιμετώπιση προβλημάτων
Εάν υπάρξουν προβλήματα κατά τη λειτουργία, ανατρέξτε στον παρακάτω πίνακα. Εάν δεν είναι δυνατή η
επίλυση των προβλημάτων όπως υποδεικνύεται στη στήλη Λύση, επικοινωνήστε με τον κατασκευαστή.
Πρόβλημα Πιθανές αιτίες Λύση
Το προϊόν δεν λειτουργεί • Έχει διακοπεί η παροχή ρεύματος
Η ενδεικτική λυχνία LED δεν
ανάβει
κατά τη φόρτιση των μπαταριών
• Μπαταρίες χωρίς φορτίο
• Δεν υπάρχει παροχή ρεύματος
• Το καλώδιο φόρτισης δεν είναι
συνδεδεμένο στο προϊόν
• Ελέγξτε την παροχή ρεύματος
• Επαναφορτίστε τις μπαταρίες
• Ελέγξτε την παροχή ρεύματος
• Ελέγξτε τη σύνδεση του
καλωδίου φόρτισης
32
Page 33

Magyar
Biztonsági utasítások
Figyelmeztetés! Ne használja a
terméket víz közelében vagy magas
páratartalmú helyen, pl. nyirkos pincében,
illetve úszómedence vagy fürdőkád
mellett.
•A terméket 8 éves és idősebb gyerekek,
illetve csökkent fizikai, érzékszervi vagy
értelmi képességű személyek, vagy
akiknek nincs meg a tapasztalatuk és
tudásuk ehhez, csak akkor használhatják,
ha felügyelik őket vagy megtanították
őket a termék biztonságos használatára
és tisztában vannak a veszélyekkel.
•Gyerekek nem játszhatnak a készülékkel.
•A termék tisztítását és karbantartását
gyermekek csak felügyelet alatt
végezhetik.
•Figyelem! Tartsa szárazon a terméket.
•Csak a mellékelt töltőadaptert használja a
termék töltésére. A polaritás az illesztő meg
kell egyeznie a polaritás a termék
.
33
Page 34

Magyar
Size - A6
Biztonsági utasítások
1. Az első használat előtt figyelmesen
olvassa el ezt a használati utasítást, és
adja tovább a termékkel. Figyeljen oda a
terméken és a használati utasításban lévő
figyelmeztetésekre. A készülék biztonságos
használatára és karbantartására vonatkozó
fontos információkat tartalmaznak.
2. Csak a rendeltetésének megfelelően használja
a terméket, és csak a javasolt kiegészítőkkel
és összetevőkkel. A helytelen használat vagy
hibás működtetés veszélyes lehet.
3. Bekapcsolt állapotban soha ne hagyja
felügyelet nélkül a készüléket.
4. Soha ne merítse a készülék elektromos
alkatrészeit víz alá működtetés vagy tisztítás
közben. Soha ne tartsa folyóvíz alá a
készüléket.
5. Semmilyen körülmények között (pl. a
tápkábel károsodása, a termék leesése
stb. esetén) ne kísérelje meg önmaga
megjavítani a terméket. A szervizelés és a
javítások elvégzéséhez lépjen kapcsolatba
egy hivatalos szervizközponttal.
6. Csak száraz beltéri helységben használja a
készüléket, odakint soha.
7. Ne használja, ne tegye ki és ne helyezze a
terméket a következők közelébe:
- közvetlen napfény és por;
- tűz (kandalló, grill, gyertyák), víz
(fröccsenő víz, vázák, tavak, kád) vagy
magas páratartalom.
8. Ez a termék nem alkalmas kereskedelmi
használatra. Csak otthoni használatra való.
9. Minden használat után tisztítsa meg a
terméket és az összes tartozékot.
10. Kövesse a Tisztítás és karbantartás
fejezetben leírt utasításokat.
11.
12. Figyelem! A kézben fogott részt le kell
A borotva tisztítható folyó víz
alatt.
csatlakoztatni az összekötő vezetékről,
mielőtt vízzel tisztítja.
Elemeket
1. Ártalmatlanítás előtt vegye ki az elemeket
a termékből.
2. Soha ne tegye ki az akkumulátort nagy
hőnek (pl. erős napfény, tűz), és soha ne
dobja tűzbe. Az akkumulátor felrobbanhat.
3. Az újratölthető akkumulátor a készülékbe
integrált és nem lehet cserélni.
4. A termék ártalmatlanításával kapcsolatban
vegye fel a kapcsolatot egy villanyszerelővel
vagy a kiskereskedővel, hogy a beépített
akkumulátorokat környezetbarát módon
távolítsa el és ártalmatlanítsa.
5. Soha ne zárja rövidre az újratölthető
akkumulátor érintkezéseit. Ne dobja tűzbe
az akkumulátort vagy a terméket. Ez tűz és
robbanásveszélyes!
6. Soha ne hagyja a termék akkumulátorát
töltés közben felügyelet nélkül.
34
Page 35

Magyar
Gratulálunk!
Köszönjük, hogy KOENIC terméket vásárolt.
Kérjük, fi gyelmesen olvassa el ezt a használati
útmutatót és tartsa meg későbbi használatra.
Rendeltetésszerű használat
Ez a termék kizárólag nedves vagy száraz szakáll
borotválására (borotvahabbal vagy nélküle), illetve
szakáll vagy pajesz vágására szolgál.
Minden más használat a termék károsodását
okozhatja vagy sérülésekhez vezethet. A termék
csak háztartási célú használatra szolgál, nem
kereskedelmi célú használatra lett tervezve.
Az Imtron GmbH nem vállal felelősséget a termék
nem körültekintő, illetve helytelen használatából,
valamint a gyártó által meghatározott
rendeltetéstől eltérő használatból eredő, a
készülékben vagy az Ön értékeiben bekövetkezett
károkért, vagy személyi sérülésekért.
Az első használat előtt
Óvatosan vegye ki a terméket és az alkatrészeket
az eredeti csomagolából. Ellenőrizze, hogy
a szállított alkatrészek hiánytalanul és épen
megvannak-e. Ha a szállított termékek hiányosak
vagy sérültek, azonnal lépjen kapcsolatba a
viszonteladóval.
Megjegyzés
• A készüléket az első használat előtt legalább
2 órán át töltse. A szokásos töltési idő 90
percig, amely függ az akkumulátor állapotától
is.
• A készülék teljesen feltöltött állapotban 60
percig használható. Ez az időtartam változhat
(az akkumulátor állapotától függően).
Ártalmatlanítás
Ne dobja a készüléket ártalmatlanítás céljából
a háztartási hulladékok közé. Vigye el egy, a
villamos és elektronikus felszerelések
újrahasznosítására kijelölt gyűjtőpontra.
További információért kérjük, lépjen kapcsolatba a
kiskereskedővel vagy a helyi hatóságokkal.
Az elemek megsemmisítését végezze
környezetbarát módon. Ne dobja az
elemeket a háztartási hulladékok közé.
Használja a helyi ártalmatlanító-begyűjtő
rendszert, vagy kérje ki kereskedőjének tanácsát.
Tartalom
1 x borotva
1 x töltő tápadapter
1 x tisztítókefe
1 x tárolózsák
1 x csereborotvafej és 2 pengeblokk
1 x használati útmutató
Kezelés és alkatrészek
A
Védőkupak
B
Borotvafej
C
Borotvafej kioldógombja, mindkét oldalon
D
Be/kikapcsoló
E
Kijelző
F
Töltőaljzat
G
Hajvágó
H
Töltő tápadapter egyenáramú kábellel és
csatlakozóval
I
Tisztítókefe
J
Tárolózsák
Pótalkatrészek
K
Borotvafej borotvaszitával
L
Pengeblokk (2x)
Műszaki adatok
Borotva
Akkus működés : 3,7 V
Névleges bemeneti
feszültség feszültség/
áram
IP-besorolás : IPX5
Hálózati adapter (HX-SV0500800)
Névleges bemeneti
feszültség
Névleges kimeneti
feszültség
IP-besorolás : IP44
Védelmi osztály : II
Akkumulátor
Újratölthető
akkumulátor
, 800 mA
: 5 V
: 100 - 240 V~, 50/60 Hz
, 800 mA
: 5 V
: Li-Ion, 3,7 V
500 mAh
35
Page 36

Size - A6
Magyar
Előkészítés
Dugja be a töltő tápadapter egyenáramú
1
csatlakozóját a töltőaljzatba, majd dugja be
a töltő tápadaptert egy megfelelő hálózati
dugaljba.
A kijelzőn megjelenik a
2
vörösen, ami azt jelzi, hogy az akkumulátor
töltése folyamatban van. Amikor az
akkumulátor teljesen feltöltődik, az
akkumulátor szimbólum
Az első használat előtt legalább 120 percen
át töltse az akkumulátort. Normál töltés
során egy lemerült akkumulátor legfeljebb
90 perc alatt feltöltődik, amit a kijelzőn
megjelenő zöld akkumulátor ikon jelez.
A töltési folyamat befejeződése után
húzza ki a töltő csatlakozóját, majd a töltő
tápadaptert is a dugaljból.
Megjegyzés
A töltés megkezdése előtt győződjön meg arról,
hogy a készülék kikapcsolt állapotban van.
LED-jelzőlámpa
LED színe LED színe Állapot
Dugó
szimbólum,
vörös
Akkumulátor
szimbólum,
zöld
Dugó
szimbólum,
villogó vörös
Használat
3
Töltés vagy hálózati működtetés
közben
A töltés befejeződött, illetve
vezeték nélküli használat közben.
Az akkumulátor teljesen feltöltve.
Működés közben, amennyiben a
töltöttség szintje 20% alatt van.
A készülék bekapcsolása
• Kapcsolja be a készüléket a be/kikapcsoló
megnyomásával.
- A kijelzőn megjelenik egy zöld
akkumulátor szimbólum.
- Hálózati módban használva a zöld
akkumulátor szimbólum és a vörös dugó
szimbólum felváltva villog.
• A készülék kikapcsolásához nyomja meg
ismét a be/kikapcsolót.
- Az akkumulátor szimbólum kialszik.
szimbólum
zölden világít.
Rezgőkéses borotválkozás
4
Megjegyzés
Ne használja a terméket az alábbi
állapotok fennállása mellett:
- bőrsérülések
- gyulladt bőr
- leégés
- pattanások és hólyagok
Megszokás:
A termék használata után egy darabig
kipirosodott vagy irritált bőrt tapasztalhat.
Ez normális reakció, mert a bőrnek
előbb hozzá kell szoknia az ilyen fajta
borotválkozáshoz. Forduljon orvoshoz, ha a
kipirosodás vagy irritáció hosszabb időszak
után sem múlik el.
• Távolítsa el a védőkupakot.
• Kapcsolja be a készüléket a be/
kikapcsolóval.
• Borotválkozás közben tartsa a készüléket
annyira merőlegesen a bőrfelületére,
amennyire csak tudja.
• A jobb eredmény érdekében feszítse ki
a bőrt a problémás területeken, például
az arcon.
• A borosta lehető legalaposabb
eltávolításához borotválkozzon a szakáll
növekedési irányával ellentétesen is.
• Ellenőrizze a borotválkozás eredményét
úgy, hogy a szabad kezével megérinti
a bőrét. Ha még borostás, akkor addig
ismételje a folyamatot, amíg a bőre sima és
borostamentes nem lesz.
• Használat után kapcsolja ki a készüléket a
Be/kikapcsolóval.
Megjegyzés
A szakáll nem lehet néhány milliméternél
hosszabb, mivel a hosszabb szőrszálak
akadályozzák a borotválkozást. Ha a szakáll
túl hosszú, vágja le előbb a hajvágóval, majd
ezt követően használja a borotvát.
36
Page 37

Magyar
Nedves borotválkozás
• Nedvesítse meg az arcát, és vigyen fel
borotvahabot vékony rétegben az arc
borotválandó területeire.
• Kövesse a fenti Rezgőkéses Borotválkozás
fejezetben leírt lépéseket.
Megjegyzés
Csak rendes borotvahab használható
a borotvával, mivel a borotvazselé
összegumósodik a borotvafejen, és
csökkenti a hatékonyságot.
Hajvágó
5
A készülék hátulján lévő hajvágóval vágható
például pajesz.
• Csúsztassa a hajvágót a készülék hátuljára
felfelé, amíg a helyére nem kattan.
• Kapcsolja be a készüléket a be/
kikapcsolóval.
• Óvatosan vezesse a hajvágót a vágandó
hajvégekhez, és végezze el a vágást a
kívánt alakra.
• Használat után kapcsolja ki a készüléket
a be/kikapcsolóval, majd nyomja lefelé a
hajvágót, amíg a helyére nem kattan.
A kapcsolózárolás használata
• Nyomja meg és tartsa benyomva a be/
kikapcsolót több mint 3 másodpercig a be/
kikapcsoló zárolásához. Az akkumulátor és a
dugó szimbólumok háromszor felvillannak, ezzel
jelezve a kapcsolózárolás aktiválását.
• A be/kikapcsoló feloldásához ismét nyomja meg
és tartsa nyomva több mint 3 másodpercig.
A borotva automatikusan bekapcsol. Nyomja
meg ismét a be/kikapcsolót a borotva
kikapcsolásához. A borotva Előkészítés
fejezetben ismertetett módon történő
tápadapterhez való csatlakoztatása szintén
kikapcsolja a be/kikapcsoló zárolását.
Tisztítás és ápolás
Vigyázat
Tisztítás során soha ne használjon oldó- vagy
súrolószereket, kemény keféket, fémes vagy
éles tárgyakat. Az oldatok károsak lehetnek az
emberi szervezetre és a műanyag alkatrészekre,
míg a súrolószerek és eszközök felsérthetik a
felszín(eke)t.
• Minden használat után használja a
6
tisztítókefét, és alaposan távolítsa el és
fújja ki a szőrszálakat.
• Nyomja meg a borotvafej kioldógombját
mindkét oldalon a borotvafej
eltávolításához.
• A borotvafej folyó víz alatt is elmosható.
Azonban ebben az esetben rendesen meg
kell szárítani.
• Óvatosan üsse meg vagy fújja meg a
borotvafejet. Használja a tisztítókefét a
két pengeblokk és az alatta lévő burkolat
megtisztításához.
• Tegye vissza a borotvafejet a borotvára úgy,
hogy mindkét oldalon a helyére kattanjon.
• Tisztítsa meg a készülék külső felületeit
egy nedves ruhával, majd alaposan szárítsa
meg.
• Ne engedje, hogy víz kerüljön a készülék
belsejébe (például a kapcsolón keresztül).
A készüléket tartsa száraz hűvös helyen,
ahol védve van a párától és közvetlen
napfénytől. A készüléket gyermekektől
tartsa távol.
37
Page 38

Size - A6
Magyar
A borotvasziták és a pengeblokkok cseréje
A beépített akkumulátorok eltávolítása
Figyelem
A pengeblokkok élesek. Kerülje el a véletlen
megérintésből eredő sérüléseket!
Napi egy borotva használatot feltételezve a
7
borotvasziták és a pengeblokkok cseréje 1 év
után ajánlott.
1. Távolítsa el a borotva fejet a Tisztítás
és karbantartás (I) fejezetben leírtak
szerint.
2. Nyomja be a borotvaszita-tartó rövidebb
oldalán található fülek (II) egyikét, majd
fokozatosan nyomja ki a borotvaszitát a
tartójával együtt a borotvafej házából (III).
Ezután helyezze be az új borotvaszitát a
tartójával együtt a borotvafejházba (IV).
3. Húzza a pengeblokkokat felfelé, és
pattintsa be az új pengeblokkokat a
tartókba (V).
4. Csatlakoztassa ismét a borotvafejet a
borotvára a Tisztítás és karbantartás
fejezetben leírtak szerint.
Hibaelhárítás
Amennyiben üzemeltetés közben bármilyen rendellenességet tapasztal, tekintse át a következő
táblázatot. Amennyiben a probléma nem oldódik meg a Megoldás, részben foglaltak elvégzését
követően, vegye fel a kapcsolatot a forgalmazóval.
Probléma Lehetséges Megoldás
A készülék nem indul el • Megszakadt az áramellátás
A LED jelzőlámpa nem gyullad fel
az akkumulátorok töltése alatt
• Akkumulátorok lemerültek
• Nincs áramellátás
• A töltőkábel nincs a
készülékhez csatlakoztatva
Figyelmeztetés
• Az akkumulátor eltávolítása előtt győződjön
meg arról, hogy a készülék nem csatlakozik
az adapterhez.
• Robbanásveszély! Soha ne cserélje ki az
akkumulátort.
Az akkumulátorokról szóló európai irányelv
értelmében a fejhallgatóban termékben lévő
akkumulátort nem szabad a hagyományos
háztartási hulladék közé dobni.
1. Vegye ki a csavarokat, majd vegye le a
burkolatot.
2. Vágja el az akkumulátor vezetékeit, majd
távolítsa el az akkumulátort.
• Ellenőrizze az áramellátást
• Töltse fel az akkumulátorokat
• Ellenőrizze az áramellátást
• Ellenőrizze a töltőkábel
csatlakozását
38
Page 39

Italiano
Istruzioni di sicurezza
Attenzione! Non usare il prodotto
nella prossimità di acqua o di alti
livelli di umidità, ad esempio in cantine
umide o vicino a piscine o vasche da bagno.
•Questo apparecchio può essere utilizzato
da bambini di età superiore agli 8 anni
e persone con ridotte capacità mentali,
fisiche o sensoriali o prive di esperienza
e conoscenze in merito, in presenza
di altre persone che ne sorveglino
l’operato o ricevano istruzioni sull’uso
dell’apparecchio in modo sicuro e ne
comprendano i pericoli.
•I bambini non devono giocare con
l'apparecchio.
•La pulizia e la manutenzione non devono
essere eseguiti da bambini a meno che
non siano controllati.
•Attenzione! Tenere il prodotto all’asciutto.
39
Page 40

Italiano
Size - A6
Istruzioni di sicurezza
•Utilizzare solo l’adattatore di ricarica
fornito per caricare il prodotto. La polarità
dell’adattatore deve corrispondere la
polarità del prodotto .
1. Leggere con attenzione questo manuale
dell’utente al primo utilizzo e consegnarlo
col prodotto. Far attenzione alle avvertenze
sul prodotto e in questo manuale d’uso.
Contiene informazioni importanti per la
sicurezza nonché relative all’uso e alla
manutenzione del dispositivo.
2. Usare il prodotto solo per lo scopo previsto
e con gli accessori e componenti consigliati.
L’uso improprio o funzionamento sbagliato
possono determinare pericoli.
3. Non lasciare mai l’apparecchio incustodito
durante l’utilizzo.
4. Non immergere mai le parti elettriche in
acqua durante la pulizia. Non tenere mai il
dispositivo sotto acqua corrente.
5. Non cercare per nessun motivo (ad es.
danno al cavo, prodotto caduto, ecc.)
di riparare il prodotto da solo. Per la
manutenzione e riparazione, consultare un
responsabile autorizzato.
6. Usare questo prodotto in ambienti chiusi e
mai all’aperto.
7. Non usare, esporre o mettere il prodotto
vicino a:
- luce solare diretta e polvere;
- fuoco (camino, griglia, candele), acqua
(schizzi, vasi, stagni, vasca da bagbo) o
eccessiva umidità.
8. Questo apparecchio non è idoneo per uso
commerciale. Esso è stato progettato solo
per uso domestico.
9. Pulire l’apparecchio e gli altri accessori dopo
ciascun utilizzo.
10. Seguire le istruzioni nel capitolo Pulizia
e cura.
40
11.
12. Attenzione! La parte portatile deve essere
Batterie
1. Togliere le batterie dal prodotto prima dello
2. Non esporre le batterie ricaricabili ad un
3. La batteria ricaricabile è incorporata in modo
4. Per lo smaltimento del prodotto, si prega di
5. Non cortocircuitare i contatti della batteria
6. Non caricare la batteria ricaricabile lasciando
Il rasoio elettrico è idoneo per
essere pulito sotto acqua
corrente.
scollegata dalla linea di alimentazione
elettrica prima di essere pulita con acqua.
smaltimento.
calore eccessivo (es. sole, fuoco), e non
gettarle nel fuoco. Le Batterie ricaricabili
potrebbero esplodere.
permanente nel prodotto e non può essere
sostituita.
consultare un elettricista o il rivenditore per
rimuovere e smaltire le batterie integrate in
modo ecologico.
ricaricabile. Non gettare la batteria
ricaricabile o il prodotto nel fuoco. Vi è il
pericolo di incendio o esplosione!
il prodotto incustodito.
Page 41

Italiano
Congratulazioni!
Grazie per aver acquistato un prodotto KOENIC.
Leggere questo manuale con attenzione e
conservarlo per futura consultazione.
Uso previsto
Questo prodotto è adatto solo per la rasatura di
barbe secche o bagnate, con o senza schiuma da
barba, nonché per la rifilatura di barbe e basette.
Ogni altro uso può causare danni al prodotto
o lesioni. Questo prodotto è progettato
esclusivamente per l’uso domestico e non è
destinato all’uso commerciale.
Imtron GmbH non si assume alcuna responsabilità
in caso di danni al prodotto, alle cose o in caso
di lesioni personali dovuti a usi inappropriati
o impropri , o per usi del prodotto che non
rispondono alle finalità indicate dal costruttore.
Prima messa in funzione
Rimuovere accuratamente il prodotto e gli
accessori dalla confezione originale. Ispezionare
i contenuti della consegna per verificarne la
completezza e l’eventuale presenza di danni.
Nel caso in cui il contenuto sia ncompleto o
danneggiato, contattare immediatamente il punto
vendita.
Nota
• Per il primo utilizzo, caricare l’apparecchio
per almeno 2 ore. Il tempo generico di
caricamento è di circa 90 minuti che dipende
anche dalle condizioni della batteria.
• Quando la batteria è completamente carica
l’apparecchio può essere utilizzato per 60
minuti. Il tempo può variare (in base alle
condizioni della batteria).
Smaltimento
Non smaltire questo dispositivo come rifiuti
domestici. Restituirlo ad un centro di
raccolta per lo smaltimento e di dispositivi
elettrici. Contattare il rivenditore o le
autorità locali per ulteriori informazioni.
Smaltire le batterie rispettando l’ambiente.
Non mettere le batterie nei rifiuti
domestici. Usare i sistemi di raccolta e
restituzione locali o contattare il rivenditore
presso il quale è stato acquistato il prodotto.
: 3,7 V
: 5 V
500 mAh
, 800 mA
, 800 mA
Sommario
1 x Rasoio elettrico
1 x Alimentatore di caricamento
1 x Spazzolino per la pulizia
1 x Custodia
1 x Testina di rasatura di ricambio e 2 blocchi lama
1 x Manuale d’uso
Controlli e componenti
A
Cappuccio protettivo
B
Testina di rasatura
C
Pulsante di rilascio testina di rasatura,
entrambi i lati
D
Interruttore on/ o
E
Display
F
Presa di ricarica
G
Dispositivo di taglio peli lunghi
H
Alimentatore di ricarica con cavo CC e spina
I
Spazzola per la pulizia
J
Custodia
Parti di ricambio
K
Testina di rasatura con lamina
L
Blocco lama (2x)
Dati tecnici
Rasoio elettrico
Funzionamento a
batteria
Ingresso nominale
voltaggio/corrente
Codice IP : IPX5
Adattatore di ricarica (HX-SV0500800)
Ingresso nominale : 100 - 240 V~, 50/60 Hz
Uscita nominale : 5 V
Codice IP : IP44
Classe di protezione : II
Batteria
Ricaricabile batteria : Ioni di Litio, 3,7 V
41
Page 42

Size - A6
Italiano
Preparazione
Inserire la spina CC dell’alimentatore di ricarica
1
all’interno della presa di ricarica e collegare la
spina a un’idonea presa elettrica.
Il simbolo
2
indica che la batteria è in fase di caricamento.
Il simbolo della batteria diventa verde
quando la batteria è completamente carica.
Caricare la batteria per almeno 120 minuti
previamente al primo uso. Per il caricamento
standard, la batteria è completamente carica
dopo un tempo di ricarica massima di 90
minuti, come indicato dall’icona della batteria
verde sul display.
Dopo aver terminato il processo di
caricamento, rimuovere la spina di ricarica e
scollegare l’alimentatore dalla presa.
Nota
Assicurarsi che il prodotto sia spento prima del
caricamento.
Indicatore LED
Colore LED Condizione Colore LED
Simbolo
spina, rosso
Simbolo
batteria,
verde
Simbolo
spina, rosso,
lampeggiante
Funzionamento
Accendere il dispositivo
3
• Accendere il dispositivo premendo il tasto
• Per spegnere il dispositivo, premere
si illumina di rosso nel display e
Durante il caricamento o
alimentato dalla rete elettrica.
Caricamento completato o
quando utilizzato come cordless.
Batteria completamente carica.
Durante il funzionamento,
quando il livello della batteria è
inferiore al 20%.
on/o.
- Il display mostra un simbolo della batteria
verde.
- Quando utilizzato in modalità di
alimentazione dalla rete elettrica,
il simbolo della batteria verde e il
simbolo della spina rosso, lampeggiano
alternativamente.
nuovamente il tasto on/o.
- Il simbolo della batteria si spegne.
Rasatura con la lama
4
Nota
Non usare il prodotto se sono presenti:
- lesioni della pelle
- pelle infiammata
- eritemi solari
- brufoli e vesciche
Familiarizzazione:
Dopo l’utilizzo del prodotto, potreste avere
la pelle arrossata o irritata per un breve
periodo. Si tratta di una reazione normale
quando si utilizza per la prima volta questo
tipo di rasoio sulla pelle. Consultare un
medico se il rossore o l’irritazione continua
per un periodo di tempo prolungato.
• Rimuovere il cappuccio di protezione.
• Accendere il dispositivo premendo il tasto
on/o.
• Durante la rasatura, tenere il dispositivo il
più perpendicolare possibile rispetto alla
superficie della pelle.
• Stringere la pelle con la mano libera in
punti problematici, ad es. sulle guance, per
ottenere un risultato migliore.
• Rasare anche nella direzione opposta a
quella di crescita della barba per rimuovere
al meglio la barba corta e ispida.
• Controllare il processo di rasatura toccando
la pelle con la mano libera. Se è presente
barba corta e ispida, ripetere nuovamente
il processo fino a quando la pelle è liscia e
priva di barba.
• Spegnere il dispositivo premendo il tasto
on/o dopo l’uso.
Nota
La barba non deve essere più lunga di
pochi millimetri, in caso contrario la rasatura
potrebbe essere compromessa. Se la barba è
molto lunga, utilizzare il dispositivo di taglio
dei peli lunghi prima di utilizzare il rasoio
vero e proprio.
42
Page 43

Italiano
Rasatura a bagnato
• Lavarsi la faccia e applicare uno strato
sottile di schiuma da barba sulle parti del
viso che devono essere rasate.
• Seguire i passaggi summenzionati nel
capitolo Lamina di taglio.
Nota
Con il rasoio si può usare solo una schiuma
da barba adatta, poiché il gel da barba si
incollerà sulla testina e comprometterà il
risultato.
Dispositivo di taglio peli lunghi
5
Il dispositivo di taglio di peli lunghi sul retro
del dispositivo consente per esempio di
tagliare le basette.
• Fare scorrere il dispositivo di taglio dei peli
lunghi sul retro dell’unità completamente in
alto fino a quando non scatta in posizione.
• Accendere il dispositivo premendo il tasto
on/o.
• Fare scorrere con attenzione il dispositivo
di taglio dei peli lunghi verso le estremità
dei peli da tagliare e dare la forma
desiderata.
• Dopo l’uso, spegnere il dispositivo con il
tasto on/o e spingere il dispositivo di
taglio dei peli lunghi verso il basso fino a
quando scatta in posizione.
Utilizzare il blocca interruttore
• Premere e tenere premuto l’interruttore on/
o per più di 3 secondi per bloccarlo. I simboli
della batteria e della spina lampeggeranno tre
volte a indicare che il blocco dell’interruttore è
stato attivato .
• Per sbloccare l’interruttore on/o, tenerlo
premuto nuovamente per più di 3 secondi.
Il rasoio si accenderà automaticamente.
Spingere di nuovo l’interruttore on/o per
spegnere il rasoio. Il collegamento del rasoio
all’alimentazione elettrica, come descritto
nel capitolo Preparazione, disattiverà
automaticamente il blocco interruttore on/o.
Pulizia e cura
Attenzione
Durante la pulizia, non usare mai solventi o
materiali abrasivi, spazzole metalliche, oggetti
metallici o taglienti. I solventi sono pericolosi
alla salute umana e possono attaccare le parti
in plastica, mentre i meccanismi di pulizia e gli
utensili potrebbero graare la superficie.
• Dopo ogni uso, utilizzare lo spazzolino per
6
pulizia per rimuovere i peli dalle lame.
• Premere i pulsanti di rilascio della testina
di rasatura su entrambi i lati e rimuovere la
testina di rasatura.
• La testina di rasatura può anche essere
sciacquata sotto l’acqua corrente. Ma, in
seguito, occorre asciugarla bene.
• Picchiettare delicatamente o soare sulla
testina di rasatura. Utilizzare lo spazzolino
per la pulizia per pulire i due blocchi lama e al
di sotto dell’alloggiamento.
• Posizionare la testina di rasatura sul rasoio
in modo tale che scatti in posizione su
entrambi i lati.
• Pulire le superfici esterne del dispositivo
con un panno umido e quindi asciugarle
completamente.
• Far attenzione a non far entrare acqua
all’interno del prodotto (ad esempio,
attraverso l’interruttore). Mantenere il
prodotto in un luogo fresco e asciutto, che
sia protetto dall’ umidità e dalla luce solare
diretta. Mantenere il prodotto lontano dalla
portata dei bambini.
43
Page 44

Size - A6
Italiano
Sostituzione delle lamine e dei blocchi lama
Attenzione
I blocchi lama sono alati. Evitare lesioni
toccandoli accidentalmente
Ipotizzando che il rasoio venga utilizzato una
7
volta al giorno, raccomandiamo di sostituire le
lamine e i blocchi lama dopo 1 anno.
1. Rimuovere la testina di rasatura come
descritto nel capitolo sulla Pulizia e
manutenzione (I).
2. Premere su una delle alette sui lati corti
del supporto della lamina (II) e premere la
lamina con il suo supporto gradualmente
per estrarli dall’alloggiamento della
testina di rasatura (III). Ora posizionare
la nuova lamina con il suo supporto
all’interno dell’alloggiamento della testina
di rasatura (IV).
3. Spingere i blocchi lama verso l’alto e
agganciare i nuovi blocchi lama sulle
stae (V).
4. Attaccare nuovamente la testina di
rasatura al rasoio come descritto nel
capitolo Pulizia e manutenzione.
Risoluzione dei problemi
Se ci sono problemi durante il funzionamento, fare riferimento alla seguente tabella. Se i problemi non
possono essere risolti come indicato sotto Soluzione, si prega di contattare il produttore.
Problema Possibili Soluzione
Il prodotto non funziona • Alimentazione interrotta
L’indicatore LED non si illumina
durante la carica delle batterie
• Batterie scariche
• Nessuna alimentazione
• Il cavo di ricarica non è
collegato al prodotto
Rimuovere la batteria integrata
Avvertenza
• Assicurarsi che il prodotto sia scollegato
dall’adattatore quando si rimuove la batteria.
• Rischio di esplosione! Non Rimettere la
batteria.
Conformemente alla Direttiva Europea Batteria,
la batteria all’interno del prodotto non può essere
smaltita con i normali rifiuti domestici.
1. Rimuovere le viti ed estrarre l’alloggiamento.
2. Tagliare i fili della batteria e rimuovere la
batteria.
• Controllare l’alimentazione
• Ricaricare le batterie
• Verificare che l’apparecchio sia
collegato all’alimentazione elettrica
• Controllare il collegamento del cavo
di ricarica
44
Page 45

Nederlands
Veiligheidsinstructies
Waarschuwing! Gebruik dit product
niet in de buurt van water of hoge
vochtigheid, bijvoorbeeld in een vochtige
kelder of dicht bij een zwembad of badkuip.
•Dit product kan worden gebruikt door
kinderen in de leeftijd vanaf 8 jaar en
ouder en personen met verminderde
lichamelijke, zintuiglijke of geestelijke
vermogens of gebrek aan ervaring en
kennis als zij onder toezicht staan of
worden geïnstrueerd over het veilige
gebruik van het product en de betrokken
gevaren begrijpen.
•Kinderen mogen niet met het product
spelen.
•Reiniging en onderhoud voor het gebruik
mag niet worden uitgevoerd door
kinderen, tenzij zij onder toezicht staan.
•Waarschuwing! Houd het product droog.
•Gebruik uitsluitend de meegeleverde
oplader om het product op te laden. De
polariteit van de adapter moet de polariteit
van het product gevonden
.
45
Page 46

Nederlands
Size - A6
Veiligheidsinstructies
1. Lees deze gebruikershandleiding voor
het eerste gebruik aandachtig door en
geef het met het product door. Neem de
waarschuwingen die op het product en in
deze gebruikershandleiding staan vermeld,
in acht. De waarschuwingen bevatten
belangrijke informatie voor uw veiligheid
en voor het gebruik en onderhoud van het
apparaat.
2. Gebruik het product uitsluitend voor het
beoogde gebruik en met de aangeraden
accessoires en onderdelen. Oneigenlijk
gebruik of een verkeerde bediening kan
leiden tot risico’s op gevaar.
3. Laat het apparaat nooit zonder toezicht als
het is ingeschakeld.
4. Dompel de elektrische onderdelen van het
apparaat nooit onder water tijdens het
reinigen of de bediening. Houd het apparaat
nooit onder stromend water.
5. Probeer onder geen beding om het product
(bijv. bij schade aan de stroomkabel,
als het product is gevallen, enz.) zelf te
repareren. Voor onderhoud en reparaties
dient u contact op te nemen met een
geautoriseerde servicedienst.
6. Gebruik dit apparaat uitsluitend op droge
plaatsen en binnen, niet geschikt voor
gebruik buiten.
7. Gebruik het apparaat nooit in de buurt van
en stel het nooit bloot aan:
- direct zonlicht en stof;
- open vuur (open haard, grill, kaarsen),
water (opspattend water, vazen, vijvers,
badkuip) of hoge mate van vochtigheid.
8. Dit product is niet geschikt voor
commercieel gebruik. Het is alleen
ontworpen voor huishoudelijk gebruik.
9. Reinig het product en andere onderdelen
na elk gebruik.
10. Volg de aanwijzingen in het hoofdstuk
Reiniging en zorg.
11. Het scheerapparaat kan
12. Let op! Het handgedeelte moet van het
schoongemaakt worden onder
de kraan.
netsnoer worden losgekoppeld voor het
schoongemaakt wordt.
46
Batterijen
1. Verwijder de batterijen uit het product
voordat u het weggooit.
2. Stel oplaadbare batterijen nooit bloot aan
overmatige hitte (bijv. direct zonlicht, vuur)
en gooi ze nooit in het vuur. De oplaadbare
batterijen kunnen exploderen.
3. De oplaadbare batterij is in het apparaat
ingebouwd en kan niet vervangen worden.
4. Wanneer u het product weg wilt gooien,
raadpleeg dan een elektricien of uw
dealer om de ingebouwde batterijen te
verwijderen en weg te gooien op een
milieuvriendelijke manier.
5. Sluit de contacten van de oplaadbare
batterij nooit kort. Gooi de oplaadbare
batterij of het apparaat nooit in het vuur. Er
bestaat dan kans op brand en een explosie!
6. Laad de oplaadbare batterij nooit op zonder
toezicht.
Page 47

Nederlands
Gefeliciteerd!!
Bedankt voor uw aankoop van een KOENIC
product. Lees het zorgvuldig en bewaar het voor
toekomstig gebruik.
Beoogd gebruik
Dit apparaat is alleen geschikt voor het scheren
van natte en droge baarden met of zonder
scheerschuim en voor het bijwerken van baarden
en bakkebaarden.
Ieder ander gebruik kan leiden tot schade aan
de machine of verwondingen. Dit product is
ontworpen voor huishoudelijk gebruik en is niet
voor commercieel gebruik bestemd.
Imtron GmbH aanvaardt geen aansprakelijkheid
voor schade aan het product, schade aan
eigendommen of lichamelijk letsel als gevolg
van onzorgvuldig of oneigenlijk gebruik van het
product, of gebruik van het product die niet voldoet
aan het doel opgegeven door de fabrikant.
Voor het eerste gebruik
Verwijder het apparaat en de accessoires voorzichtig uit de verpakking. Controleer de inhoud van de
verpakking op compleetheid en schade. Indien de
inhoud incompleet of beschadigd is, dient u direct
contact op te nemen met uw lokale verkooppunt.
Opmerking
• Voor het eerste gebruik dient u het apparaat
tenminste 2 uur op te laden. In het algemeen
is de oplaadtijd on gever 90 minuten , maar dit
hangt ook af van de conditie van de batterij.
• Als de batterij volledig is opgeladen kan het
apparaat 60 minuten gebruikt worden. De
tijd is variabel (hangt af van de conditie van
de batterij).
Afval
Behandel dit apparaat niet als normaal
gemeentelijk afval. Breng het terug naar
een afvalbrengpunt, dat duidelijk aangeeft
dat het elektrische en elektronische
apparaten recyclet. Vraag uw verkoper of
gemeente naar meer informatie.
Werp batterijen op een milieuvriendelijke
manier weg. Gooi batterijen niet in de
prullenbak. Gebruik alstublieft de retouren
inzamelingssystemen in uw gemeente of neem
contact op met de leverancier waar u dit product
heeft gekocht.
: 5 V
500 mAh
, 800 mA
, 800 mA
Inhoud
1 x Scheerapparaat
1 x Oplader
1 x Reinigingsborstel
1 x Opbergetui
1 x Reserve scheerkop en 2 messenblokken
1 x Gebruikshandleiding
Besturingselement en onderdelen
A
Beschermkap
B
Scheerkop
C
Scheerkop ontgrendelknop, beide kanten
D
Aan / uit knop
E
Display
F
Oplaadaansluiting
G
Tondeuse
H
Laadadapter met DC kabel en stekker
I
Reinigingsborsteltje
J
Opbergetui
Reserve onderdelen
K
Scheerkop met scheerblad
L
Messenblok (2x)
Technische Gegevens
Scheerapparaat
Werkt op batterijen : 3,7 V
Ingangsspanning
Ingangsspanning/stroom
IP code : IPX5
Oplaadadapter (HX-SV0500800)
Ingangsspanning : 100 - 240 V~, 50/60 Hz
Uitgangsspanning : 5 V
IP code : IP44
Beschermingsklasse : II
Batterij
Oplaadbaar batterij : Li-Ion, 3,7 V
47
Page 48

Size - A6
Nederlands
Voorbereiding
Steek de DC stekker van de lader in de
1
laadaansluiting en sluit de oplader aan op
een geschikt stopcontact.
Het symbool
2
en geeft aan dat de batterij wordt opgeladen.
Het batterijsymbool licht groen op
wanneer de batterij volledig is opgeladen.
De batterij voor het eerste gebruik minstens
120 minuten opladen. Voor standaardladen
is de lege batterij volledig opgeladen na een
maximale oplaadtijd van 90 minuten, zoals
aangegeven door het groene batterij-icoon
op het display.
Als het opladen is voltooid, verwijdert u de
laadstekker en trekt u de stekker van de lader
uit het stopcontact.
Let op
Zorg er voor het opladen voor, dat het apparaat
uitstaat.
LED indicatielampje
LED-kleur LED-kleur conditie
Stekkersymbool,
rood
Batterijsymbool,
groen
Stekkersymbool,
rood, knipperend
Bediening
Het apparaat aanzetten
3
• Schakel het apparaat in door op de aan / uit
knop te drukken.
- Het display toont een groen
batterijsymbool.
- Bij gebruik op netstroom, zullen het
groene batterijsymbool en het rode
stekkersymbool om beurten knipperen.
• Druk nogmaals op de aan / uit knop om het
apparaat uit te zetten.
- Het batterijsymbool gaat uit.
licht rood op in het display
Tijdens het opladen of
werkend op netspanning.
Opladen gereed of draadloos
gebruik. Volledig opgeladen.
Tijdens bedrijf, wanneer het
batterijniveau minder is dan
20%.
Scheren met het scheerblad
4
Let op
Gebruik het product niet bij:
- Huidletsel
- Ontstoken huid
- Door de zon verbrande huid
- Vlekken en blaren
Leer uw scheerapparaat kennen:
Na gebruik van het apparaat kan uw huid
een tijdje rood of geïrriteerd zijn. Dit is een
normale reactie omdat de huid aan deze
manier van scheren moet wennen. Neem
contact op met een arts als deze roodheid
of irritatie langere tijd aanhoudt.
• Verwijder de beschermkap.
• Schakel het apparaat in door op de aan / uit
knop te drukken.
• Houd tijdens het scheren het apparaat
zo loodrecht mogelijk ten opzichte van
de huid.
• Trek bij probleemgebieden, bijv. de wangen,
met uw vrije hand de huid strak, om een
beter resultaat te krijgen.
• Scheer ook tegen de haargroei in om de
stoppels zo goed mogelijk te verwijderen.
• Controleer het scheerproces door met
uw vrije hand te voelen. Als er nog
baardstoppels aanwezig zijn, herhaalt u het
proces net zo lang tot de huid glad is en er
geen stoppels meer aanwezig zijn.
• Schakel het apparaat uit door na gebruik op
de aan / uit knop te drukken.
Let op
De baard dient niet langer te zijn dan een
paar millimeter omdat langer haar het
scheren lastiger maakt. Als de baard te
lang is, gebruikt u de tondeuse voor u het
scheerapparaat gebruikt.
48
Page 49

Nederlands
Nat scheren
• Maak uw gezicht nat en breng een dunne
laag scheerschuim aan op de delen van uw
gezicht die geschoren moeten worden.
• Volg de stappen uit het deel Folie Scheren.
Let op
Alleen echt scheerschuim mag met het
scheerapparaat worden gebruikt, omdat
scheergel de scheerkop zal verstoppen en
het resultaat negatief zal beïnvloeden.
Tondeuse
5
Met de tondeuse achterop het apparaat kunt
u bijvoorbeeld de bakkebaarden bijwerken.
• Schuif de tondeuse achterop het apparaat
helemaal omhoog tot deze op zijn plaats
klikt.
• Schakel het apparaat in door op de aan / uit
knop te drukken.
• Leid de tondeuse voorzichtig naar het eind
van het haar dat bijgewerkt moet worden
en snijd het in de gewenste vorm.
• Schakel het apparaat uit door na gebruik
op de aan / uit knop te drukken en druk de
tondeuse weer omlaag tot deze weer op
zijn plaats klikt.
De schakelaar vergrendeling gebruiken
• Druk de aan / uit knop gedurende tenminste
3 seconden in om deze te vergrendelen.
De batterij- en stekkersymbolen knipperen
driemaal en geven aan dat de schakelaar
vergrendeling is geactiveerd.
• Druk de aan / uit knop gedurende tenminste
3 seconden in om deze weer te ontgrendelen.
Het scheerapparaat zal automatisch weer
inschakelen. Druk op de aan/uit-schakelaar
om het scheerapparaat uit te schakelen. Het
scheerapparaat aansluiten op de voeding als
uitgelegd in het deel Voorbereiding zal ook de
aan / uit-schakelaar vergrendeling deactiveren.
Reiniging en onderhoud
Waarschuwing
Gebruik tijdens het reinigen nooit oplosmiddelen,
schurende materialen, harde borstels,
metalen voorwerpen of scherpe voorwerpen.
Oplosmiddelen zijn schadelijk voor de
gezondheid en kunnen de kunststof onderdelen
van het apparaat aantasten, terwijl schurende
reinigingsmiddelen krassen kunnen veroorzaken
op het oppervlakte/de oppervlaktes.
• Na ieder gebruik gebruikt u de
6
reinigingsborstel om de baardtrimmer
grondig af te borstelen en blaast u het
haar weg.
• Druk op de scheerkop ontgrendeling aan
beide zijden en verwijder de scheerkop.
• De scheerkop kan ook onder de kraan
afgespoeld worden. Daarna dient u hem
goed te drogen.
• Tik de scheerkop voorzichtig om deze
schoon te maken, of blaas deze schoon.
Gebruik de reinigingsborstel om de twee
messenblokken en de behuizing eronder
schoon te maken.
• Plaats de scheerkop op het scheerapparaat
zodat deze aan beide zijden op zijn plaats
klikt.
• Reinig de buitenvlakken van het apparaat
met een vochtige doek en droog ze
vervolgens volledig af.
• Zorg ervoor dat er geen water het
apparaat (bijvoorbeeld via de schakelaar)
binnendringt. Bewaar het product in een
droge, koele plaats die beschermd is tegen
vocht en direct zonlicht. Houd dit product
buiten het bereik van kinderen.
49
Page 50

Size - A6
Nederlands
Vervangen van de scheerbladen en
messenblokken
Let op
De messenblokken zijn scherp. Voorkom
verwondingen door ze per ongeluk aan te raken.
Ervan uitgaande dat het scheermes eenmaal
7
per dag wordt gebruikt, raden we aan de
scheerbladen en de messenblokken na 1 jaar
te vervangen.
1. Verwijder de scheerkop zoals beschreven
in het hoofdstuk Schoonmaken en
onderhoud (I).
2. Druk een van de nokken aan de korte zijden
van de scheerbladhouder (II) in en duw het
scheerblad met de houder geleidelijk uit de
behuizing van de scheerkop (III). Plaats nu
het nieuwe scheerblad met de houder in de
behuizing van de scheerkop (IV).
3. Trek de messenblokken omhoog en klik de
nieuwe messenblokken op de houders (V).
4. Plaats de scheerkop weer op het
scheerapparaat zoals beschreven in
het hoofdstuk Schoonmaken en
onderhoud.
Problemen oplossen
Als zich problemen voordoen tijdens het gebruik, raadpleeg de volgende tabel. Als problemen niet
kunnen worden opgelost zoals aangegeven onder Oplossing, neem contact op met de fabrikant.
Probleem Probleem Oplossing
Het product werkt niet • Onderbroken
LED indicatielampje gaat niet
branden tijdens het opladen van
de batterijen
stroomvoorziening
• Batterijen leeg
• Geen voedingsspanning
• Het oplaadsnoer is niet op het
apparaat aangesloten
Verwijderen van de geïntegreerde batterij
Waarschuwing
• Zorg ervoor dat het product is losgekoppeld
van de adapter voordat u de batterij
verwijdert.
• Gevaar voor explosie! Vervang de batterij
nooit.
Volgens de Europese Batterij Richtlijn mag de
batterij in het product niet worden afgevoerd met
het normale huishoudelijk afval.
1. Verwijder de schroeven en neem de behuizing
weg.
2. Knip de draden van de accu door en verwijder
de accu.
• Controleer de
stroomvoorziening
• Laad de batterijen opnieuw op
• Controleer de
stroomvoorziening
• Controleer de aansluiting van
het laadsnoer
50
Page 51

Polski
Instrukcje bezpieczeństwa
Ostrzeżenie! Produktu nie wolno
używać w pobliżu wody lub dużej
wilgotności, np. w wilgotnej piwnicy lub w
pobliżu zlewozmywaka lub wanny.
•Produkt ten może być obsługiwany
przez dzieci w wieku od 8 lat i przez
osoby o zmniejszonych możliwościach
psychicznych, sensorycznych i
umysłowych czy braku doświadczenia
i wiedzy, jeśli będą pod nadzorem lub
zostaną dokładnie poinstruowane
w zakresie użytkowania produktu
w bezpieczny sposób i zrozumieją
związane z tym zagrożenia.
•Nie wolno dopuszczać, aby dzieci bawiły
się produktem.
•Czyszczenie i konserwacja
przez użytkownika nie może być
przeprowadzana przez dzieci chyba, że
będą one nadzorowane.
•Ostrzeżenie! Urządzenie powinno być
suche.
•Do ładowania baterii produktu korzystaj
wyłącznie z dostarczonej wraz z produktem
ładowarki. Polaryzacja adaptera musi
odpowiadać polaryzacji produktu
.
51
Page 52

Polski
Size - A6
Instrukcje bezpieczeństwa
1. Przed pierwszym użytkowaniem zapoznaj
się uważnie z tą instrukcją obsługi, a
sprzedając produkt przekaż ją nowemu
właścicielowi. Zwróć uwagę na ostrzeżenia
znajdujące się na produkcie i w tej instrukcji.
Zawiera ona ważne informacje dotyczące
Twojego bezpieczeństwa, użytkowania i
utrzymania sprzętu.
2. Korzystaj z urządzenia tylko zgodnie z
jego przeznaczeniem i tylko z polecanymi
akcesoriami i częściami. Niewłaściwe lub
złe użytkowanie może doprowadzić do
zagrożenia.
3. Nigdy nie pozostawiać włączonego
produktu bez nadzoru.
4. W trakcie czyszczenia czy użytkowania nigdy
nie zanurzać podzespołów elektrycznych
produktu w wodzie. Nigdy nie wkładać
produktu pod strumień bieżącej wody.
5. Pod żadnym pozorem nie próbuj naprawiać
urządzenia samodzielnie (np.: uszkodzonego
kabla zasilania, gdy produkt zostanie
upuszczony, itp.). W celu dokonania napraw
skonsultuj się z autoryzowanym serwisem.
6. Produkt użytkować tylko w suchych
pomieszczeniach, nigdy na otwartym
powietrzu.
7. Nigdy
- nie używaj i nie umieszczaj urządzenia w
pobliżu ognia (kominek, grill, świece), wody
(ochlapanie, wazony, oczka wodne, wanny);
- nie wystawiaj urządzenia na
bezpośrednie działanie promieni
słonecznych, kurzu i dużej wilgotności.
8. Produkt ten nie nadaje się do zastosowań
komercyjnych. Jest przeznaczony jedynie do
użytkowania w gospodarstwie domowym.
9. Urządzenie i pozostałe części należy czyścić
po każdym użyciu.
10. Prosimy zwracać uwagę na rozdział
Czyszczenie i pielęgnacja.
11.
12. Uwaga! Przed czyszczeniem wodą
Golarka nadaje się do
czyszczenia pod bieżącą wodą.
urządzenie należy odłączyć od zasilania.
Baterie
1. Przed usunięciem urządzenia wyjmij z niego
baterie.
2. Nigdy nie wystawiaj akumulatorków na
działanie nadmiernei temperatury (np.: ostre
słońce, ogień) i nigdy nie wrzucaj ich do
ognia. Akumulatorki mogą eksplodować.
3. Akumulator jest na stałe wbudowany w
urządzenie i nie może zostać wymieniony.
4. Usuwając produkt zasięgnij porady
elektryka lub sprzedawcy, u którego
zakupiono produkt, aby wymontować i
usunąć akumulatory w sposób zgodny z
ochroną środowiska.
5. Nigdy nie zwieraj styków akumulatora. Nie
wrzucaj akumulatora lub urządzenia do
ognia. Istnieje niebezpieczeństwo pożaru
i wybuchu!
6. Nigdy nie doładowuj akumulatora
urządzenia bez nadzoru.
52
Page 53

Polski
Gratulacje!
Dziękujemy za zakup produktu KOENIC. Prosimy o
uważne przeczytanie tej instrukcji I zachowanie
jej na przyszłość.
Przeznaczenie
Urządzenie nadaje się tylko do golenia suchej lub
mokrej brody, z kremem do golenia lub bez niego,
a także do przycinania brody i bokobrodów.
Użycie jakichkolwiek innych może doprowadzić
do uszkodzenia urządzenia lub do obrażeń ciała.
Produkt ten jest przeznaczony wyłącznie do użytku
domowego i nie nadaje się do użytku komercyjnego.
Imtron GmbH nie bierze żadnej odpowiedzialności
za uszkodzenie produktu, szkody majątkowe
czy jakiekolwiek obrażenia ciała spowodowane
nieostrożnym użytkowaniem produktu czy
użytkowaniem produktu do celu innego niż ten
określony przez producenta.
Przed pierwszym użyciem
Produkt wraz z wyposażeniem należy ostrożnie
wyjąć z oryginalnego opakowania. Zawartość
opakowania należy sprawdzić pod względem
kompletności i uszkodzeń. W przypadku braku części
w opakowaniu lub w razie stwierdzenia uszkodzeń
należy skontaktować się z punktem sprzedaży.
Wskazówka
• Przed pierwszym użyciem urządzenie
należy naładować przez co najmniej 2
godzin. Ogólny czas ładowania wynosi
około 90 minut, co również zależy od stanu
naładowania akumulatora.
• Kiedy akumulator jest w pełni naładowany,
urządzenie może pracować przez 60 minut.
Czas może być różny (w zależności od stanu
akumulatora).
Utylizacja
Nie należy wyrzucać tego urządzenia wraz z
odpadami domowymi. Zużyty sprzęt należy
oddać do wyznaczonego punktu zbiórki
sprzętu elektrycznego i elektronicznego.
Więcej informacji na ten temat udzielają lokalne
władze lub sprzedawca urządzenia.
Prosimy zutylizować baterie w sposób
przyjazny dla środowiska. Nie wolno
wyrzucać baterii wraz z innymi odpadkami
gospodarstwa domowego. W celu znalezienia
odpowiedniego punktu zbiórki baterii należy
skontaktować się ze sprzedawcą.
Zawartość
1 x golarka
1 x ładowarka
1 x szczoteczka do czyszczenia
1 x pokrowiec
1 x wymienna głowica goląca i 2 bloki ostrza
1 x instrukcja obsługi
Sterowniki i części składowe
A
Osłona
B
Głowica goląca
C
Przyciski zwalniające głowicę golącą, z obu stron
D
Przycisk włączania/wyłączania
E
Wyświetlacz
F
Gniazdko ładowarki
G
Trymer do włosów
H
Ładowarka z kablem i wtyczką
I
Szczoteczka do czyszczenia
J
Pokrowiec
Części zamienne
K
Głowica goląca z folią tnącą
L
Blok ostrza (2x)
Dane techniczne
Golarka
Zasilane bateryjne : 3,7 V
Moc wejściowa
znamionowa Napięcie/
natężenie prądu
Kod IP : IPX5
Ładowarka (HX-SV0500800)
Moc wejściowa
znamionowa
Moc wyjściowa
znamionowa
Kod IP : IP44
Klasa ochronności : II
Bateria
Wielokrotnego
ładowania Akumulator
: 5 V
: 100 - 240 V~, 50/60 Hz
: 5 V
: Litowo-jonowa, 3,7 V
500 mAh
, 800 mA
, 800 mA
53
Page 54

Size - A6
Polski
Przygotowanie
Włóż wtyczkę ładowarki do gniazda
1
ładowania i włóż ładowarkę go
odpowiedniego gniazdka.
Symbol
2
wskazując na ładowanie akumulatora. Symbol
baterii zaświeci się na zielono, gdy
akumulator zostanie w pełni naładowany.
Ładuj akumulator przez co najmniej
120 minut przed pierwszym użyciem. W
przypadku standardowego ładowania pusta
bateria jest całkowicie naładowana po
maksymalnym czasie ładowania wynoszącym
90 minut, co jest sygnalizowane symbolem
zielonej baterii na wyświetlaczu.
Po zakończeniu ładowania wyjmij wtyczkę
ładowania i wyjmij zasilacz z gniazdka.
Uwaga
Przed ładowaniem upewnij się, czy urządzenie
jest wyłączone.
Kontrolka LED
Kolory LED Znaczenie koloru LED
Symbol wtyczki,
czerwony
Symbol baterii,
zielony
Symbol wtyczki,
czerwony,
migający
Obsługa
Włącz urządzenie
3
• Włącz urządzenie, naciskając przycisk
• Aby wyłączyć urządzenie, naciśnij
zaświeci się na czerwono,
Podczas ładowania lub
zasilania sieciowego.
Ładowanie zakończone lub
używana bezprzewodowo. W
pełni naładowana.
Podczas pracy, gdy poziom
naładowania akumulatora jest
mniejszy niż 20%.
- Wyświetlacz pokazuje zielony symbol
baterii.
- W trybie zasilania sieciowego na przemian
pulsuje zielony symbol baterii i czerwony
symbol wtyczki.
ponownie przycisk włączania/wyłączania.
- Symbol baterii zgaśnie.
Folia goląca
4
Uwaga
Nie używaj urządzenia, jeśli masz:
- zmiany skórne
- zaognioną skórę
- oparzenie słoneczne
- krosty i pęcherze
Zaznajomienie się z urządzeniem:
Po użyciu urządzenia przez pewien
czas możesz mieć zaczerwienioną lub
podrażnioną skórę. Jest to normalna reakcja,
ponieważ skóra musi najpierw przyzwyczaić
się do tego rodzaju golenia. Skonsultuj
się z lekarzem, jeśli zaczerwienienie lub
podrażnienie utrzymuje się dłużej niż w tym
początkowym okresie.
• Zdejmij osłonę.
• Włącz urządzenie za pomocą włącznika/
wyłącznika.
• Podczas golenia urządzenie powinno być
trzymane jak najbardziej prostopadłe do
powierzchni skóry.
• Napnij skórę wolną ręką w
problematycznych obszarach, np.: na
policzkach, aby osiągnąć lepszy wynik
golenia.
• Należy również golić się pod włos, aby jak
najdokładniej usunąć zarost.
• Kontroluj postępy w goleniu, dotykając
skóry wolną ręką. Jeśli wyczuwasz zarost,
powtarzaj proces ponownie, aż skóra
będzie gładka i pozbawiona zarostu.
• Po użyciu wyłącz urządzenie za pomocą
włącznika/wyłącznika.
Uwaga
Broda nie powinna być dłuższa niż kilka
milimetrów, ponieważ dłuższe włosy mogą
pogorszyć golenie. Jeśli broda jest za długa,
użyj trymera do włosów, aby ją obciąć przed
użyciem samej golarki.
54
Page 55

Polski
Golenie na mokro
• Zwilż twarz i nałóż cienką warstwę pianki
do golenia na części twarzy, które zostaną
ogolone.
• Wykonaj czynności opisane powyżej w
rozdziale Folia goląca.
Uwaga
Z golarką może być używana tylko właściwa
pianka do golenia, ponieważ żel do golenia
zatka głowicę golącą i pogorszy efekt
golenia.
Trymer do włosów
5
Trymer do włosów z tyłu urządzenia
umożliwia podcinanie, np.: bokobrodów.
• Przesuń trymer do włosów z tyłu
urządzenia do góry, aż usłyszysz kliknięcie.
• Włącz urządzenie za pomocą włącznika/
wyłącznika.
• Ostrożnie przysuń trymer do końcówek
włosów, które mają zostać przycięte i
wytnij żądany kształt.
• Po użyciu wyłącz urządzenie za pomocą
przycisku włączania/wyłączania i popchnij
trymer do tyłu, aż usłyszysz kliknięcie.
Korzystanie z blokady przełącznika
• Naciśnij i przytrzymaj włącznik/wyłącznik przez
dłużej niż 3 sekundy, aby zablokować włącznik/
wyłącznik. Symbole baterii i wtyczki migną trzy
razy i wskażą, że blokada jest włączona.
• Aby odblokować włącznik/wyłącznik, naciśnij i
przytrzymaj go przez ponad 3 sekundy. Golarka
włączy się automatycznie. Ponownie naciśnij
włącznik/wyłącznik, aby wyłączyć golarkę.
Podłączenie golarki do zasilania, jak podano w
rozdziale Przygotowanie, również spowoduje
wyłączenie blokady włącznika/wyłącznika.
Czyszczenie i konserwacja
Ostrzeżenie
Do czyszczenia nie należy nigdy używać
rozpuszczalników, silnych środków
czyszczących, twardych szczotek, metalowych
ani ostrych przedmiotów. Rozpuszczalniki
są szkodliwe dla zdrowia ludzkiego i mogą
uszkodzić plastikowe części; silne środki i
przybory do czyszczenia mogą natomiast
porysować powierzchnię.
• Po każdorazowym użyciu, użyj szczoteczki
6
do czyszczenia, aby dokładnie wyczyścić i
zdmuchnąć włosy.
• Naciśnij przyciski zwalniające głowicę
golącą po obu stronach i zdejmij ją.
• Głowicę golącą można również płukać pod
bieżącą wodą. Następnie trzeba ją dobrze
wysuszyć.
• Delikatnie postukaj lub przedmuchaj głowicę
golącą. Użyj szczoteczki, aby wyczyścić dwa
bloki ostrzy i obudowę pod spodem.
• Umieść głowicę golącą na golarce tak, aby
kliknęła na swoim miejscu z obu stron.
• Oczyść wszystkie zewnętrzne
powierzchnie urządzenia wilgotną
ściereczką i osusz je całkowicie.
• Należy uważać, aby woda nie dostała
się do wnętrza urządzenia (np. przez
przełącznik). Przechowuj urządzenie w
suchym i chłodnym miejscu nie narażonym
na wilgoć i bezpośrednie działanie promieni
słonecznych. Przechowuj urządzenie poza
zasięgiem dzieci.
55
Page 56

Size - A6
Polski
Wymiana folii tnących i bloków ostrzy
Wyjmij akumulator
Uwaga
Bloki ostrzy są ostre. Unikaj obrażeń przez
przypadkowe ich dotknięcie.
Zakładając, że maszynka do golenia jest
7
używana raz dziennie, zalecamy wymianę
folii tnących i bloków ostrzy po upływie 1
roku.
1. Zdejmij głowicę golącą zgodnie z opisem w
rozdziale Czyszczenie i konserwacja (I).
2. Wciśnij jeden z występów na krótkich
bokach uchwytu folii tnącej (II) i stopniowo
wysuwaj ją wraz z uchwytem z obudowy
głowicy golącej (III). Umieść nową folię
tnącą wraz z uchwytem w obudowie
głowicy golącej (IV).
3. Pociągnij bloki ostrzy w górę i wepnij nowe
klocki ostrzy na uchwyty (V).
4. Przymocuj głowicę golącą z powrotem
do golarki, jak opisano w rozdziale
Czyszczenie i konserwacja .
Wykrywanie i usuwanie usterek
Jeśli istnieją jakiekolwiek problemy podczas użytkowania, należy zapoznać się z poniższą tabelą. Jeśli
problemów nie można rozwiązać według wskazań w kolumnie Rozwiązanie, należy skontaktować się
z Producentem.
Problem Możliwe przyczyny Czynności naprawcze
Produkt nie działa • Zanik napięcia zasilania
Kontrolka LED nie świeci się
podczas ładowania akumulatora/
baterii
• Wyczerpany akumulator/
baterie
• Brak zasilania
• Przewód ładujący nie jest
podłączony do urządzenia
Ostrzeżenie
• Przed wyjęciem akumulatora upewnij się, że
urządzenie jest odłączone od zasilacza.
• Niebezpieczeństwo wybuchu! Nigdy nie
wymieniaj akumulatora.
Zgodnie z europejską dyrektywą o bateriach,
akumulator znajdujący się w urządzeniu nie może
być wyrzucany wraz z normalnymi odpadami
gospodarstwa domowego.
1. Usuń śruby i zdejmij tył obudowy.
2. Odetnij przewody akumulatora i wyjmij go.
• Sprawdzić zasilanie
• Naładować akumulator/baterie
• Sprawdź zasilanie
• Sprawdź połączenie przewodu
zasilania
56
Page 57

Português
Instruções de segurança
Atenção! Não use este produto
nas proximidades de água ou níveis
de humidade elevados, por exemplo numa
adega húmida ou perto de uma piscina ou
banheira.
•Este produto pode ser utilizado por
crianças com mais de 8 anos e por
pessoas com capacidades físicas,
sensoriais ou mentais reduzidas ou sem
experiência, se forem supervisionadas
ou instruídas relativamente à utilização
segura do produto e se compreenderem
os perigos envolvidos.
•As crianças não devem brincar com o
produto.
•A limpeza e a manutenção do utilizador
não devem ser feitas por crianças a
menos que sejam supervisionadas.
•Aviso! Mantenha o aparelho seco.
•Utilize apenas o adaptador de carga
fornecido para carregar o aparelho. A
polaridade do adaptador deve corresponder
a polaridade do produto
.
57
Page 58

Português
Size - A6
Instruções de segurança
1. Leia atentamente este manual do utilizador
antes da primeira utilização e ceda-o
juntamente com o produto. Preste atenção
aos avisos existentes no produto e no
manual do utilizador. Contém informações
importantes para a sua segurança, bem
como para a utilização e manutenção do
equipamento.
2. Utilize o produto apenas para o fim a que se
destina e com os acessórios e componentes
recomendados. A utilização indevida ou
incorreta pode dar origem a perigos.
3. Nunca deixe o produto sem supervisão
enquanto estiver ligado.
4. Nunca mergulhe peças eléctricas do
produto na água durante a respectiva
limpeza ou funcionamento. Nunca segure o
produto debaixo de chuva.
5. Não tente reparar o produto por si próprio,
sob nenhuma circunstância (por exemplo,
danos no cabo de alimentação, se o
produto cair, etc.). Para fins de assistência
e reparação, contacte um agente de
assistência autorizado.
6. Utilize este produto apenas em áreas
internas e secas e nunca no exterior.
7. Nunca utilize, exponha nem coloque o
produto junto de:
- luz solar direta e pó;
- fogo (lareiras, grelhadores, velas), água
(salpicos de água, jarras, lagos, banheiras)
ou humidade intensa.
8. Este produto não é adequado para uso
comercial. Foi concebido apenas para uso
doméstico.
9. Limpe o aparelho e os respectivos
acessórios após cada utilização.
10. Siga as instruções no capítulo Limpeza e
cuidado.
11.
12. Atenção! O mecanismo da máquina deve
A máquina de barbear pode ser
limpa com água corrente.
ser desligado do cabo de ligação antes de
limpar a máquina de barbear com água.
Pilhas
1. Remover as pilhas do produto antes de
eliminá-lo.
2. Nunca exponha as baterias recarregáveis
ao calor excessivo (por ex., luz do sol, fogo)
e nunca as atire para o fogo. As baterias
recarregáveis podem explodir.
3. A bateria recarregável está incorporada
permanentemente no produto e não pode
ser substituída.
4. Ao descartar o produto, consulte por
favor um eletricista ou o seu revendedor
para remover e descartar as baterias
incorporadas de forma não nociva para o
ambiente.
5. Nunca ligue os contactos da bateria
recarregável em curto-circuito. Não atire a
bateria recarregável nem o produto para o
fogo. Existe o risco de incêndio e explosão!
6. Nunca carregue a bateria recarregável do
produto sem supervisão.
58
Page 59

Português
Parabéns!
Agradecemos a aquisição de um aparelho KOENIC.
Leia este manual cuidadosamente e guarde-o
para consultas futuras.
Finalidade de utilização
Este produto apenas é adequado para barbear
barbas secas ou molhadas, com ou sem espuma
de barbear e para aparar barbas e patilhas.
Qualquer outra utilização pode resultar em danos
para o produto ou ferimentos. Este produto foi
concebido apenas para uso doméstico e não se
destina a uso comercial.
A Imtron GmbH não se responsabiliza por danos
ao produto, danos a propriedade ou ferimentos
pessoais devido a negligência ou utilização
indevida do produto, ou utilização do produto fora
da finalidade especificada pelo fabricante.
Antes de utilizar pela primeira vez
Remova o produto e os acessórios com cuidado
da embalagem original. Inspeccione o conteúdo
fornecido e verifique se está completo e sem
danos. Se o conteúdo ornecido estiver incompleto
ou com danos, contacte imediatamente o seu
ponto de venda.
Nota
• Para a primeira utilização, carregue o aparelho
durante pelo menos 2 horas. A duração geral
de carregamento é cerca de 90 minutos o
que também depende da condição da bateria.
• Quando a bateria está totalmente carregada,
o aparelho pode ser utilizado durante 60
minutos. O tempo pode variar (dependendo
da condição da bateria).
Eliminação
Não elimine este aparelho como lixo
doméstico. Entregue-o num ponto de
recolha designado para a reciclagem de
equipamento eléctrico e electrónico.
Contacte o seu vendedor ou a sua autoridade
local para mais informações.
Elimine as pilhas de forma ecológica. Não
as jogue no lixo doméstico. Utilize os
sistemas de devolução e recolha da sua
zona ou contacte o vendedor onde comprou o
produto.
: 5 V
500 mAh
, 800 mA
, 800 mA
Conteúdo
1 x máquina de barbear
1 x Fonte de alimentação/carregador
1 x escova de limpeza
1 x saco para guardar a máquina
1 x cabeça de barbear sobressalente e 2 blocos
de lâminas
1 x manual do utilizador
Controlo e componentes
A
Tampa de proteção
B
Cabeça de barbear
C
Botão de libertação da cabeça de barbear, de
ambos os lados
D
Botão para Ligar/Desligar
E
Visor
F
Tomada para carregar
G
Aparador de cabelo
H
Fonte de alimentação/carregador com cabo
CC e ficha
I
Escova de limpeza
J
Saco para guardar
Peças sobressalentes
K
Cabeça de barbear com rede de corte
L
Bloco de lâminas (2x)
Especificações técnicas
Máquina de barbear
Funciona com bateria : 3,7 V
Potência de entrada
tensão/corrente
Código IP : IPX5
Adaptador/carregador (HX-SV0500800)
Potência de entrada : 100 - 240 V~, 50/60 Hz
Potência de saída : 5 V
Código IP : IP44
Classe de proteção : II
Bateria
Recarregável bateria : Li-Ion, 3,7 V
59
Page 60

Size - A6
Português
Preparação
Insira a ficha CC da fonte de alimentação/
1
carregador na tomada de carga e ligue a ficha
da fonte de alimentação/carregador a uma
tomada de corrente adequada.
O símbolo
2
visor para indicar que a bateria está ser
carregada. O símbolo fica verde quando
a bateria estiver totalmente carregada.
Carregue a bateria durante pelo menos 120
minutos antes da primeira utilização. Para um
carregamento normal, a bateria descarregada
ficará totalmente carregada após um máximo
de 90 minutos, como indicado pelo ícone da
bateria verde no visor.
Depois de concluído o processo de carga,
remova a ficha de carga e desligue a fonte
de alimentação/carregador da tomada de
parede.
Nota
Certifique-se de que o aparelho está desligado
antes de começar a carregar a bateria.
Indicador LED
Cor do LED Estado indicado pela cor do LED
Símbolo
da ficha,
vermelho
Símbolo
da bateria,
verde
Símbolo
da ficha, a
piscar
Operação
Ligar o aparelho
3
• Ligue o aparelho premindo o botão para
Ligar/Desligar (On/O).
• Para desligar o aparelho, prima novamente
o botão para Ligar/Desligar (On/O).
acende-se a vermelho no
Durante o carregamento ou
alimentação direta pela rede.
Carregamento completo ou
quando utilizada sem fios.
Totalmente carregada.
Durante a utilização, quando a
carga da bateria é inferior a 20%.
- O visor mostra o símbolo da batera verde.
- Quando utilizada ligada à rede elétrica,
o símbolo verde da bateria e o símbolo
vermelho da ficha piscam alternadamente.
- O símbolo da bateria apaga-se.
Barbear
4
Nota
Não utilize o produto se tiver:
- esões na pele
- pela inflamada
- queimaduras solares
- borbulhas ou bolhas
Familiarização:
Depois de utilizar o produto a sua pele pode
ficar vermelha ou irritada durante algum
tempo. Esta é uma reação normal porque
a pele tem de se habituar primeiro a este
tipo de barbear. Consulte um médico se
a vermelhidão ou irritação continuarem
durante mais tempo
• Remova a tampa protetora.
• Ligue o aparelho premindo o botão para
Ligar/Desligar (On/O).
• Ao barbear, mantenha o aparelho o mais
perpendicular possível à superfície da pele.
• Estique a pele com a sua mão livre nas
áreas mais difíceis, por ex., nas bochechas,
para obter melhores resultados.
• Além disso, avance contra a direção de
crescimento da barba para remover os
pelos o melhor possível.
• Controle o progresso do corte tocando na
pele com a sua mão livre. Se ficarem pelos
mal cortados repita o processo as vezes
necessárias até que a pele fique macia e
sem pelos salientes.
• Desligue o aparelho premindo o botão
para Ligar/Desligar (On/O) depois da sua
utilização.
Nota
A barba não deve ter mais do que uns
poucos milímetros porque uma barba mais
longa irá dificultar o corte. Se tiver uma
barba comprida, utilize o aparador de cabelo
para a cortar antes de utilizar a função para
barbear.
60
Page 61

Português
Barbear com a barba húmida
• Molhe a cara e aplique uma fina camada de
espuma de barbear às partes da cara que
deseja barbear.
• Siga os mesmos passos indicados acima no
capítulo Barbear.
Nota
Só pode ser utilizada espuma para barbear,
pois o gel para barbear entope a cabeça de
corte e prejudica o resultado obtido.
Aparador de cabelo
5
O aparador de cabelo na parte traseira do
aparelho pode ser utilizado, por exemplo, para
aparar as patilhas.
• Deslize para cima o aparador de cabelo
localizado na parte traseira da unidade até
que encaixe na posição de funcionamento.
• Ligue o aparelho premindo o botão para
Ligar/Desligar (On/O).
• Aproxime com cuidado o aparador de
cabelo das extremidades do cabelo que
deseja aparar e corte como adequado.
• Depois da utilização, desligue o aparelho
premindo o botão para Ligar/Desligar e
recolha totalmente o aparador de cabelo.
Utilizar o bloqueio do interruptor
• Prima e mantenha premido o interruptor para
ligar/desligar durante mais de 3 segundos
para bloquear o interruptor para ligar/desligar.
Os símbolos da bateria e da ficha piscam três
vezes para indicar que o bloqueio do interruptor
está ativado.
• Para desbloquear o interruptor para ligar/
desligar prima-o e mantenha-o premido
novamente durante mais de 3 segundos. A
máquina de barbear liga-se automaticamente.
Prima novamente o botão para ligar/desligar
para desligar a máquina de barbear. A ligação
da máquina de barbear à fonte de alimentação
como indicado no capítulo Preparação também
desativa o bloqueio do interruptor para ligar/
desligar.
Limpeza e manutenção
Aviso
Durante a limpeza, nunca utilize solventes,
materiais abrasivos, escovas duras nem
objetos metálicos ou afiados. Os solventes são
prejudiciais à saúde humana e podem danificar
as peças de plástico, enquanto os materiais
e instrumentos de limpeza abrasivos podem
deixar riscos na(s) superfície(s).
• Após cada utilização, utilize a escova de
6
limpeza para escovar e remover todos os
pelos.
• Prima os botões para libertar cabeça de
barbear de ambos os lados e remova a
cabeça de barbear.
• A cabeça de barbear também pode ser
lavada com água corrente. Mas tem de a
secar bem.
• Bata suavemente ou sopre os pelos para
fora da cabeça de barbear. Utilize a escova
de limpeza para limpar os dois blocos de
lâminas e o alojamento inferior.
• Coloque a cabeça de barbear na máquina
de barbear de modo a que encaixe com um
clique de ambos os lados.
• Limpe as superfícies exteriores do aparelho
com um pano húmido e, em seguida,
seque-as totalmente.
• Certifique-se de que não se infiltra água
no produto (por exemplo, através do
interruptor). Guarde o produto nul local
fresco e seco, protegido contra a humidade
e luz solar directa. Mantenha este produto
fora do alcance das crianças.
61
Page 62

Size - A6
Português
Substituição das redes de corte e blocos
de lâminas
Atenção
Os blocos de lâminas estão muito afiados.
Não toque nos blocos de lâminas para evitar
ferimentos acidentais.
Assumindo que a máquina de barbear
7
é utilizada uma vez todos os dias,
recomendamos que substitua a rede de corte
e os blocos de corte após 1 ano de utilização.
1. Remova a cabeça de barbear como descrito
no capítulo Limpeza e cuidados (I).
2. Prima uma das patilhas dos lados mais
curtos do suporte da rede de corte (II)
e empurre a rede de corte lentamente e
juntamente com o seu suporte para fora
da caixa da cabeça de barbear (III). Em
seguida, instale uma nova rede de barbear
no seu suporte na caixa da cabeça de
barbear (IV).
3. Puxe os bloco de lâminas para cima e
encaixe os novos blocos de lâminas nos
suportes (V).
4. Fixe novamente a cabeça de barbear à
máquina de barbear como descrito no
capítulo Limpeza e cuidados.
Resolução de problemas
Se houver algum problema durante o funcionamento, consulte a tabela seguinte. Se os problemas não
forem solucionados conforme indicado em Solução, contacte o seu fabricante.
Problema Causas Possíveis
O produto não funciona • Fonte de alimentação
O indicador LED não se acende
durante o carregamento das
baterias
interrompida
• Baterias gastas
• Alimentação desligada
• O cabo de carga não está
ligado ao produto
Remover a bateria integrada
Advertência
• Certifique-se de que o produto está
desligado do adaptador antes de remover
a bateria.
• Risco de explosão! Nunca volte a instalar
a bateria.
Em conformidade com a Diretiva Europeia sobre
Baterias, a bateria utilizada neste produto
não pode ser eliminada juntamente com o lixo
doméstico normal
1. Remova os parafusos e retire a bateria da caixa.
2. Corte os fios da bateria e remova-a.
• Verifique a fonte de
alimentação
• Recarregue as baterias
• Verifique a fonte de
alimentação
• Verifique a ligação do cabo
de carga
62
Page 63

Svenska
Säkerhetsinstruktioner
Varning! Använd inte produkten i
närheten av vatten eller på platser
där det finns mycket fukt, t.ex. i en fuktig
källare eller nära bassänger eller badkar.
•Denna produkt kan användas av barn
över 8 års ålder och personer med
reducerad fysisk, sensorisk eller mental
hälsa eller saknar erfarenhet och
kunskap om de har fått instruktion
eller övervakas beträande produktens
användning på ett säkert sätt samt
förstår risken förknippade med detta.
•Barn ska inte leka med produkten.
•Rengöring och underhåll av strykjärnet
får inte utföras av barn utan vuxens
tillsyn.
•Varning! Håll produkt en torr.
•Använd endast den medföljande
laddningsadaptern för att ladda produkten.
Polariteten av adaptern måste matcha
polariteten hos produkten
.
63
Page 64

Svenska
Size - A6
Säkerhetsinstruktioner
1. Läs denna bruksanvisning noggrant
innan du använder produkten för första
gången, och låt den följa med om du
säljer produkten. Var uppmärksam på de
varningar som anges på produkten och i
denna bruksanvisning. Bruksanvisningen
innehåller information som är viktig för din
säkerhet och för användning och underhåll
av utrustningen.
2. Använd produkten enbart för dess avsedda
ändamål och med rekommenderade tillbehör
och komponenter. Felaktig användning eller
hantering kan medföra risk för skador.
3. Lämna aldrig produkten utan uppsikt när
den är påslagen.
4. Doppa aldrig ner elektriska delar i vatten
i samband med rengöring eller under
användning. Håll aldrig produkten under
rinnande vatten.
5. Försök aldrig under några omständigheter
att reparera produkten själv (t.ex. om
strömkabeln skadats eller om produkten
tappats i golvet). För service och
reparationer måste du kontakta en
auktoriserad serviceverkstad.
6. Använd bara denna produkt inomhus och
aldrig utomhus.
7. Produkten får inte användas, exponeras
eller ställas i närheten av:
- direkt solljus och dammkällor
- eld (öppen spis, grill, stearinljus), vatten
(vattenstänk, vaser, dammar, badkar) eller
hög luftfuktighet.
8. Denna produkt är inte lämplig för
kommersiellt bruk. Den är designad för
hushållbruk och inget annat.
9. Rengör produkten och alla andra tillbehör
efter varje användning.
10. Följ instruktionerna i kapitlet Rengöring
och skötsel.
11.
12. Observera! Handdelen måste kopplas bort
Rakapparaten är lämplig att
rengöra under rinnande vatten.
från strömanslutningen innan den rengörs
med vatten.
Batterier
1. Avlägsna batterierna före du kastar bort
produkten.
2. Utsätt aldrig laddningsbara batterier för
stark värme (t.ex. direkt solljus, öppen
låga), och kasta dem aldrig i elden. De
laddningsbara batterierna kan explodera.
3. Det uppladdningsbara batteriet är
permanent inbyggt i produkten och kan
inte bytas ut.
4. Konsultera en elektriker eller din
återförsäljare när produkten kasseras,
för att ta bort och avyttra de inbyggda
batterierna på ett miljövänligt sätt.
5. Kortslut aldrig polerna på det laddningsbara
batteriet. Kasta inte det laddningsbara
batteriet eller produkten i en eld. Risk för
brand och explosion!
6. Lämna aldrig produktens laddningsbara
batteri utan tillsyn när det laddas.
64
Page 65

Svenska
Grattis!
Tack för ditt köp av en KOENIC produkt. Läs
denna bruksanvisning noggrant och spara den för
framtida referens.
Avsedd användning
Denna produkt är endast lämpad för att raka
torra eller våta skägg, med eller utan rakkräm.
Den lämpar sig även för trimning av skägg och
polisonger.
Annan användning än den avsedda kan leda till
skador på produkten eller personskador. Denna
produkt är endast avsedd för hushållsbruk och
inte avsedd för yrkesverksamhet.
Imtron GmbH tar inget ansvar för skador
på produkten, för skador på egendom eller
personskador på grund av vårdslös eller felaktig
användning av produkten eller användning av
produkten som inte uppfyller tillverkarens angivna
ändamål.
Innan första användning
Ta försiktigt upp produkten och tillbehören ur
originalförpackningen. Kontrollera leveransens
innehåll, så att alla delar finns med och att
delarna inte är skadade. Om leveransens innehåll
är ofullständigt eller skadat bör du kontakta din
återförsäljare omedelbart.
OBS
• Innan första användning, ladda apparaten i
minst 2 timmar. Allmänt är laddningstiden ca
90 minuter även beror av batteriets tillstånd.
• När batteriet är laddat fullt, kan apparaten
användas i 60 minuter. Tiden kan variera
(beroende av batteriets tillstånd).
Avyttring
Kasta inte bort den här apparaten i
hushållssoporna. Lämna in den på en
återvinningsstation för återvinning av
elektrisk och elektronisk utrustning.
Kontakta din återförsäljare eller lokala myndigheter
för ytterligare information.
Gör dig av med batterierna på ett
miljövänligt sätt. Släng inte batterier i
hushållssoporna. Använd återvinnings och
uppsamlingssystemet i din kommun eller kontakta
den återförsäljare där du köpte produkten.
: 5 V
500 mAh
, 800 mA
, 800 mA
Innehåll
1 x rakapparat
1 x strömladdare
1 x rengöringsborste
1 x förvaringsväska
1 x utbytesrakhuvud och 2 rakbladsblock
1 x bruksanvisning
Kontroller och komponenter
A
Skyddshuva
B
Rakhuvud
C
Losskopplingsknapp för rakhuvud, båda sidor
D
Strömbrytare
E
Skärm
F
Laddningsuttag
G
Hårtrimmer
H
Strömladdare med sladd och kontakt
I
Rengöringsborste
J
Förvaringsväska
Reservdelar
K
Rakhuvud med rakfolie
L
Rakbladsblock (2x)
Tekniska data
Rakapparat
Batteridriven : 3,7 V
Märkström Spänning/
ström
IP-kod : IPX5
Laddningsadapter (HX-SV0500800)
Märkström : 100 - 240 V~, 50/60 Hz
Märkeekt : 5 V
IP-kod : IP44
Skyddsklass : II
Batteri
Laddningsbart batteri : LiLitiumjon, 3,7 V
65
Page 66

Size - A6
Svenska
Förberedelser
Sätt i laddkontakten i laddningsuttaget på
1
rakapparaten och stoppa in strömkontakten i
ett lämpligt strömuttag.
Symbolen
2
indikerar att batteriet håller på att laddas.
Batterisymbolen lyser grönt när
batteriet är fulladdat.
Ladda batteriet minst 120 minuter före
första användningen. Vid standardladdning
blir det tomma batteriet fulladdat efter en
längsta laddningstid på 90 minuter, vilket
indikeras av den gröna batteriikonen på
skärmen.
När laddningen är färdig tar du ut
laddkontakten och tar ut strömkontakten
ur uttaget.
Obs
Se till att apparaten är avstängd före laddning.
LED-indikator
LED-färg Tillstånd
Laddsymbol,
röd
Batterisymbol,
grön
Laddsymbol,
röd, blinkande
Användning
Sätt på apparaten
3
• Sätt på apparaten genom att trycka på
strömbrytaren.
• För att stänga av apparaten trycker du på
strömbrytaren igen.
tänds i rött på skärmen och
Under laddning eller vid
anslutning till elnätet
Laddningen färdig eller vid
sladdlös användning Fulladdad.
Under användning, när
batterinivån är under 20 %.
- Skärmen visar en grön batterisymbol.
- När apparaten är ansluten till elnätet
blinkar den gröna batterisymbolen och
den röda laddsymbolen omväxlande.
- Batterisymbolen släcks.
Folierakning
4
Obs
Använd inte produkten om du har:
- hudskador
- inflammerad hud
- solbränna
- finnar och blåsor
Tillvänjning:
När du använt apparaten kan du få röd eller
irriterad hud ett tag. Detta är en normal
reaktion eftersom huden måste vänja sig vid
den här typen av rakning. Rådfråga en läkare
om det röda eller irritationen inte försvinner
efter ett tag.
• Ta bort skyddshuvan.
• Sätt på apparaten med strömbrytaren.
• När du rakar dig ska du försöka ha
apparaten så vinkelrät som möjligt mot
huden.
• På svåra områden, till exempel kinderna,
kan du strama åt huden med din lediga
hand för att få ett bättre resultat.
• Och tänk på att raka dig i motsatt riktning
mot skäggstrånas växtriktning för att få
bort så mycket skäggstubb som möjligt.
• Kontrollera resultatet efter hand genom
att känna efter på huden med din lediga
hand. Finns det kvar skäggstubb så
upprepar du rakningen igen och igen tills
huden är len och utan stubb.
• Stäng av apparaten med strömbrytaren
efter användning.
Obs
Skägget får inte vara längre än några
millimeter eftersom längre skäggstrån
försämrar apparatens rakförmåga. Om
skägget är för långt använder du först
hårtrimmern för att trimma det innan du
använder själva rakfunktionen.
66
Page 67

Svenska
Våt rakning
• Fukta ditt ansikte och lägg på ett tunt
lager raklödder på de delar av ansiktet som
ska rakas.
• Följ stegen ovan i kapitlet Folierakning.
Obs
Endast riktigt raklödder får användas med
rakapparaten, eftersom rakgel klibbar ihop
rakhuvudet och försämrar resultatet.
Hårtrimmer
5
Med hårtrimmern på apparatens baksida kan
du till exempel klippa polisongerna.
• Skjut på hårtrimmern på baksidan av
apparaten hela vägen tills den klickar på
plats.
• Sätt på apparaten med strömbrytaren.
• Placera försiktigt hårtrimmern i änden av
det hår som ska trimmas och klipp det i
önskad form.
• Efter användning stänger du av apparaten
med strömbrytaren och skjuter tillbaka
trimmern neråt tills den klickar på plats.
Använda knapplåset
• Tryck på och håll inne strömbrytaren i mer än 3
sekunder för att låsa strömbrytaren i på-läge.
Batteri- och laddsymbolerna blinkar tre gånger
och indikerar att knapplåset är aktiverat.
• För att låsa upp knapplåset igen trycker du
på och håller inne strömbrytaren i mer än 3
sekunder. Apparaten sätter på sig automatiskt.
Tryck på strömbrytaren igen för att stänga av
rakapparaten. Om du ansluter rakapparaten
till elnätet enligt kapitlet Förberedelser så
avaktiveras även strömbrytarens knapplås.
Rengöring och skötsel
Varning
Vid rengöring, använd aldrig lösningsmedel eller
slipande material, hårda borstar, metall eller
vassa föremål. Lösningsmedel är skadliga för
människors hälsa och kan angripa plastdelarna,
medan slipande rengöringsmedel och verktyg
kan repa ytan(-orna).
• Efter varje användning, använd
6
rengöringsborsten för att noggrant borsta
bort och blåsa ut hår.
• Tryck på losskopplingsknapparna på
båda sidorna av rakhuvudet och ta bort
rakhuvudet.
• Rakhuvudet kan också sköljas under
rinnande vatten. Men då måste du torka
det noggrant.
• Knacka försiktigt på eller blås ut rakhuvudet.
Använd rengöringsborsten för att rengöra
de två rakbladsblocken och kåpan under
dem.
• Placera rakhuvudet på rakapparaten så att
det klickar på plats på båda sidorna
• Rengör de yttre ytorna av enheten med en
fuktig trasa och torka dem sedan helt.
• Se till att inget vatten kommer in i
produktens interiör (till exempel genom
kontakten). Förvara produkten på en torr
och sval plats som är skyddad mot fukt och
direkt solljus. Förvara denna produkt utom
räckhåll för barn.
67
Page 68

Size - A6
Svenska
Byte av rakfolie och rakbladsblock
Tänk på!
Rakbladsblocken är vassa. Rör inte vid dem så
undviker du skador.
Om du använder rakapparaten en gång varje
7
dag rekommenderar vi att du byter rakfolien
och rakbladsblocken efter 1 år.
1. Ta bort rakhuvudet enligt beskrivningen i
kapitlet Rengöring och underhåll (I).
2. Tryck in ett av fästena på kortsidan av
rakfoliehållaren (II) och tryck ut rakfolien
och dess hållare ur rakhuvudets kåpa (III).
Placera sedan den nya rakfolien och dess
hållare i rakhuvudets kåpa (IV).
3. Dra rakbladsblocken uppåt och knäpp på de
nya rakbladsblocken på hållaren (V).
4. Fäst rakhuvudet på rakapparaten igen
enligt beskrivning i kapitlet Rengöring
och underhåll.
Felsökning
Om problem uppstår under användningen, se följande tabell. Om problemet inte kan lösas enligt
beskrivningen som anges under Lösning, kontakta tillverkaren.
Problem Möjliga Orsaker
Produkten fungerar inte • Strömavbrott
LED-indikatorn lyser inte när
batterierna laddas
• Batterierna är slut
• Ingen strömförsörjning
• Laddkabeln är inte ansluten till
apparaten
Ta bort det integrerade batteriet
Varning
• Se till att apparaten är frånkopplad från
elnätet innan du tar bort batteriet.
• Risk för explosion! Byt aldrig ut batteriet.
Enligt det europeiska batteridirektivet får
inte batteriet i apparaten slängas bland
hushållssoporna.
1. Skruva loss skruvarna och ta bort höljet.
2. Kapa batteriledningarna och ta bort batteriet.
• Kontrollera strömförsörjningen
• Ladda batterierna
• Kontrollera strömförsörjningen
• Kontrollera laddkabelns
anslutning
68
Page 69

Türkçe
Güvenlik Talimatları
Uyarı! Bu ürünü su veya nem
yakınında kullanmayın, örn. nemli bir
bodrumda veya bir yüzme havuzunun veya
küvetin yanında.
•Bu cihaz, eğer gözetim altındalar ise veya
bu ürünün güvenli bir şekilde kullanımıyla
ilgili talimatları aldılar ve içerdiği
tehlikeleri anladılar ise 8 yaş ve üstü
çocuklar tarafından ve fiziksel, duyusal
veya zihinsel yetenekleri sınırlı ya da
deneyim ve bilgisi bulunmayan kişiler
tarafından kullanılabilir.
•Çocuklar ürünle oynamamalıdır.
•Gözetim altında olmadığı sürece temizlik
ve kullanıcı bakımı çocuklar tarafından
yapılmamalıdır.
•Uyarı! Ürünü kuru tutun.
•Ürünü şarj etmek için sadece verilen şarj
adaptörünü kullanın. Adaptör polaritesi
ürünün polarite eşleşmelidir
.
69
Page 70

Türkçe
Size - A6
Güvenlik Talimatları
1. İlk kullanımdan önce bu kullanım kılavuzunu
tamamen okuyun ve ürünle beraber teslim
edin. Ürün üzerindeki ve bu kılavuzdaki
uyarılara dikkat edin. Ekipmanın kullanımı
ve bakımıyla olduğu kadar sizin güvenliğiniz
hakkında da önemli bilgiler içermektedir.
2. Ürünü sadece amaçlanan doğrultuda
ve tavsiye edilen aksesuar ve parçalarla
kullanın. Uygunsuz kullanım ve yanlış işletim
tehlikelere yol açabilir.
3. Ürün çalışır durumdayken asla denetimsiz
bırakmayın.
4. Temizleme veya işletim sırasında ürünün
hiçbir elektrikli parçasını su içerisine
sokmayın. Ürünü asla akan suyun altına
tutmayın.
5. Hiç bir koşul altında (örn. Elektrik kablosu
hasarı, ürün düşürülmüş ise, vs) ürünü
kendiniz onarmaya kalkışmayın. Hizmet
ve onarımlar için, lütfen yetkili bir servis
elemanına danışın.
6. Bu ürünü kuru kapalı alanlarda kullanın, asla
açık alanda kullanmayın.
7. Ürünü asla aşağıdakilere maruz bırakmayın
veya yanında kullanmayın:
- direk gün ışığı ve toz;
- ateş (şömine, ızgaralar, mumlar), su (su
sıçramaları, vazolar, küçük havuzlar,
küvetler) veya yüksek nem.
8. Bu ürün ticari kullanım için uygun değildir.
Sadece ev içi kullanım için tasarlanmıştır.
9. Cihazı ve diğer aksesuar parçalarını her
kullanımdan sonra temizleyin.
10. Temizlik ve bakım bölümünü dikkate alın.
11.
12. Dikkat! Suyla temizlenmeden önce elde
Tıraş makinesi akan su altında
temizlenmeye uygundur.
tutulan kısmın bağlantı hattıyla bağlantısı
kesilmelidir.
Piller
1. Ürünü atmadan önce pillerini çıkarın.
2. Şarj edilebilir pilleri asla aşırı ısıya (örneğin
parlak güneş, ateş) maruz bırakmayın ve
asla ateşe atmayın. Şarj edilebilir piller
patlayabilir.
3. Şarj edilebilir pil ürüne kalıcı yerleşik yapılmış
olup, değiştirilemez.
4. Ürünü tasfiye ederken pilleri sökmek ve
çevreye zarar vermeden tasfiye etmek için
bir elektrik uzmanına veya satıcınıza danışın.
5. Şarj edilebilir pilin kontaklarını asla kısa devre
etmeyin. Şarj edilebilir pili veya ürünü ateşe
atmayın. Yangın ve patlama tehlikesi vardır!
6. Gözetimsiz ürünün şarj edilebilir pilini asla
şarj etmeyin.
70
Page 71

Türkçe
Tebrikler!
Bir KOENIC ürünü aldığınız için teşekkür ediyoruz.
Lütfen bu kılavuzu dikkatlice okuyun ve gelecekte
başvurmak için saklayın.
Amaçlanan kullanım
Bu ürün yalnızca tıraş kremi ile veya olmadan kuru
veya ıslak sakalı tıraş etmeye ve sakal ve favorileri
düzeltmeye uygundur.
Herhangi bir diğer kullanım ürüne hasara veya
yaralanmalara neden olabilir. Bu ürün, ticari
kullanıma yönelik değil, sadece ev tipi kullanım için
tasarlanmıştır.
Imtron GmbH ürünün dikkatsiz veya yanlış
kullanımı ya da ürünün üretici tarafından belirtilen
amaca uymayan kullanımı nedeniyle ürüne hasar,
maddi hasar veya kişisel yaralanma için herhangi
bir sorumluluk kabul etmez.
İlk kullanimdan önce
Ürünü ve aksesuarı dikkatlice orijinal ambalajdan
çıkarın. Ambalaj içeriğinin tam olup olmadığını ve
hasar bakımından kontrol edin. Ambalaj içeriği
eksik ise veya hasar tespit ederseniz derhal satış
yerinize başvurun.
Not
• İlk kez kullanırken cihazı en az 2 saat şarj
edin. Genel şarj süresi yaklaşık 90 dakika olup
bataryanın durumuna da bağlıdır.
• Batarya tam dolu olduğu zaman cihaz 60
dakika kullanılabilir. Bu süre değişebilir
(bataryanın durumuna bağlı olarak).
İmha etme
Bu cihazı evsel atık olarak imha etmeyin.
Cihazı, elektrikli ve elektronik ekipmanlar
için kurulan geri dönüştürme ya da toplama
noktalarına teslim edin. Daha fazla bilgi
almak için satıcınıza veya yerel mercilere danışın.
Lütfen pilleri çevreye duyarlı şekilde
bertaraf edin. Pilleri evsel atıklarla birlikte
atmayın. Lütfen bölgenizdebulunan geri
dönüşüm ve toplama sistemlerini kullanın veya
ürünü satın aldığınız satıcıya danışın.
, 800 mA
, 800 mA
İçindekiler
1 x Tıraş makinesi
1 x Şarj güç kaynağı
1 x Temizleme fırçası
1 x Saklama çantası
1 x Yedek tıraş başlığı ve 2 bıçak bloğu
1 x Kullanım kılavuzu
Kontroller ve bileşenler
A
Koruyucu kapak
B
Tıraş başlığı
C
Tıraş bıçağı çıkarma düğmesi, çift taraflı
D
Açma/kapama düğmesi
E
Ekran
F
Şarj soketi
G
Saç düzeltici
H
DC kablosu ve fişi olan şarj güç kaynağı
I
Temizleme fırçası
J
Saklama çantası
Yedek parçalar
K
Tıraş elekli tıraş başlığı
L
Bıçak bloğu (2x)
Teknik Veriler
Tıraş makinesi
Pil ile çalışır : 3,7 V
Anma girişi
Gerilim/akım
IP kodu : IPX5
Şarj adaptörü (HX-SV0500800)
Anma girişi : 100 - 240 V~, 50/60 Hz
Anma çıkışı : 5 V
IP kodu : IP44
Koruma sınıfı : II
Pil
Şarj edilebilir pil : Li-İyon, 3,7 V
: 5 V
500 mAh
71
Page 72

Size - A6
Türkçe
Hazırlık
Şarj güç kaynağının DC fişini şarj soketine ve
1
diğer ucunu uygun bir prize takın.
Ekrandaki
2
pilin şarj edildiğini gösterir. Pil tamamen şarj
olduğunda pil sembolü yeşil renkte
yanar.
İlk kullanımdan önce pili en az 120 dakika şarj
edin. Standart şarjda 90 dakikalık maksimum
şarj süresinin ardından boş pil tamamen dolar
ve bu durum ekrandaki yeşil pil simgesiyle
gösterilir.
Şarj işlemi tamamlandıktan sonra şarj fişini
cihazdan ve şarj güç kaynağını prizden çıkarın.
Not
Şarj etmeden önce ürünün kapalı olduğundan
emin olun.
LED göstergesi
LED Rengi LED Rengi Durumu
Fiş sembolü,
kırmızı
Pil sembolü,
yeşil
Fiş sembolü,
kırmızı, yanıp
söner
İşlem
Cihazdaki düğme
3
• Açma/kapama düğmesine basarak cihazı
açın.
• Cihazı kapamak için açma/kapama
düğmesine yeniden basın.
ışığı kırmızı renkte yanarak
Şarj sırasında ya da prizden
çalışırken.
Şarj tamamlandığında ya da
kablosuz kullanılırken. Tam şarj oldu.
Çalışma sırasında, pil seviyesi %20
’nin altına düştüğünde.
- Ekranda yeşil pil sembolü gösterilir.
- Prizden kullanıldığında yeşil pil sembolü ile
kımızı fil sembolü dönüşümlü yanıp söner.
- Pil sembolü söner.
Sakal tıraşı
4
Not
Aşağıdakilerinden biri sizde varsa bu
ürünü kullanmayın:
- deri lezyonları
- deri iltihabı
- güneş yanığı
- sivilce ve su kabarcığı
Alışma:
Ürünü kullandıktan sonra cildiniz bir
süreliğine kızarabilir ya da tahriş olabilir.
Cildinizin en başta bu tarz tıraşa alışması
gerektiğinden bu normal bir tepkidir.
Kızarıklık ya da tahriş uzun süre devam
ederse bir doktora danışın.
• Koruyucu kapağı çıkarın.
• Açma/kapama düğmesine basarak cihazı
açın.
• Tıraş sırasında cihazı cilt yüzeyine mümkün
olduğunca dik tutun.
• Yanaklar gibi sorunlu alanlarda daha iyi
sonuç elde etmek için boştaki elinizle
cildinizi gerin.
• Sakalınızı tam kesebilmek için sakal uzama
yönünün aksine de tıraş edin.
• Boştaki elinizle cildinize dokunarak tıraşın
nasıl ilerlediğini kontrol edin. Sakalınız tam
olarak kesilmemişse cildinizdeki tüm sakal
kesilene kadar bu işlemi tekrarlayın.
• Kullandıktan sonra açma/kapama
düğmesine basarak cihazı kapatın.
Not
Uzun sakal tıraşı zorlaştıracağından sakalınız
birkaç milimetreden uzun olmamalıdır.
Sakalınız çok uzunsa bıçakla kesim
işleminden önce saç düzeltici ile kesin.
72
Page 73

Türkçe
Islak tıraş
• Yüzünüzü ıslatın ve yüzünüzün tıraş
edilecek kısımlarına ince bir tabaka tıraş
köpüğü sürün.
• Sakal tıraşı bölümünde açıklanan adımları
uygulayın.
Not
Tıraş jeli tıraş başlığında toplanıp sonucu
olumsuz etkileyeceğinden bıçakla ancak
normal tıraş köpüğü kullanılabilir.
Saç düzeltici
5
Cihazın arkasındaki saç düzeltici ile favori gibi
kısımları kesebilirsiniz.
• Cihazın arkasındaki saç düzelticiyi yerine
oturana kadar gittiği yere kadar kaydırın.
• Açma/kapama düğmesine basarak cihazı
açın.
• Saç düzelticiyi düzeltilecek saçın uçlarında
dikkatlice gezdirin ve istenen şekli verin.
• Kullanımdan sonra cihazı açma/kapama
düğmesiyle kapatın ve saç düzelticiyi
yerine oturana kadar geri aşağıya itin.
Düğme kilidinin kullanımı
• Açma/kapama düğmesini kilitlemek için açma/
kapama düğmesini 3 saniyeden uzun süre
basılı tutun. Pil ve priz sembolleri üç defa yanıp
sönerek kilidin etkinleştirildiğini gösterir.
• Açma/kapama düğmesinin kilidini açmak için
yine düğmeyi 3 saniyeden uzun süre basılı
tutun. Tıraş makinesi otomatik kapanır. Tıraş
makinesini kapatmak için yeniden açma/kapama
düğmesine basın. Tıraş makinesini Hazırlık
bölümünde açıklandığı şekilde güç kaynağına
bağlarsanız yine açma/kapama düğmesi kilidi
devre dışı kalır.
Temizleme ve bakım
Uyarı
Temizlerken, çözücüler veya aşındırıcı
malzemeler, sert fırçalar, metalik veya keskin
nesneler kullanmayın. Çözücüler insan sağlığına
zararlıdır ve aşındırıcı temizlik mekanizmaları ve
araçları bir yandan yüzeyleri çizebilirken, plastik
parçalara zarar verebilir.
• Her kullanımdan sonra saçı iyice fırçalayıp
6
üflemek için lütfen temizleme fırçasını
kullanın.
• Her iki yandaki tıraş başlığı çıkarma
düğmelerini kullanarak tıraş başlığını çıkarın.
• Tıraş başlığı da akan su altında temizlenebilir.
Fakat bu işlemden sonra iyice kurutmalısınız.
• Tıraş başlığına hafifçe vurup üfleyin. İki bıçak
bloğunu ve altındaki muhafazayı temizlemek
için temizleme fırçasını kullanın.
• Tıraş başlığını her iki yanda yerine oturacağı
şekilde tıraş makinesinin üzerine yerleştirin.
• Nemli bir bezle cihazın dış yüzeylerini
temizleyin ve ardından tamamen kurulayın.
• Ürünün içine su girmemesine (örneğin,
anahtar yoluyla) dikkat edin. Ürünü nem
ve direk güneş ışığından korunmuş kuru,
serin bir yerde saklayın. Ürünü çocukların
erişebileceği yerlerden uzak tutun.
73
Page 74

Size - A6
Türkçe
Tıraş eleğinin ve bıçak bloklarının
değiştirilmesi
Dikkat
Bıçak blokları keskindir. Yanlışlıkla dokunup
yaralanmaktan sakının.
Bıçağın günde bir defa kullanılacağı var
7
sayıldığında tıraş eleklerinin ve bıçak
bloklarının yılda bir defa değiştirilmesini
öneririz.
1. Tıraş başlığını Temizlik ve bakım (I)
başlıklı bölümde açıklandığı şekilde çıkarın.
2. Tıraş eleği tutucunun (II) kısa yanlarındaki
tırnaklardan birisine bastırın ve tıraş eleğine
tutucusundan tıraş başlığı muhafazasından
(III) kademeli olarak dışarı bastırın. Şimdi
yeni tıraş eleğini tutucusuyla tıraş başlığı
muhafazasına (IV) yerleştirin.
3. Bıçak bloğunu yukarıya doğru çekin ve
yeni bıçak bloklarını braketlerin üzerine (V)
geçirin.
4. Tıraş başlığını Temizlik ve bakım
başlığında açıklandığı şekilde geri tıraş
başlığına bağlayın.
Sorun Giderme
Çalışma sırasında herhangi bir sorun olursa, lütfen aşağıdaki tabloya bakın. Sorunlar Çözüm altında
belirtilen şekilde çözülemiyorsa, lütfen üreticisine başvurun.
Sorun Olası Nedenler
Ürün çalışmıyor • Kesintiye uğramış güç kaynağı
Piller şarj edilirken LED göstergesi
yanmıyor
• Piller boş
• Güç kaynağı yok
• Şarj kablosu ürüne bağlı değil
Entegre pili çıkarın
Uyarı
• Pili çıkarmadan önce ürünün adaptörden
bağlantısının kesildiğinden emin olun.
• Patlama Riski! Pilleri asla değiştirmeyin.
Avrupa Pil Direktifine göre ürünün içindeki pil
normal ev atıklarıyla atılamaz.
1. Vidaları ve muhafazayı çıkarın.
2. Pil tellerini kesin ve pili çıkarın.
• Güç kaynağını kontrol edin
• Pilleri yeniden şarj edin
• Güç kaynağını kontrol edin
• Şarj kablosu bağlantısını
kontrol edin
74
 Loading...