

Page 1
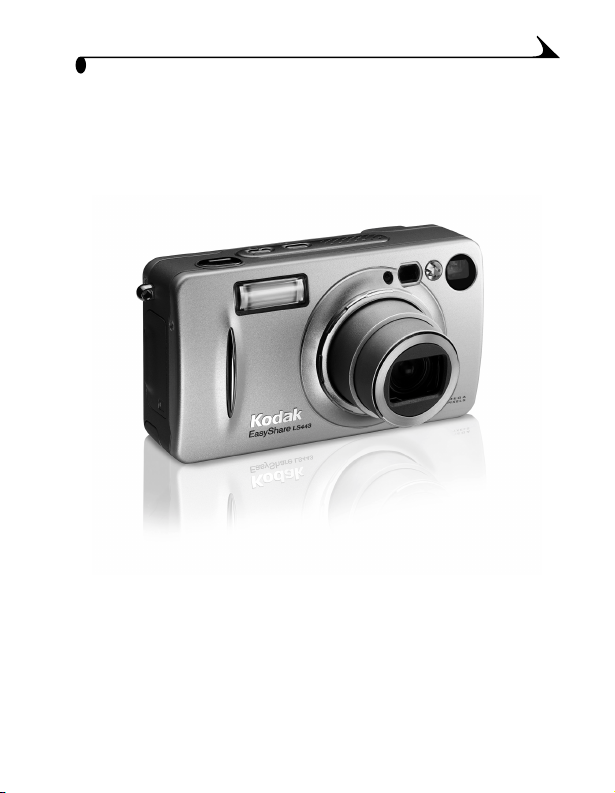
KODAK EASYSHARE
LS443 Zoom Digital Camera
User’s Guide
Visit Kodak on the World Wide Web at www.kodak.com
Page 2

Eastman Kodak Company
343 State Street
Rochester, New York 14650
© Eastman Kodak Company, 2002
Kodak and EasyShare are trademarks of Eastman Kodak Company.
P/N 6B8176
Page 3

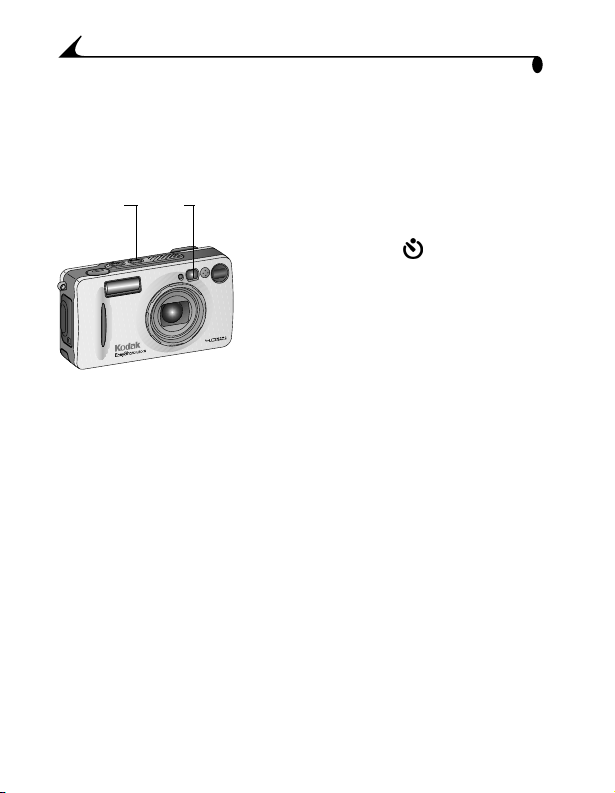
Front View
12
Product Over view
2
1
8
7
6
5
4
3
11
1 Shutter button 7 Microphone
2 Flash button 8 Viewfinder
3 Self Timer/Burst button 9 Lens
4 Speaker 10 Lens thread ring
5 Light sensor 11 Flash unit
6 Low Light Auto Focus/Self timer LED 12 Wrist strap post
9
10
i
Page 4
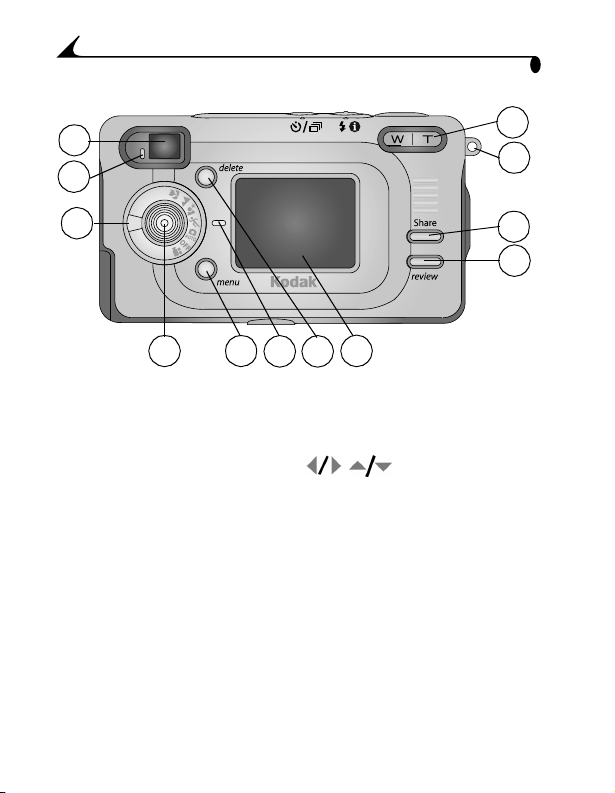
Back View
Produ c t Ove rvie w
12
11
10
5
6
789
1 Zoom (Wide Angle and Telephoto) 7 Power light
2 Wrist strap post 8 Menu button
3 Share button 9 Joystick/OK button
/press
4 Review button 10 Mode dial
5 LCD (picture, video display) 11 Ready light
6 Delete button 12 Viewfinder
1
2
3
4
ii
Page 5
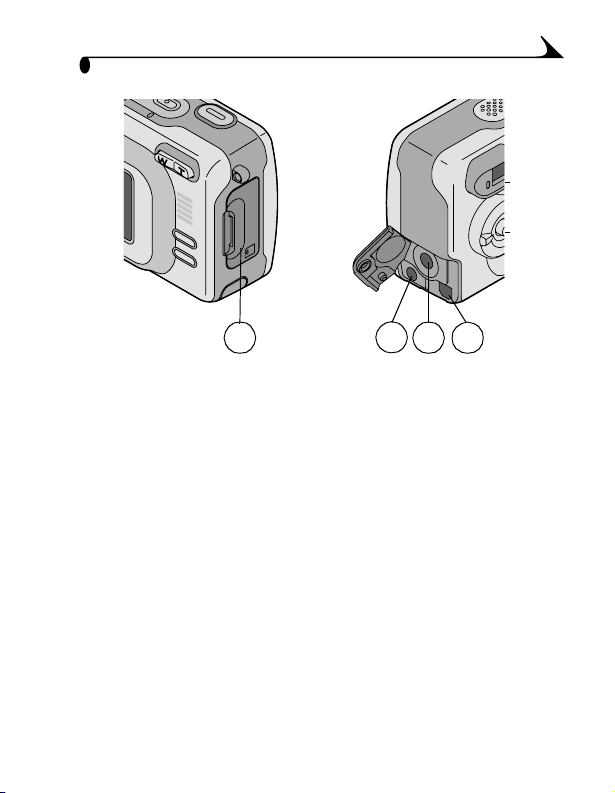
Side Views
Product Over view
1 3
1 Slot for optional MMC/SD card
2 A/V Out
3 DC In
4 USB port
2
4
iii
Page 6
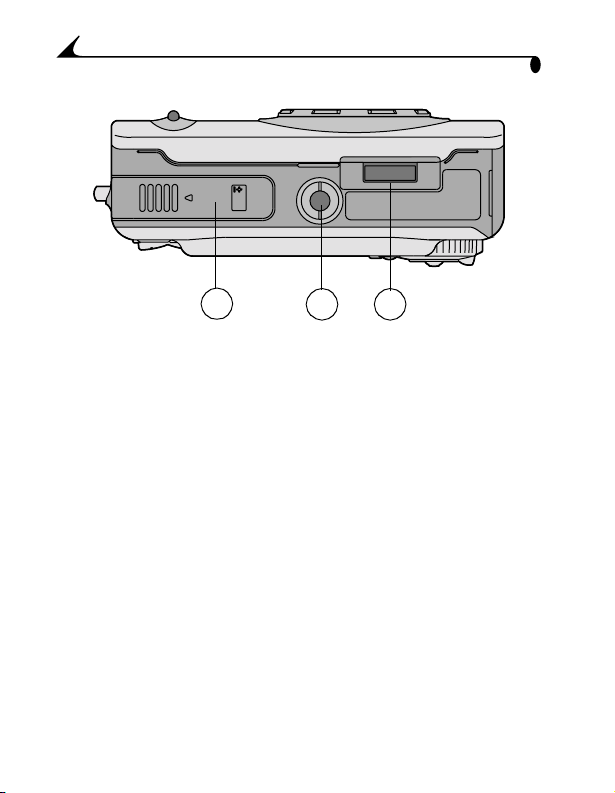
Bottom View
2
Produ c t Ove rvie w
1
1 Battery door
2 Tripod socket
3 Dock connector
iv
32
Page 7

Table of Contents
1 Getting Started ...................................................................1
Install Software First................................................................1
Need This Guide in Larger Print?............................................1
What Can I Do With My Camera?...........................................2
What Can I Do With My Digital Pictures and Videos?.....2
Package Contents..................................................................... 3
Attaching the Wrist Strap.................................................... 4
Loading the Battery.................................................................5
Using the AC Adapter ............................................................. 5
Mode Dial Settings...................................................................6
Turning On the Camera.............................................................7
Setting the Date and Time....................................................8
Checking Camera Status Bar...............................................9
Inserting an MMC/SD Card...................................................10
Choosing Internal Memory or MMC/SD Card....................11
Adding Optional Lenses .........................................................12
2 Taking Pictures .................................................................13
Taking Pictures in Auto Mode..............................................13
Using the Low Light Auto Focus LED................................14
Taking Pictures in Sport Mode............................................14
Taking Pictures in Night Mode.............................................15
Taking Pictures in Landscape Mode...................................16
Taking Pictures in Close-up Mode ....................................... 17
v
Page 8

Liveview—Using the LCD to Frame Your Subject ..........18
Quickview—Reviewing the Picture Just Taken................19
Using the Auto Focus Framing Marks.............................20
Using the Optical Zoom..........................................................21
Using the Advanced Digital Zoom....................................... 21
Using the Flash........................................................................ 22
Putting Yourself in the Picture........................................... 24
Taking a Burst Series of Pictures.....................................25
Still Menus................................................................................26
Setting Exposure Compensation....................................... 27
Setting White Balance ..........................................................28
Setting Picture Quality.........................................................29
Setting Color Mode ................................................................30
Setting Exposure Metering ..................................................31
Setting Focus Zone................................................................32
Setting ISO Speed..................................................................33
Setting Long Time Exposure................................................34
Placing the Date on Pictures..............................................35
Setting the Orientation Sensor........................................ 36
Other Features....................................................................... 36
3 Taking Videos ....................................................................37
Taking a Video........................................................................... 37
Quickview—Reviewing the Video Just Taken...................38
Using the Optical Zoom.........................................................39
Video Menus..............................................................................39
Putting Yourself in the Video ..............................................40
vi
Page 9

4 Reviewing Pictures and Videos .................................... 41
Picture and Video Icons..........................................................41
Viewing Single Pictures and Videos ................................... 42
Viewing Multiple Pictures and Videos ............................... 42
Playing a Video.........................................................................43
Deleting Pictures and Videos..............................................43
Review Menus...........................................................................44
Magnifying Pictures...............................................................44
Protecting Pictures and Videos From Deletion.............45
Running a Slide Show ............................................................46
Copying Pictures and Videos...............................................48
Displaying Video Date............................................................49
Viewing Picture/Video Information.....................................49
5 Tagging Pictures and Videos ........................................ 51
When Can I Tag My Pictures and Videos?..........................51
Tagging Pictures for Printing.............................................. 52
Tagging Pictures and Videos for Emailing.......................53
Tagging Pictures and Videos as Favorites ..................... 54
6 Customizing Your Camera Settings .........................55
To Access Setup Mode/Menus ..........................................55
Setup Menus............................................................................55
Changing the Print Quantity Default ...............................56
Turning Off Quickview.............................................................56
Turning On Liveview in Still Modes......................................57
Turning Off the Shutter Sound...........................................57
vii
Page 10

Turning Off the Low Light Auto Focus LED.....................58
Setting Video Out...................................................................58
Selecting a Language ............................................................59
Formatting Internal Memory or MMC/SD Card............ 60
Viewing Camera Information .................................................61
Changing Advanced Digital Zoom........................................61
7 Installing the Software .................................................63
WINDOWS System Requirements .................................... 63
MAC OS X System Requirements......................................64
MAC OS 8.6 and 9.x System Requirements .................64
Install the Software...............................................................65
8 Connecting to the Computer ......................................67
Using the EASYSHARE LS443 Camera Dock...............67
Connecting With the USB Cable......................................... 72
Printing Pictures from Your Computer............................ 73
9 Troubleshooting ...............................................................75
Troubleshooting—Camera ................................................... 75
Troubleshooting—Camera Dock........................................ 86
10 Getting Help ...................................................................89
Helpful Web Links.................................................................... 89
Help in this Manual................................................................89
Software Help ......................................................................... 89
Telephone Customer Support............................................. 90
viii
Page 11

11 Appendix ............................................................................93
Camera Specifications..........................................................93
Original Factory Settings—Camera ................................95
Upgrading Your Software and Firmware .........................96
Tips, Safety, Maintenance...................................................96
Storage Capacities.................................................................97
Locating Pictures and Videos on a Card.........................98
Card File Naming Conventions ............................................98
Using the Battery ................................................................100
Power-Saving Features.........................................................101
Regulatory Information.........................................................101
ix
Page 12

Page 13

1 Getting Started
Install Software First
Install the software from the KODAK EASYSHARE Software CD before
connecting the camera (or camera dock) to the computer. Failure to do so
may cause the software to load incorrectly.
See the Quick Start Guide or WINDOWS System Requirements, page 63.
Need This Guide in Larger Print?
For a large print version of this User’s Guide:
1 Go to http://www.kodak.com/go/ls443support.
2 Under Explore EasyShare, click Service and Support.
3 Under Manuals/Guides, View PDF, click your language to open the User’s
Guide.
4 With the User’s Guide open on a WINDOWS-based computer or
MACINTOSH OS 8.6 or 9.x:
m From the File menu, select Print.
m In the Print window, select Fit to Page.
5 With the User’s Guide open on MACINTOSH OS X:
m From the File menu, select Page Setup.
m Change Scale to 200%.
6 Print as usual.
1
Page 14

Chapter 1
What Can I Do With My Camera?
Capture Still Pictures —Enjoy point-and-shoot operation with flash,
self timer, and zoom features. Use Auto, Sport, Night, Landscape, and Close-up
modes to expand your capabilities.
Capture Videos with Sound —Capture videos as QUICKTIME movies.
Review —Display, protect, and delete pictures and videos. “Tag”
pictures to print, email, and save as Favorites.
Set Up —Customize your camera functions.
What Can I Do With My Digital Pictures and Videos?
Install the software from the KODAK EASYSHARE Software CD, then:
Transfer—Transfer pictures and videos to your computer.
Share—Print pictures, order prints online, email pictures and videos.
Print—(see page 73) Print pictures directly to your home printer. Order
prints online from Ofoto, a Kodak Company. Or purchase an optional KODAK
Multimedia Card (MMC) or a Secure Digital (SD) card and:
m Automatically print to any printer with an MMC/SD slot
m Make prints at an MMC/SD-capable KODAK Picture Maker
m Take the card to your local photo retailer for professional printing
Organize—Use Favorites to organize, find, and retrieve your pictures on the
computer.
Edit—Add special effects to your pictures, make a custom slide show, fix
red-eye, crop, rotate, and much more.
Refer to the Quick Start Guide or KODAK EASYSHARE Software Help for details.
Some MACINTOSH operating systems may support limited KODAK EASYSHARE
Software features.
2
Page 15
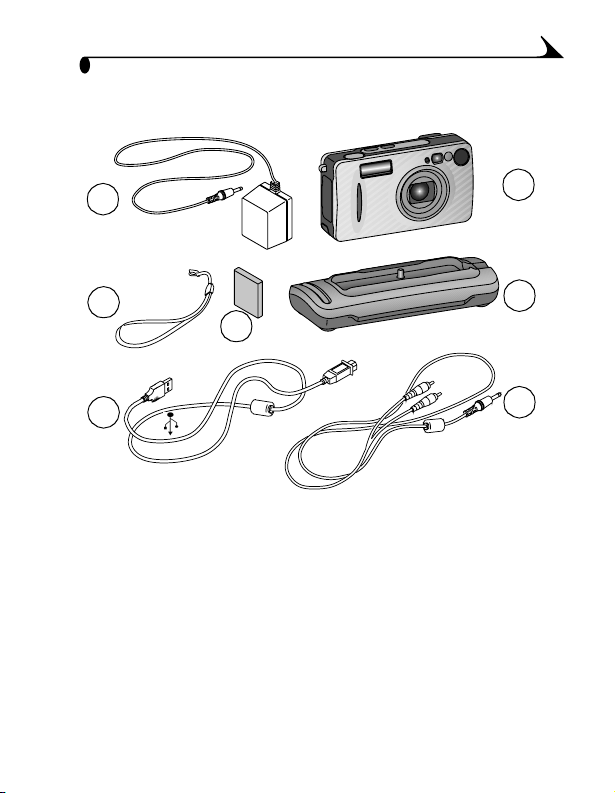
Package Contents
Chapter 1
6
5
7
4
1 Camera 5 Wrist strap
2 Camera Dock 6 AC adapter
3 Audio/Video cable 7 Battery
4 USB cable
Not shown: User’s Guide, Quick Start Guide, KODAK EASYSHARE Software CD.
(In some countries, the User’s Guide is provided on a CD instead of in printed
form.)
1
2
3
3
Page 16

Chapter 1
Attaching the Wrist Strap
1 Thread the short loop of the wrist strap
through the wrist strap post.
2 Thread the long loop through the short
Long
loop
Short
loop
loop. Pull until secure.
4
Page 17
Chapter 1
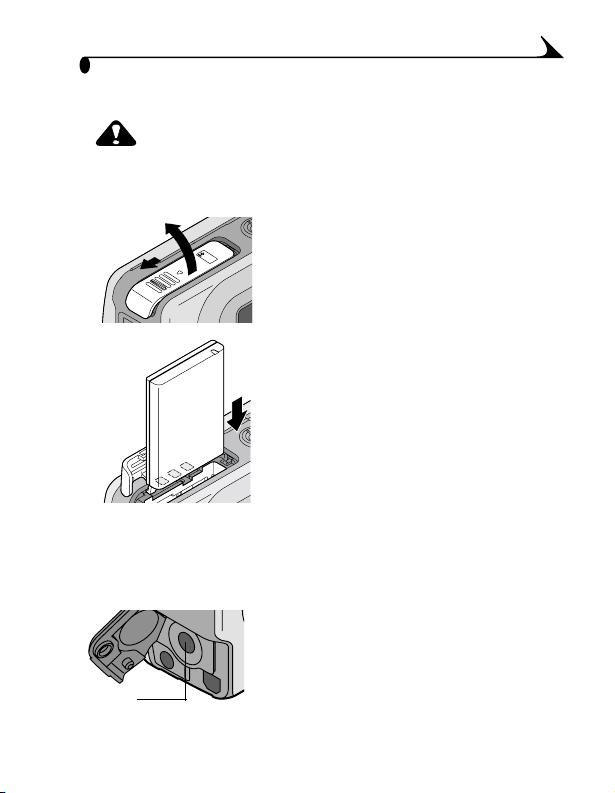
Loading the Battery
CAUTION:
We recommend using only a KODAK EASYSHARE Li-Ion
Rechargeable Battery. For important battery and warranty
information, see Using the Battery, page 100.
2
1
1 Turn off the camera.
2 Open the battery door.
3 Orient the battery as shown.
4 Close the battery door.
NOTE: The battery may need charging the first
time you use it. (See page 71.)
Using the AC Adapter
Use only the battery or supplied AC adapter to power the camera. The adapter
will not charge the battery.
1 Connect the AC adapter to the DC-In port.
2 Connect the other end of the AC adapter to
an electrical outlet.
Purchase batteries and AC adapters at
DC-In
http://www.kodak.com/go/accessories
5
Page 18
Chapter 1
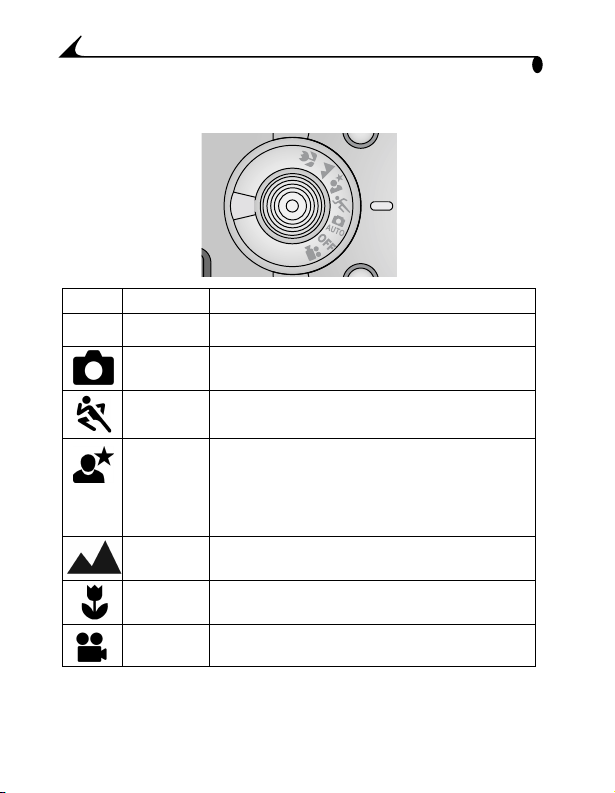
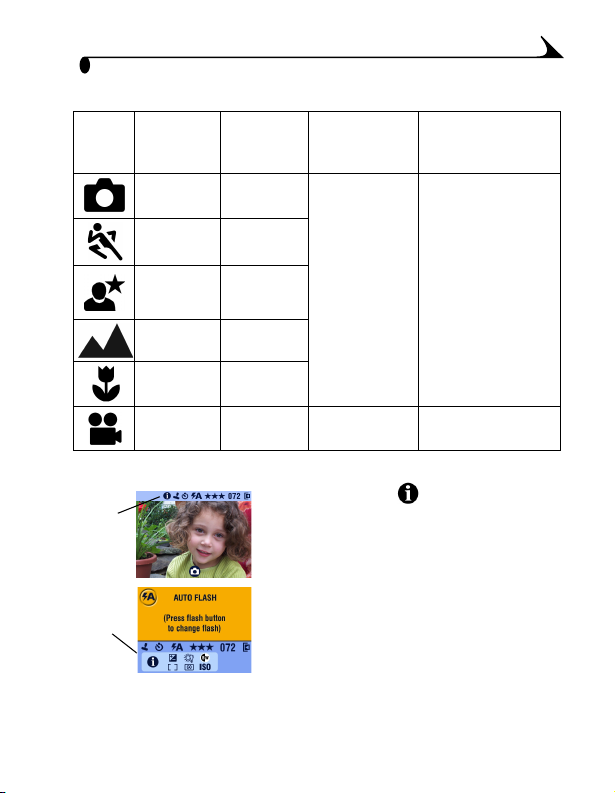
Mode Dial Settings
Icon Mode Purpose
Off Turns off the camera.
Off
Auto For general picture-taking. Automatically sets
Sport For subjects that are in motion. Shutter speed is fast.
Night For night scenes or low light conditions. Captures
Landscape For distant subjects. Flash does not fire unless you
Close-up For subjects 6 to 27.5 in. (13 to 70 cm) from the
Video Captures video with sound. Flash does not fire.
exposure and focus. Flash fires if needed.
Flash fires if needed.
close and background subjects. Flash fires if
needed. In dark scenes, the shutter speed is set
between 1/1700 and 1/2 second. Place camera on a
flat, steady surface or tripod to avoid camera shake.
turn it on.*
lens. Flash does not fire unless you turn it on.*
To use individual modes, see page 13.
* To turn on the flash, see page 22.
6
Page 19
Chapter 1
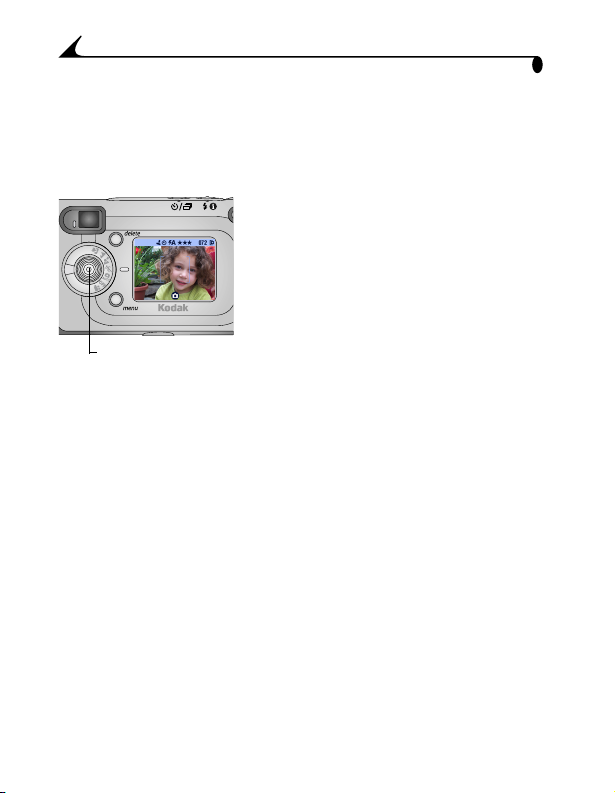
Turning On the Camera
Ready
light
OK
Power
Mode
dial light
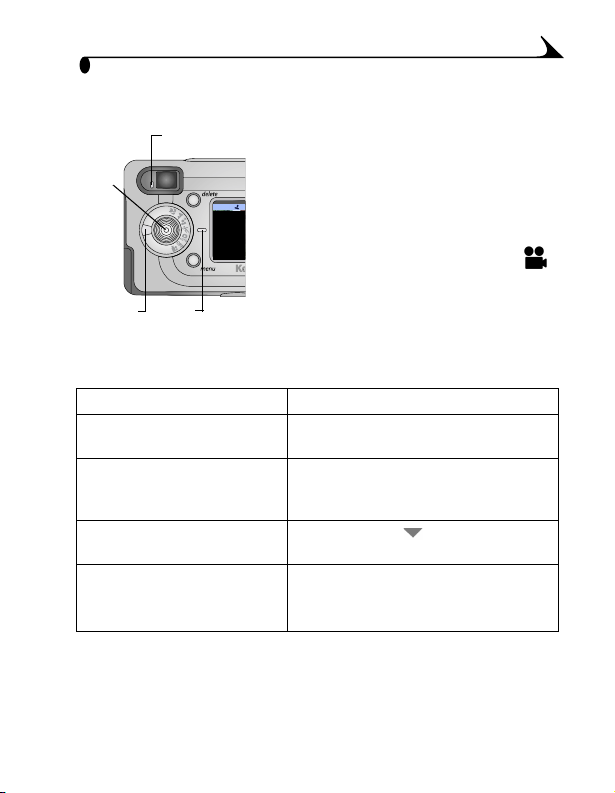
Adjusting the Display
To Do This
Turn Liveview on so that the
LCD can be used as a viewfinder
Change the Liveview setting
so that it is on whenever the
camera is on
Turn the status bar back on
after it times out
Turn off the camera Turn the Mode dial to Off.
Turn the Mode dial from Off to any other
position.
The Power light glows green.
The ready light blinks while the camera
performs a self-check, then glows green
when the camera is ready to take pictures
(or videos, if the mode dial is set to ).
In Still and Video modes, a status bar
appears on the LCD.
Press the OK button. To turn it off, press
the OK button again.
See page 57.
Move the joystick .
The camera completes operations that
are in process.
7
Page 20
Chapter 1
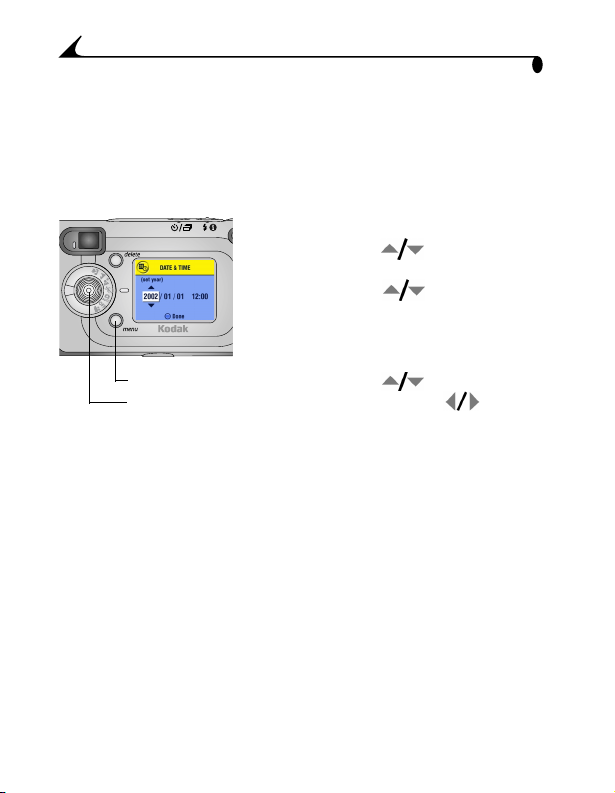
Setting the Date and Time
The Date & Time screen is displayed the first time you turn on the camera or if
the battery is removed for more than 10 minutes. If this is the first time the
camera has been turned on, go to Step 3.
To set the date and time after that:
1 Turn on the camera, then press the Menu
button.
2 Move the joystick to highlight Setup,
then press the OK button.
3 Move the joystick to highlight Date
& Time, then press the OK button.
The date format is YYYY/MM/DD. The time
is displayed in a 24-hour format.
Menu
Joystick/OK
NOTE: Depending on your computer operating system, KODAK EASYSHARE
Software may allow your computer to automatically update the camera
clock when you connect the camera. See the KODAK EASYSHARE
Software Help for details.
4 Move the joystick to adjust the date
and time. Move the joystick to
advance to the next setting.
5 When finished, press the OK button.
6 Press the Menu button to exit the menu.
The setting remains until you change it.
8
Page 21
Chapter 1
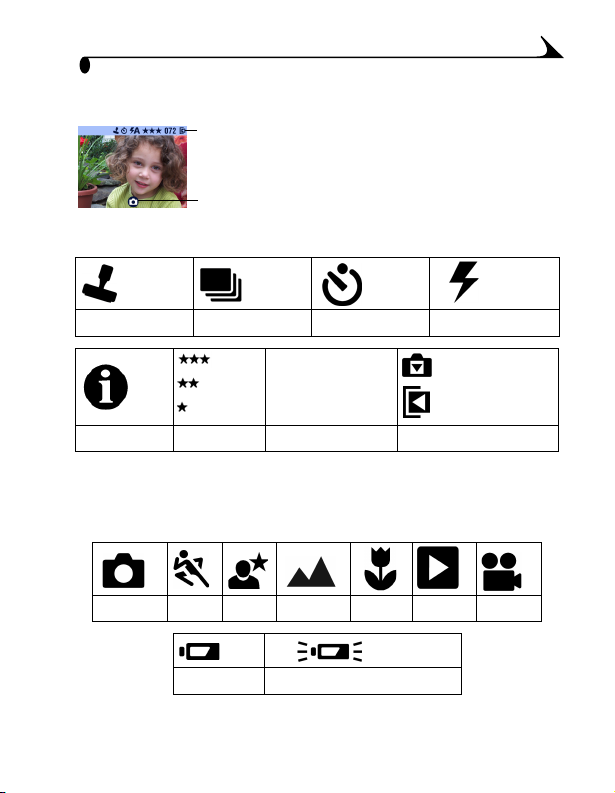
Checking Camera Status Bar
Status
Bar
Screen
Icon
Status Bar Icons (Top of LCD)
Date stamp Burst Self Timer Flash mode
To check the current camera settings, turn
the Mode dial from the Off position.
For flash icons, see page 22.
For Share icons, see page 51.
Best
Better
Good
Custom Quality Pictures remaining Current Storage location
072
Internal memory
Memory Card
Screen Icons (Bottom of LCD)
Auto Sport Night Landscape Close-up Review Video
Low battery Exhausted battery (blinking)
9
Page 22
Chapter 1
Inserting an MMC/SD Card
Optional MMC/SD cards provide removable, reusable storage for pictures and
videos.
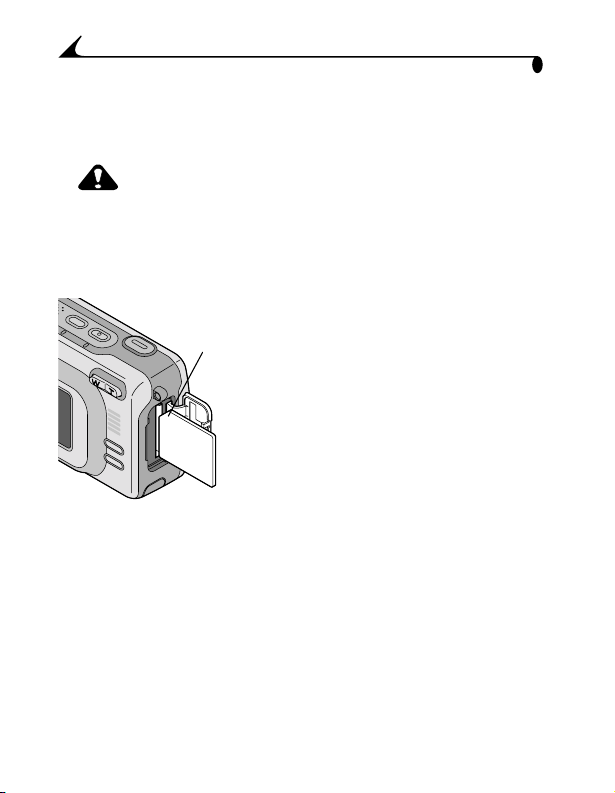
CAUTION:
The card can only be inserted one way; forcing it may
damage the camera or card.
Do not insert or remove a card when the green ready light
is blinking; doing so may damage your pictures, card, or
camera.
Notched
corner
of card
See page 97 for storage capacities. Purchase accessories at your KODAK retail
dealer or http://www.kodak.com/go/accessories.
To insert an MMC/SD card:
1 Turn off the camera.
2 Open the card door.
3 Orient the card as shown on the card door.
4 Push the card into the slot to seat the
connector. (To remove the card, turn off
the camera. Push the card in, then release
it. When the card is partially ejected, pull it
out.)
5 Close the door.
10
Page 23
Chapter 1
Choosing Internal Memory or MMC/SD Card
The camera offers two options for storing pictures and videos:
Internal Memory —store pictures and videos in internal memory.
MMC/SD Card —store as many pictures and videos as you like,
depending on the size of the card. Purchase accessories at your KODAK retail
dealer or http://www.kodak.com/go/accessories. For storage capacities, see
page 97.
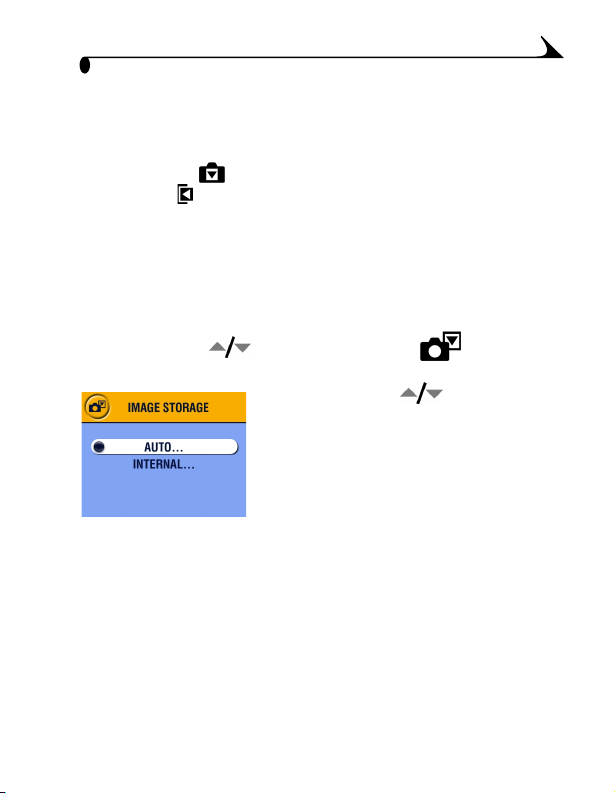
Managing Your Storage Location Setting
1 Turn on the camera.
2 Press the Menu button.
3 Move the joystick to highlight Image Storage , then press the
OK button.
4 Move the joystick to highlight an
option, then press the OK button:
Auto (default)—the camera uses the card
if one is in the camera. If not, the camera
uses internal memory.
Internal Memory—the camera always
uses internal memory, even if a card is
installed.
5 Highlight Continue, then press the OK button again.
6 The setting remains until you change it and applies to all camera functions.
7 Press the Menu button to exit the menu.
11
Page 24
Chapter 1
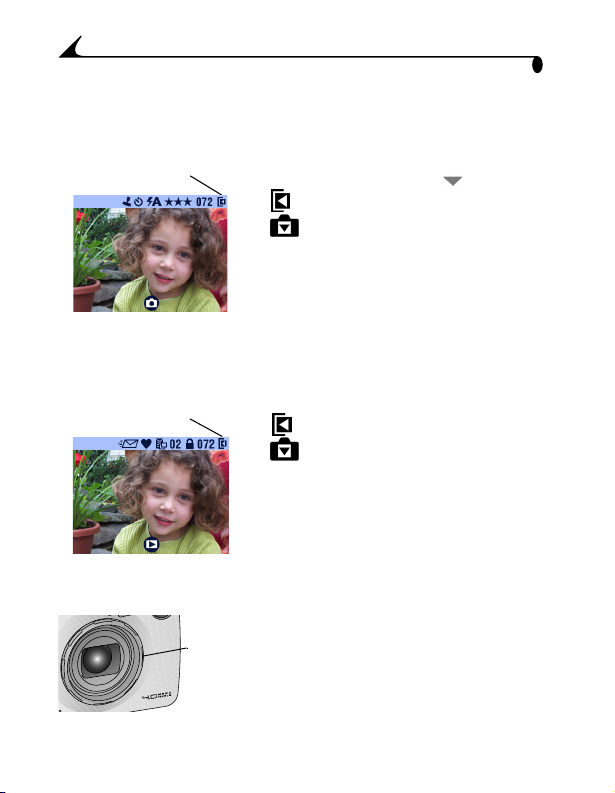
Checking Your Storage Setting
In Still and Video modes, the storage location icon that appears in the status
bar indicates the camera’s storage location. To check the location, either:
Picture or video
location
m Turn the Mode dial from the Off position, or
m In any capture mode, press .
—Memory Card
—Internal Memory
Checking a Picture or Video’s Location
In Review mode, the storage location icon that appears with a picture
indicates the location of the picture or video and the camera setting.
Picture or video
location
Press the Review button.
—Picture or video is stored on a card
—Picture or video is stored in internal
memory
Adding Optional Lenses
Purchase optional lenses at your Kodak
Lens
thread
ring
retail dealer or on our Web site at
http://www.kodak.com/go/accessories.
Turn the lens thread ring counterclockwise
to remove it; then mount a lens.
12
Page 25
2 Taking Pictures
The camera is ready to take pictures when you turn it on—even if you are in
Review, Share, or Setup. (In Video mode, the camera captures video.) Before
you take a picture, make sure your picture storage location is set the way you
want it (see page 11).
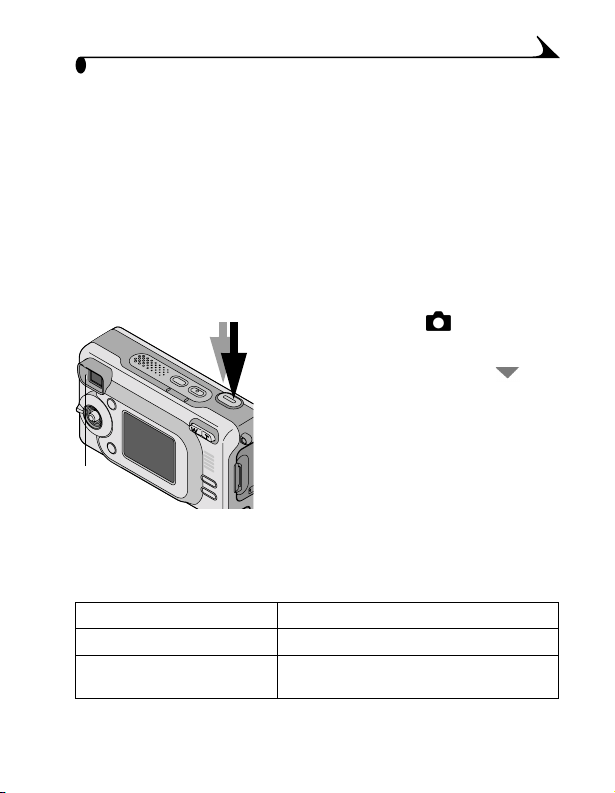
Taking Pictures in Auto Mode
Use Auto for general picture-taking. Exposure, focus, and flash are automatic.
1 Turn the Mode dial to .
The LCD displays a mode description. To
interrupt the description, press .
2 Use the viewfinder or LCD to frame your
subject. (To turn the LCD Liveview on or off,
press the OK button.)
3 Press the Shutter button half-way to set
Ready
light
4 When the ready light glows green, continue pressing the Shutter button
completely down to take the picture.
When the ready light blinks green, the picture is being saved; you can
still take pictures. If the ready light is red, wait until it turns green.
Default flash setting: Auto
Available flash settings: Auto, Flash Off, Fill Flash, Red-eye
Camera returns to default: When you change modes or turn off the
the exposure and focus. (Otherwise, picture
could be too dark, too light, or blurry.)
camera.
13
Page 26

Chapter 2
Using the Low Light Auto Focus LED
Low Light
Auto Focus LED
When the Shutter button is pressed half-way
down in low light, the Low Light Auto Focus LED
may emit a brief beam of light. This light
illuminates the subject so that:
m The camera can focus more effectively.
m You get better pictures.
To turn off the Low Light Auto Focus LED,
see page 58.
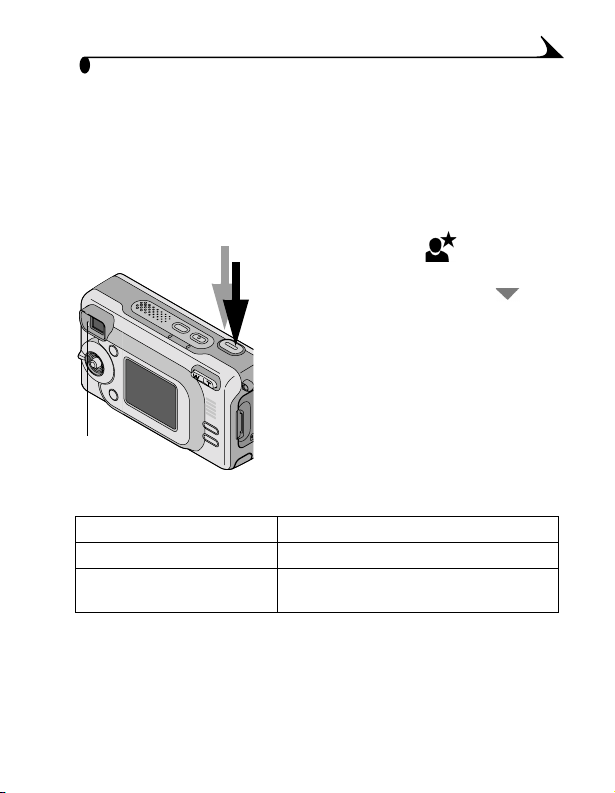
Taking Pictures in Sport Mode
Use this mode when the subject is in motion.
1 Turn the Mode dial to .
The LCD displays a mode description. To
interrupt the description, press .
2 Press the Shutter button half-way to set
the exposure and focus.
3 When the ready light glows green, continue
pressing the Shutter button completely
down to take the picture.
Ready
light
Default flash setting: Auto
Available flash settings: Auto, Flash Off, Fill Flash, Red-eye
Camera returns to default: When you change modes or turn off the
The ready light blinks green while the
picture is saved.
camera.
14
Page 27
Chapter 2
Taking Pictures in Night Mode
Use this mode for night scenes or low light conditions. The flash illuminates
close subjects. A longer exposure captures more detail of background
subjects. The Low Light Auto Focus LED (see page 14) turns on as needed to
assist with focus and capture in low light.
NOTE: To avoid blurry pictures caused by slow shutter speed, place the camera
on a flat, steady surface or use a tripod.
1 Turn the Mode dial to .
The LCD displays a mode description. To
interrupt the description, press .
2 Press the Shutter button half-way to set
the exposure and focus.
3 When the ready light glows green, continue
pressing the Shutter button completely
down to take the picture.
The ready light blinks green while the
Ready
light
Default flash setting: Auto
Available flash settings: Auto, Flash Off, Fill Flash, Red-eye
Camera returns to default: When you change modes or turn off the
picture is saved.
camera.
15
Page 28
Chapter 2
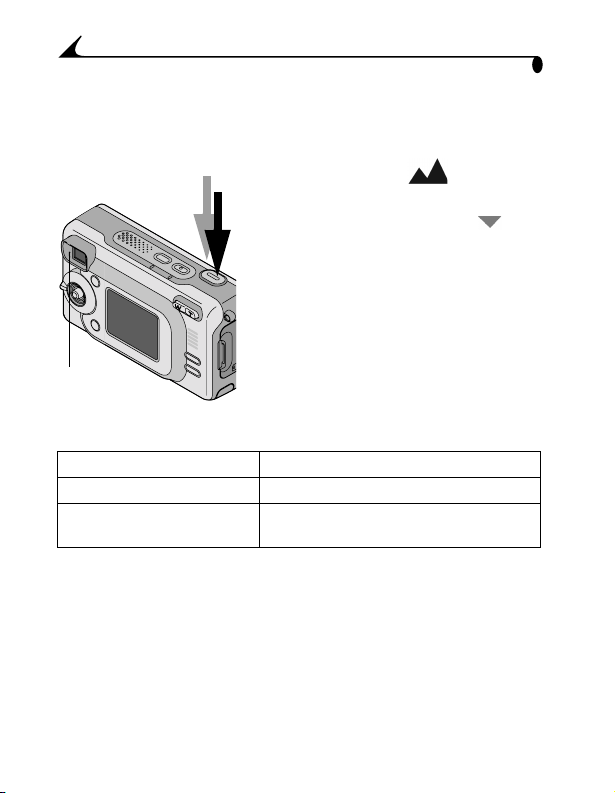
Taking Pictures in Landscape Mode
Use this mode to capture distant subjects, such as landscape scenes.
1 Turn the Mode dial to .
The LCD displays a mode description. To
interrupt the description, press .
2 Press the Shutter button half-way to set
the exposure.
3 When the ready light glows green, continue
pressing the Shutter button completely
down to take the picture.
The ready light blinks green while the
Ready
light
Default flash setting: Off
Available flash settings: Auto, Flash Off, Fill Flash, Red-eye
Camera returns to default: When you change modes or turn off the
picture is saved.
camera.
16
Page 29

Chapter 2
Taking Pictures in Close-up Mode
Use this mode to capture subjects 6 to 27.5 in. (13 to 70 cm) from the lens.
1 Turn the Mode dial to .
The LCD displays a mode description. To
interrupt the description, press .
2 Press the Shutter button half-way to set
the exposure and focus.
3 When the ready light glows green, continue
pressing the Shutter button completely
down to take the picture.
The ready light blinks green while the
Ready
light
Default flash setting: Off
Available flash settings: Auto, Flash Off, Fill Flash, Red-eye
Camera returns to default: When you change modes or turn off the
picture is saved.
camera.
17
Page 30
Chapter 2
Liveview—Using the LCD to Frame Your Subject
When you turn on Liveview, the LCD displays a live image of what the lens sees.
Use the LCD to frame your subject.
1 Turn the Mode dial to any Still position.
2 Press the OK button to turn on Liveview.
3 Frame your subject in the LCD.
4 Press the Shutter button half-way to set
the exposure and focus, then continue
pressing completely down to take the
picture.
OK
To use the Auto Focus Framing Marks, see page 20.
To change the Liveview setting so that it is on whenever the camera is on, see
page 57.
5 To turn off Liveview, press the OK button.
NOTE: Liveview quickly depletes battery power.
To conserve battery power, turn off
Liveview and use the Viewfinder to frame
your subject.
18
Page 31

Chapter 2
Quickview—Reviewing the Picture Just Taken
After you take a picture, the LCD displays a Quickview of that picture for
approximately 5 seconds. While the picture is displayed, you can:
Delete Share
To save battery power, you can turn off the Quickview feature. (See page 56.)
m Review it: If you take no action, the picture
is saved.
m Share it: Press the Share button to tag the
picture for print, email, or as a Favorite.
(See Tagging Pictures and Videos, page 51.)
m Delete it: Press the Delete button while the
picture and are displayed. Follow the
prompts to delete the picture.
NOTE: Only the final of a burst series of pictures
(see page 25) is displayed during
Quickview. If Delete is selected, all
pictures in the burst series are deleted.
To delete selectively, do so in Review
(see page 43).
19
Page 32
Chapter 2
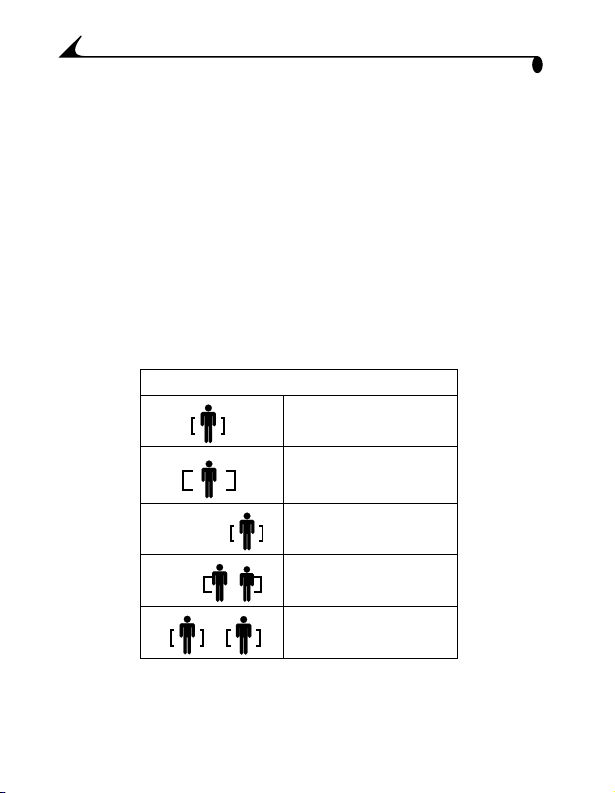
Using the Auto Focus Framing Marks
For the best possible pictures, the camera attempts to focus on foreground
subjects (even if the subjects are not centered in the scene).
NOTE: Auto Focus framing marks appear only when the LCD is turned on.
Framing marks do not appear in Landscape mode. When the focus is set
to Center Zone, focus is fixed at Center wide (see page 32).
1 In any Still mode (except Landscape), press the OK button.
The LCD turns on.
2 Press the Shutter button half-way to set the exposure and focus.
3 The Auto Focus framing marks depict the main focus area or areas. If the
camera is not focusing on the desired subject (or if the framing marks
disappear), release your finger, recompose the scene, and repeat Step 2.
When the framing marks turn red, focus is accomplished.
While Shutter Button is Pressed Half-way
Center focus
Center wide focus
Side focus
Center and side focus
Left and right focus
4 Continue pressing the Shutter button completely down to take the
picture.
20
Page 33
Chapter 2
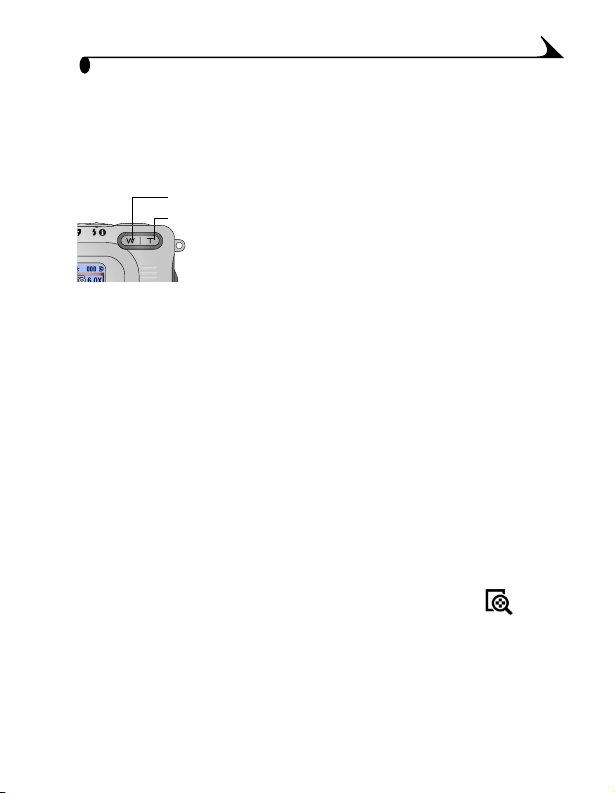
Using the Optical Zoom
Use Optical Zoom to get up to 3X closer to your subject. When you turn on the
camera, the lens extends to the Wide Angle position.
1 Use the viewfinder or LCD to frame your
Wide angle
Telephoto
subject.
2 Press the Telephoto (T) button to zoom in.
Press Wide Angle (W) button to zoom out.
The lens extends or retracts. The
viewfinder or LCD displays the zoomed
image.
3 Press the Shutter button half-way to set the exposure and focus, then
continue pressing completely down to take the picture.
NOTE: The lens retracts when the camera is turned off.
Using the Advanced Digital Zoom
Use Advanced Digital Zoom to get an additional 3.3X magnification beyond
Optical Zoom.
IMPORTANT: Even with the camera’s Advanced Digital Zoom, you
1 Press the OK button to turn on Liveview.
2 Press the Telephoto (T) button to the Optical Zoom limit. Release the
button, then press it again.
The LCD displays the zoomed image and the magnification .
NOTE: You can change the way the digital zoom is turned on. See page 61.
3 Press the Shutter button half-way to set the exposure and focus, then
completely down to take the picture.
may notice a decrease in printed image quality when
using Digital Zoom.
6.0X
21
Page 34
Chapter 2
Using the Flash
Use the flash when you take pictures at night, indoors, or outdoors in heavy
shadows. The flash setting can be changed in any Still mode; the default flash
setting is restored when you exit the mode or turn off the camera.
Flash Range
m Wide angle: 1.5 to 10.8 ft (0.5 to 3.3 m)
m Telephoto: 1.5 to 6.2 ft (0.5 to 1.9 m)
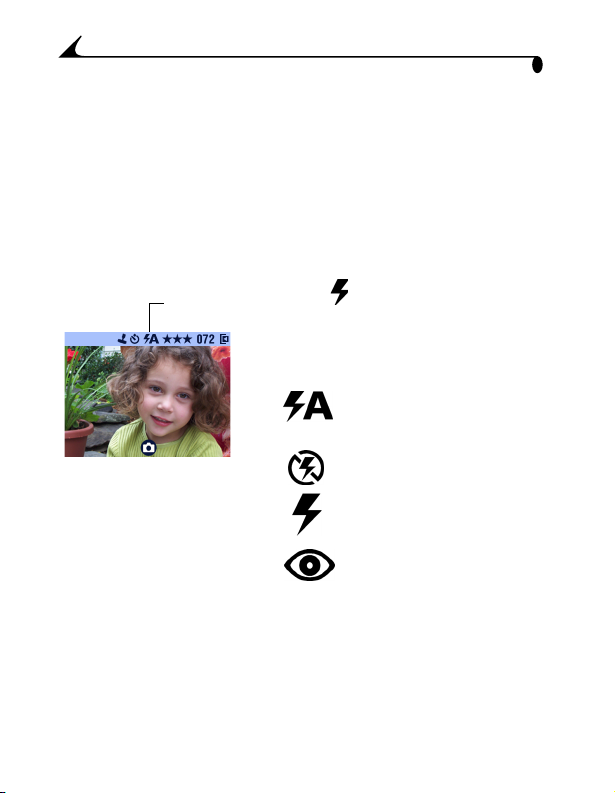
Turning On The Flash
Flash
Setting
Press the button repeatedly to scroll
through the flash options.
The flash icon that is displayed on the
LCD status bar (page 9) is the active
option.
Auto Flash—flash fires when
the lighting conditions require
it.
Off—flash never fires.
Fill—flash fires every time you
take a picture, regardless of the
lighting conditions.
Red-eye—flash fires once so
the subject’s eyes become
accustomed to the flash, then
fires again when the picture is
taken.
22
Page 35
Chapter 2
Flash Settings In Each Mode
Icon Mode Default
Flash
Setting
Auto Auto or
Red-eye
Sport Auto
Night Auto
Landscape Off
Close-up Off
Video Off None Flash cannot be
Available
Flash Settings
Auto, Flash Off,
Fill Flash,
Red-eye
Other Flash Screen Information
When the Custom icon appears in the
Custom
icon
Current
features
status bar, press the Flash button.
The LCD displays the features that are
currently set.
Camera Returns to
the Default Flash
Setting
When you exit the
mode or turn off the
camera
turned on
23
Page 36
Chapter 2
Putting Yourself in the Picture
The Self Timer creates a 10-second delay between the time you press the
Shutter button and the time the picture is taken.
1 Place the camera on a flat surface or use a
Self
Timer
Self
Timer
light
tripod.
2 In any Still mode, press the Self Timer
button.
The Self Timer icon appears on the
status bar.
3 Compose the scene. Then press the Shutter
button half-way to set the exposure and
focus, then continue pressing completely
down. Move into the scene.
The white Self Timer light blinks slowly
for 8 seconds (then quickly for 2 seconds)
before the picture is taken.
The Self Timer turns off after you take the
picture or if you change modes.
To cancel the Self Timer before the
picture is taken, press the Self Timer
button. (The Self Timer setting remains
active.)
24
Page 37

Chapter 2
Taking a Burst Series of Pictures
Burst lets you to take up to 3 pictures in quick succession. Burst is ideal for
taking pictures of sporting events or moving objects. When you use the Burst
feature, the Flash and the Self Timer are disabled.
Turn On Burst
In any Still mode, press the Self Timer
button twice.
The Burst icon appears on the status
bar.
NOTE: The setting remains until you change it
or turn off the camera.
Take the Pictures
1 Press the Shutter button half-way to set the auto-focus and exposure for
all the pictures in the sequence.
2 Continue pressing and holding the Shutter button completely down to
take the pictures.
The camera takes up to 3 pictures in quick succession. It stops taking
pictures when the Shutter button is released, when 3 pictures are
taken, or when there is no more storage space.
Exposure, focus, white balance, and orientation that are set for the
first picture are applied to all 3 pictures.
25
Page 38
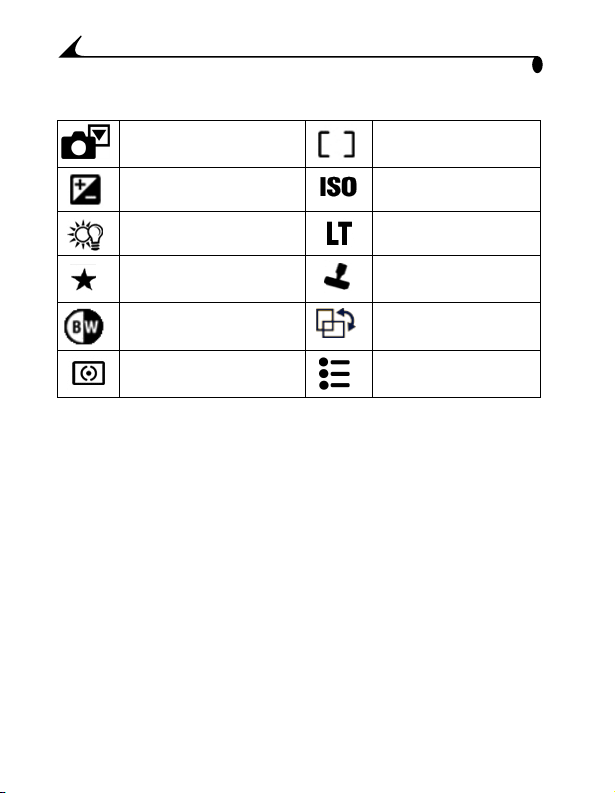
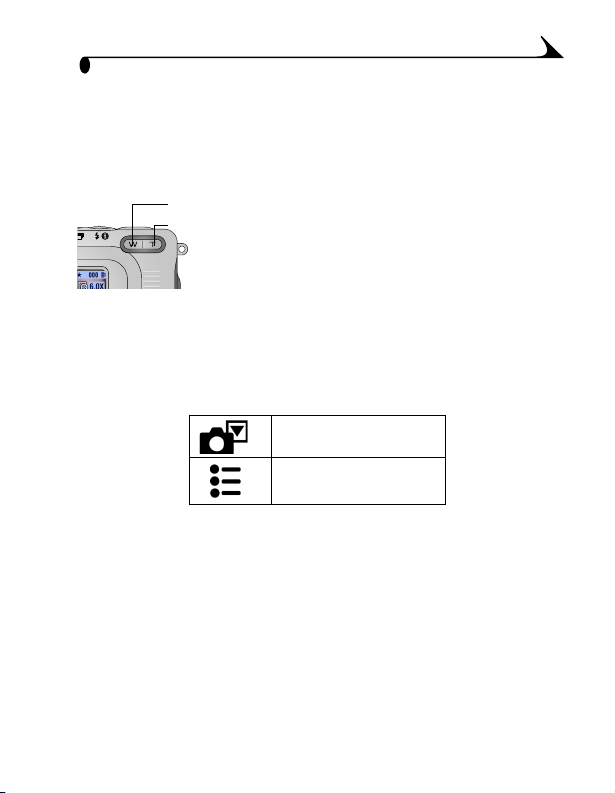
Still Menus
Image Storage(page 11) Focus Zone (page 32)
Chapter 2
26
Exposure Compensation
(page 27)
White Balance (page 28) Long Time Exposure
Picture Quality (page 29) Date Stamp (page 35)
Color Mode (page 30) Orientation Sensor
Exposure Metering
(page 31)
ISO Speed (page 33)
(page 34)
(page 36)
Setup Menu (page 55)
Page 39
Chapter 2
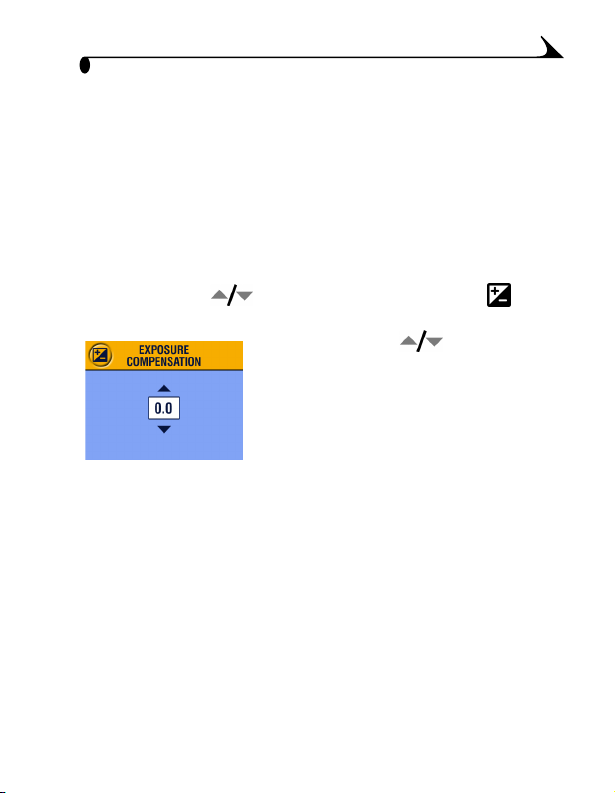
Setting Exposure Compensation
Use Exposure Compensation to control how much light enters the camera. This
setting is useful for taking pictures in very large rooms, under low light,
without a flash.
Adjust the exposure by plus or minus 2 steps in 1/2-step increments.
NOTE: Exposure Compensation cannot be used with Long Time Exposure.
1 In any Still mode, press the Menu button.
2 Move the joystick to highlight Exposure Compensation , then
press the OK button.
3 Move the joystick to select the
Exposure Compensation setting.
m If pictures are too light, decrease the
value.
m If pictures are too dark, increase the
value.
4 Press the OK button to accept the change.
5 Press the Menu button to exit the menu.
6 Use the LCD to frame your subject. Press the
Shutter button half-way to set the focus,
then continue pressing completely down
to take the picture.
This setting remains until you move the
Mode dial or turn off the camera.
27
Page 40
Chapter 2
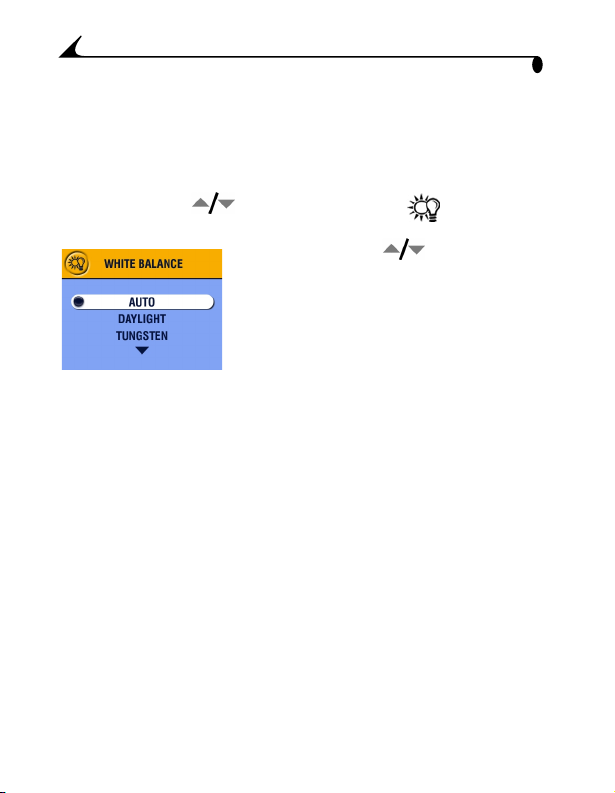
Setting White Balance
Whites can look white in daylight, but different under other lighting conditions.
Use White Balance to correct the color shifts that result from shooting pictures
under different light sources.
1 In any Still mode, press the Menu button.
2 Move the joystick to highlight White Balance , then press the
OK button.
3 Move the joystick to highlight an
option, then press the OK button.
Auto (default)— automatically corrects
white balance. Ideal for general picture
taking.
Daylight—for pictures in natural
lighting.
Tungsten—corrects the orange cast of
household light bulbs. Ideal for indoor
pictures under tungsten or halogen
lighting without flash.
Fluorescent—corrects the green cast of
fluorescent lighting. Ideal for indoor
pictures under fluorescent lighting
without flash.
4 Press the Menu button to exit the menu.
This setting remains until you change it
or turn off the camera.
28
Page 41
Chapter 2
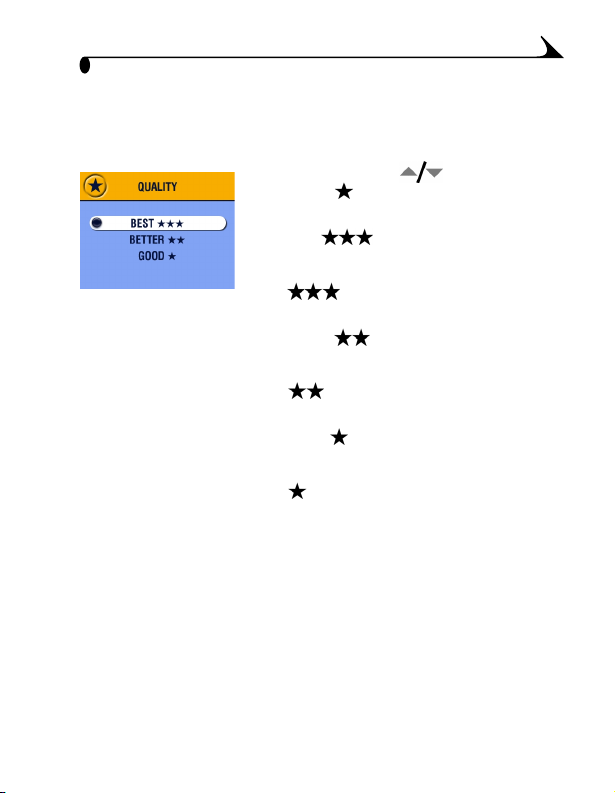
Setting Picture Quality
Use the Quality setting to select a picture resolution.
1 In any Still mode, press the Menu button.
2 Move the joystick to highlight
Quality , then press the OK button.
3 Highlight an option:
Best (4.0 MP)—for printing up
to 20 x 30 in.(50 x 75 cm); pictures are
highest resolution and largest file size.
appears on the status bar.
Better (2.2 MP)—for printing up
to 8 x 10 in. (20 x 25 cm); pictures are
medium resolution with smaller file size.
appears on the status bar.
Good (1.0 MP)—for emailing,
Internet, or screen display; pictures are
lowest resolution and smallest file size.
appears on the status bar.
4 Press the OK button.
5 Press the Menu button to exit the menu.
6 This setting remains until you change it.
29
Page 42

Chapter 2
Setting Color Mode
Use Color Mode to control color tones and moods.
1 In any Still mode, press the Menu button.
2 Move the joystick to highlight Color Mode , then press the OK
button.
3 Move the joystick to highlight an
option, then press the OK button.
Color (default)—for color pictures
Black & White—for black-and-white
pictures
Sepia—for pictures with a
reddish-brown, antique look
4 Press the Menu button to exit the menu.
This setting remains until you change it
or turn off the camera.
30
Page 43

Chapter 2
Setting Exposure Metering
Use Exposure Metering to ensure that the proper amount of light enters the
camera lens.
1 In any Still mode, press the Menu button.
2 Move the joystick to highlight Exposure Metering , then press
the OK button.
3 Move the joystick to highlight an
option, then press the OK button.
Multi-patterned— evaluates lighting
conditions throughout the image to give
an optimum picture exposure. Ideal for
general picture taking.
Center-weighted—evaluates the
lighting conditions of the subject centered
in the viewfinder. Ideal for backlit
subjects.
Center-spot—similar to
Center-weighted, except the metering is
concentrated on a smaller area of the
subject centered in the viewfinder. Ideal
when an exact exposure of a specific area
in the picture is needed.
4 Press the Menu button to exit the menu.
This setting remains until you change it.
31
Page 44

Chapter 2
Setting Focus Zone
Use the Focus Zone to select a large or a concentrated area of focus.
1 In any Still mode, press the Menu button.
2 Move the joystick to highlight Focus Zone , then press the OK
button.
3 Move the joystick to highlight an
option, then press the OK button.
Multi-zone (default)— evaluates 3
zones to give an even picture focus. Ideal
for general picture taking.
See Using the Auto Focus Framing Marks,
page 20.
Center zone—evaluates the small area
centered in the viewfinder. Ideal when
precise focus of a specific area in the
picture is needed.
4 Press the Menu button to exit the menu.
This setting remains until you change it.
32
Page 45

Chapter 2
Setting ISO Speed
The ISO setting controls the camera’s sensitivity to light. Use a lower ISO setting
in brightly lit scenes; use a higher ISO setting for low-light scenes.
NOTE: Higher ISO speeds may create a picture that is “noisier” than a picture
taken at lower ISO speeds. These settings are available only in Auto,
Landscape, and Close-up modes.
1 Press the Menu button.
2 Move the joystick to highlight ISO Speed , then press the OK
button.
3 Move the joystick to highlight an
option, then press the OK button.
AUTO (default)—sets an ISO speed based
on scene brightness. Ideal for general picture
taking.
ISO 100—for daylight pictures in bright
sun, when fine detail is needed. Ideal for
portraits or nature scenes.
ISO 200—for cloudy, overcast days. Ideal
when you need extra speed without
sacrificing image quality.
ISO 400—for dusk or night pictures when
flash is prohibited. Ideal for sporting events
and excellent for indoor shots with or without
flash.
4 Press the Menu button to exit the menu.
This setting remains until you change it or turn off the camera.
33
Page 46

Chapter 2
Setting Long Time Exposure
Use Long Time Exposure to control how long the shutter stays open. Settings
are: Off, 0.7, 1, 1.5, 2, 3, and 4 seconds.
NOTE: Long Time Exposure cannot be used with Exposure Compensation. If
ISO speed has been changed, it is reset to Auto.
Set Long Time Exposure
1 In any Still mode, press the Menu button.
2 Move the joystick to highlight Long Time Exposure , then press
the OK button.
3 Move the joystick to select an
option, then press the OK button.
4 Press the Menu button to exit the menu.
Take the Picture
1 Place the camera on a flat surface or use a tripod.
2 Use the LCD to frame your subject. Press the Shutter button half-way to
set the focus, then continue pressing completely down to take the
picture.
This setting remains until you move the Mode dial or turn off the
camera.
Default flash setting: Off
Available flash settings: Auto, Flash Off, Fill Flash, Red-eye
Camera returns to default: When you change modes or turn off the
camera.
34
Page 47

Chapter 2
Placing the Date on Pictures
Use the Date Stamp setting to imprint the date on your pictures.
1 Make sure the camera clock is set to the correct date (page 8).
2 In any Still mode, press the Menu button.
3 Move the joystick to highlight Date Stamp , then press the OK
button.
4 Move the joystick to highlight an
option, then press the OK button.
5 Press the Menu button to exit the menu.
The current date is printed in the bottom
right corner of new pictures. This setting
remains until you change it.
35
Page 48
Chapter 2
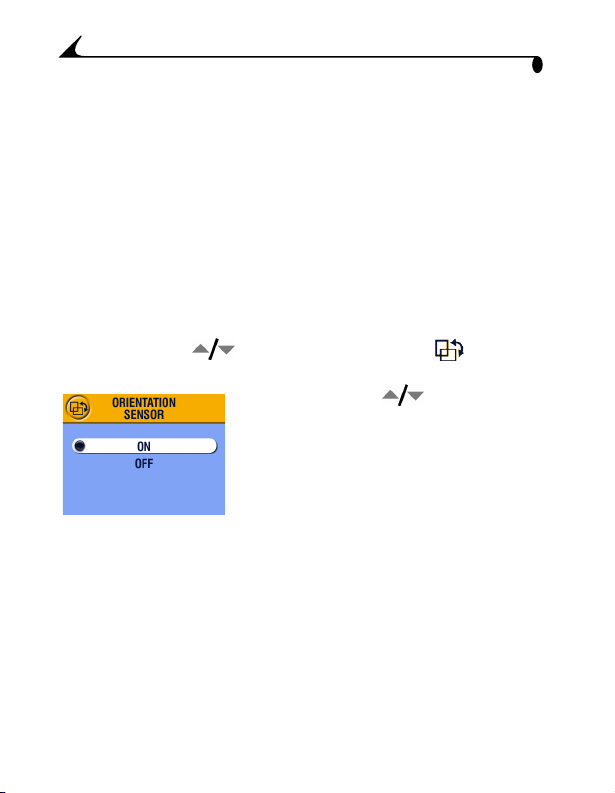
Setting the Orientation Sensor
If you rotate the camera to take a picture (for example, a portrait shot), the
Orientation Sensor reorients the picture so that it is displayed correct side up.
The Orientation Sensor is turned on as the default. You can turn it off so that
pictures are displayed in their original orientation.
NOTE: When your subject is above or below you (such as pictures of an object
in the sky, on the ground, or when pointing down at small objects on a
table), turn off the Orientation Sensor so that pictures are not
rotated unnecessarily.
1 In any Still mode, press the Menu button.
2 Move the joystick to highlight Orientation Sensor , then press
the OK button.
3 Move the joystick to highlight On or
Off, then press the OK button.
4 Press the Menu button to exit the menu.
This setting remains until you change it.
Other Features
m Choosing Internal Memory or MMC/SD Card, page 11
m Taking Videos, page 37
m Tagging Pictures and Videos, page 51
36
Page 49

3 Taking Videos
Use the Video setting to take videos or to customize video-taking settings.
Before you take a video, make sure your picture storage location is set the way
you want it (see page 11).
NOTE: Flash is not available in Video mode. You can change Optical Zoom
before (but not during) video recording.
Taking a Video
1 Turn the Mode dial to Video .
A live image, the status bar, and the
recording time available appear on the
LCD.
2 Use the viewfinder or LCD to frame your
subject.
NOTE: To conserve battery power, press the OK
button to turn off the LCD.
3 Press the Shutter button completely down and release within 2 seconds.
The ready light blinks green while the camera is recording. Recording
stops when you press the Shutter button again or when the current
storage location is full.
NOTE: If you prefer, you can press and hold the Shutter button completely
down for more than 2 seconds to record. Release the Shutter button to
stop recording.
See page 97 for video storage capacities.
37
Page 50
Chapter 3
Quickview—Reviewing the Video Just Taken
After you take a video, the LCD displays the first frame of the video for
approximately 5 seconds. While the frame is displayed, you can:
Delete Share
OK
To save battery power, you can turn off the Quickview feature. (See page 56.)
When Quickview is turned off, the video is not displayed on the LCD after you
take it.
m Review it: If you take no action, the video
is saved.
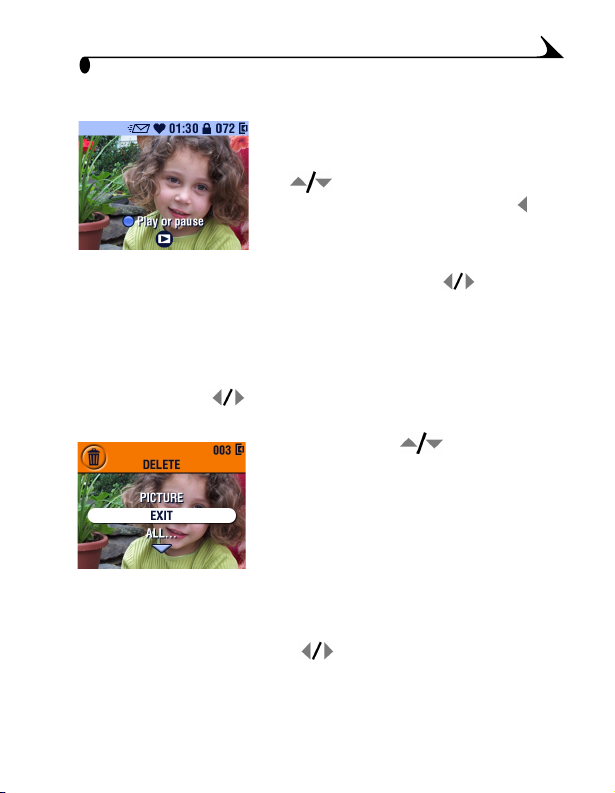
m Play it: Press the OK button. Press
to adjust the volume. Press OK again to
pause the video.
m Share it: Press the Share button to tag the
video for email or as a Favorite (see
page 51).
m Delete it: Press the Delete button while the
video and are displayed.
38
Page 51
Chapter 3
Using the Optical Zoom
Use Optical Zoom to get up to 3X closer to your subject. When you turn on the
camera, the lens is set to the Wide Angle position.
NOTE: You can change Optical Zoom before (but not during) video recording.
Wide angle
Telephoto
1 Use the viewfinder or LCD to frame your
subject.
2 Press the Telephoto (T) button to zoom in.
Press Wide Angle (W) button to zoom out.
The lens extends or retracts. The
viewfinder or LCD displays the zoomed
image.
3 Press the Shutter button to take the video.
Video Menus
Image Storage(page 11)
Setup Menu (page 55)
39
Page 52
Chapter 3
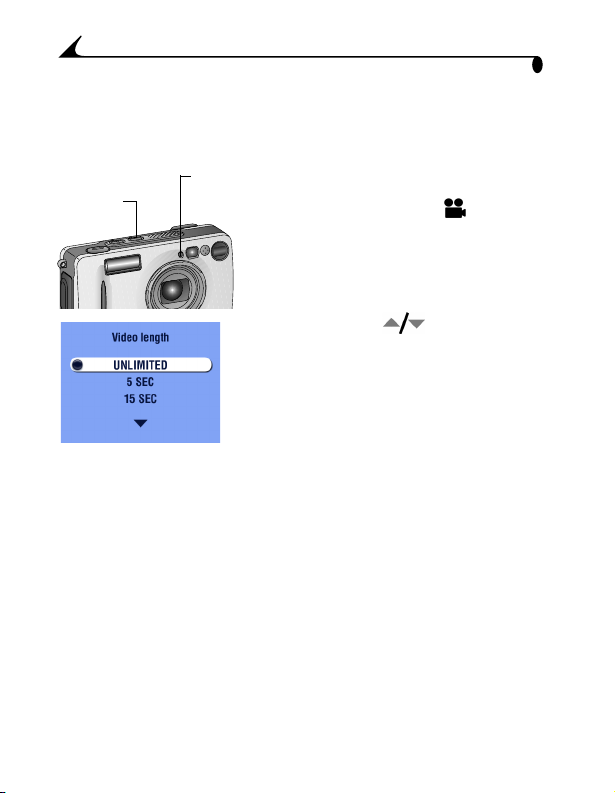
Putting Yourself in the Video
The Self Timer creates a 10-second delay between the time you press the
Shutter button and the time video recording begins.
1 Place the camera on a flat surface or use a
Self
Timer
Self
Timer
light
tripod.
2 Turn the Mode dial to Video , then press
the Self Timer button.
3 Move the joystick to highlight a
Video Length option, then press the OK
button:
Unlimited—records until you stop
recording or until storage is full.
Seconds—records for the specified time
or until storage is full.
4 Compose the scene, then press the Shutter
button completely down. Move into the
scene.
The white Self Timer light blinks slowly
for 8 seconds, quickly for 2 seconds. The
Self Timer turns off after you take the
video.
NOTE: To stop recording before the specified time, press the Shutter button.
(The Self Timer setting remains active.) If the current storage location
does not have adequate space, some video length options are not
displayed. See page 97 for video storage capacities.
40
Page 53
4 Reviewing Pictures and
Videos
Press the Review button to view and work with your pictures and videos.
Remember, press the Shutter button to take a picture anytime, even
in Review.
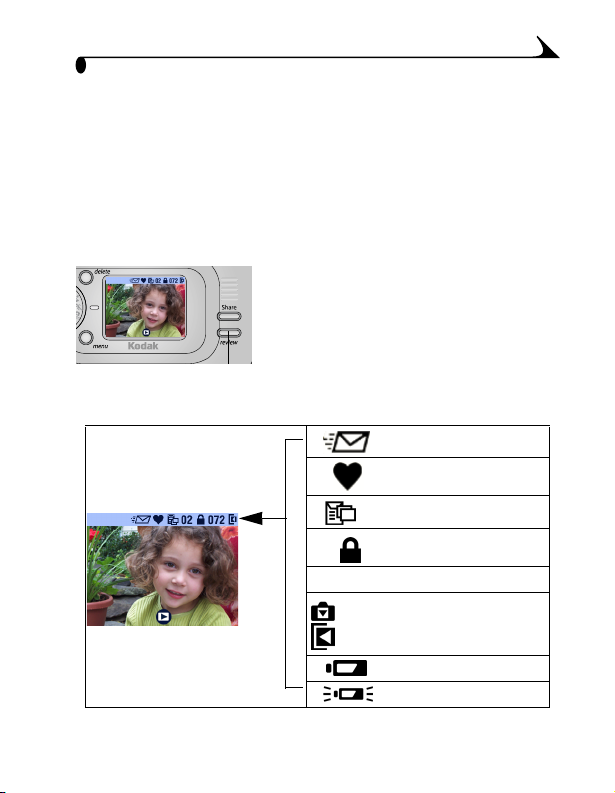
1 Press the Review button.
The LCD displays the last picture or video
taken.
2 Press the Review button to exit Review.
Picture and Video Icons
Email
Favorite
Print # of copies
02
Protect
072
Internal
Card
Picture/video number
Picture Location
Low battery
Exhausted battery
41
Page 54
Chapter 4
Viewing Single Pictures and Videos
1 Press the Review button.
2 Move the joystick to scroll backward or forward through pictures
and videos. For fast scrolling, press and hold a button.
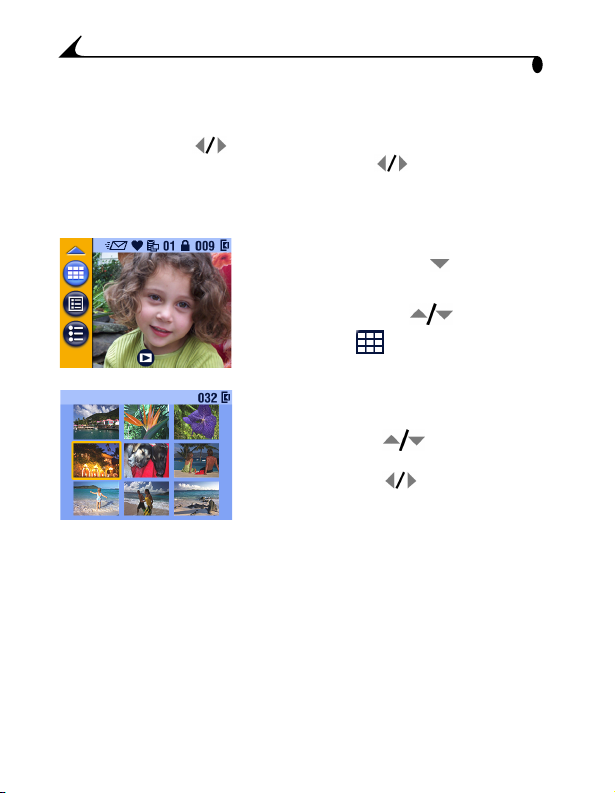
Viewing Multiple Pictures and Videos
1 Press the Review button.
2 Either move the joystick , or
m Press the Menu button.
m Move the joystick to highlight
Multi-up .
m Press the OK button.
Thumbnails of nine pictures and videos
are displayed at once.
3 Move the joystick to display the
previous or next row of thumbnails.
4 Move the joystick to scroll through
the thumbnails one at a time.
The selected picture is highlighted in
yellow.
5 Press the OK button to display a single view
of the selected picture.
42
Page 55
Chapter 4
Playing a Video
m To play a video, press the OK button. To
pause, press the OK button during playback.
m To adjust the volume, move the joystick
during playback.
m To rewind a video, move the joystick
during playback. To play the video, press
the OK button.
m To go to the previous or next picture or
video, move the joystick while no
video is playing.
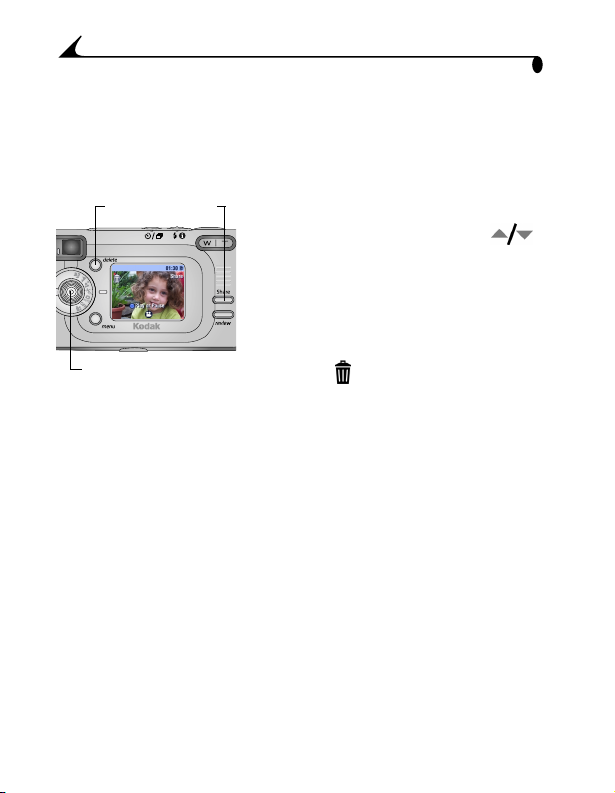
Deleting Pictures and Videos
1 Press the Review button.
2 Move the joystick to locate a picture or video (or highlight one in
multiple view), then press the Delete button.
3 Move the joystick to highlight an
option, then press the OK button:
PICTURE or VIDEO—deletes the
displayed picture or video.
EXIT—exits the Delete screen.
ALL—deletes all pictures and videos from
your current storage location.
NOTE: Protected pictures and videos cannot be
deleted in this manner. Remove
protection before deleting (page 45).
4 After deleting, move the joystick to stay in delete mode and scroll to
different pictures and videos. To exit Delete, press the Delete button.
43
Page 56
Review Menus
Chapter 4
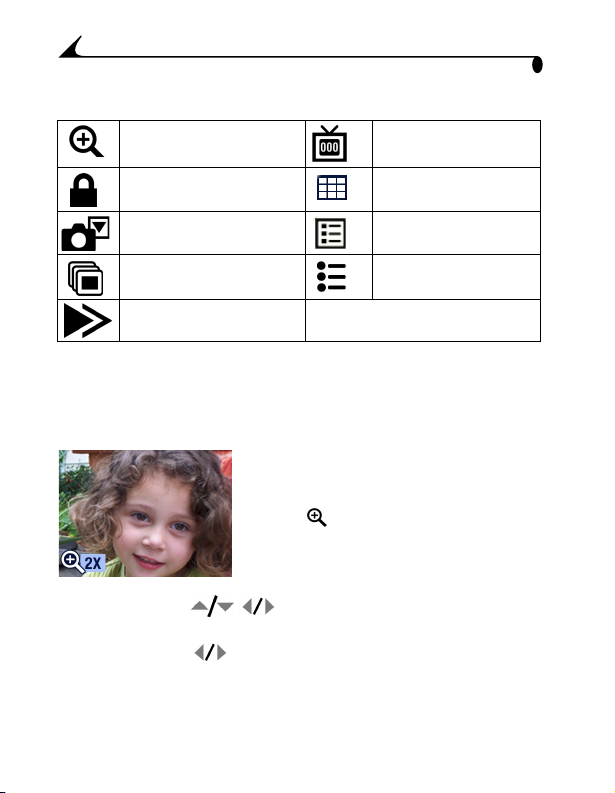
Magnify (page 44) Video Date Display
Protect (page 45) Multi-up (page 42)
Image Storage (page 11) Picture Info (page 49)
Slide Show (page 46)Setup Menu (page 55)
Copy (page 48)
(page 49)
Magnifying Pictures
Use the Magnify feature to zoom in to different areas of a picture.
1 Press the Review button, then locate a picture.
2 To magnify at 2X, press the OK button. To
magnify at 4X, press the OK button again.
The picture is magnified. The Magnify
icon and the magnification value
are displayed.
3 Move the joystick to navigate to different parts of the picture.
4 Press the OK button to redisplay the picture at the 1X (original) size.
5 Move the joystick to locate a different picture, or press the Review
button to exit Review mode.
44
Page 57

Chapter 4
Protecting Pictures and Videos From Deletion
1 Press the Review button, then locate the picture or video to protect.
2 Press the Menu button.
Protect icon
CAUTION:
Formatting internal memory or MMC/SD card deletes all
(including protected) pictures, videos, and email
addresses.
4 To remove protection, press the OK button again.
5 Press the Menu button to exit the menu.
3 Move the joystick to highlight
Protect , then press the OK button.
The picture or video is protected and
cannot be deleted. The Protect icon
appears with the protected picture or
video.
45
Page 58

Chapter 4
Running a Slide Show
Use the Slide Show to display your pictures and videos on the LCD. To run a
slide show on a television or on any external device, see page 47.
Starting the Slide Show
1 Press the Review button, then press the Menu button.
2 Move the joystick to highlight Slide Show , then press the OK
button.
3 Move the joystick to highlight Begin
Show, then press the OK button.
Each picture and video is displayed once,
in the order in which you took them.
Then the camera returns to the Menu
screen.
4 To cancel the Slide Show, press the OK
button.
Changing the Slide Show Display Interval
The default interval setting displays each picture for 5 seconds. You can
increase the display interval to up to 60 seconds.
1 On the Slide Show menu, move the joystick
2 Select a display interval.
3 Press the OK button.
to highlight Interval, then press the
OK button.
To scroll through the seconds quickly,
press and hold .
The interval setting remains until you
change it.
46
Page 59

Chapter 4
Turning On Slide Show Loop
When you turn on Loop, the slide show is continuously repeated.
1 On the Slide Show menu, move the joystick
to highlight Loop, then press the OK
button.
2 Move the joystick to highlight On,
then press the OK button.
When you start a slide show, it repeats
until you cancel it by pressing the OK
button or until battery power is
exhausted. The Loop setting remains until
you change it.
Displaying Pictures and Videos on a Television
You can display pictures and videos on a television, computer monitor, or any
device equipped with a video input. (Images may not look as good on a
television as on a computer monitor or when printed.)
NOTE: Ensure that the Video Out setting is correctly set to NTSC or PAL
(page 58).
1 Connect the audio/video cable from the
camera video-out port to the television
video-in port. (Refer to your television
User’s Guide for details.)
The camera LCD turns off; the television
Video
out
NOTE: If you connect or disconnect the audio/video cable while a slide show is
running, the slide show stops.
screen acts as the camera display.
2 Review pictures and videos on the television
screen.
47
Page 60

Chapter 4
Copying Pictures and Videos
You can copy pictures and videos from a card to internal memory or from
internal memory to a card.
Before you copy, make sure that:
m A card is inserted in the camera.
m The camera’s picture storage location is set to the location from which you
are copying. See Choosing Internal Memory or MMC/SD Card, page 11.
Copy pictures or videos:
1 Press the Review button, then press the Menu button.
2 Move the joystick to highlight Copy , then press the OK
button.
3 Move the joystick to highlight an
option:
PICTURE or VIDEO—copies the current
picture.
EXIT—returns to the Copy screen.
ALL—copies all pictures and videos from
your selected storage location to the other
location.
4 Press the OK button.
5 A progress bar monitors the copy process until complete. (For information
on picture numbering, see page 98.)
NOTE:
m Pictures and videos are copied, not moved. To remove pictures and videos
from the original location after they are copied, delete them (see page 43).
m Tags that you applied for print, email, and favorites are not copied.
Protection settings are not copied. To apply protection to a picture or
video, see page 45.
48
Page 61

Chapter 4
Displaying Video Date
To display the capture date and time (only during video playback on the
camera):
1 Press the Review button, then press the Menu button.
2 Move the joystick to highlight Video Date Display, then press the
OK button.
3 Move the joystick to highlight an
option, then press the OK button.
4 Press the Menu button to exit the menu.
The capture date and time appear during
video playback on the camera. This
setting remains until you change it.
Viewing Picture/Video Information
1 Press the Review button, then press the Menu button.
2 Move the joystick to highlight
About, then press the OK button.
Information about the picture or video is
displayed.
3 To view information on the next or previous
picture or video, move the joystick .
Press the Menu button to exit the menu.
49
Page 62

Page 63

5 Tagging Pictures and Videos
The Share button lets you “tag” your pictures and videos. When they are
transferred to your computer, you can share:
Tagged Pictures
m By print
m By email
m As Favorites, for easy organization on your computer
Tagged Videos
m By email
m As Favorites
Share
icons
Print (page 52)
Email (page 53)
Favorite (page 54)
When Can I Tag My Pictures and Videos?
Tag pictures and videos whenever they appear on the LCD:
m Just after you take them, during Quickview (see page 19 and page 38)
m After pressing the Review button (see page 41)
NOTE: Tags remain until removed. If a tagged picture or video is copied, the
tag is not copied. In a burst series, only the last picture is tagged during
Quickview. For details on organizing, printing, or emailing, see the
Quick Start Guide or KODAK EASYSHARE Software Help.
51
Page 64
Chapter 5
Tagging Pictures for Printing
1 Press the Review button, then locate a
picture.
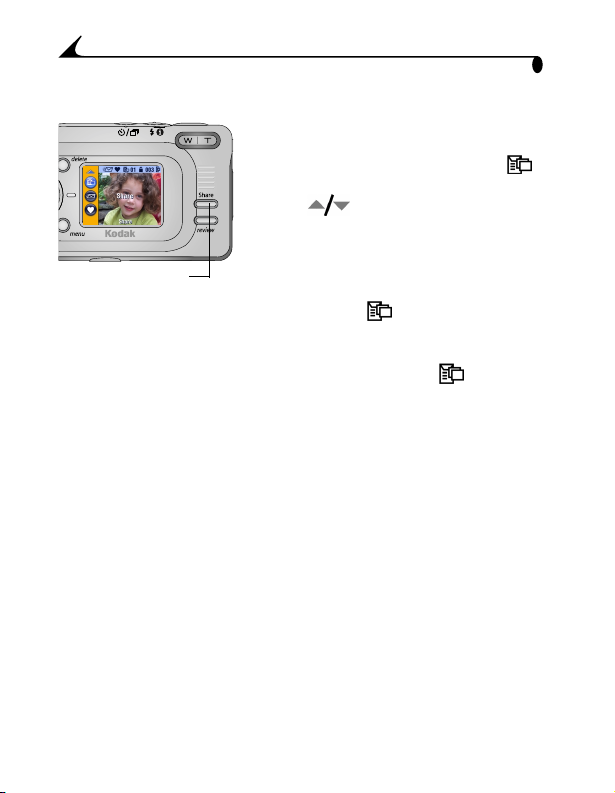
2 Press the Share button. Highlight Print ,
then press the OK button.*
3 Press to select the number of copies
(0-99). Zero removes the tag for that
picture.
Share
* To tag all pictures in the storage location, highlight Print All , press the
OK button, then indicate the number of copies as described above. Print All is
not available in Quickview.
To remove the print tagging for all pictures in the storage location, highlight
Cancel Prints, then press the OK button. Cancel Prints is not available in
Quickview.
Printing Tagged Pictures
To print pictures, see page 73.
4 Press the OK button. Press the Share button
to exit the Share menu.
The Print icon appears on the status
bar. The default quantity is one. (To
change the default, see page 56.)
52
Page 65
Chapter 5
Tagging Pictures and Videos for Emailing
First, use KODAK EASYSHARE Software to create an email address book on
your computer. Then, copy up to 32 email addresses to the camera’s internal
memory. See the Quick Start Guide or KODAK EASYSHARE Software Help for
details.
1 Press the Review button, then locate a
picture or video.
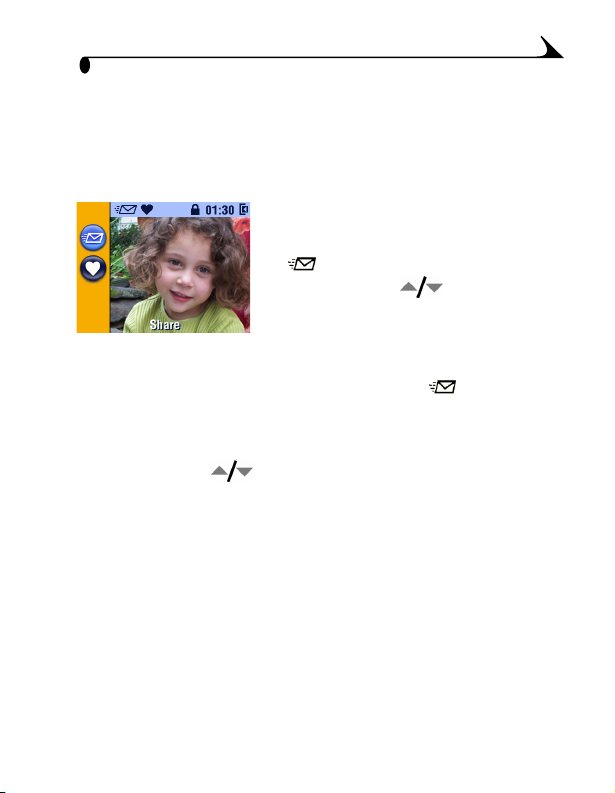
2 Press the Share button. Highlight Email
, then press the OK button.
3 Move the joystick to highlight an
email address, then press the OK button. To
send the picture to more than one person,
repeat step 3 for each address.
Selected addresses are noted with a check
mark; the email icon appears on the
status bar.
4 To remove a selection, highlight a checked address and press the OK
button. To remove all email selections, highlight Clear All.
5 Move the joystick to highlight Exit, then press the OK button.
Your selections are saved.
6 Press the Share button to exit the Share menu.
Emailing Tagged Pictures and Videos
When you transfer the tagged pictures and videos to your computer, the KODAK
EASYSHARE Software email screen opens and lets you immediately send the
pictures and videos to the addresses you specified.
See the Quick Start Guide or KODAK EASYSHARE Software Help for details on
address books and emailing.
53
Page 66

Chapter 5
Tagging Pictures and Videos as Favorites
1 Press the Review button, then locate a
picture or video.
2 Press the Share button.
3 Move the joystick to highlight
Favorite , then press the OK button.
The Favorite icon appears on the
status bar.
4 To remove the tag, press the OK button
again.
5 Press the Share button to exit the Share
menu.
Using Favorites On Your Computer
When you transfer tagged pictures and videos to your computer, you can
retrieve, organize, and label them by subject, date, event, or any category you
choose.
See the Quick Start Guide or KODAK EASYSHARE Software Help for details.
54
Page 67
6 Customizing Your Camera
Settings
Use Setup to customize camera settings according to your preferences.
To Access Setup Mode/Menus
1 In any mode, press the Menu button.
2 Move the joystick to highlight Setup , then press the OK button.
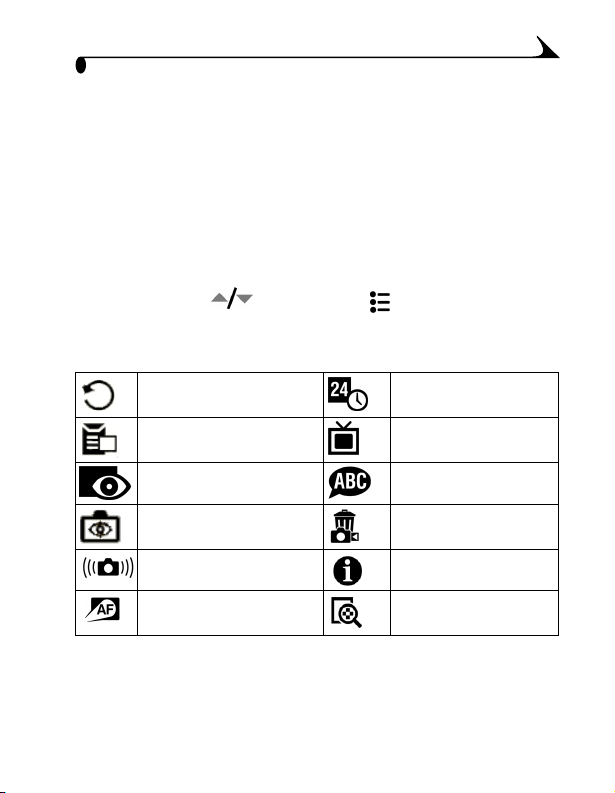
Setup Menus
Return to previous menu Date & Time Set (page 8)
Default Print Quantity
(page 56)
Quickview (page 56) Language (page 59)
Liveview (page 57)Format (page 60)
Shutter Sound (page 57) About (page 61)
Low Light Auto Focus LED
(page 58)
Video Out (page 58)
Advanced Digital Zoom
(page 61)
55
Page 68
Chapter 6
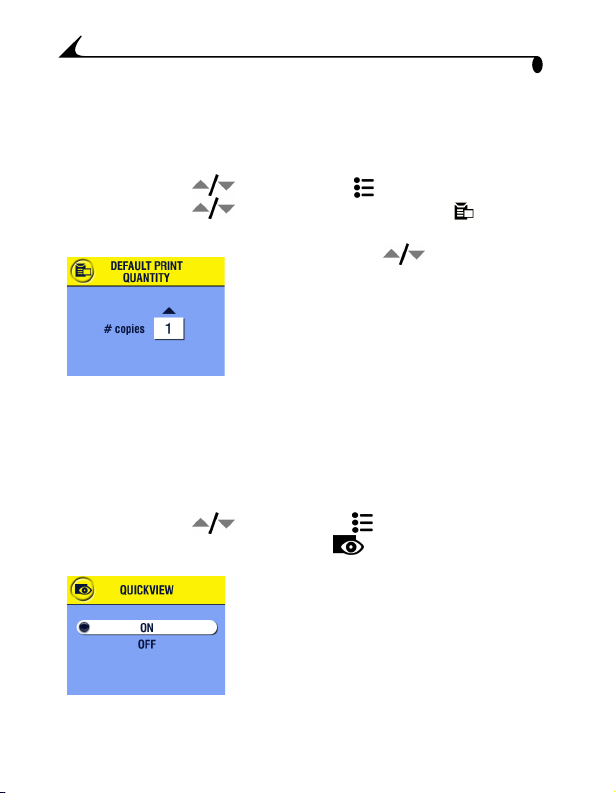
Changing the Print Quantity Default
The Default Print Quantity setting determines the value that is displayed on the
Share Print screen (page 52). The default value is 1.
1 Press the Menu button.
2 Move the joystick to highlight Setup , then press the OK button.
3 Move the joystick to highlight Default Print Quantity , then
press the OK button.
4 Move the joystick to select the new
default quantity, then press the OK button.
5 Press the Menu button to exit the menu.
This setting remains until you change it.
Turning Off Quickview
After you take a picture or video, Quickview displays it on the LCD for
approximately 5 seconds (see page 19 and page 38). To save battery power,
turn off Quickview.
1 Press the Menu button.
2 Move the joystick to highlight Setup , then press the OK button.
3 Move the joystick to highlight Quickview , then press the OK button.
4 Move the joystick to highlight Off, then press
the OK button.
5 Press the Menu button to exit the menu.
The picture is not displayed on the LCD
after you take it. To see the picture or
video, press the Review button. This
setting remains until you change it.
56
Page 69

Chapter 6
Turning On Liveview in Still Modes
The Liveview feature lets you use the LCD as a viewfinder (see page 18). The
default setting is Off; press the OK button to turn the LCD on when you need it.
NOTE: Liveview quickly depletes battery power; use it sparingly. The Liveview
default setting is On in Video and Close-up modes.
1 Press the Menu button.
2 Move the joystick to highlight Setup , then press the OK button.
3 Move the joystick to highlight Liveview , then press the OK button.
4 Highlight On, then press the OK button.
The live image is displayed whenever the
camera is on. Press the OK button to
manually turn it off and on.
5 Press the Menu button to exit the menu.
This setting remains until you change it.
Turning Off the Shutter Sound
1 Press the Menu button.
2 Move the joystick to highlight Setup , then press the OK button.
3 Move the joystick to highlight Shutter Sound , then press the OK button.
4 Move the joystick to highlight Off,
then press the OK button.
No sound plays when a picture is taken.
5 Press the Menu button to exit the menu.
This setting remains until you change it.
57
Page 70
Chapter 6
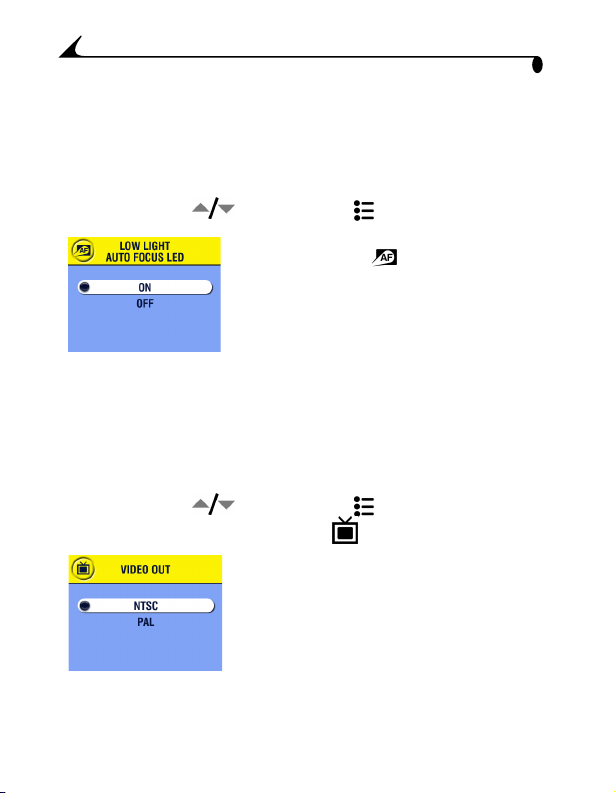
Turning Off the Low Light Auto Focus LED
You can prevent the Low Light Auto Focus LED (page 14) from firing.
NOTE: When the Low Light Auto Focus LED is off, the camera may not perform
as well in low light.
1 Press the Menu button.
2 Move the joystick to highlight Setup , then press the OK button.
3 Move the joystick to highlight Low Light
Auto Focus LED , then press the OK
button.
4 Move the joystick to highlight Off, then press
the OK button.
5 Press the Menu button to exit the menu.
This setting remains until you change it.
Setting Video Out
Video Out must be set correctly to run a slide show on a television or other
external device (see page 47).
1 Press the Menu button.
2 Move the joystick to highlight Setup , then press the OK button.
3 Move the joystick to highlight Video Out , then press the OK button.
4 Move the joystick to highlight an option:
NTSC—used in most countries except
those in Europe and China. The United
States and Japan use NTSC.
PAL—used in Europe and China.
5 Press the OK button to accept the change.
6 Press the Menu button to exit the menu.
This setting remains until you change it.
58
Page 71

Chapter 6
Selecting a Language
You can display menus and screen messages in different languages.
1 Press the Menu button.
2 Move the joystick to highlight Setup , then press the OK button.
3 Move the joystick to highlight Language , then press the OK button.
4 Highlight an option, then press the OK
button.
5 Press the Menu button to exit the menu.
Text is displayed in the selected language.
This setting remains until you change it.
59
Page 72
Chapter 6
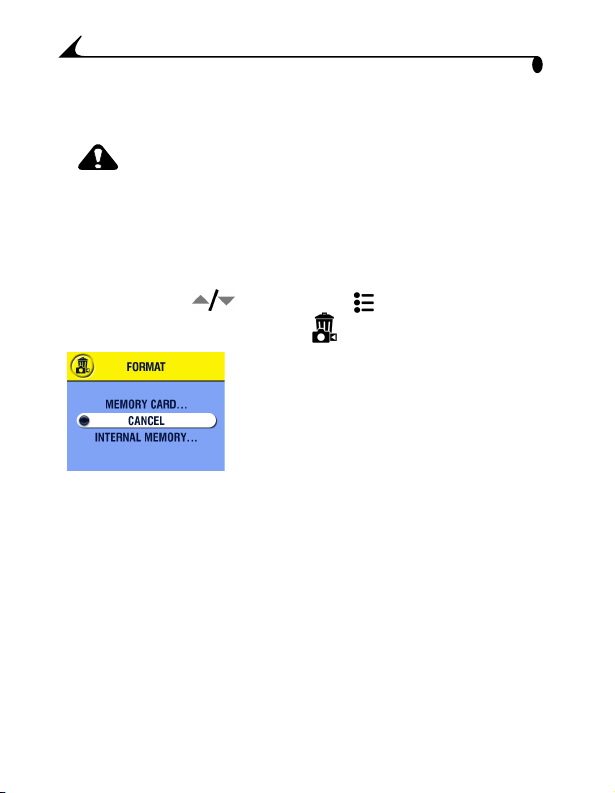
Formatting Internal Memory or MMC/SD Card
CAUTION:
Formatting a card erases all pictures and videos, including
protected files. Formatting internal memory erases all
pictures, videos, and email addresses. (To restore
addresses, see KODAK EASYSHARE Software Help.)
Removing a card during formatting may damage the card.
1 Press the Menu button.
2 Move the joystick to highlight Setup , then press the OK button.
3 Move the joystick to highlight Format , then press the OK button.
4 Move the joystick to highlight an option:
MEMORY CARD—deletes everything on
the card; formats the card.
CANCEL—exits without making a change.
INTERNAL MEMORY—deletes everything
in internal memory; formats the internal
memory.
5 Press the OK button.
6 Highlight Continue Format, then press the OK button.
When the formatting is complete, the Setup menu appears.
60
Page 73
Chapter 6
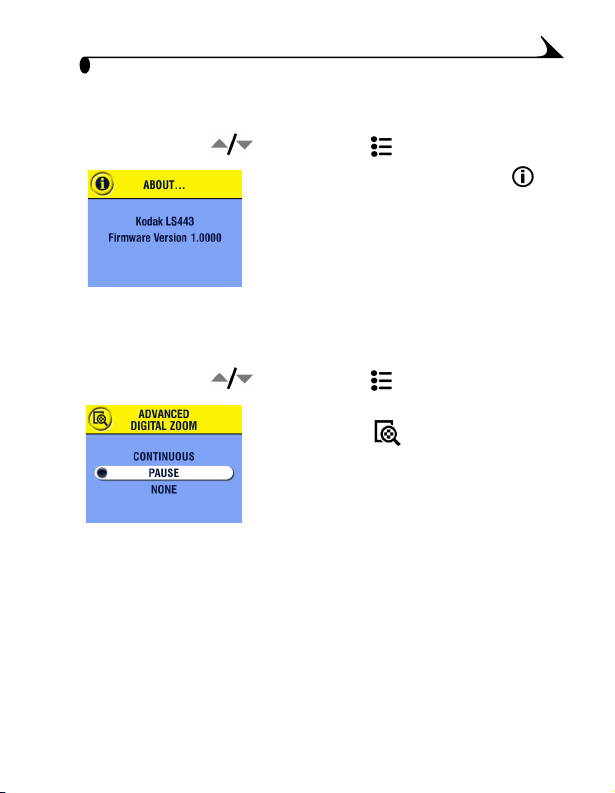
Viewing Camera Information
1 Press the Menu button.
2 Move the joystick to highlight Setup , then press the OK button.
3 Move the joystick to highlight About ,
then press the OK button.
The camera model and the current
firmware version appear.
4 Press the Menu button to exit the menu.
Changing Advanced Digital Zoom
1 Press the Menu button.
2 Move the joystick to highlight Setup , then press the OK button.
3 Move the joystick to highlight Advanced
Digital Zoom , then press the OK
button.
4 Move the joystick to highlight an option:
None—disables digital zoom.
Pause—digital zoom turns on after the
Telephoto button is pressed to the optical
zoom limit, then is pressed again.
Continuous—digital zoom automatically
turns on after the Telephoto button is
pressed to the optical zoom limit and held.
5 Press the Menu button to exit the menu.
61
Page 74

Page 75

7 Installing the Software
WINDOWS System Requirements
m Personal computer for WINDOWS 98, 98SE, ME, 2000, or XP
m 233 MHz processor or greater
m 64 MB of available RAM (128 MB for WINDOWS XP)
m 200 MB of available hard disk space
m CD-ROM drive
m Available USB port
m Color monitor with a minimum resolution of 800 x 600 pixels; High Color
(16-bit) or True Color (24-bit) recommended
m Internet access for online printing and emailing
63
Page 76

Chapter 7
MAC OS X System Requirements
m MACINTOSH computer with a G3 or G4 processor
m MAC OS 10.1.2, minimum
m 128 MB of available RAM
m 200 MB of available hard disk space
m CD-ROM drive
m Built-in USB port
m Color monitor with a minimum resolution of 800 x 600 pixels; thousands
or millions of colors recommended
m Internet access for online printing and emailing
MAC OS 8.6 and 9.x System Requirements
m POWERPC-based MACINTOSH computer
m MAC OS 8.6 or 9.x
m 64 MB of available RAM
m 200 MB of available hard disk space
m CD-ROM drive
m Built-in USB port
m Color monitor with a minimum resolution of 800 x 600 pixels; thousands
or millions of colors recommended
m Internet access for online printing and emailing
NOTE: OS 8.6 and 9.x do not support the Share button functions. OS X is
recommended for full functionality.
64
Page 77

Chapter 7
Install the Software
For information on the software applications included on the KODAK
EASYSHARE Software CD, see the Quick Start Guide or the KODAK EASYSHARE
Software Help.
CAUTION:
Install the software from the
KODAK EASYSHARE Software
CD before connecting the
camera or dock to the
computer. Failure to do so may
cause the software to load
incorrectly.
1 Before you begin, close all software
applications that are open on your
computer.
2 Place the KODAK EASYSHARE Software CD
into the CD-ROM drive.
3 Load the software:
WINDOWS-based computer—if the first
install window does not appear, choose Run
from the Start menu and type d:\setup.exe
where d is the drive letter that contains the
CD.
MAC OS 8.6 or 9.x—on the install
window, click Continue.
MAC OS X—double-click the CD icon on
the desktop, then click the Install icon.
65
Page 78

Chapter 7
Follow the on-screen instructions to install the software. If prompted,
4
restart the computer when the installation is complete.
m Select Typical to automatically install the most commonly used
applications.
m Select Custom to choose the applications you wish to install.
NOTE: When prompted, take a few minutes to electronically register your
camera and software. This lets you receive information regarding
software updates and registers some of the products included with the
camera. You must be connected to your Internet service provider to
register electronically. To register later, see
www.kodak.com/go/register.
For further installation help, see the Quick Start Guide.
66
Page 79

8 Connecting to the Computer
CAUTION:
Install the software from the KODAK EASYSHARE Software
CD before connecting the camera or Camera Dock to the
computer. Failure to do so may cause the software to load
incorrectly.
You can transfer pictures and videos from the camera to the computer using
either the KODAK EASYSHARE LS443 Camera Dock or the USB cable. See
page 68 for connecting with the USB cable.
Using the EASYSHARE LS443 Camera Dock
The KODAK EASYSHARE LS443 Camera Dock makes it easy to transfer your
pictures and videos to the computer.
The Camera Dock is also a rapid battery charger for the included KODAK Li-Ion
Rechargeable Battery, and supplies power to the camera. To keep the battery
charged, store your camera in the Camera Dock.
67
Page 80
Chapter 8
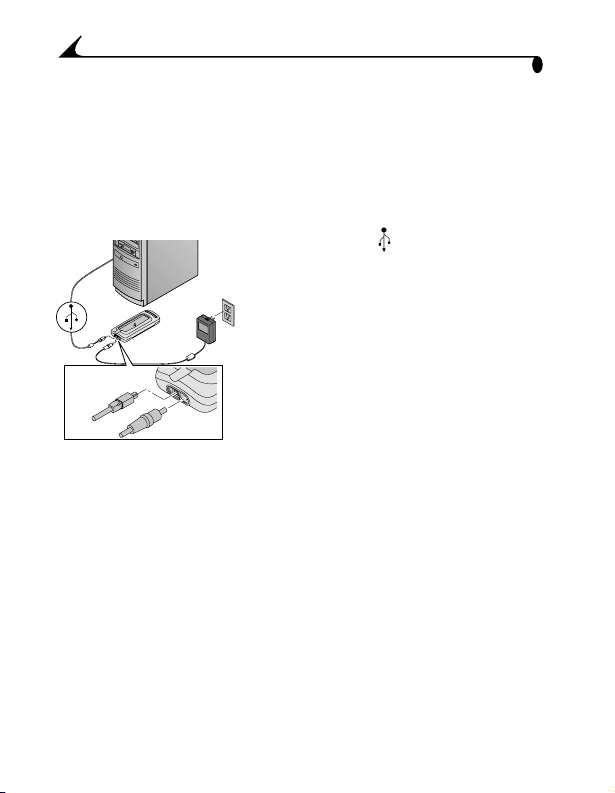
Connecting the Camera Dock
After the KODAK EASYSHARE Software is loaded (see page 63), connect the
Camera Dock to your computer and to an external power source. You need:
m The USB cable included with your camera
m The AC power adapter, 5V included with the Camera Dock
IMPORTANT: Make sure your camera is NOT in the Camera Dock
when you are connecting to power and the computer.
1 Plug the labeled end of the USB cable
into the labeled USB port on your computer.
See your computer User’s Guide for details.
2 Plug the other end of the USB cable into the
square USB connector on the back of the
Camera Dock.
3 Plug the 5V AC adapter into the round
power connector on the back of the Camera
Dock and into a power outlet.
IMPORTANT: Use only the 5V AC adapter included with the Camera
68
Dock. Other adapters may cause damage to your
camera, Camera Dock, or computer.
Page 81

Chapter 8
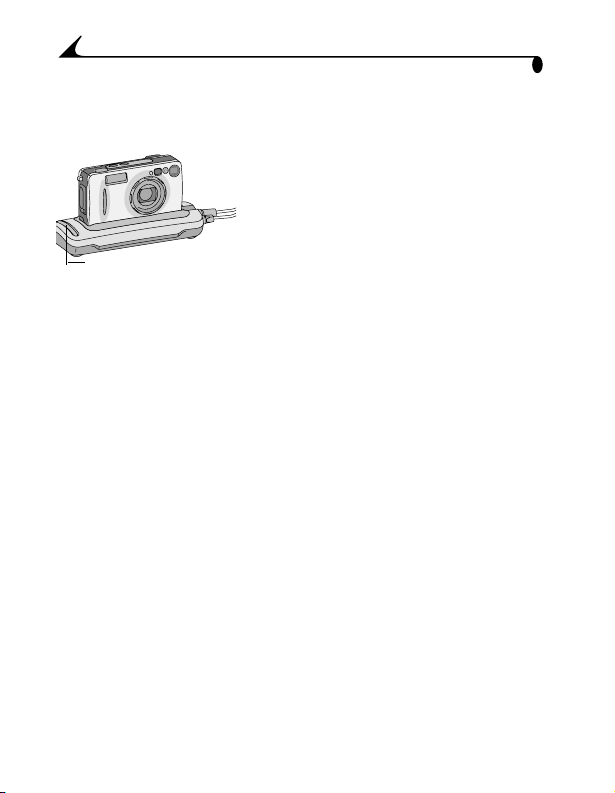
Docking the Camera
To transfer pictures and videos from the camera to the computer, or to charge
the battery:
1 Tu r n off the camera.
Dock connector
2 Place the camera in the Camera Dock and
push down to seat the connector.
The Power/Transfer light glows green
when the camera is properly seated.
The camera is now powered by the
Connector
Power/
Transfer
light
NOTE: If the battery requires charging, the Camera Dock immediately begins
charging.
Camera Dock.
69
Page 82
Chapter 8
Transferring Pictures and Videos
To transfer pictures and videos from your camera to your computer:
1 Place the camera in the Camera Dock. The
camera can be on or off.
If the battery is being charged, charging
pauses, then resumes after pictures and
videos are transferred.
2 Press the Connect button.
Connect button,
Power/Transfer
light
The Power/Transfer light blinks green
while pictures and videos transfer.
3 For details on printing and emailing, see the
Quick Start Guide or the KODAK
EASYSHARE Software Help.
NOTE: After transferring pictures and videos,
leave the camera in the Camera Dock.
Eight minutes after the transfer is
complete, the Camera Dock resumes
charging as necessary.
Caution When Using a Tripod
Do not connect a tripod to the Camera Dock. Remove the camera from the
Camera Dock and connect the tripod directly to the camera.
70
Page 83

Chapter 8
Charging the Battery
The battery is not charged when you receive it.
1 Tur n off the camera.
2 Make sure the battery is installed in the camera (see page 5).
3 Place the camera in the Camera Dock (see page 69).
m Charging begins immediately.
m The red light indicates charging in progress. (See page 87 for other
Camera Dock light information.)
m Full charging takes about 3 hours. After the battery is fully charged,
leave the camera in the Camera Dock to maintain the full charge.
m Charging stops if you turn on the camera. If the camera is left in the
Camera Dock with the power on, charging resumes when the camera
enters Auto Power-off (see page 101).
m Charging pauses if you press the Connect button on the Camera Dock.
Charging resumes after pictures and videos are transferred.
NOTE: The Camera Dock only charges the provided KODAK EASYSHARE Li-Ion
Rechargeable Battery.
71
Page 84
Chapter 8
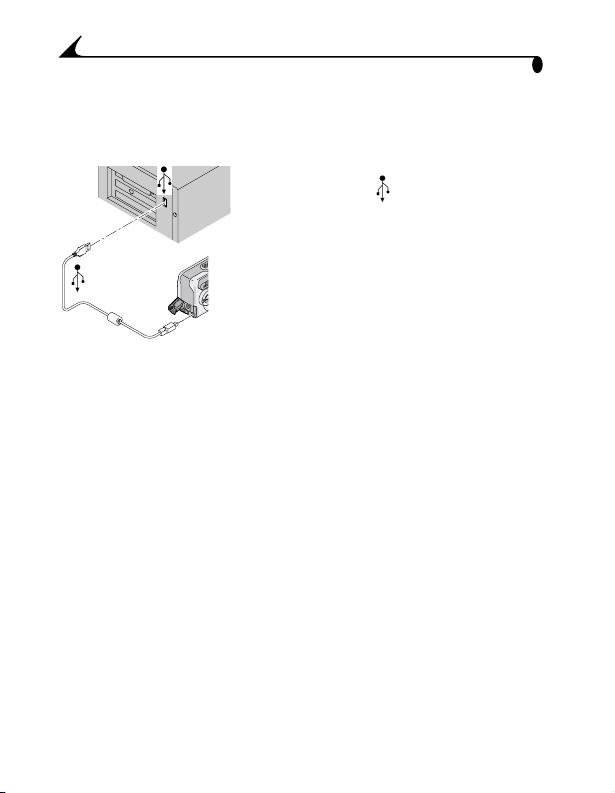
Connecting With the USB Cable
NOTE: You can use the KODAK AC adapter to power the camera; it saves battery
power when transferring pictures (see page 5).
1 Turn off the camera.
2 Plug the labeled end of the USB cable
into the labeled USB port on your computer.
See your computer User’s Guide for details.
3 Plug the other end of the USB cable into the
labeled USB port on the camera.
The software prompts you through the
transfer process.
NOTE: You can also use a KODAK Multi-Card Reader or KODAK SD Multimedia
Card Reader-Writer to transfer your pictures. Purchase accessories at
your KODAK retail dealer or http://www.kodak.com/go/accessories.
Transferring Pictures and Videos to Your Computer
For details on transferring pictures and videos, see the Quick Start Guide or the
KODAK EASYSHARE Software Help.
72
Page 85

Chapter 8
Printing Pictures from Your Computer
For details on printing pictures from your computer, see the Quick Start Guide
or the KODAK EASYSHARE Software Help.
Printing From an MMC/SD Card
m Automatically print tagged pictures when you insert your card into a printer
with an MMC/SD slot. See your printer User’s Guide for details.
m Make prints at an MMC/SD-capable KODAK Picture Maker. (We suggest
contacting a location prior to visiting.)
m Take the card to your local photo retailer for professional printing.
Ordering Prints Online
KODAK EASYSHARE Print Service (provided by Ofoto http://www.ofoto.com), is
just one of the many great online print services offered in the KODAK
EASYSHARE Software. You can easily:
m Upload your pictures.
m Edit, enhance, and add borders.
m Store pictures, and share them with family and friends.
m Order high quality prints, photo greeting cards, frames, and albums—and
have them delivered to your door.
73
Page 86

Page 87

9 Troubleshooting
There may be times when you have questions about using your camera or
Camera Dock. Additional technical information is available in the ReadMe file
located on the KODAK EASYSHARE Software CD. For updates to
Troubleshooting information, see http://www.kodak.com/go/ls443support.
Troubleshooting—Camera
Camera Problems
Camera
Problem Cause Solution
Camera does not
turn on.
Camera does not
turn off; lens does
not retract.
Pictures
remaining
number does not
decrease after
taking a picture.
Picture
orientation is not
accurate.
Battery is not properly
installed.
Battery is not charged. Recharge the battery (page 100).
A non-approve d battery
may ha ve been ins talled
in the camera.
The picture does not
take up enough space
to decrease the
number.
The camera was
rotated or tilted while
the picture was taken.
Reinstall the battery (page 5).
Try operating the camera with the
KODAK EASYSHARE Li-Ion
Rechargeable Battery.
The camera is operating
normally. Continue taking
pictures.
Set the Orientation Sensor
(page 36).
75
Page 88

Chapter 9
Camera
Problem Cause Solution
Shutter button
does not work.
Part of the picture
is missing.
In Review mode,
you do not see a
picture (or the
expected picture)
on the LCD.
Stored pictures
are damaged.
Camera is not turned
on.
The camera is
processing a picture;
the ready light (near
the viewfinder) is
blinking.
The card or internal
memory is full.
Something was
blocking the lens when
the picture was taken.
Your eye or the picture
was not centered
correctly in the
viewfinder or LCD.
The camera may not be
accessing the correct
storage location.
The card was removed
when the ready light
was blinking.
Turn on the camera
(page 7).
Wait until the light stops blinking
before attempting to take another
picture.
Transfer pict ures to the compu ter
(page 67), delete pictures from
the camera (page 43), switch
storage locations (page 11), or
insert a card with available
memory (page 10).
Keep hands, fingers, or other
objects away from the lens when
taking pictures.
Leave space around subject when
centering picture in viewfinder or
LCD.
Check the picture storage location
setting (page 11).
Make sure the ready light is not
blinking before removing the
card.
76
Page 89

Chapter 9
Camera
Problem Cause Solution
Picture is too
dark.
Picture is too
light.
Flash is not on. Turn on the flash (page 22).
The subject is too far
away for the flash to
have an effect.
The subject is in front
of a bright light
(backlit).
Lighting is too dark. Increase Exposure Compensation
The flash is not needed. Change to Auto flash (page 22).
The subject was too
close for flash.
The light sensor is
covered.
Lighting is too bright. Decrease exposure compensation
Move so there is no more than
10.8 ft (3.3 m) between the
camera and the subject; 6.2 ft
(1.9 m) in Telephoto.
Use Fill fl ash (page 22) or change
your position so light is not
behind the subject.
(page 27) or Long Time Exposure
(page 34).
Move so there is at least 1.5 ft (0.5
m) between camera and subject.
Hold the camera so your hands or
other objects do not cover the
light sensor.
(page 27).
77
Page 90

Chapter 9
Camera
Problem Cause Solution
Picture is not
clear.
Slide show does
not run on
external video
device.
Camera freezes
up when a card is
inserted or
removed.
The lens is dirty. Clean the lens (page 96).
Subject too close when
taking picture.
Subject or the camera
moved while the
picture was taken.
The subject is too far
away for the flash to be
effective.
Video Out setting is
incorrect.
External device is set
incorrectly.
Camera detects an
error when the card
was inserted or
removed.
Move so there is at least 2.0 ft (0.6
m) between the camera and the
subject, or at least 0.5 ft (15.2
cm) in Close-up mode.
Hold the camera steady while
taking the picture.
Move so there is no more than
10.8 ft (3.3 m) between the
camera and the subject; 6.2 ft
(1.9 m) in Telephoto.
Adjust the camera Video Out
setting (NTSC or PAL,
page 58).
Refer to the external device’s
user’s guide.
Turn the camera off, then back
on. Make sure the camera is
turned off before inserting or
removing a card.
78
Page 91

Chapter 9
Camera/Computer Communications
Camera Communications
Problem Cause Solution
The computer
cannot
communicate
with the
camera.
Cannot transfer
pictures. Add
New Hardware
Wizard cannot
locate drivers.
There is a problem with
the configuration of the
USB port on the
computer.
Camera power is off. Turn on the camera (page 7).
Battery is not charged. Recharge the battery (page 71).
Some Advanced Power
Management utilities on
laptops turn off ports to
save battery life.
USB cable is not
securely connected.
Software is not installed. Install the software
Too many applications
are running on the
computer.
The Battery Monitor or
similar software runs
constantly.
Software is not installed. Disconnect USB cable. (If using
See this file on the EASYSHARE
Software CD: USB.html Or, go to:
www.kodak.com/go/camerasuppo
rt
See the Power Management section
of the laptop user’s guide to disable
this feature.
Connect cable to camera and
computer port (page 72).
(page 63).
Disconnect camera from the
computer. Close all software
applications, reconnect camera.
Close that software before starting
the KODAK Software.
Camera Dock, disconnect cable
and remove camera from Dock).
Install EASYSHARE Software
(page 63).
79
Page 92

Chapter 9
MMC/SD Cards and Internal Memory
MMC/SD Cards and Internal Memory
Problem Cause Solution
The camera
does not
recognize
MMC/SD card.
Camera freezes
up when a card
is inserted or
removed.
Memory card
full
The card may not be
MMC/SD certified.
The card may be
corrupt.
Card is not fully
inserted in camera.
Camera detects an
error when the card
was inserted or
removed.
Storage is full. Transfer pictures and videos to the
The maximum
number of files or
folders is reached (or
other directory
concern).
Purchase a certified MMC/SD card
(page 10).
Reformat the card (page 60).
Caution: Formatting erases all
pictures and videos, including
protected files.
Insert a card into the slot, then push
to seat (page 10).
Turn the camera off, then back on.
Make sure the camera is off when
inserting or removing a card.
computer, then delete them from
the camera.
Transfer pictures and videos to the
computer, then format the card or
internal memory (page 60).
Caution: Formatting a card erases
all pictures and videos, including
protected files. (Formatting internal
memory also erases email
addresses. To restore addresses,
see KODAK EASYSHARE Software
Help.)
80
Page 93

Chapter 9
Camera LCD Messages
LCD Messages
Message Cause Solution
No images to display There are no pictures
Memory card requires
formatting
Memory card cannot
be read (Please format
card or insert another
card)
Internal memory
requires formatting
Internal memory
cannot be read (Please
format internal
memory)
No memory card (Files
not copied)
Not enough space to
copy files (Files not
copied)
Read only c ard, ch ange
to internal memory to
capture
in the current storage
location.
The card is corrupted
or formatted for
another digital camera.
The camera internal
memory is corrupted.
There is no card in the
camera. Pictures were
not copied.
There is not enough
space in the location
you are copying to
(internal memory or
the card).
The card in the camera
is write-protected.
Change picture storage
location setting (page 11).
Insert a new card or format
the card (page 60).
Format the internal
memory (page 60).
Insert a card (page 10).
Delete pictures from the
location you are copying to
(page 43), or insert a new
card.
To take a picture, insert a
new card or change storage
location to internal
memory (page 11).
81
Page 94

Chapter 9
LCD Messages
Message Cause Solution
Card is protected
(Reset switch on card)
Card is locked (Insert
a new card)
Card is unusable
(Insert a new card)
Recording stopped.
Record in internal
memory (Card speed is
slow)
Memory card is full
(Cannot save Share
tagging)
Internal memory is full
(Cannot save Share
tagging)
Date/Tim e entry sc reen
appears automatically
Switch on card is in
write-protect position.
The card is
write-protected.
The card is slow,
corrupted, or
unreadable.
Card cannot be used to
take videos.
There is no space
remaining.
This is th e first time you
turned on the camera;
or the battery has been
removed for an
extended period of
time; or the battery is
exhausted.
Reset the switch as shown
on LCD.
To take a picture, insert a
new card or change storage
location to internal
memory (page 11).
Insert a new card
(page 10).
Change storage location to
internal memory
(page 11). Use ca rd to take
pictures.
Insert a new card
(page 10), transfer
pictures (page 67), or
delete pictures (page 43).
Insert a card (page 10),
transfer pictures
(page 67), or delete
pictures (page 43).
Reset the clock (page 8).
82
Page 95

Chapter 9
LCD Messages
Message Cause Solution
High camera
temperature. (Camera
will be turned off.)
Memory Card is full There is no more space
Internal Memory is full There is no more space
Unrecognized File
Format
No Address Book in
Camera
Other error code An error is detected. Turn the Mode dial off,
The internal
temperature of the
camera is too high for
the camera to operate.
The viewfinder light
glows red and the
camera turns off.
on the card in the
camera.
in the camera’s internal
memory.
The camera cannot
read the picture format.
No email addresses
appe ar because there is
no address book.
Leave the camera off for
several minutes, then turn
it back on.
If the message reappears,
repeat the sequence above
until the message does not
appear.
Delete pictures from the
card (page 43), insert a
new card, or change
storage location to internal
memory (page 11).
Delete pictures from the
interna l memory (page 43)
or change storage location
to Auto and insert card
(page 10).
Transfer the unreadable
picture to the computer
(page 67), or delete the
picture (page 43).
Create and copy address
book from computer. See
EASYSHARE Software Help.
then back on. If error
appears again, call for
service.
83
Page 96
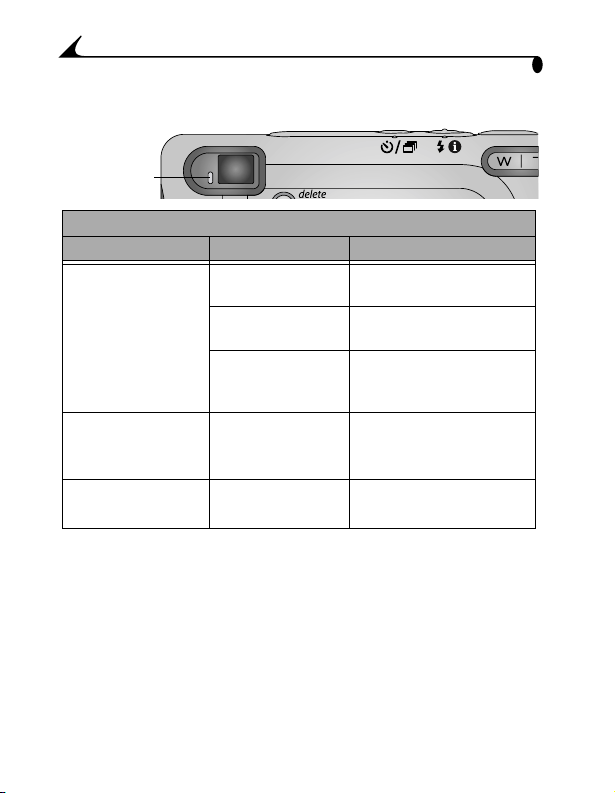
Chapter 9
Camera Ready Light Status
Ready light
Camera Ready Light
Problem Cause Solution
Ready light does not
turn on and the
camera does not
work.
Ready light glows
steady green.
Ready light blinks red. Battery is low or
Camera is not turned
on.
Battery is exhausted. Recharge the battery
Mode dial was on
when battery was
reloaded.
Camera is on; ready
to take a picture or
video.
exhausted.
Turn on the camera
(page 7).
(page 71).
Turn Mode dial off, then
back on.
The camera is operating
normally.
Recharge the battery
(page 71).
84
Page 97

Chapter 9
Camera Ready Light
Problem Cause Solution
Ready light glows
steady red.
Ready light blinks
green.
Ready light blinks
yellow.
Camera’s internal
memory or card is
full.
Camera processing
memory is full.
Card is read-only. Change storage location to
Picture is being
processed and saved
to the camera.
Flash is not charged. Wait. Resume picture taking
Auto exposure or
auto focus are not
locked.
Transfer pictures to the
computer (page 67), delete
pictures from the camera
(page 43), switch storage
locations (page 11), or
insert a card with available
memory (page 10).
Wait. Resume picture taking
when the light turns green.
internal memory (see
page 11), or use a different
card.
Camera is operating
normally.
when the light stops blinking
and turns green.
Release the Shutter button
and recompose the picture.
85
Page 98

Chapter 9
Troubleshooting—Camera Dock
Camera Dock Problems
Camera Dock
Problem Cause Solution
Pictures are not
transferred to
the computer
AC adapter or USB
cable is not securely
connected.
Software is not
installed.
Too many applications
running on computer.
Camera was removed
from the Camera Dock
during picture transfer.
Connect button was not
pressed.
Check the connections (page 68).
Install the software (page 63).
Close all software applications
and try again.
Replace the camera on the
Camera Dock and press the
Connect button.
Press the Connect button.
86
Page 99
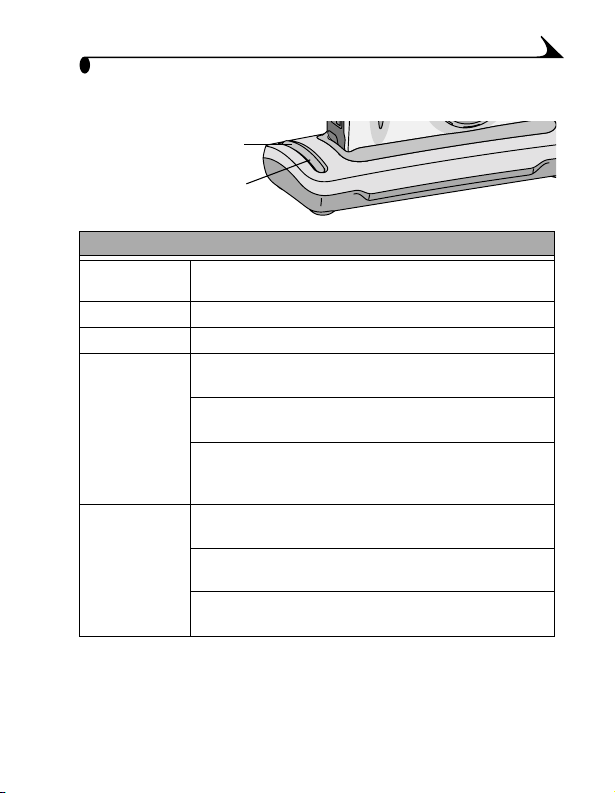
Chapter 9
Camera Dock Light Status
Power/Transfer light
Batter y charging light
Camera Dock Lights
Steady Green The camera is seated in the Camera Dock, connected to AC
Blinking Green Pictures and videos are being transferred to the computer.
Steady Red The battery is charging.
Blinking Red The battery is not properly installed. Reinstall the battery
No Lights Camera is not properly seated in Camera Dock. Remove
power, and battery is not charging.
(page 5).
The battery or connector pins are damaged. Check for
damage.
The camera and battery have been exposed to very high or
low temperatures. Slowly return the camera and battery to
room temperature.
the camera and re-seat it (page 69).
There is no power. Plug the Camera Dock into AC power.
(page 68).
The battery is not properly installed. Reinstall the battery
(page 5).
87
Page 100

 Loading...