

Page 1

i6000 Series Check Scanners
User’s Guide
CAT No. 146 4916
A-61557
Part No. 9E4728
Page 2

Contents
Safety information . . . . . . . . . . . . . . . . . . . . . . . . . . . . . . . . . . . . . . . . . . . . 1
User precautions . . . . . . . . . . . . . . . . . . . . . . . . . . . . . . . . . . . . . . . . . . . 1
Safety and regulatory agency approvals . . . . . . . . . . . . . . . . . . . . . . . . . . . 2
Environmental information . . . . . . . . . . . . . . . . . . . . . . . . . . . . . . . . . . . . . . 2
European Union. . . . . . . . . . . . . . . . . . . . . . . . . . . . . . . . . . . . . . . . . . . . 2
Acoustic emission . . . . . . . . . . . . . . . . . . . . . . . . . . . . . . . . . . . . . . . . . . . . 3
EMC statements . . . . . . . . . . . . . . . . . . . . . . . . . . . . . . . . . . . . . . . . . . . . . . 3
United States . . . . . . . . . . . . . . . . . . . . . . . . . . . . . . . . . . . . . . . . . . . . . . 3
European Union. . . . . . . . . . . . . . . . . . . . . . . . . . . . . . . . . . . . . . . . . . . . 3
People Republic of China . . . . . . . . . . . . . . . . . . . . . . . . . . . . . . . . . . . . 3
1 Introduction . . . . . . . . . . . . . . . . . . . . . . . . . . . . . . . . . . . . . . . . . . . . . . . . . 4
Scanner features . . . . . . . . . . . . . . . . . . . . . . . . . . . . . . . . . . . . . . . . . . . . . 4
2 Getting Started . . . . . . . . . . . . . . . . . . . . . . . . . . . . . . . . . . . . . . . . . . . . . . . 5
What’s in the box . . . . . . . . . . . . . . . . . . . . . . . . . . . . . . . . . . . . . . . . . . . . . 5
System requirements . . . . . . . . . . . . . . . . . . . . . . . . . . . . . . . . . . . . . . . . . . 5
Installing the scanner . . . . . . . . . . . . . . . . . . . . . . . . . . . . . . . . . . . . . . . . . . 6
Installing the drivers . . . . . . . . . . . . . . . . . . . . . . . . . . . . . . . . . . . . . . . . . . . 7
Windows 2000 . . . . . . . . . . . . . . . . . . . . . . . . . . . . . . . . . . . . . . . . . . . . . 7
Windows XP . . . . . . . . . . . . . . . . . . . . . . . . . . . . . . . . . . . . . . . . . . . . . 13
Scanner components . . . . . . . . . . . . . . . . . . . . . . . . . . . . . . . . . . . . . . . . . 19
3 Using the Scanner . . . . . . . . . . . . . . . . . . . . . . . . . . . . . . . . . . . . . . . . . . . 21
Turning the scanner on and off . . . . . . . . . . . . . . . . . . . . . . . . . . . . . . . . . 21
Document preparation . . . . . . . . . . . . . . . . . . . . . . . . . . . . . . . . . . . . . . . . 22
Scanning your documents . . . . . . . . . . . . . . . . . . . . . . . . . . . . . . . . . . . . . 22
4 Maintenance . . . . . . . . . . . . . . . . . . . . . . . . . . . . . . . . . . . . . . . . . . . . . . . . 23
Supplies and consumables . . . . . . . . . . . . . . . . . . . . . . . . . . . . . . . . . . . . 23
Cleaning the scanner . . . . . . . . . . . . . . . . . . . . . . . . . . . . . . . . . . . . . . . . 23
Daily cleaning procedures . . . . . . . . . . . . . . . . . . . . . . . . . . . . . . . . . . . 23
Weekly cleaning procedures . . . . . . . . . . . . . . . . . . . . . . . . . . . . . . . . . 25
Replacing the ink cartridge . . . . . . . . . . . . . . . . . . . . . . . . . . . . . . . . . . . . . 28
5 Troubleshooting . . . . . . . . . . . . . . . . . . . . . . . . . . . . . . . . . . . . . . . . . . . . . 29
Indicator lights . . . . . . . . . . . . . . . . . . . . . . . . . . . . . . . . . . . . . . . . . . . . . . 29
Clearing a document jam . . . . . . . . . . . . . . . . . . . . . . . . . . . . . . . . . . . . . 30
Problem solving . . . . . . . . . . . . . . . . . . . . . . . . . . . . . . . . . . . . . . . . . . . . . 31
Image quality issues. . . . . . . . . . . . . . . . . . . . . . . . . . . . . . . . . . . . . . . . . . 32
Appendix A Specifications . . . . . . . . . . . . . . . . . . . . . . . . . . . . . . . . . . . . . . 33
A-61557 December 2006 i
Page 3

Safety information • When placing the Check Scanner, make sure that the electrical
power outlet is located within 1.52 metres (5 feet) of the Check
Scanner and is easily accessible.
• Material Safety Data Sheets (MSDS) for chemical products are
available on the Kodak website at: www.kodak.com/go/msds. When
accessing the MSDSs from the website, you will be required to
provide the catalog number of the consumable you want the Material
Safety Data Sheet for. See the section entitled, “Supplies and
consumables” later in this guide for supplies and catalog numbers.
User precautions Users and their employer need to observe the common sense
precautions applicable to the operation of any machinery. These
include, but are not limited to, the following:
• Do not wear loose clothing, unbuttoned sleeves, etc.
• Do not wear loose jewelry, bracelets, bulky rings, long necklaces, etc.
• Hair length should be kept short, using a hair net if needed, or tying
long hair up in a bundle.
• Remove all other loose objects from the area that could be drawn into
the machine.
• Follow the recommended Kodak cleaning procedures. Do not use air,
liquid or gas spray cleaners. These cleaners only displace the dust,
dirt or debris to another location within the Check Scanner, which
could cause the Check Scanner to malfunction.
Supervisors should review their practices and make compliance with
these precautions as a part of the job description for operation of the
Kodak Check Scanner or any mechanical device.
A-61557 December 2006 1
Page 4

Safety and regulatory agency approvals
The Kodak i6000 Series Check Scanners conform to applicable
national and international product safety and electronic emission
regulatory requirements. This includes, but is not limited to, the
following:
Country or Region Safety Approval Safety Mark Electromagnetic Compatibility EMC Mark
Canada CAN/CSA-C22.2
No. 60950-1
China GB4943 CCC
European Union
EN 60950-1
International IEC 60950-1
United States UL 60950-1 UL CFR 47 Part 15 Subpart B
CUL Canada ICES - 003 Issue 3
Class A
GB 9254 Class A
“S&E”
CE
TUV GS
GB 17625.1 Harmonics
EN 55022
ITE Emissions Class A
EN61000-3-2
Powerline harmonics
EN 61000-3-3 Flicker
EN 55024 ITE Immunity
CISPR 22 Class A
FCC Class A
CCC
“S&E”
CE
FCC
Environmental information
• The Kodak i6000 Series Check Scanners are designed to meet
worldwide environmental requirements.
• Guidelines are available for the disposal of consumable items that
are replaced during maintenance or service; follow local regulations
or contact Kodak locally for more information.
• Disposal of this material may be regulated due to environmental
considerations. For disposal or recycling information, contact your
local authorities or, in the USA, visit the Electronics Industry Alliance
website: www.eiae.org.
• The product packaging is recyclable.
• Parts are designed for reuse or recycling.
European Union This symbol indicates that when the last user wishes to discard this
product, it must be sent to appropriate facilities for recovery and
recycling. Please contact your local Kodak representative or refer to
www.kodak.com/go/recycle for additional information on the collection
and recovery programs available for this product.
2 A-61557 December 2006
Page 5

Acoustic emission Maschinenlärminformationsverordnung – 3, GSGV
Der arbeitsplatzbezogene Emissionswert beträgt <70 db(A).
[Machine Noise Information Ordinance — 3, GSGV
The operator-position noise emission value is <70 dB(A).]
EMC statements
United States This equipment has been tested and found to comply with the limits for
a Class A digital device pursuant to Part 15 of the FCC rules. These
limits are designed to provide reasonable protection against harmful
interference when the equipment is operated in a commercial
environment. This equipment generates, uses, and can radiate radio
frequency energy and, if not installed and used in accordance with the
instruction manual, may cause harmful interference to radio
communications. Operation of this equipment in a residential area is
likely to cause harmful interference in which case the user will be
required to correct the interference at his own expense.
European Union WARNING: This is a Class A product. In a domestic environment this
product may cause radio interference in which case the user may be
required to take adequate measures.
Peoples Republic of China WARNING: This is a Class A product. In a domestic environment this
product may cause radio interference in which case the user may be
required to take adequate measures.
声明,该产
此为A级产品,在生活环境中品可能会造成无线电干扰。在这种情况下,可能需要
用户对其干扰采取切实可行的措施
A-61557 December 2006 3
Page 6
1 Introduction
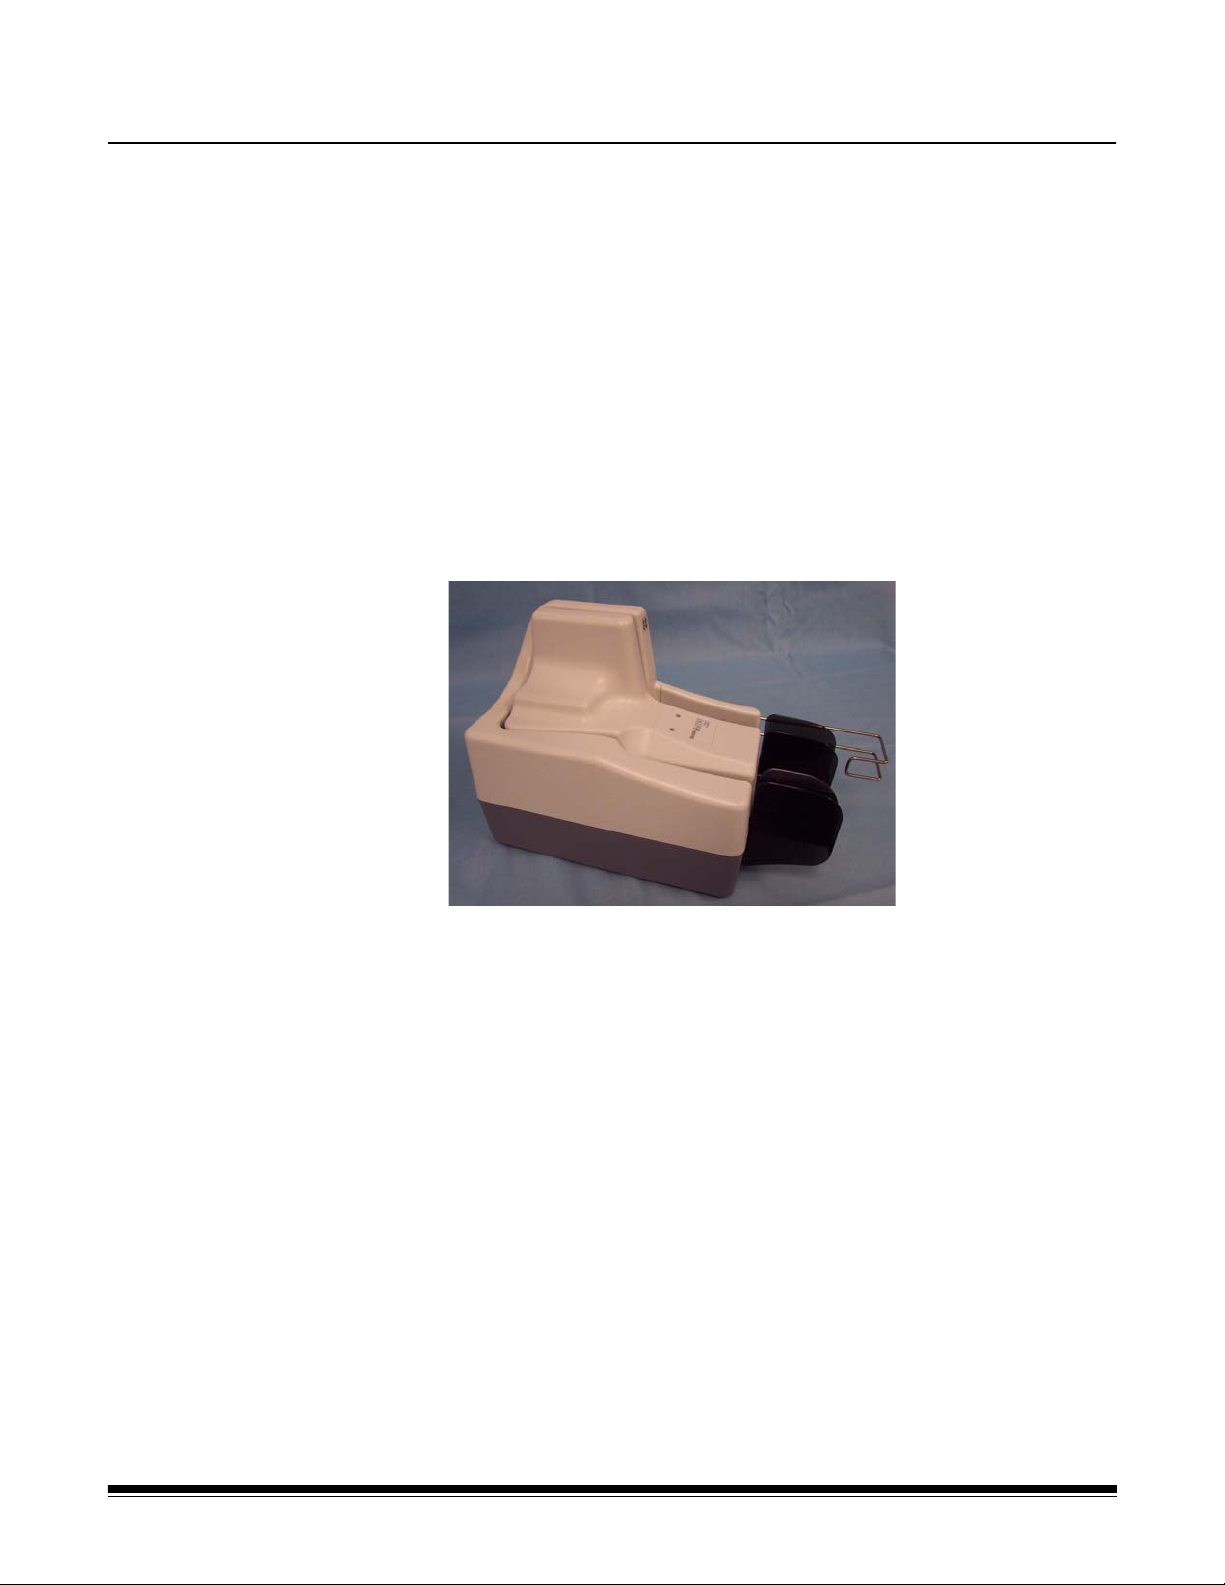
The Kodak i6000 Series Check Scanners are easy-to-use, compact
scanners that can be connected to your PC. These scanners read
Magnetic Ink Character Recognition (MICR) data. After scanning, the
images and data are transmitted via a USB connection to your PC for
viewing.
The following models are available:
• Kodak i6015 Check Scanner — automatically scans the front and/or
back of a document one document at a time.
•
Kodak i6060 Check Scanner — automatically scans the front and/or
back of documents at up to 65 documents per minute.
Kodak i6090 Check Scanner — automatically scans the front and/or
•
back of documents at up to 100 documents per minute.
This User’s Guide provides information and procedures for the
i6000 Series Check Scanners. The information in this User’s Guide is
for all i6000 Series Check scanners unless otherwise noted.
Scanner features • High quality images that meet X9B image quality standards
• Small, compact size fits easily into environments where space is a
premium
• Easy installation and integration into existing PC configurations with
the USB 2.0 interface
• Three models are available with multiple throughputs to satisfy your
processing requirements
• Automatic feeder holds up to 50 documents (
Scanners only
• Magnetically reads MICR data for maximum accuracy
• Optional inkjet printer allows pre-scan imprinting of document control
numbers (DCN) or other customer information on the check
• Easy cleaning and maintenance
)
i6060 and i6090
Kodak
4 A-61557 December 2006
Page 7

2 Getting Started
What’s in the box Before you begin, open the box and check the contents:
•
Kodak i6000 Series Check Scanner or Kodak i6000 Series Check
Scanner with Inkjet Printer
• USB 2.0 cable
• Power supply
• Inkjet cartridge (if printer is included)
• Welcome Folio including:
- Registration card
- Installation Guide
-Quick Tips Guide
- Printed User’s Guide, English
- Installation and Maintenance CD
- Cleaning supplies (cleaning cards and swabs)
- Country Contact Sheets
System requirements The following system requirements are recommended to obtain the
best performance for running your
Scanners.
Kodak i6000 Series Check
Recommended:
• Intel Pentium IV, 2.4 GHz processor, 512 MB RAM
• USB port 2.0
• Windows 2000, Windows XP (Professional/Home)
• 200 MB free hard disk space
• CD-ROM drive
Minimum:
• Intel Pentium III, 1 GHz processor, 128 MB RAM
• USB port 1.1
• Windows 2000 Professional, Windows XP (Professional/Home)
• 100 MB free hard disk space
• CD-ROM drive
A-61557 December 2006 5
Page 8
Installing the scanner Follow the instructions below to install your Kodak i6000 Series Check
Scanners.
NOTES:
• Make sure that the power outlet is located within 1.52 metres
(5 feet) of the scanner and is easily accessible.
• Use only the power supply that was provided with the
Series Check Scanners. Do not substitute another power supply
model or another manufacturer’s power supply.
• Place the power supply on the floor. Do not place it next to the
scanner. Failure to do so may result in degraded MICR read rates.
1. Place the scanner on a flat surface near the PC that you are
connecting it to. Do not install it in a location where it will be in direct
sunlight.
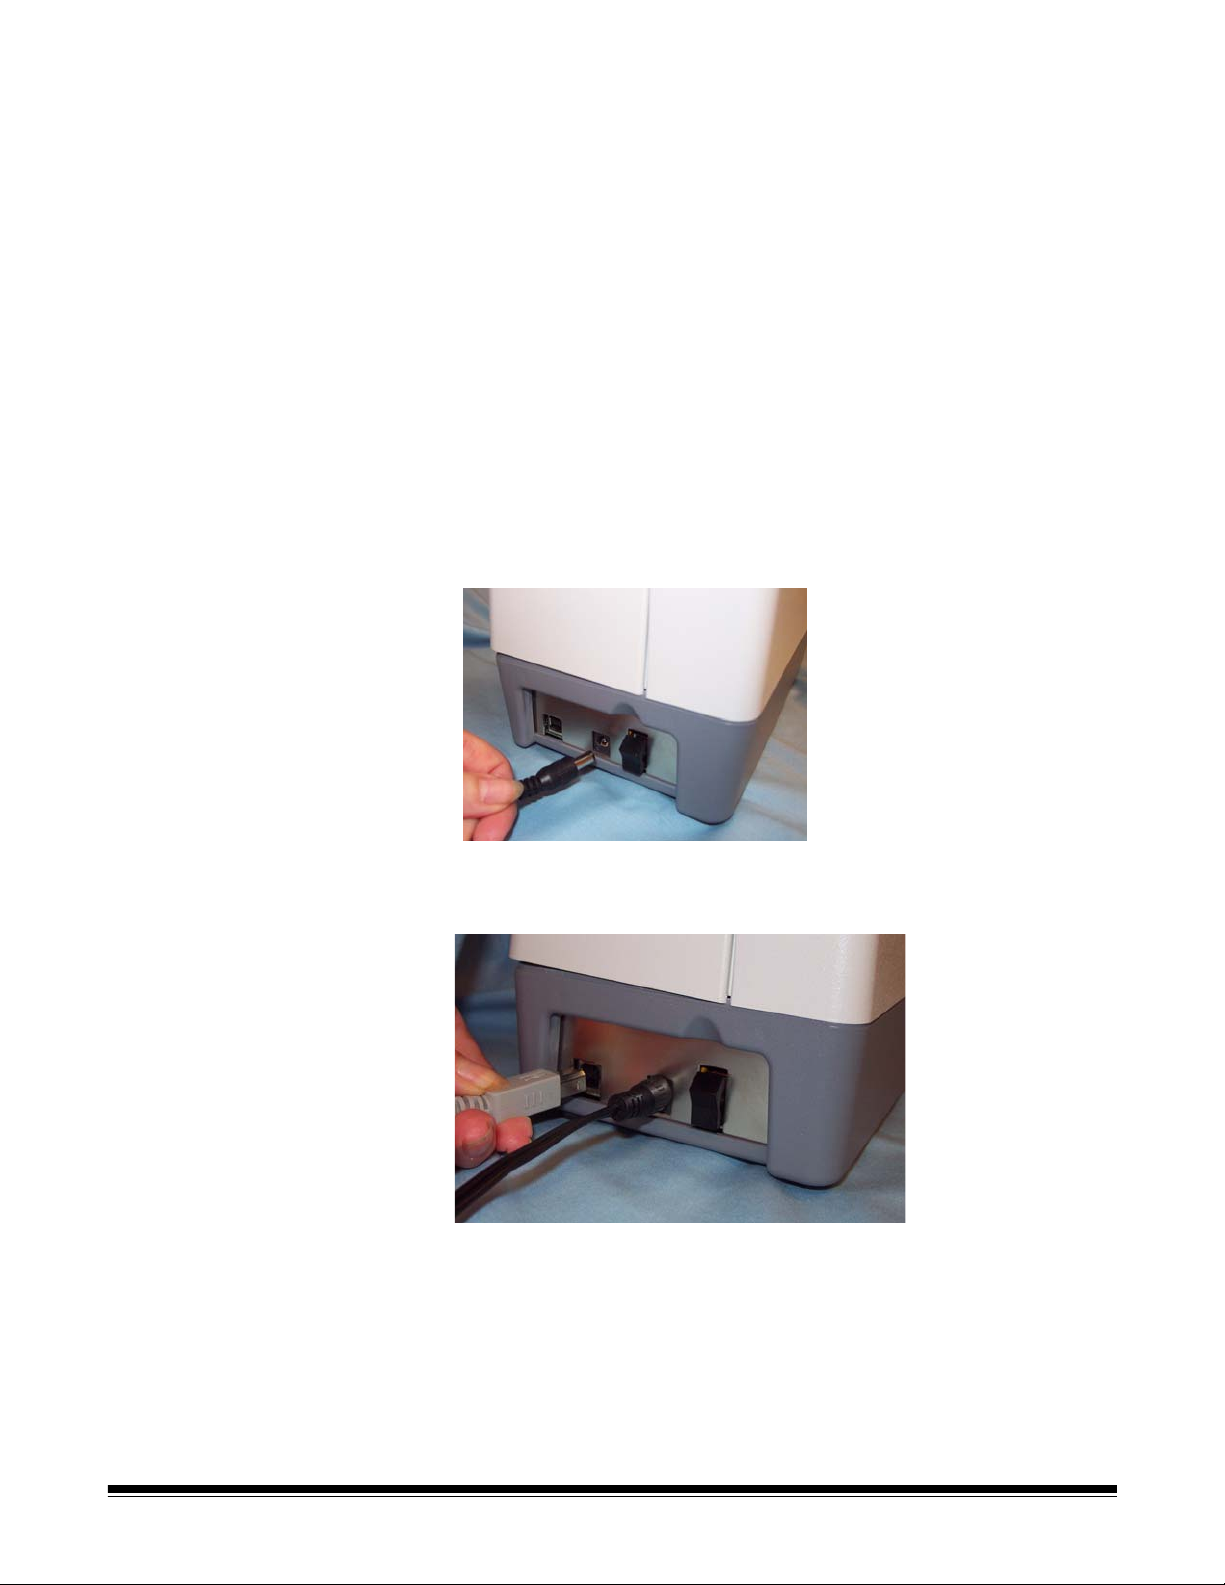
2. Plug the output power cord from the power supply into the power
port on the scanner.
power cord into the wall outlet.
Be sure this is done before plugging the
Kodak i6000
3. Plug the other end of the power cord into the wall outlet.
4. Connect the USB cable between your scanner and PC.
IMPORTANT: DO NOT turn on the scanner until the drivers are
installed on the PC and the PC is powered on. The
drivers will not load properly if Windows detects the
USB device prior to having the drivers installed.
6 A-61557 December 2006
Page 9
Installing the drivers
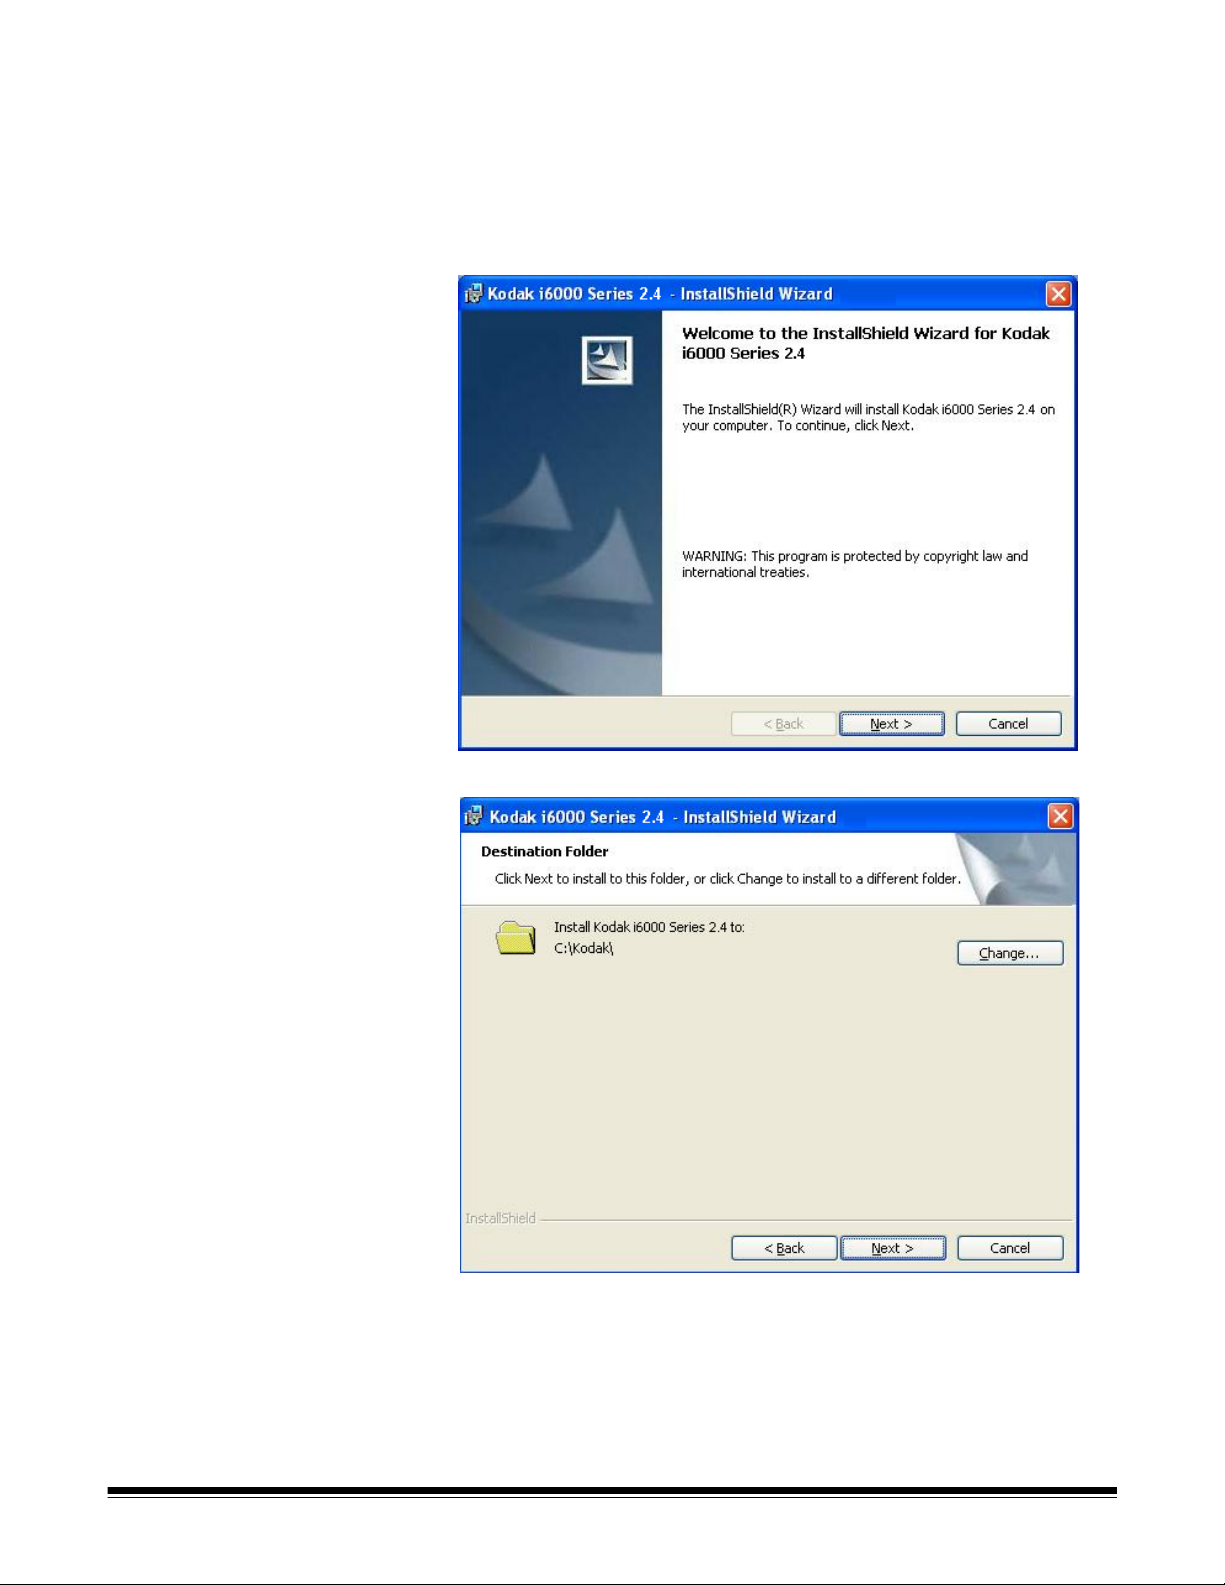
Windows 2000 1. Logon to the PC with an account that has system administrative
privileges.
2. Place the Installation CD in your CD-ROM drive. The installation
utility will start up automatically.
3. Click
Next to display the Destination Folder window.
A-61557 December 2006 7
Page 10
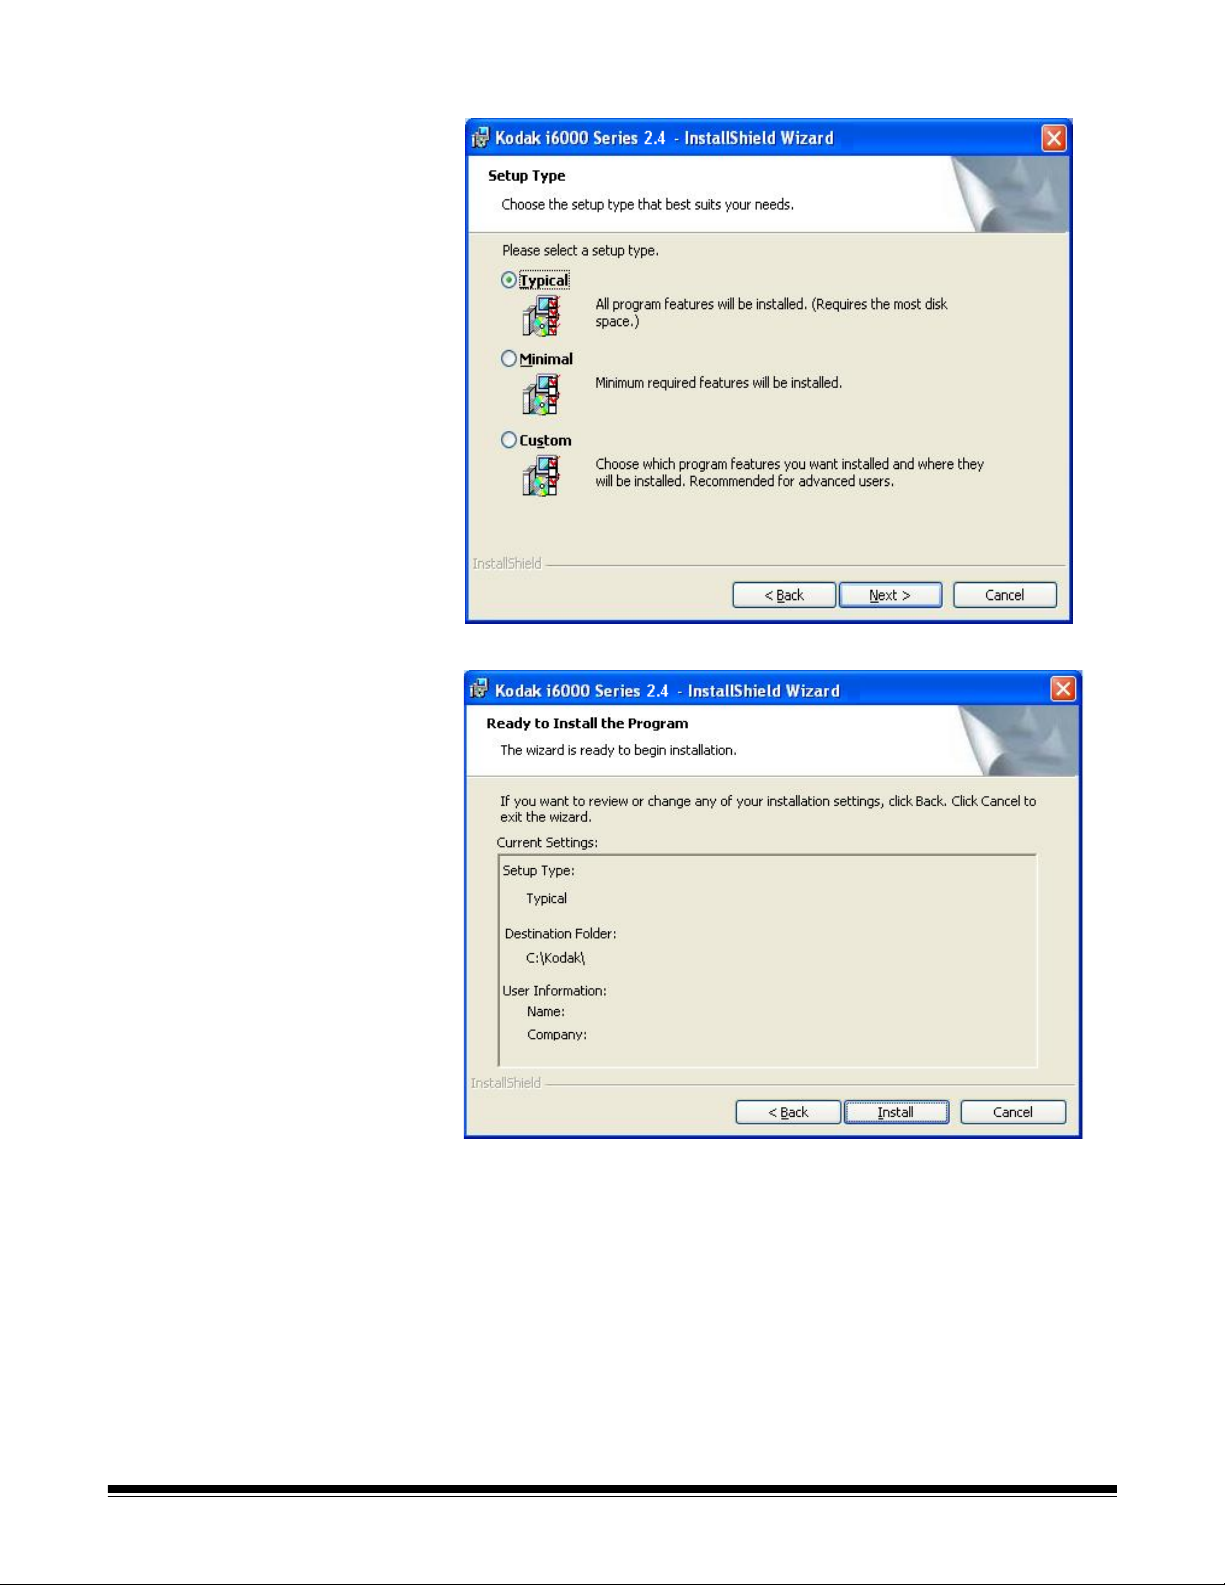
4. Click Next to select the type of setup.
5. Select the
Typical installation and click Next.
8 A-61557 December 2006
Page 11
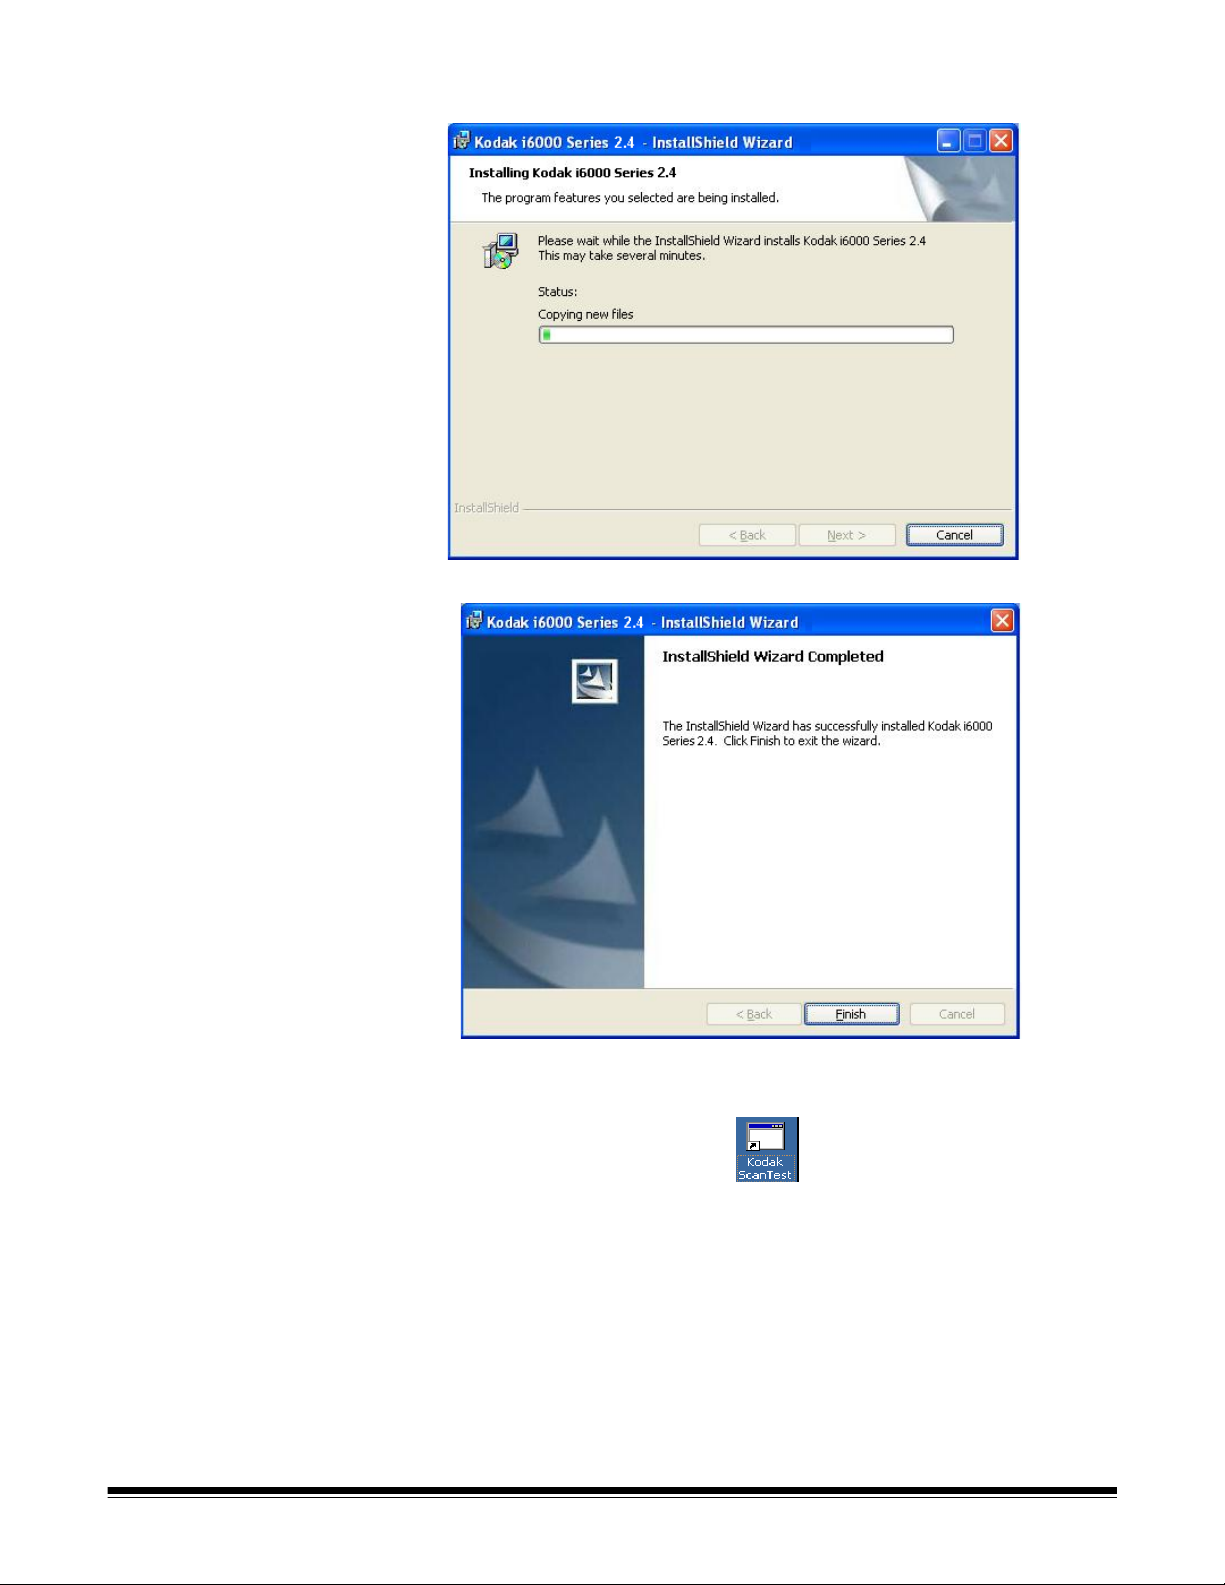
6. Click Install to begin the installation.
When finished, the following window will be displayed:
7. Click
Finish. The Kodak ScanTest Software icon will be placed on
your desktop.
8. Remove the installation CD from the CD drive.
9. When finished with the installation, turn on the scanner.
10.Double-click on the icon to start the ScanTest Software program.
NOTE: When installing on PCs running Windows 2000, the software will
need to be installed for each USB port that scanner may be
plugged into.
A-61557 December 2006 9
Page 12
If the PC does not recognize the Kodak i6000 Series Check
Scanner:
1. Go to Start>My Computer, right mouse click and select
Properties. The Properties dialog box will be displayed.
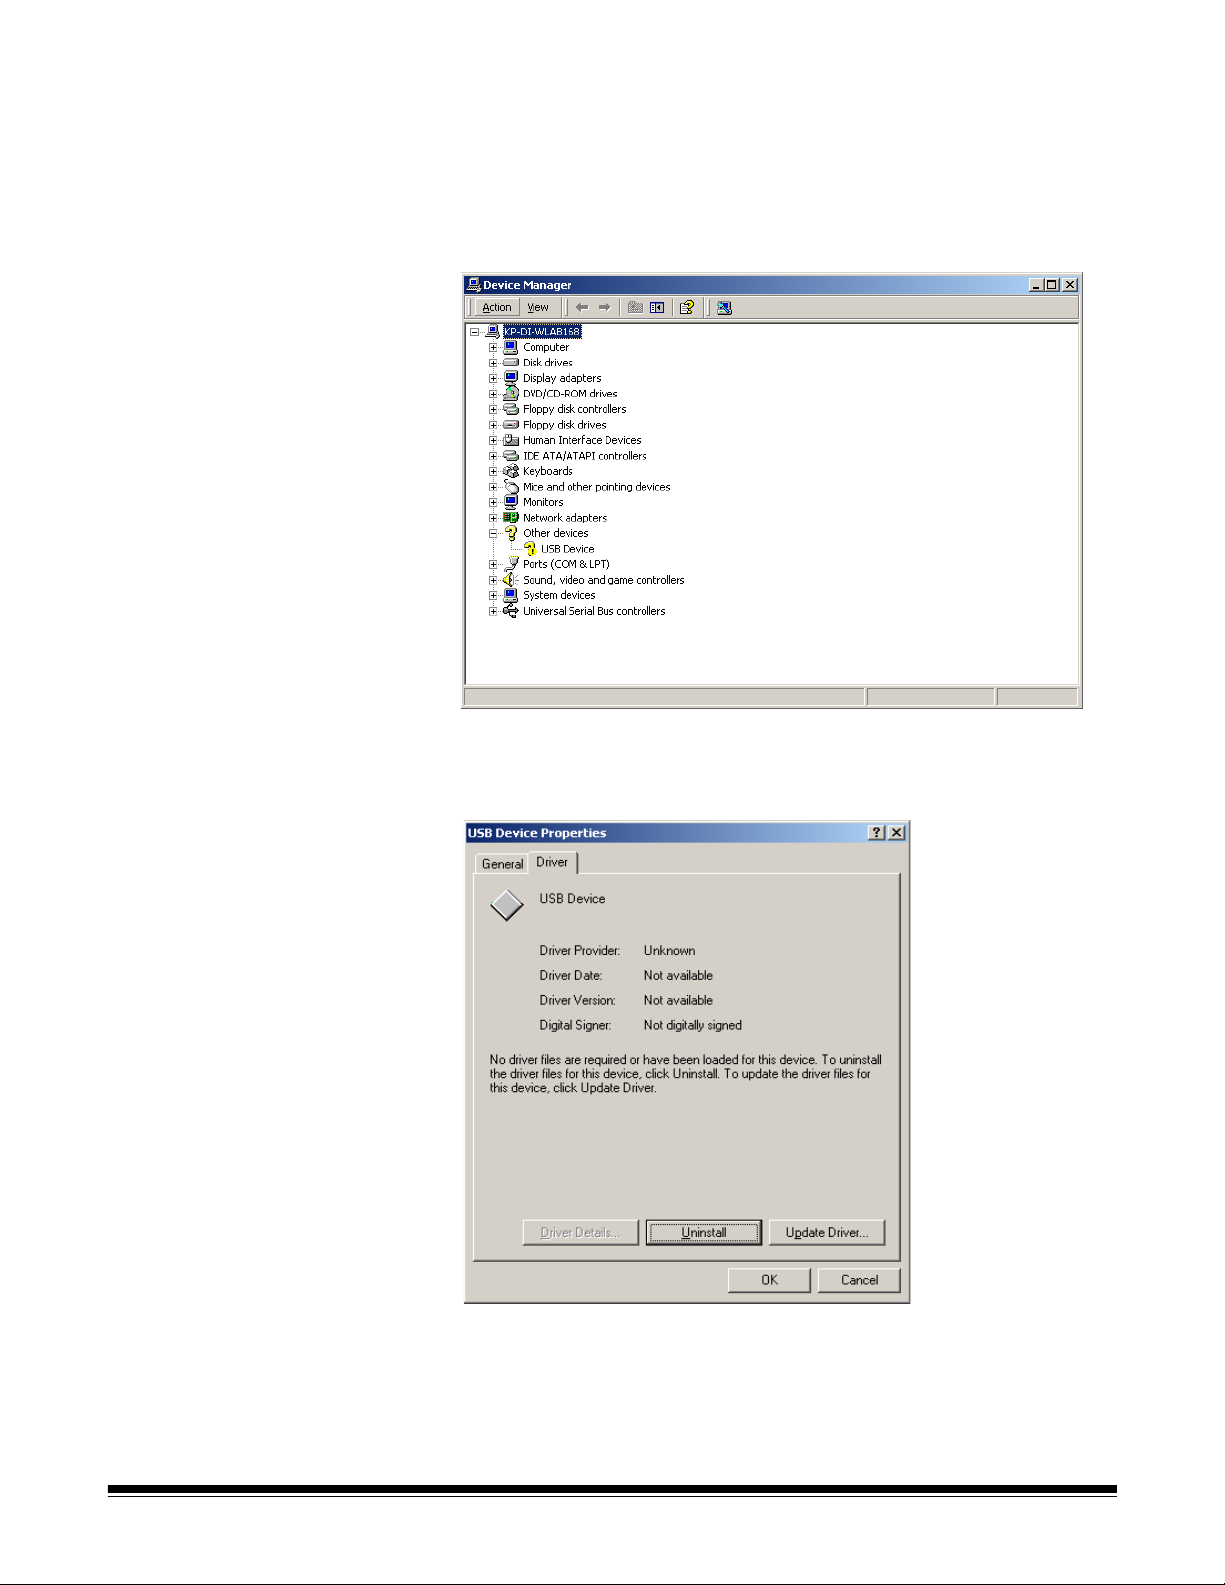
2. Select the
Device Manager window
Hardware tab and click Device Manager to display the
.
3. Select Other devices and highlight USB Device, then click the right
mouse button and select
The USB Device Properties window is displayed
Properties.
.
4. Select the Driver tab and click Update Driver.
10 A-61557 December 2006
Page 13

The Update Device Driver Wizard window is displayed:
5. Click
6. Select
Next.
Search for a suitable driver for my device
(recommended)
and click Next.
A-61557 December 2006 11
Page 14

7. Select CD-ROM drives and click Next.
8. Click
Finish. The Kodak ScanTest Software icon will be placed on
your desktop.
12 A-61557 December 2006
Page 15

Windows XP 1. Logon to the PC with an account that has system administrative
privileges.
2. Place the Installation CD in your CD-ROM drive. The installation
utility will start up automatically.
3. Click
Next to display the Destination Folder window.
A-61557 December 2006 13
Page 16

4. Click Next to select the type of setup.
5. Select the
Typical installation and click Next.
14 A-61557 December 2006
Page 17

6. Click Install to begin the installation.
When finished, the following window will be displayed:
7. Click
Finish. The Kodak ScanTest Software icon will be placed on
your desktop.
8. Remove the installation CD from the CD drive.
9. When finished with the installation, turn on the scanner.
10.Double-click on the icon to start the ScanTest Software program.
A-61557 December 2006 15
Page 18

If the PC does not recognize the Kodak i6000 Series Check
Scanner:
1. Go to Start>My Computer, right mouse click and select
Properties. The Properties dialog box will be displayed.
2. Select the
Device Manager window
Hardware tab and click Device Manager to display the
.
3. Select Universal Serial Bus controllers and highlight TellerScan
then click the right mouse button and select Update Driver.
The Hardware Update Wizard is displayed
4. Select No, not this time and click Next.
.
16 A-61557 December 2006
Page 19

5. Click Next.
6. Select
click
Next.
7. Select
Next.
Install from a list or specific location (Advanced) and
Search removable media (floppy, CD-ROM...) and click
A-61557 December 2006 17
Page 20

8. Click Finish. The Kodak ScanTest Software icon will be placed on
your desktop.
18 A-61557 December 2006
Page 21

Scanner components Front view
Scanner top
cover
Indicator
lights
Back
cover
Side cover
Exit
stop
wire
Exit tray
Automatic
feeder
Input tray
Automatic feeder and input tray
— depending on the document
thickness and condition, holds up to 50 documents. Place documents in
the input tray for scanning (
i6060 and i6090 Scanners only).
Indicator lights (LEDs) — illuminates or flashes indicating scanner
status. See Chapter 5, “Indicator lights” for more information.
Exit tray/Exit stop wire — collects the scanned documents.
Scanner covers — the scanner has three scanner covers (top, side
and back covers) which can be removed for maintenance or clearing
document jams.
Back view
USB port
USB port
Power port
— connects the scanner to the PC.
Power switch
Power port — connects the power cord to the scanner.
Power switch — turns the scanner on and off.
A-61557 December 2006 19
Page 22

Inside view
3
Inkjet
printer
2
Entry separation drive roller
and i6090 Scanners only
).
1
— feeds checks into the scanner (i6060
4
Entry
separation
drive roller
Main drive rollers (1 - 4) — these rollers along the scanner path,
provide smooth document feeding of various sizes, thicknesses and
textures of documents.
Inkjet printer (optional) — prints endorsements on the back of
documents before scanning. The printer has one position and is
programmable to endorse the documents with customized information,
logos, dates, and/or sequential numbers. The inkjet printer is designed
to create a crisp image of the endorsement which is captured with the
image of the document.
20 A-61557 December 2006
Page 23

3 Using the Scanner
Turning the scanner on and off
Document preparation
• Toggle the power switch on the back of the scanner to turn the
scanner on or off.
After you turn on the scanner, wait for it to complete the self-test. When
completed, the red LED will remain on and constant.
NOTE: Once your application has detected the scanner, the red LED
will change to green. If checks are in the input tray, the Paper
Detect (left LED) will illuminate.
• For i6060 and i6090 Scanners only. A batch of documents to be fed
into the scanner must be arranged so the bottom and left leading
edges of all documents are aligned in the automatic feeder; this
allows the feeder to introduce documents into the scanner one at a
time.
• Remove all staples, rubber bands and paper clips, etc. before
scanning.
• Documents should be in good condition.
• If your documents are very flat and smooth, it may be necessary to
loosen the documents by bending them back and forth several times
to help loosen and separate them.
Paper Weights: 60 to 120 g/m
Document Size:
• Height: 54 to 106 mm (2.12 to 4.17 in.)
•
Length: 99 to 228 mm (3.91 to 8.97 in.)
Paper inks: All inks on the paper must be dry before scanning is
started. This includes: Standard offset printing, Inkjet printer, Thermal
transfer, Handwriting inks.
Correction Fluids: All correction fluids on the paper must be dry before
scanning is started. This includes: Liquid Paper®, Tipp-Ex®, Wite-out®,
and other similar correction fluids.
2
(16 to 32 lbs.)
A-61557 December 2006 21
Page 24

Scanning your documents
1. Place the documents into the input tray of the scanner until the left
LED is lit. Be sure to slide the documents far enough forward so the
scanner can detect the documents.
NOTE: If checks do not sit flat in the paper path, the Paper Detect
LED may not recognize their presence. Be sure that the
checks are flat and not lifted at a slight angle.
The documents should be placed in the input tray facing away from
the scanner.
2. Using your application software, click
For i6060/i6090 Check Scanners:
The i6060/i6090 Check Scanners feature continuous feed, which
allows checks to be added to the feeder while scanning, maintaining
production.
For i6015 Check Scanner:
Insert the document into the Check Scanner until you can push it in no
farther. Wait until the scanner grabs the document before releasing it.
Scan.
22 A-61557 December 2006
Page 25

4 Maintenance
Supplies and consumables
Contact your scanner supplier to order additional supplies:
Description CAT No.
Cleaning Kit / Kodak i6000 Series Check Scanners
(including cleaning cards and swabs)
Inkjet Cartridge hp c6602a 830 1087
802 7393
Cleaning the scanner Cleaning will depend upon how frequently your scanner is used. It is
usually needed after scanning 3,000 to 5,000 documents. Ink from
scanned checks can build up on the drive rollers as well as dust, lint
and small particles can get into the track area between the front and
rear scan heads. It is recommended that you clean your scanner at
regular intervals based upon the number of documents scanned. This
could be as often as once a day. Every fourth cleaning cycle, it is
recommended to use the cleaning swabs on the four main drive rollers,
and do a weekly/monthly cleaning procedure as described later in this
chapter.
NOTES:
• Cleaning frequency can be reduced if you allow the ink on the check
to completely dry before scanning.
Daily cleaning procedures
• Videos demonstrating proper cleaning techniques can be found on
the PC, under
came in the Welcome Folio has been run.
1. Launch the Kodak ScanTest Software.
2. Open the cleaning card package and remove the cleaning card.
3. Place the cleaning card between the entry separation drive roller as
shown.
Start>Programs>Kodak, if the installation CD that
A-61557 December 2006 23
Page 26

4. While holding the cleaning card in place, select Scan from the
Kodak ScanTest Software window allowing the entry rollers to scrub
the card.
5. Wait until the motor stops, then remove the card, observing the dirt
and flip the card to a clean corner and repeat Step 4.
To clean the remaining drive rollers:
6. Place the cleaning card in the input tray and select
Scan. You may
need to give the cleaning card a slight push to start it through the
transport.
7. Turn the cleaning card over and repeat Step 6.
8. Scan the cleaning card three or four more times. Be sure that you
continue to turn the cleaning card to a clean side each time you
scan the cleaning card through the transport. Steps 6 through 8
remove the residual dirt on the four drive rollers.
9. When finished, discard the cleaning card and shut down the
Kodak
ScanTest Software.
24 A-61557 December 2006
Page 27

Weekly cleaning procedure
A weekly cleaning should be performed approximately every fourth
regular cleaning cycle.
1. Before starting this procedure, perform the daily cleaning procedure
as outlined in the previous section.
2. Turn the scanner off.
3. Remove the scanner top cover.
4. Lift and remove the side cover.
5. Pull the exit stop wire out about 4 inches to provide adequate
clearance for removing the back cover.
NOTE: Do not remove the exit stop wire from the scanner. If you should
accidently remove it, when you reinsert it you will need to align
the exit wire with the holes in the scanner and wiggle it back into
place.
A-61557 December 2006 25
Page 28

6. Lift and remove the back cover.
NOTE: If the back cover does not easily lift up, be sure that the exit
stop wire is pulled out approximately 4 inches.
7. Loosen and remove the thumbscrew that holds the scan tower door
in place.
8. Open the scan tower door.
9. Using the cleaning swab wipe both surfaces of the scan heads.
10.Close the scan tower door and reinstall the thumbscrew.
11. Replace the back cover first, then the side cover and turn the
scanner on.
NOTE: Be sure the yellow wires are clear of the back cover when you
reinstall it.
26 A-61557 December 2006
Page 29

12.Launch the Kodak ScanTest Software.
13.Clean each drive roller by selecting
Software window. Selecting
Eject will turn the drive rollers for about
Eject on the Kodak ScanTest
5 seconds.
14.Thoroughly clean all of the drive rollers (black and white) with the
swab. While the rollers are turning, use an up-and-down motion to
clean the entire roller. You may need to use several cleaning swabs
if the rollers are very dirty.
15.Replace the top scanner cover.
NOTE: Be sure that the covers are installed in the proper positions.
Take care not to install covers at an angle. The paper path
should be clear to allow documents to transport freely through
the scanner.
A-61557 December 2006 27
Page 30

Replacing the ink cartridge
If you are using the Inkjet Printer, periodically you will need to change
the ink cartridge. The ink cartridge should be changed when the
endorsement print is light and difficult to read.
Replacement cartridge: Hewlett-Packard Inkjet Cartridge hp c6602a
(CAT No. 830 1087).
1. Turn off the scanner.
2. Remove the scanner top cover.
3. Lift up the tab at the rear of the ink cartridge and pull it out of the ink
cartridge holder.
4. Dispose the empty ink cartridge in accordance with all federal, state
and local laws.
5. Take the new cartridge out of its packaging and remove the
protective tape from the cartridge.
IMPORTANT: Do not touch the exposed metal chip or the cartridge
could be damaged.
6. Insert the ink cartridge into the ink cartridge holder and push the ink
cartridge down until it snaps into place.
7. Reinstall the scanner top cover.
28 A-61557 December 2006
Page 31

5 Troubleshooting
Occasionally you may encounter a situation with your check scanner
where it may not function properly. Refer to the information in this
chapter to help you resolve the situation before calling Technical
Support.
Indicator lights The two indicator lights provide information on the current state of the
scanner:
LED Scanner State
Right LED on - red Scanner is powered-on.
Right LED on - green Scanner is ready for operation and has detected
the Kodak t6000 Client Software.
Left LED on Scanner detects the presence of documents in
the input tray.
Flashing An error has been encountered.
A-61557 December 2006 29
Page 32

Clearing a document jam
If a document jam occurs, try one of the following methods to clear the
document path:
• If you are using the
button.
• If the document does not clear the paper path, grasp the document
with both hands and carefully wiggle it back and forth as you lift it out
of the paper path.
Kodak ScanTest Software, select the Eject
• If the document cannot be easily removed, do the following:
1. Remove the scanner top cover.
2. Clear the paper path of any jammed documents and make sure
the rollers are free of paper and debris. If necessary, manually
rotate the main drive roller to clear the document.
3. Reinstall the scanner top cover.
30 A-61557 December 2006
Page 33

Problem solving Use the chart below as a guide to check possible solutions to problems
you may encounter when using the
Scanners.
Periodic and scheduled cleanings should be performed before
determining if any further problem resolution is needed. Refer to
Chapter 4,
Maintenance for complete cleaning procedures.
Helpful hints:
• Always jog the documents to align the leading and bottom edges.
Visually check the leading edges for bent or curled corners and
straighten them as needed.
• Place the stack of documents halfway into the input tray, then slide
the stack forward until the left indicator light comes on.
• Be sure the exit wire stop is extended enough to allow for
approximately 1/2-inch more than the longest document.
Error Codes Possible Solution
212 No checks There are no checks in the input tray.
A scan cycle has been started, but the left LED is not on, indicating that
no documents are present.
• Restack the batch of documents and insert them back into the input
tray. Slide them forward until the LED comes on.
216 Mis-Feed Documents are not feeding.
• Remove the documents and re-align the leading edges.
• Check for bent or excessively curled leading edges and straighten as
needed.
• Verify that the documents are not stuck together.
• Be sure that checks are properly inserted in the input tray for scanning.
• Rescan the documents.
Kodak i6000 Series Check
If this error continues, it may indicate that:
• The entry separation drive roller may be dirty
• Something may be lodged in the document path.
217 Double Document Feed More than one document has been detected in the document path.
• Eject the documents to clear the error condition.
• If the document does not eject, grab the upper edges with both hands
and wiggle the document back and forth to remove it from the path.
• Thicker single documents that give a false 217 error condition will have
to be fed one at a time.
• Insert and rescan the documents.
If this error continues, it may indicate that:
• The entry separation drive roller may be dirty.
220 Document stopped in the path A document was stopped in the document path or was slow in exiting.
• Eject the documents to clear the error condition.
• If the document does not eject, grab the upper edges with both hands
and wiggle the document back and forth to remove it from the path.
• Check for bent or excessively curled leading edges and straighten as
needed.
• Check the document path for any debris such as loose paper or
staples.
• The entry separation drive roller may need to be cleaned.
A-61557 December 2006 31
Page 34

Problem Possible Solution
553 No print head The check scanner may not be recognizing the ink cartridge for one of
the following reasons. Refer to the procedures in “Replacing the ink
cartridge” earlier in the chapter for proper installation procedures.
• Be sure the inkjet cartridge is properly installed.
• If it is, remove the cartridge and reseat it.
• Try installing a new inkjet cartridge.
If you have verified that the ink cartridge is installed correctly or have
replaced it, the ribbon connector may need to be reseated or the main
board may be bad.
• Contact Technical Support.
125 No scanner The scanner was not found during the application to scanner
initialization.
• Check the cable and power connections to be sure the USB cable and
power supply connections are securely in place.
• Try a different USB port.
• Verify that the PC has the proper drivers and scanner firmware files
installed.
• If you have recently disconnected the USB cable from the PC, be sure
you have installed it to the same USB port or reinstall the drivers as per
the installation instructions described in Chapter 2.
NOTE: Depending on which Windows operating system you have, XP or
2000), you may need to install the drivers on all USB ports.
Image quality issues Any number of image quality issues can be encountered during
scanning (i.e., heavy backgrounds, an image may have streaks or
fades, shaded lines on the rear image, etc.). Before calling Technical
Support, thoroughly clean your scanner using the recommended
cleaning procedures in the section entitled, “Weekly cleaning
procedures” in Chapter 4.
If you are experiencing skewed images, check to be sure that the entry
tray is fully seated.
32 A-61557 December 2006
Page 35

Appendix A Specifications
Scanning device 2 x 850 cell, 108 mm Contact Image Sensor (CIS)
Light source Tri-color LED
Scanning method Concurrent, duplex (front and rear)
Document size Height: 56 to 106 mm (2.12 to 4.17 in.)
Length:
Weight: 60 to 120 g/m
Auto feeder capacity Depending on document thickness and condition: 1 to 50 documents
Output sort pockets Depending on document thickness and condition: 1 pocket / 50 documents
Scanning capture speed 50 cm/sec. (19.7 in./sec.) grayscale/bi-tonal/color
Scan system throughput Speed varies depending on scanner model, the scan mode and PC performance:
i6015: single feed
i6060: 65 dpm
i6090: 100 dpm
Scanner image format Uncompressed grayscale, bi-tonal and color
Grayscale image depth 8 bits/pixel (256 shades of gray)
1 bit/pixel bi-tonal (B&W)
4 bits/pixel (16 shades of gray)
software selectable from the API
Color image depth 24 bits/pixel (16,777,216 shades)
Image resolution 200 x 200 dots per inch (dpi)
100 x 100 or 200 x 100 software selectable from the API
Image formats Bitmap (bmp); 4-side cropping and image rotation performed by the API
Image compression TIFF Group 4 and JPEG
Image transmission Through the USB port
Double feed device Infra Red (IR) Transmissive type
Double feed detection Programmable delay (performs skip-over function)
Perforation skipping Included (selectable perforation size)
Interface USB 2 (backwards compatible to USB 1.1)
Operating system Windows 2000 and Windows XP
Minimum PC configuration 1 GHz Pentium III processor
128 MB RAM
100 MB free disk space
Windows 2000 or XP
CD-ROM drive
USB port 1.1
Recommended PC
configuration
2.4 GHz Pentium IV processor or greater
512MB RAM
200 MB free disk space
Windows 2000 or XP
CD-ROM drive
USB port 2.0
99 to 228 mm (3.91 to 8.97 in.)
2
(16 to 32 lbs.)
A-61557 December 2006 33
Page 36

MICR recognition Recognition algorithm for E13B, CMC7 or CMC0 standards performed by the API
MICR data transmission Analog waveform through the USB port
Temperature Operating: 60 - 90°F (15 - 32°C)
Storage: 32 - 104°F (0 - 40°C)
Humidity 35 to 85% non-condensing
Scanner Dimensions Height: 6.8 in. / 17.3 cm
Length: 11 in. / 27.9 cm
Depth: 5.1 in. / 12.9 cm
Weight: 5 lbs. / 2.3 kg
Footprint: 5.1 in. / 12.9 cm x 8 6 in. / 21.8 cm
Acoustic Noise
(Sound Power level)
Electrical requirements Power Consumption: 50 watts (maximum)
Agency approvals UL, CUL, FCC, Class A, CE, EN55022 Class A
Product life 5,000,000 checks
Duty cycle
i6060 or i6090 Check Scanner
MTTR (Mean time to repair) 20 minutes
Optional Printer Endorse back side of document prior to capturing the scanned image
56 Lpa (dbA) peak @ the operator position
115 Vac ± 10% 60 Hz
230 Vac ± 10% 50 Hz
3,000 to 5,000 checks per day
12 nozzle printing resolution (96 dpi)
Cartridge: Hewlett Packard 6602A (up to 7,000,000 characters)
34 A-61557 December 2006
Page 37

MICR recognition Recognition algorithm for E13B, CMC7 or CMC0 standards performed by the API
MICR data transmission Analog waveform through the USB port
Temperature Operating: 60 - 90°F (15 - 32°C)
Storage: 32 - 104°F (0 - 40°C)
Humidity 35 to 85% non-condensing
Scanner Dimensions Height: 6.8 in. / 17.3 cm
Length: 11 in. / 27.9 cm
Depth: 5.1 in. / 12.9 cm
Weight: 5 lbs. / 2.3 kg
Footprint: 5.1 in. / 12.9 cm x 8 6 in. / 21.8 cm
Acoustic Noise
(Sound Power level)
Electrical requirements Power Consumption: 50 watts (maximum)
Agency approvals UL, CUL, FCC, Class A, CE, EN55022 Class A
Product life 5,000,000 checks
Duty cycle
i6060 or i6090 Check Scanner
MTTR (Mean time to repair) 20 minutes
Optional Printer Endorse back side of document prior to capturing the scanned image
56 Lpa (dbA) peak @ the operator position
115 Vac ± 10% 60 Hz
230 Vac ± 10% 50 Hz
3,000 to 5,000 checks per day
12 nozzle printing resolution (96 dpi)
Cartridge: Hewlett Packard 6602A (up to 7,000,000 characters)
34 A-61557 December 2006
Page 38

Eastman Kodak Company
343 State Street
Rochester, NY 14650 USA
© Kodak, 2006. TM: Kodak.
www.kodak.com/go/docimaging
 Loading...